
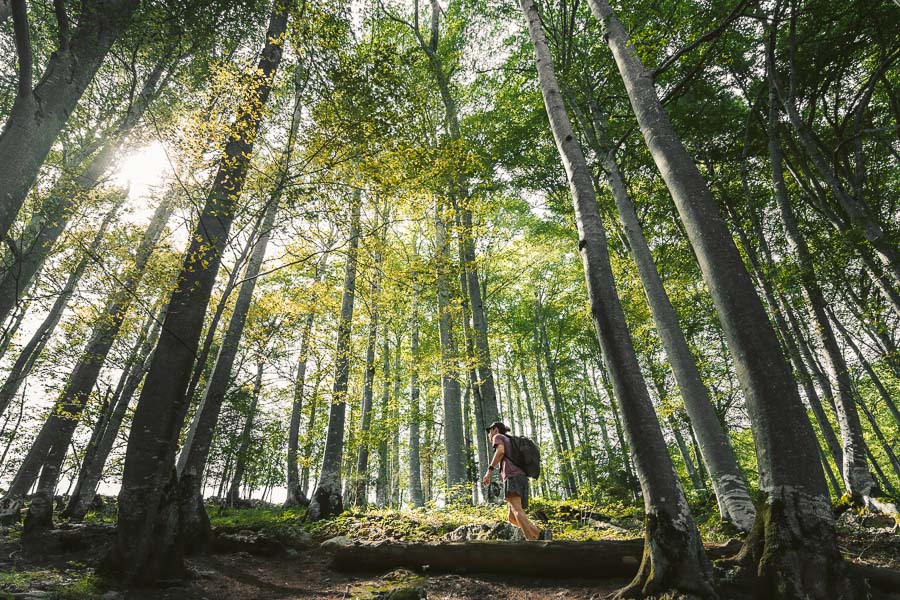
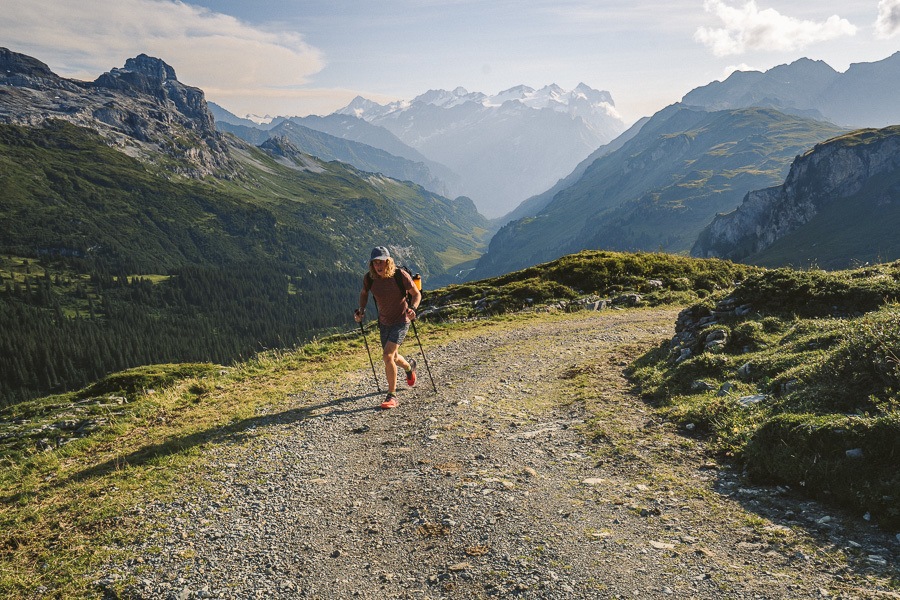
Switzerland is without a doubt one of the top hiking locations in the world. The abundance of hiking trails is the sole reason why I visited. I spent three months hiking almost every single day in Switzerland during the summer and on each hike, I documented the trail information and tips you need to know as well as capturing photos of the journey. Throughout my 3-month hiking trip, I visited many different regions around Switzerland such as Interlaken, Zermatt, Grindelwald, Engelberg, Chur, Murren, Fribourg, Appenzell, and many more as I attempted to see all of the best hiking trails in Switzerland. In this article, I’ll share the details about 50 of the Best Hikes in Switzerland.
50 BEST HIKES IN SWITZERLAND
In this blog post, I have chosen my favorite 50 hikes in Switzerland so that you can pick a couple that stands out to you so you can head off and explore the Swiss Alps and hiking trails around this incredibly picturesque country!
THINGS TO KNOW ABOUT THIS ’50 BEST HIKES IN SWITZERLAND’ BLOG POST
Before you dive into this epic list of the best hikes in Switzerland there are a couple of things to know about this blog post. I’ve included a huge ‘Things to know when hiking in Switzerland‘ section at the bottom of the blog post with lots of information and tips but there are a few pieces of information you need to know before looking at the list of my favorite 50 hikes in Switzerland
- Switzerland has a SAC difficulty scale, which labels hikes with a technical score such as T2 or T5 etc. All of the hikes in this blog post are T4 with a few T5 exceptions. I have included the full table that shows the difficulty scale at the bottom of the blog post so you can see what level suits you and the explanation of each level.
- This guide will be broken up by region so it is easy to skim through to a section you are visiting or interested in.
- The best app for navigating on the Switzerland hiking trails is the free Switzerland Mobility App, which works offline (usually) and the Alltrails App. I used both depending on their availability on a specific trail, along with Google Maps and Maps.me if it is a basic hike.
- I backpacked around Switzerland by using trains and buses. They are very efficient, have good coverage, and are also very damn expensive. What I did is bought the Swiss Half-Fare Card, which gives you half price off any ticket (except some cable cars) It basically pays itself off within five days so if you are there for a week you NEED it. Trust me. If you are looking to move across the country quickly and doing some big train journeys they will be more than $100 USD sometimes. Many people get the Swiss Travel Pass, which is pretty expensive at about $100 USD a day but gives you unlimited free travel and half price on many cable cars. I’d say get the Swiss Half-Fare Pass for sure but don’t rush into the full Swiss Travel Pass until you have mapped out your route.
THE SWITZERLAND HIKING GUIDE
Okay, let’s get into it. I dedicated a lot of time and effort to creating this guide and to doing these hikes over an 85-day period in Switzerland. Blood was shed, many ‘last trains’ were missed, several hiking shoes perished and a significant amount of chocolate and cheese were consumed. I hope you enjoy my Switzerland Hiking Guide: 50 Best Hikes in Switzerland.
SWITZERLAND HIKING REGION: INTERLAKEN
I stayed in the town of Interlaken for more than two weeks and actually re-visited twice. In my opinion, it is the best place to base yourself for hiking in Switzerland and also the cheapest town to base in with a bit of a backpacker vibe compared to most Swiss towns.
You have Grindelwald, Murren, Lauterbrunnen, and more all within 1-hour on the train from Interlaken. It’s perfect for 2-3 weeks of adventure if you value keeping the same home base throughout. You can check out my in-depth Interlaken guide here: 15 AWESOME HIKES NEAR INTERLAKEN
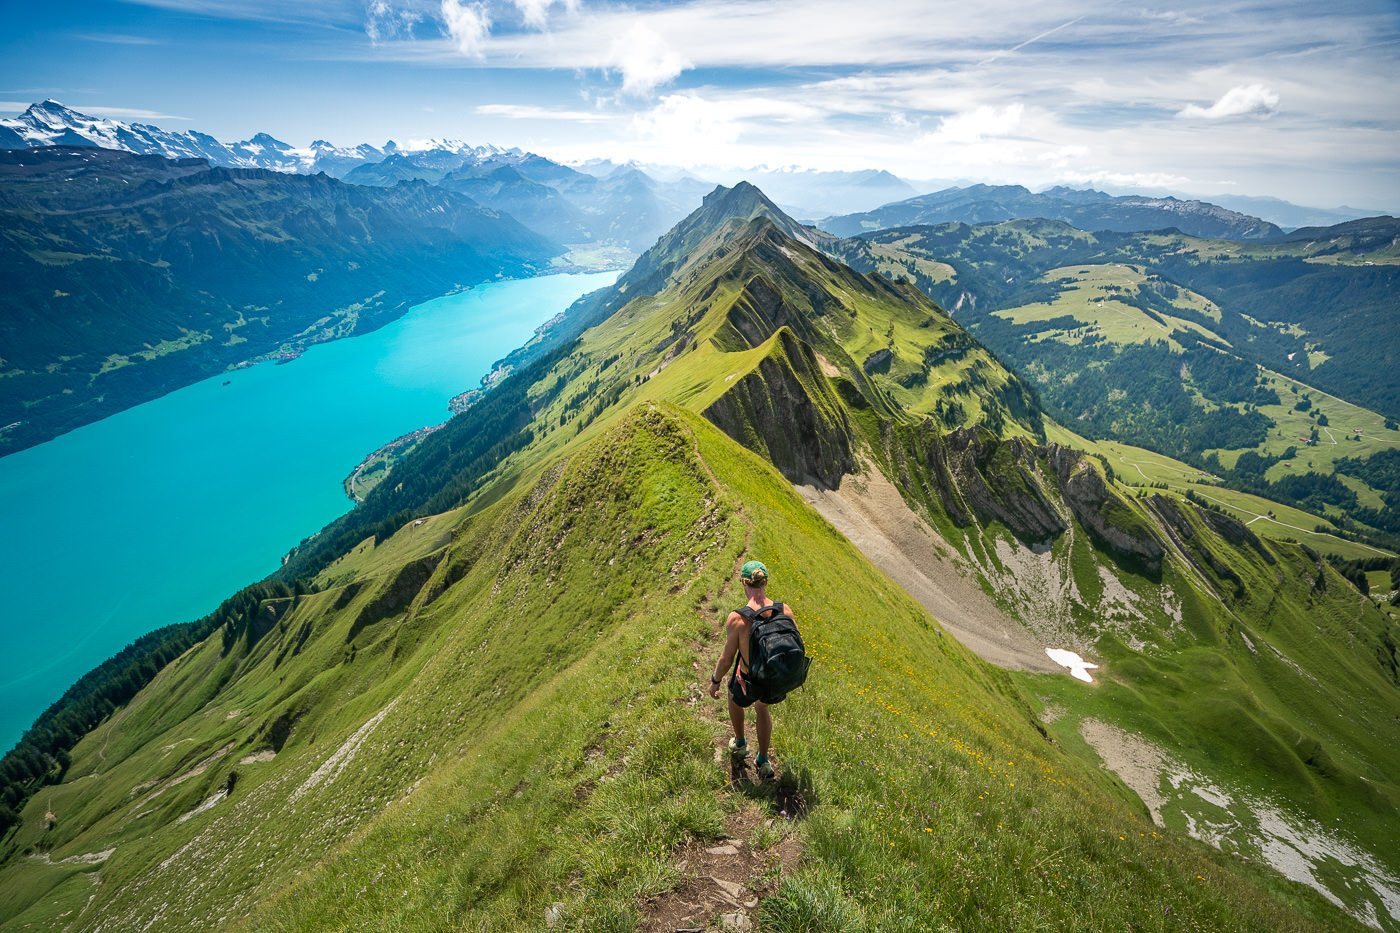
HARDERGRAT TRAIL
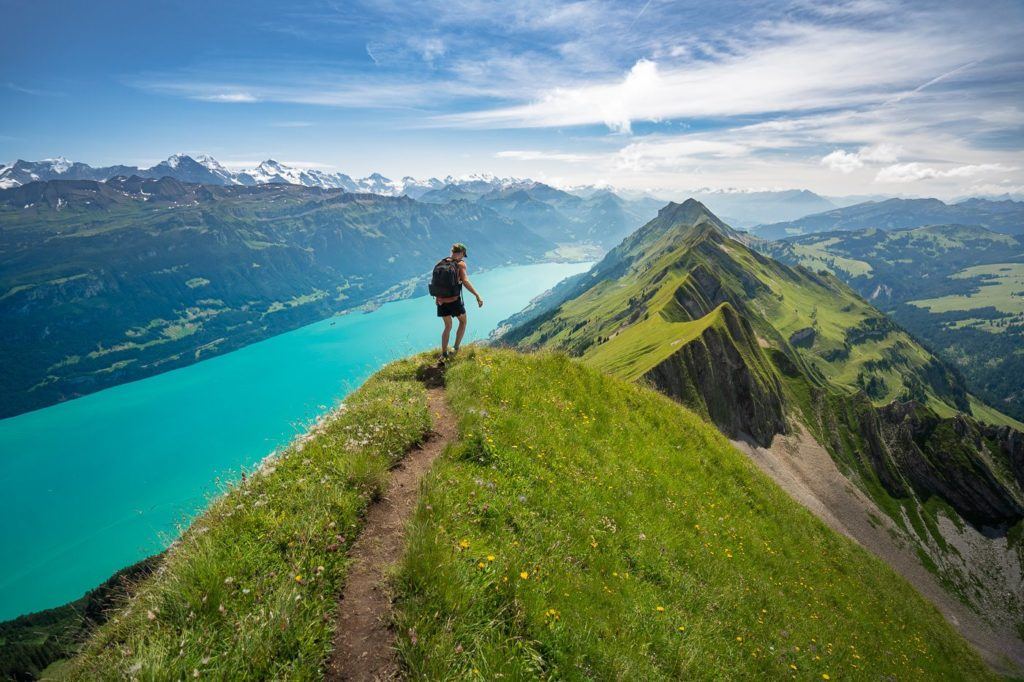
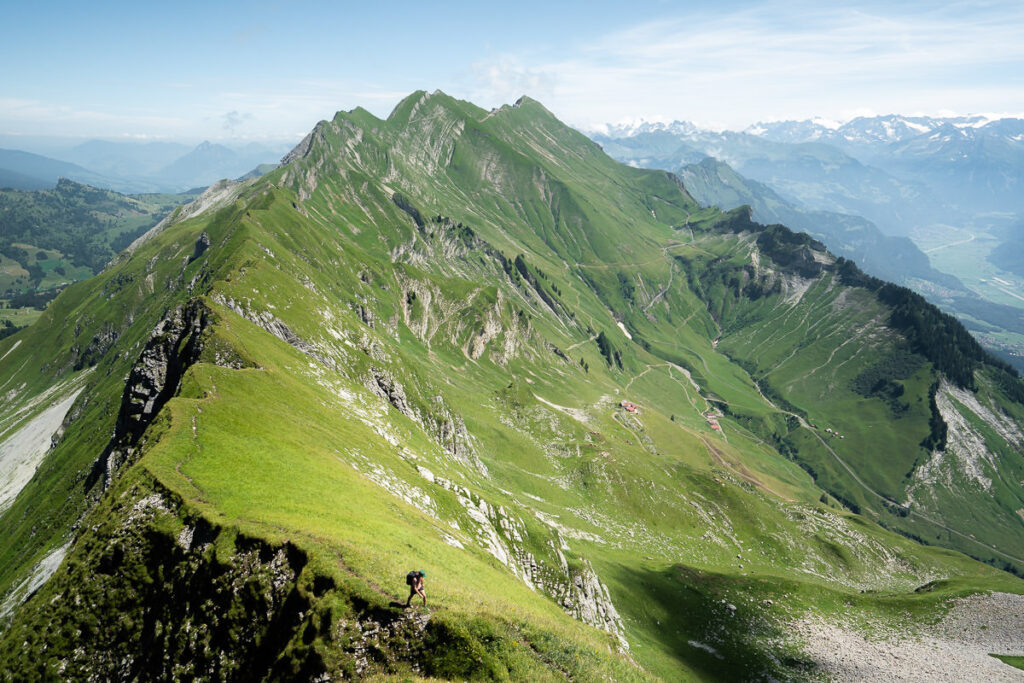
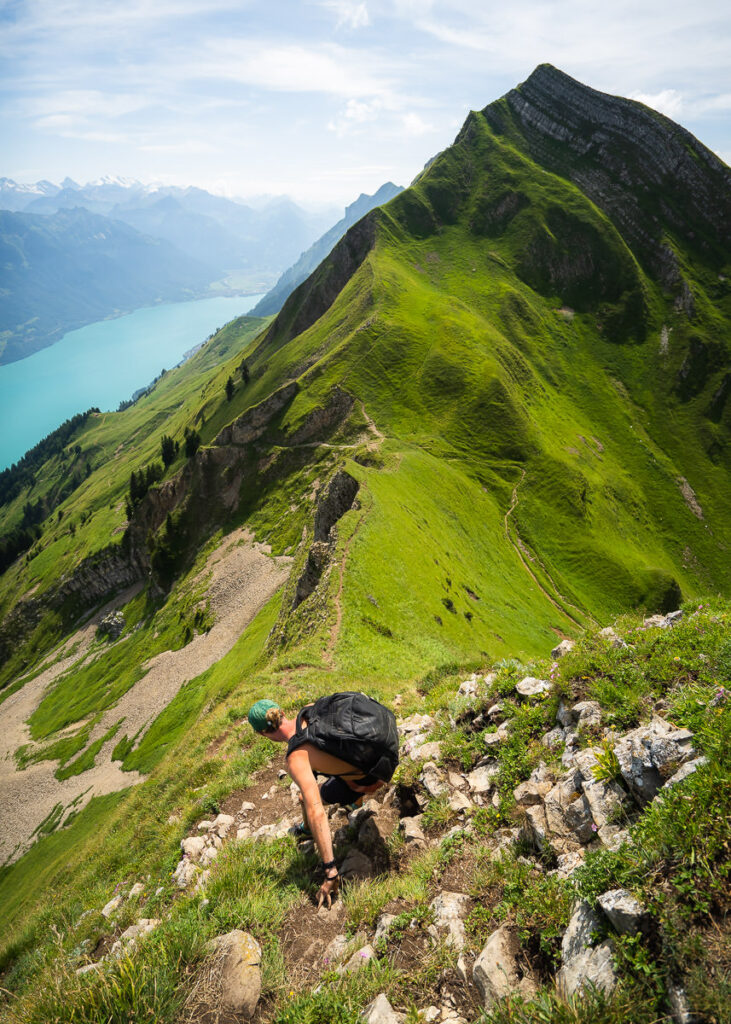
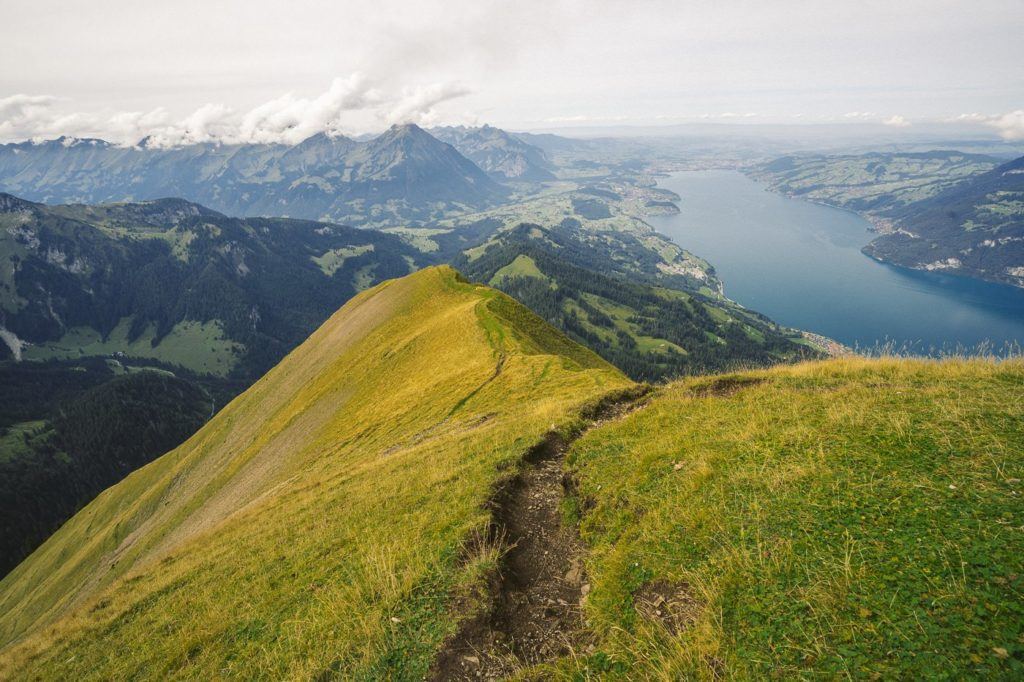
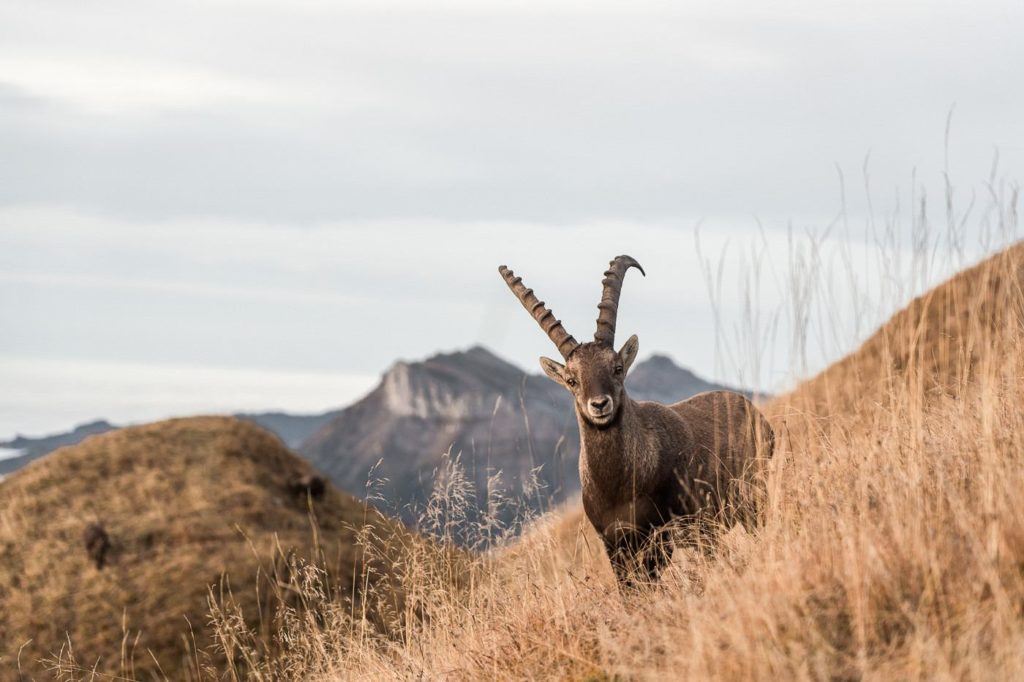
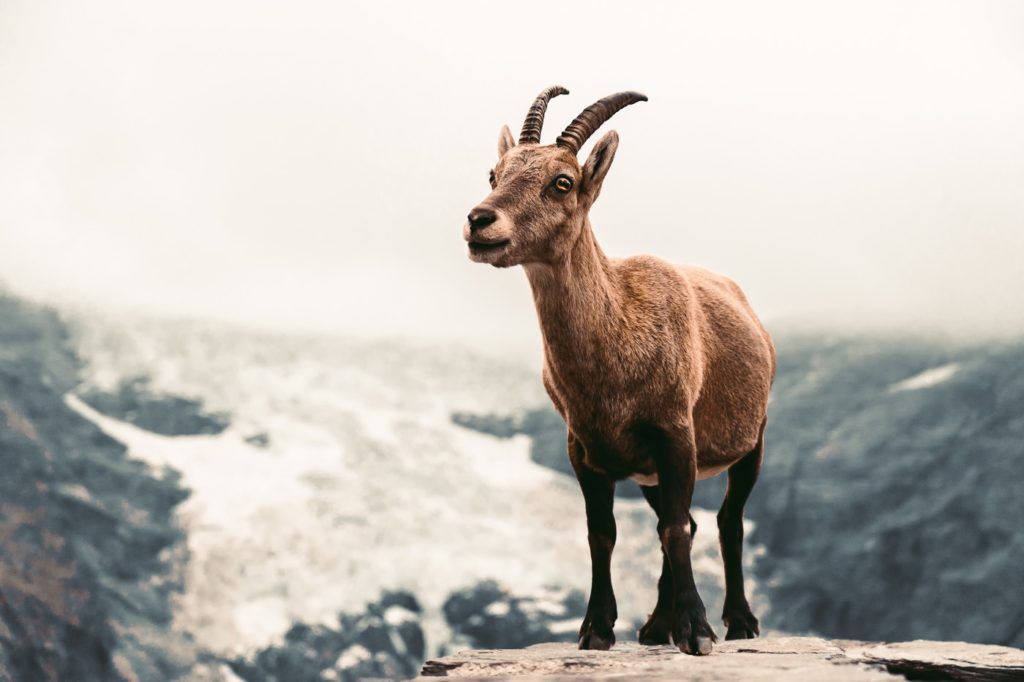
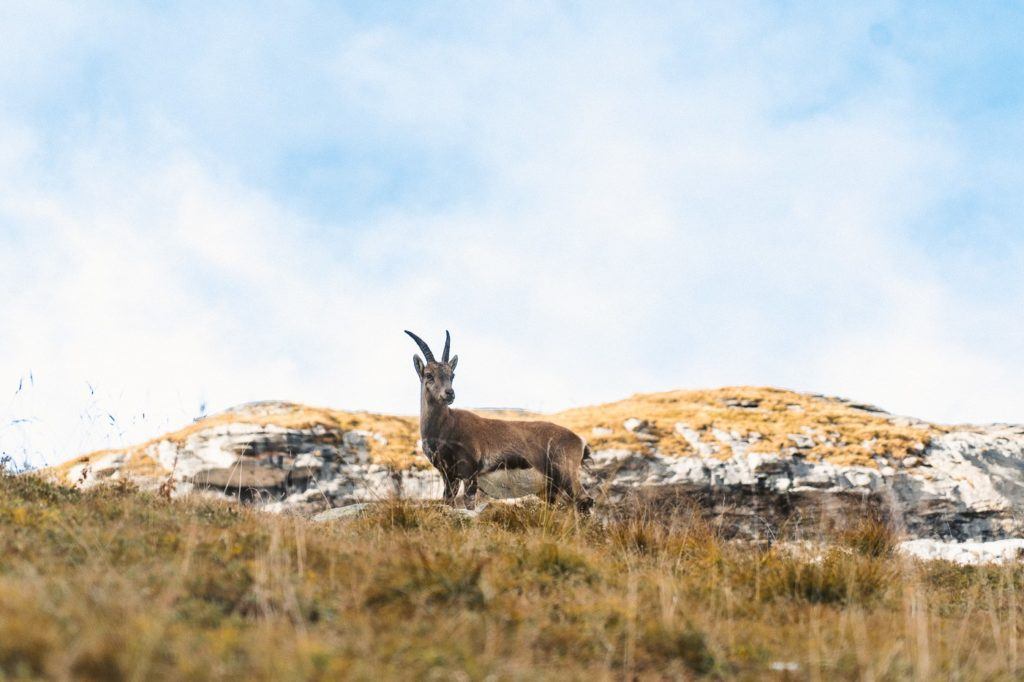
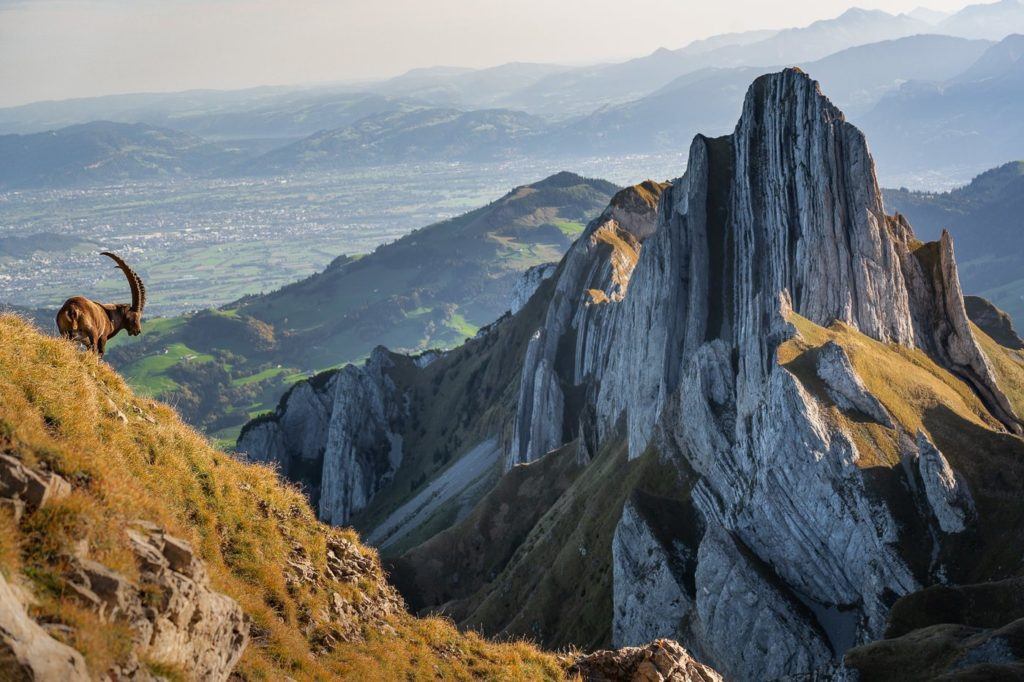
The Hardergrat Ridge hike has to be somewhere at the top of this list. It’s known as one of the toughest hikes day-hikes in Switzerland and also one of the most dangerous. The trail begins at Brienz and runs along the Brienzersee (Brienz Lake) all the way to Harder Kulm Station. Along the route, you will traverse the narrow ridge trail. Expect steep drop-offs and some scrambling along the route. One of my favorite parts about this epic hike in Switzerland is the chance to bump into the resident Ibex colony now the Augstmatthorn peak along the route.
It takes fit hikers about six hours to complete and there are many parts with very, very steep drop-offs. It is for experienced hikers and to be avoided on wet days is the steep cliffs can be unforgiving. It’s possible to get the train up to Brienz and then book the train down from Harder Kulm so you just hike along the ridge but you will need to hike fast and with determination because if you miss the last train you will be hiking down another 800m of incline.
The best route is to get the early train (it’s also half-price) at Brienz, work your way along the ridge to Harder-Kulm Station, and make sure you catch the last train down. Alternatively, if you are a hiking machine, you can hike up to Brienzer Rothorn, along the ridge to Harder Kulm Station, and then down to Interlaken for a total of almost 30 kilometers and 3000m+ of incline throughout the day. Good luck with the journey on what is one of the most epic point-to-point hiking trails in Switzerland.
Want more details and photos? View the full blog post here: HARDERGRAT TRAIL
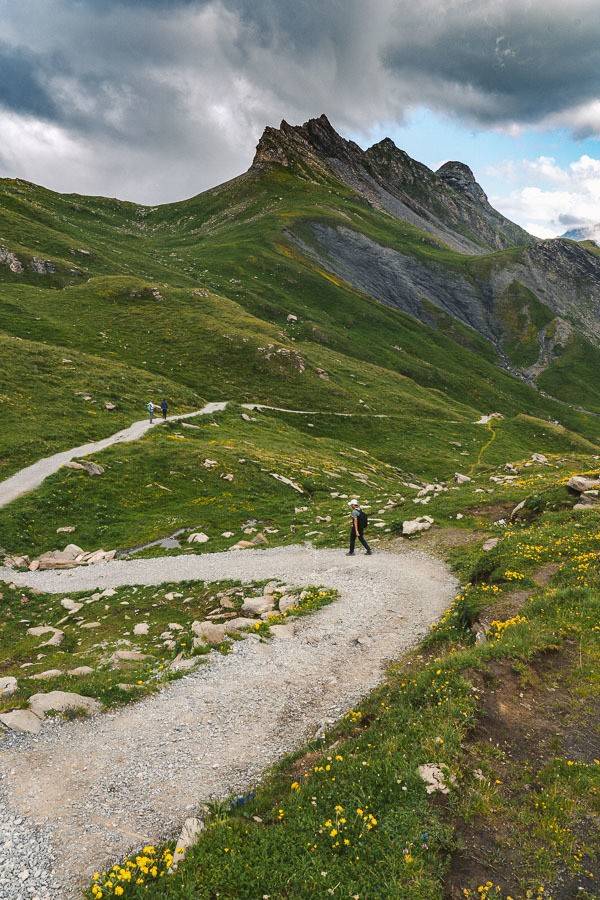
SCHYNIGE PLATTE TO FIRST HIKE
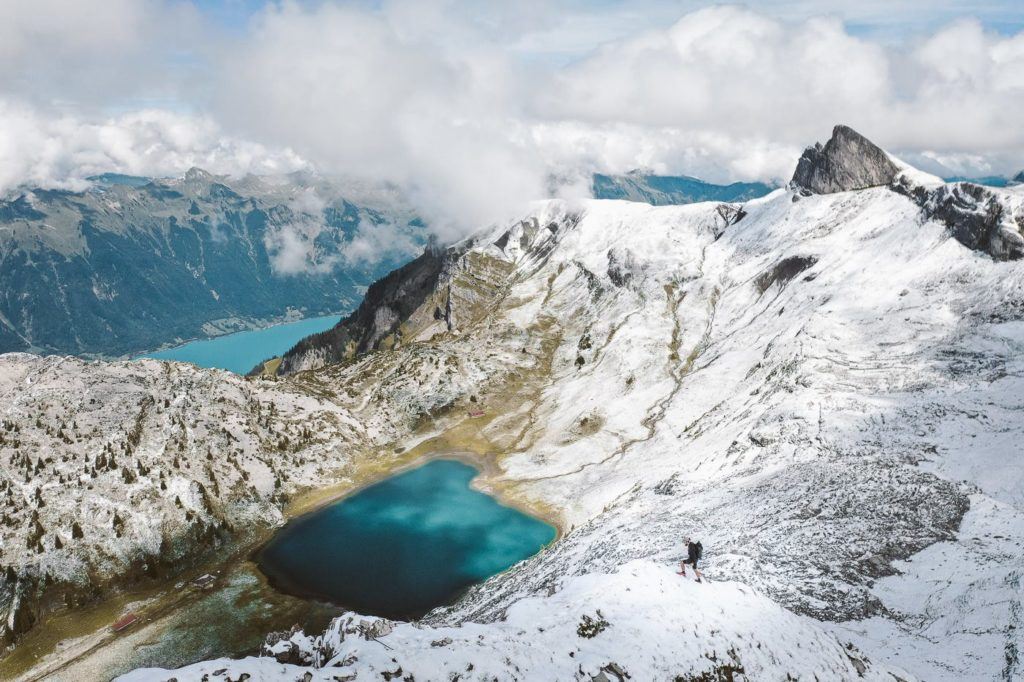
The hike from Schynige Platte to First via Faulhorn is among the top hikes in Interlaken with an epic view around every turn. Expect a long day on the legs with 16km of the trail ahead of you and nearly 1000m of incline. The soup and coffee at Faulhorn with magical views make it all worthwhile.
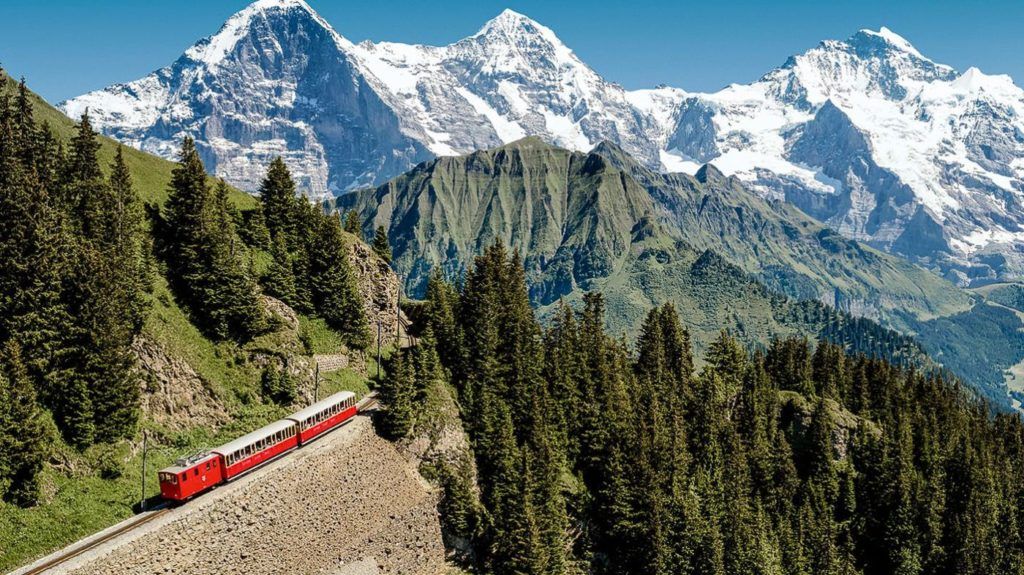
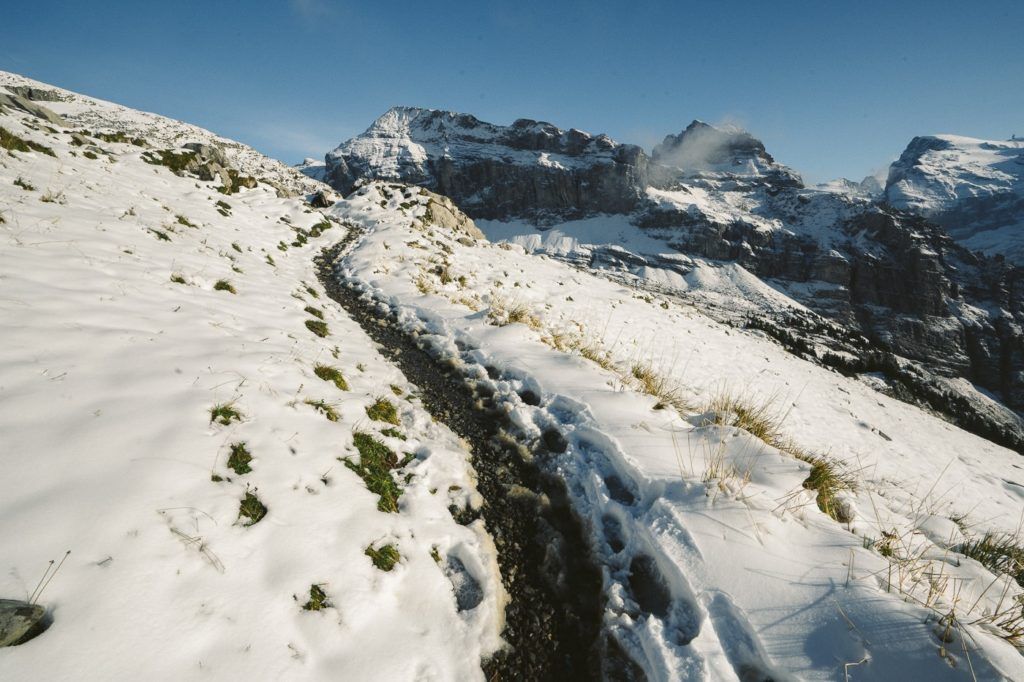
To get there, you will book a ticket on a 125-year-old cogwheel train from Wilderswil to Schynige Platte mountain ridge. This hike is also quite special because it has views of Brienzersee along the way before heading up past alpine lakes to the Fualhorn Mountain Hut. I did this iconic hike near Interlaken after the first snow of the season and it was just stunning. It’s also a great hike for the middle of the spring when the alpine flowers are in full bloom.
While the 1000m of incline is substantial, there are no points where the trail is overly exposed. Many parts of the trail are rocky and involve a tiny bit of clambering but you never need to use your hands or climb.
The hike took me a total time of 5 hours. It could be done in a little less time, especially if you don’t summit Oberberg and Faulhorn but that is the whole point of the hike! I’d bargain for 5-7 hours for the total trip and you will enjoy a coffee and soup at Faulhorn and have lots of spare time to enjoy your hike.
Want more details and photos? View the full blog post here: SCHYNIGE PLATTE HIKE TO FAULHORN & FIRST
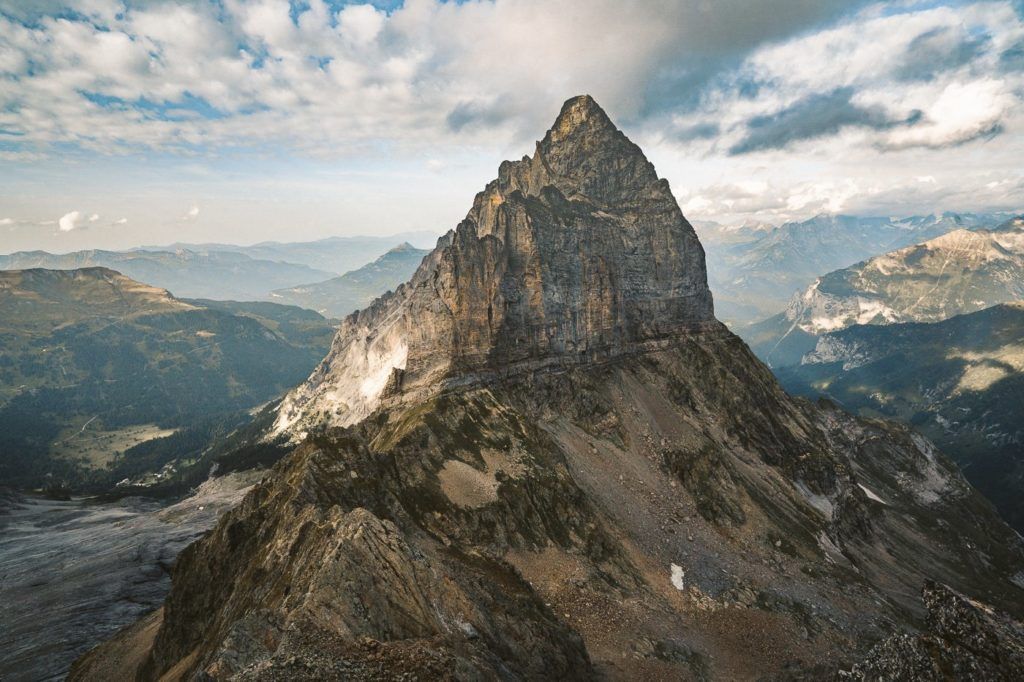
MOUNT NIESEN HIKE ‘THE SWISS PYRAMID’
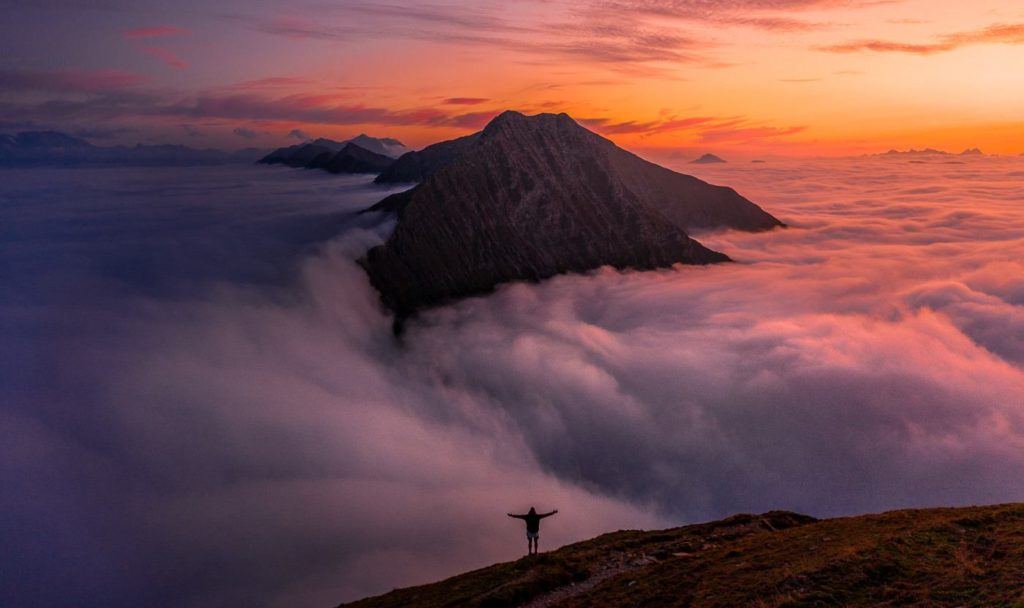
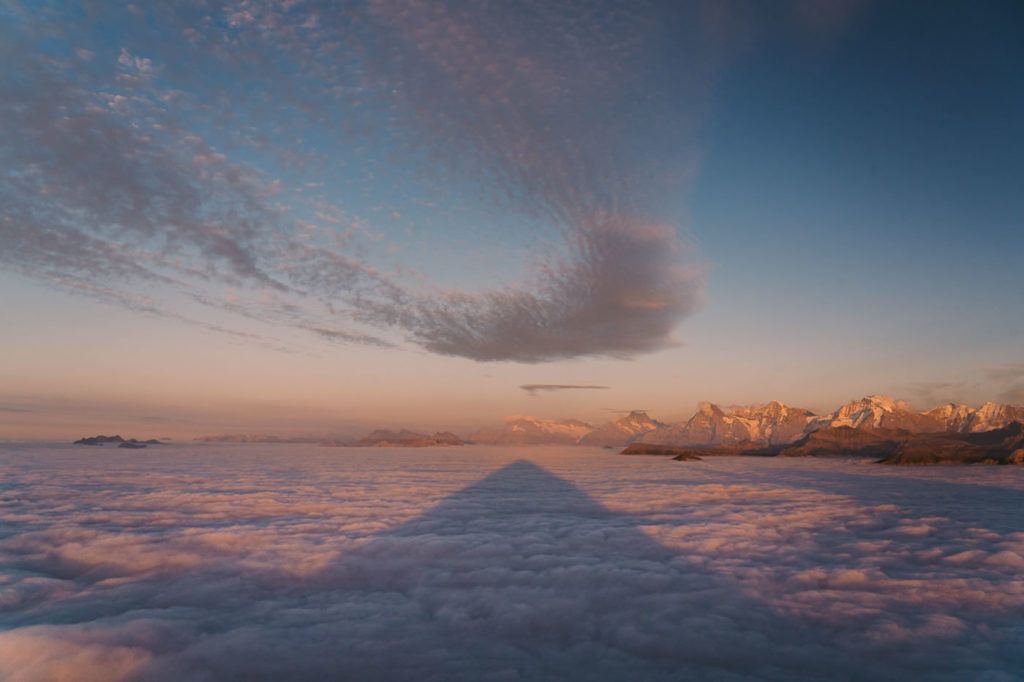
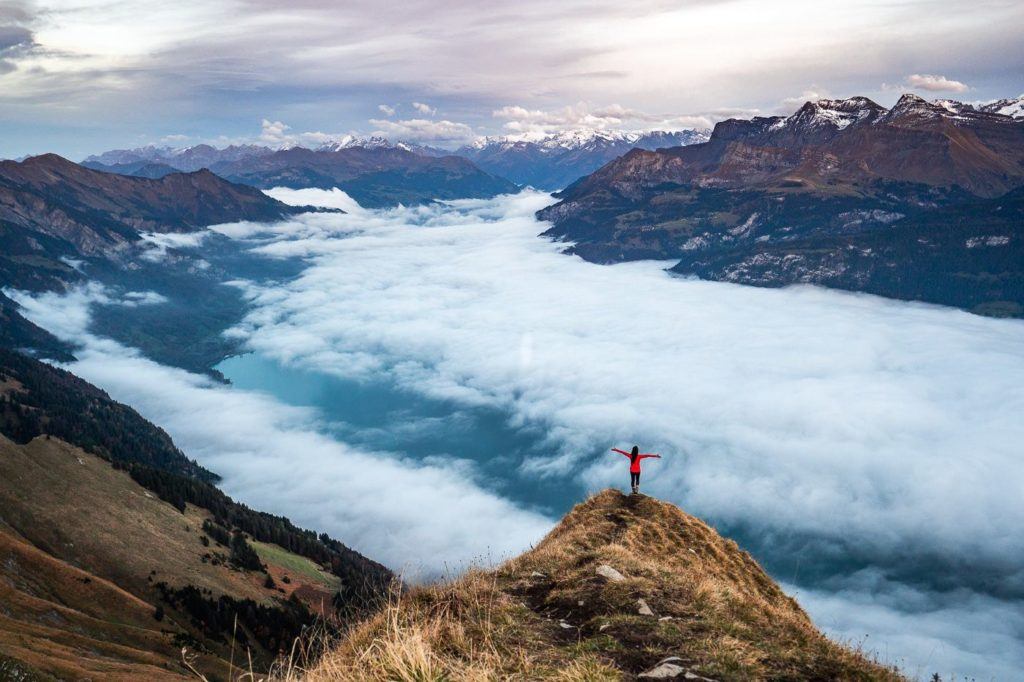
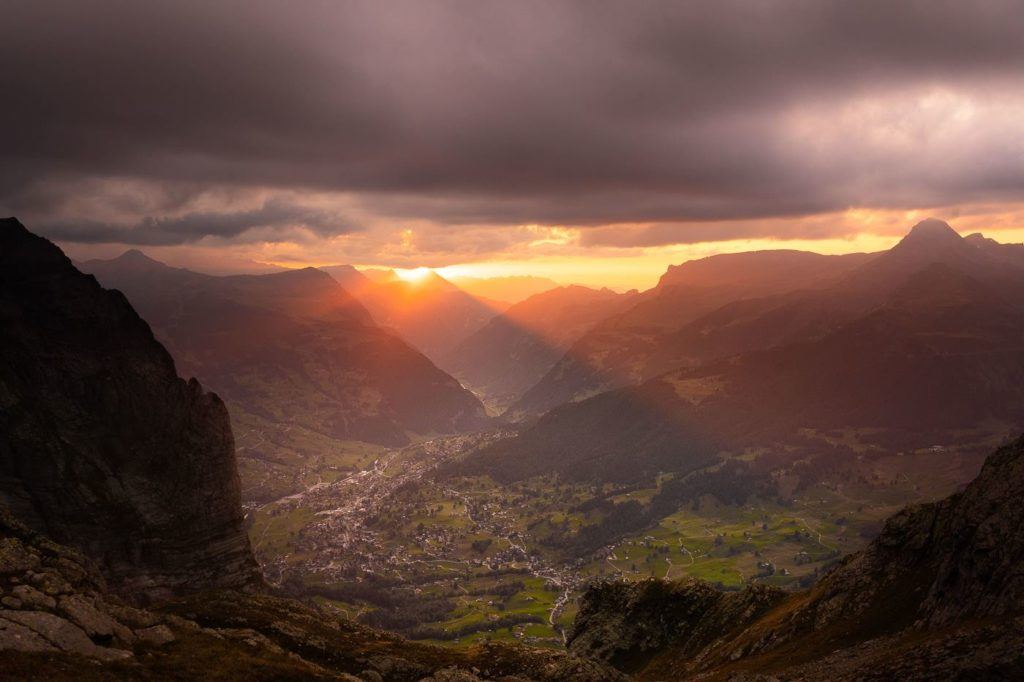
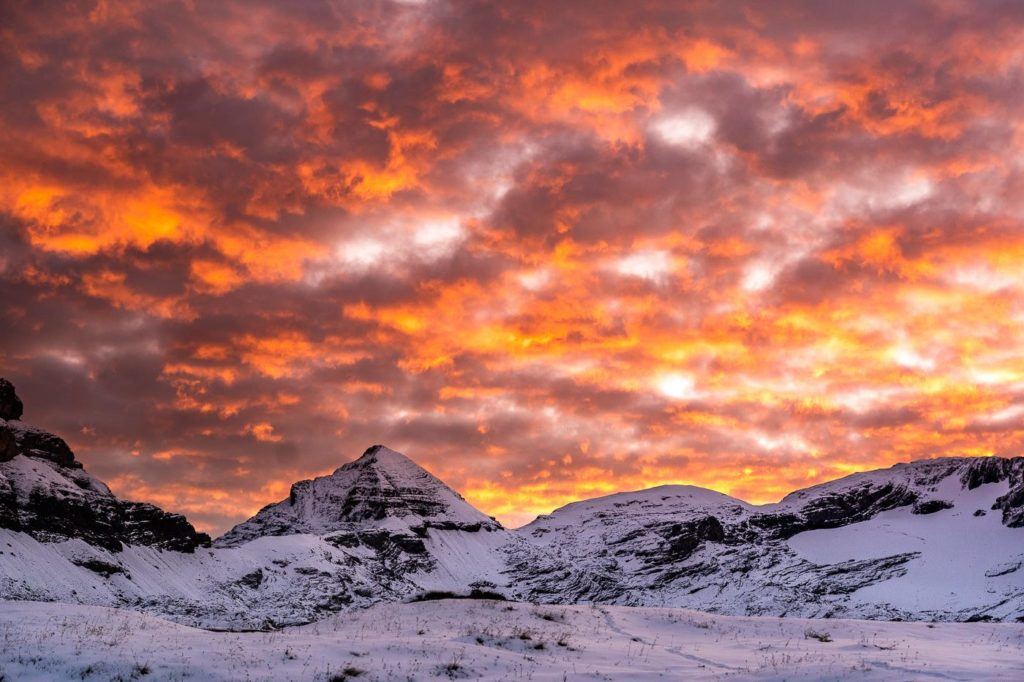
Mount Niesen was a hike I hadn’t heard too much about but it delivered in so many different ways! The cable car is so steep it’s an exciting ride in itself, the views on the panorama trail to the summit were incredible, and then to be above the clouds at Niesen Kulm Berghaus enjoying the sunset was out of this world.
One of the most remarkable sights in Thun is a peak that stands out above the clouds for its unique pyramid shape. The peak also features a mountain hut restaurant on top, making it a popular destination for visitors. From the photos, you can see the pyramid’s shadow cast during sunset. This solo hike was one of my favorites in Switzerland, as I had the fortune of witnessing an epic sunset and clear skies.
If you plan on visiting Niesen Kulm from Mulenen, you can take a cable car to Schwandegg station, which is halfway up the 7.7km distance. From there, you can hike to Niesen Kulm. When I did the same, it took me 1 hour and 13 minutes to complete the 4.8km hike, which involved an incline of 646 meters. If you prefer a leisurely pace, it is recommended to allocate 2-3 hours for the hike.
The trail is relatively easy with no significant exposure. The hardest part of this hike is the incline. If you lack confidence, it is advisable to start halfway at Schwandegg because there is 1700m of climbing from Mulenen, which may be a bit too much for beginners but fine for regular hikers. Don’t forget to include this hike in your Swiss itinerary!
Want more details and photos? View the full blog post here: HIKING MOUNT NIESEN ‘THE SWISS PYRAMID’
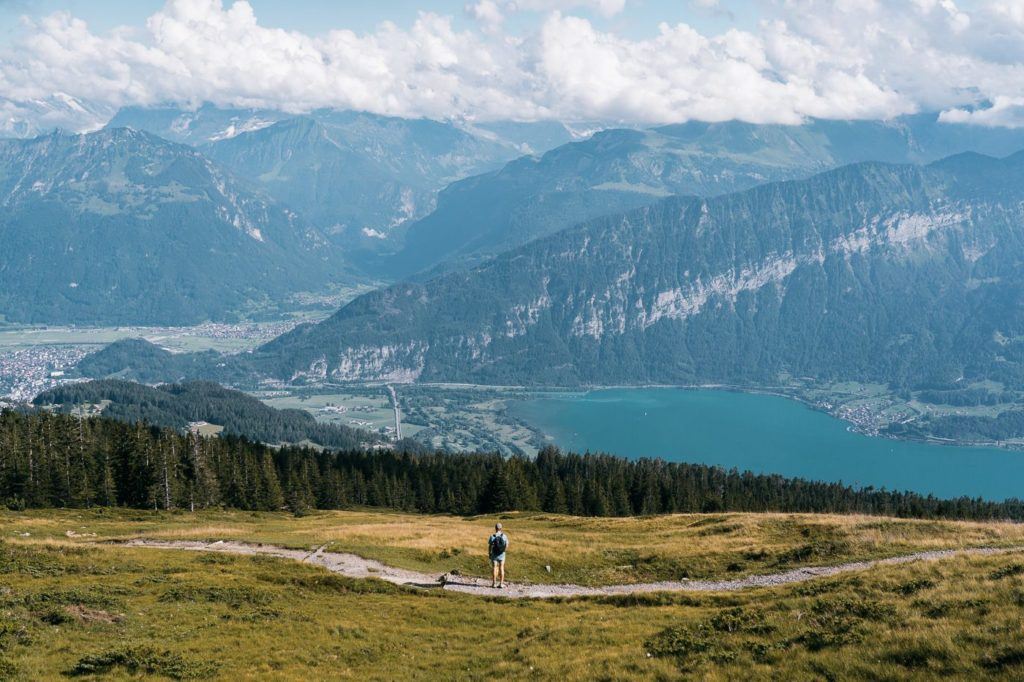
MORGENBERGHORN HIKE: BEST VIEW OF LAKE THUN
The Morgenberghorn Hike is a challenging trail that features a 1300-meter incline, but the panoramic viewpoint at the end offers the best view of Lake Thun in the entire region. This hike is conveniently located close to Interlaken, and as you can see, I actually walked all the way back to Interlaken since it’s so nearby.
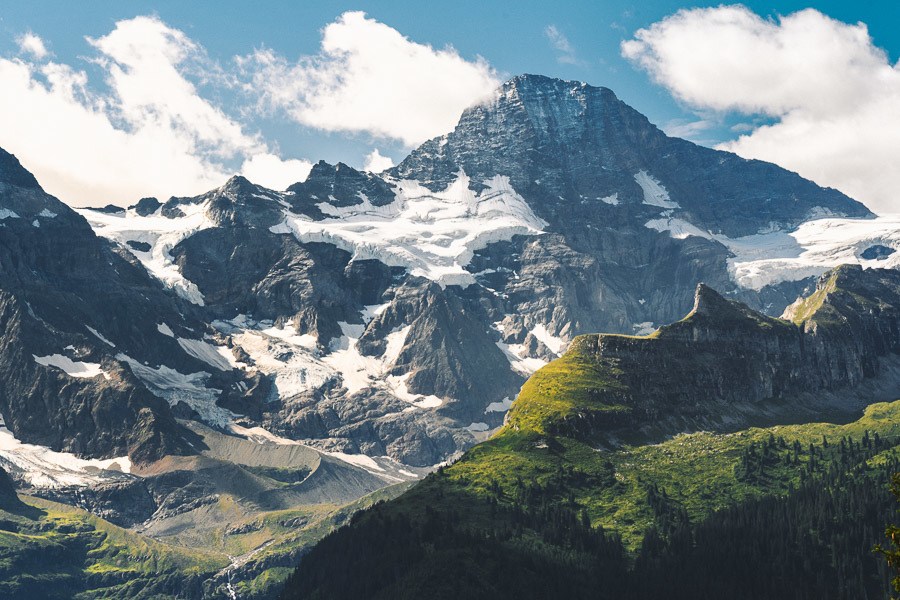
It’s a fun little trail up to a viewpoint that overlooks Lake Thun and even has views of ‘The Big Three’ when the clouds clear. Those are Eiger, Monch, and Jungfrau.
I hiked a total distance of 19 kilometers, starting from the summit of Morgenberghorn and continuing all the way to Wilderswil. Although it was a long route, you can make it shorter by returning to Aescherid or taking other nearby descents. If you’re staying in Interlaken, you’ll need to add an extra 1.5 hours of transit time to get back. However, the overall travel time will be similar.
Want more details and photos? View the full blog post here: MORGENBERGHORN HIKE: BEST VIEW OF LAKE THUN
AUGSTMATTHORN HIKE FROM HARDER KULM
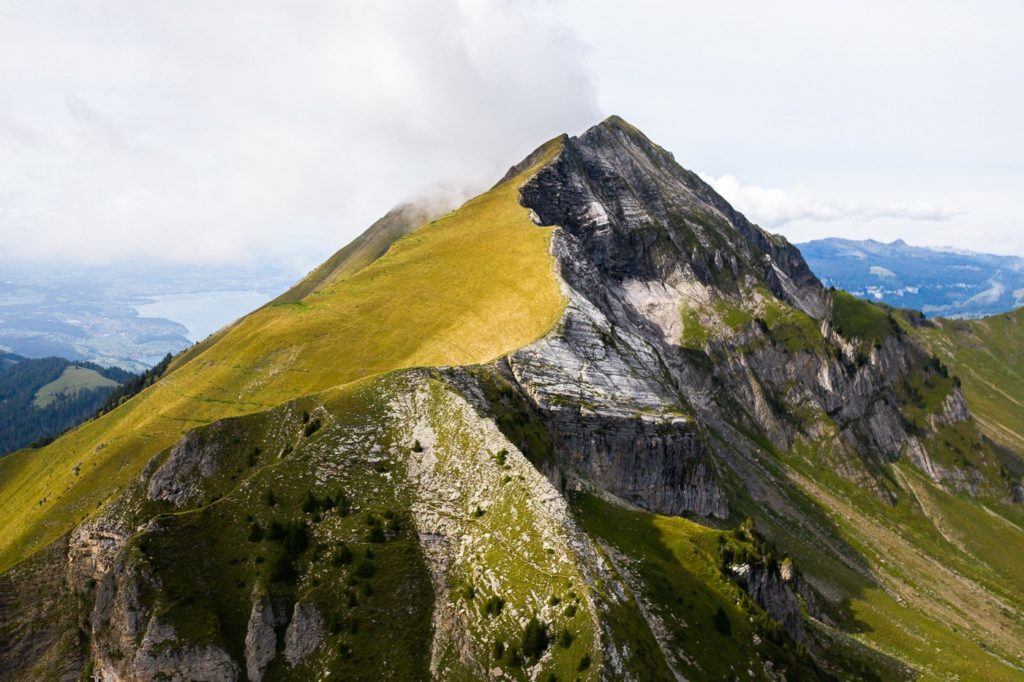
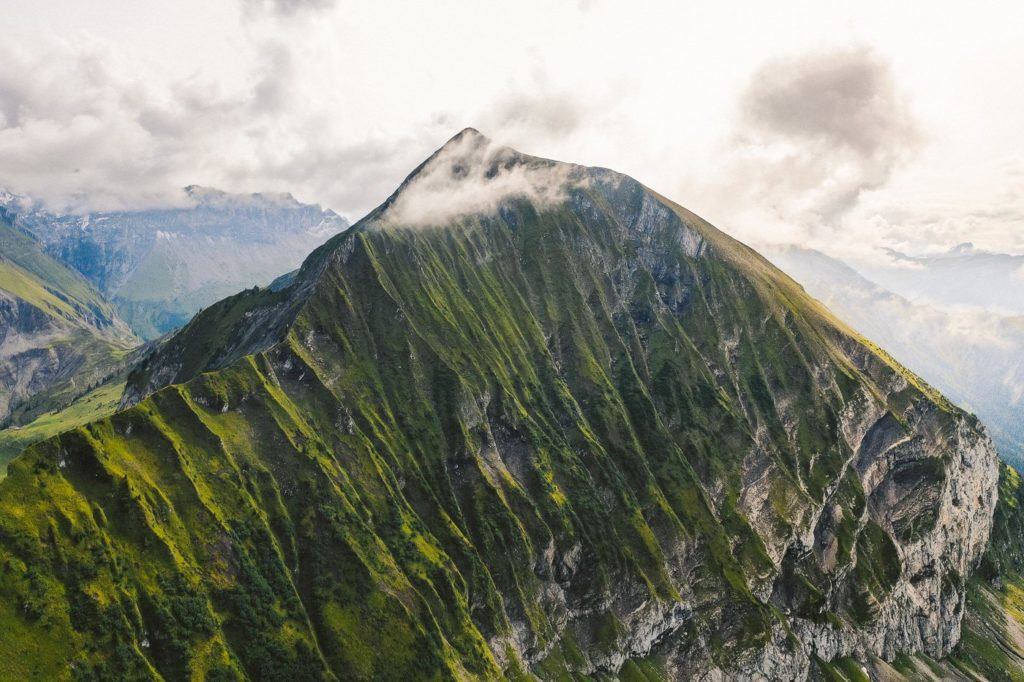
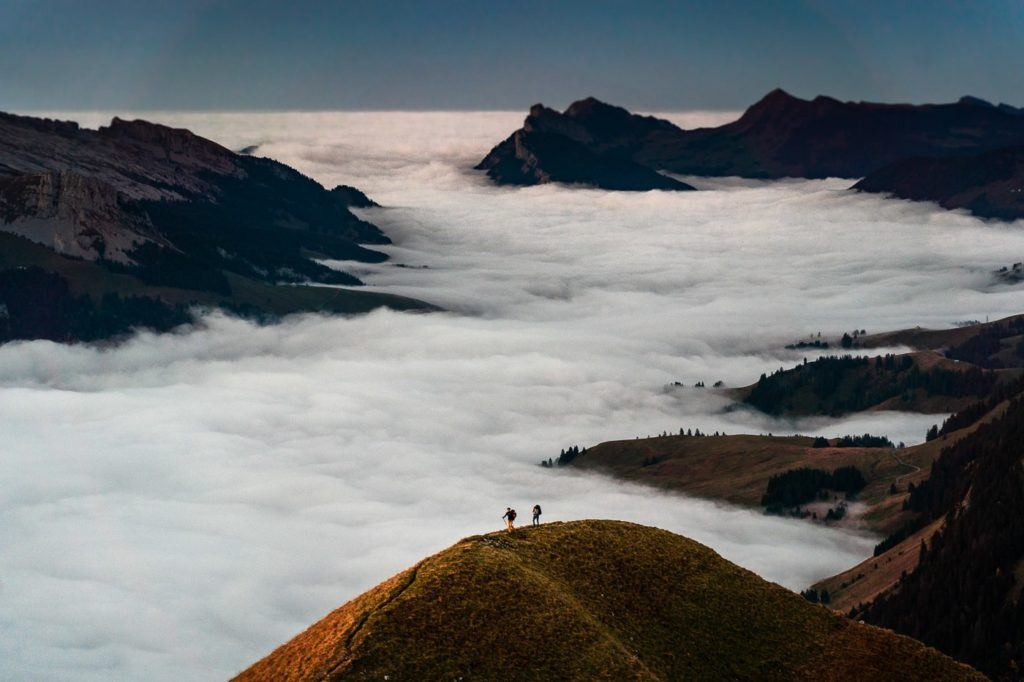
Augstmatthorn is a breathtaking summit situated along the Hardergrat Ridge and is renowned for its stunning views and the Ibex colony that inhabits it. There are multiple routes that lead to the summit, but the most popular one begins after catching the train to Harder Kulm Station and involves a walk along the ridge.
The view from Augstmatthorn was breathtaking, with the clouds below us. We could see the entire Hardergrat ridge, had a stunning view of Brienzersee, and across to the Swiss Alps. The Ibex colony was hanging around, indifferent to us as hikers. It was an incredible experience to witness these amazing creatures in such an epic location. This Swiss hiking trail is definitely one of the best hikes in Interlaken!
The total distance of the hike from Harder Kulm to Augstmatthorn and then back down to Habkern is 16 kilometers. Once you reach Habkern, you can take a bus back to your destination. If you plan on doing a round trip from Harder Kulm, it’s recommended to start your hike early in the day to ensure you catch the last train down from Harder Kulm to Interlaken.
Want more details and photos? View the full blog post here: AUGSTMATTHORN HIKE FROM HARDER KULM

HIKING TO DOSSEN HUT VIA ROSENLAUI GLACIER
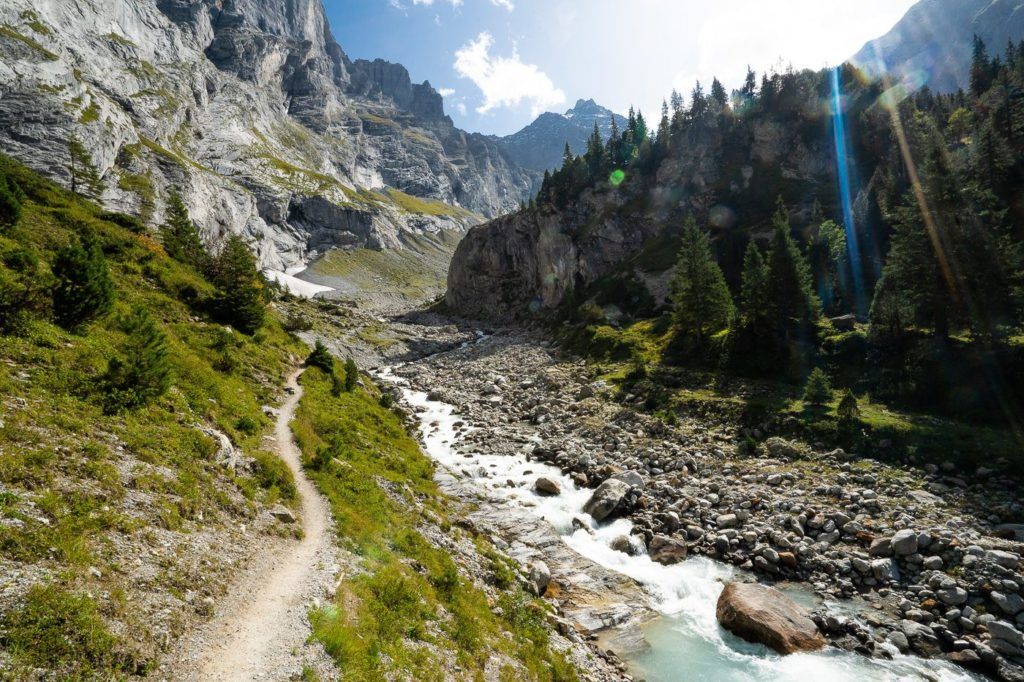
The Dossen Hut hike is an epic 19km T4 Difficulty route that starts off at Rosenlaui Glacier and leads you up to the mountain hut and down to Innertkirchen. This one requires a train and a bus from Interlaken but I made it all work as an Interlaken day-hike.
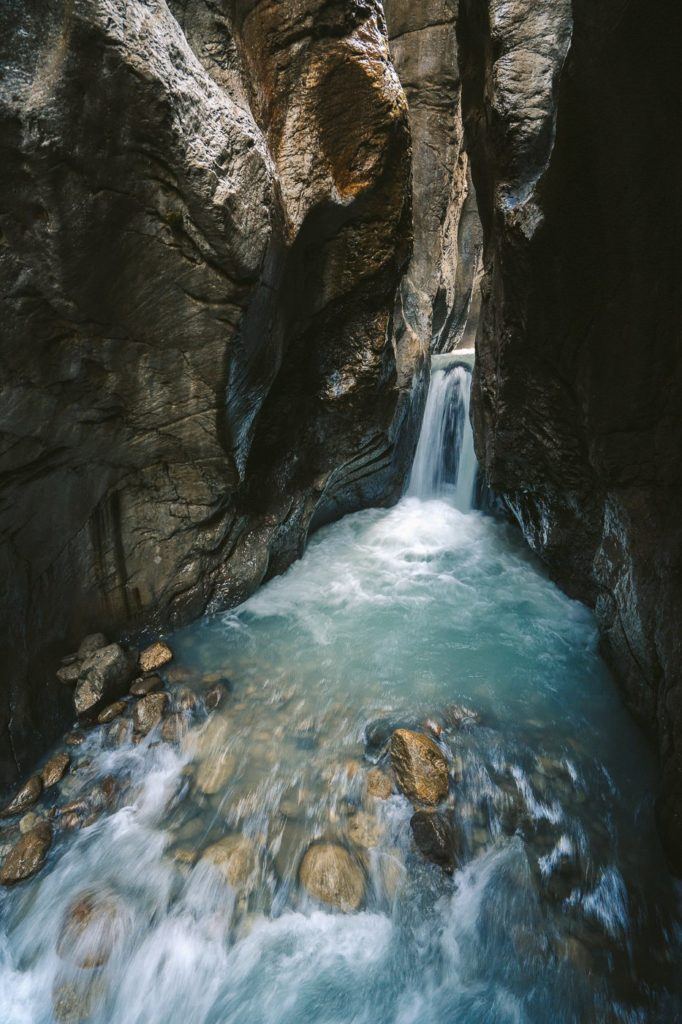
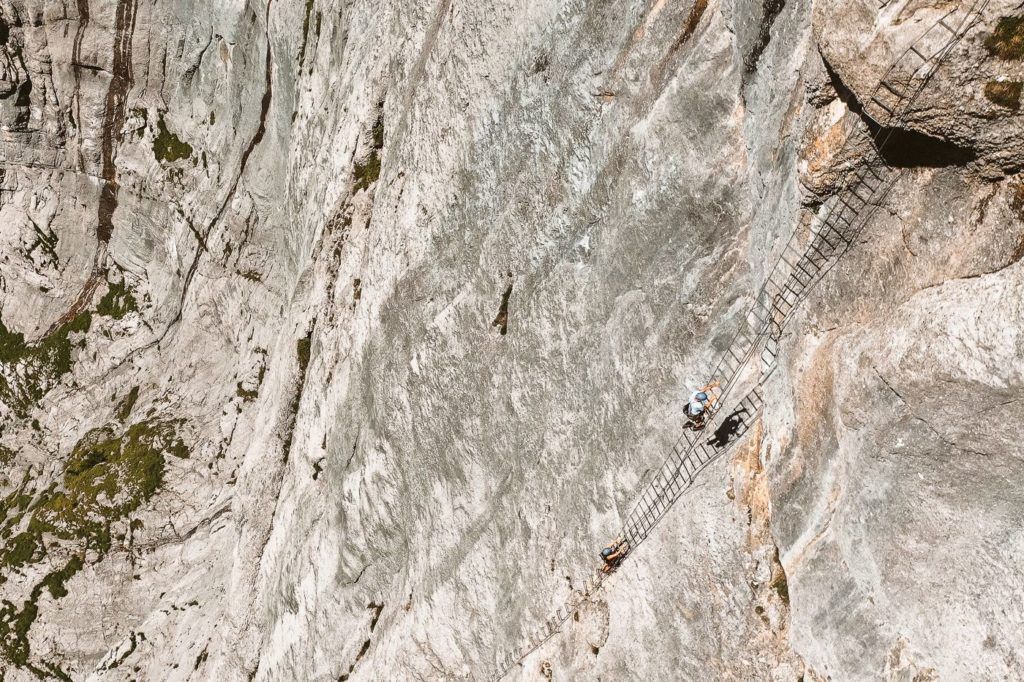
The hike starts by taking you through a canyon and several waterfalls before you begin the T4 route up the rocky slopes. During the climb, ladders, ropes, and pegs will guide you up the scramble until you reach the mountain hut. From the hut, you can enjoy an epic view of the Rosenlaui Glacier. On your way back, you will pass through the canyon on the other side of the ridge before catching the train back to Interlaken.
The hike from Rosenlaui Hotel to Dossen Hut and down to Innertkirchen is suggested to take around 8 hours. However, as you will see in this blog post, I completed the hike in 5 hours, although I had to run an additional 5km from Innertkirchen to Meiringen Train Station. It is possible to complete the hike in less than 5 hours, but most hikers will likely take between 5 to 10 hours. I absolutely loved this hike and consider it one of the most unique day hikes in Switzerland, with plenty of things to see along the trail.
Want more details and photos? View the full blog post here: HIKING TO DOSSEN HUT VIA ROSENLAUI GLACIER

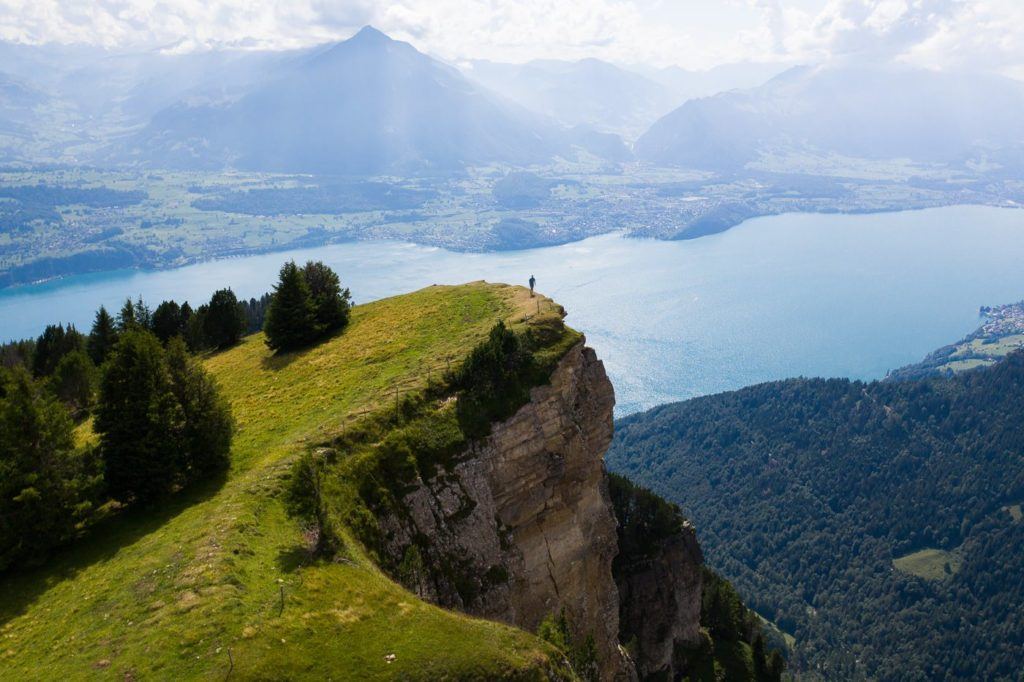
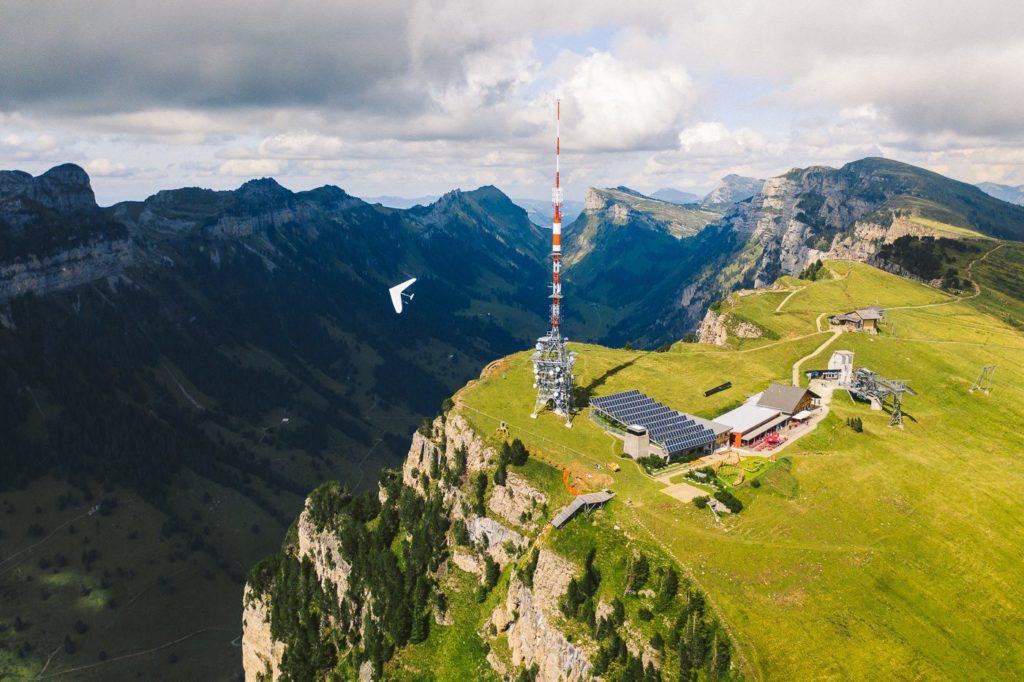
THE NIEDERHORN HIKE: A BEAUTIFUL RIDGE WALK
The Niederhorn is a popular summit with lots of action at the time, highlighted by incredible views of Lake Thun, which is very close to Interlaken. It’s possible to ride up or down with the cable car but exploring the Niederhorn ridge hike at the summit is a must!
At the summit, we hung out on the ridge that overlooks the western end of Lake Thun and was all by ourselves the entire time. We watched as paragliders took off (I watched that one from my drone, which was a little scary), scoped out Lake Thun, and looked at the small huts in the valley below.
We took a cable car to the summit and then hiked along the ridge for 7 kilometers before descending to Beatenberg Station. The entire loop is 14 kilometers and can also be done in reverse. Families who prefer walking to strenuous hikes often take the cable car to the top, walk along the ridge, which has a gentle incline, and then catch the cable car down. This is a popular strategy for those hiking in Switzerland with kids.
Want more details and photos? View the full blog post here: THE NIEDERHORN HIKE: A BEAUTIFUL RIDGE WALK
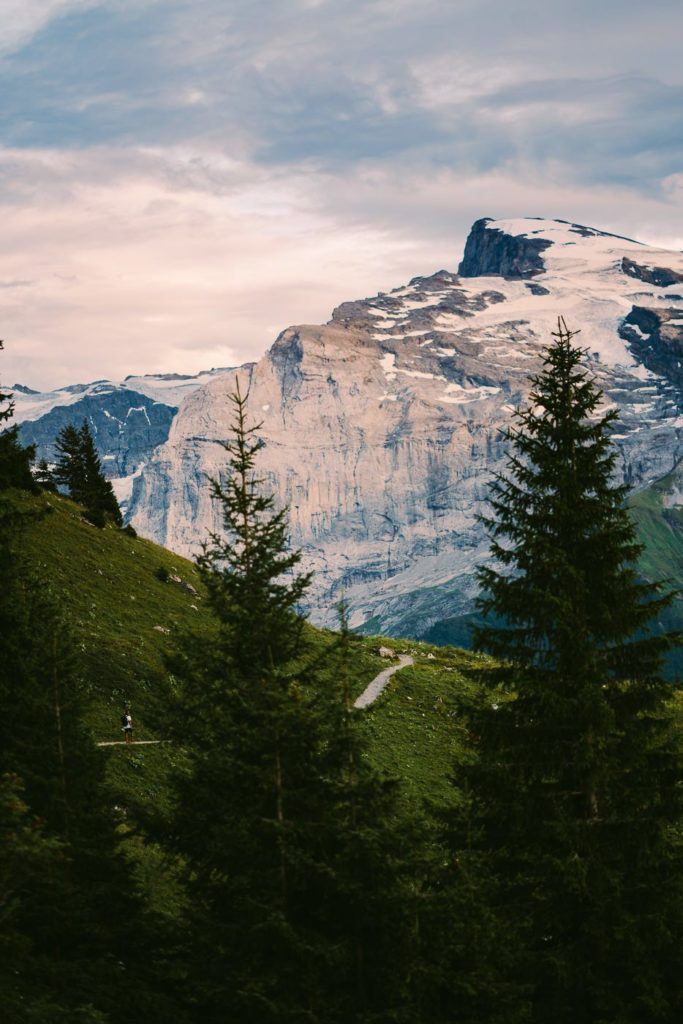
SWITZERLAND HIKING REGION: MURREN
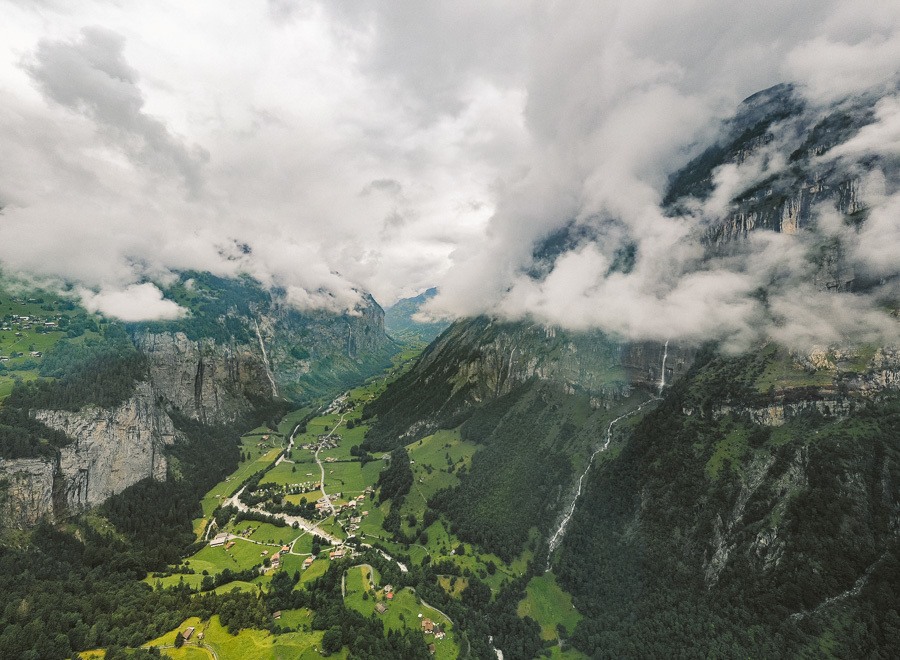
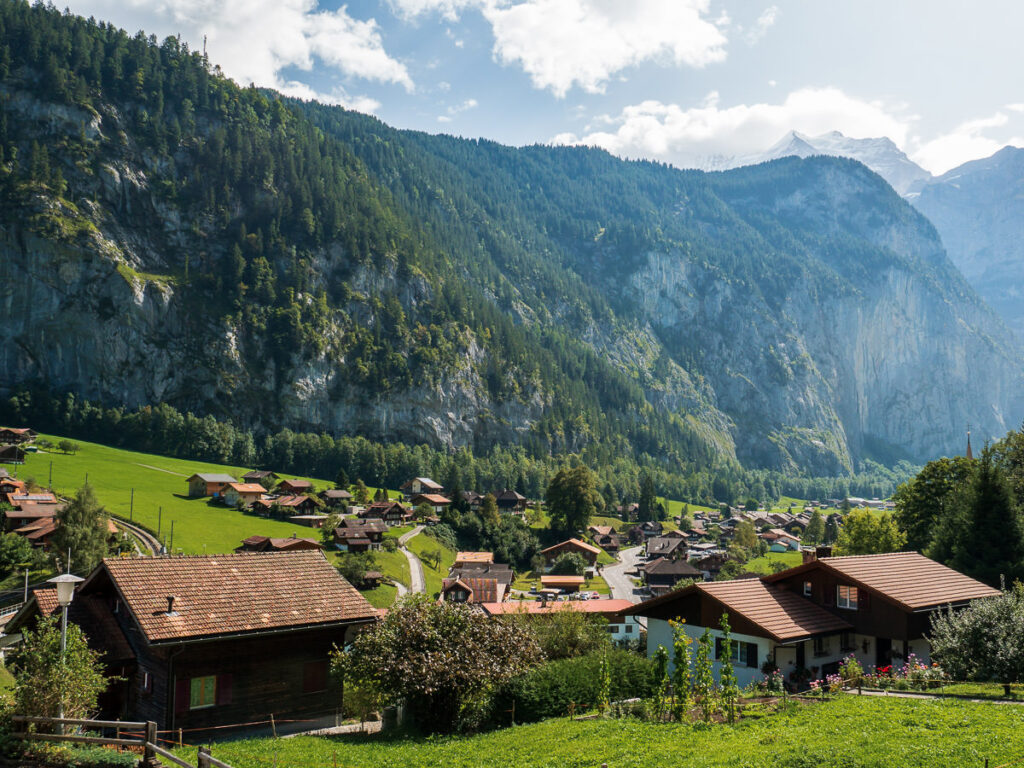
Murren is one of my favorite regions in Switzerland with some of the best balcony views in the world, which look down over Lauterbrunnen Valley with the ‘Big 3’ in the distance (Eiger, Jungfrau, Monch). I visited this region for 5 days and barely had enough time to see all of the amazing hikes in Murren. You can check out my in-depth guide to hiking in Murren: 7 AWESOME HIKES NEAR MURREN
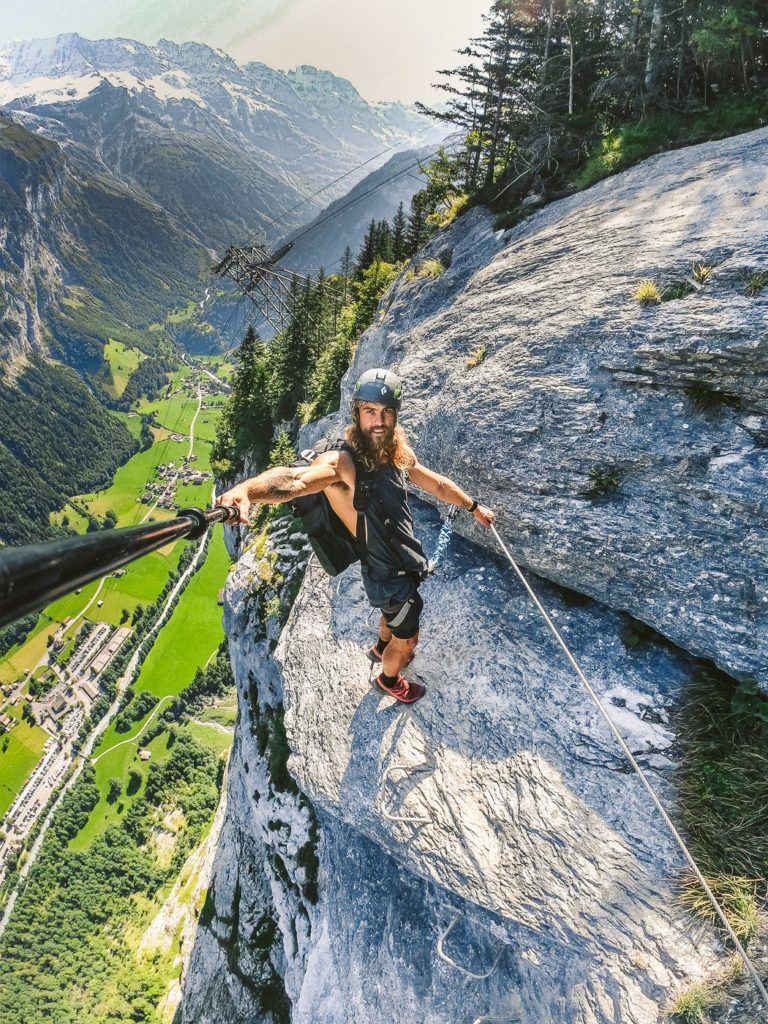
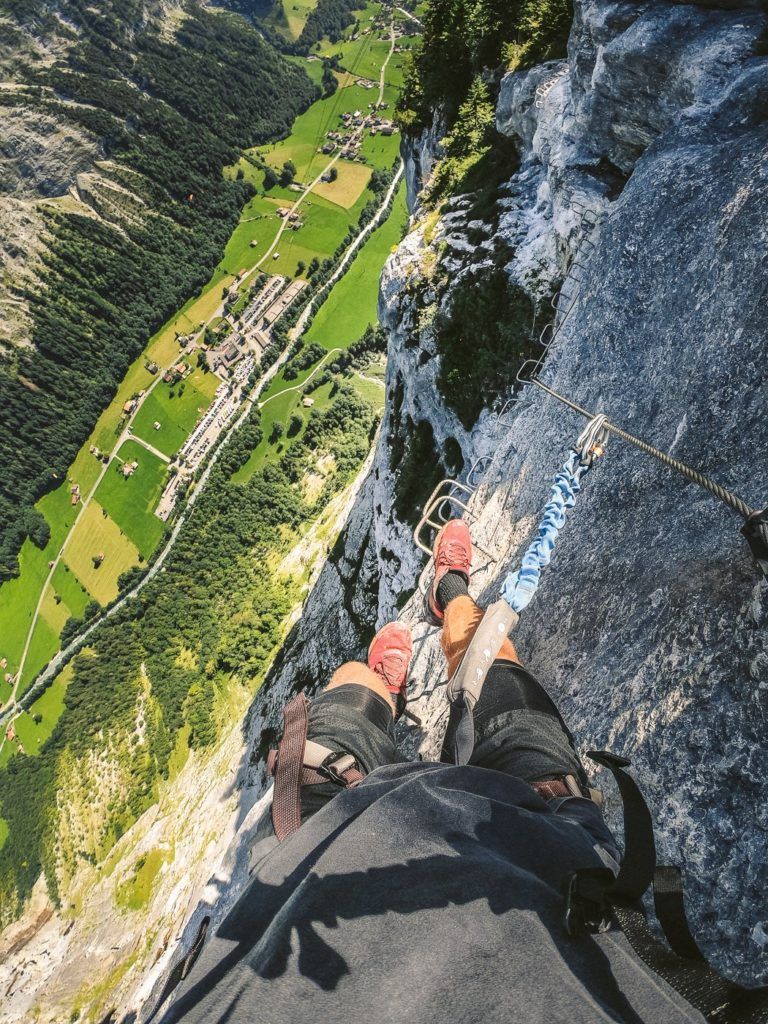
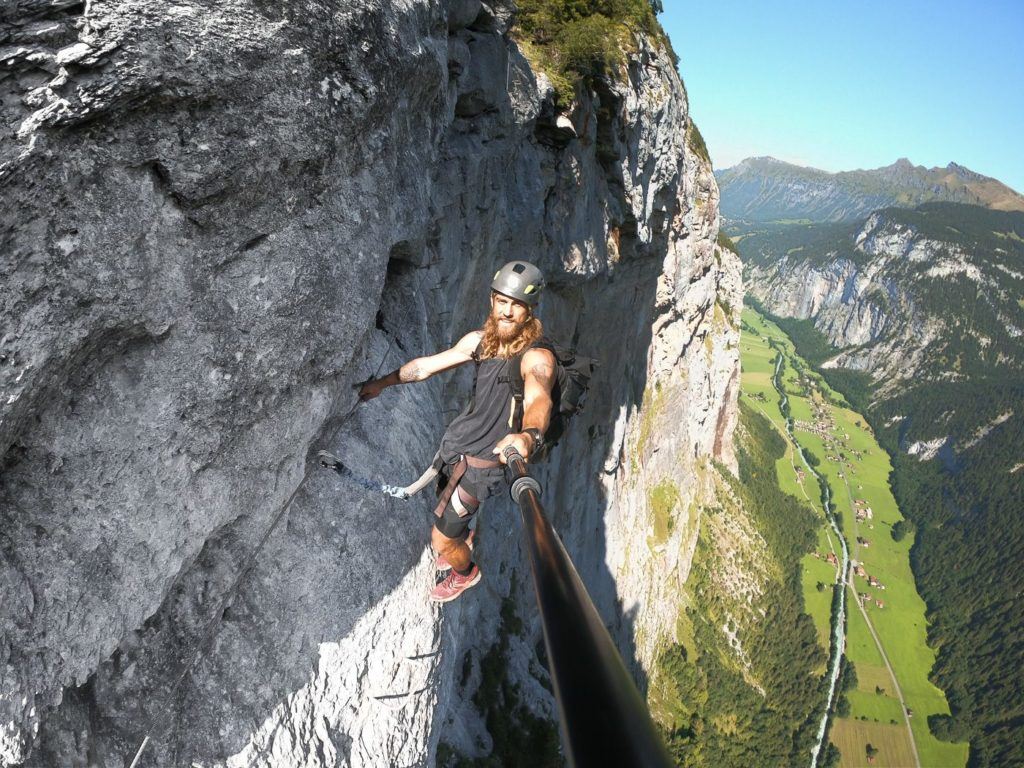
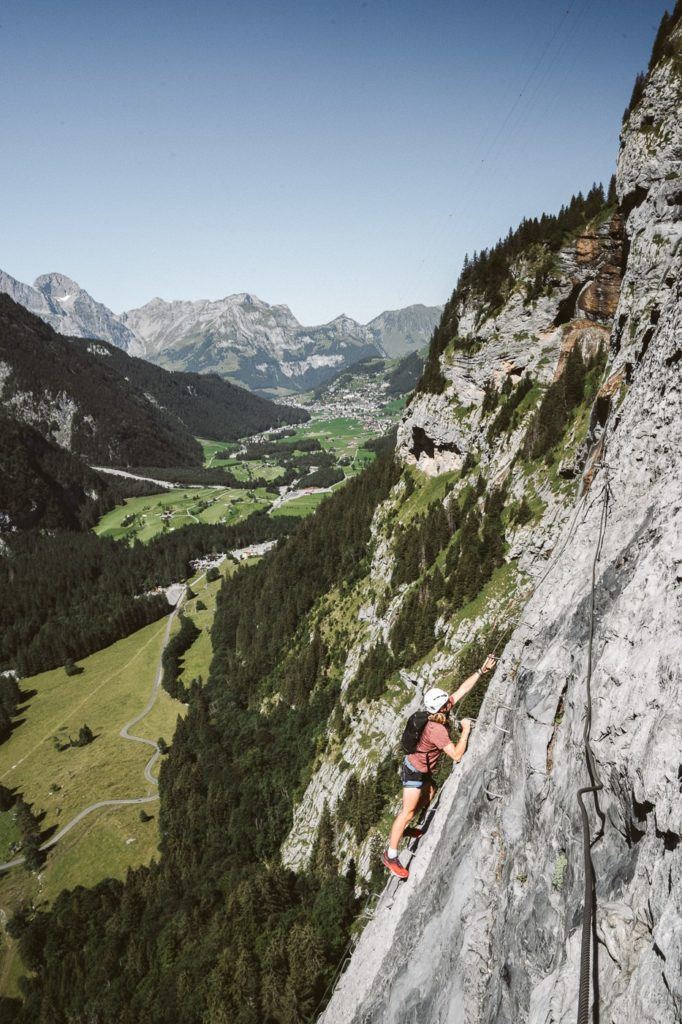
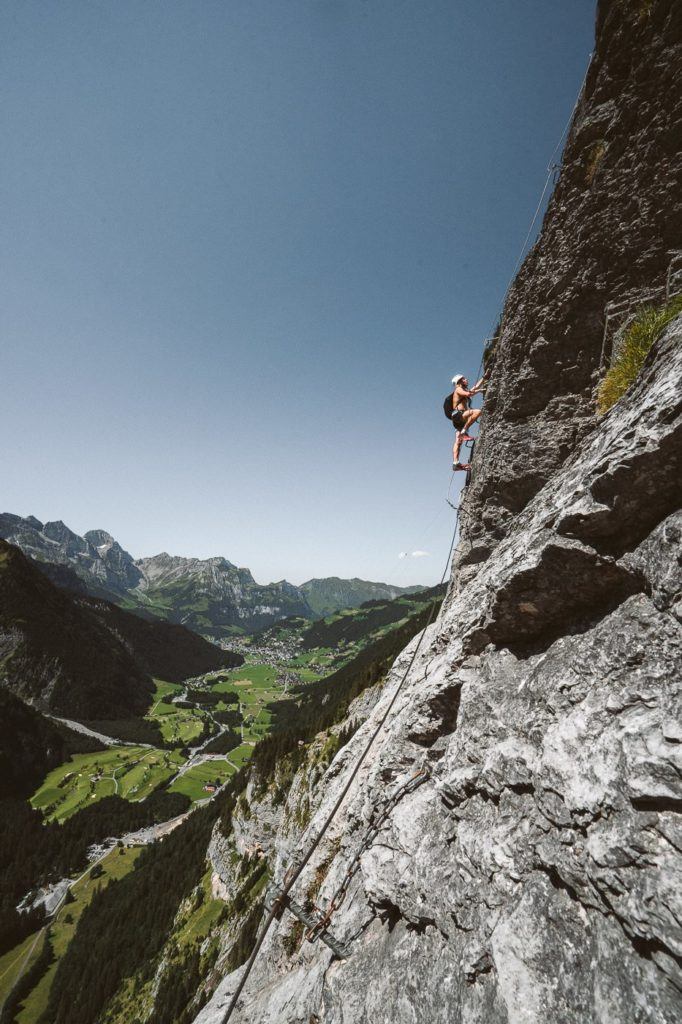
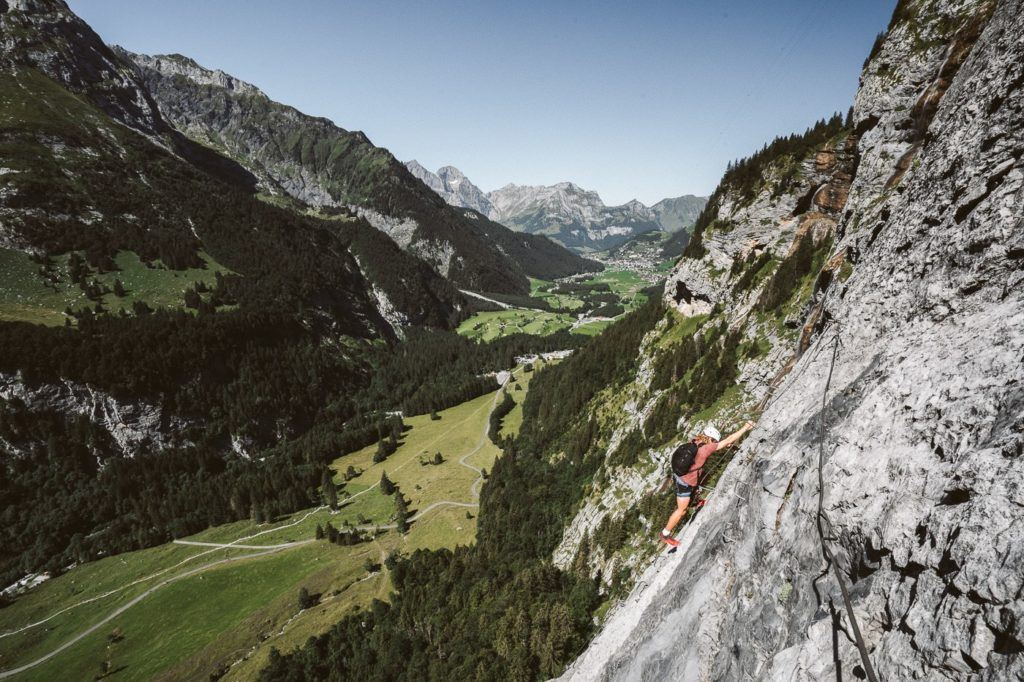
MURREN TO GIMMELWALD VIA FERRATA
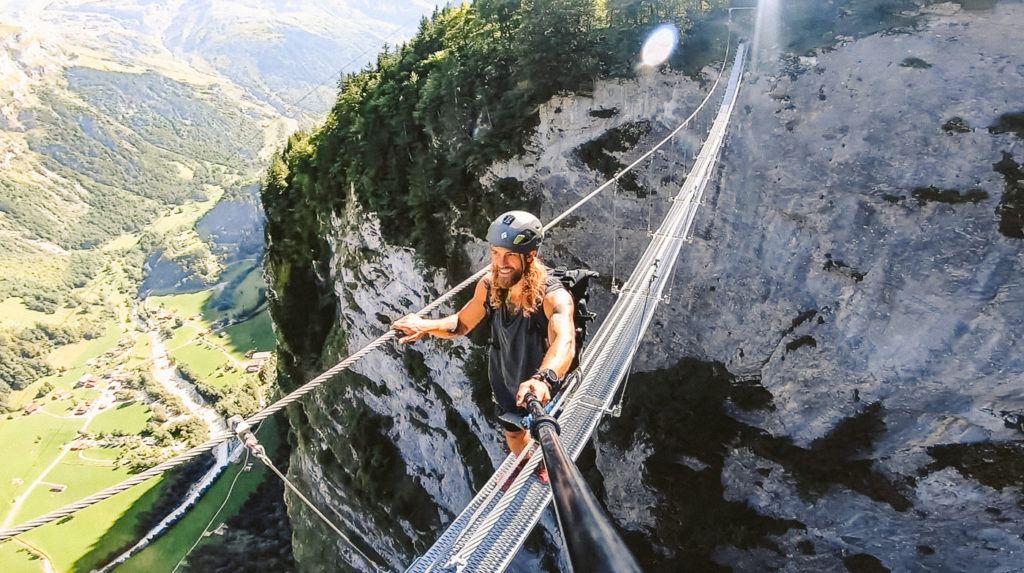
The Via Ferrata from Murren to Gimmelwald is an epic adventure in Switzerland, where you traverse ladders and steps on the edge of a cliff overlooking Lauterbrunnen, all while being safely strapped in with a harness.
If you’re not familiar with Via Ferrata, it’s a route marked by a series of ladders, steps, and rock climbing sections that help you ascend a vertical cliff. You’ll be wearing a harness and attaching yourself to a steel cable at the start of the route. Throughout the climb, you’ll always be secured to the cable with at least one clip.
I wrote a post you might be interested that includes all of the Via Ferrates I did while in Switzerland: 4 AWESOME VIA FERRATA ROUTES IN SWITZERLAND
On the Murren Via Ferrata, you will literally be hanging off the wall over a 500-meter drop down into Lauterbrunnen Valley. You up for it? You NEED to add at least one Via Ferrata to your Swiss hiking itinerary as it is quite unique and something most countries don’t have.
I’ve added the instructions to get to the start of the Murren Via Ferrata below.
- From Interlaken, you will need to catch the train Lauterbrunnen
- Once in Lauterbrunnen take the Grutschalp cable car, which is right next to the train station. This will take you all the way up to Grutschalp station where you can switch onto the historic, Murren Railway.
- The Murren Railway is one of the most scenic rides in Switzerland with views of Eiger and the surrounding peaks along the journey.
- Once you arrive at the Murren Train Station turn left out of the station and walk for 10-minutes past Hotel Edelweiss and you will arrive at the sports chalet on your right and Intersport on your left for the hiring of the gear.
Want more details and photos? View the full blog post here: THE MURREN TO GIMMELWALD VIA FERRATA
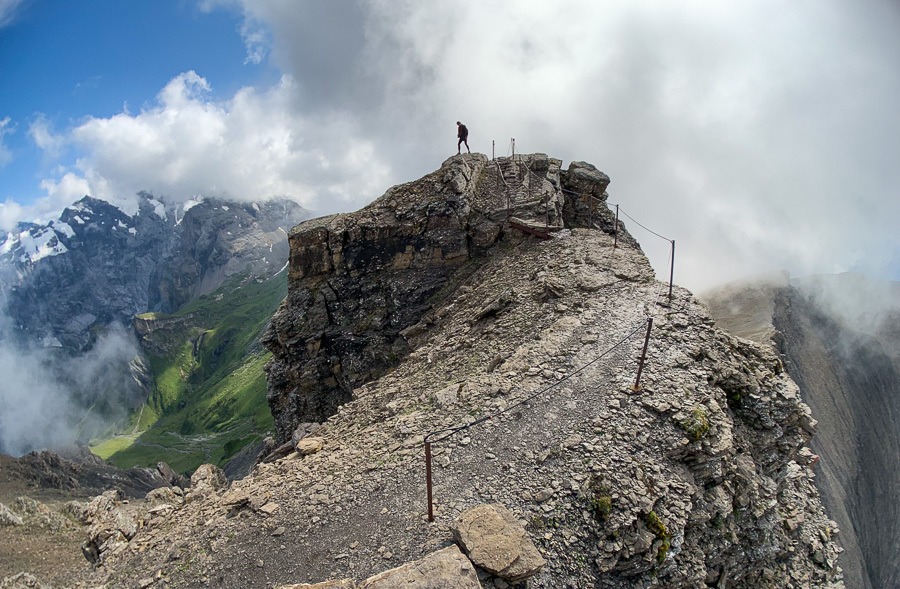
MURREN TO SCHILTHORN HIKE (PIZ GLORIA)
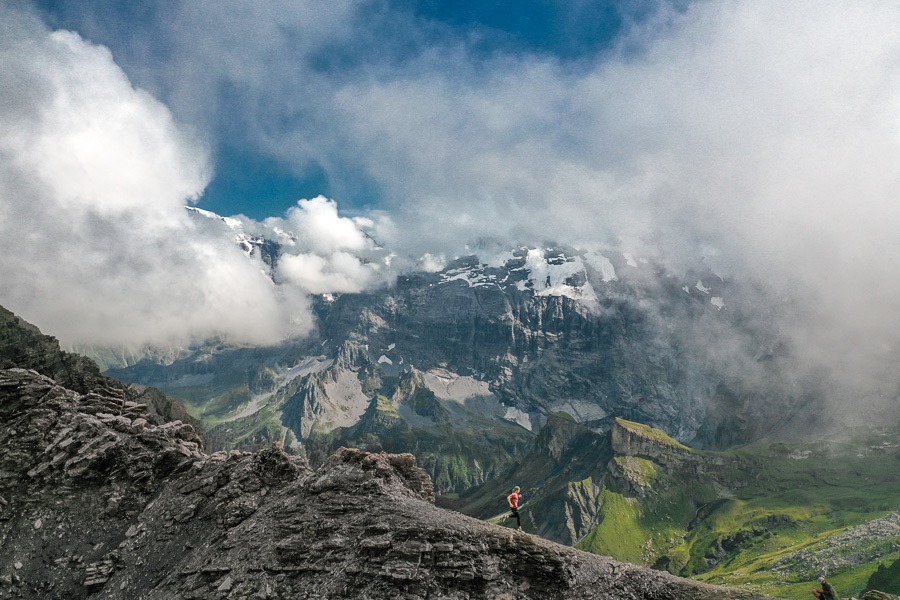
The hike from Murren to Schilthorn is challenging with 1600m of altitude climbed throughout the trail to the Piz Gloria summit where James Bond ‘007’ was filmed. At the summit, you can reward yourself after the long hike with a warm bowl of soup at the revolving restaurant, which lets you take in the 360-degree panoramic views as you enjoy your meal. From Interlaken, you will want to leave quite early to give yourself enough time to do the hike and get back for what is a very possible day-hike from Interlaken.
It’s 12.9km Total distance from Murren to Schilthorn mountain summit. If you want to hike down you will need to add a few more kilometers but we caught the Schilthornbahn down to Murren, which was a nice way to return after a long day on the legs.
Want more details and photos? View the full blog post here: MURREN TO SCHILTHORN HIKE

TANZBODELI & OBERSTEINBERG HIKE
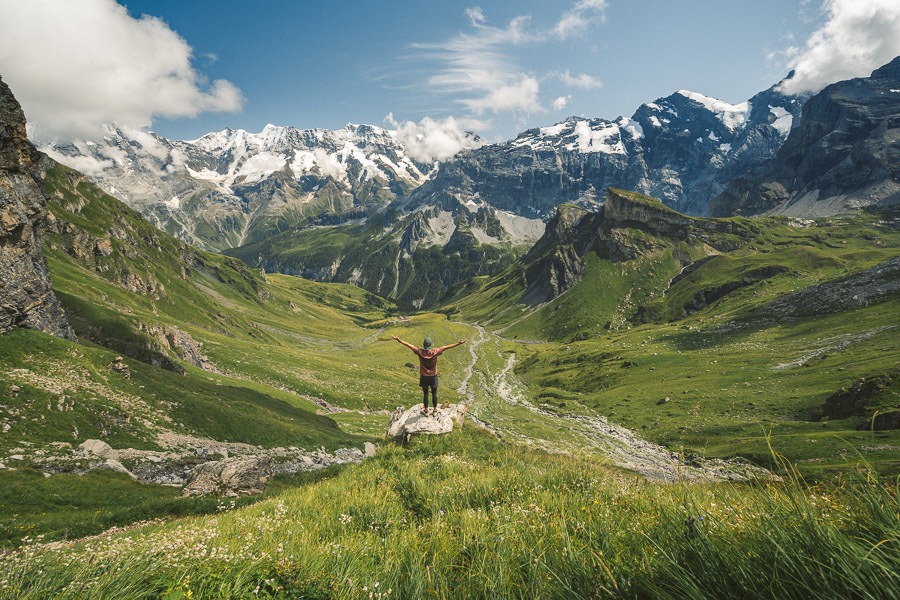
Tanzbodeli is one of my favorite hikes in the Lauterbrunnen region because it provides the best 360 degrees of the entire mountainscape. On a clear day, it feels as though you are at the center of the Jungfrau region and you can see all of the glacier-laden peaks. On a gloomy, cloudy day, it is equally impressive as you are seemingly inside a cloud, on top of the world. We had bits of both on our journey to Tanzbodeli and Obersteinberg from Gimmelwald. If you are looking for a great view of the Swiss Alps, hike up to Tanzbodeli on a clear day as the plateau at the summit is known as one of the best places to hike in the Jungfrau region for views of the Swiss Alps.
- Hike Distance: 13.9km Total distance from Gimmelwald to Tanzbodeli to Obersteinberg to Stechelberg. The total distance from Gimmelwald to Tanzbodeli was 6 steep kilometers in 2 hours.
- Hike Duration: 4 hours of moving time but total time was 7 hours including an hour at the summit, an hour at the Obersteinberg Hotel, and other stops.
- Hike Difficulty: The trail is not technically difficult although there are parts where you will clamber up rocks. No drop-offs are ever apparent on either side of the trail. Dirt path most of the way. Relatively simple hiking although the incline is quite steep and air does get thin. Physically challenging but relatively safe.
- Hike Incline: Total elevation throughout the hike 1100-meters.
Want more details and photos? View the full blog post here: TANZBODELI & OBERSTEINBERG HIKE: THE BEST VIEW OF LAUTERBRUNNEN
SWITZERLAND HIKING REGION: GRINDELWALD
Grindelwald is everything that makes Switzerland so incredible. You have the quintessential chalets with flows perfectly pruned on the balconies, the snowcapped mountains loom over the top of the town, the sound of cowbells can be heard around many corners and you have some amazing hikes. You have the famous Eiger Wall but also the tallest train station in Europe with Jungfraujoch but many beautiful alpine lakes and other peaks to explore.
There are lots of great overnight mountain hut hikes in this region and it’s just one of the best places to hike in Switzerland. You can check out my in-depth hiking guide for Grindelwald here: 12 EPIC HIKES NEAR GRINDELWALD
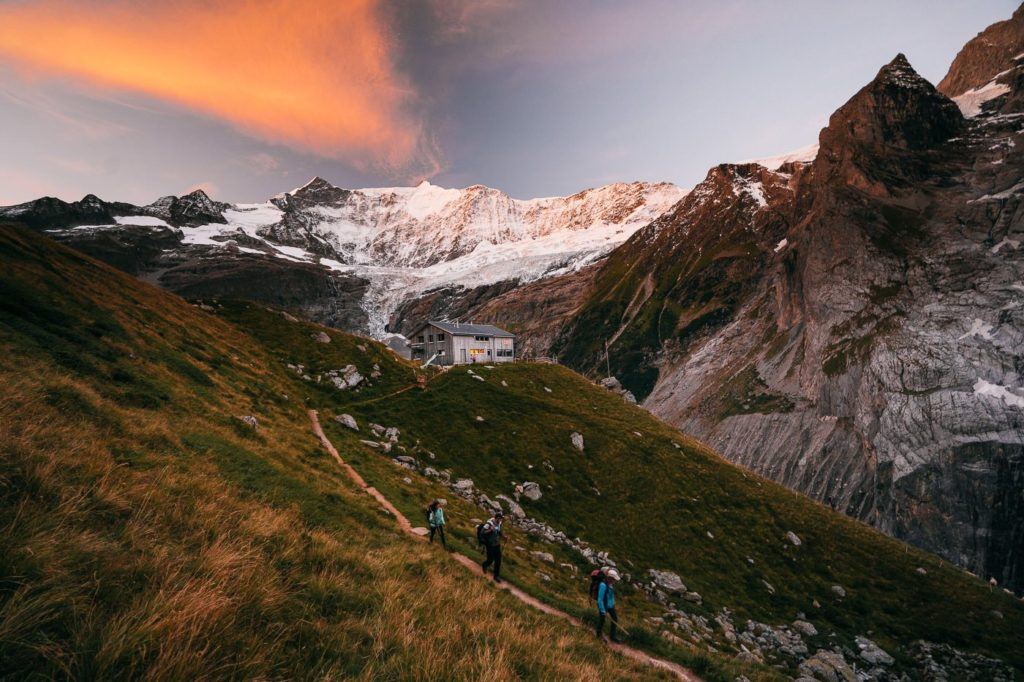
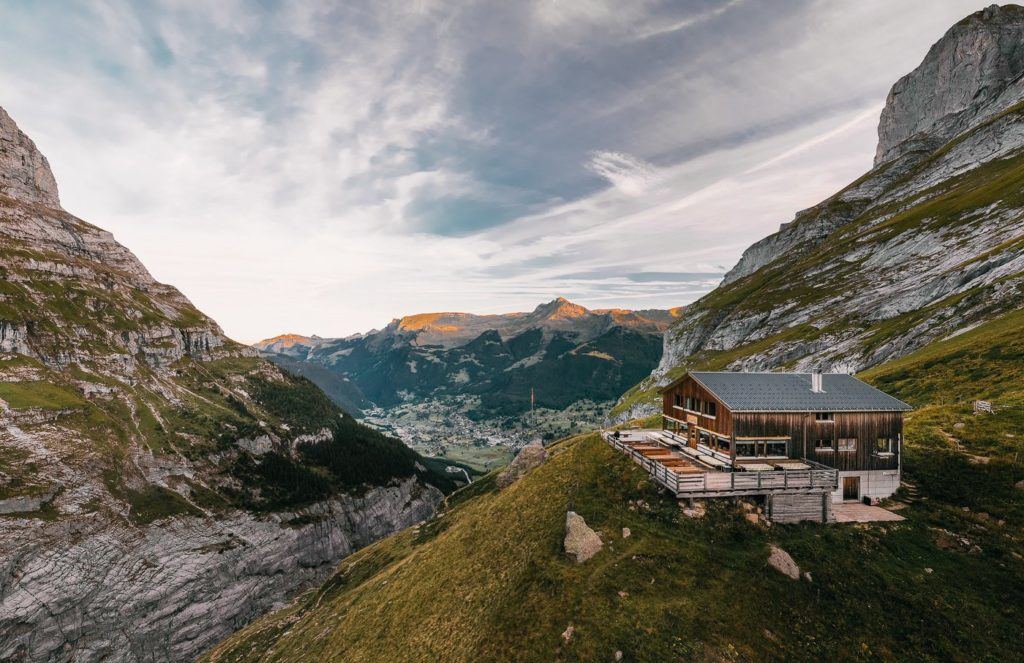
BAREGG HUT HIKE WITH OVERNIGHT STAY & HIKE TO SCHRECKHORN HUT
Baregg Hut (Bareghutte) is perched on the edge of a cliff, overlooking the lower Grindelwald Glacier. It’s just a 3km walk from Pfingstegg and is a great place for an overnight stay and a basecamp to hike to the Schreckhorn Hut (Schreckhornhutte). I caught the train from Interlaken to Grindelwald and began from there and returned the next day. My hostel let me leave my bags in their lockers for free.
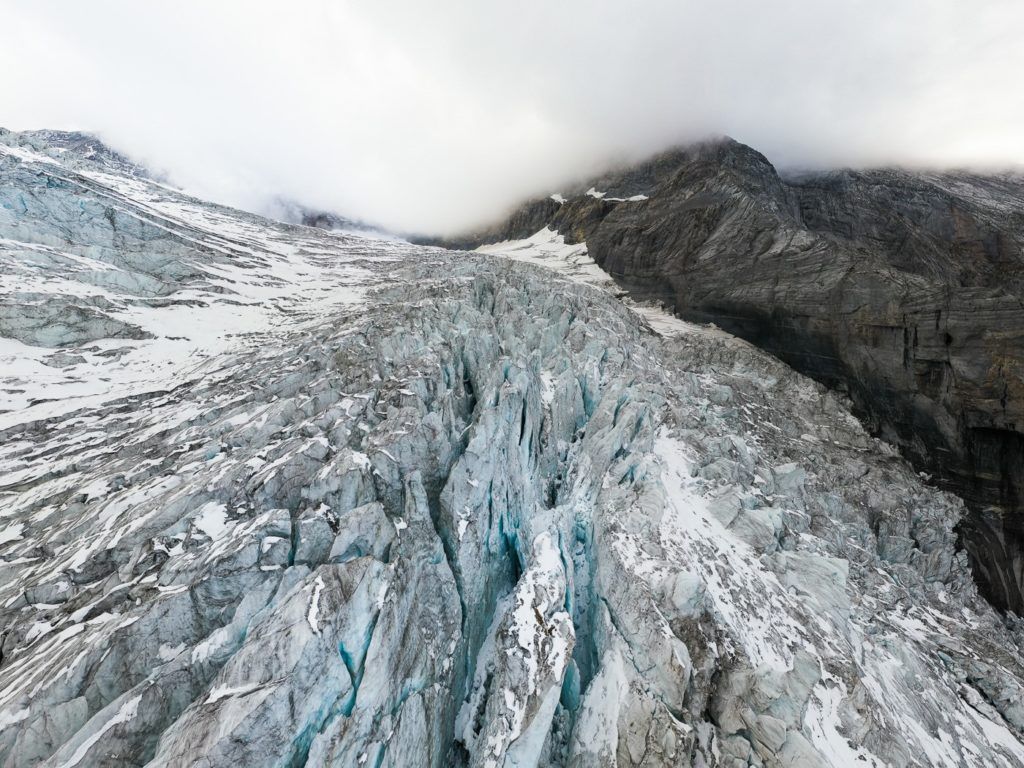
The trail runs alongside the Lower Grindelwald Glacier, or at least where it once was, following the edge of the cliff. This hike provides a clear demonstration of how much the glacier has receded over the past century and a half.
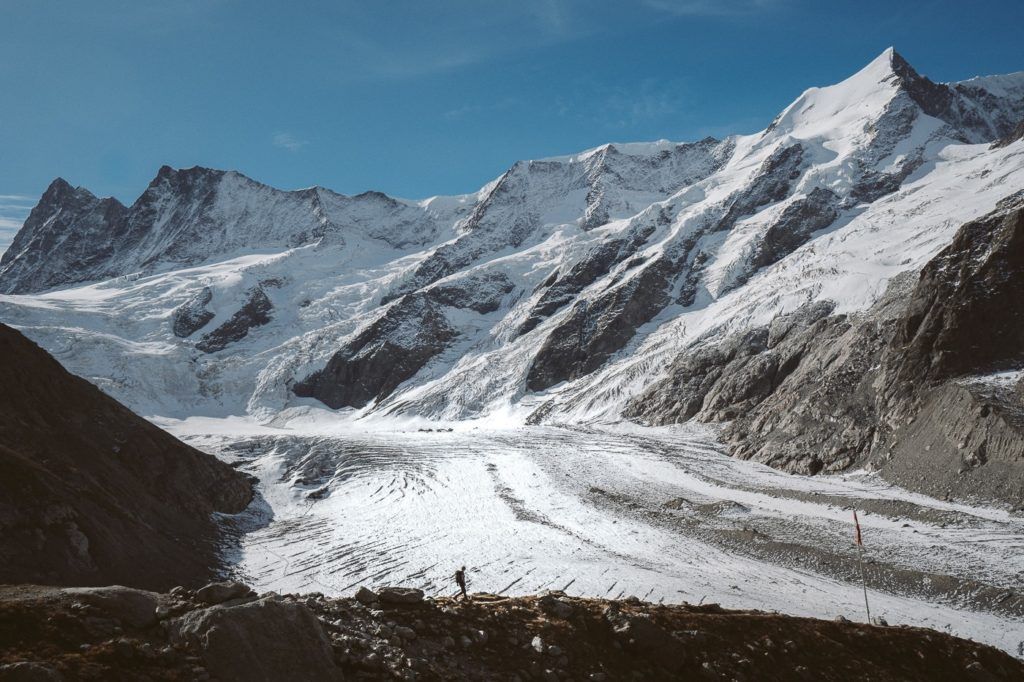
The hike from Baregg Hut to Schreckhorn Hut is more challenging than the route from Pfingstegg to Baregg Hut. It’s a 12km round-trip hike with over 1000m of incline, which makes it a perfect example of trekking in Switzerland.
Aside from the ladders and cables, you do have to climb 1000+ meters, which is a challenge in itself so definitely gear up for an adventure! The views of the glacier that are within touching distance throughout the trail make it all worth it!
The distance from Pfingstegg to Baregg Hut is just 2.75km. However, the next day the hike to Schreckhorn and return to Baregg Hut is 11.8 kilometers, and then the 2.75km return to Pfingstegg. So all up for this hike in Switzerland it is 17.3km.
Want more details and photos? View the full blog post here: BAREGG HUT HIKE WITH OVERNIGHT STAY & HIKE TO SCHRECKHORN HUT

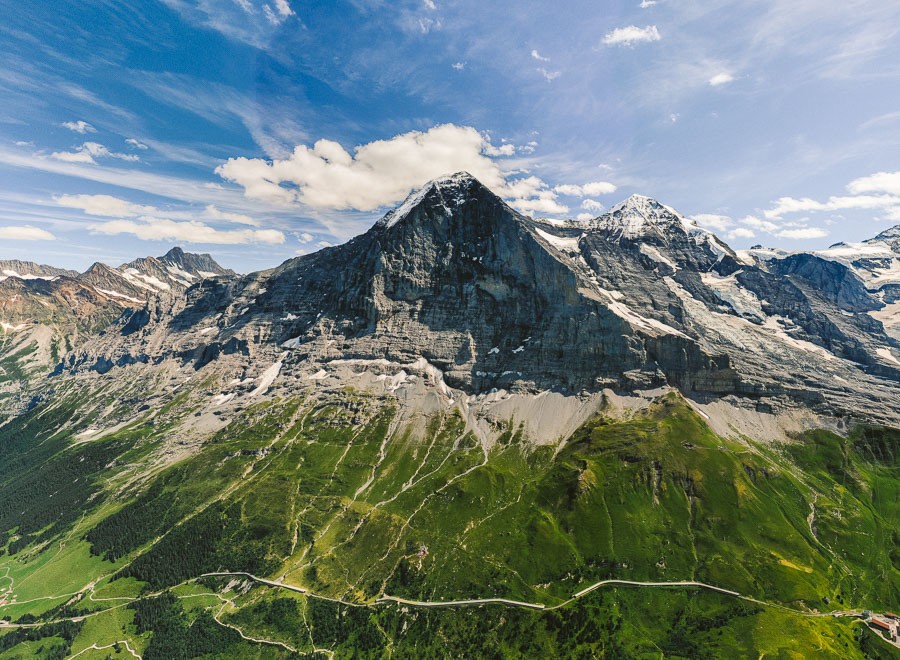
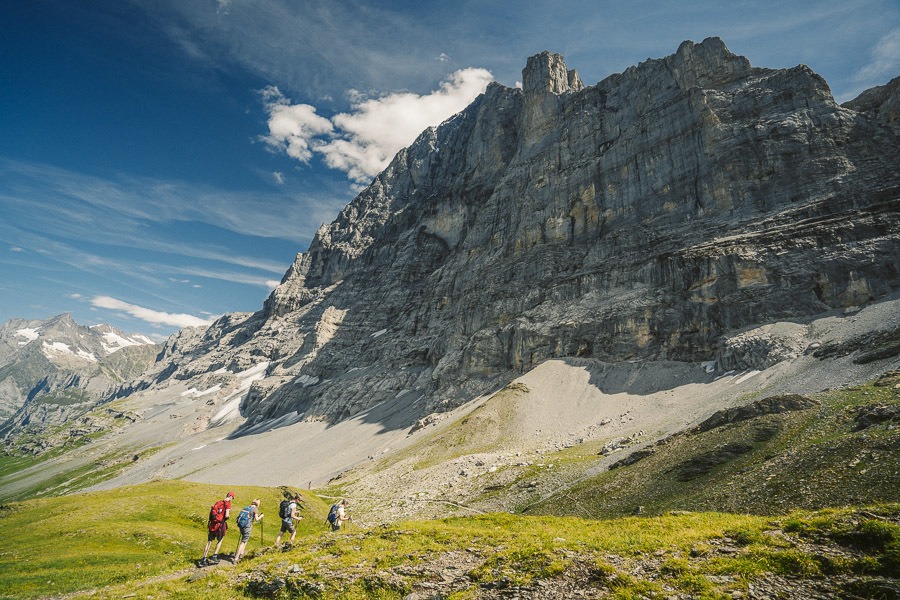
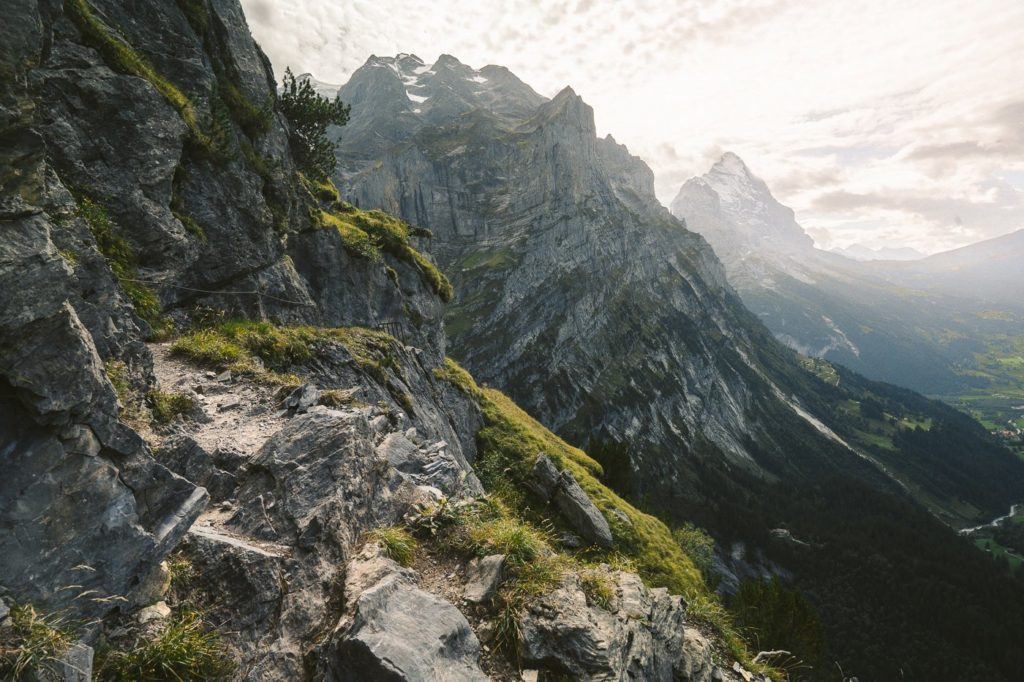
THE EIGER TRAIL HIKE: EIGERGLETSCHER TO ALPIGLEN
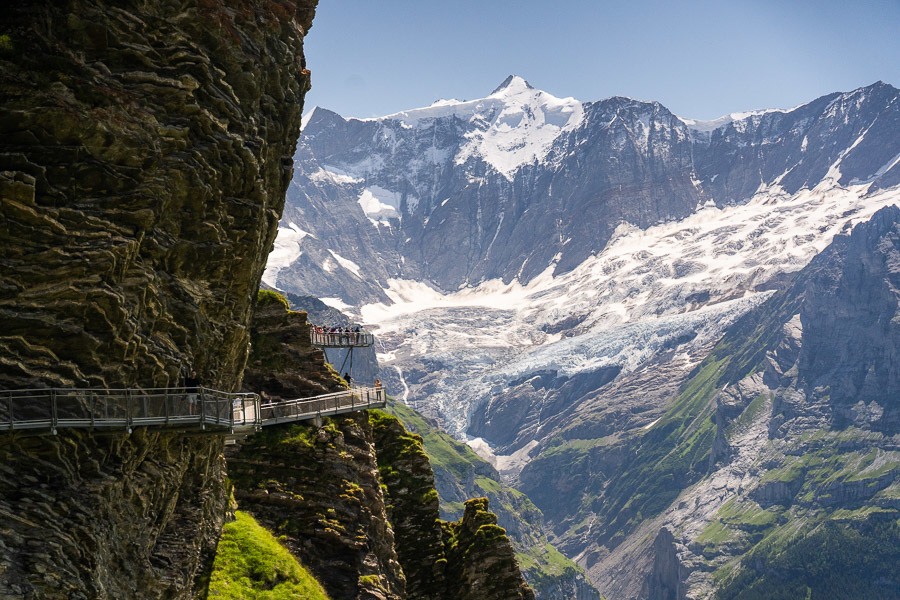
The Eiger Trail hike is one of the most popular routes in Switzerland because the path leads hikers directly under the world-famous Eiger North Face Wall, which is renowned as one of the toughest climbs in the world.
I started off on the trail and noticed that the first 200m had a slight incline. However, it was spread out over a few kilometers and was not too exhausting. At this point, the Eiger mountain was not yet visible, but the panoramic views of the valley and the towering glacial mountains were breathtaking. Everywhere I looked, there was something beautiful to admire. I hiked in Switzerland during July, and it was the perfect time for this hike!
After walking for about 2km into the trail, you will soon arrive at the Eiger viewing area. You will probably notice a small group of people and maybe even some local cows. This is the perfect spot to admire the Eiger Mountain. If you read the signs, you can even identify the climbing path that the climbers use to scale the North Face wall of Eiger.
The Eiger Trail stretches for 6.5km between Eigergletscher Train Station and Alpiglen. The hike typically takes around 2.5 hours, but if you don’t stop for photos or breaks, you can finish it in under two hours. If you’re a fast runner, you could complete it in less than an hour.
Want more details and photos? View the full blog post here: THE EIGER TRAIL HIKE: EIGERGLETSCHER TO ALPIGLEN
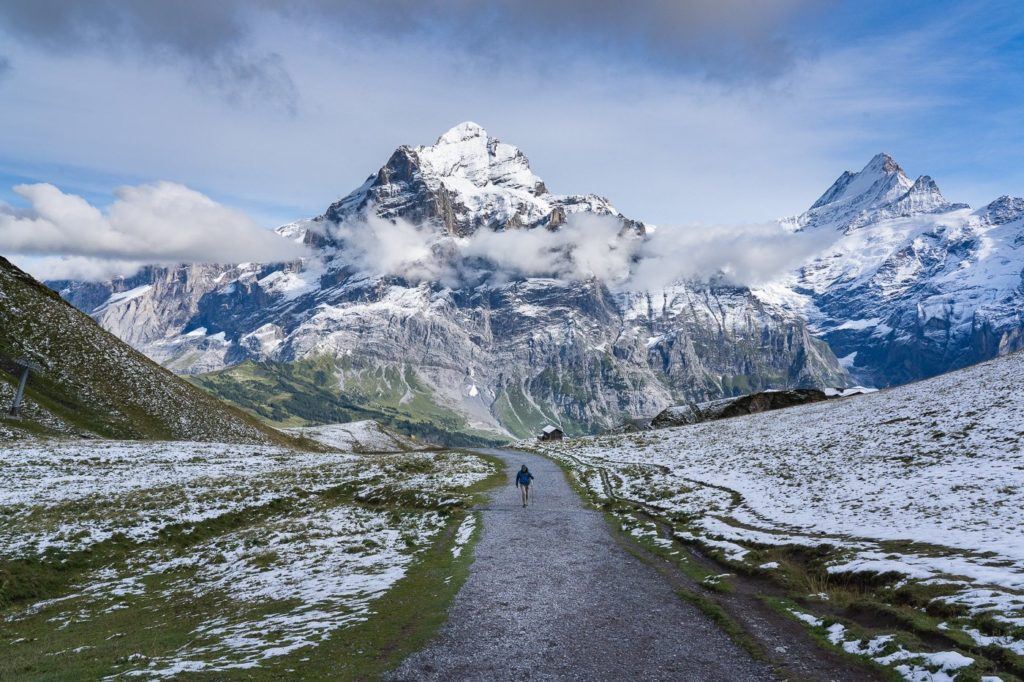
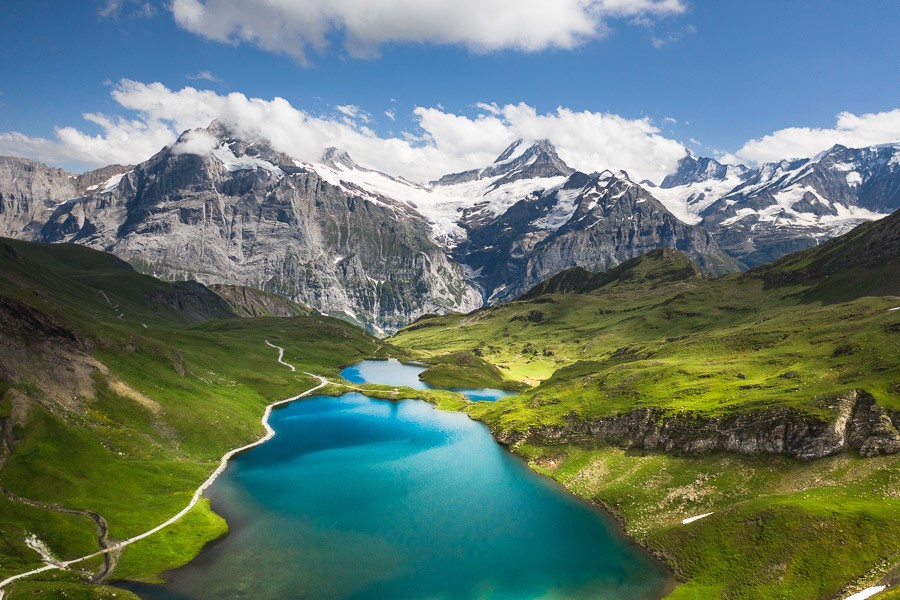
HIKING TO FAULHORN SUMMIT VIA FIRST & BACHALPSEE
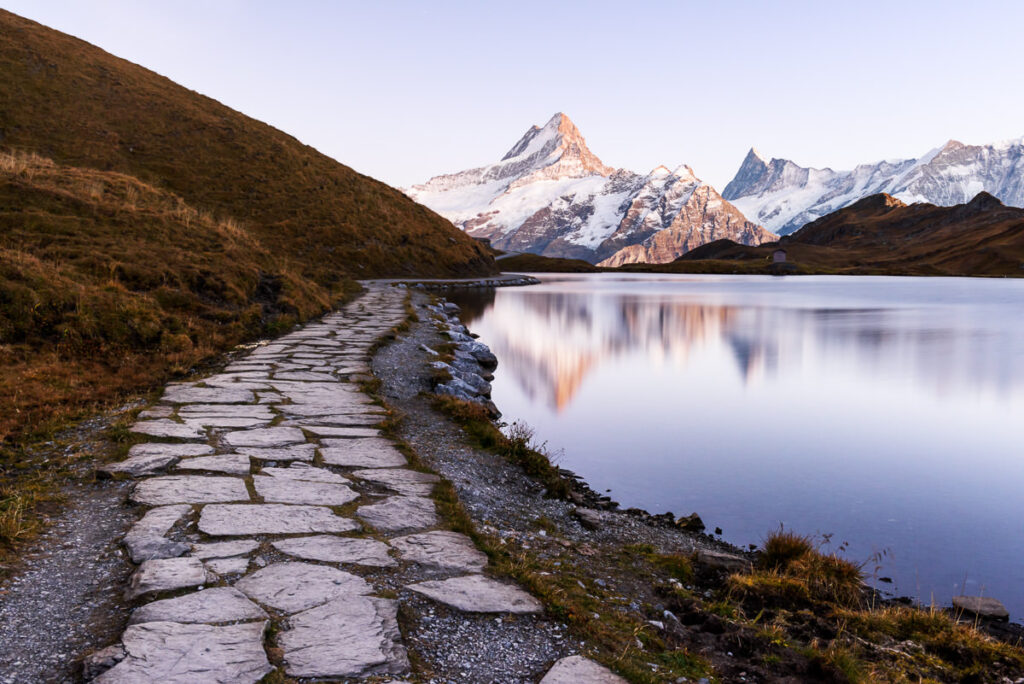
Bachalpsee is one of the most stunning alpine lakes in Switzerland. It is surrounded by wildflowers and adorned with an incredible backdrop of glacial mountains. The beauty of the Bachalpsee Lake is that there is a cable car to First, making it just a one-hour trek from the First station to the lake, despite being located at 2,265m in altitude. This hike is one of the most impressive near Interlaken, offering everything one could ask for. The lake is incredible, and the mountain hut is one of the best ones I have been to. It is easily one of the best hikes in Switzerland.
- Hike Distance: After the cable car to First the hike from First to Bachalpsee was 3km one way and you will need to hike back so 6km in total.
- Hike Duration: 2 hours of moving time. With breaks, swimming, and photos, the total time was 3 hours return.
- Hike Difficulty: Very easy. Dirt trail the whole way. Some incline but nothing too major just 188m up and 188m down.
- Hike Incline: 188m
If you want to skip the line, which is often quite long, you can book your return ticket to Grindelwald to First (return) online in advance. This ticket allows you to ‘skip the line’ and includes a return trip to First with access to First Cliff Walk.
Want more details and photos? View the full blog post here: HIKING TO FAULHORN SUMMIT VIA FIRST & BACHALPSEE

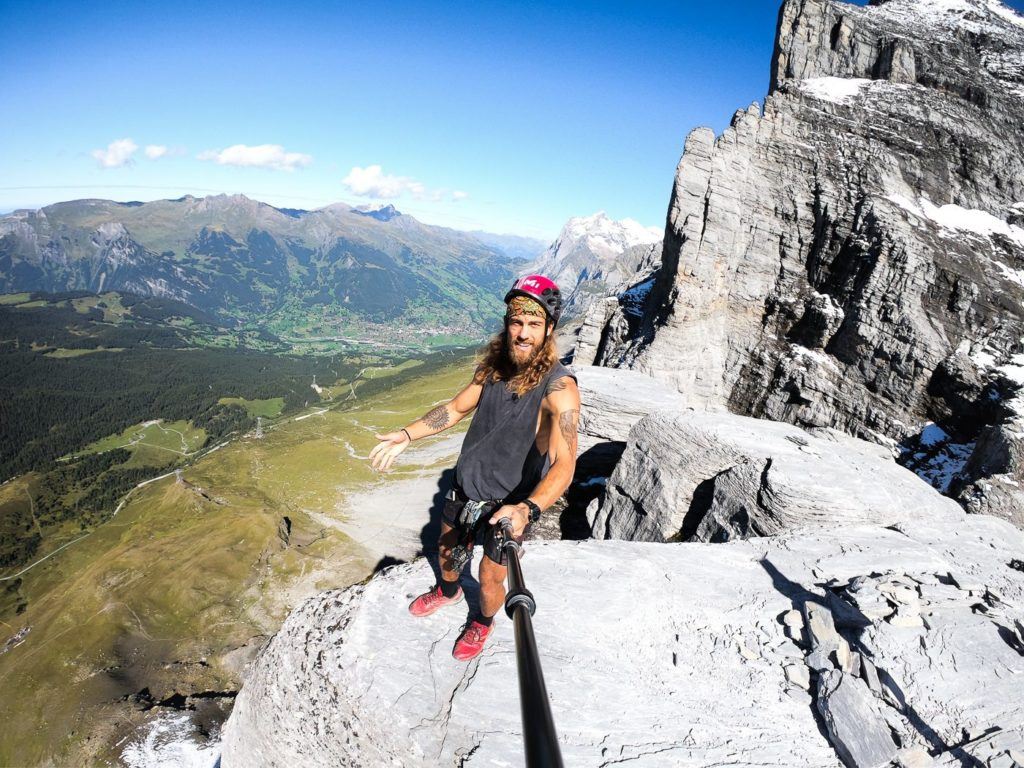
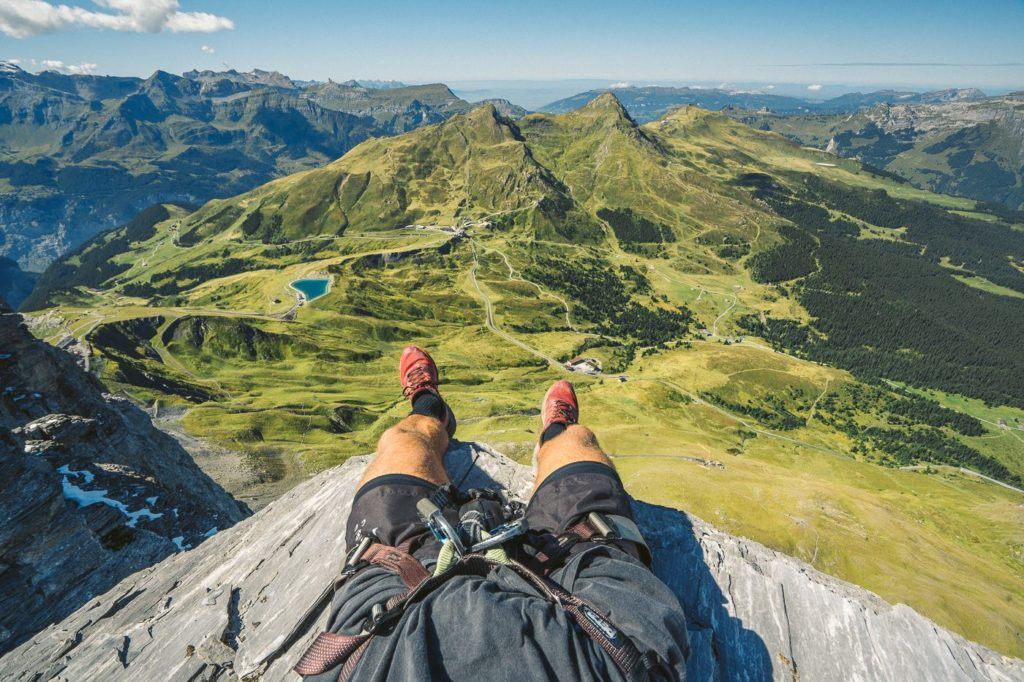
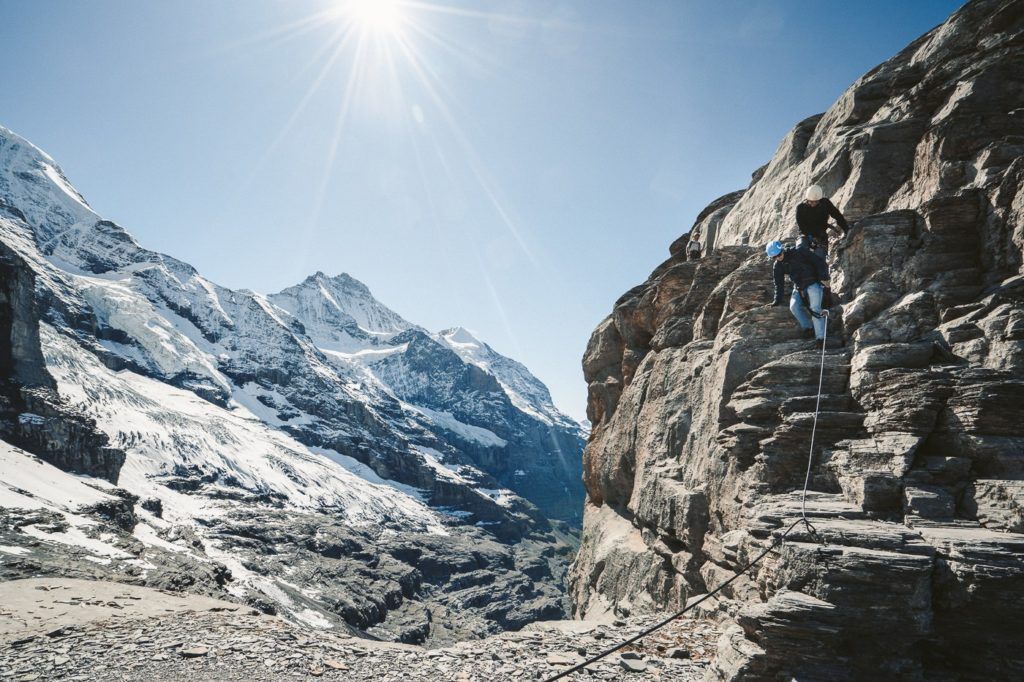
THE ROTSTOCK VIA FERRATA AT EIGER, GRINDELWALD
The Rotstock Via Ferrata is an epic climb right next to the famous North Face Wall of Eiger. Using a harness, stairs, and metal stairs you can climb 400m of incline to the 360-degree panoramic viewpoint. This is one of the more adventurous hiking trails in Switzerland but it’s actually not too long!
For those who don’t know what a Via Ferrata is, it’s basically a series of ladders, steps, and rock climbing that leads you up a wall. You are wearing a harness and clip into a strong wire at the start of the Via Ferrata. From that point, you are always clipped in with at least one clip.
The total hike distance was 5km from the start of the Eiger Trail, and up to the summit and then back down to Eigergletscher Station.
Want more details and photos? View the full blog post here: THE ROTSTOCK VIA FERRATA AT EIGER, GRINDELWALD
HIKING TO GLECKSTEIN HUT AND CHRINNENHORN PEAK
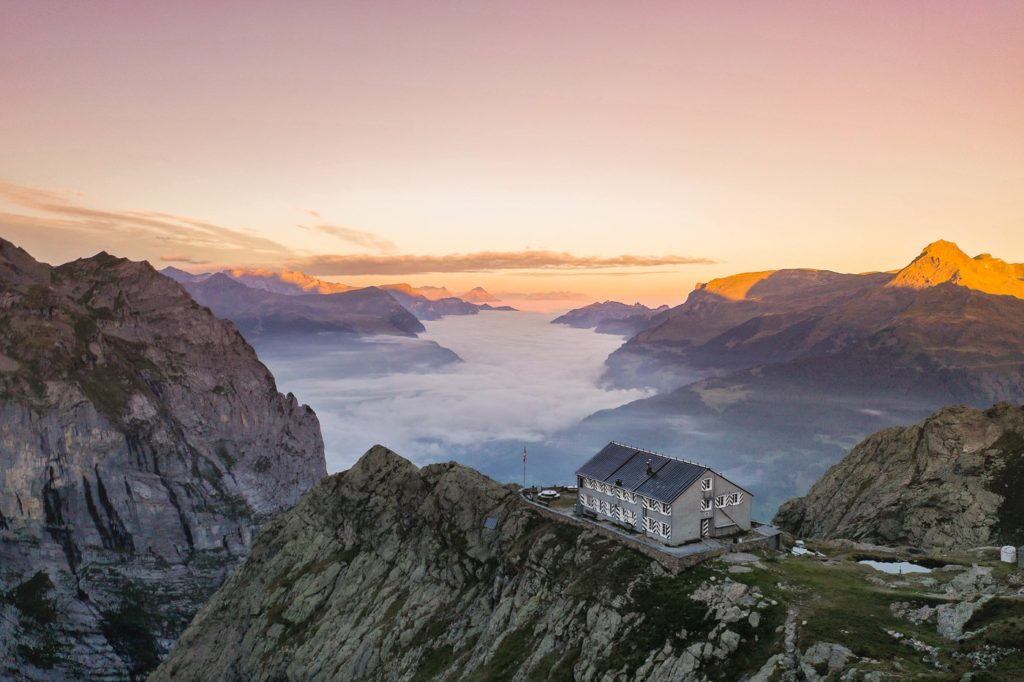
The Gleckstein Hut, also known as Glecksteinhutte, is situated above Grindelwald and offers breathtaking views of the valley below, with magnificent glaciers in the backdrop. It is an ideal location to spend the night and enjoy the beauty of both sunrise and sunset. If you’re not an experienced mountaineer, you can still access the Chrinnerhorn summit, which is just a few hundred meters above the Gleckstein Hut, and enjoy the stunning views of the Gleckstein Hut and Grindelwald. The area near Grindelwald is perfect for hut-to-hut hiking, and a stopover at the Gleckstein Hut should definitely be included in your itinerary!
According to the sign, the suggested duration for the trek is 3 hours and 50 minutes. However, I took 1 hour and 34 minutes to reach the top and 58 minutes to come down the next day. The trail is marked with red-and-white stripes and is rated as moderately difficult, with a few exposed areas. There are cables provided wherever the trail is exposed. The ascent involves an incline of 1,100m, which may be challenging for many, but I saw quite a few older hikers making it up to the hut. A slow and steady pace will make the trek easier and more enjoyable for most.
Want more details and photos? View the full blog post here: HIKING TO GLECKSTEIN HUT AND CHRINNENHORN PEAK
HIKING TO LAKE BACHALPSEE FROM FIRST
Bachalpsee is one of the most stunning alpine lakes in Switzerland, surrounded by wildflowers and adorned with an incredible backdrop of glacial mountains. The beauty of the Bachalpsee Lake is that because there is a cable car to First, it is just a one-hour trek from the First station to the lake, despite being located at 2,265m in altitude.
Bachalpsee is one of the most spectacular lakes in Switzerland and probably one of the most incredible lakes you will find on a hike near Interlaken. When you are exploring Bachalpsee, it will become clear why this is one of the most popular hiking trails in Switzerland.
After the cable car to First, the hike from First to Bachalpsee was 3km one way and you will need to hike back so 6km in total.
If you want to skip the line, which is often quite long, you can book your return ticket to Grindelwald to First (return) online in advance. This ticket allows you to ‘skip the line’ and includes a return trip to First with access to First Cliff Walk.
Want more details and photos? View the full blog post here: HIKING TO LAKE BACHALPSEE FROM GRINDELWALD/FIRST
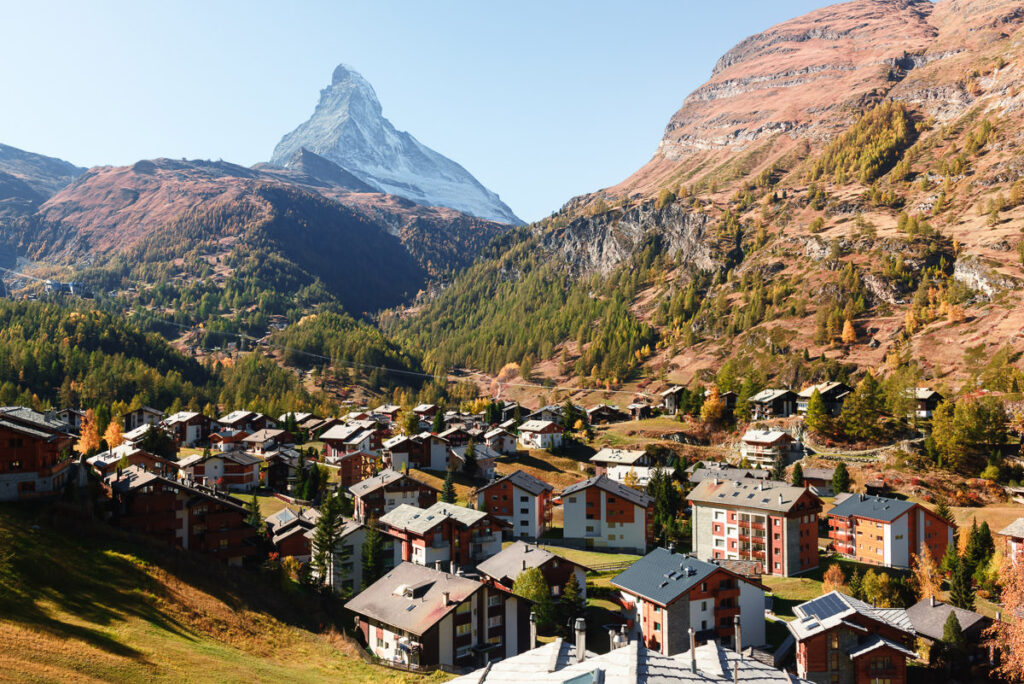
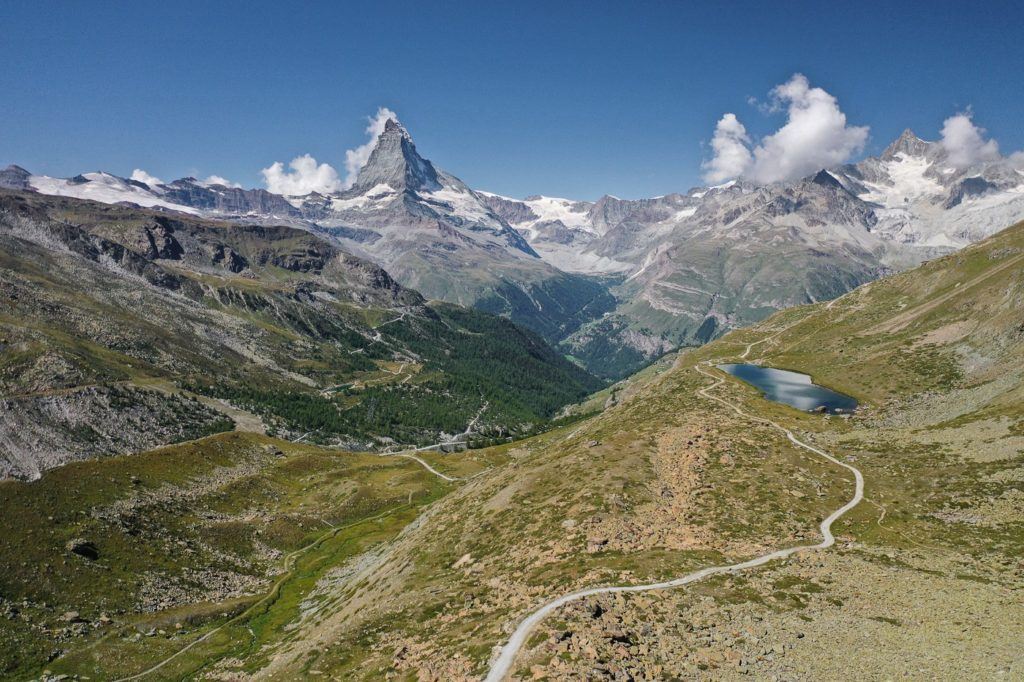
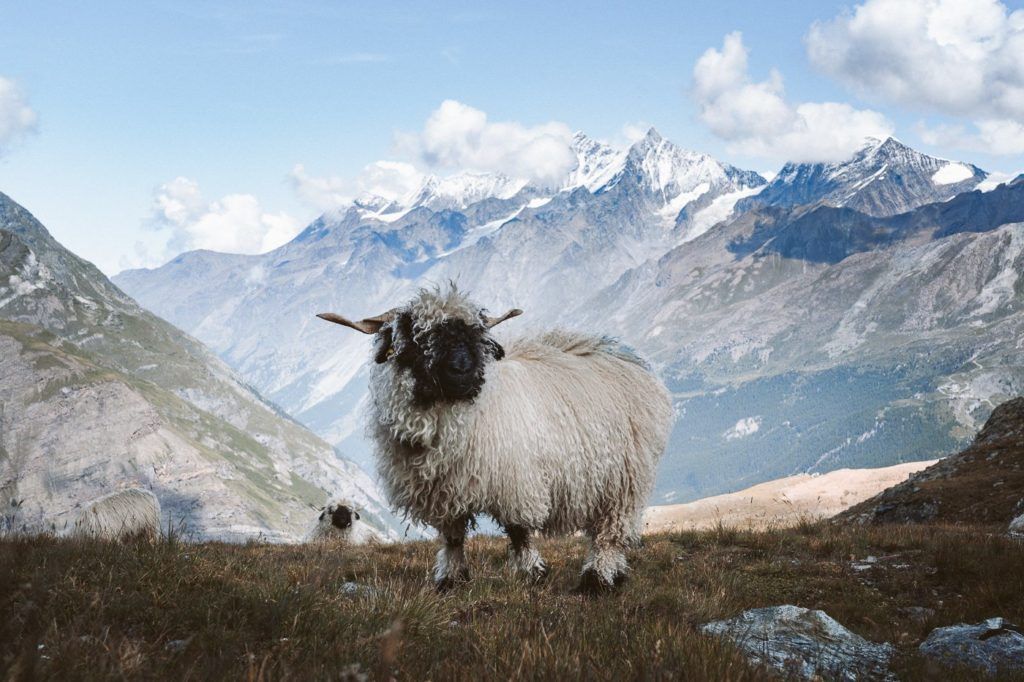
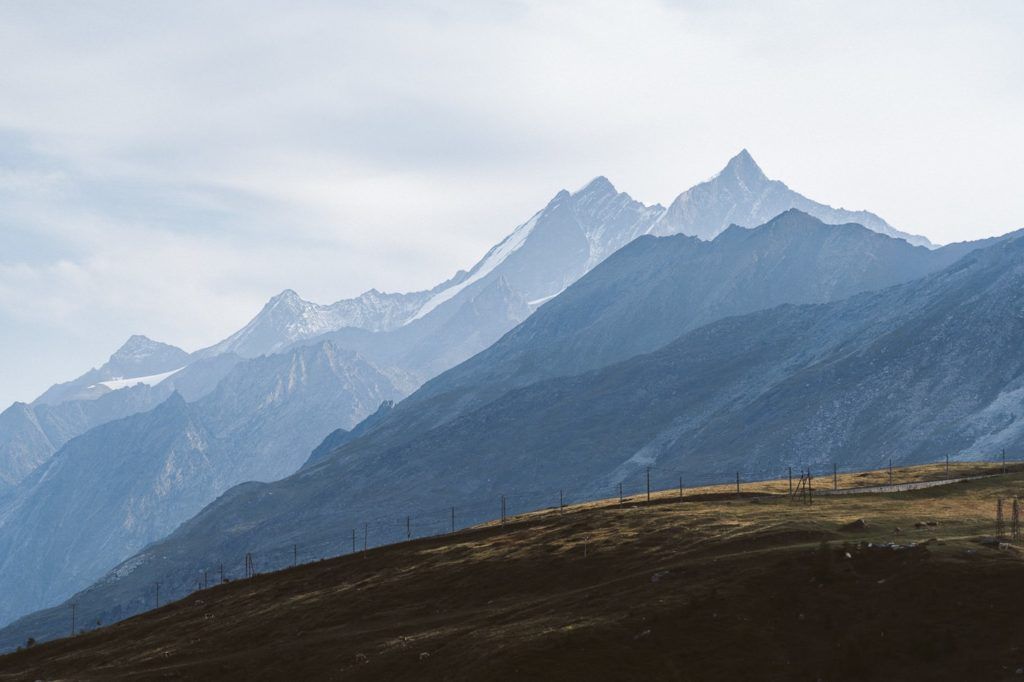
SWITZERLAND HIKING REGION: ZERMATT
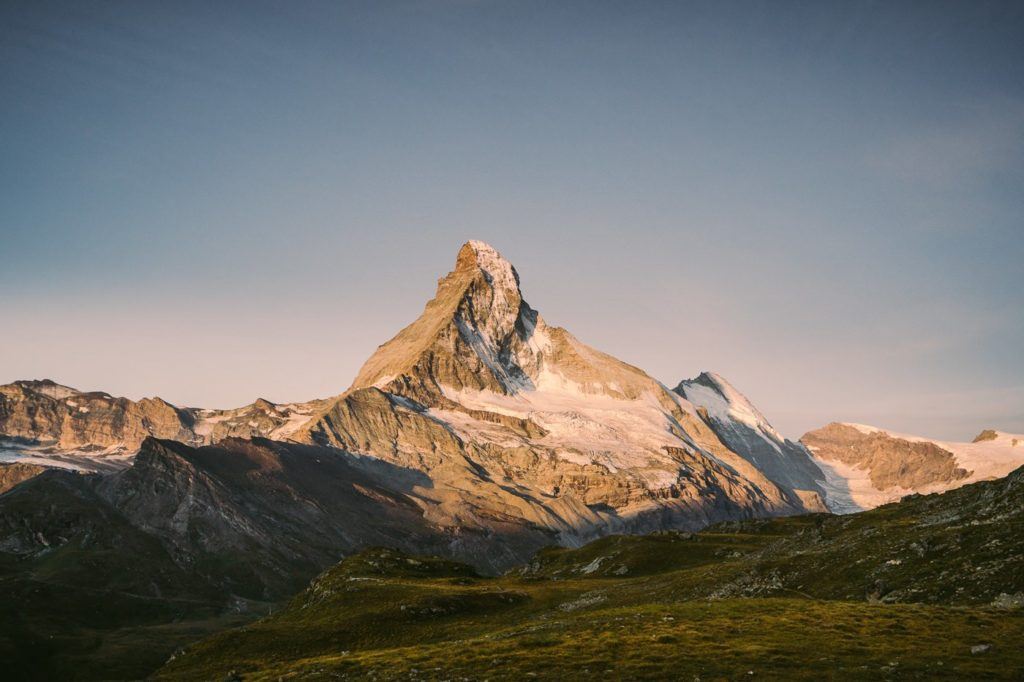
Zermatt is probably the most popular region in Switzerland and with good reason. In the summer it is one of the best places for hiking in Switzerland and in the winter it is a skiing mecca. I visited in the late summer and marveled at the might Matterhorn peak from a number of different trails. For those looking to delve into some more diffuclt trekking in Switzerland or even some climbing, Zermatt is the place.
Zermatt is one of the most popular spot for climbers in the Swiss Alps with more than 40 4000-meter peaks to summit in the region. In this guide we will stick to the more moderate hiking trails, but it’s still good to be in part of an atmosphere where that sort of adventuring is going on.
The car-less town of Zermatt has kept much of it’s original charm although it is very expensive and slightly overrun by eager tourists so it loses a few points there. Overall though, it was definitely worth the week I spent hiking some truly incredible trails. You can check out my in-depth hiking guide to Zermatt here: 6 AWESOME HIKES IN ZERMATT
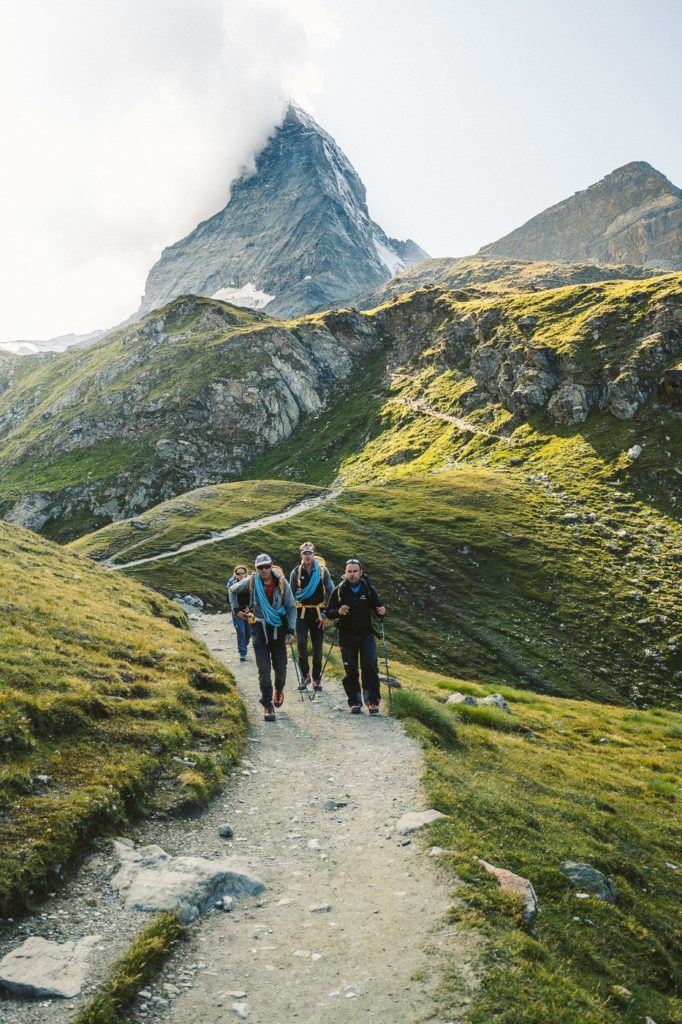
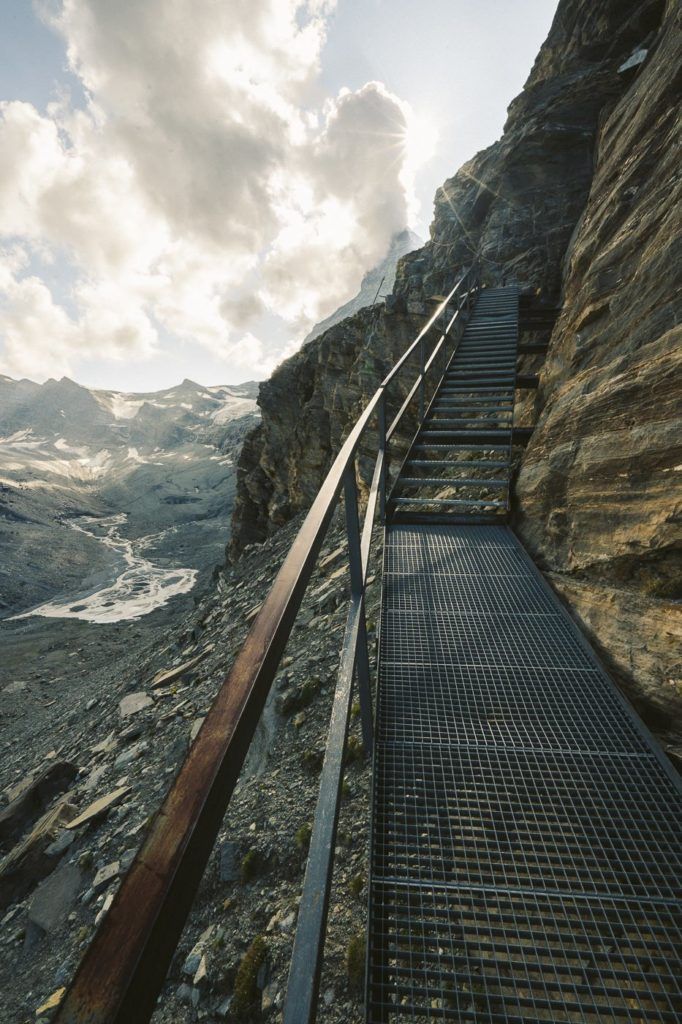
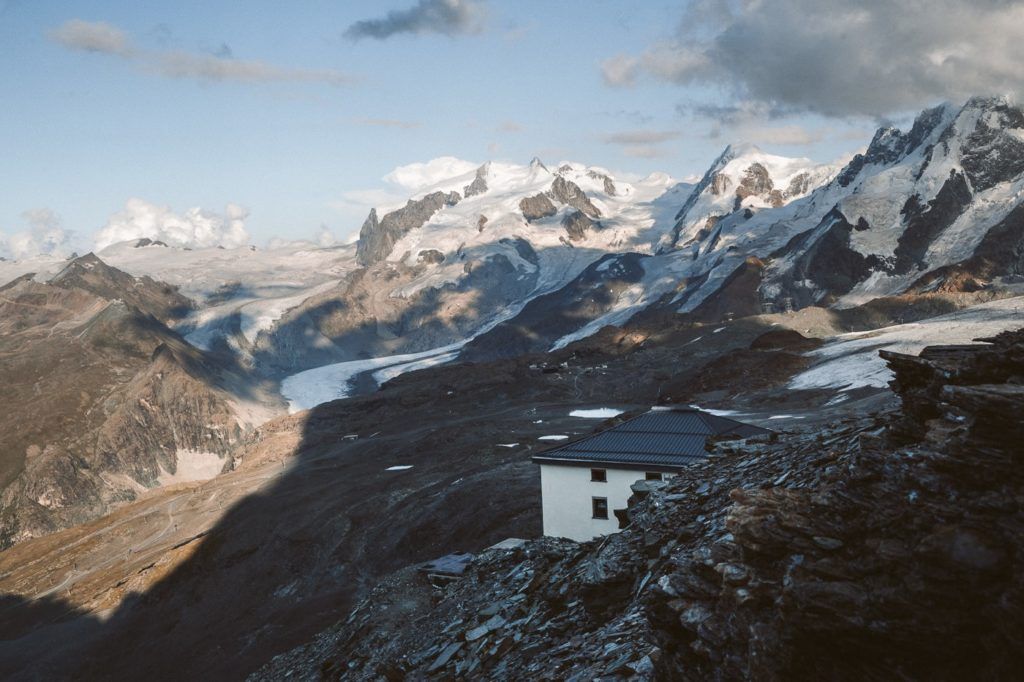
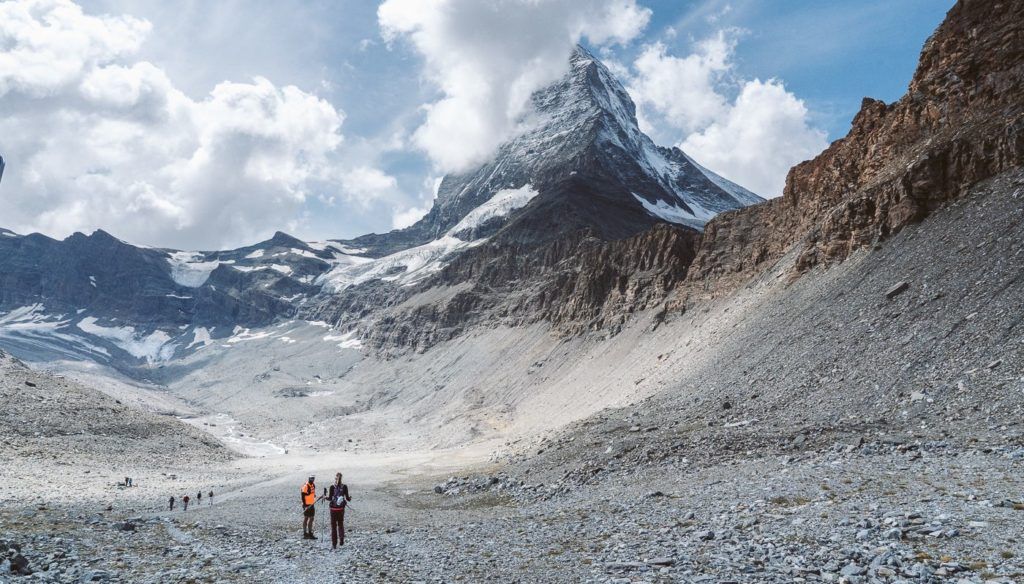
HORNLIHUTTE HIKE ‘MATTERHORN BASE CAMP’ IN ZERMATT
The Hornlihutte (Hornli Hut) is the most common base camp for the Matterhorn climb. However, hiking to Hornlihutte is a great hike in its own right as I found out. I took the cable car to Schwarzsee and hiked up to Hornlihutte for sunset and then hiked all the way back down to Zermatt town in the dusk and then the dark for a total journey of 16 kilometers. At an altitude of 3,260 meters, the hut is a base camp for some and a summit for others.
- Hike Distance: Schwarzsee to Hornlihutte is 4km with 715 meters of incline. Obviously, you have to come back down to Schwarzsee so that is a minimum of 8km. However, if you go for sunset or miss the last 4:30 pm cable car, you will need to walk all the way back to Zermatt. My total hike distance with the walk back to Zermatt main street was 16.68km.
- Hike Duration: Schwarzsee to Honlihutte should take about 1.5 hours maximum.
- Hike Difficulty: The hike difficulty for Hornlihutte was medium. From Schwarzsee to the start of the ridge, you are on a red and white marked trail that is quite simple, although even on that trail there are rocky sections and a few drop-offs although nothing dramatic. Once upon the ridge, it is a blue and white alpine trail. This means stop walking if you aren’t up for a bit of a challenge.
- Hike Incline: 967m total climb with over 1500m of decline (if you go back down to Zermatt main street)
Want more details and photos? View the full blog post here: HORNLIHUTTE HIKE ‘MATTERHORN BASE CAMP’ IN ZERMATT

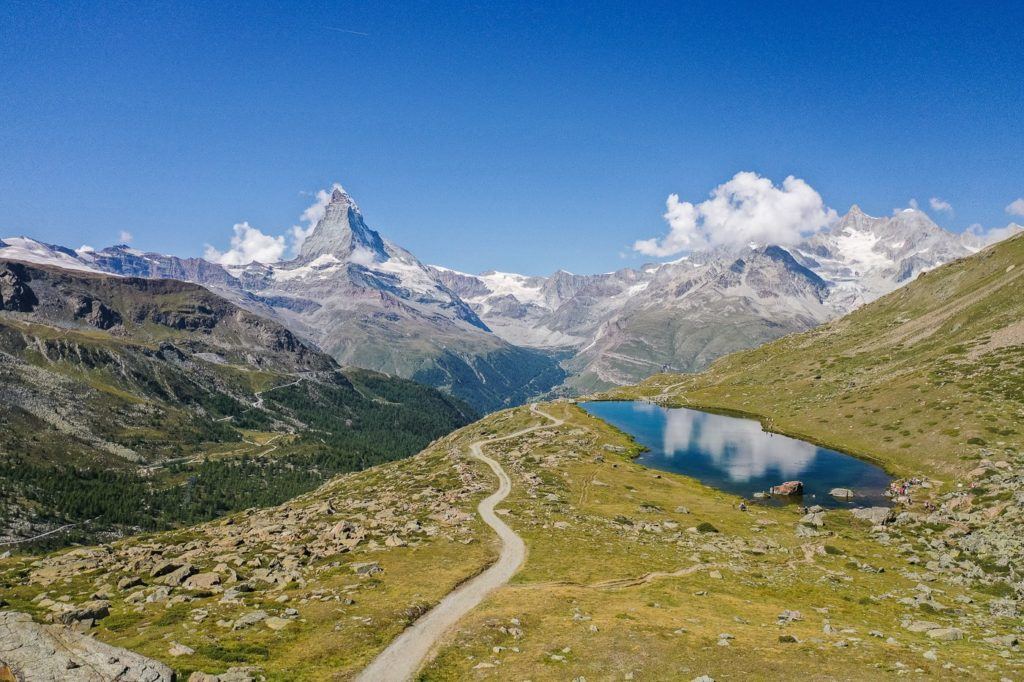
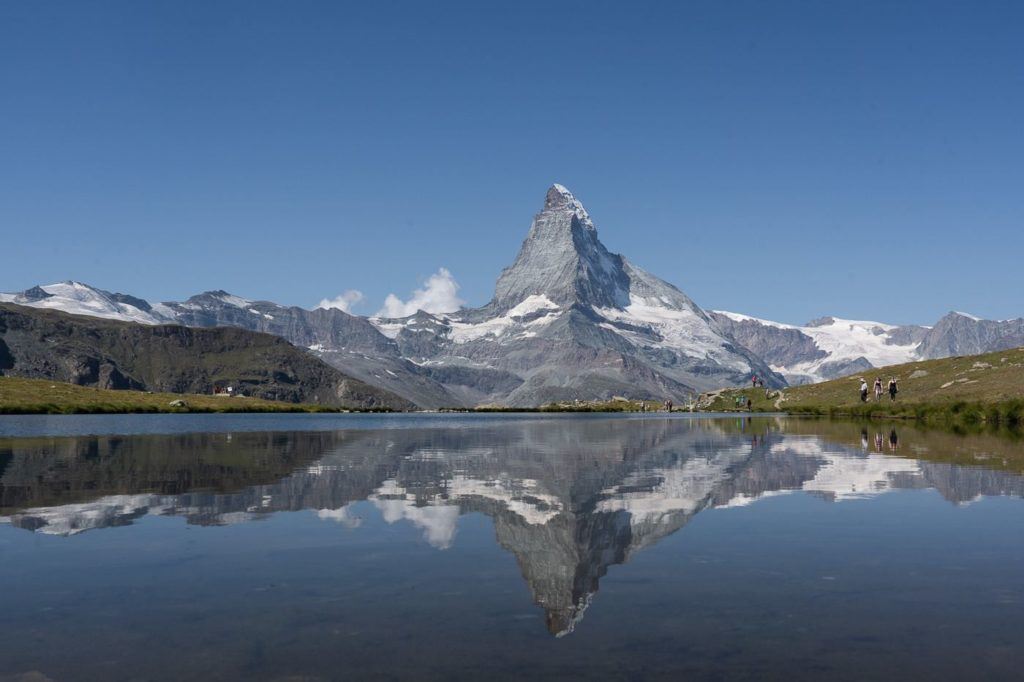
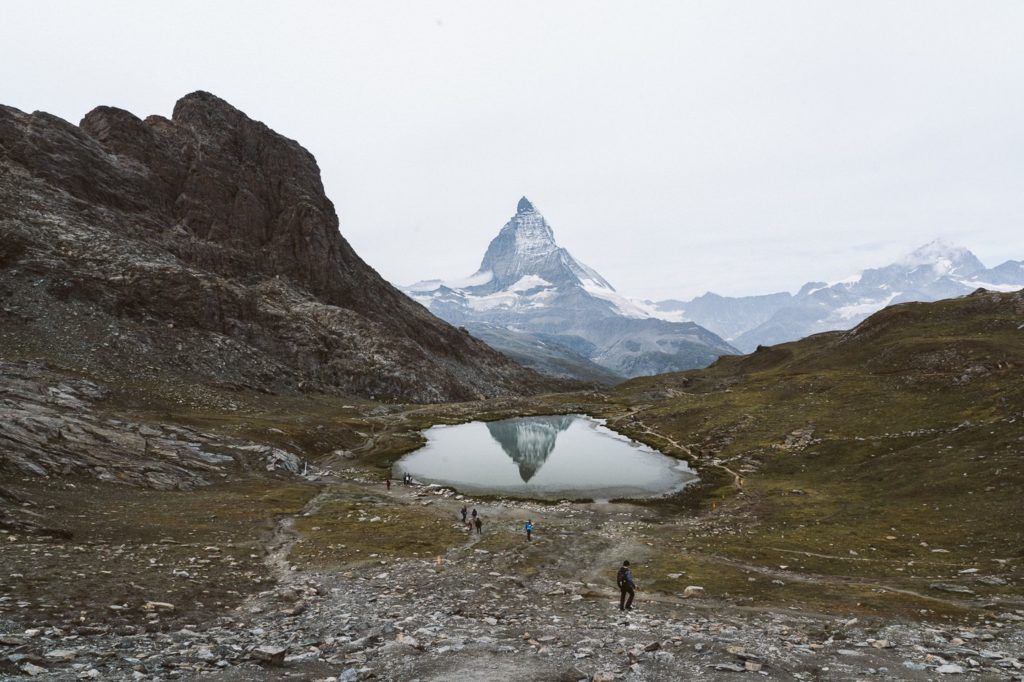
THE 5 LAKES HIKE IN ZERMATT (MATTERHORN VIEWS)
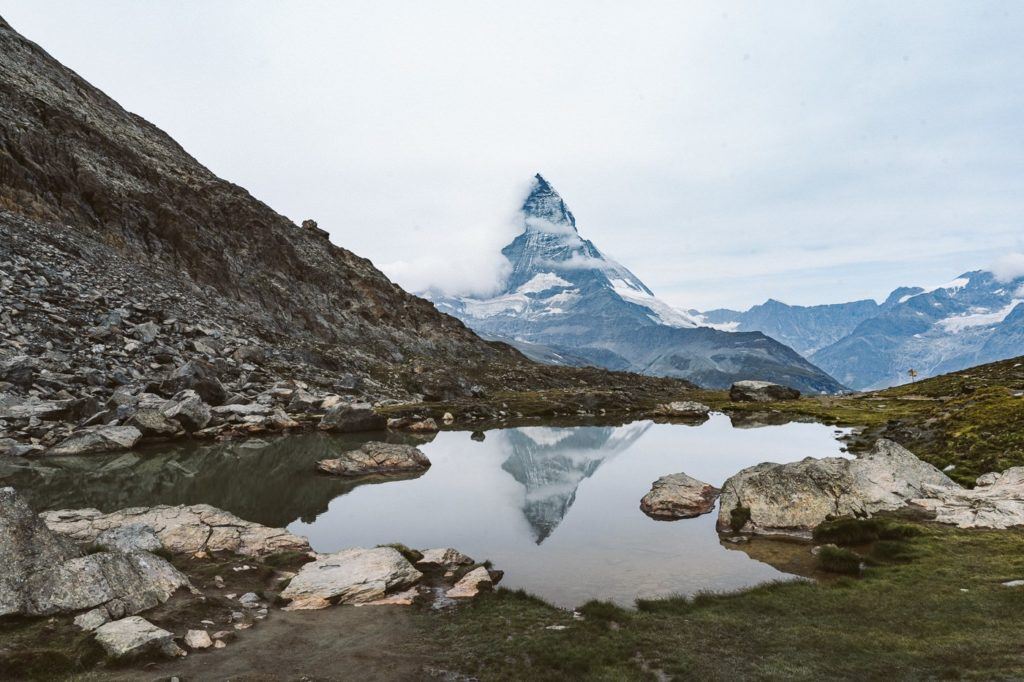
The 5 Lakes hike is one of the most popular walking trails in Zermatt because it is accessible to everyone and has minimal steep climbing. Along the route are five stunning lakes where you can create reflections of the Matterhorn at the right angle. It’s a great day out and relatively one of the best hikes in Switzerland for families.
Catch a train up to the plateau and you will do most of the incline in the train. Once you reach the plateau, complete the loop walk by checking out each of the lakes on the trail. On a clear day, you will be able to see the reflection of the Matterhorn in several of the lakes, which is always a great crowd-pleaser. This hike is much less intense than many others due to the lower incline, although there are still a few hills to contend with, so don’t expect a complete walk in the park. It’s the perfect summer hike in Zermatt. The hike distance is not mentioned in the original text.
- Hike Distance: The entire loop is 6km
- Hike Duration: The hike should take about 3 hours if you stop at each lake and wander around a bit. Total walking time should be no more than 2 hours.
- Hike Difficulty: Very low difficulty. Suitable for families.
- Hike Incline: 241 meters
Want more details and photos? View the full blog post here: THE 5 LAKES HIKE IN ZERMATT (MATTERHORN VIEWS)
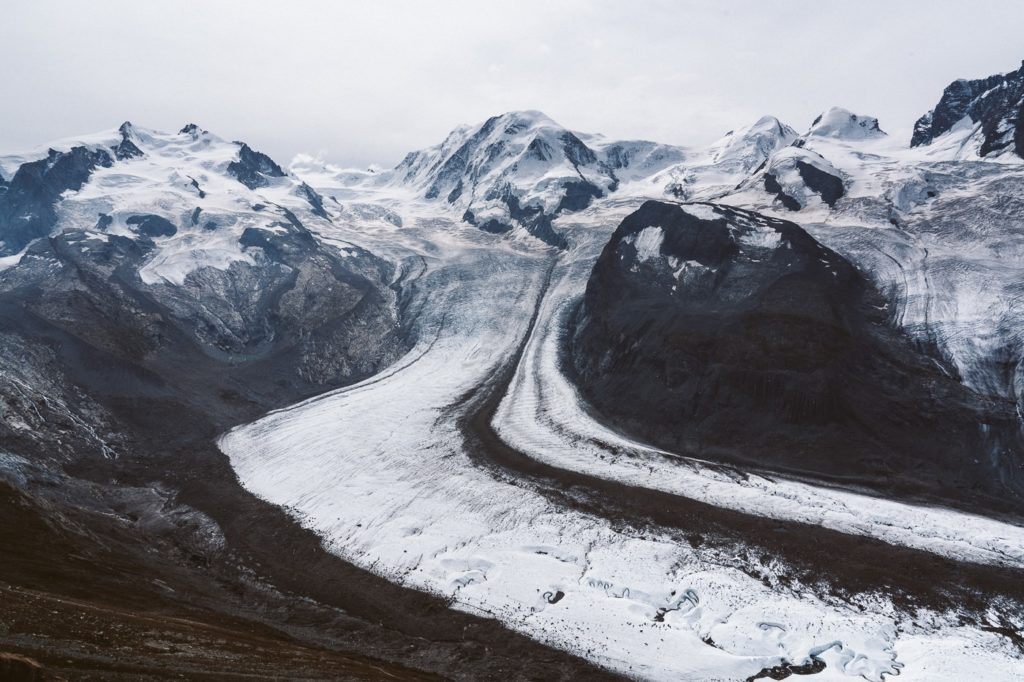
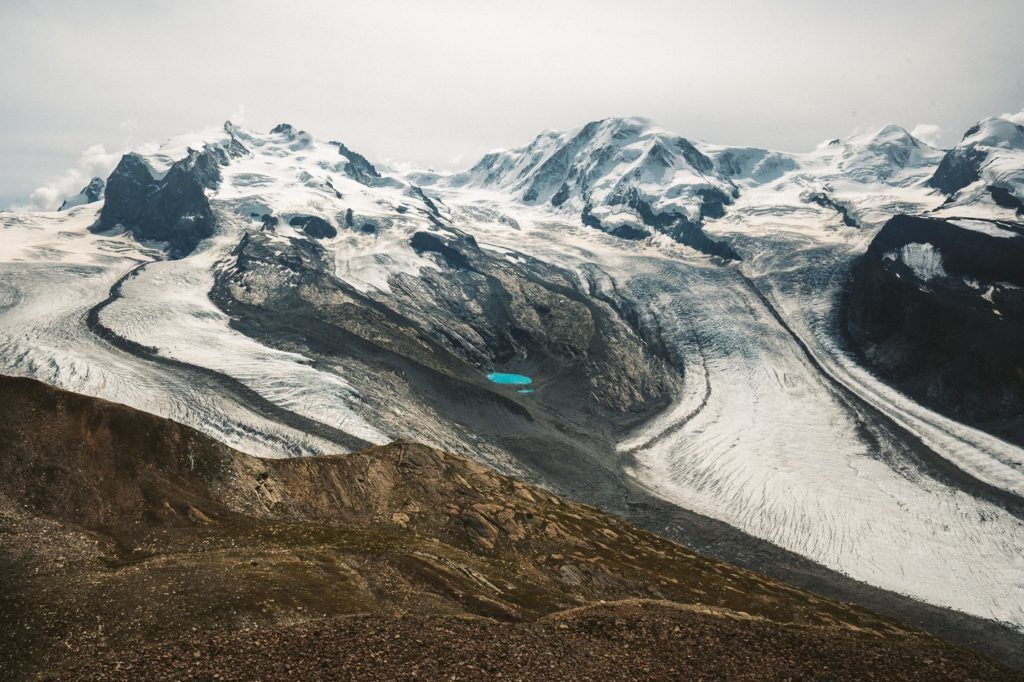
THE GORNERGRAT HIKE FROM RIFFELALP IN ZERMATT
The hike from Riffelalp to Gornergrat takes you along one of the most scenic routes in Zermatt. The Matterhorn is in your sights for most of the journey as you pass by several lakes with perfect reflections of the mighty Matterhorn. There are two highlights of this hike in Zermatt. The first is the reflections of the Matterhorn in the Riffelsee (lake).
Many come all the way to Zermatt and spend big bucks on the train up here to see this very reflection. The highlight is looking out over the incredible Gornergrat Glacier, which is mindblowing in size and you really get an idea of the evolution of the glacier over time. This is truly one of the top hikes in Switzerland.
Skip the line and book a ticket online for the Gornergrat Cogwheel. Cross stunning bridges, ride through galleries and tunnels, idyllic forests, past gorges and mountain lakes as your climb the Gornergrat on the cogwheel train with the Matterhorn continually in view. At the summit, explore the picturesque alpine world of the Swiss Alps.
- Hike Distance: The total distance from the Riffelalp train station to Gornergrat Hotel via Riffelsee is 6 kilometers. You can then catch the Gornergratbahn back down to Zermatt. My total loop was 20km from Riffelalp to Riffelsee to Gornergrat to Hohtalli to Zermatt.
- Hike Duration: From Riffelalp to Gornergrat you are expecting it to take about 2 to 2.5 hours.
- Hike Difficulty: The hike difficulty for Riffelsee from Riffelalp was very low. There was some incline but the path was always very clear and quite flat. Suitable for children. From Riffelsee to Gornergrat the trail is quite steep but there are no sections with any real danger. From Gornergrat to Hohtalli (I’ll explain later in the blog), there was some exposure and rock scrambling.
- Hike Incline: From Riffelalp to Hotel Gornergrat Kulm the incline is 900m. The altitude at Hotel Gornergrat Kulm is 3,100 meters.
Want more details and photos? View the full blog post here: THE GORNERGRAT HIKE FROM RIFFELALP IN ZERMATT
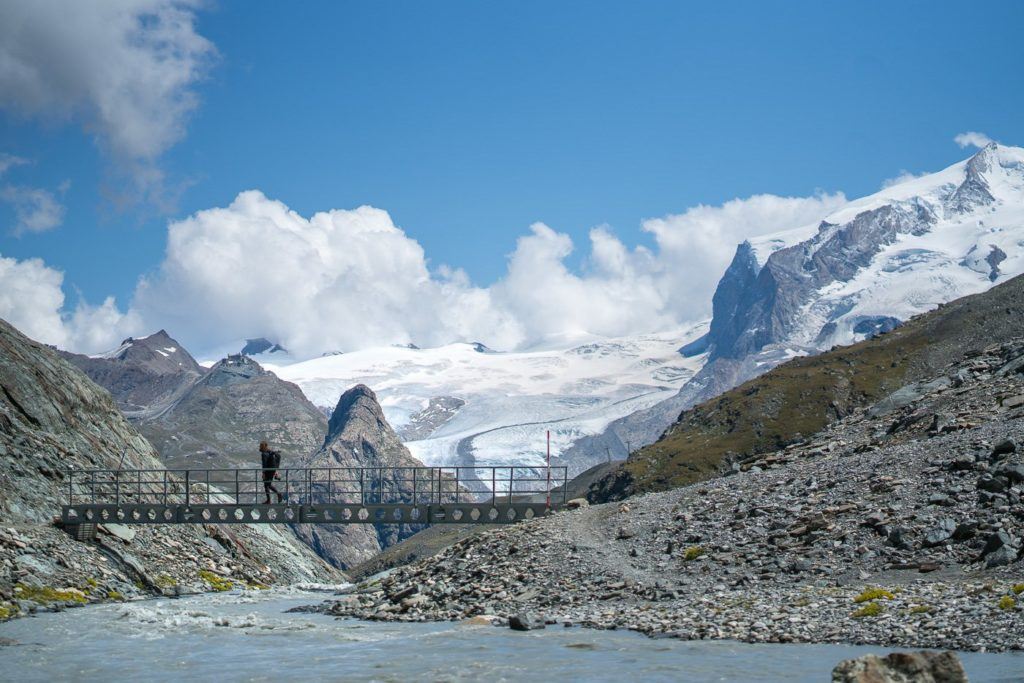
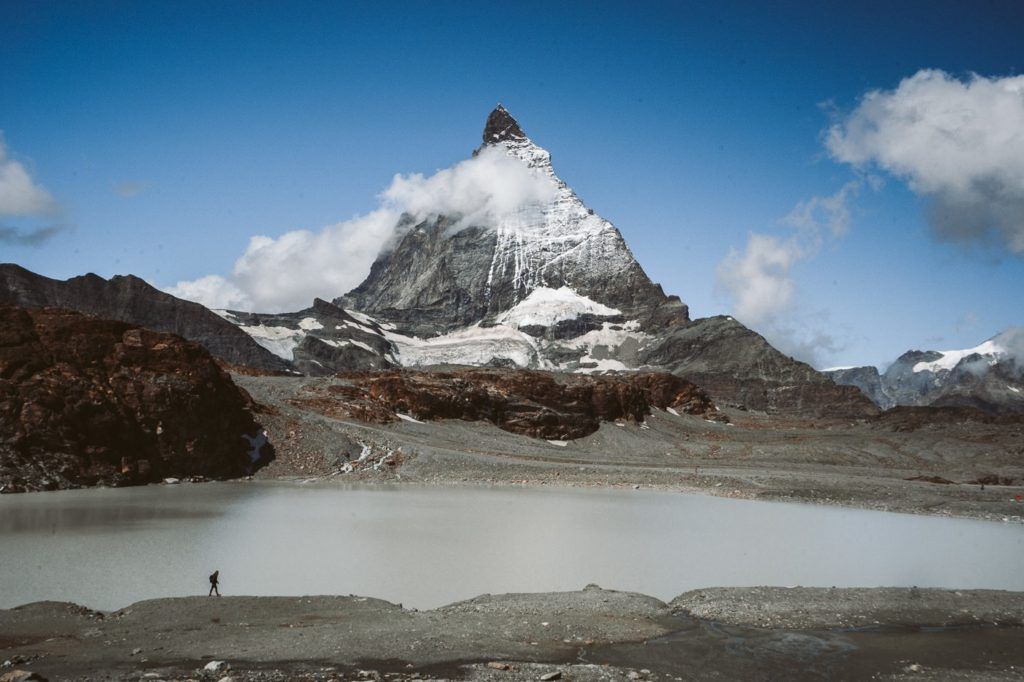
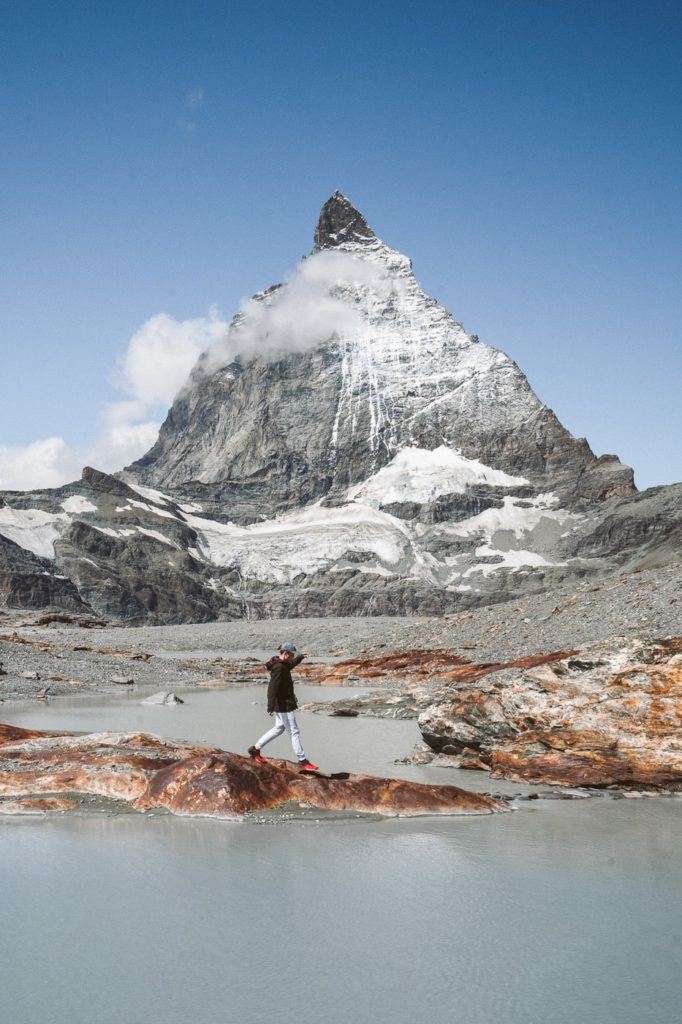
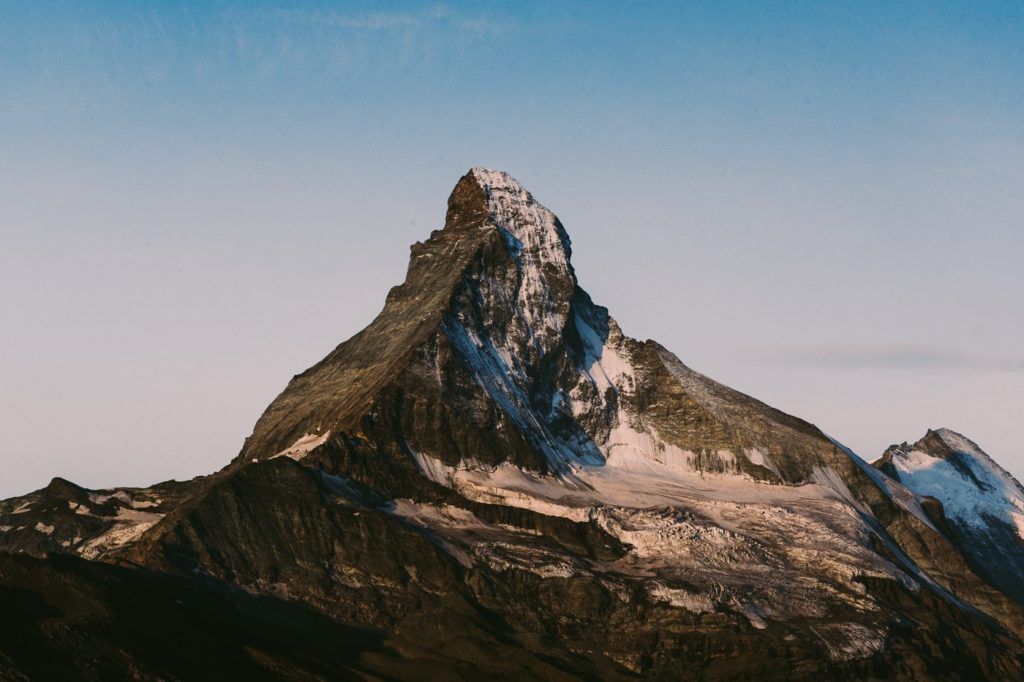
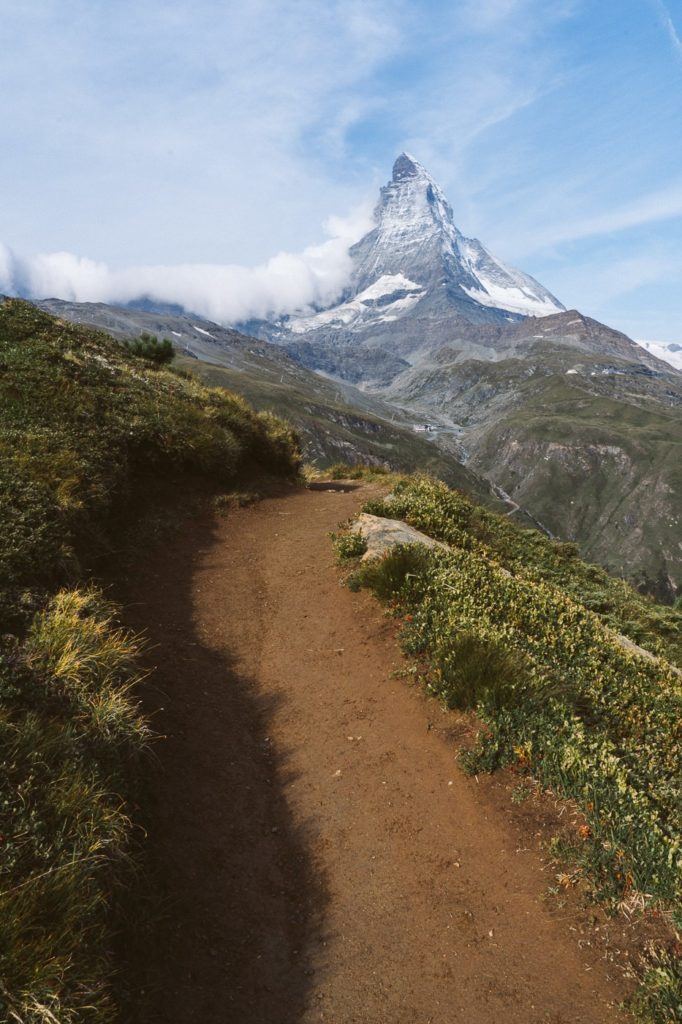
THE MATTERHORN GLACIER TRAIL HIKE IN ZERMATT
The Matterhorn Glacier Trail hike in Zermatt is a great walking trail that winds underneath the Matterhorn. It is one of the best day hikes in Zermatt and definitely one of the top places to see the Matterhorn from a very close distance without having to do any crazy incline or hiking. For an epic view of the Matterhorn with lots of lake reflection shots, this is my top recommendation for a hiking trail in Zermatt.
Are you interested in hiking in Zermatt? If you are looking for a picturesque view of the Matterhorn along with some amazing lake reflections, then I highly recommend the hiking trail I am about to suggest. This particular trail is an excellent choice for families and tourists who want to experience the beauty of the Matterhorn but are not looking for a challenging adventure. With only a 150m total incline, it is one of the easiest hikes in Zermatt. By taking the cable car all the way up to the top, you can enjoy a point-to-point route instead of a loop. This way, most of the trail is downhill and you end up at a different cable car station.
- Hike Distance: 6.4km from Trockener Steg to Schwarzsee
- Hike Duration: 2-3 hours
- Hike Difficulty: Very low. The total incline is 150m and a decline of 500m Sometimes rocky trails but never any dangerous or exposed trail.
- Hike Incline: 150m total climb with 500m of decline.
The Matterhorn Glacier Trail starts just beneath the Trockener Steg cable car station. You will begin the cable car journey on the Matter Glacier Paradise Cable Car, which leaves from the Zermatt Bergbahnen Station. You can skip the line if you book online here in advance.
The cable cars are open every day from 8:30 to 4:30 but you can check here on
Want more details and photos? View the full blog post here: THE MATTERHORN GLACIER TRAIL HIKE IN ZERMATT
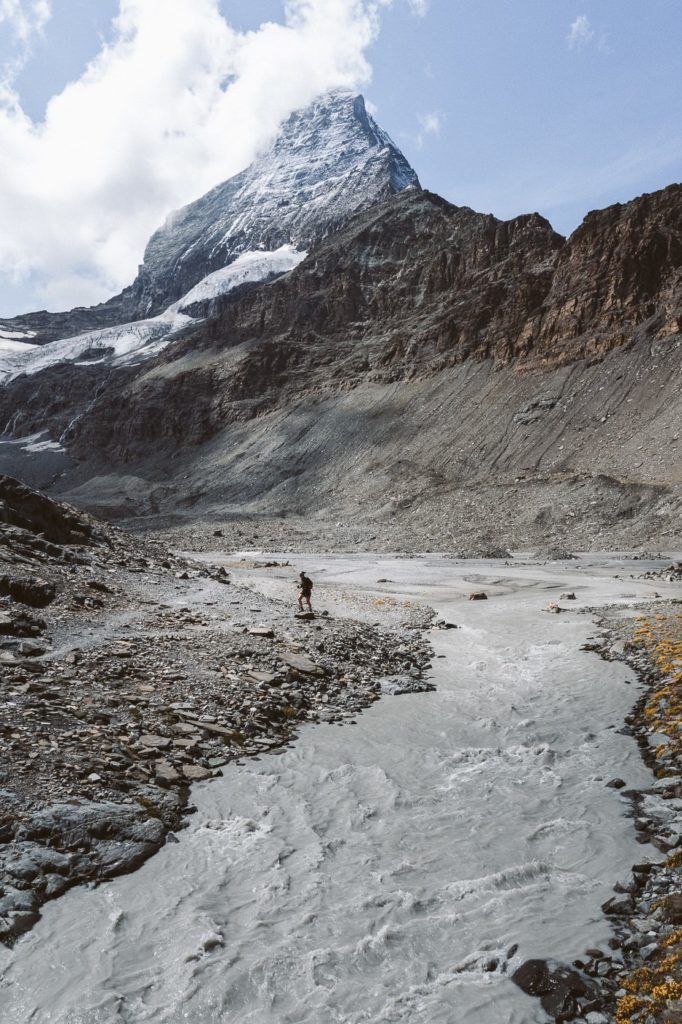
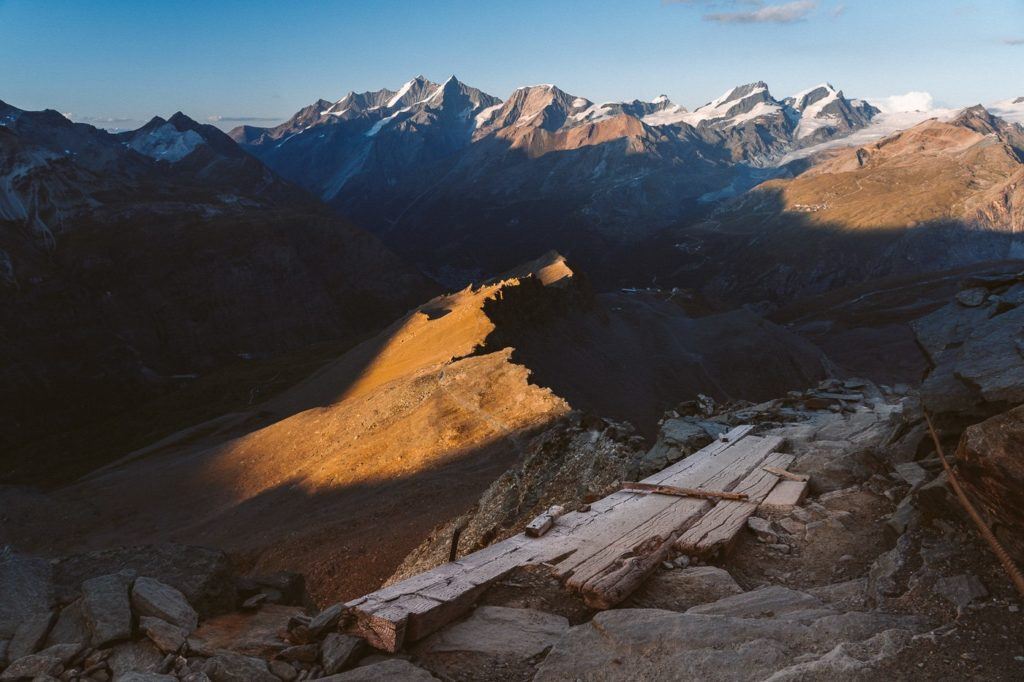
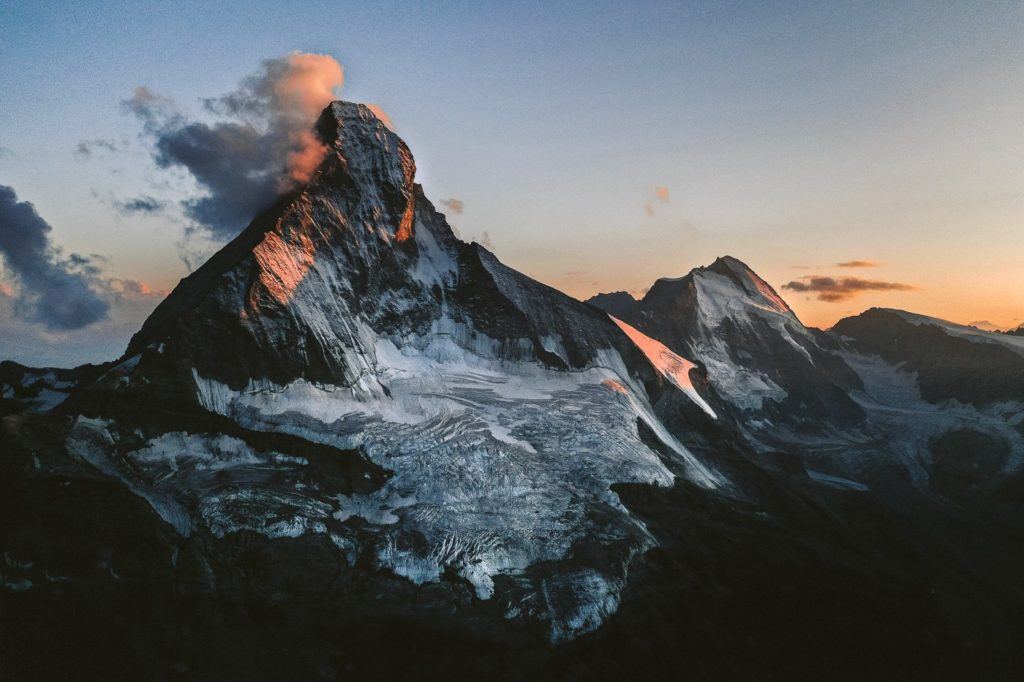
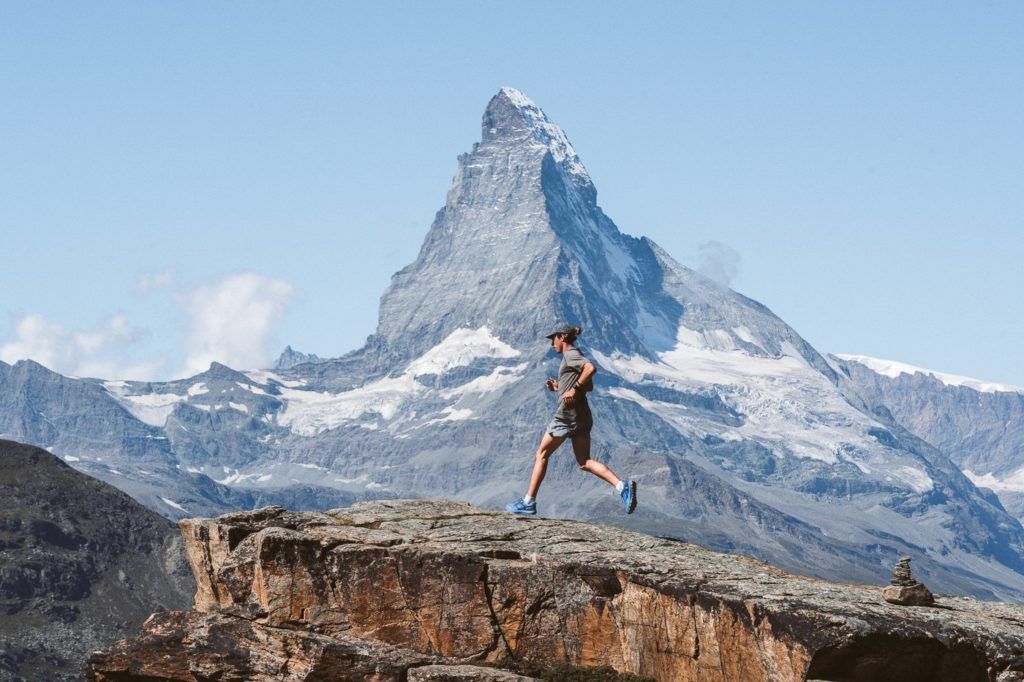
HOHBALMEN SUNRISE HIKE IN ZERMATT – MATTERHORN VIEWPOINT
The Hohbalmen sunrise hike in Zermatt is an intense way to start your day. It involves a challenging climb of 1,100m to reach a stunning viewpoint with clear views of Matterhorn. This hike is not very popular probably because it requires a lot of effort and there are other trails that offer similar views with much less difficulty. Nevertheless, this viewpoint offers a mesmerizing sunrise experience and you will not encounter many people on this trail. I really enjoyed waking up early and embarking on this adventure to reach the viewpoint, and it was definitely a strenuous workout.t.
- Hike Distance: The hike from Zermatt to Hohbalmen viewpoint and to return is 10km. However, there are lots of routes that continue from Hohbalmen that can make it a 20km loop. I just went up to the viewpoint and down and it was 10km.
- Hike Duration: The hike took me 2 hours and 50 minutes although it would be more likely to take 3-5 hours round-trip for an average pace of hiking.
- Hike Difficulty: The hike is not exposed and there are no dangers. The incline to the viewpoint is very aggressive with 1000m of incline within the first 4km, which is a lot to handle for many people…, especially before a coffee!
- Hike Incline: Starting point at Zermatt Town: 1608m – Hohbalmen Viewpoint: 2,673m
Want more details and photos? View the full blog post here: HOHBALMEN SUNRISE HIKE IN ZERMATT – MATTERHORN VIEWPOINT

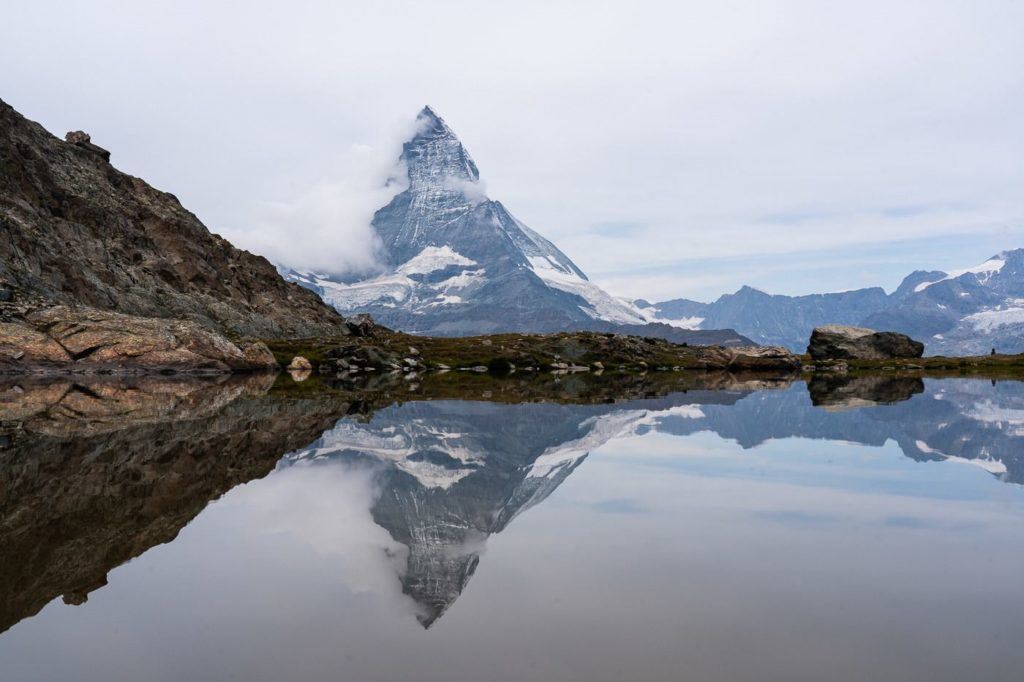
RIFFELSEE LAKE HIKE IN ZERMATT WITH MATTERHORN REFLECTION
The Riffelsee (Riffel Lake) Hike may just be the best spot in Zermatt to find the perfect reflection photo of the mighty Matterhorn. A train takes you to Riffelalp before you hike around the mountain with constant views of the Matterhorn until you end up at Riffelsee and witness the amazing reflection.
The Riffelsee is amazing at sunset or sunrise but quite difficult to get to at those hours as the train is usually finished. Therefore it is quite a mission to hike in the dark before sunrise or after sunset. Adventurers love this challenge to see the alpenglow on the Matterhorn reflecting in the lake.
There are usually some diehard photographers at the lake who have made the effort. Once you are up there at the lake it is one of the nicest walks in Zermatt in my opinion.
- Hike Distance: The total distance from Riffelalp train station to Riffelsee via the Riffelseeweg is just 4.1km. You can then catch the Gornergratbahn back down to Zermatt. However, I suggest you continue hiking up to Gornergrat and keep exploring. My total loop was 20km from Riffelalp to Riffelsee to Gornergrat to Hohtalli to Zermatt.
- Hike Duration: From Riffelalp to Riffelsee you are expecting it to take about 1.5 hours.
- Hike Difficulty: The hike difficulty for Riffelsee from Riffelalp was very low. There was some incline but the path was always very clear and quite flat. Suitable for children.
- Hike Incline: From Riffelalp to Riffelsee the incline is just under 600m of climbing. Riffelsee is at 2,762 meters above sea level.
Skip the line and book a ticket online for the Gornergrat Cogwheel. Cross stunning bridges, ride through galleries and tunnels, idyllic forests, past gorges and mountain lakes as your climb the Gornergrat on the cogwheel train with the Matterhorn continually in view.
Want more details and photos? View the full blog post here: RIFFELSEE LAKE HIKE IN ZERMATT WITH MATTERHORN REFLECTION
SWITZERLAND HIKING REGION: CHUR
Chur was a bit of a surprise packet for me. No one recommended me to visit Chur, to be honest, but I found it a great little base to explore a number of hikes in the region. While the best hiking trails seemed to be just outside of the town of Chur itself (but still nearby) the town was quite lovely and quiet and its central location made it easy to navigate the region by train on lots of day hikes.
I wouldn’t recommend Chur if you just had a short amount of time in Switzerland (and your main focus was hiking) but if you are doing a long hiking tour like myself or don’t mind getting off the beaten path and away from the hotspots you will find some gems near Chur so it is worth adding to your Switzerland hiking itinerary. You can view my in-depth hiking guide to Chur here: 7 AWESOME HIKES NEAR CHUR

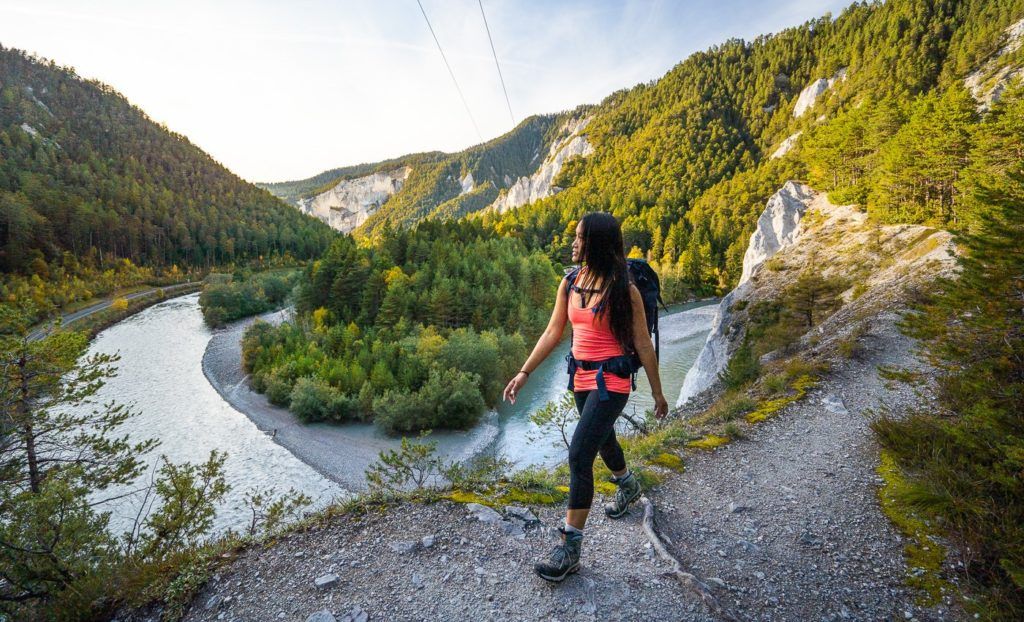
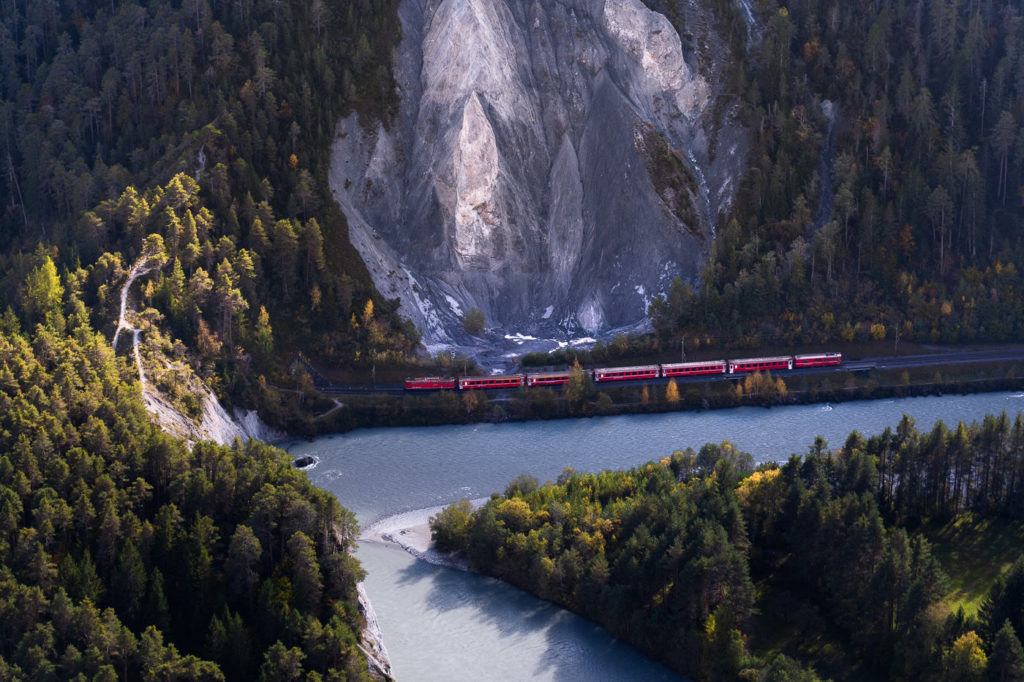
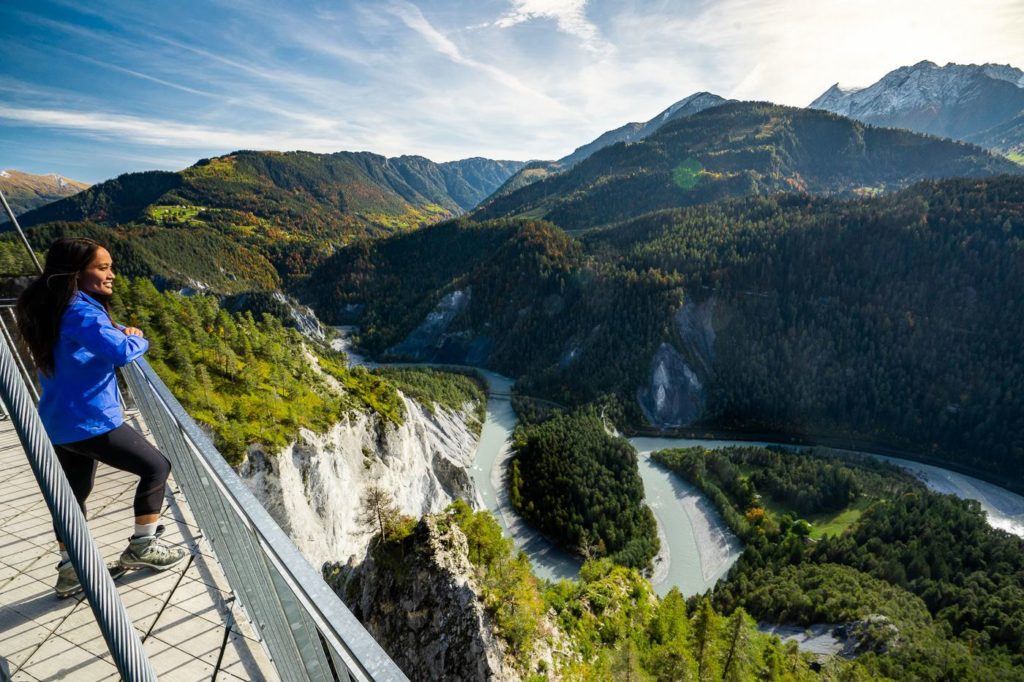
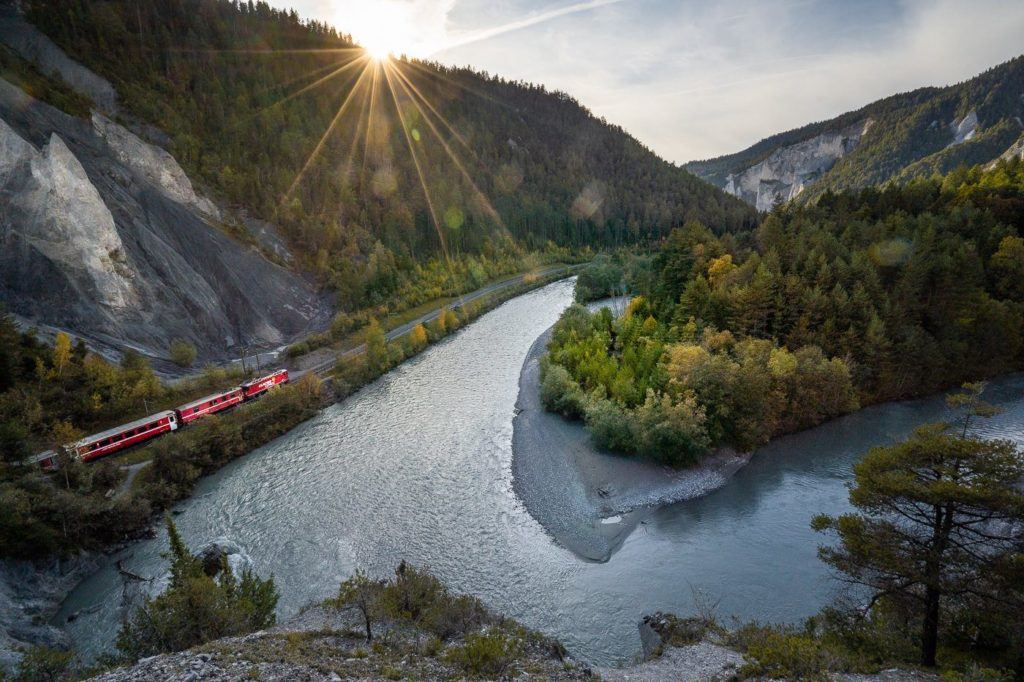
RHINE GORGE RIVER HIKE & VIEWPOINT ‘SWISS GRAND CANYON’
The Rhine Gorge is often referred to as the ‘Swiss Grand Canyon’, and while that may be a bit of a stretch in terms of comparison, it is an impressive gorge and a great location for hiking. The strange rock formations, cliffs, and blue-tinted water make the Rhine River and the gorge one of the most unique attractions in Switzerland.
The Rhine Gorge offers multiple hiking routes with various entry and exit points and a train that runs through the gorge itself. This provides adventurers with plenty of options for their journey, which can range from a few kilometers to a massive 21-kilometer hike. For those who prefer a more relaxed experience, the viewing platform overlooking the gorge is a great option. Additionally, visitors can take a train ride through the gorge, making it accessible to non-hikers as well.
Want more details and photos? View the full blog post here: RHINE GORGE RIVER HIKE & VIEWPOINT ‘SWISS GRAND CANYON’
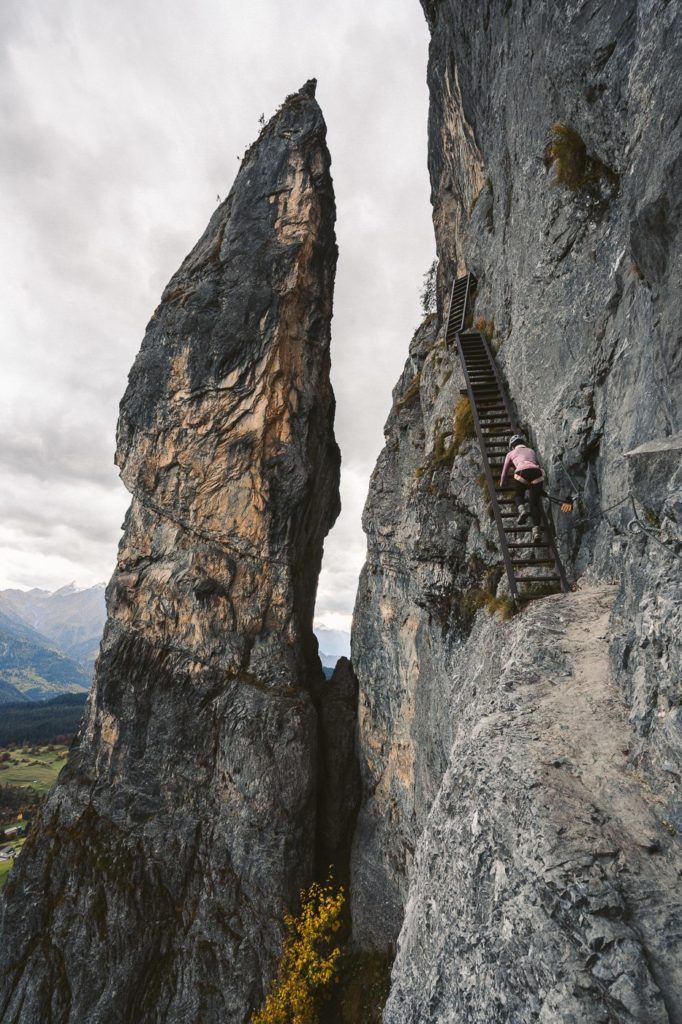
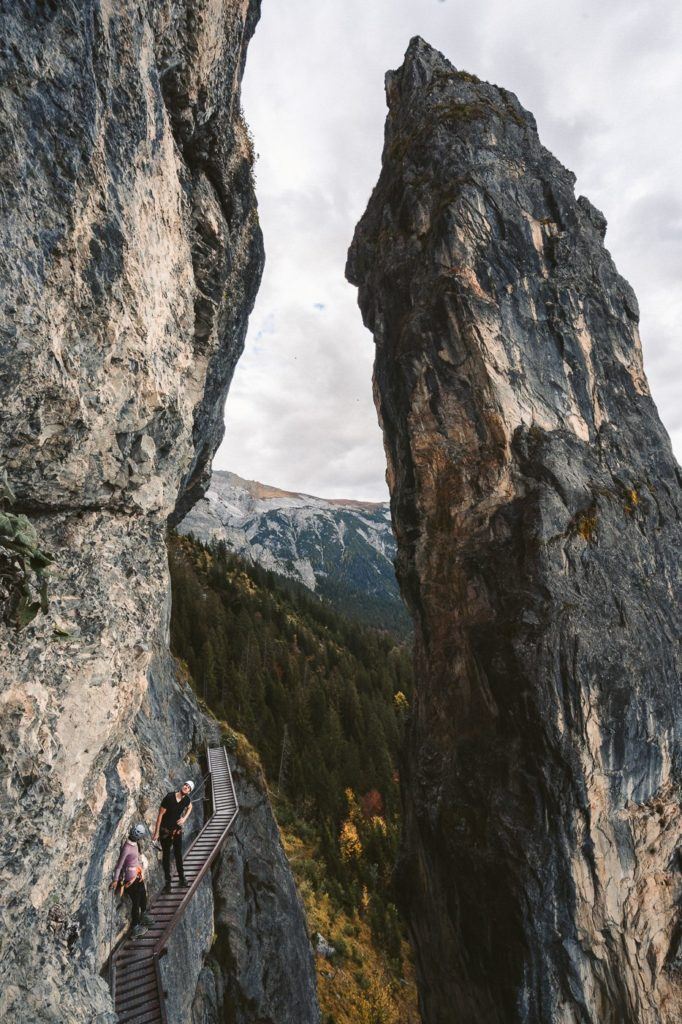
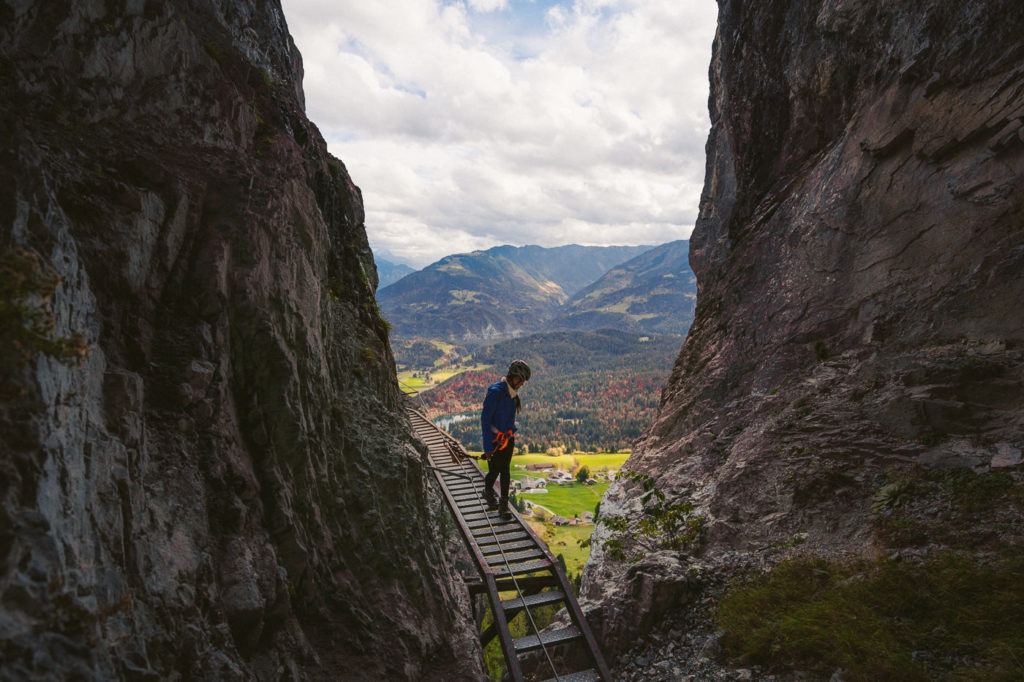
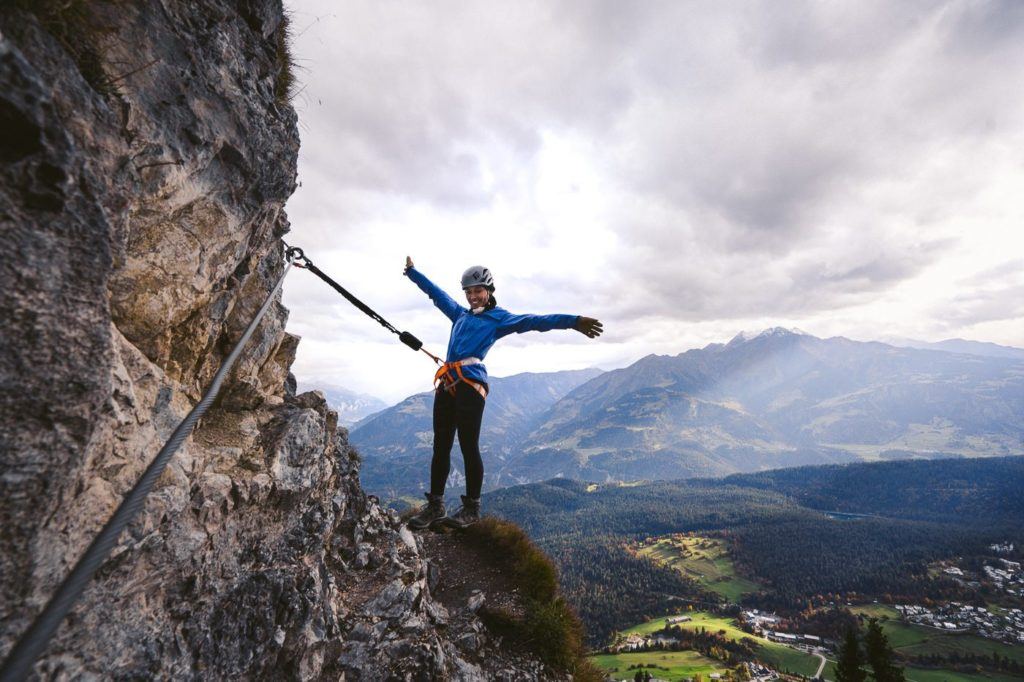
PINUT VIA FERRATA (KLETTERSTEIG) IN FLIMS
The Via Ferrata (Klettersteig) in Flims is an epic series of staircases and ladders on the edge of a cliff that winds up hundreds of meters above the valley. From the summit, you have incredible views of Crestasee, Caumasee, and the entire region of Flims
The Pinut Via Ferrata is actually the oldest of its kind in all of Switzerland and was opened in 1907. For those who are nervous hearing about climbing a century-old ladder, fear not. This Via Ferrata is maintained by the tourism board and was fully renovated in 2007.
The first part of the Pinut Via Ferrata is, in my opinion, the most spectacular. There is a huge spire that you pass by on the boardwalks in between scaling the ladders up the cliffside. It is a really unique rock formation and by walking upon the cliffside you get a close-up inspection.
The route then continues up the wall and actually leads you inside some caves and small tunnels, all the while connected to the strong cable, which keeps you safe throughout the hike. From within the tunnels and caves, you can see out the gaps all the way down to Flims and the lakes.
Want more details and photos? View the full blog post here: PINUT VIA FERRATA (KLETTERSTEIG) IN FLIMS – EPIC CLIFFSIDE STAIRWAY
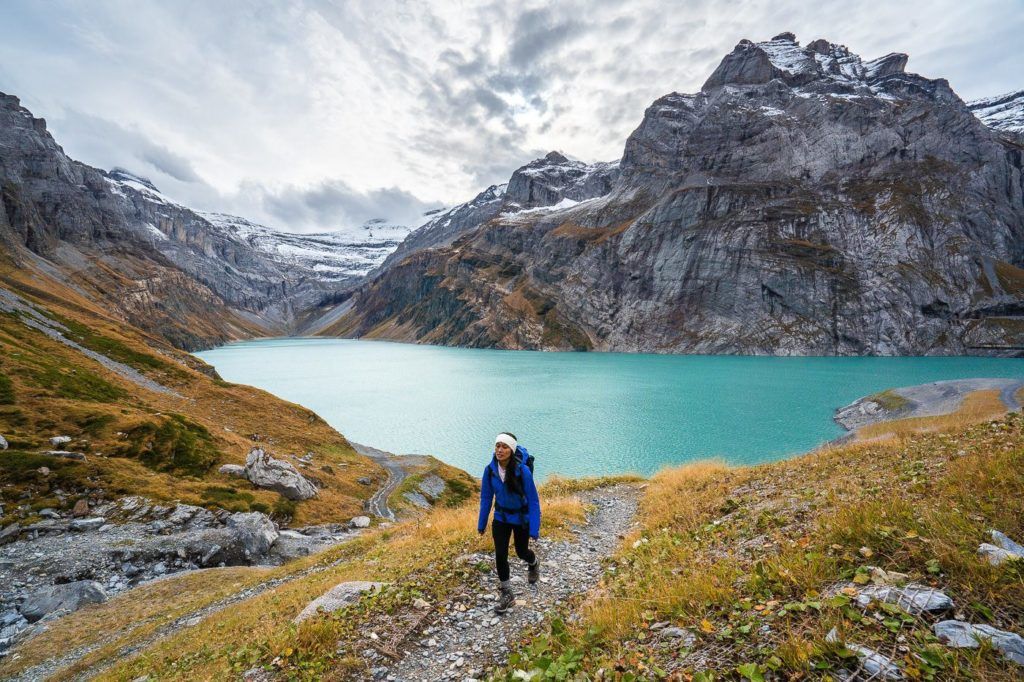
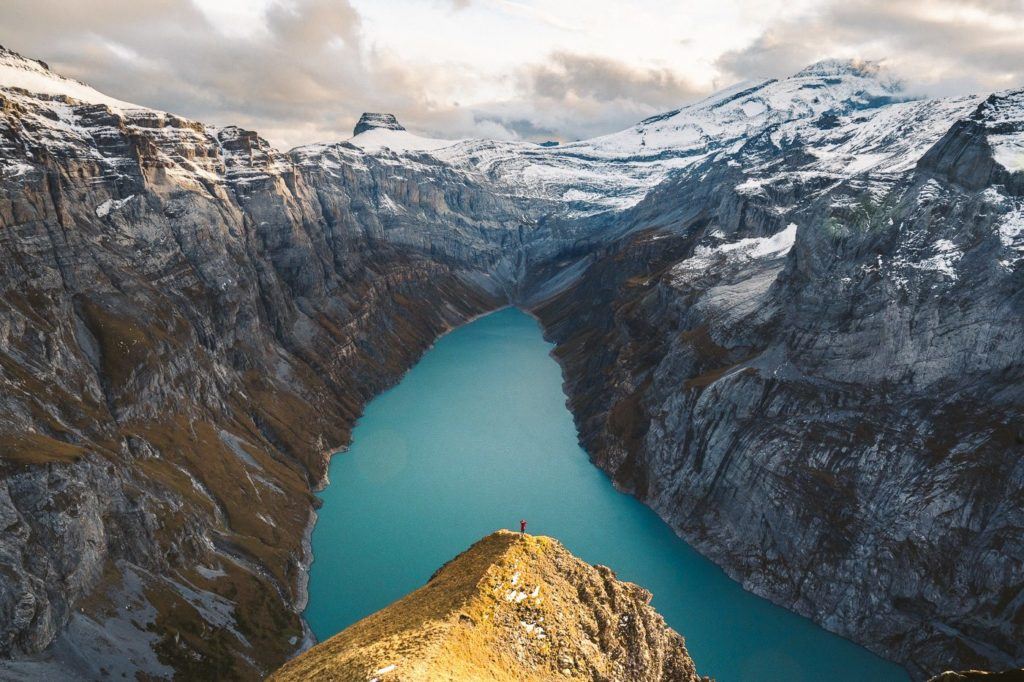
MUTTSEE HUT HIKE VIA LIMERENSEE LAKE
The trek to Muttsee Hut (Muttseehütte) was an unusual journey I experienced in Switzerland. Nevertheless, the end result was awe-inspiring. The adventure commences in Linthal, where you need to walk 6.7 kilometers to the Tierfehd cable car, and then traverse a 3-kilometer-long tunnel that is dark and damp, before emerging at Limerensee. The trail then ascends a very steep mountain until you reach some breathtaking vantage points of the Limerensee and, of course, the Muttsee Hut. I hiked in Switzerland in September when I did this trek, but it is advisable to undertake this trek during summer as the trail closes during winter.
- Hike Distance: The hike distance from the top of the Tierfehd Cable car through the tunnel and to the Muttsee Hut is 5.8 kilometers. However, if you are using public transport, you will need to walk from the Linthal train station to Tierfehd cable car station, which is an extra 6.7km and a total of 12.5 kilometers. The hike is a round-trip hike so you will need to make the entire 10.6 kilometers without the walk from Linthal or 25 kilometers including the journey to and from Linthal.
- Hike Duration: If you begin at Linthal, you can expect the entire journey to take about 4-5 hours. If you begin at Tierfehd the journey will take 2-3 hours.
- Hike Difficulty: The hike is a red and white marked trail and quite simple. I did the hike in October on the last week of opening for Muttsee Hut and even with a bit of snow around it was quite simple. The incline is challenging from the end of the tunnel to the Muttsee Hut and is non-stop ascent although it is only 5-600m of incline so if you are prepared to take a few breaks you will make it eventually, no matter your physical ability.
- Hike Incline: From Linthal the total incline is 900-1000m but from the Tierfehd cable car station the total hiking incline (once getting off the cable car at the start of the tunnel) is 600m.
Want more details and photos? View the full blog post here: MUTTSEE HUT HIKE VIA LIMERENSEE LAKE
CRESTASEE AND CAUMASEE LAKE LOOP WALK
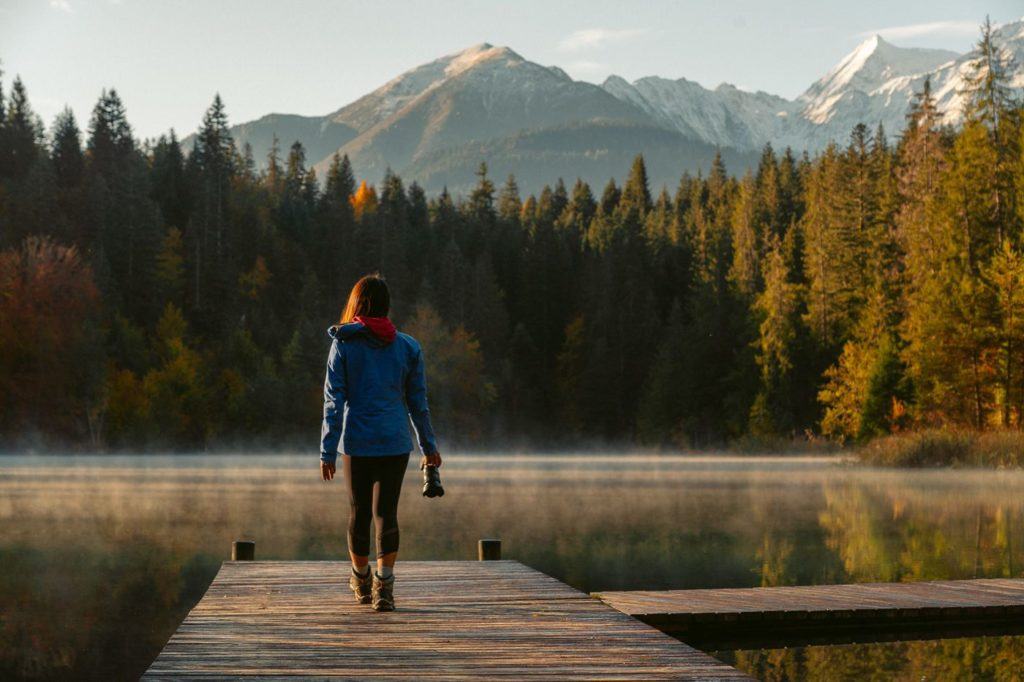
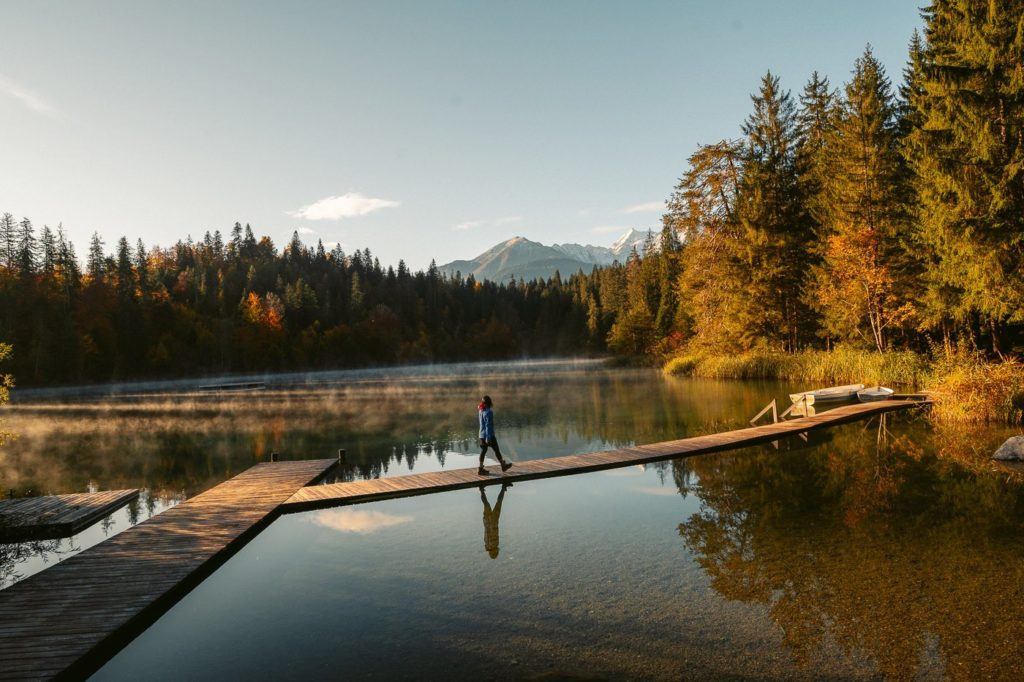
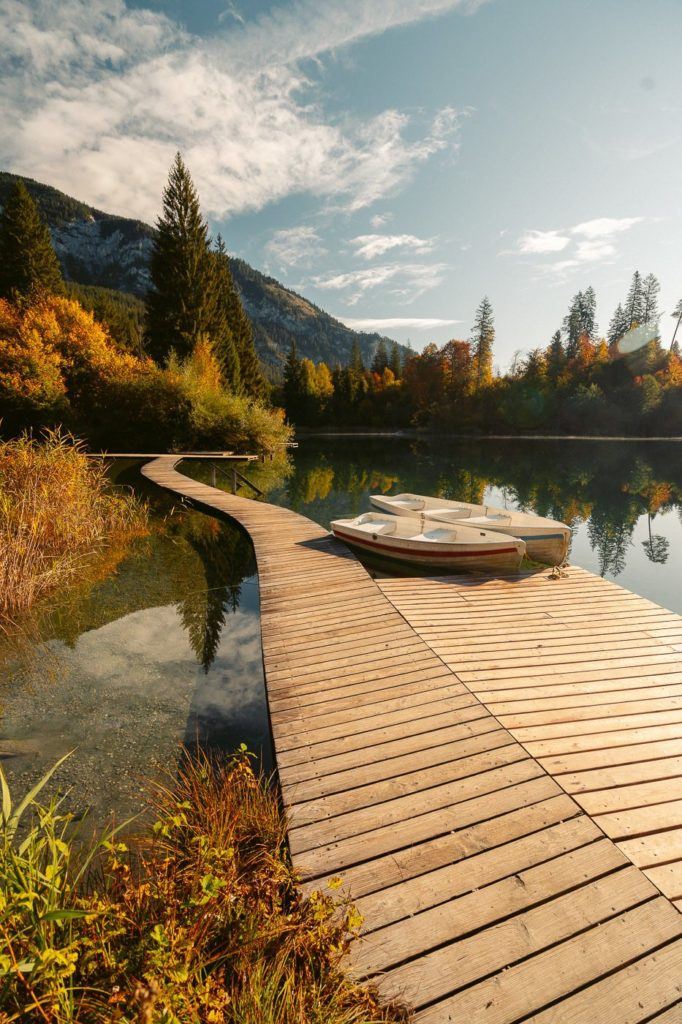
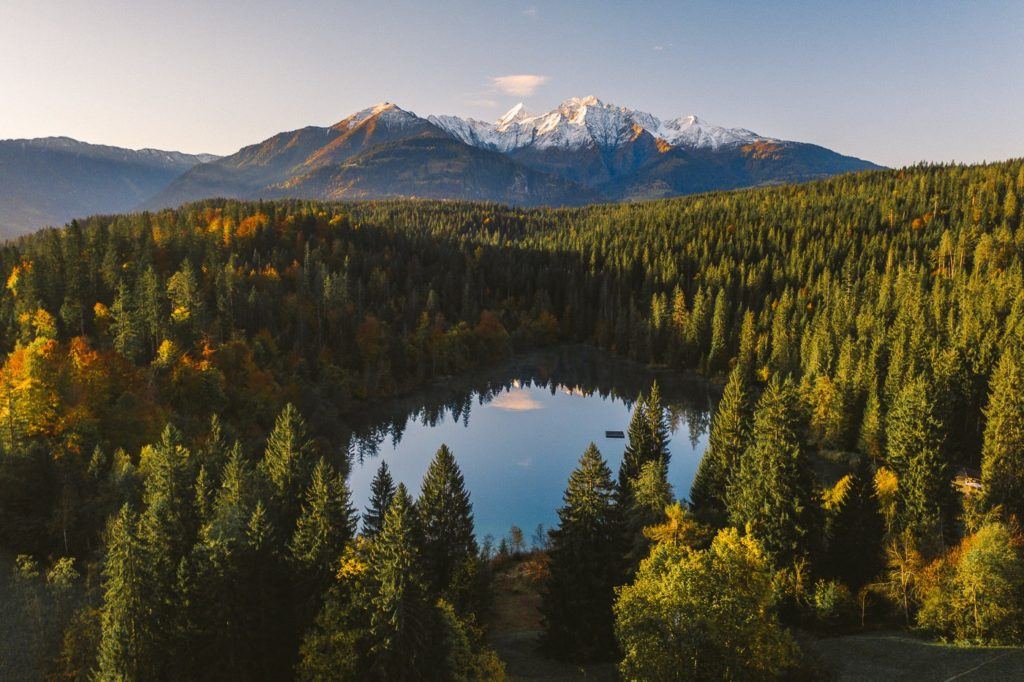
If you’re looking for stunning lakes to visit near Chur, Crestasee, and Caumasee should be on your list. To get there, take the public bus from Chur city center to Crestasee. From there, you can explore the first lake before following the circuit path through the forest to reach the second lake, Caumasee. It’s a great way to spend a day in the beautiful Swiss countryside.
During my visit to Crestasee, I was mesmerized by the breathtaking scenery of the lake, surrounded by a forest and bordered by mountain ridges. It was the fall season, which had turned the trees into a vibrant display of changing colors. The early morning reflections on the steaming lake were nothing short of stunning. Caumasee, on the other hand, is a vast lake that draws many tourists who come to visit the cafe, take a walk, and indulge in a swim during the summer months.
The entire circuit takes around two hours with a stop at each lake. However, you have the option to extend the route by hiking down to the Rhine Gorge viewpoint called ‘Il Spir’. We even hiked down into the gorge after visiting the two lakes which made the entire day a 21 km hike. But, if you only want a small adventure to the lakes, the distance between the Crestasee and Caumasee is just a few kilometers.
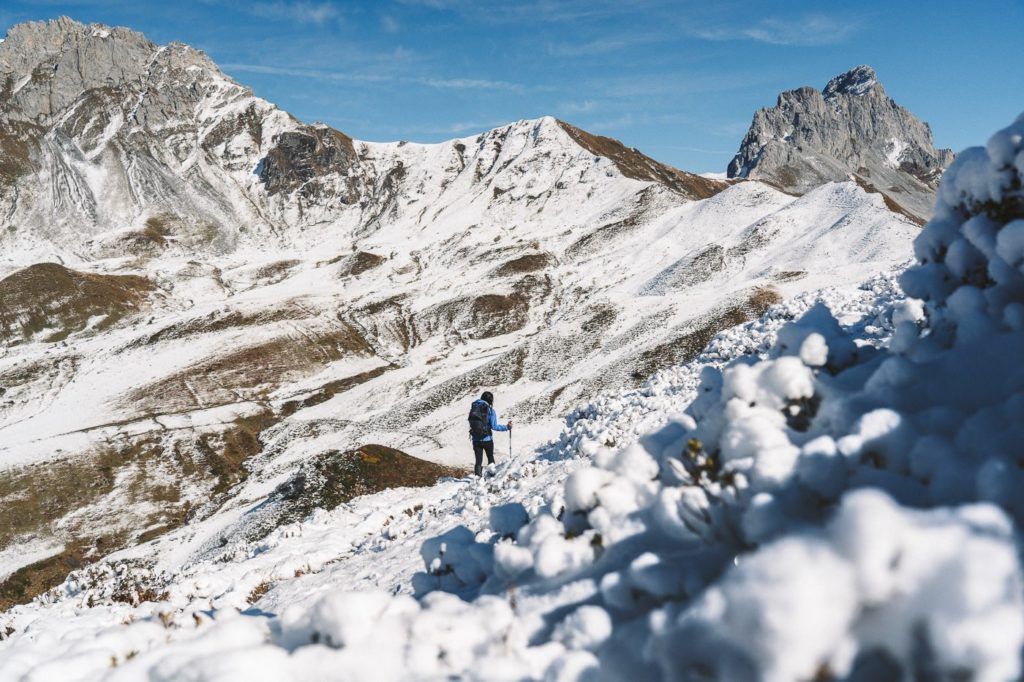
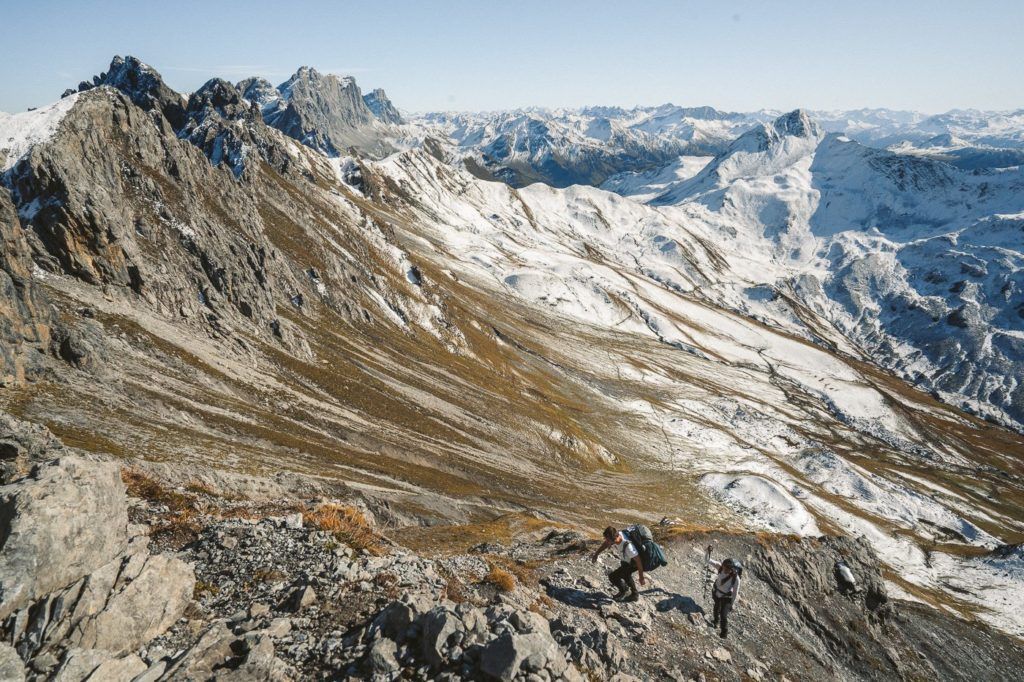
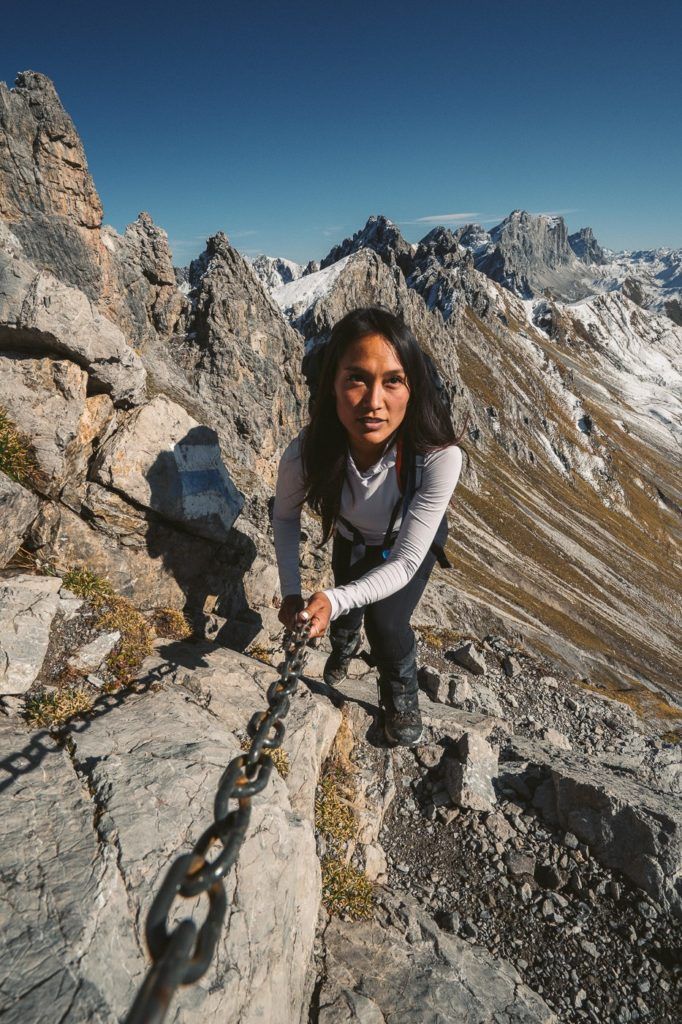
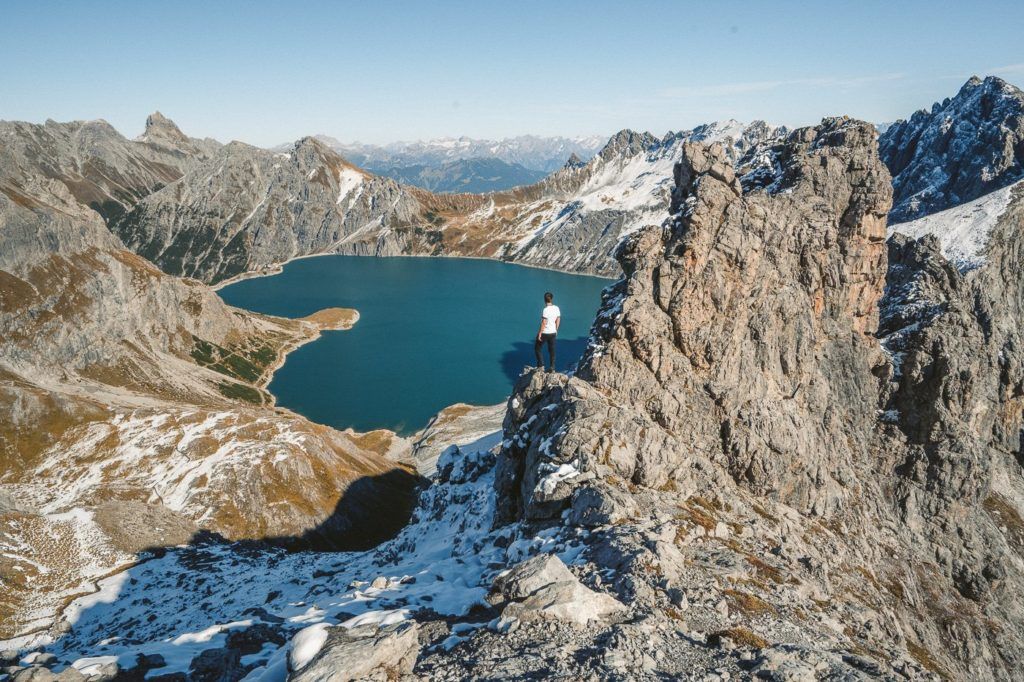
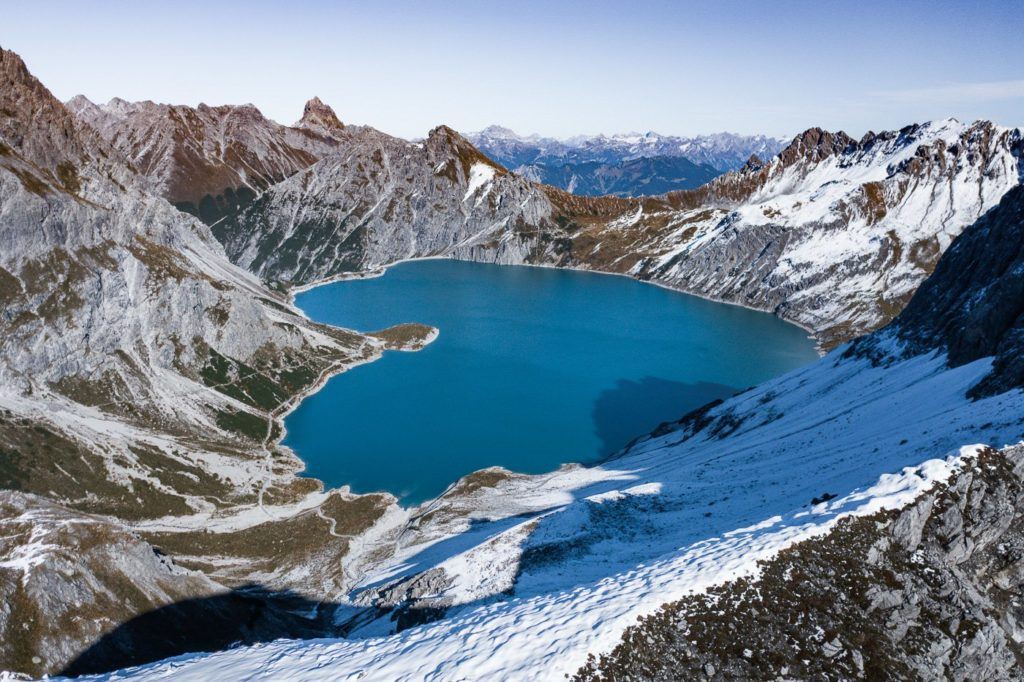
LUNERSEE HIKE – LOVE HEART LAKE VIEWPOINT AT GAMSLUGGEN
While the Lunersee (lake) is actually in Austria, the viewing point we went to is right on the Swiss side of the border. Funnily enough, you could actually walk down to the lake from where we were and cross the border into Austria.
The hike to Lunersee Lake is quite an interesting adventure because although we were in Switzerland and hiked all the way to the viewpoint above the lake, it is actually in Austria. If you went down to walk around the Lunersee Lake, you would have crossed the border and entered Austria. The hike itself is long and full of adventure with some chains and exposure towards the end. The shape of the lake is a love-heart but only when viewed from certain angles such as the Gamsluggen viewpoint in Switzerland.
Want more details and photos? View the full blog post here: LUNERSEE HIKE – LOVE HEART LAKE VIEWPOINT AT GAMSLUGGEN
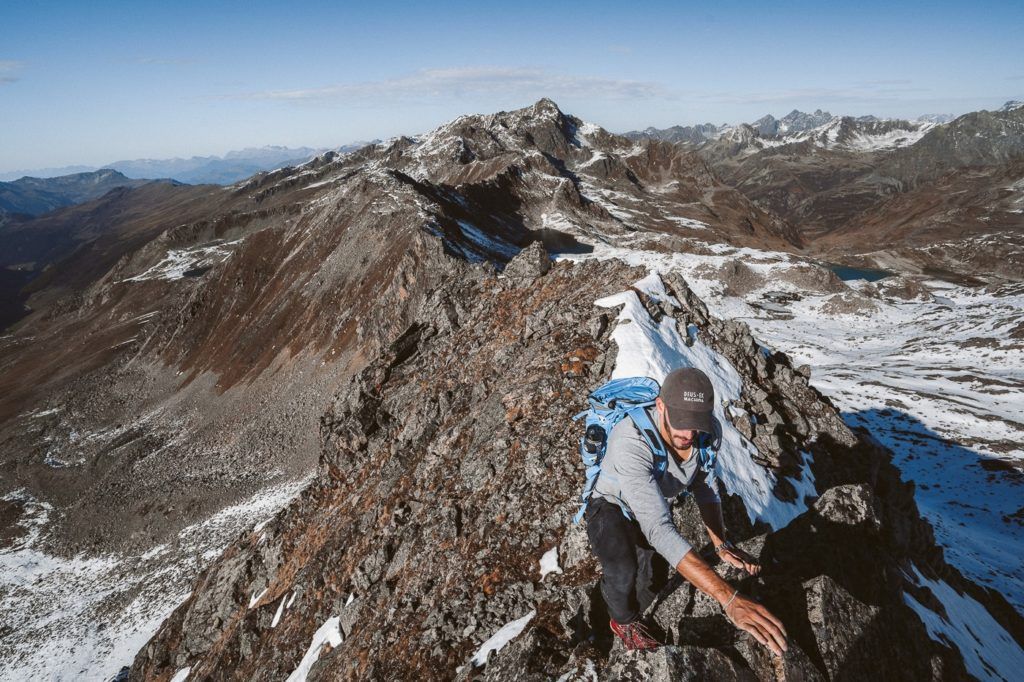
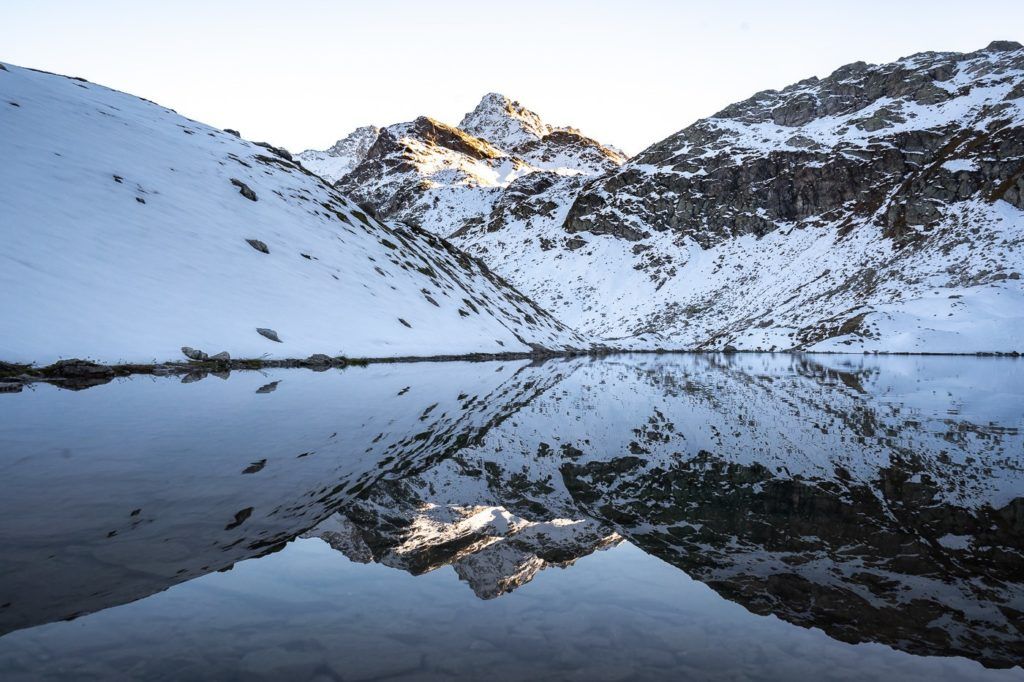
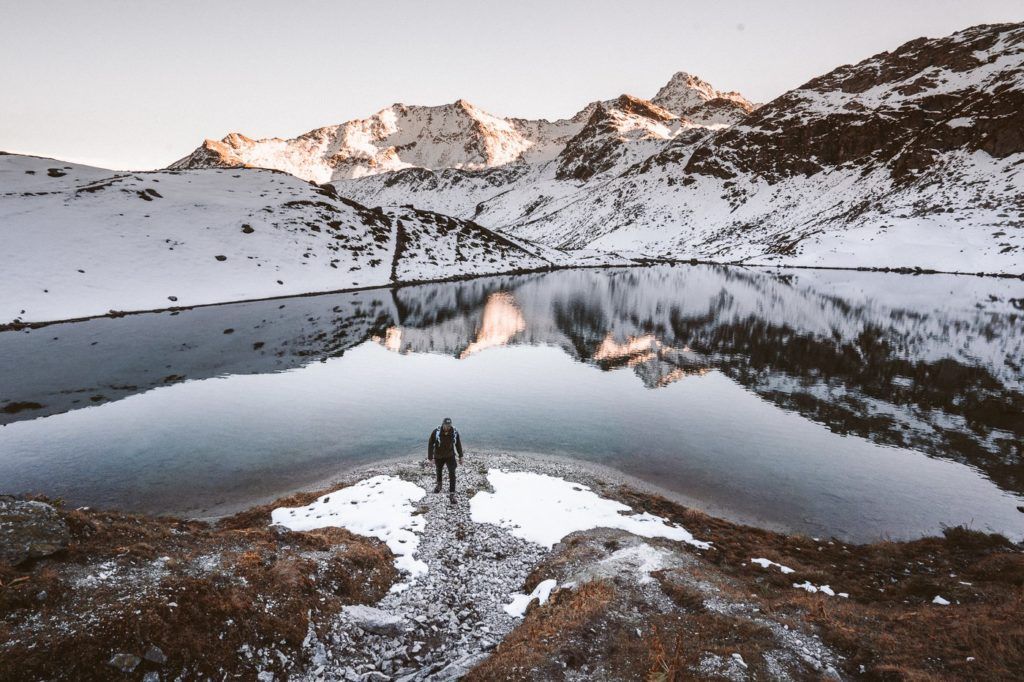
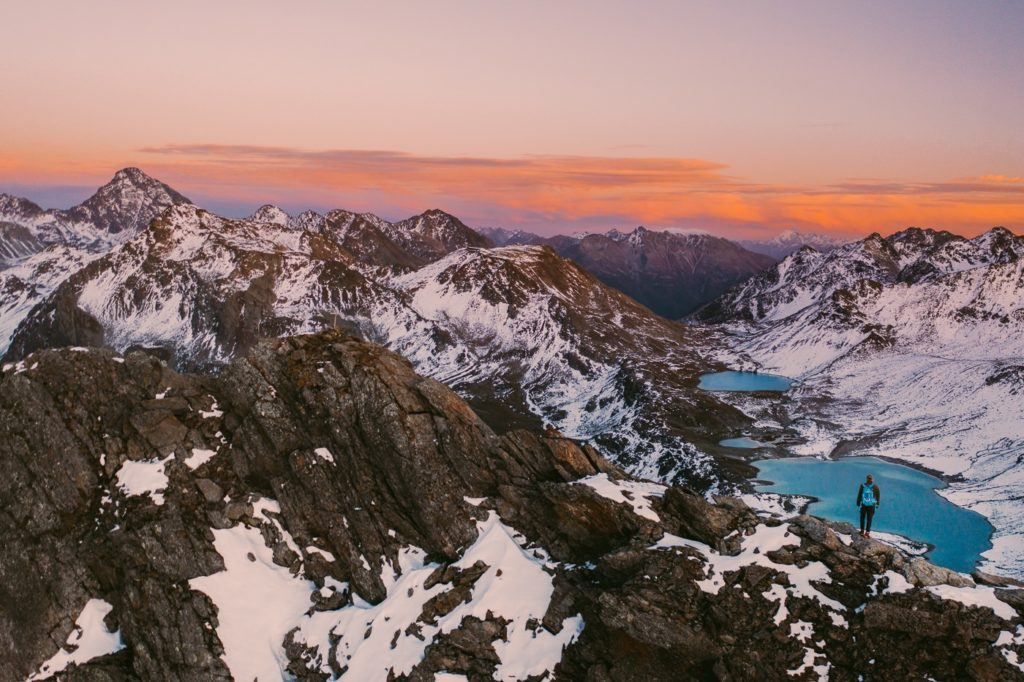
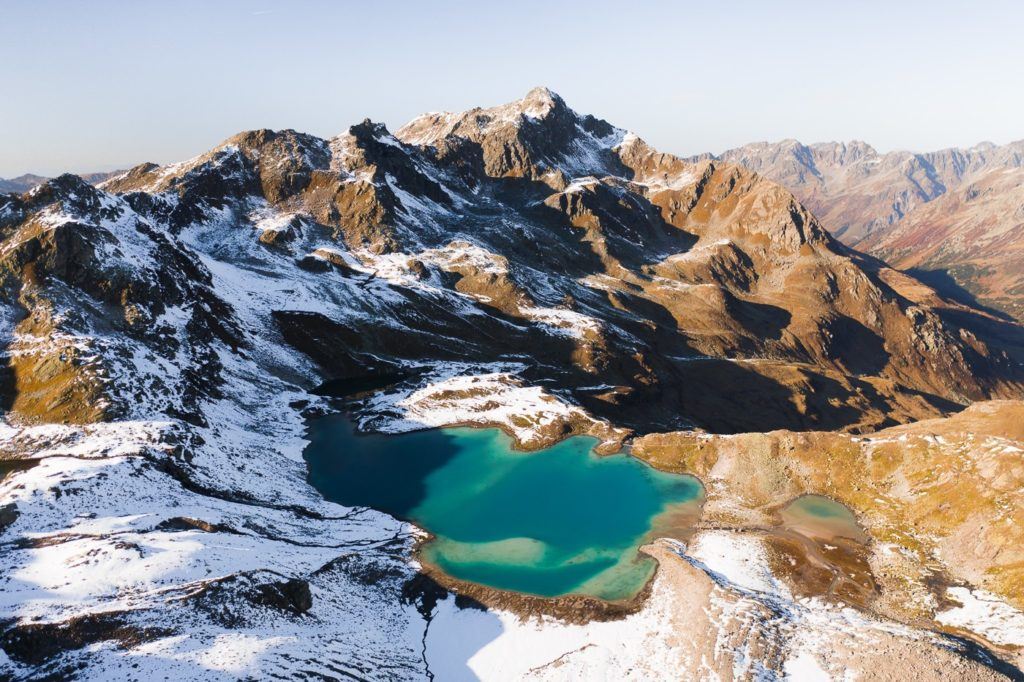
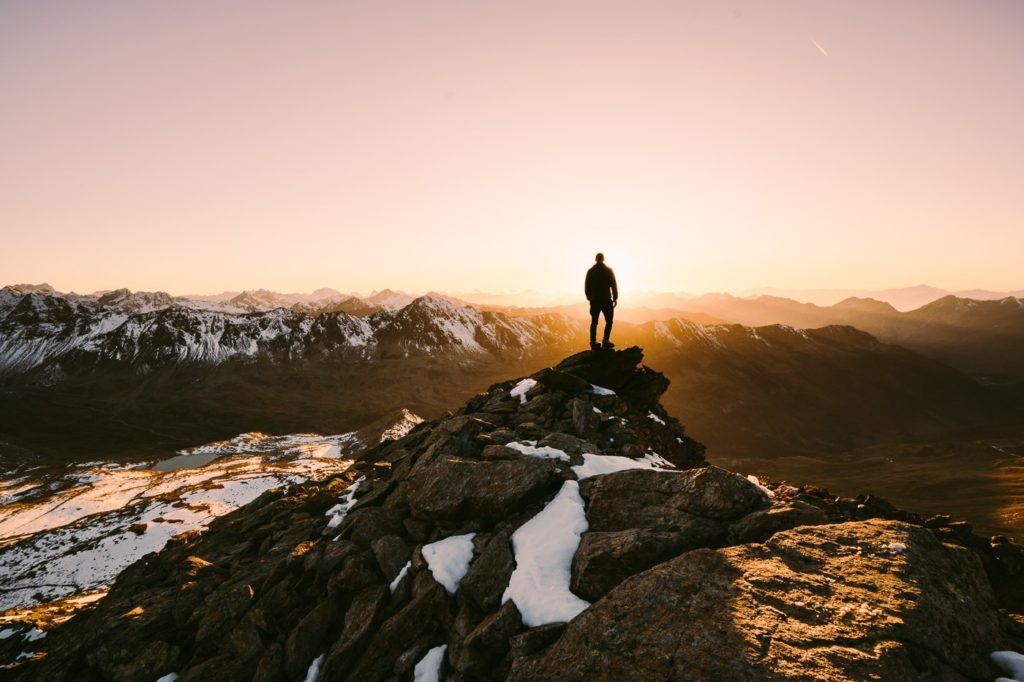
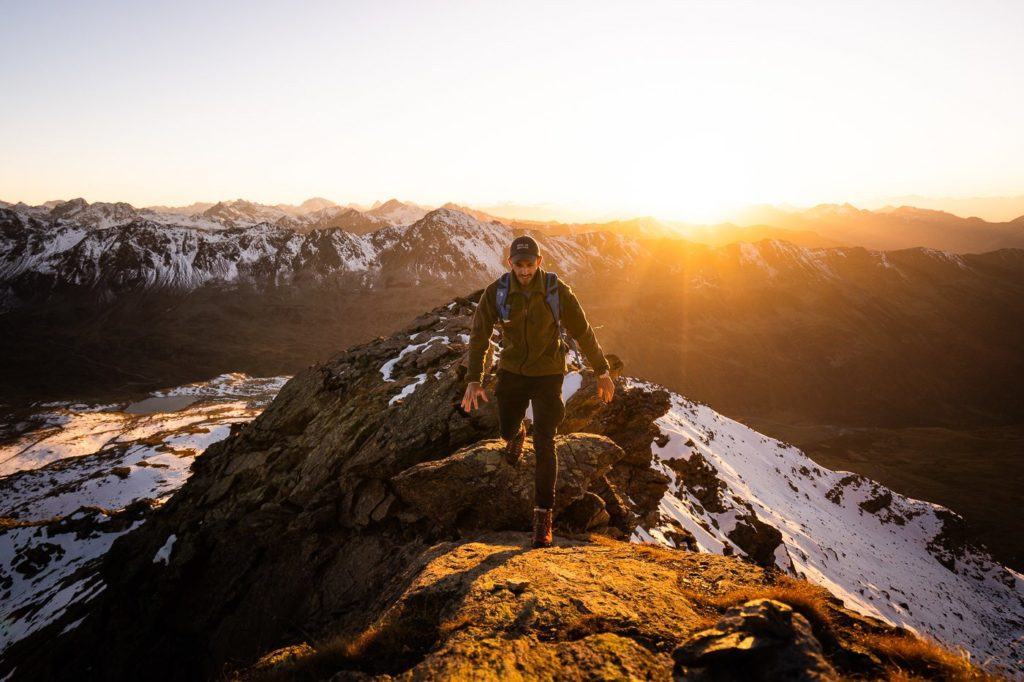
JORISEEN LAKE & JORIHORN SUMMIT HIKE IN DAVOS
This hike near Chur is an epic 12km loop trail that takes you to multiple lakes and then to the summit of Jorihorn where you have epic views of Joriseen and the Swiss Alps. The trail takes you past each of the lakes in the valley before summitting the Jorihorn for the sunset view of a lifetime.
- Hike Distance: The entire loop was 12.75km but if you don’t summit Jorihorn the loop is just 11km.
- Hike Duration: The whole loop including Jorihorn will take 5-6 hours including rest times but you could bargain for an extra hour if you take lunch down by the lakes. The incline sections and Jorihorn climb are not quick parts of the trail.
- Hike Difficulty: The incline is what makes this hike a little challenging although it is spread out in different sections so it isn’t one big block of climbing.
- Hike Incline: 1002 meters.
Want more details and photos? View the full blog post here: JORISEEN LAKE & JORIHORN SUMMIT HIKE IN DAVOS
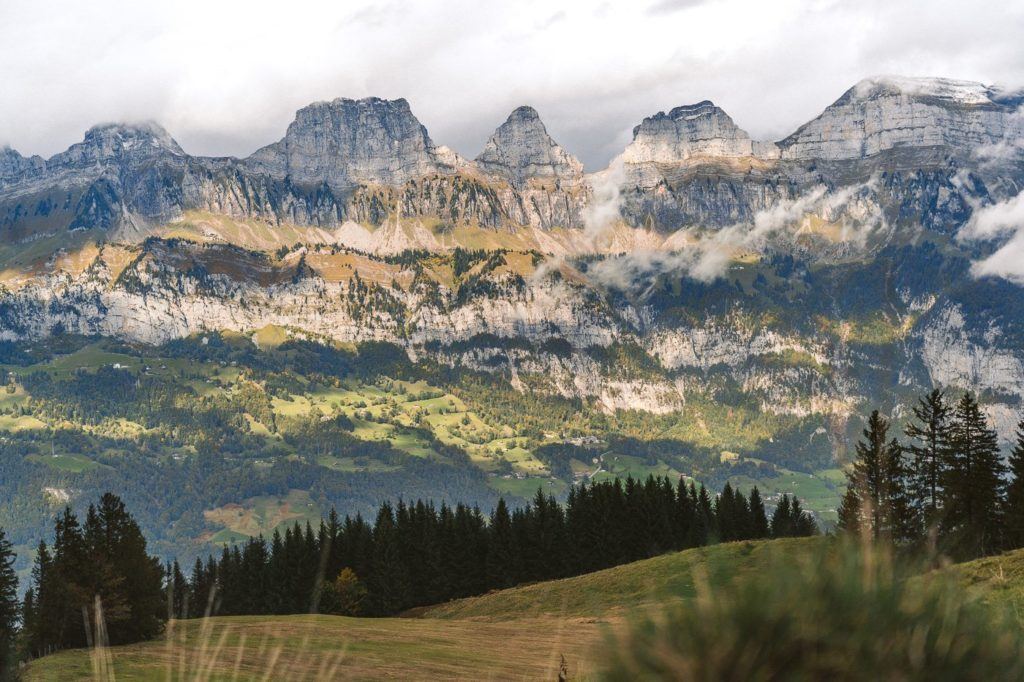
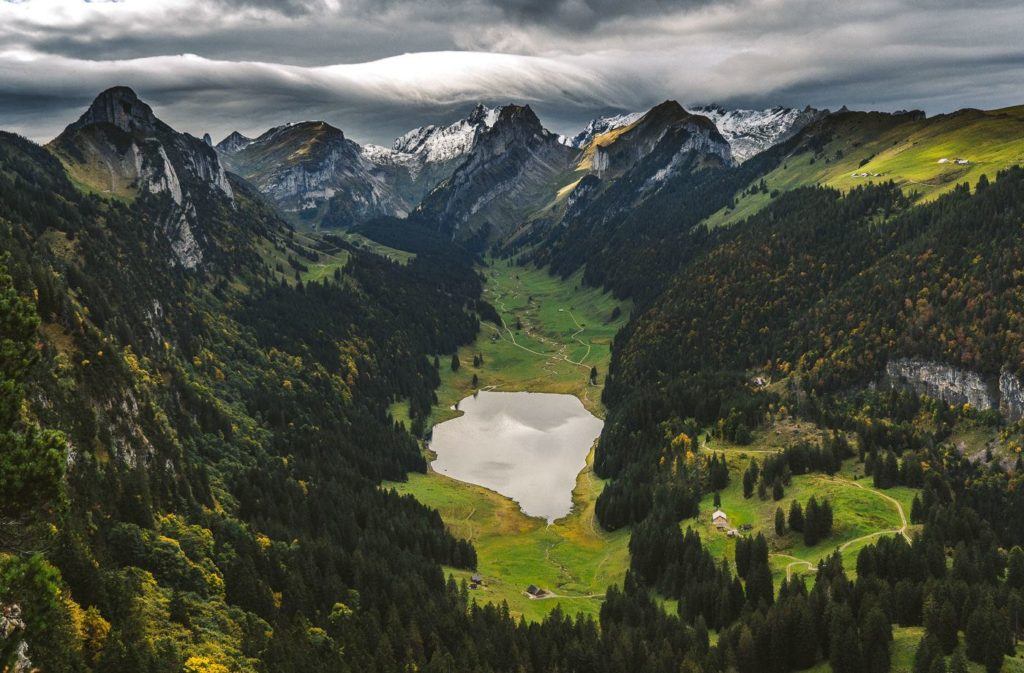
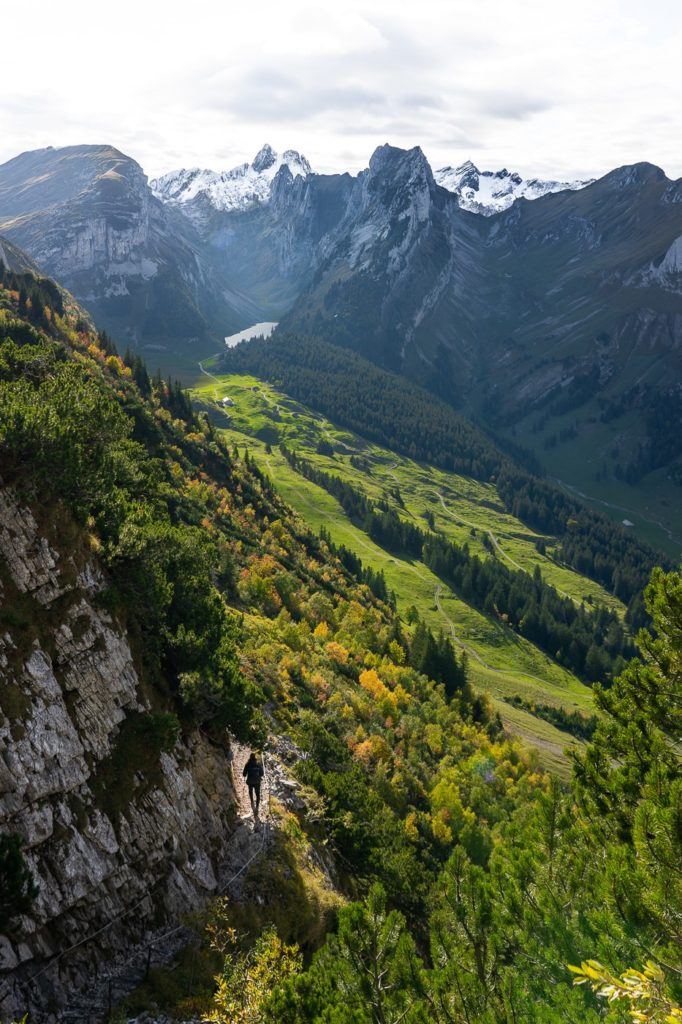
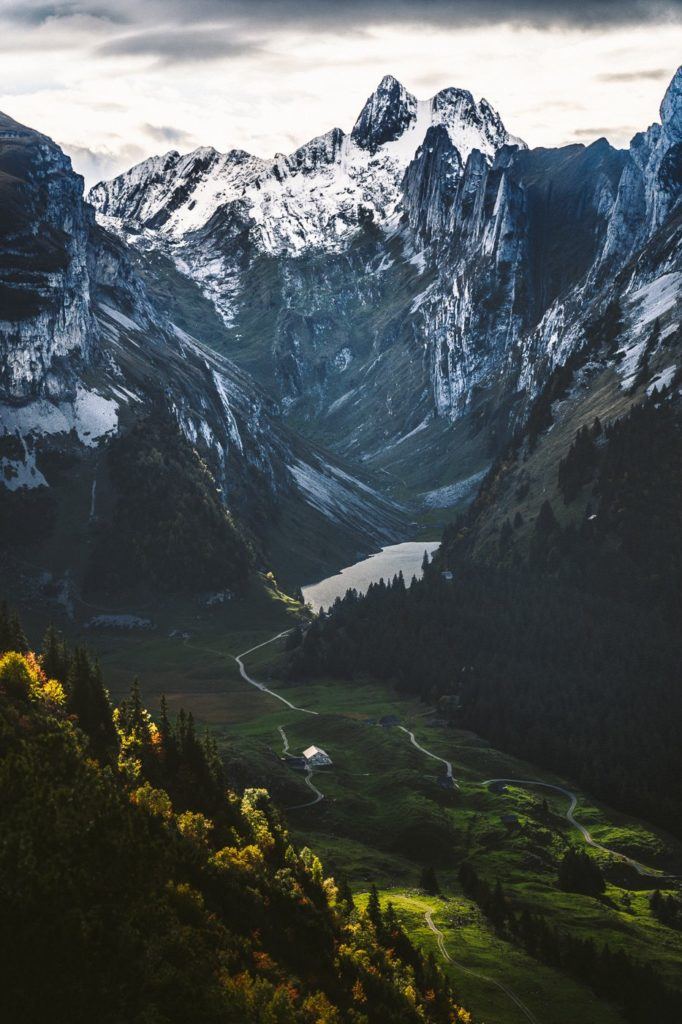
SWITZERLAND HIKING REGION: APPENZELL
I’m actually a little disappointed this region is so low in my blog posts but they can’t all be at the top. It’s actually up there as one of my favorite regions for hiking in Switzerland. The town of Appenzell is quite small and nothing too much is going on although it is quite traditional and picturesque. All of the good hiking happens in the Alpstein region, where you can do some of the best hut-to-hut hikes in Switzerland on a multi-day tour or individual day hikes.
I tried to reach every peak in this region and made a pretty good effort and even stayed overnight in the huts. For a full, in-depth guide to the hikers near Appenzell and in the Alpstein region, you can click here: 9 AWESOME HIKES IN APPENZELL
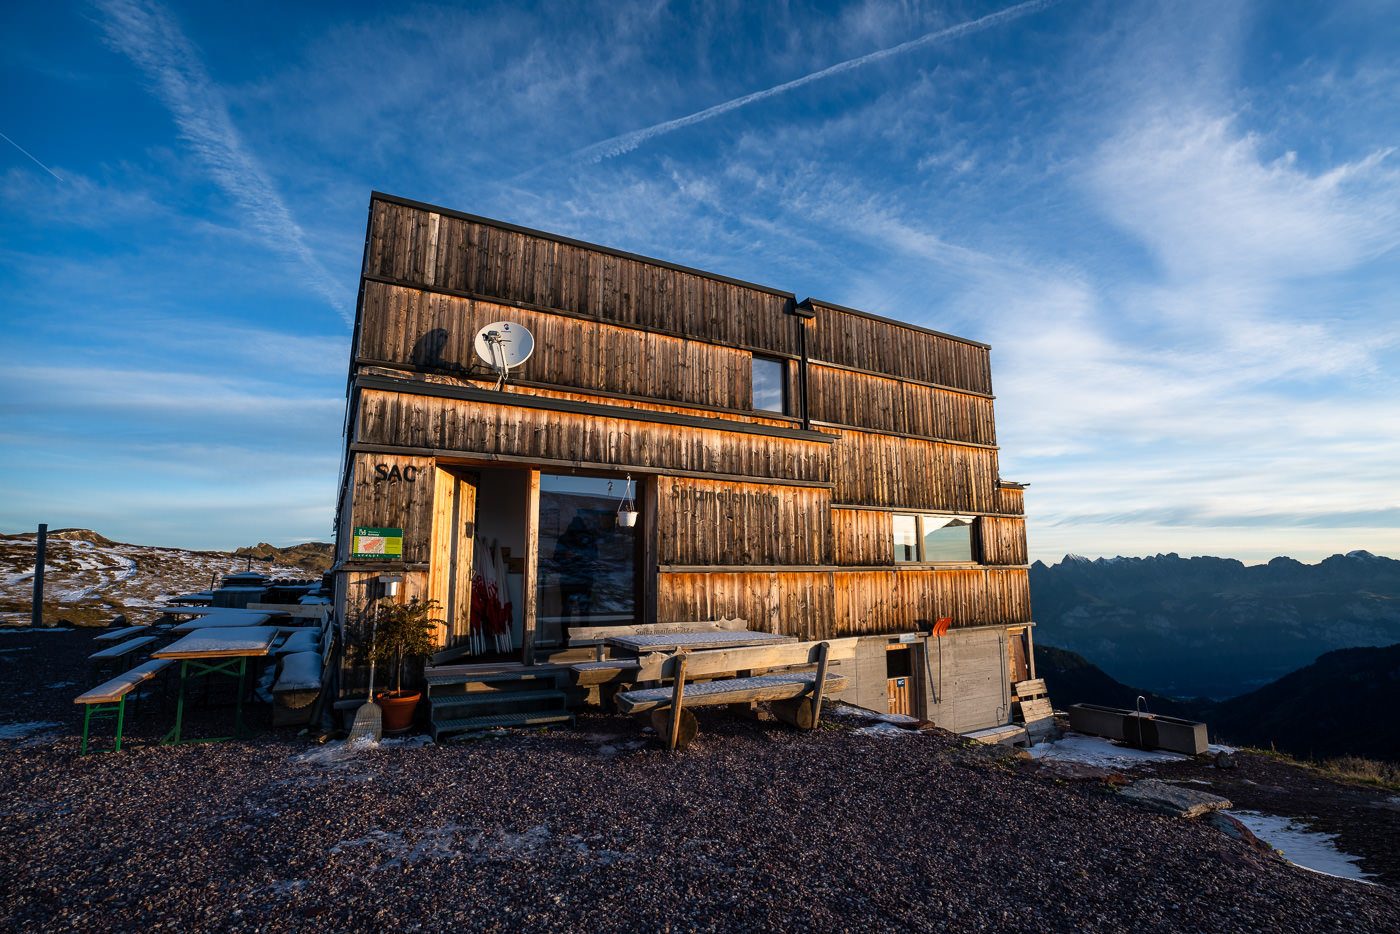
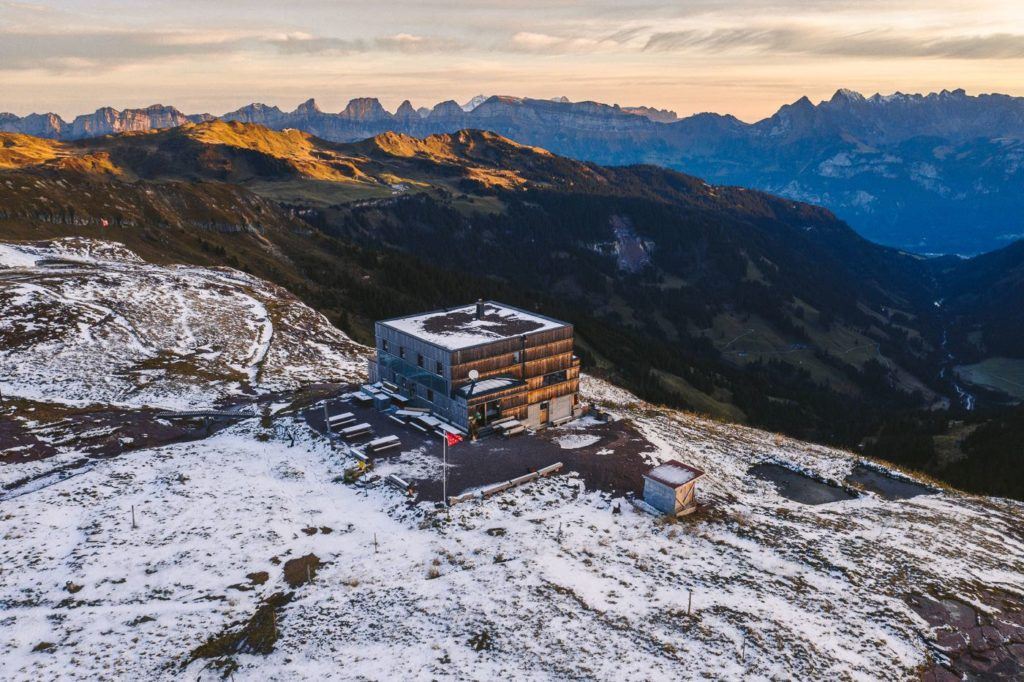
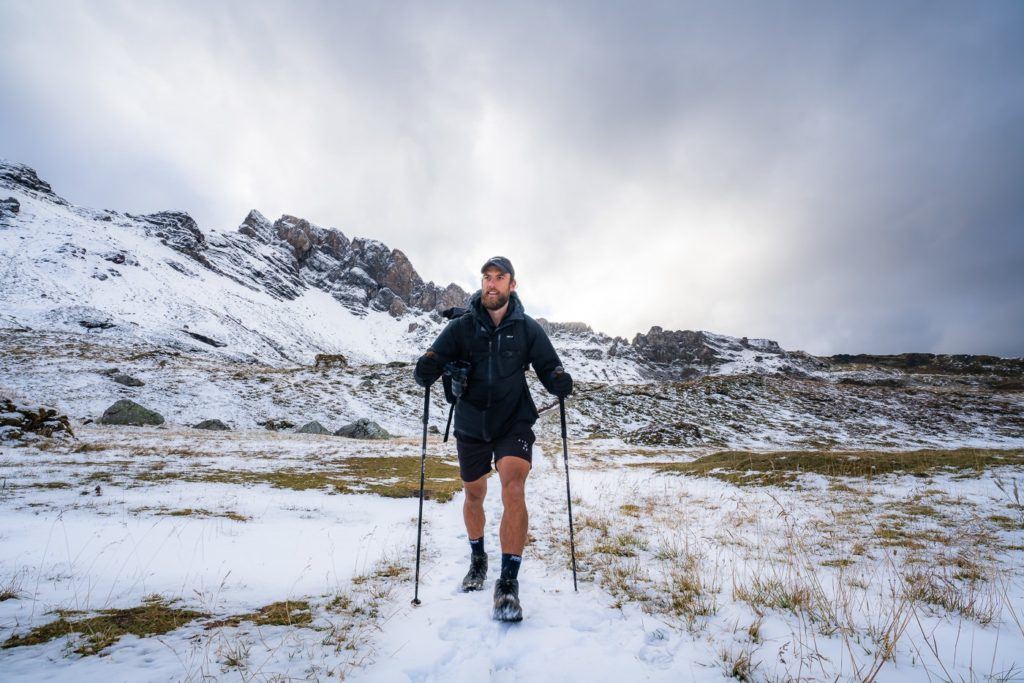
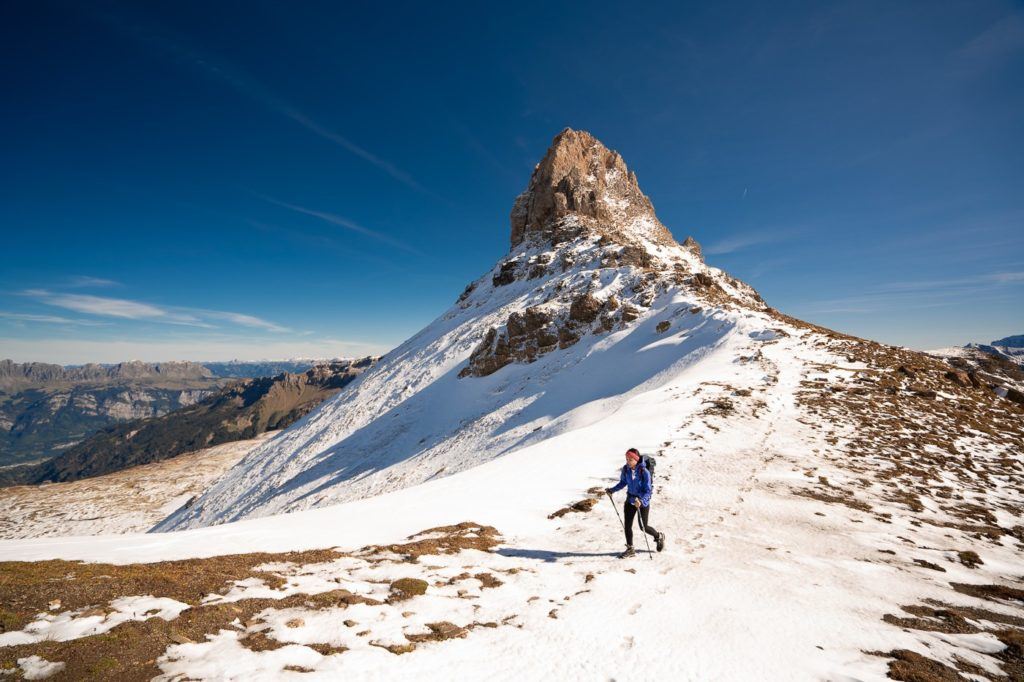
HIKING TO THE SPITZMEILEN HUT AND PEAK
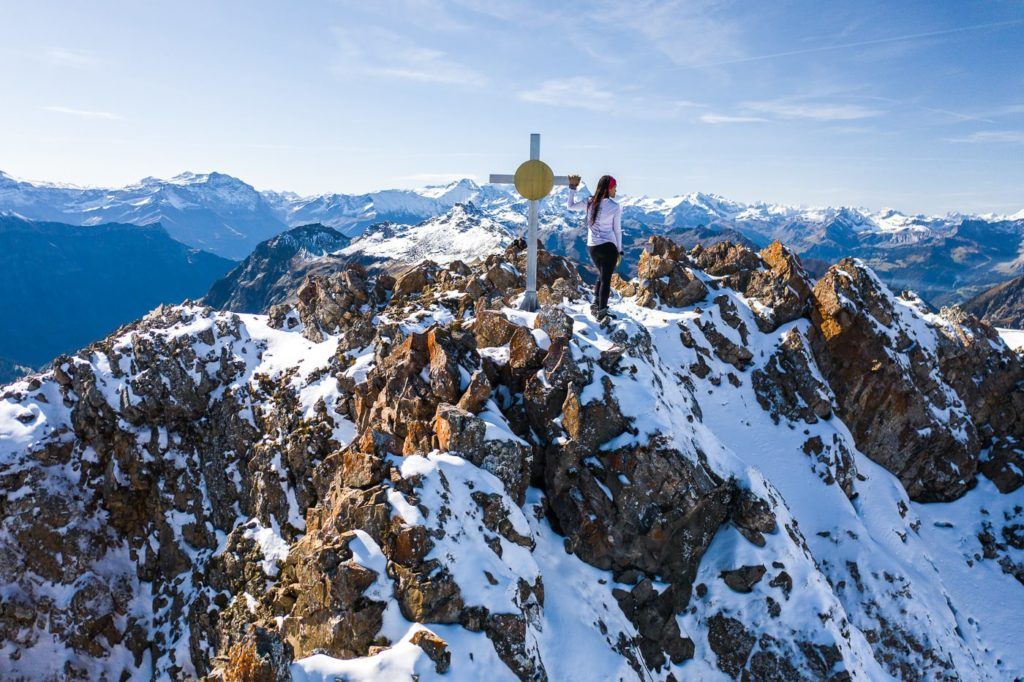
Now this one isn’t right in Appenzell and took about two hours by train to reach there. We left our luggage at our hotel in Chur for one night and returned the next day after our overnight at the Spitzmeilen Hut. Why not hike to the Spitzmeilen Hut (Spitzmeilenhutte) for a beautiful overnight stay before climbing the Spitzmeilen Peak and the Wissmeilen Peak in the morning!? We did this hike after the first snowfall of the year in October and while a little dangerous, the views were magical from Spitzmeilen Peak!
- Hike Distance: The hike from Tannenboden to Spitzmeilen Hut (after catch the cable car from Unterterzen) was 11.6 kilometers. The next day the hike from Spitzmeilen Hut to Spitzmeilen Peak to Wissmeilen Peak and then down to Engi was 14.17 kilometers. You could take a cable car up further and walk a shorter distance to Spitzmeilen Hut and Engi is not the shortest route down. Therefore there are many ways to make it shorter but this is definitely one of the most scenic routes totaling just over 25km over two days.
- Hike Duration: We did the hike over two days. Day one from Tannenboden to Spitzmeilen Hut took just under 3 hours of moving time but 4.5 hours including stops, photos. Day two from Spitzmeilen Hut to Spitzmeilen Peak to Wissmeilen Peak to Engi took 3.5 hours of moving time but 6-7 hours in total including a lot of photos, hanging out at the summit and many stops along the way.
- Hike Difficulty: The hike from Tannenboden to Spitzmeilen Hut is very low difficulty and is mostly through vast valleys once you are up the initial incline. The climb to Spitzmeilen was quite difficult in the snow with some exposure and then, of course, the climb up Spitzmeilen summit is not easy. There are chains in place to help you climb but you will need to be in pretty good shape despite the chains.
- Hike Incline: Tannenboden to Spitzmeilen Hut: 854m Spitzmeilen Hut to Spitzmeilen to Wissmeilen to Engi: 453m incline (Decline: 1657m)
Want more details and photos? View the full blog post here: HIKING TO THE SPITZMEILEN HUT AND SPITZMEILEN PEAK
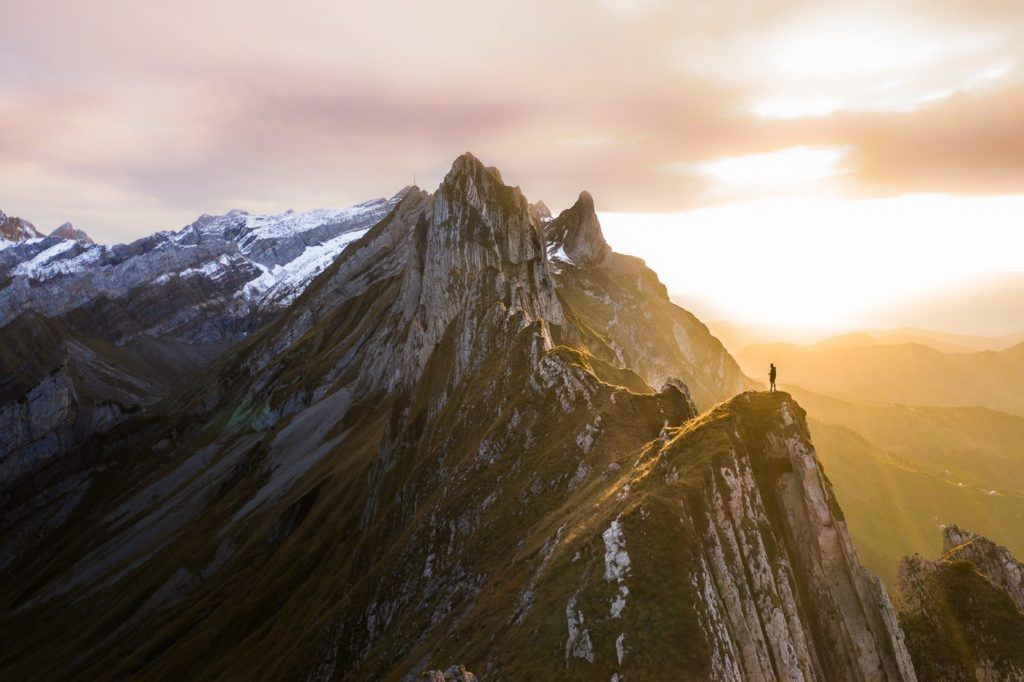
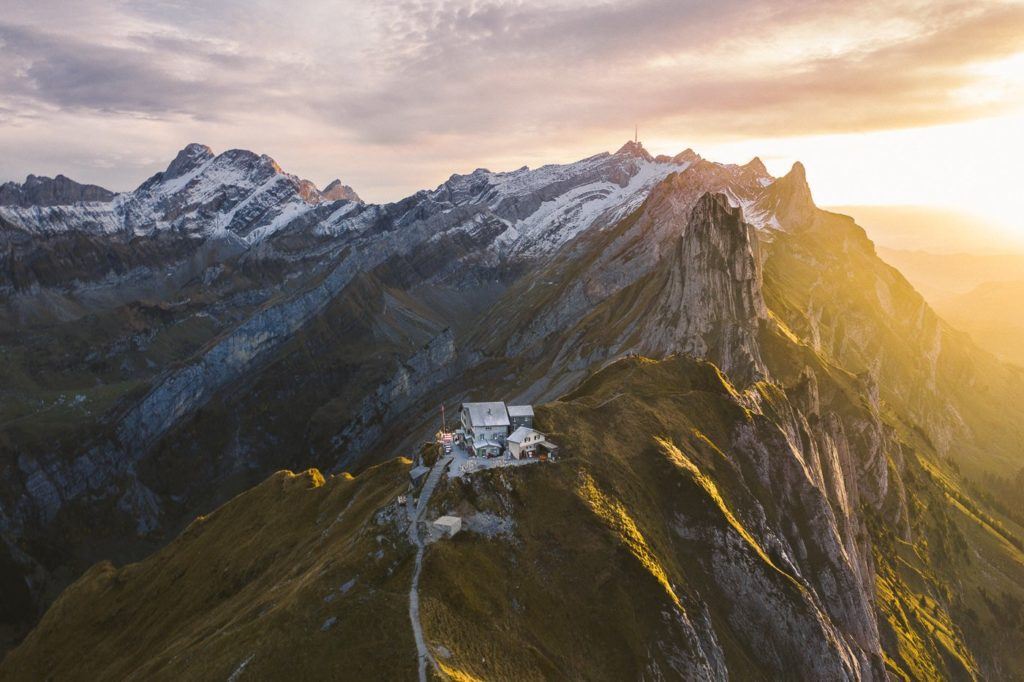
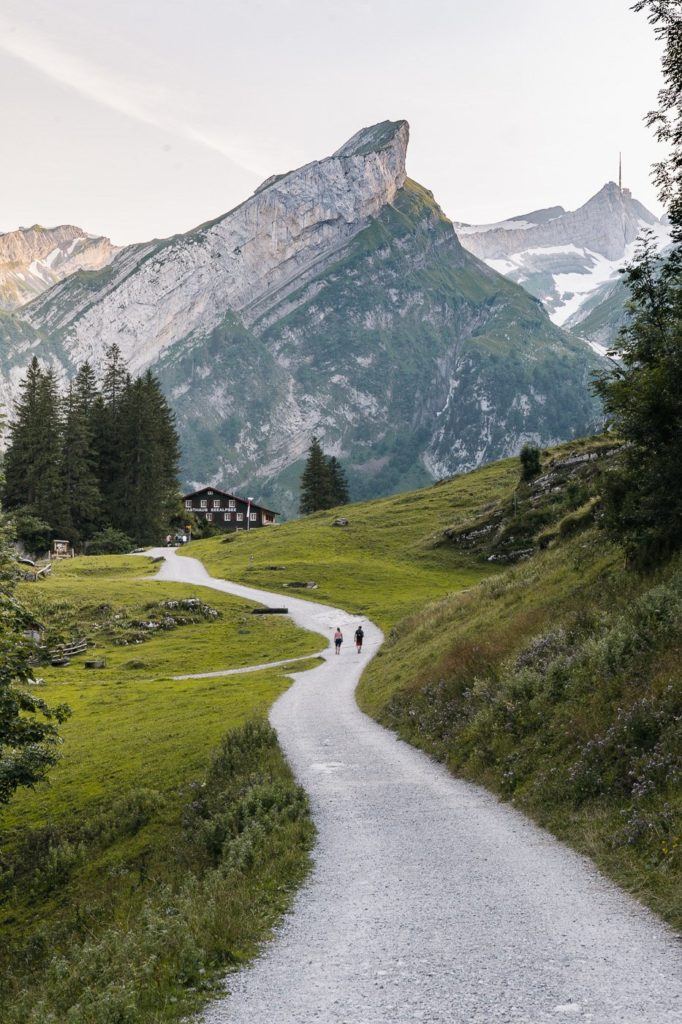
SCHÄFLER RIDGE HIKE AND MOUNTAIN HUT
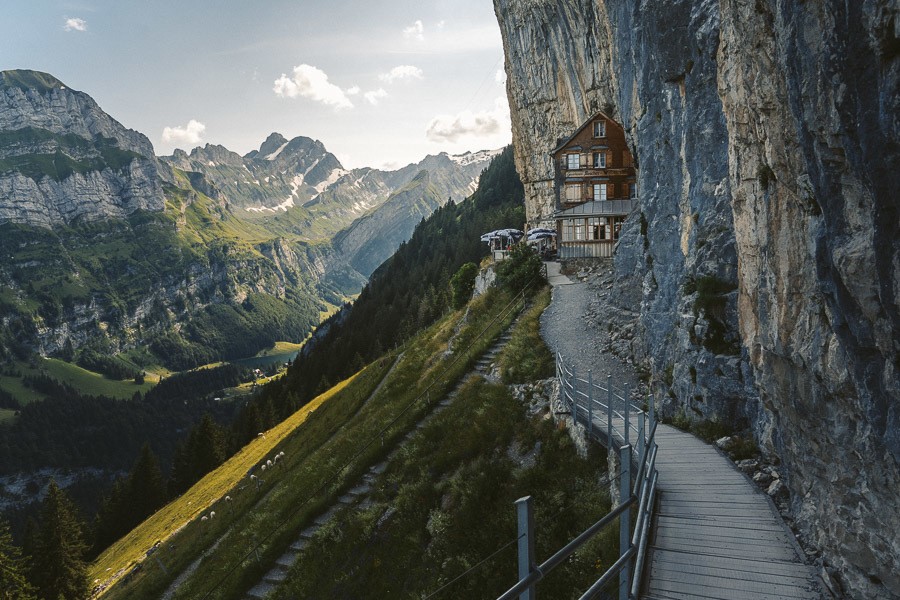
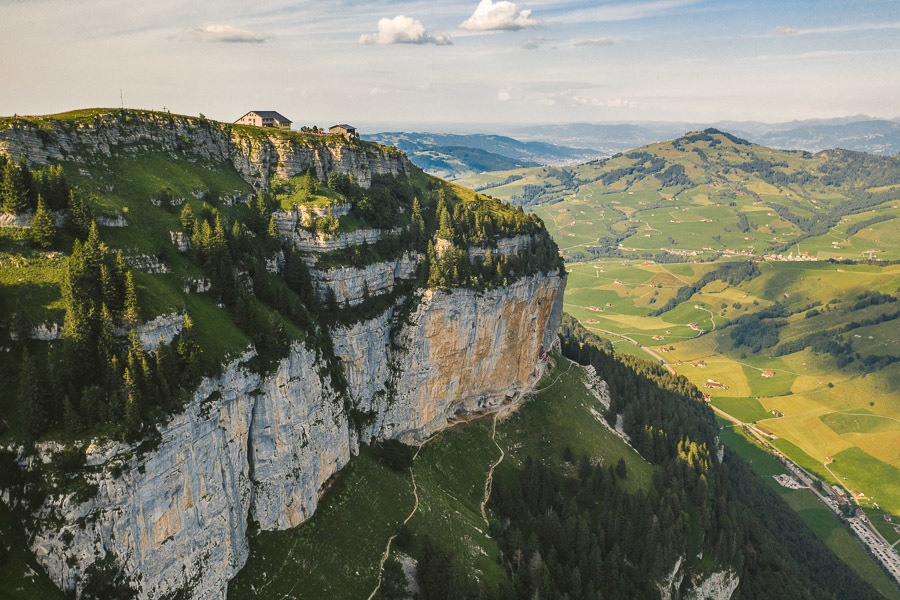
The Schäfler Hut, also known as Schäflerhutte, is located atop the stunning Schäfler Ridge, which is one of the most breathtaking sections of the Alpstein region in Appenzellerland. If you’re looking for the perfect hiking spot in Appenzell, this should be at the top of your list. The trail offers plenty of scenic views along the way, and the ultimate reward is the stunning ridge that will leave you amazed.te reward is the stunning ridge that will leave you amazed.
The hike begins in Wasserauen and leads you up to the world-renowned Aescher Cliff Restaurant, passing through Ebenalp and then up to Schäflerhutte and Schäfler Ridge. I highly recommend spending the night at the mountain hut to relish the breathtaking sunset and sunrise at this incredible spot. In my opinion, this is one of the finest hikes easily accessible in Appenzell!
- Hike Distance: The hike distance from Wasserauen to Schäfler Hut is 7.5km. However, I suggest walking and exploring along the Schäfler Ridge, which will add an extra kilometer or two onto your tally. Bargain for about 8.5 kilometers one-way.
- Hike Duration: The total hiking time from Wasserauen to Schäfler Hut will be about three hours but depends a lot on your pace up 1200m of incline. I did the trail in just over 2 hours but was on quite a mission for pace. 3-4 hours will be enough time to reach the Schäfler Hut at a modest pace.
- Hike Difficulty: The hike is a red and white marked trail and quite simple. The incline will get a lot of people but there are no dangerous drop-offs or moments of high exposure. It is a trail that is very possible for children and the family dog.
- Hike Incline: From Wasserauen to Schäfler Hut the total incline is: 1,230m
Want more details and photos? View the full blog post here: SCHÄFLER RIDGE HIKE AND MOUNTAIN HUT
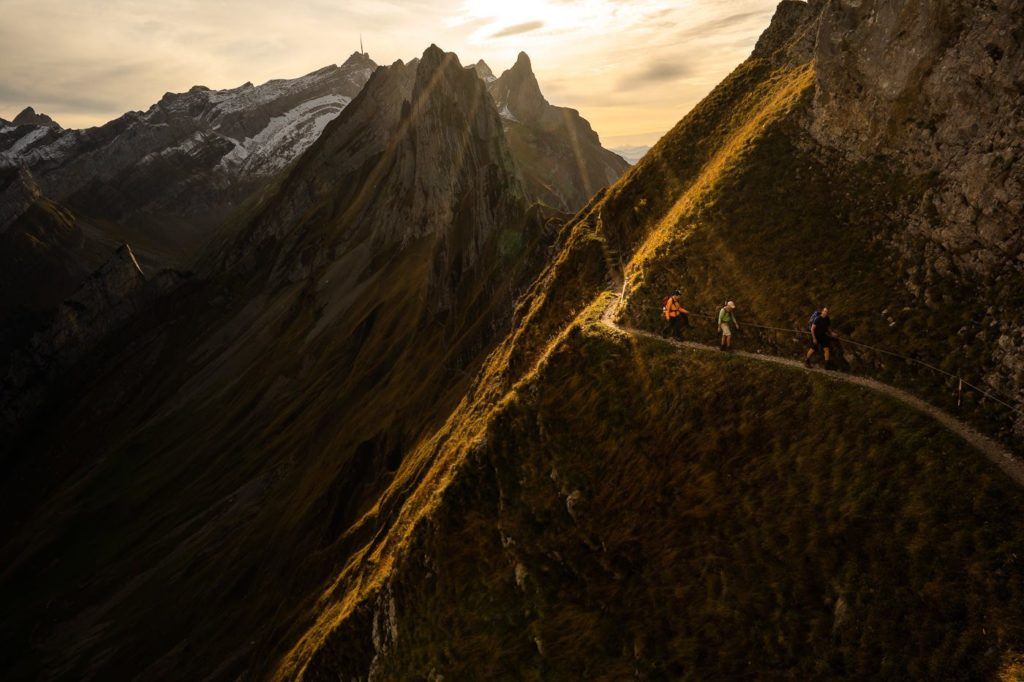
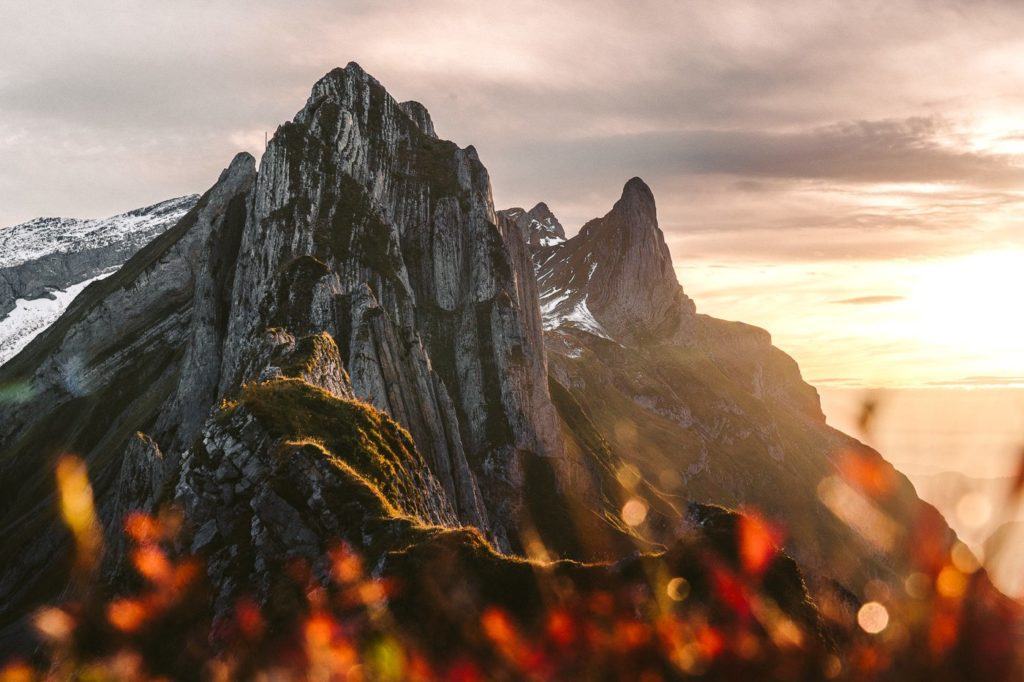
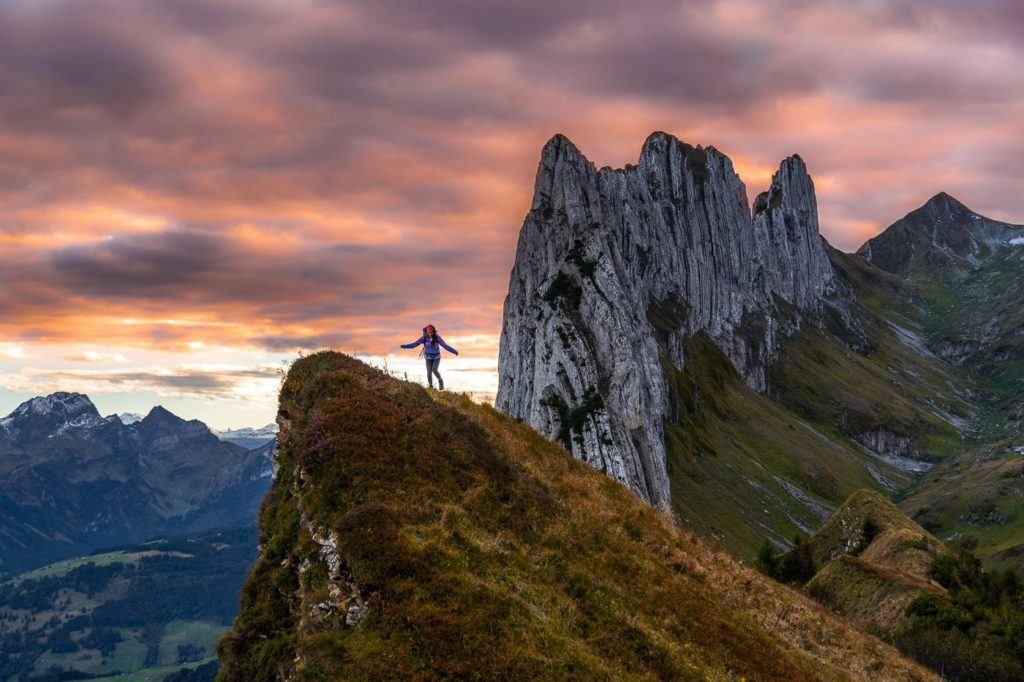
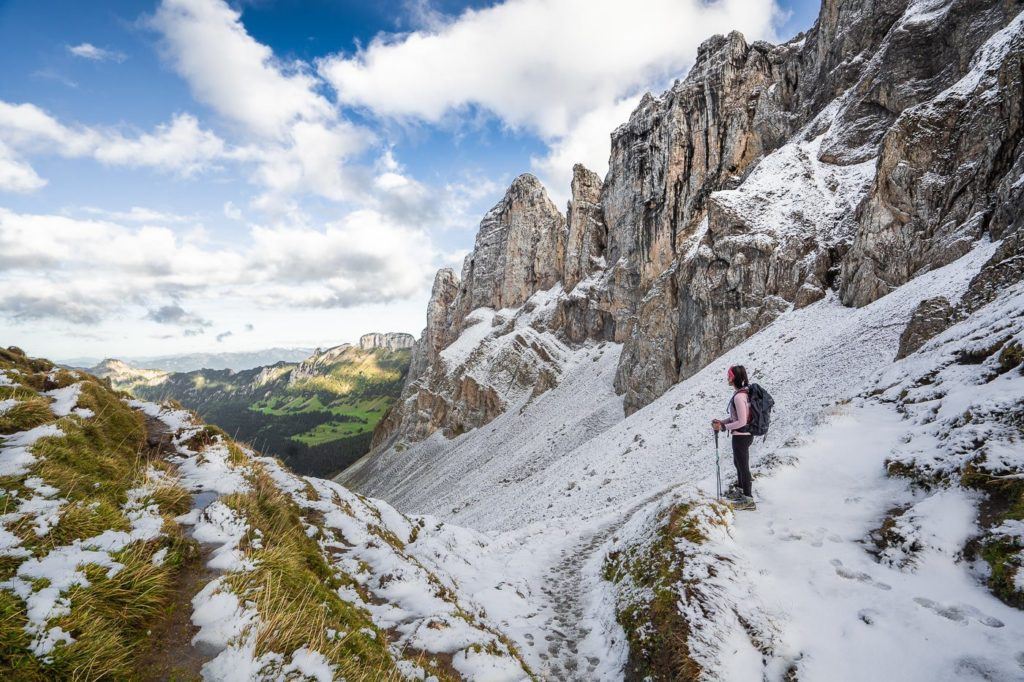
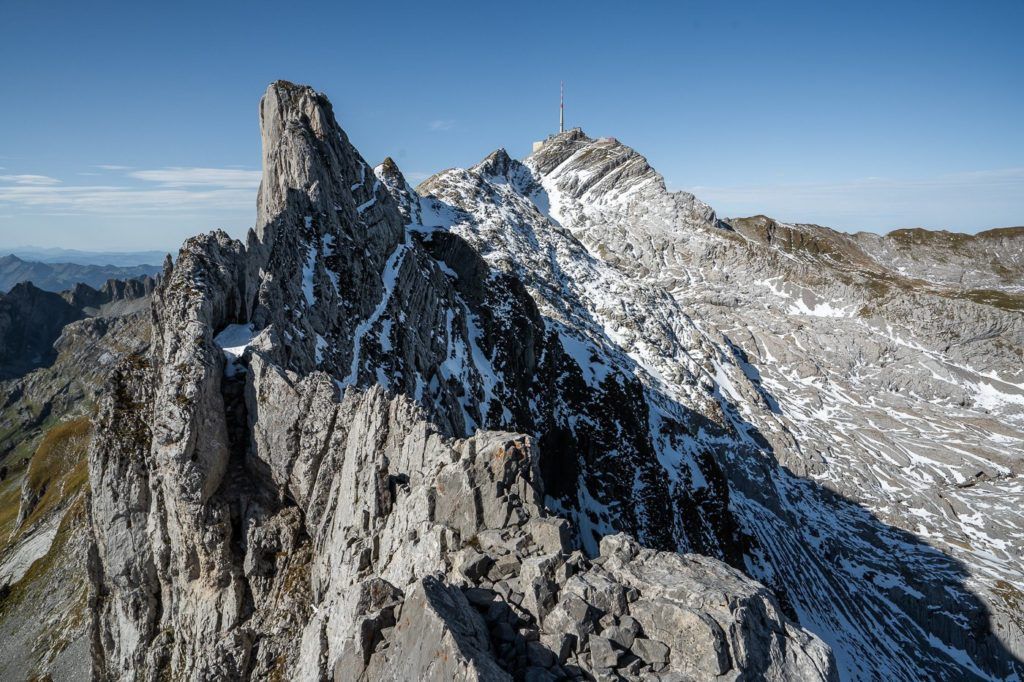
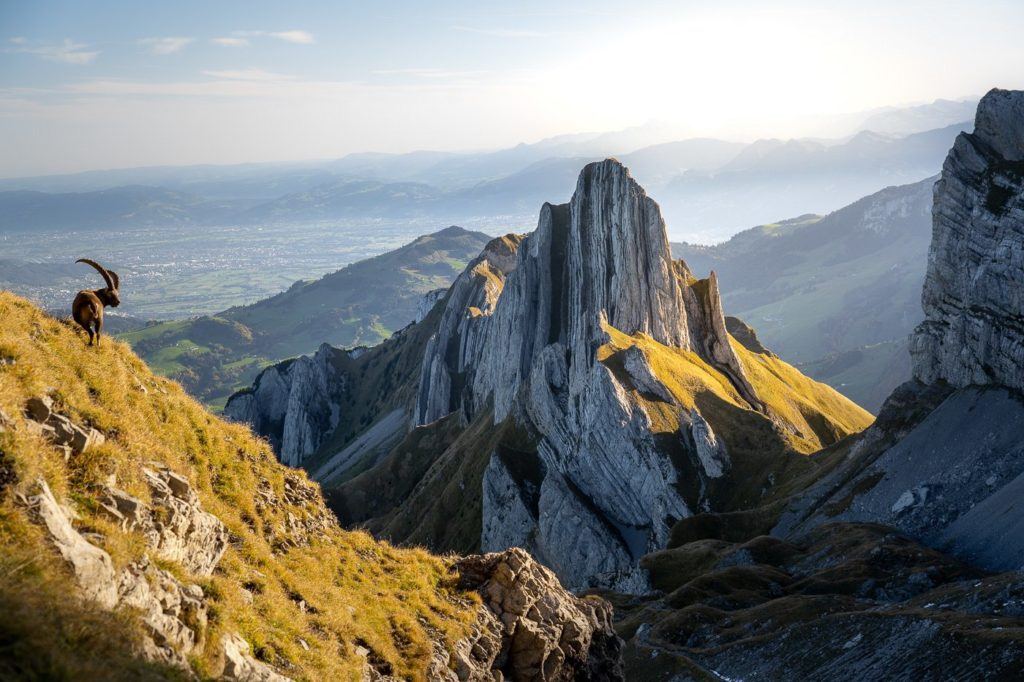
SAXER LÜCKE HIKE FROM HOHER KASTEN
I want to share my experience with the Saxer Lücke hike, which offers stunning views of Samtisersee from a picturesque ridge, culminating in the epic Saxer Lücke Ridgeline. You have the option to start from either Hoher Kasten or Staubern, but I personally started from Hoher Kasten. The entire route was a 17km hike, but it was worth it for the breathtaking scenery along the way.
I would like to share my experience of the Saxer Lücke hike, which offers stunning views of Samtisersee from a picturesque ridge, culminating in the epic Saxer Lücke Ridgeline. You have the option to start from either Hoher Kasten or Staubern, but I personally started from Hoher Kasten. The entire route was a 17km hike, but it was totally worth it for the breathtaking scenery all along the way.
- Hike Distance: The entire loop is 17km
- Hike Duration: The hike should take about 5 hours depending on how long you stop at Staubern and Saxer Lücke
- Hike Difficulty: The majority of the trail is flat or downhill. There aren’t many points at all with much exposure so I definitely would say this is possible for families, especially the fact that you can start at Staubern and cut some of the distance off. There was a trail the whole way, mostly dirt, gravel, and sometimes a little rocky.
- Hike Incline: 450 meters
Want more details and photos? View the full blog post here: SAXER LÜCKE HIKE FROM HOHER KASTEN
ASCHER, EBENALP & SEEALPSEE HIKE FROM WASSERAUEN
Wasserauen serves as an exceptional hiking hub for some of the most magnificent peaks in Switzerland. The mountain map of the region is brimming with numerous trail options that seemingly interconnect, enabling you to plan your own route based on the desired time and difficulty level. Our group opted to commence our hike from Wasserauen, climb up through the forest to Ascher Restaurant and Ebenalp Peak before descending through the forest below the restaurant to reach Seaalpsee, the stunning Alpine lake nestled in the valley beneath all of the imposing peaks above.
The hike up to Ascher Cliff Restaurant can also be done by a cable car but that wouldn’t be much of a hike. You can also link this hike with other points of interest in the Alpstein Mountain Range such as Schäfler Ridge
- Hike Duration: 4 hours
- Hike Difficulty: Some steep climbs. No technical climbing or rock climbing. The path the whole way. Moderate overall. Kids were on the trail.
- Hike Incline: Wasserauen 876m to Ebenalp 1644m.
Want more details and photos? View the full blog post here: ASCHER, EBENALP & SEEALPSEE HIKE FROM WASSERAUEN
THREE LAKES HIKE IN THE ALPSTEIN REGION, APPENZELL
The Three Lakes Hike in Alpstein offers breathtaking views but is a challenging 17.3km walk with an incline of 1100+ meters. Although the trail is safe, the steep incline can make it difficult, and it is not a leisurely walk around the lake. The hike takes you to Seealpsee, Fallensee, and Samtisersee, each of which is incredibly beautiful and will leave you awestruck.
- Hike Distance: The entire route is 17.34 kilometers
- Hike Duration: The hike should take around 6-8 hours in total depending on how long you spend at each lake.
- Hike Difficulty: The incline is what makes this hike a little challenging although it is spread out in different sections so it isn’t one big block of climbing. There are no dangerous spots on this trail with high exposure although many spots do have a big drop on one side. Usual care needs to be taken. Children can do this hike but with many drop-offs, close supervision would be advised.
- Hike Incline: 1150 meters.
Want more details and photos? View the full blog post here: THREE LAKES HIKE IN THE ALPSTEIN REGION

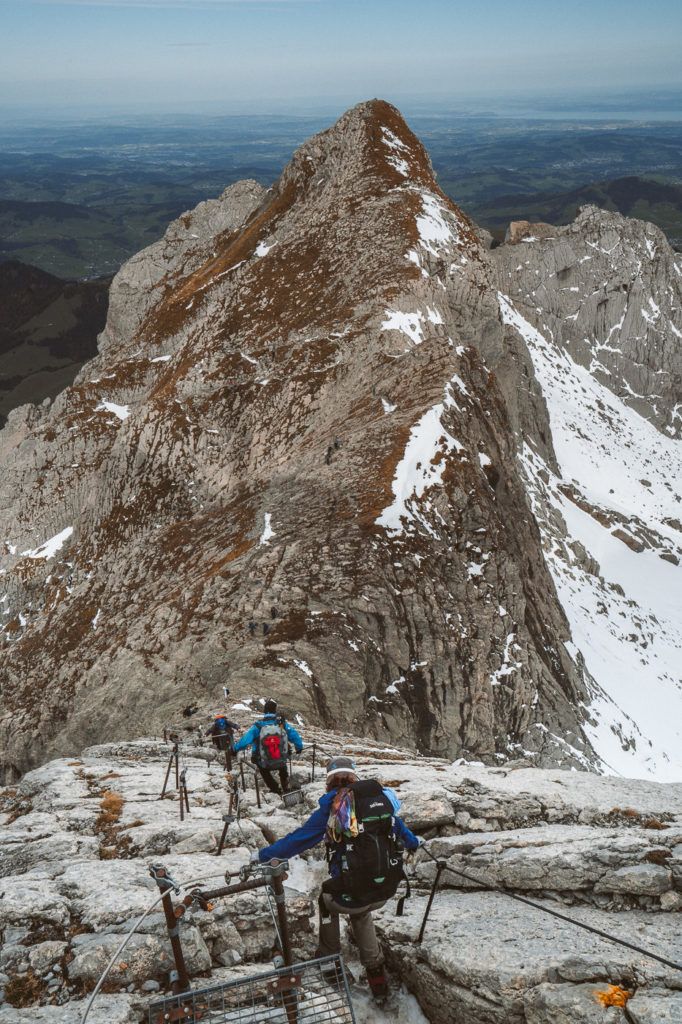
LISENGRAT: EPIC RIDGE HIKE BETWEEN SÄNTIS AND ALTMANN
During my travels in Switzerland, I came across the Lisengrat ridge hike, which was one of the most remarkable sections of the trail that I experienced. The narrow ridge, located between Säntis Peak and Altmann, is known as the most challenging part of the Alpstein Loop. I attempted the Lisengrat ridge as part of the entire Alpstein Loop, which remains one of my favorite hiking trails in Switzerland.
- Hike Distance: This depends on where you enter and exit along the Alpstein Mountain Range but the journey from Santis to Altmann is only a few kilometers.
- Hike Duration: The hike should take around 1-2 hours in total.
- Hike Difficulty: This was a very technical section of the Alpstein Mountain Range and I would say that you need to be experienced and exercise a high degree of caution. It is also recommended to only do this route on a dry day.
Want more details and photos? View the full blog post here: LISENGRAT: EPIC RIDGE HIKE BETWEEN SÄNTIS AND ALTMANN
DO YOU NEED HIKING INSURANCE
One thing I never really skip anymore on trips that involve hiking, road-tripping, or moving around a lot is travel insurance. I’ve done enough adventure travel over the years to know that things don’t always go to plan, especially when you’re dealing with mountain roads, trail injuries, ferry changes, scooter mishaps, or getting sick while abroad. For that kind of trip, you can check out SafetyWing Nomad Insurance, which is one of the more practical options I’ve come across because it’s designed for travelers, can be bought online in just a few minutes, and is flexible if your trip dates change or you’re traveling long-term. It’s the kind of thing you hope you never need, but when you’re heading off to hike or explore somewhere properly, it’s worth having sorted.

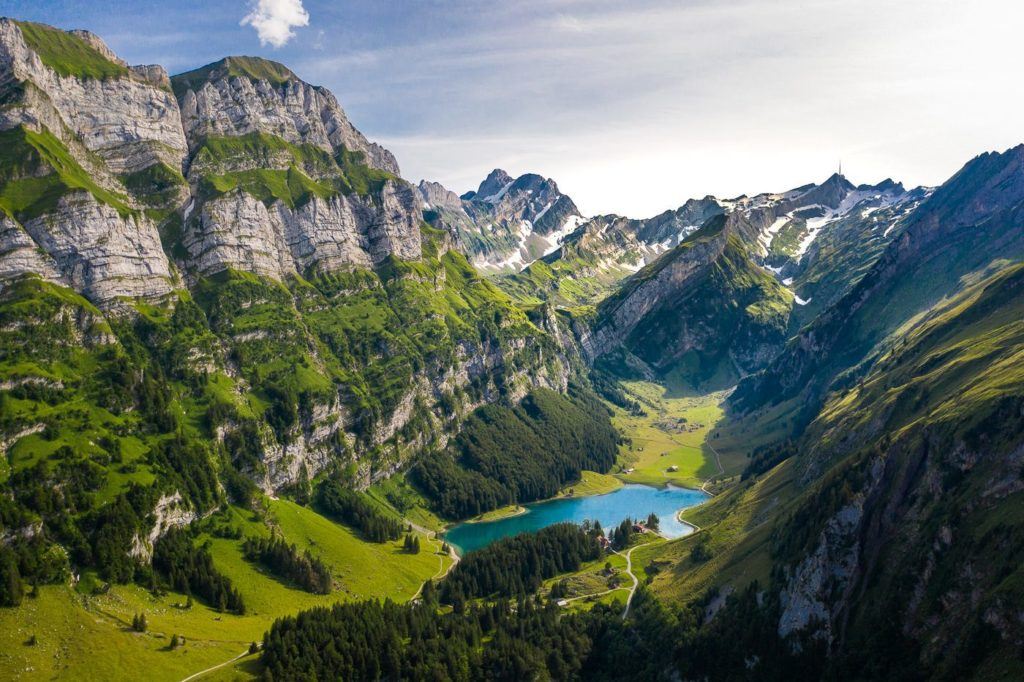
SEEALPSEE HIKE IN APPENZELL
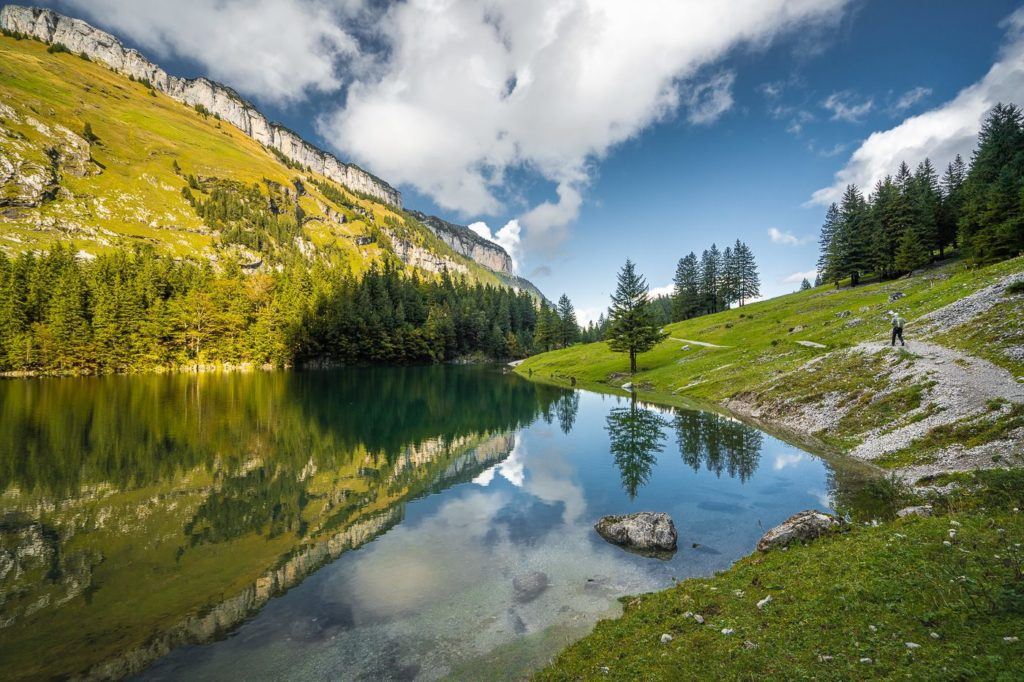
Seealpsee is a stunning alpine lake situated in the Alpstein region of Appenzell, Switzerland. The lake can be easily reached in less than an hour from Wasserauen Train Station or by taking more challenging hiking routes through Alpstein. Its accessibility and moderate incline make it one of the most popular attractions in the Appenzell region.
- My first visit was in the summer when I hiked up to Ascher, Ebenalp and then down through the forest to Seealpsee. You can read that blog post here.
- The second visit was part of the ‘Alpstein 3 Lakes Hike’, which includes Samtisersee and Falensee. You can read that blog post here.
- The final visit was the final stop on my Alpstein Loop hike, which was a great way to finish my favorite overnight adventure in Switzerland.
Want more details and photos? View the full blog post here: SEEALPSEE HIKE IN APPENZELL – EVERYTHING YOU NEED TO KNOW


MOUNT SÄNTIS HIKE IN ALPSTEIN, SWITZERLAND
The Mount Säntis hike is one in the Alpstein region and is one of the most spectacular trails in Switzerland. It’s possible to trek to the top of Mount Säntis as part of the Alpstein loop or as a straight ascent. Once you reach the top you will find incredible viewing platforms and a large restaurant.
There is also a cable car servicing Mount Säntis so you can choose to hike just one way and catch the cable car either up or down. No matter how you reach the Säntis Peak, the view of the Alpstein region from the summit is magical.
Want more details and photos? View the full blog post here: MOUNT SÄNTIS HIKE IN ALPSTEIN, SWITZERLAND
FALENSEE (FALEN LAKE) HIKE
The Falensee, also known as Falen Lake, is a breathtaking alpine lake located in the Alpstein region of Appenzell. It can be an adventure on its own or a part of several nearby hikes. The Bollenwees Mountain Hut, situated right next to the Falensee, is an excellent place to stay overnight and a perfect base camp for exploring the surrounding lakes and peaks during sunset and sunrise.
I visited the Falensee on two occasions. The first visit was part of the ‘Alpstein Three Lakes Hike‘ and the second occasion was at the end of the Hoher Kasten to Saxer Lucke Hike. However, you can also hike in from Brulisau just to stay overnight at Bollenwees and visit the Falensee. In this blog post, I will detail all of the options to visit the Falensee and what other hikes you could do when using Falensee and Bollenwees as a base camp.
Want more details and photos? View the full blog post here: FALENSEE (FALEN LAKE) HIKE – EVERYTHING YOU NEED TO KNOW
SWITZERLAND HIKING REGION: ENGELBERG
Engelberg is one of the most underrated regions for hiking in Switzerland. It’s home to the famous Mount Titlis but most visitors just take the cable car up Mount Titlis and then move on with their short Switzerland vacation. However, there are a number of great hikes and mountain huts to explore in this region, which I actually visited twice. For an in-depth guide to hiking in Engelberg, you can check this out: 5 AWESOME HIKES IN ENGELBERG
THE FOUR LAKES HIKE IN ENGELBERG
The Four Lakes Hike in Engelberg, Switzerland is a breathtaking one-way hiking trail that takes you on a high-altitude mountain path to visit four stunning lakes. The hike can be done in either direction, with Truebsee Lake and Melchsee Lake serving as the start and endpoint. Additionally, there’s an optional, yet epic, sunset view that’s worth considering.
This beautiful hiking trail near Engelberg leads you through a valley of lakes, farmhouses, and thriving cow populations before finishing at one of the most spectacular viewpoints in Engelberg. We finished at the viewpoint with a great sunset while overlooking Titlis Mountain.
- Hike Distance: 16.95km total distance from Melchsee to Truebsee (including a slight detour up towards Schafberg).
- Hike Duration: 6 hours of elapsed time for us from Melchsee to Truebsee and 4 hours and 15 minutes of total moving time.
- Hike Difficulty: The trail from Melchsee to Truebsee is relatively easy. There is nothing technical along the way and you almost always have a path, albeit a dirt trail. There is minimal rock scrambling but it does get steep if you add in the viewpoint close to Schafberggraus. Most of the way is a dirt path although there are some sections that are a mixture of rock and path. Most families will easily navigate their way to Truebsee from Melchsee despite the length of the journey.
- Hike Incline: Total elevation was 1242m from Melchsee to Truebsee as we recorded. The hike starts in Melchsee at 1,891 meters of altitude and finishes at the Truebsee, which has an altitude of 1,764 meters.
Want more details and photos? View the full blog post here: THE FOUR LAKES HIKE IN ENGELBERG

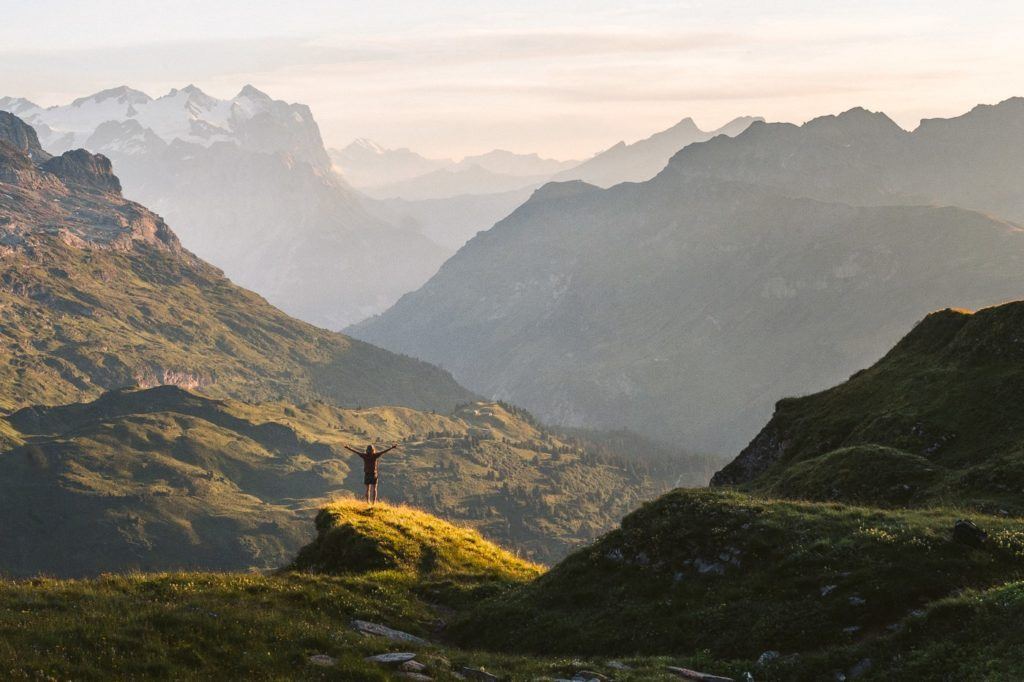
‘RUGGHUBELHUTTE’ MOUNTAIN HUT HIKE IN ENGELBERG
The hike to and from Rugghubelhutte is an adventure all about enjoying a good meal in the mountains, and witnessing sunrise and sunset from the patio of the mountain hut. I hiked up from Engelberg and was gifted an incredible, fiery red sunset, and then after a great dinner and night of rest, the sunset produced another glowing display in the sky. Of all the hikes in Switzerland that I ventured out on, I think this was my best sunset.
As you trek towards the mountains, you’ll eventually reach the Rugghubelhutte, a mountain hut where you can rest for the night, enjoy dinner and breakfast. The next day, you can either descend the mountain or continue on to explore the ridge and other peaks in the area. The total distance of the hike will depend on the route you take.
- Hike Distance: Engelberg to Rugghubelhutte: 10km
- Hike Duration: Again it depends on where you start from. My journey from Engelberg to Rugghubelhutte took 3 hours at a medium pace. The journey -through knee-deep snow- back to Bannalpsee took 3.5 hours but would be much, much quicker on a dry day.
- Hike Difficulty: In the summer the hike difficulty is quite low. On the way up there are no exposed sections. The incline is quite a bit from Engelberg with 1200m of ascent to contend with but other than that a lot of the trail is actually a road so I would put this one at a low difficulty level.
- Hike Incline: The incline for the hike from Engelberg to Rugghubelhutte was 1,320m and the elevation up to Rotgratli and down to Bannalpsee was 450m of climbing.
Want more details and photos? View the full blog post here: ‘RUGGHUBELHUTTE’ MOUNTAIN HUT HIKE IN ENGELBERG

WALENPFAD HIKE IN ENGELBERG
The Walenpfad hike in Engelberg offers a stunning start as you circle Lake Harzli, followed by a steep ascent to get a panoramic view of the lake. The trail then takes you downhill towards Engelberg and winds through a beautiful forested area before reaching the finish line at the Brunnihutte. It’s a great hike for a slow-paced adventure to take in multiple vistas in the Engelberg region and one of the most underrated hikes in Switzerland.
- Hike Distance: The total distance of the hike was 10.6km starting at the Bannalpsee Lake and finishing at the Brunnihutte. However, we hiked down from the Brunnihutte as we stayed for sunset so the cable cars had definitely finished by then. That meant our total hike from Bannalpsee to Brunnihutte to Engelberg Town was 16.3km.
- Hike Duration: Our total elapsed time from Bannalpsee to Engelberg Town was 5 hours and 41 minutes but the total moving time was only 3 hours and 41 minutes. We take lots of photos and stop to take in the scenery often.
- Hike Difficulty: The Walenpfad hike is one of the easier hikes we’ve done out here in Switzerland. There were some moments of incline but the trail itself was always quite safe and there was no scrambling or rock bouldering necessary. This is a good hike for anyone who can handle the distance. I could imagine families, young children and dogs managing this hike fine especially with the cable car down from Brunnihutte.
- Hike Incline: Total elevation from Bannalpsee to Brunnihute was 834m. We also grabbed about a kilometer of decline as well, which is often just as hard!
Want more details and photos? View the full blog post here: WALENPFAD HIKE IN ENGELBERG
EPIC VIA FERRATA AT FÜRENALP
Hiking in Switzerland is an incredible experience, offering some of the most breathtaking mountain views and summits in the world. If you’re looking for a more adventurous experience, you can take it to the next level by trying out Via Ferrata. This involves climbing directly up the mountain face on a ladder while being clipped into a wire, which ensures it’s completely safe. However, it’s still an adrenaline rush as you scale hundreds of meters up the rock face..
The Via Ferrata in Fürenalp, Engelberg is known as one of the best routes in the country. It’s challenging but such an adventure!
- Hike Distance: The total hike distance was 6.54 kilometers, which includes the 1km walk from the shop/ticket office to the start of the Via Ferrata. Not sure how accurate that was considering the ups and downs but that is how my Garmin watch recorded the day.
- Hike Duration: Our total time from the shop to the wall to the summit was 4 hours and 12 minutes. Our total moving time was 2 hours and 17 minutes. We let a lot of other climbers pass us and went very slowly as always to take photos and just sit around and enjoy the views. It’s not the kind of activity to rush.
- Hike Difficulty: This route is rated K4 difficulty. I haven’t done too many Via Ferrata’s but I was told this is one of the more challenging ones out there. It was actually my first time ever and was a pretty simple concept of clicking in and out so don’t worry if you have little to no experience. We climbed 773 meters of an incline in total and a lot of it was ladders and metal pegs out of the wall.
- Hike Incline: The total incline for the day was 773m from the shop to Fürenalp. The hike starts at the ticket shop/Fürenalp cable car office and finishes at an altitude of 1811m.
Want more details and photos? View the full blog post here: EPIC VIA FERRATA AT FÜRENALP IN ENGELBERG
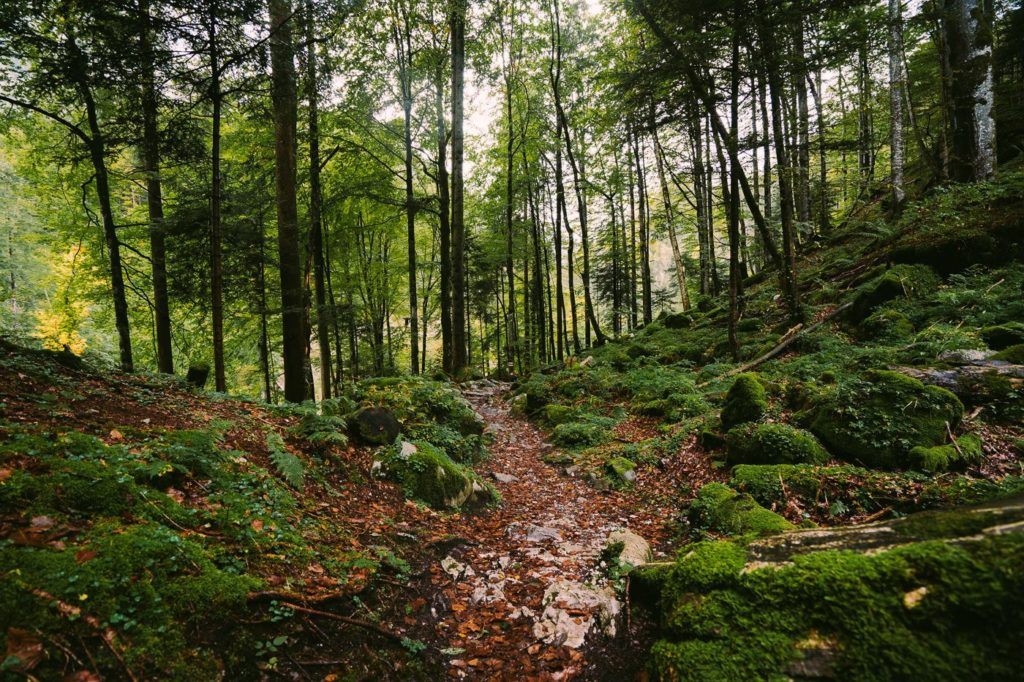
THE AA GORGE TRAIL – BEAUTIFUL FOREST WALK IN ENGELBERG
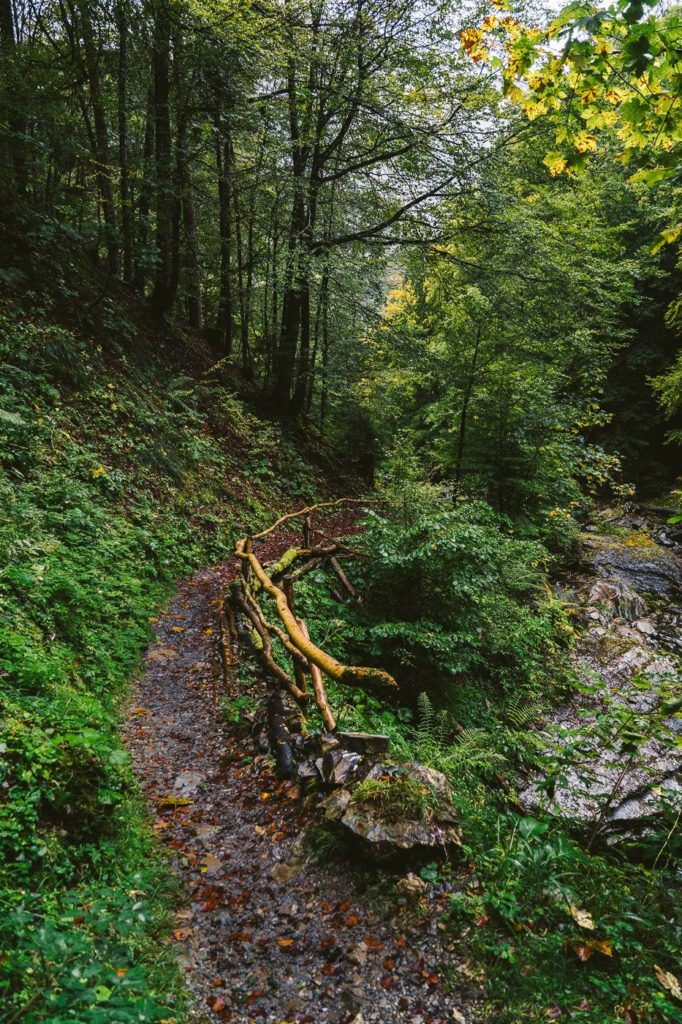
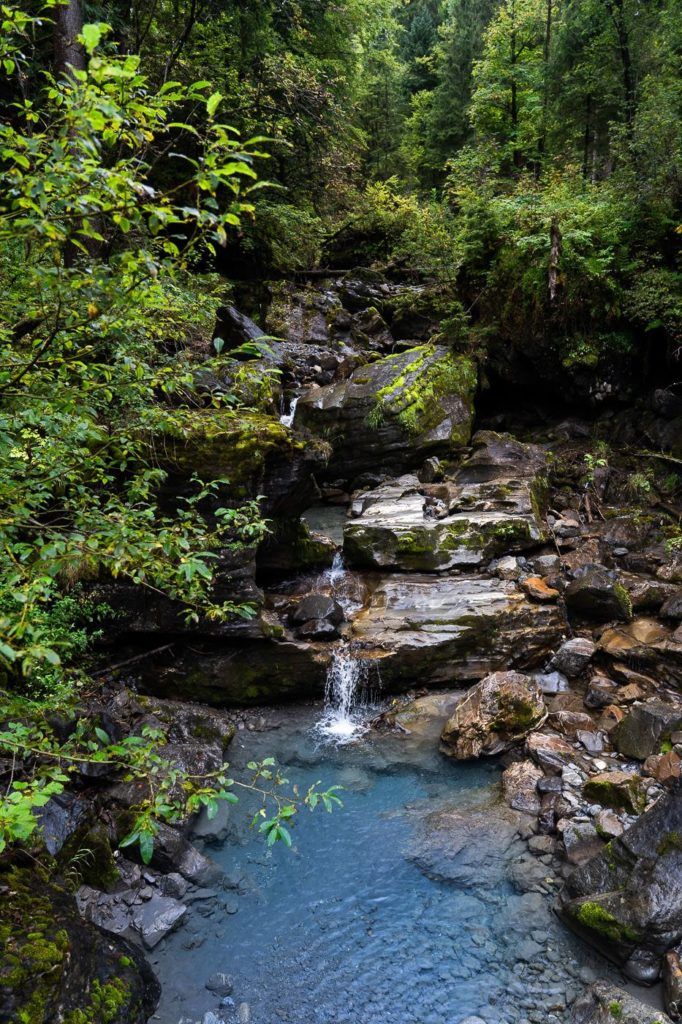
The Aa Gorge Trail, also known as Aaschlucht, is a stunning hiking path that takes you through a dense forest. The trail starts at the center of Engelberg, winds its way around the lake, and then descends into the forest. As you follow the trail, you’ll cross the river over 10 bridges, which makes for an exciting and adventurous journey. The path meanders along the river, making several back-and-forth crossings until it eventually emerges from the forest.
I loved the mossy tree trunks, the smell of the forest, and the beautiful waterfalls and rockpools on this trail. Watch out for the tree tunnel as well!
- Hike Distance: The total distance of the Aa Gorge Trail is 8.9 kilometers from Engelberg Train Station to Grafenort Train Station.
- Hike Duration: The hike should take about two hours.
- Hike Difficulty: Difficulty is very low. Suitable for children, families, and dogs. It can be a bit slippery but other than that there are no dangers. Some parts of the trail are exposed down to the river but the path is wide and relatively flat.
- Hike Incline: The trail has 435 meters of incline if you begin at Grafenort and finish at Engelberg. In reverse, you only have 9 meters of incline if you start at Engelberg and it is mostly a downhill walk.
Want more details and photos? View the full blog post here: THE AA GORGE TRAIL – BEAUTIFUL FOREST WALK IN ENGELBERG
SWITZERLAND HIKING REGION: OTHER
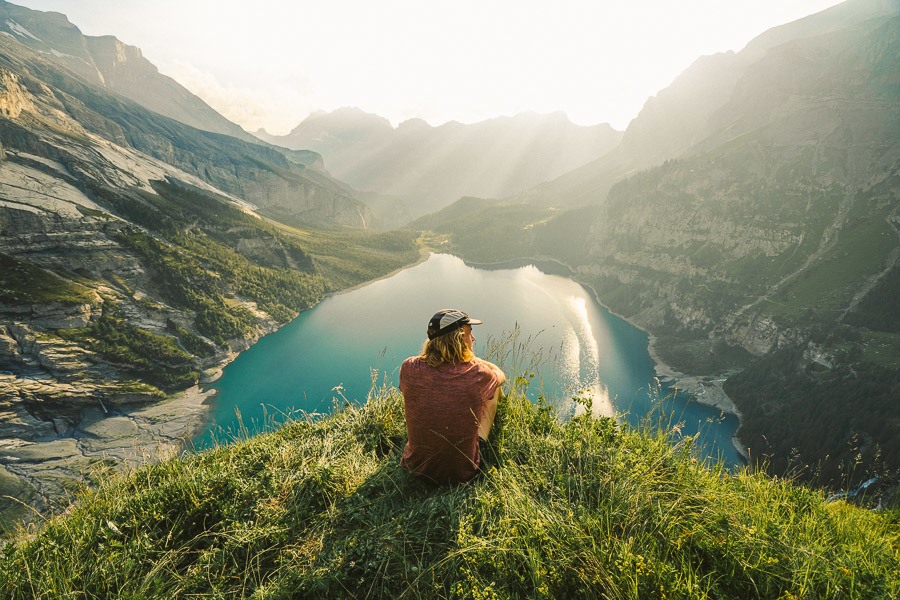
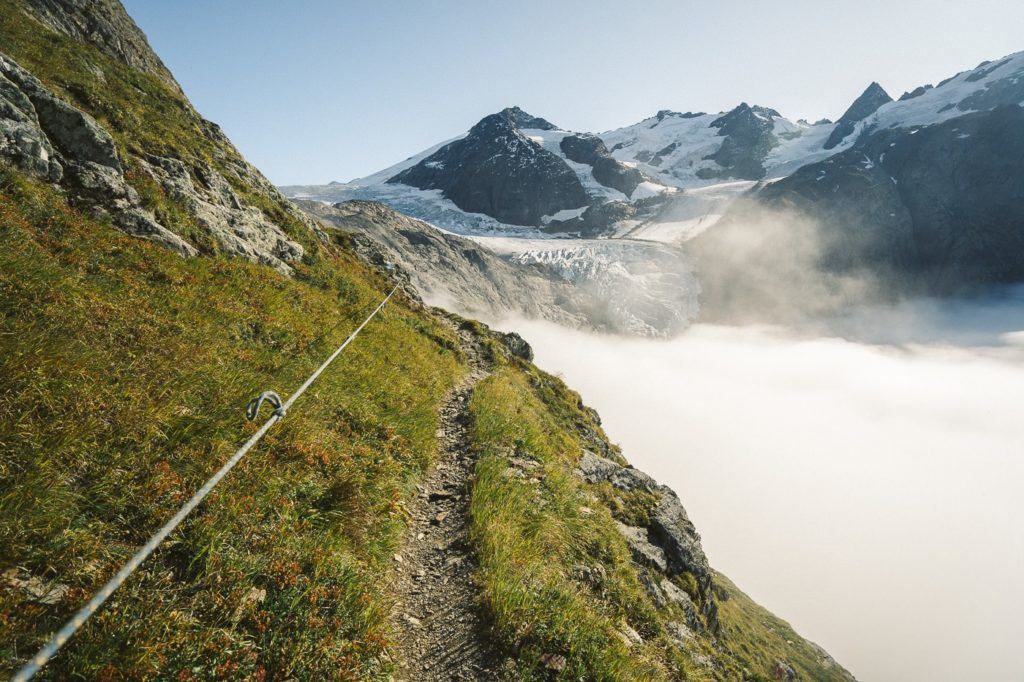
Throughout my three months in Switzerland, I moved around quite a bit and sometimes only did one hike in a specific region rather than base there for a couple of weeks. These hikes in the ‘Other’ section are actually some of the best hikes in Switzerland but they just don’t quite fit into one of the regions above although you can reach many from the regions listed earlier. For example, I visited Trift Hut from Interlaken but it was a 2-hour transit so I prefer not to suggest that in the Interlaken section of this hiking guide. So don’t be put off by the ‘Other’ tag, some of these are up there with the best hikes in Switzerland like the Trift Hut and Oeschinensee Hike.
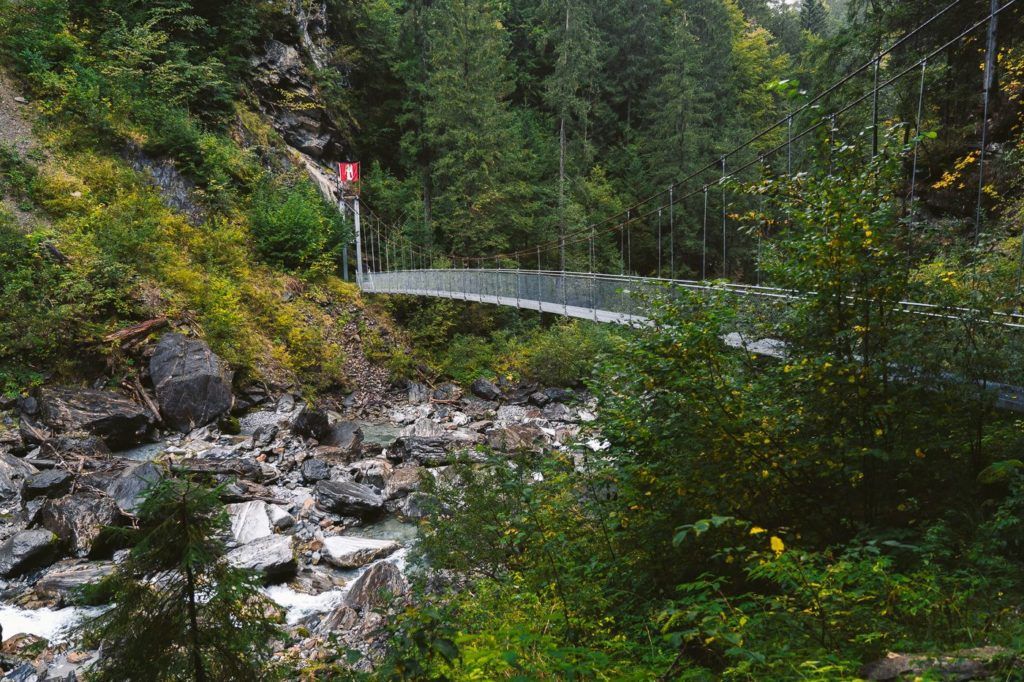
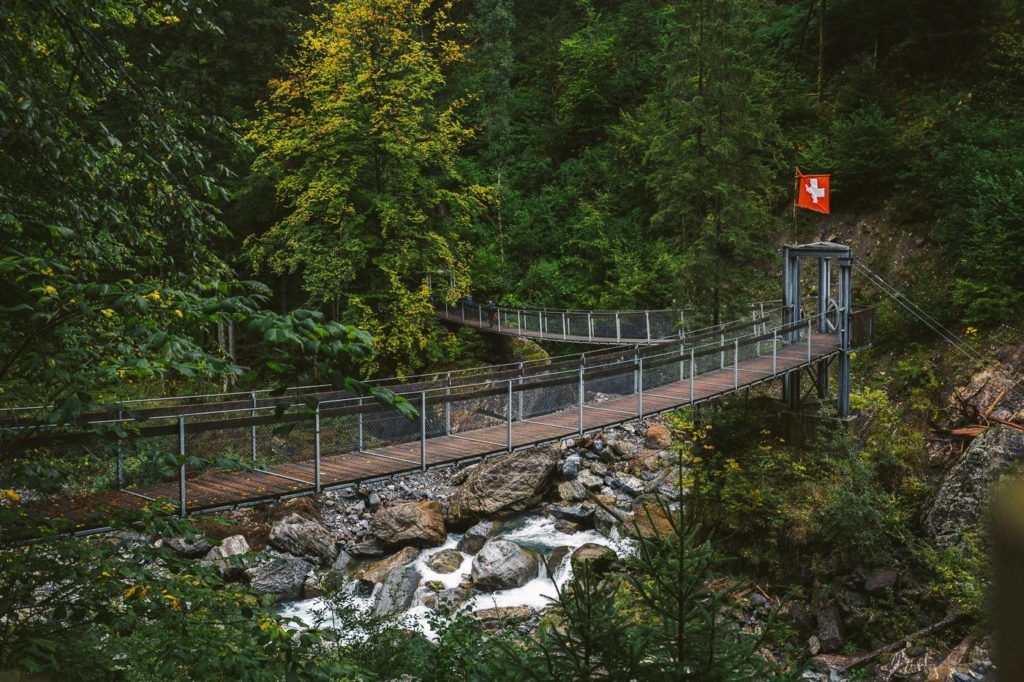
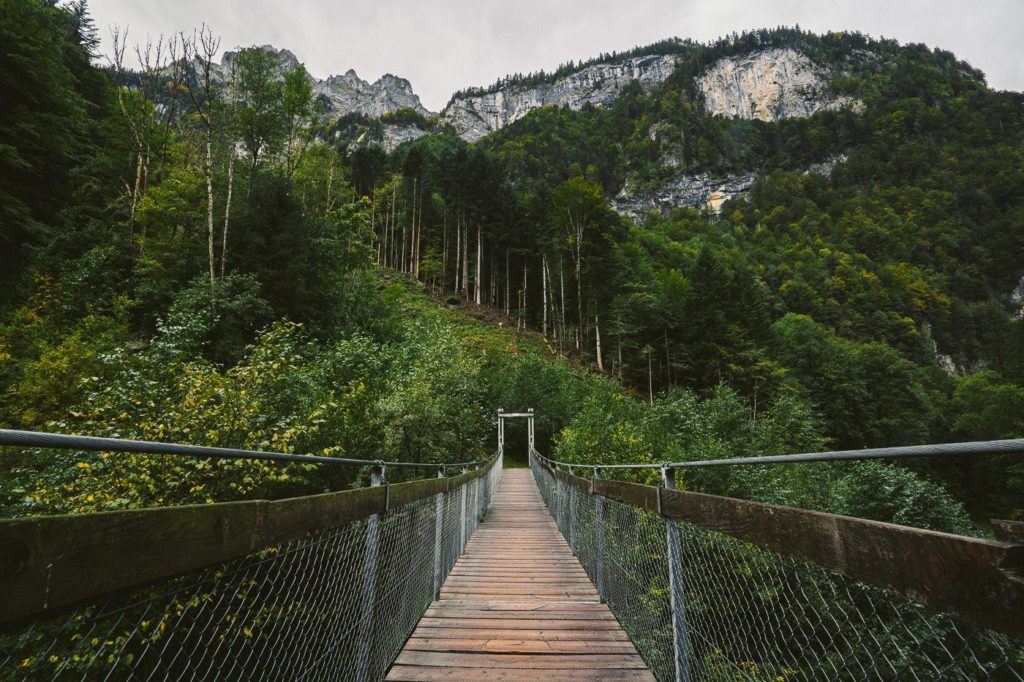
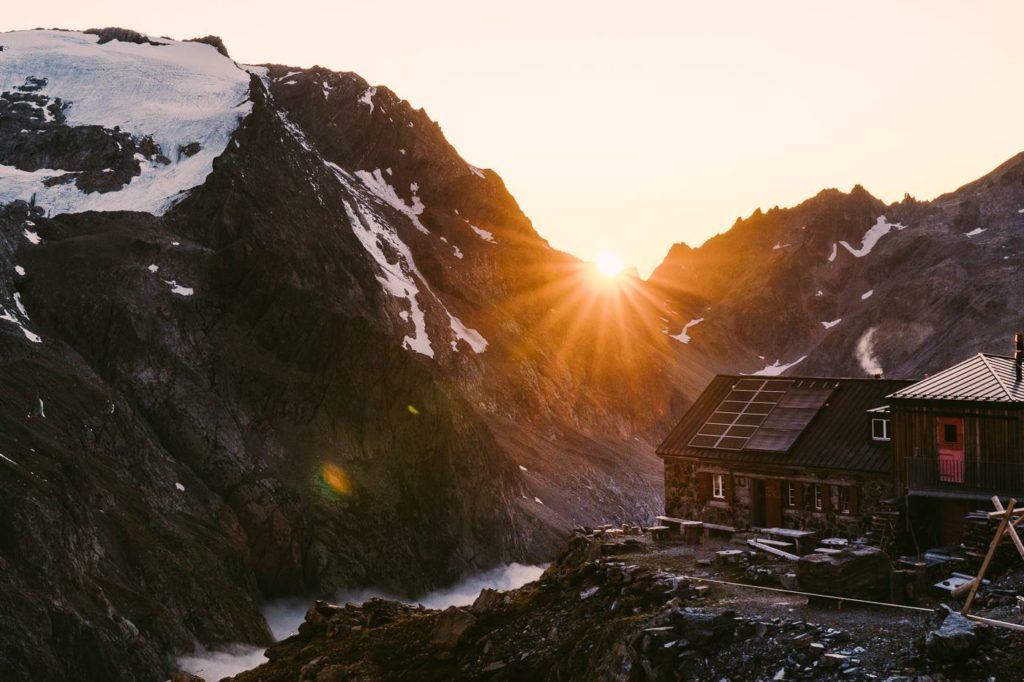
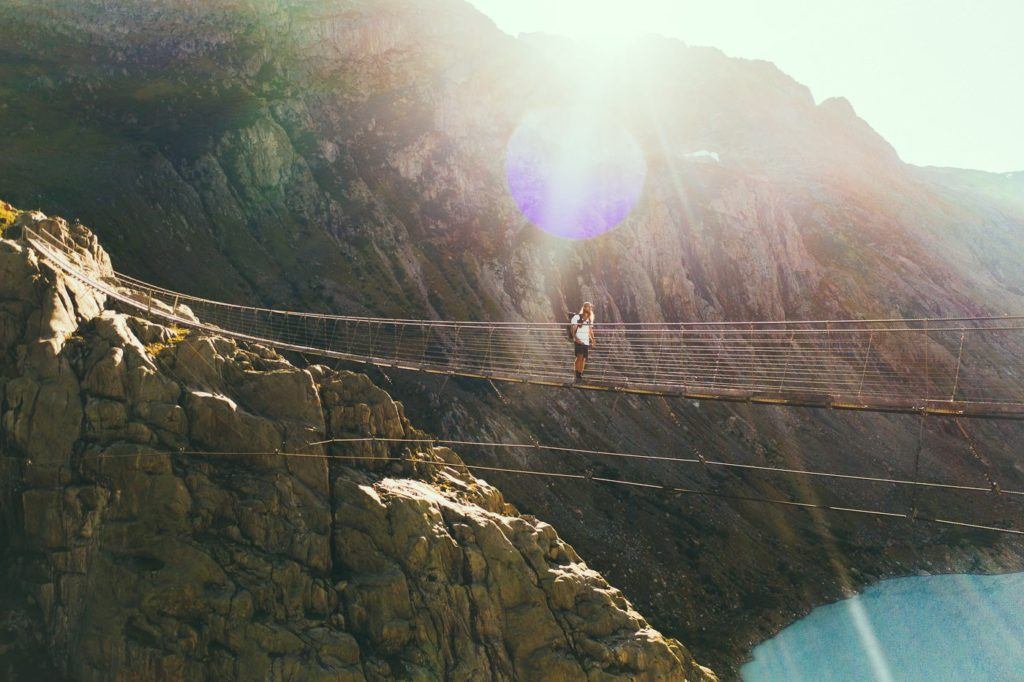
TRIFT HUT AND TRIFT SUSPENSION BRIDGE HIKE
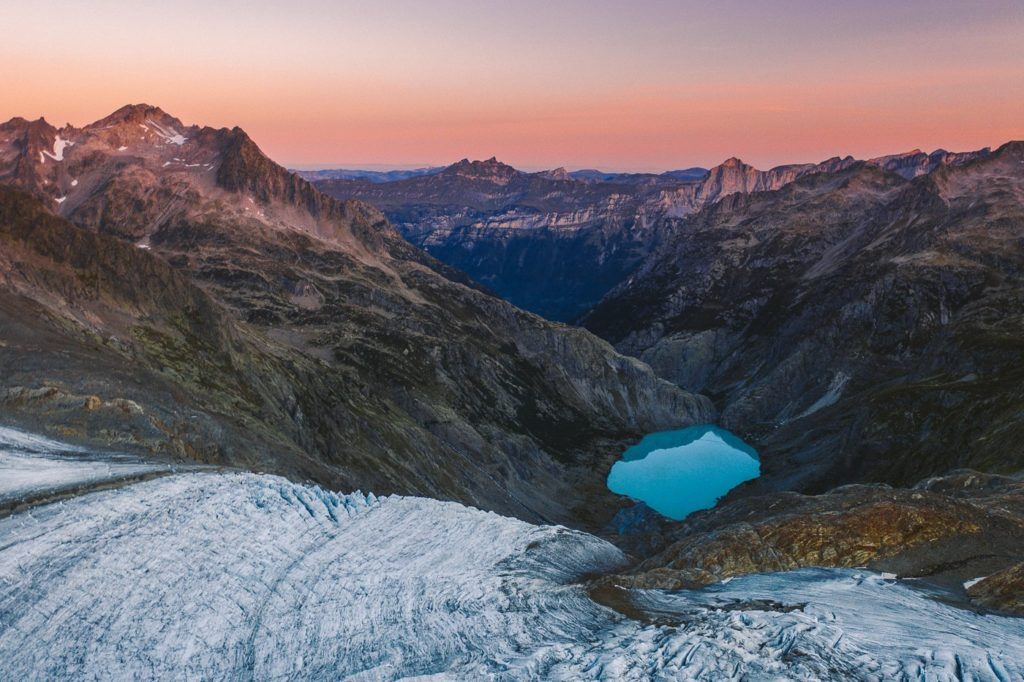
The hike to Trift Bridge and Trift Hut covers a distance of 12km from Nessental Station. Alternatively, you can take a shorter 6km hike starting from Triftbahn Station. The trail offers breathtaking views of the Trift Suspension Bridge that spans over Triftsee. You can also visit Windegg Hut and enjoy the scenic Trift Glacier views from Trift Hut. Spending a night at Trift Hut can be a great experience too
- Hike Distance: The hike from Nessental Station to Trift Hut is 12km, which is what I did. The return route would also be the same unless you detour to Windegg Hut for an extra couple of kilometers. Making it a 24km return trip approximately.
- Hike Duration: 7 hours from Nessental to Trift Hut
- Hike Difficulty: From Nessental all the way to the Trift Suspension Bridge, the path is classified as a red-and-white hiking trail. This means that it is quite ‘doable’ for most hikers although there is quite a bit of incline. The path is a blue and white alpine rating from Trift Bridge to Trift Hut and has ladders, interesting river crossings, and a number of exposed areas. There are cables and ladders wherever the trail is exposed.
- Hike Incline: Starting point at Nessental Station: 1,356m – Triftbahn Station: 2,663m – Trift Hut: 630m

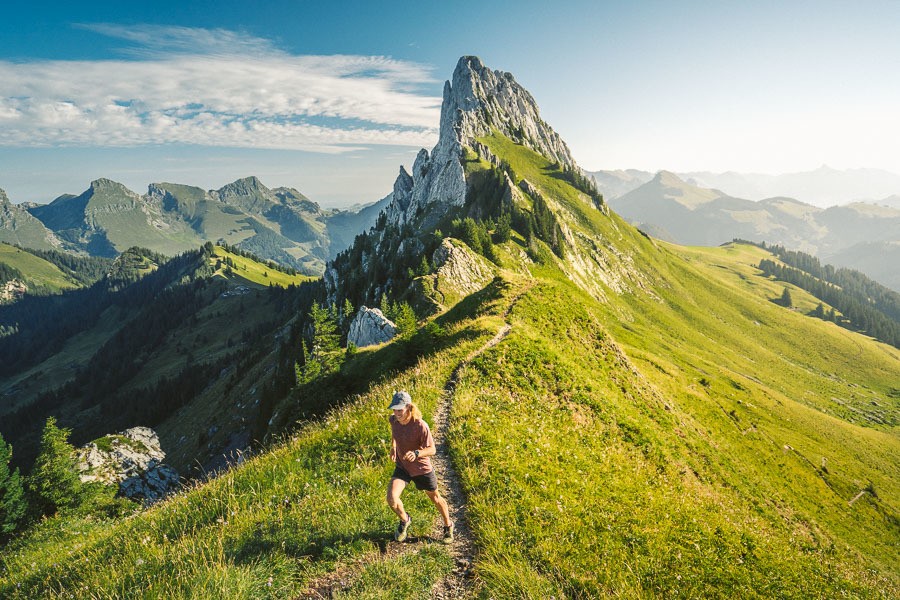
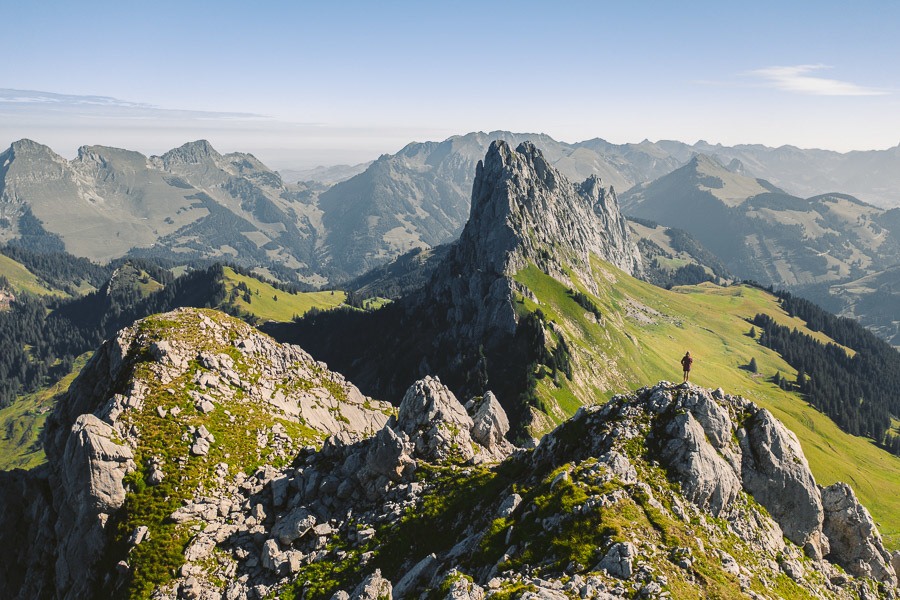
GASTLOSEN HIKING TRAIL
A Sunday morning on the Gastlosen hiking trail was a quintessential Swiss experience. There were epic, panoramic mountain views, friendly hikers of all ages on the trail, ‘bonjour’ being thrown around every few steps, coffee and cake back at the cabin restaurant and it was all topped off by the owner playing the Fribourg anthem on the Alpine Horn. It was a morning not to be forgotten.
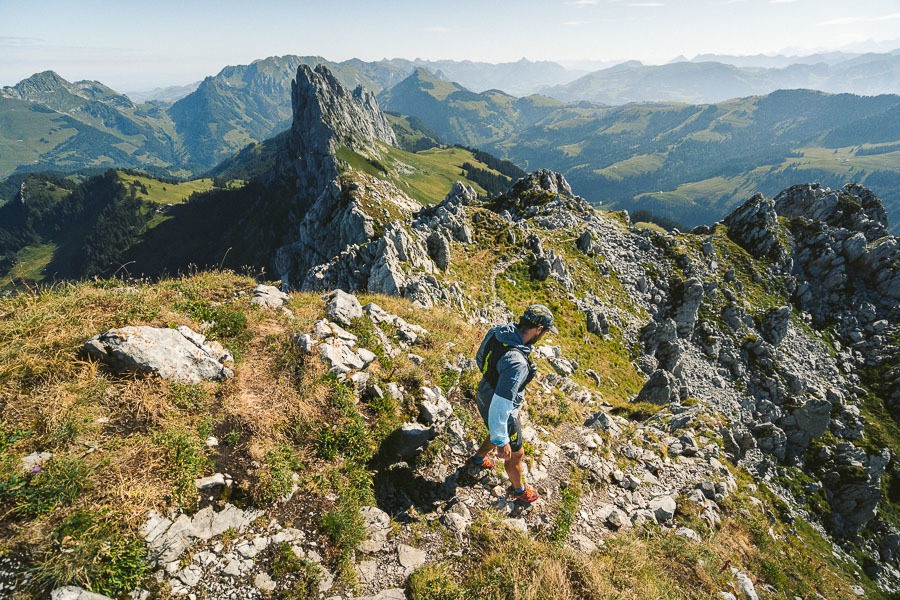
The usual route for hiking in Gastlosen is to follow the circular panoramic trail. But our group decided to take the more exciting and challenging path to the summit of Wandflue. This route had steep inclines, rocky ridges, and sharp drop-offs, making it an exhilarating hike with stunning views in every direction.
- Hike Distance: From the parking lot to the summit and return the hike is almost 10 kilometers exactly.
- Hike Duration: 2.5 to 3 hours of moving time.
- Hike Difficulty: The trail begins on a wide, steep path. Then progresses to a dirt and rocky path, which is still steep. Progresses again to rock, grass, and gravel where some hands may be required but it is not extremely technical. 700m of the incline in 5km so it is quite steep.
- Hike Incline: Total elevation throughout the hike 800m total incline on the out and back loop.
Want more details and photos? View the full blog post here: GASTLOSEN HIKING TRAIL: THE DOLOMITES OF SWITZERLAND
ROCHERS DE NAYE HIKE FROM MONTREUX
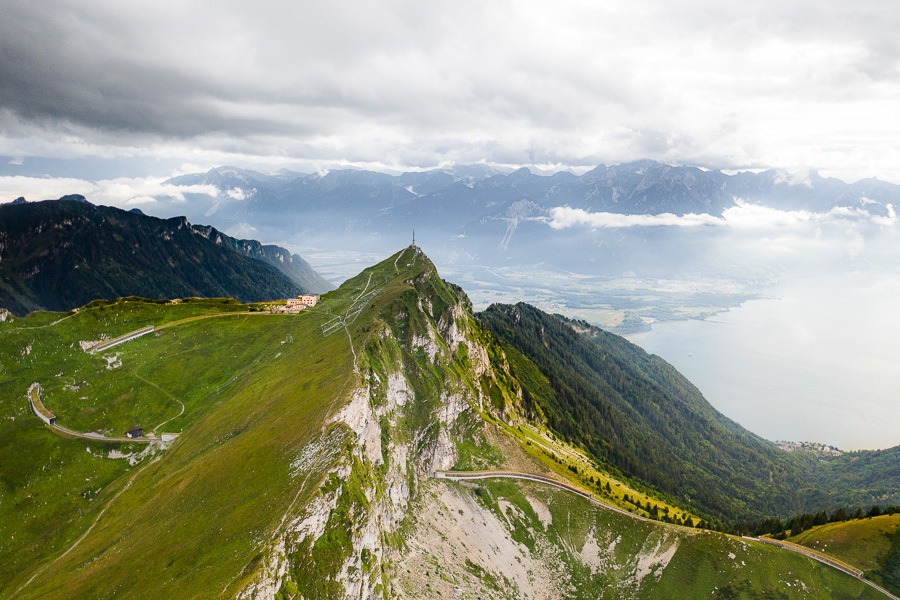
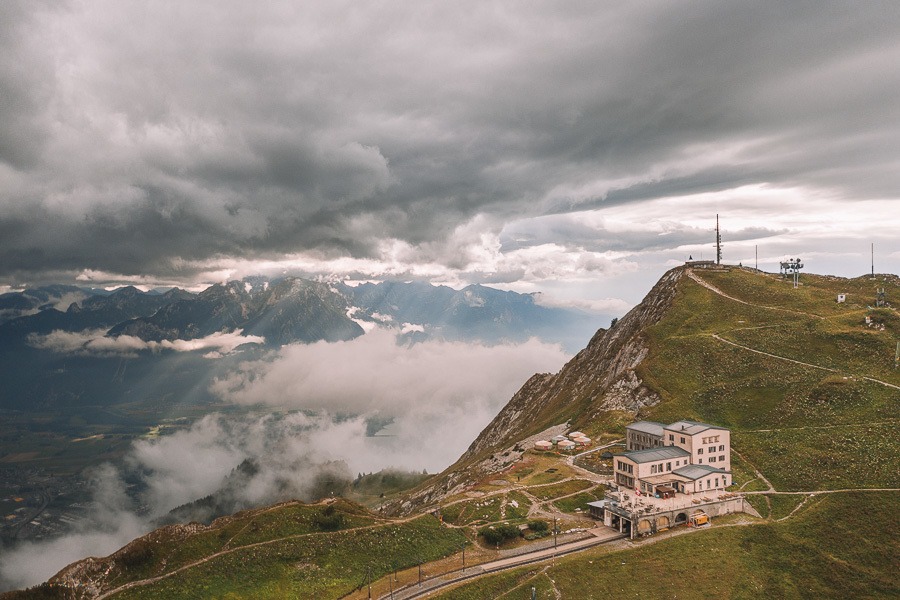
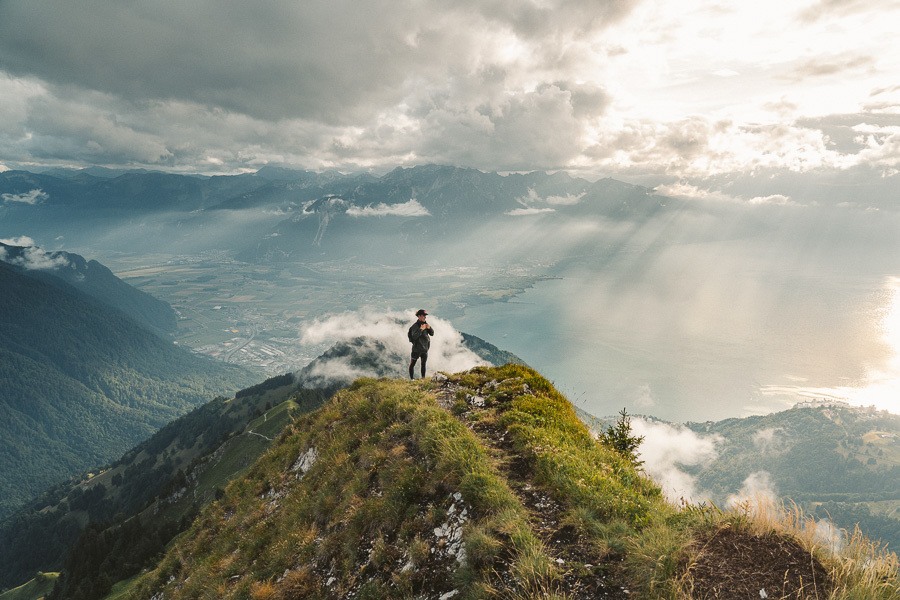
The Rochers de Naye hike will take you to a summit just above Montreux, which offers arguably the best view of Lake Geneva. Depending on the weather, you may even be above the clouds, which is always an incredible experience. To reach the summit, you can either hike up or take the train. For the more adventurous, there is also a Via Ferrata option available.
Like many hikes in Switzerland, you can take the train up and down or just one-way and hike the other. We caught the train up and hiked down and had an amazing time winding down the mountain. At the summit there is a caldera-like formation with a mountain hut on top at the train station. It’s often above the clouds and has great views over Lake Geneva so there is a lot to see from the summit.
- Hike Distance: 13km one-way. Probably best to choose either to hike up or down otherwise prepare for 7+ hours of hiking.
- Hike Duration: This depends on whether you hike up, down or both. It can range from 3-10 hours depending on what you choose. To hike down from Rochers de Naye should take no more than 3 hours.
- Hike Difficulty: Steep but safe and not technical. Some walking through the forest on a dirt trail.
- Hike Incline: Starting point at Montreux: 396m – Rochers de Naye: 2,042m
Want more details and photos? View the full blog post here: ROCHERS DE NAYE HIKE FROM MONTREUX, SWITZERLAND
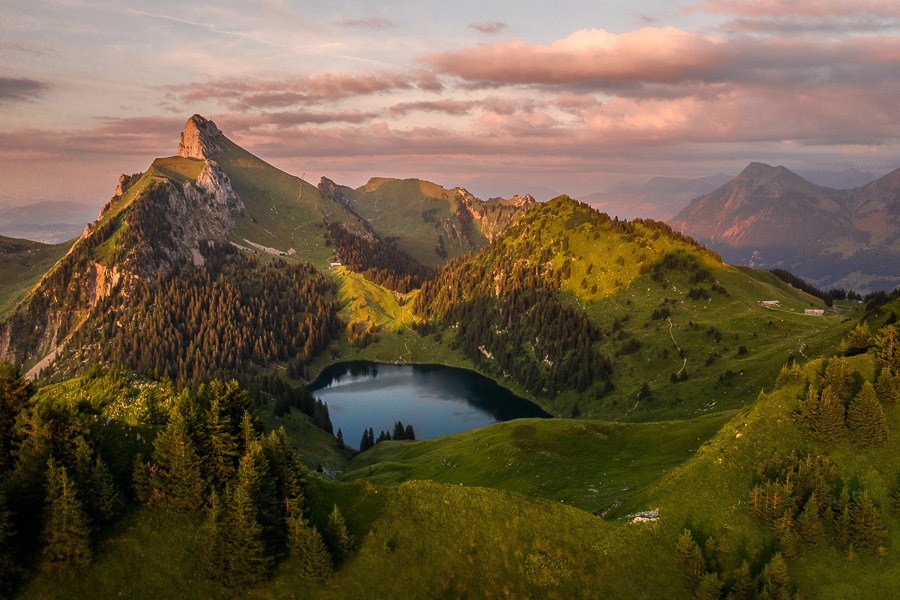
STOCKHORN HIKE
Stockhorn is a beautiful peak that overlooks two stunning alpine lakes, Oberstockensee and Hinterstockensee. At 2,190m the panorama viewpoint and restaurant atop the Stockhorn provides 360-degree views of the Erlenbach region and beyond. The adventure began with a cable car up to the Stockhorn Summit. You can hike up but it will be a long adventure to hike up and down so maybe choose to either go up or down on the cable car unless you are keen for a huge day.
- Hike Distance: Depends on the route taken as there are many on offer. We clocked 11.2kms from the top down including our stop at Oberstockensee.
- Hike Duration: 5 hours (Again this depends on whether you hike up, down or both. It can range from 3-10 hours depending on what you choose.
- Hike Difficulty: Steep but safe and not technical. Some walking through the forest on a dirt trail and steep descent through farm fields.
- Hike Incline: Starting point at Erlenbach: 700m – Stockhorn: 2,190
Want more details and photos? View the full blog post here: STOCKHORN & OBERSTOCKENSEE HIKE IN SWITZERLAND
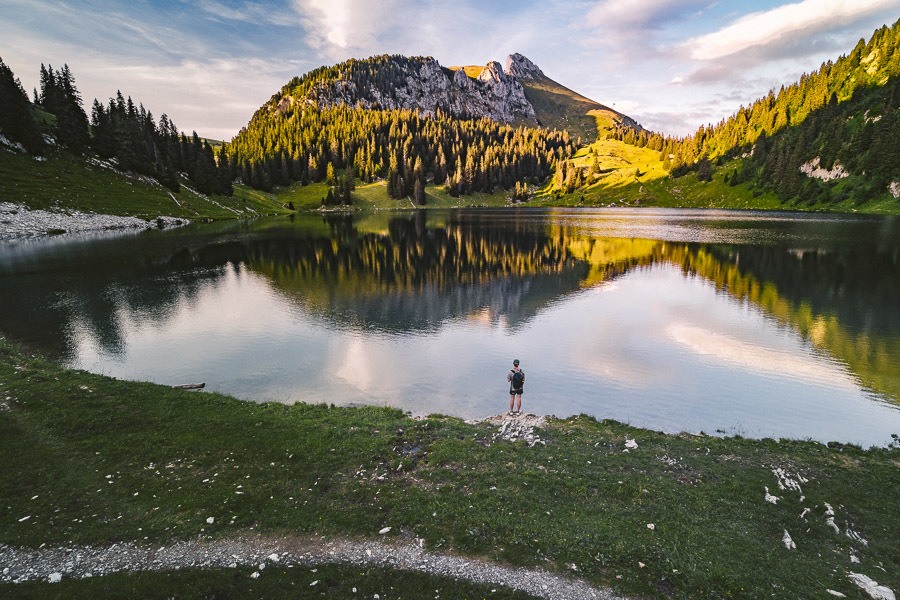
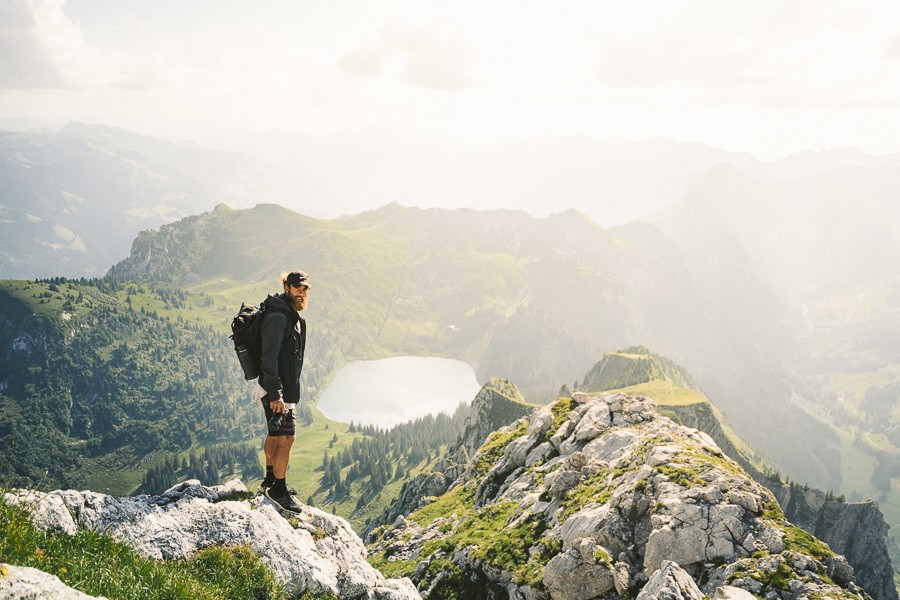
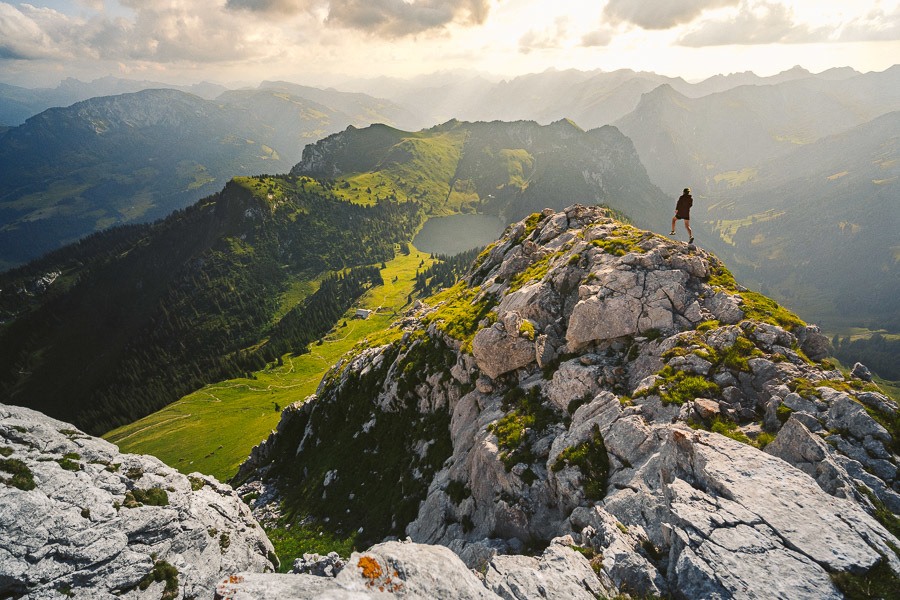
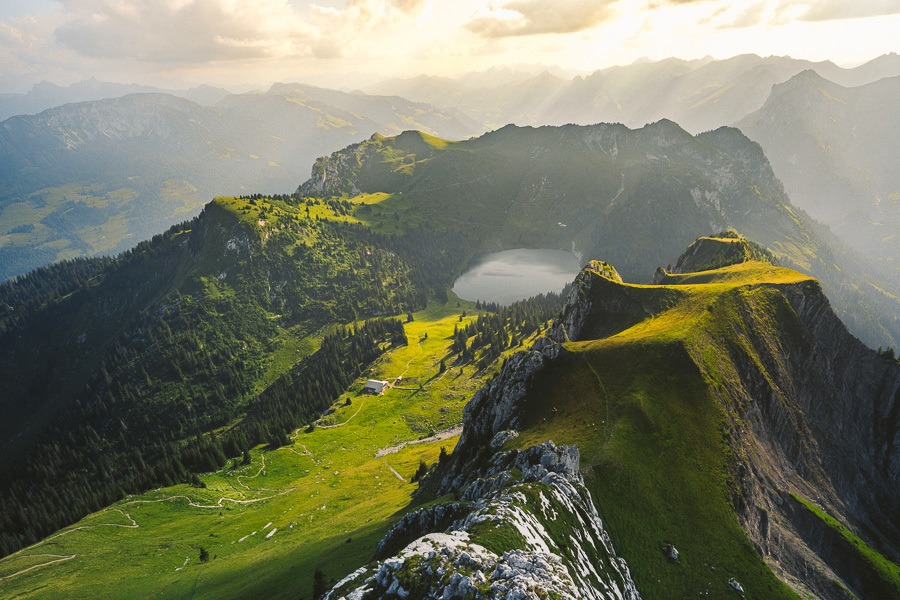
SEEBERGSEE HIKE
Seebergsee is a stunning alpine lake surrounded by beautiful grass hills and steep viewpoint cliffs, making it an ideal destination for adventurers. The lake is easily accessible by car, with a nearby parking lot, although there are also several hiking options available in the surrounding area. It’s a perfect spot for a summer picnic or chill-out day with friends, as you can swim and cool off in the lake.
While we made our Seebergsee adventure into a pretty interesting little hike, many families just did the short trail to the lake. We hiked up onto the cliffs above the lake and chilled up there before trekking down to swim in the icy water.
Want more details and photos? View the full blog post here: SEEBERGSEE LAKE & EPIC VIEWPOINT HIKE IN SWITZERLAND
LE MOLESON TO TEYSACHAUX HIKE
The hike from Le Moleson to Teysachaux is a fun yet challenging day hike that includes a bit of rock scrambling to reach the panoramic views of Gruyeres in the Fribourg region. You can either do the hike entirely or use a cable car to ascend and descend the majority of the incline. This means you can enjoy the varying ups and downs of the ridge between Le Moleson and Teysachaux without overexerting yourself.
- Hike Distance: Without cable car from Le Moleson Summit to Teysachaux Summit and Return was 13km
- Hike Duration: 3 hours of moving time. With breaks and photos, the total time was 5 hours.
- Hike Difficulty: Steep in parts. The parking lot to Moleson was very safe with no drop-offs or climbing. The final climb up to Teysachaux was technical with moderate rock clambering required but no moments of exposure as it was climbing up a linear incline. Minimal chance of falling off of the cliff face. That section of trail was rocky but only lasted for 15-20 minutes.
- Hike Incline: Total elevation throughout the hike 719m
Want more details and photos? View the full blog post here: LE MOLESON TO TEYSACHAUX HIKING TRAIL IN SWITZERLAND
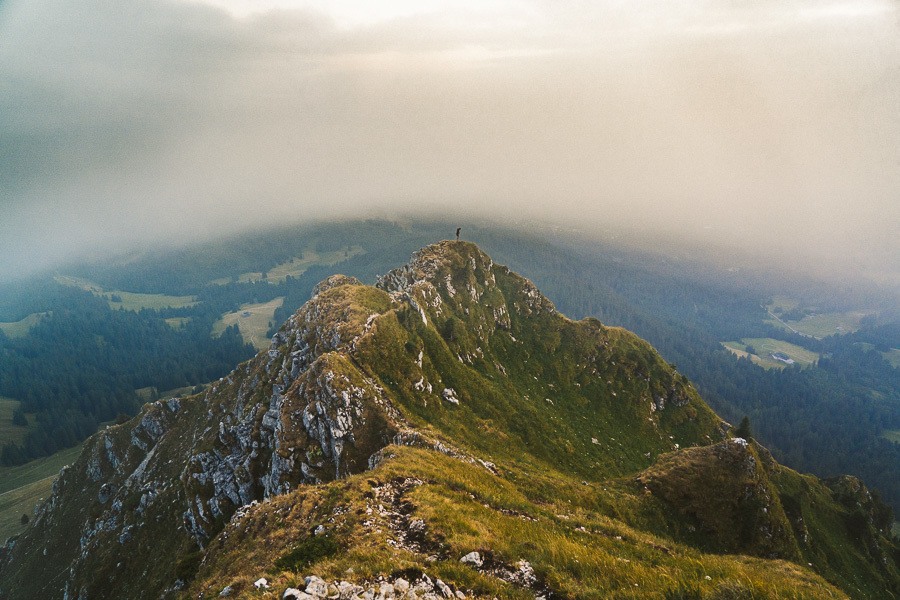

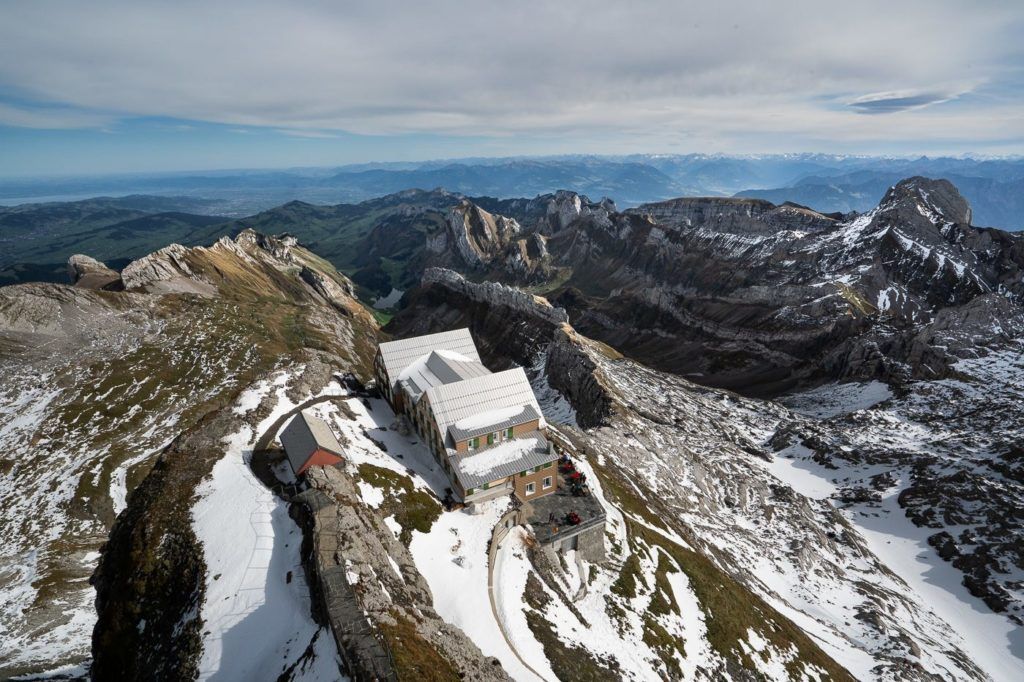
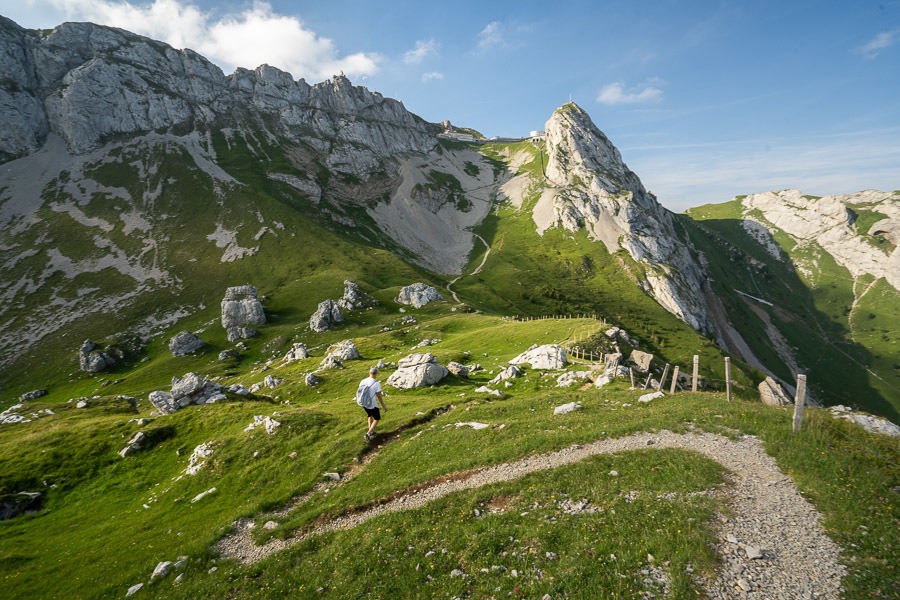
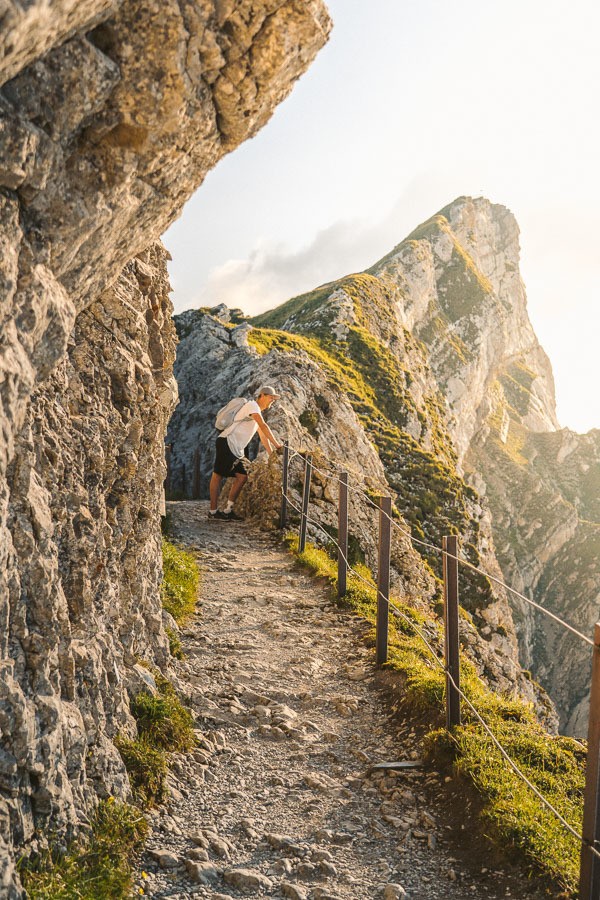
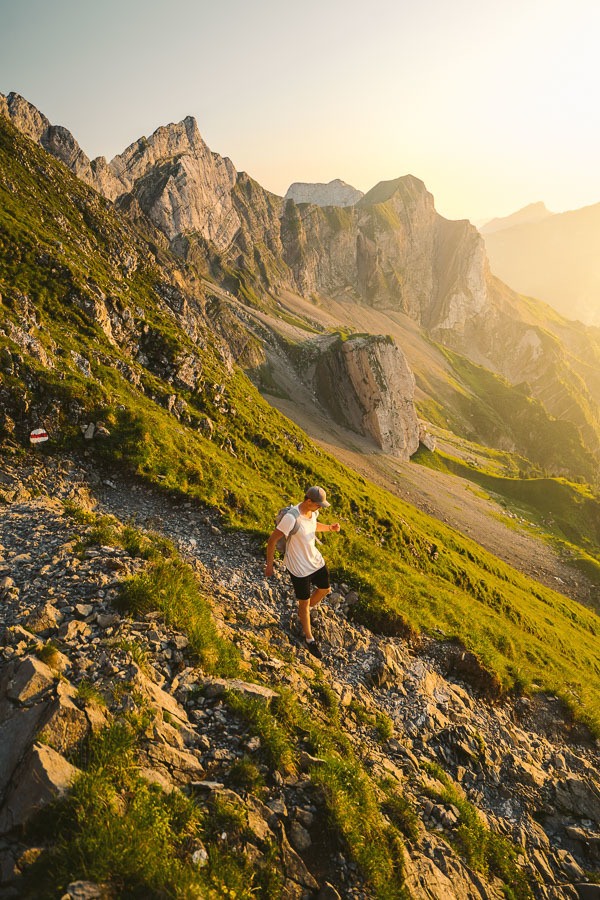
MOUNT PILATUS HIKE
Mount Pilatus is a 2073m summit, which you can reach with a 2-hour hike or by booking a ticket on the world’s steepest cogwheel train to the summit where you will find a hotel, restaurant, and of course amazing views. From the summit, you can venture a little higher to Mount Tomlishorn, which is another stunning view and the highest peak in the region at 2,128 meters.
Mount Pilatus is one of the most popular hikes in Switzerland but for many, they take the cable car up or down… or both. We hiked up and down and it was a huge day, which you can read about in the link below. However, it was all worth it as we enjoyed the sunset at the summit, well after the last cable car and all the tourists were gone. It meant we had to hike down in the dark but that is often the way in Switzerland. If you sacrifice the last cable car for a good sunset, you will rarely regret it.
- Hike Distance: Alpnachstad to Mount Pilatus: 8km – Alpnachstad to Tomlishorn: 1km – Tomlishorn to Kriens 13km
- Hike Duration: Alpnachstad to Mount Pilatus 3.5 hours + 30 minutes to Tomlishorn + 3 hours to Kriens.
- Hike Difficulty: Steep but safe and not technical. Moderately tough because of the incline but a path the whole way.
- Hike Incline: Starting point at Alpnachstad: 464m – Mount Pilatus height: 2,073m – Mount Tomlishorn height: 2,128m
Want more details and photos? View the full blog post here: MOUNT PILATUS HIKE IN SWITZERLAND

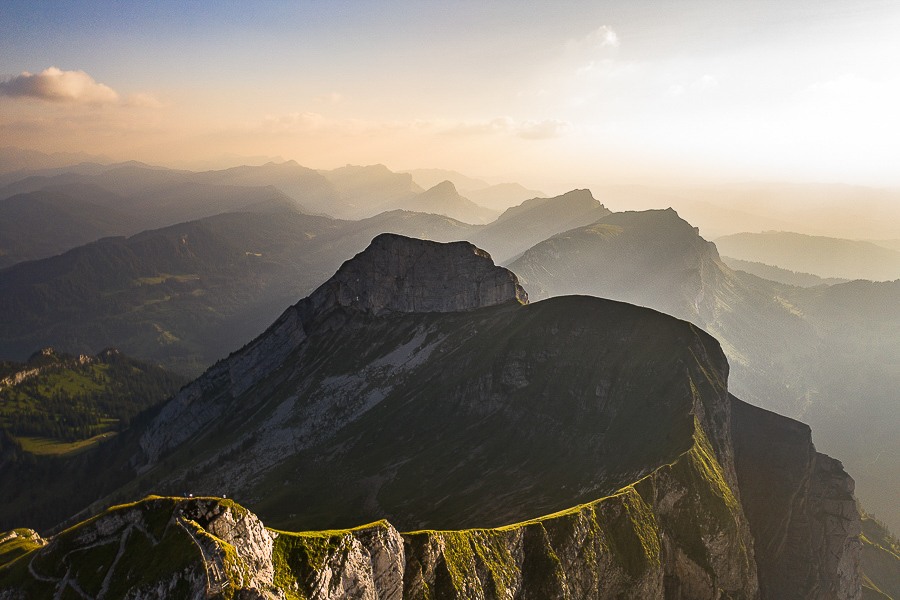
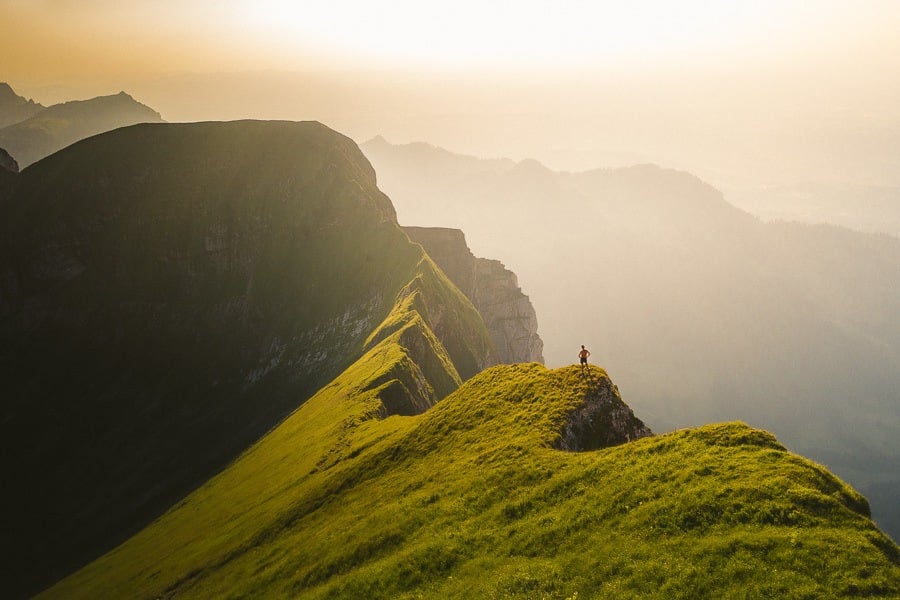
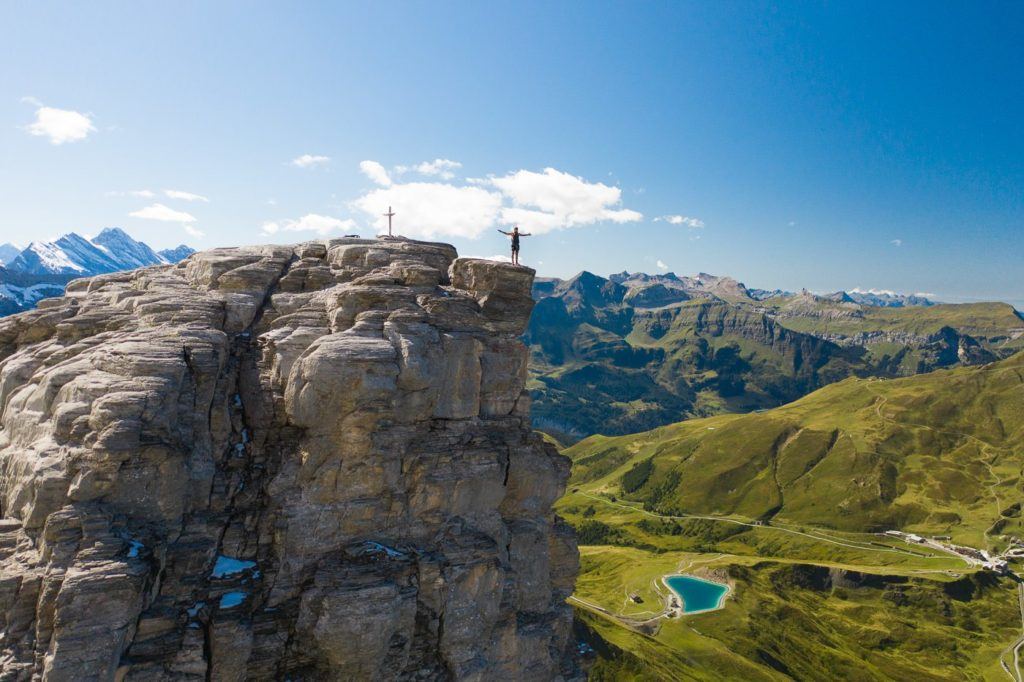
RIGI HOCHFLUE HIKE
Rigi Hochflue is a challenging hike with a steep incline that leads to a panoramic viewpoint, marked by a cross, overlooking Vierwaldstattersee, the huge Lake Lucerne. The hike is not for the faint-hearted, featuring a vertical ladder climb on the way up and a rocky descent on the way down. Though the hike is relatively short, it will separate the amateurs from the fit hikers with some steep descent that will really burn the legs. We did this hike in late June, during the summer, and it was scorching, which made it even more challenging!
The summit provides breathtaking views in all directions, with Lake Lucerne being particularly stunning during the summer. You’ll know you’ve reached the peak of your hike when you see the giant cross at the top. The descent back down the steep slopes can be challenging, but it’s worth it. After the hike, we took a refreshing dip in Lake Lucerne, which I highly recommend as a post-hike activity.
- Hike Duration: 5 hours
- Hike Difficulty: Consistent steep climbs. Vertical ladder up rock-face (not hard but if you fall it won’t be pretty). The descent is with chains bolted in for hand-holds and steep rocks. Very steep decline. I would rate this with up there as very physically challenging and attack with caution
- Hike Incline: Starting point at Goldau Arth: 510m – Rigi Hochflue height: 1698m
Want more details and photos? View the full blog post here: RIGI HOCHFLUE HIKE NEAR BRUNNEN
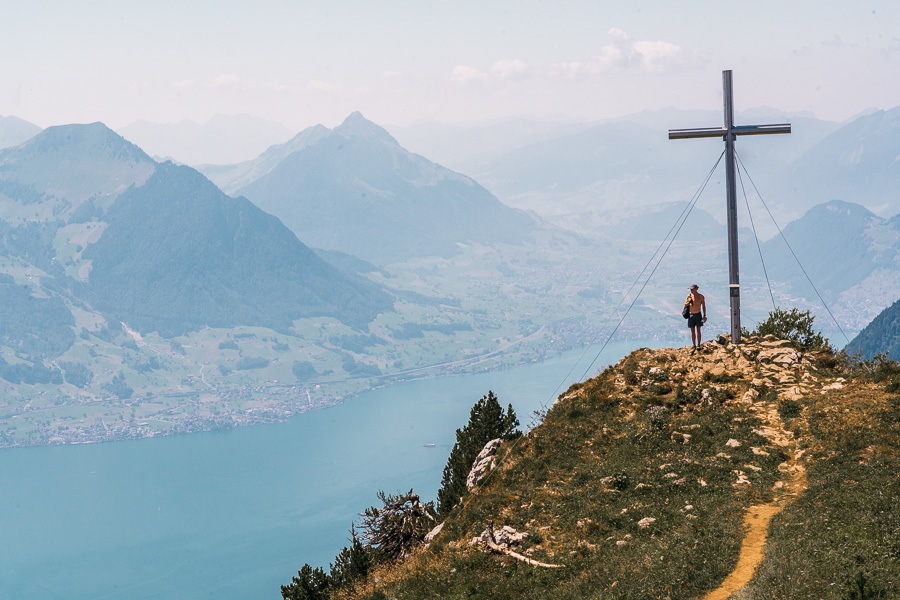

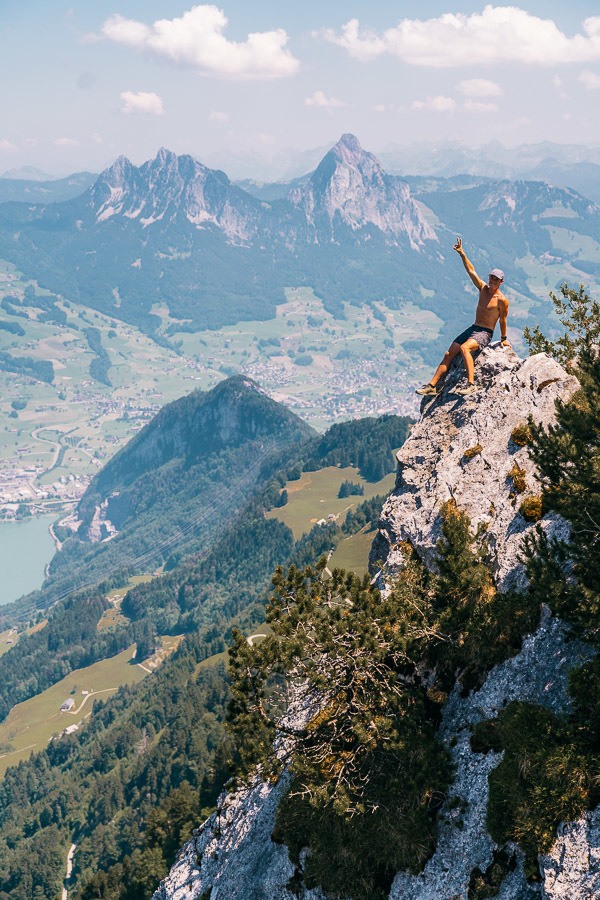
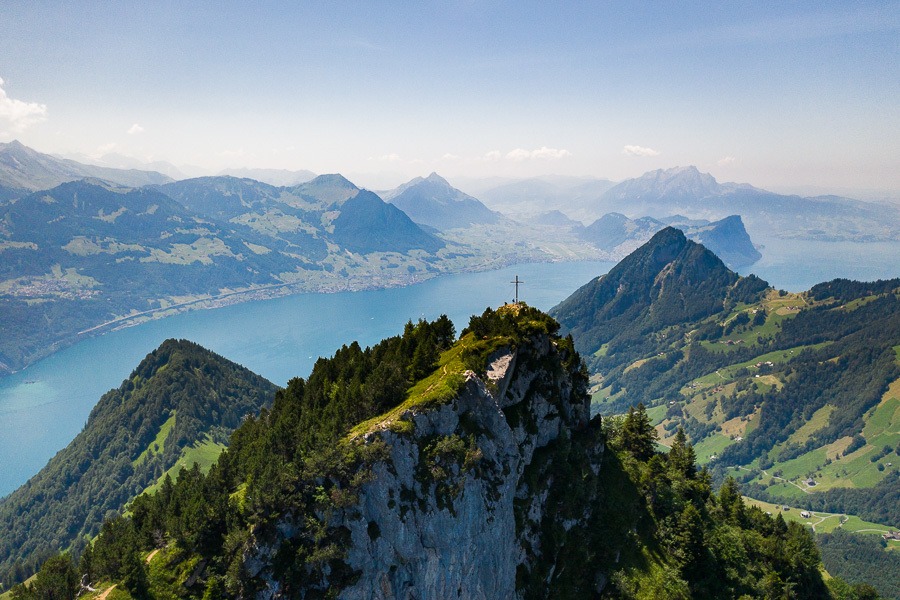
OESCHINENSEE LAKE HIKE
Oeschinensee, also known as Oeschinen Lake, is a popular destination for alpine lake enthusiasts in Switzerland. The lake boasts an azure blue color and is surrounded by towering ridges, which are covered in snow during the winter and transform into beautiful waterfalls in the summer. The natural amphitheater created by the surroundings is truly magical and may seem too beautiful to be true. This was one of my first hikes in Switzerland, so it wasn’t a bad way to start!
The hike to Oeschinensee is beautiful, but the real breathtaking views start once you reach the lake. You can trek all the way up to the top of the mountains behind the lake and look back down over the lake. While many tourists opt for the cable car ride, we enjoyed hiking around the lake. We even had lunch and coffee at one of the huts, which offered a panoramic view of the entire region.
- Hike Duration: 1 hour to Oeschinen Lake from Kandersteg (Additional for hiking around the lake)
- Hike Distance: 4km
- Hike Difficulty: Easy. Children on the trail. Short but steep. Hiking to the cabins is steeper but still safe.
- Hike Incline: Starting point at Kandersteg: 1,174m – Oeschinensee height: 1,578m
Want more details and photos? View the full blog post here: OESCHINENSEE HIKE IN SWITZERLAND (ALPINE LAKE)
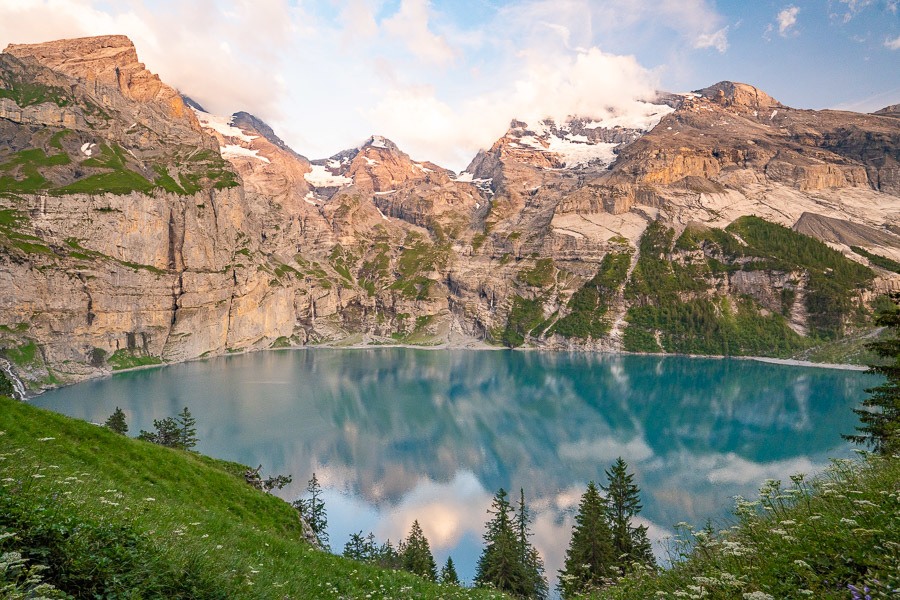
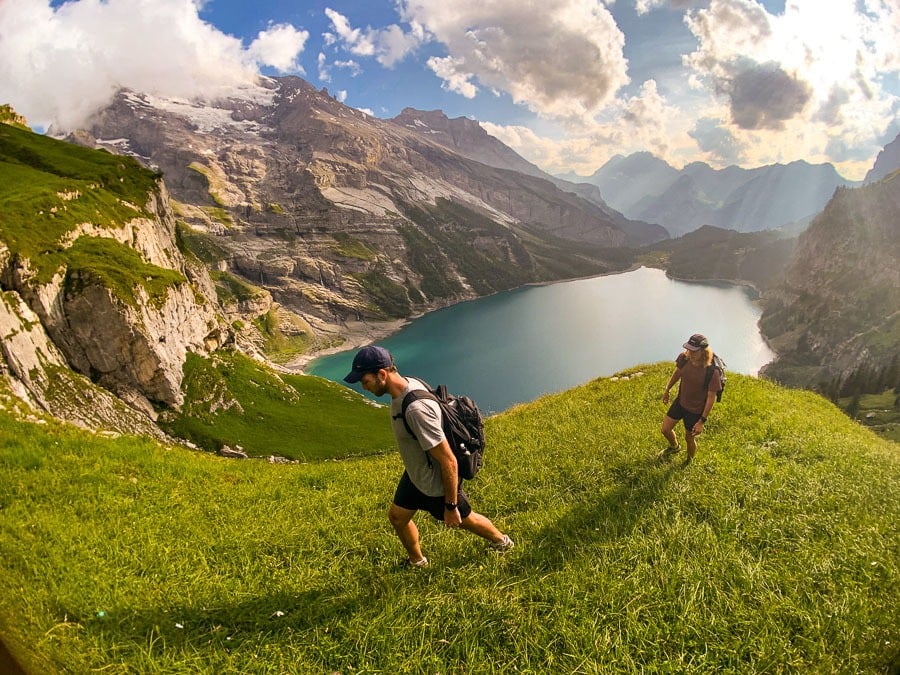
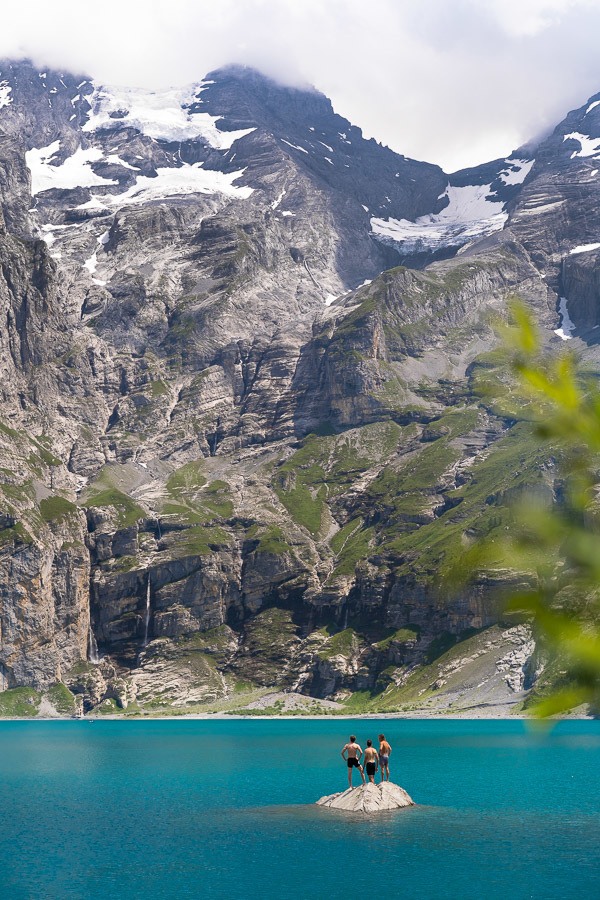
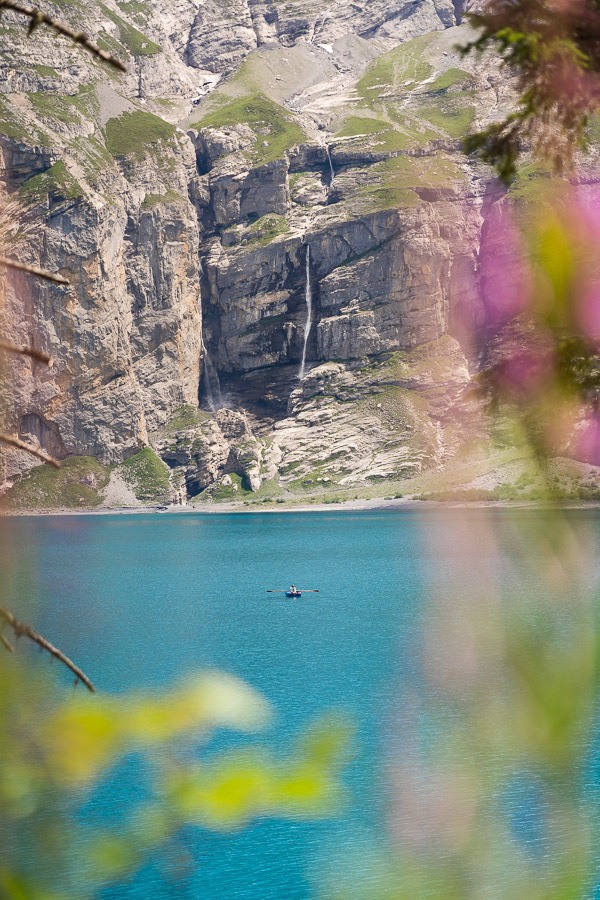
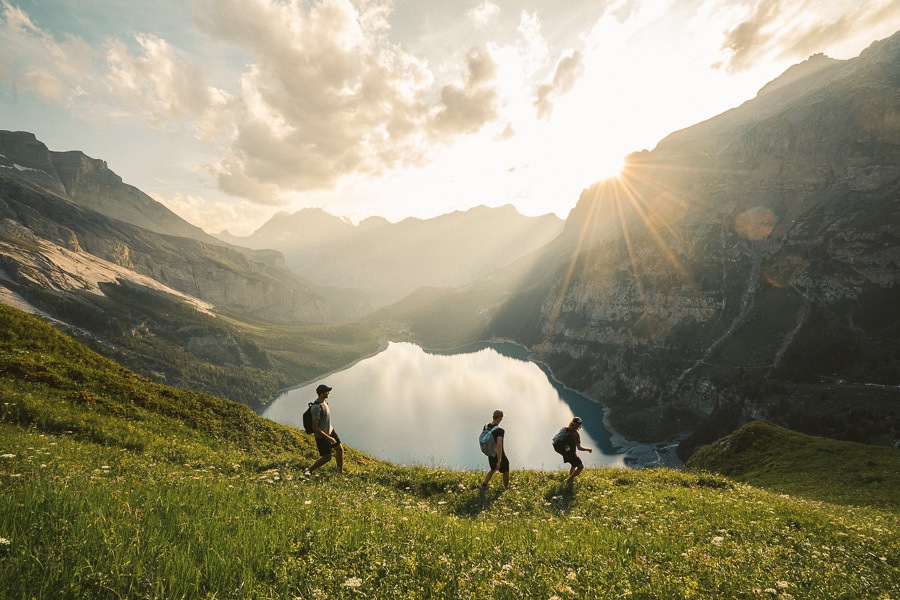
GENERAL INFORMATION TO KNOW FOR ALL HIKES IN SWITZERLAND
So after three months, those were 50 favorite hikes in Switzerland that made the list! In this section below, I’ll share some tips and resources with you that I think are hand to know before planning a Switzerland hiking tour. I really knew nothing before I entered Switzerland and had to learn everything from scratch so hopefully these help you be a bit more prepared.
TRAIL MARKERS FOR HIKING IN SWITZERLAND
Red and white markers on the trail mean it is a Swiss walking trail and you won’t need any expertise in climbing. It doesn’t mean it’s easy though as it could be 20 kilometers of hiking trails with 2000m of consistent incline but it won’t be technical so you will still need to look into the hike first to know what you are up against. Blue and white markers will be painted when they are indicating a technical or alpine route. Sometimes they are still quite tame but again, this is a warning sign that it is not going to be a leisurely walk on a trail and you can expect some kind of rock scrambling or climbing to be involved.
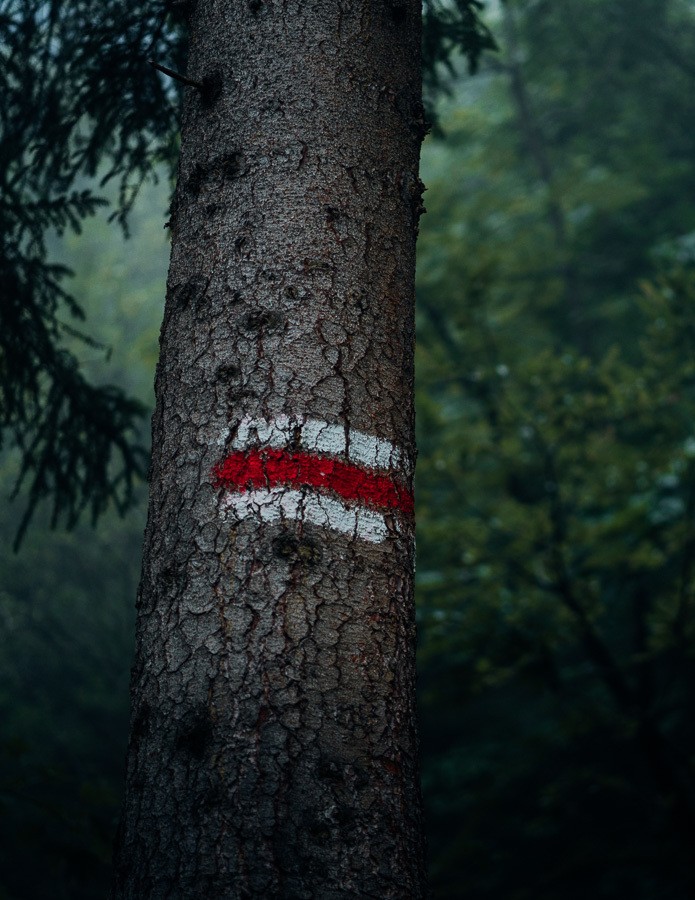
LOCAL EXPERIENCE
Swiss locals have years of experience on the trails so never compare yourself to a local and assume you can do it. I saw some local children on hikes that were far more experienced than me so you are better off comparing yourself to your previous efforts when deciding if you can take a certain route or make a certain climb.
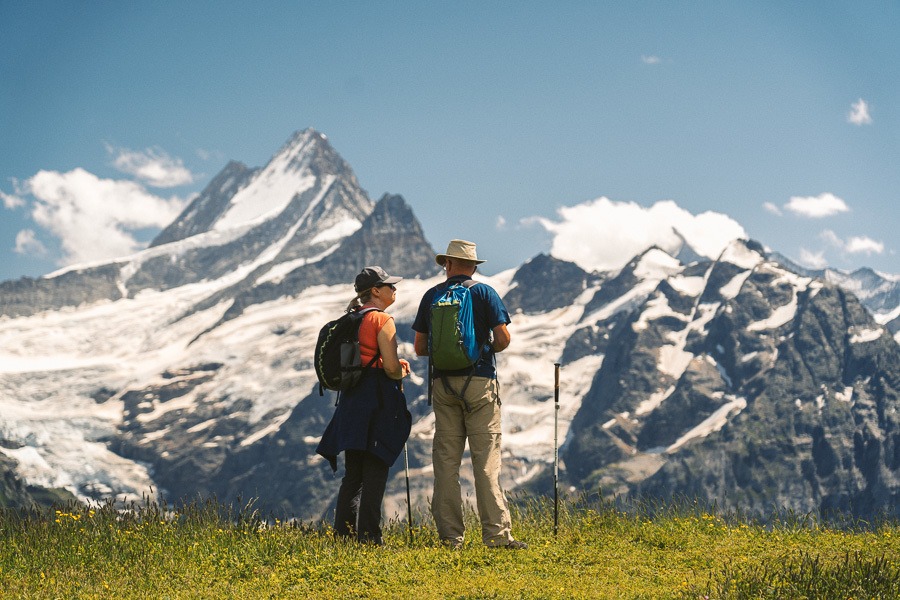
SWISS TRAVEL PASS or HALF-FARE CARD
OPTION 1: Buy the Swiss Half Fare Card: Switzerland trains, buses, and cable cars are EXPENSIVE! I found the best way to get around cheaply was to buy the Swiss Half-Fare Card before I arrived. It gives you 50% off every regular train, bus, and even many cable cars. It only costs $150 USD but pays itself off in just a few days with many train tickets in Switzerland costing close to $100 alone. If you are staying for more than 5 days, I suggest buying the Swiss Half-Fare Card.
OPTION 2: Buy the Swiss Travel Pass: The second option is to get the Swiss Travel Pass, which gives you unlimited train, bus, and (many) cable car rides but it’s pretty expensive at around $100 USD per day so if you don’t travel each day it isn’t worth it.
OPTION 3: Buy the FLEXI Swiss Travel Pass: The final (BEST) option is to get the FLEXI Swiss Travel Pass, which allows you to buy 8 days’ worth of transit but you can choose the night before if you want to activate the next day. That way you don’t need to travel every day to get your money’s worth, you can just activate the FLEXI Swiss Travel Pass on the days when you are doing sizeable transits. My advice is to book the Swiss Half-Fare Card or the FLEXI Swiss Travel Pass in advance before your trip so it’s ready to go when you arrive.
GET A SWISS TRAVEL PASS!
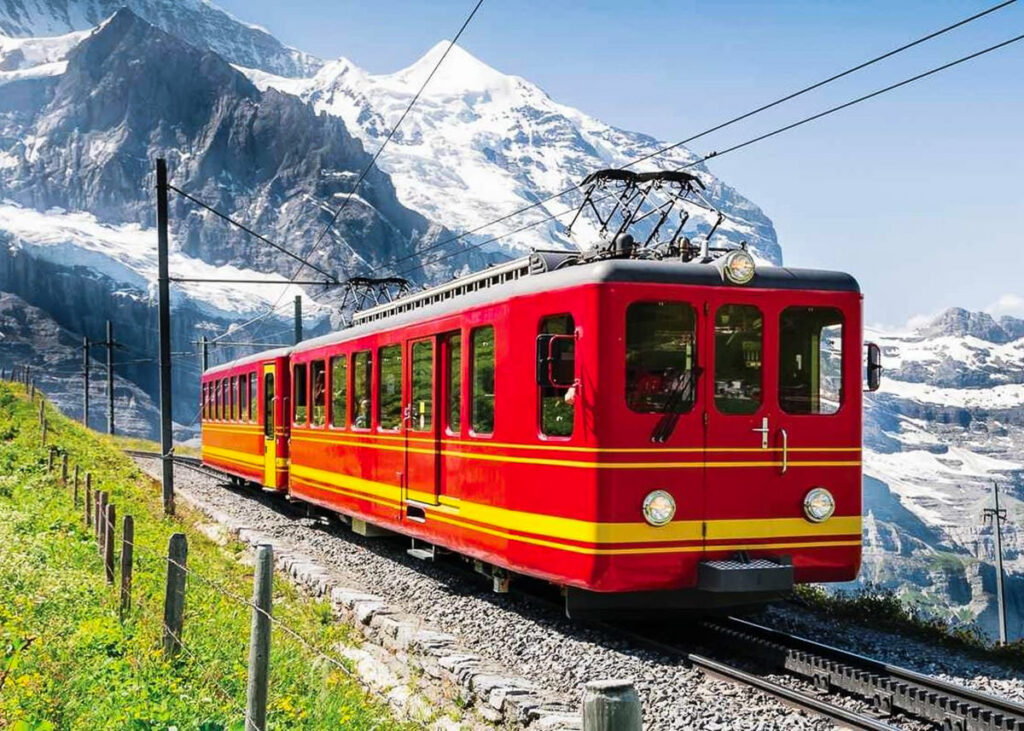
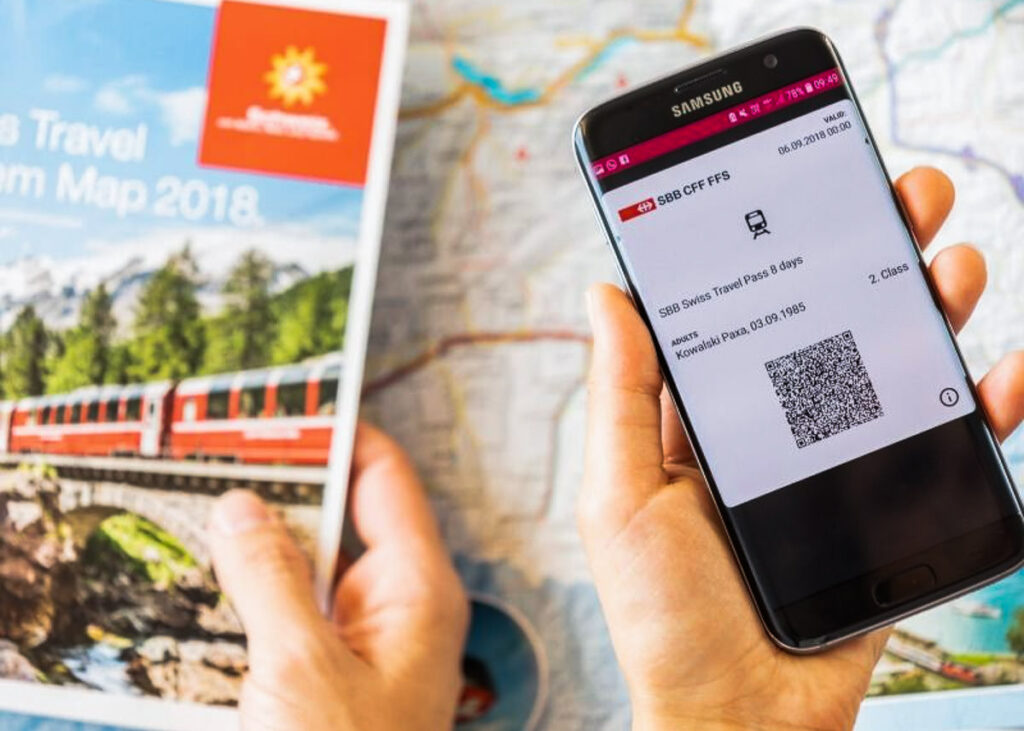
Enjoy UNLIMITED train, boat, and bus rides in Switzerland for up to 15 days. Click to book a flex Swiss Travel Pass or choose the Consecutive Swiss Travel Pass.
The Swiss Travel Pass starts at $260 for 3 days. Click here to check if it’s available on your travel dates.
CHECK THE TIME OF THE LAST CABLE CAR
Always check when the last cable car or the last train comes down on that day otherwise you will have a dark run home. I missed many cable cars by choice so I could enjoy the late sunset in the summer but I’ve seen some poor people stuck and have to hike 10km down and for some, it can be a bit rattling.
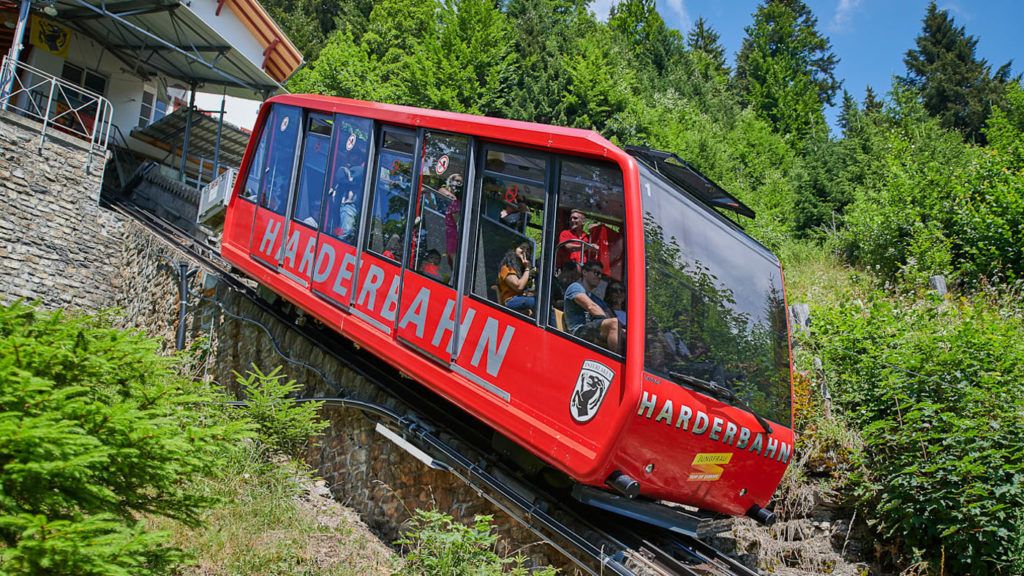
TRAIL ETIQUETTE
It’s courtesy on the trails to say hello as you pass people and you will find the Swiss are quite polite and this is just common behavior on the trail. Depending on where you are in Switzerland it may be a French, German, or even Italian-speaking region so make sure to know a basic hello in the local language so you can greet people on the trail.
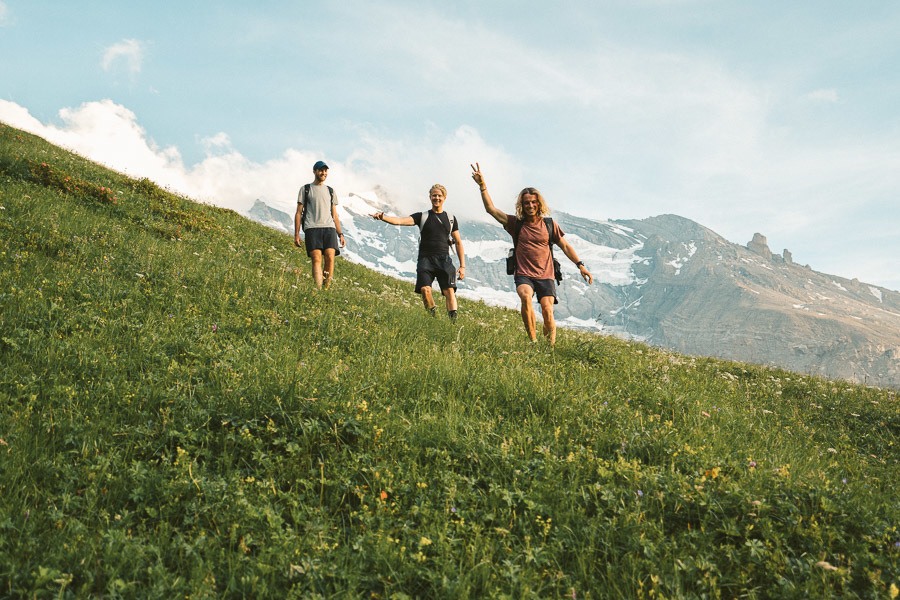
TRAIL SIGNAGE
The yellow signs in Switzerland are your best friend and are pretty accurate. They are correct so often, that you stop questioning them and put full faith in their accuracy even during a storm or an important decision. Often they have time markers on them as well so you know how far til you reach a safe spot or a mountain hut.
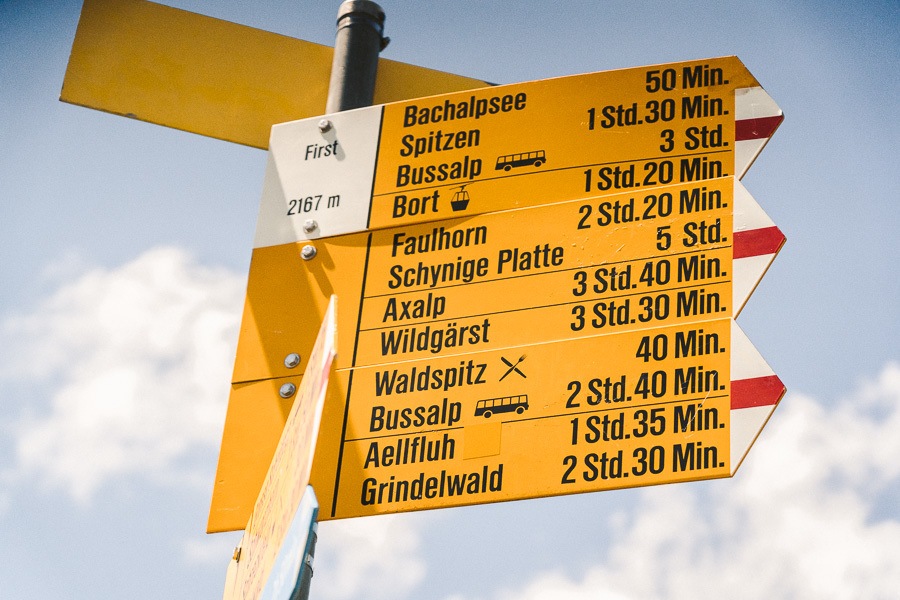
SWITZERLAND HIKING WEBCAMS
Many trails and summits in Switzerland have a webcam at the top. This isn’t to ruin the surprise of the view for yourself but to check the weather. Remember in some cases you may be at accommodation several thousand meters below the summit you are hiking up so there can be a big difference and you may want to check that there isn’t a huge layer of fog and maybe wait for a more appropriate day. I used the webcams as a guide but sometimes the weather can change quickly. Simply search webcam+name of hike and you will find if there is one. One site that has many of them is Bergfex, which I use regularly.
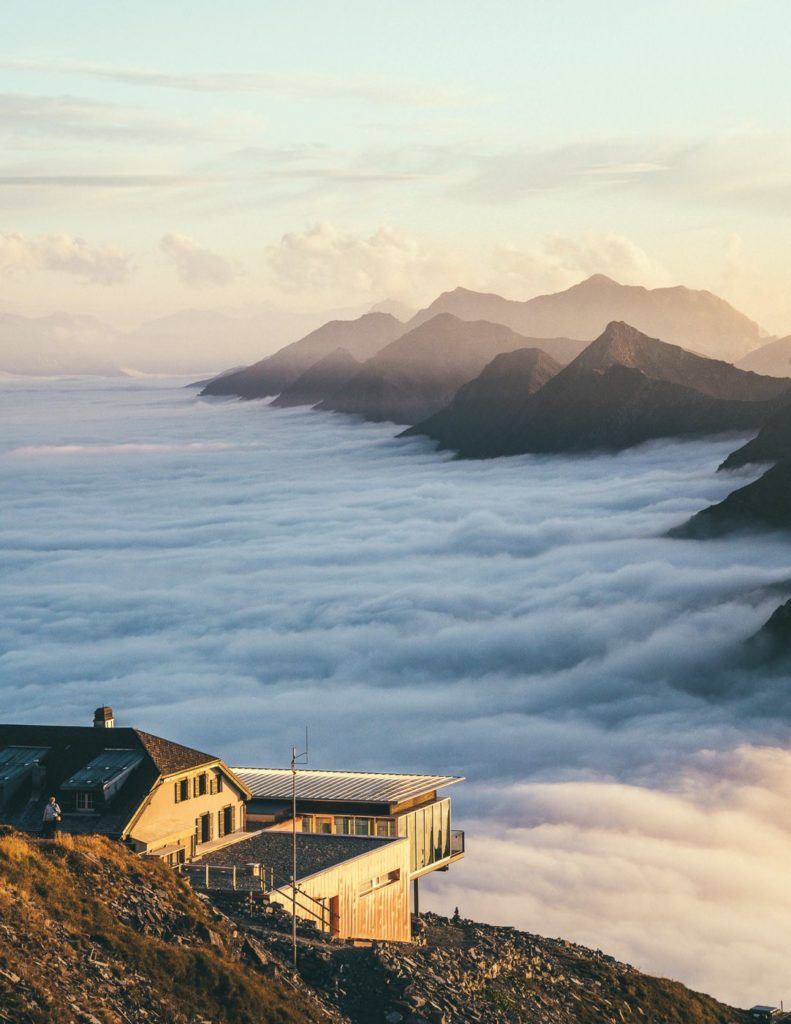
ESSENTIAL HIKING GEAR FOR SWITZERLAND
Hiking in Switzerland is very different in the summer to the winter, which will obviously make a huge impact on what type of clothes and gear are necessary. However, for this little section on essential gear, I will just point out a few key items that you should have for basic hiking in average conditions. You’ll need hiking boots or trail running shoes, beanies, hiking socks, and more but I’ll write a more detailed post about that another time.
This is just a quick round-up of three essentials but for a full rundown of all the hiking gear and camera gear I use you can check out this post: MY TRAVEL PHOTOGRAPHY GEAR: WHAT’S IN MY BACKPACK
Hiking Poles: Leki Micro Vario Carbon Fiber Hiking Poles – Not everyone will use them but the Swiss are religious about them, unlike many Australians or Americans. You will learn to love them too as they take the strain off your knees and quads on both the uphill and the downhill. I used them to power up hills and help as a shock absorber on the way down. You can get them quite cheap but I found that there were two components to my hiking poles that I really liked.
They were foldable down to a small size so I could put them in my backpack side pocket and they were the carbon fiber/lightweight style. They were a bit more expensive but I used them a lot and they became a necessity in the end. I’ll link you here to the carbon-fiber LEKI foldable hiking poles that I bought. I purchased them in Switzerland so they were very expensive but you can get them online much cheaper.
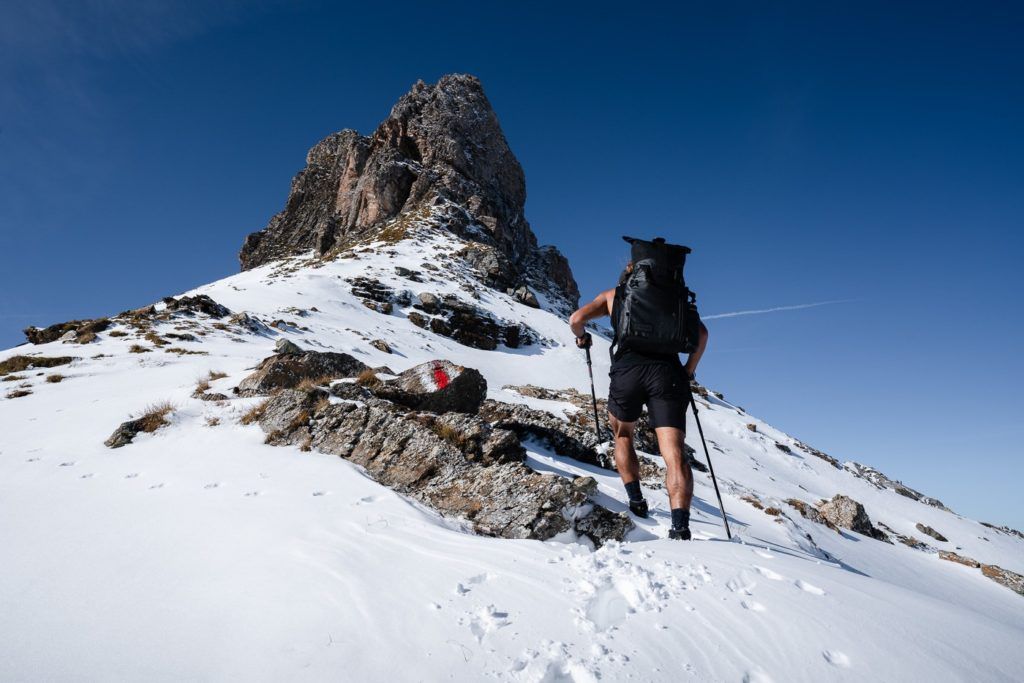
Down-Jacket: Patagonia Nano Puff Jacket: The next key item to have is a down jacket. Even in the summer when it might be hot at lower altitudes, once you reach the summit it gets that much colder. If it’s a sunrise or a sunset, I always have a lightweight but very warm down jacket with me. I chose one that I could stuff into my backpack when it was too hot but could always afford to carry it size-wise in case it was colder than I expected and I used it too many times to count. I’ll link you here to the Patagonia lightweight down-jacket that I bought online before heading to Switzerland.
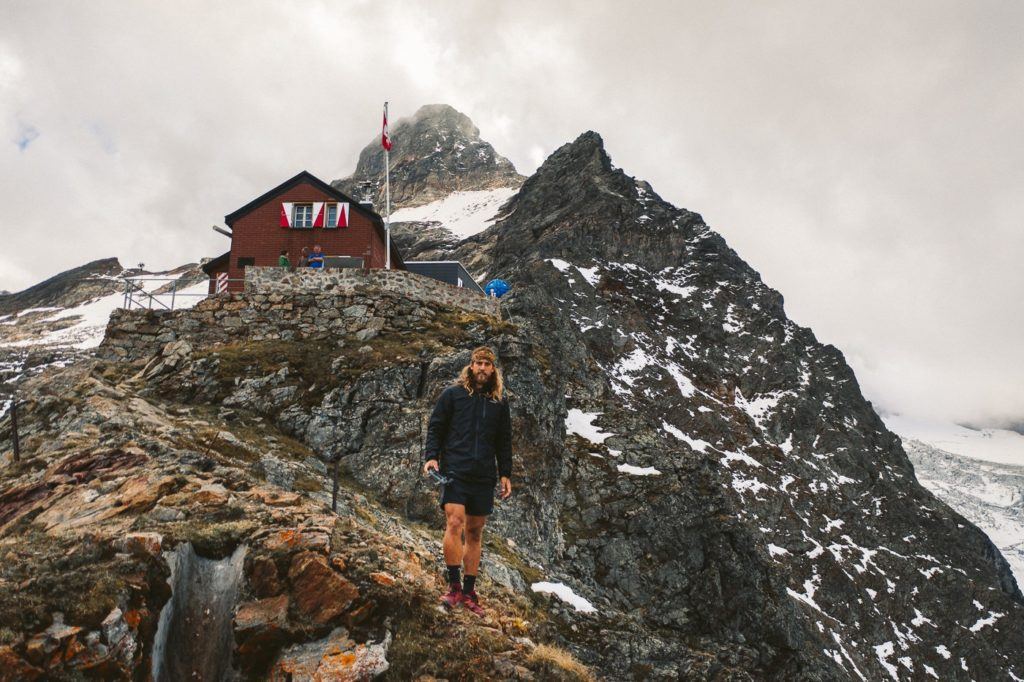
Hiking Gloves: North Face E-tip Gloves – They might seem like a small item but your hands are the first things to go when it gets cold. They don’t have to be amazing gloves but you want something. I chose gloves that still let me operate my camera and phone but had a decent amount of warmth too. Once you start doing sub-zero hikes in Switzerland, you will want a more heavy-duty type of glove. I’ll link here to the gloves I used in Switzerland that let me still operate my camera.
HIKING TO MOUNTAIN HUTS IN SWITZERLAND
While you are hiking in Switzerland, it is inevitable you will come across some incredible mountain huts. I didn’t know much about the hut culture in Switzerland but once I was in on it, I loved it. Basically, the mountain huts are kind of like mountain cabin hotels. They usually have a restaurant and also a number of dormitory-style rooms.
For average-sized huts, it is common for a family to live up in the hut on the mountain during the summer and hiking season and visitors can book a night or more up at the hut. When you arrive they have dinner and breakfast included in their nightly fee. I stayed overnight at five different huts (which were listed above) and most ranged from about $60 a night to $100 a night per person including breakfast and dinner.
The ‘huts’ are actually pretty fancy and have heating, nice restaurants, a balcony, alcohol, games, books and much more. All you need to bring is a sleeping bag liner and your hiking gear and you are set. You can also shower at most of the huts (usually included in the price).
I always did a one-night stay so I would hike up, watch the sunset, and stay the night. I would then hike at sunrise and explore further on before hiking back down.
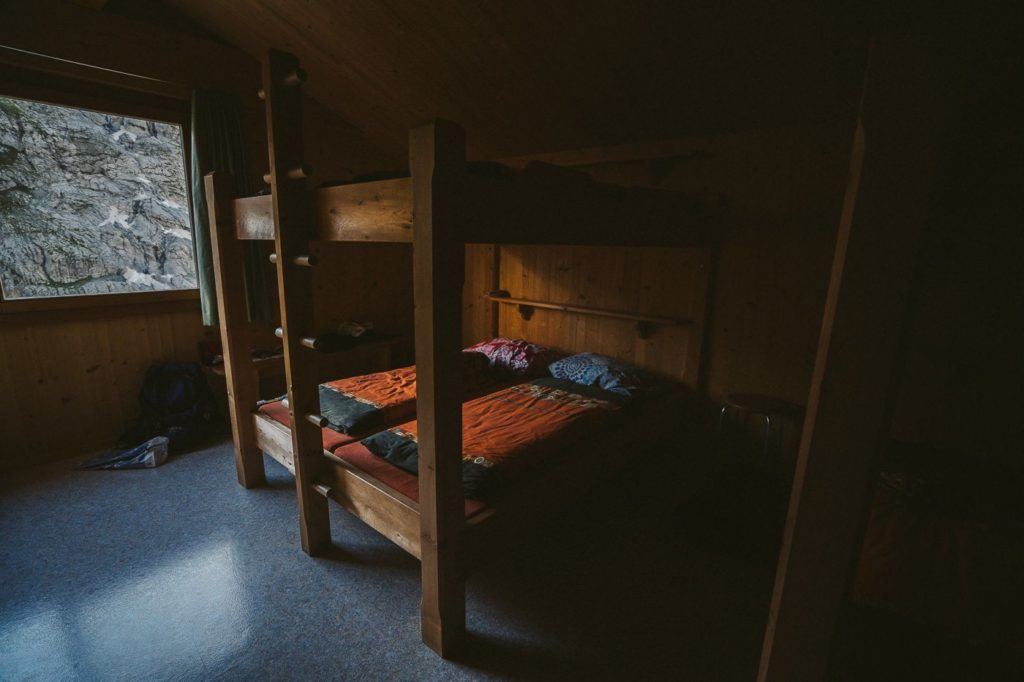
Many hikers like to do hut-to-hut mountain hiking, which means you map out several huts that are within hiking distance of each other and you do a multi-day trek where each night you will make it to a new mountain hut on the connecting trails throughout the Swiss Alps. It’s a great way to hike because you don’t need to carry all of your food, heavy camping gear, or warm clothes for the cold nights outside. You do all your eating at the hut restaurants carry a few snacks with you and sleep in the comfort of the cabin dormitories. If you are in Switzerland in the summer, I can’t recommend it enough.
The other key point to remember is that most meals in Switzerland are $20-$40 at least so when you consider you are getting two meals included, the accommodation is really only $30-40 per night, which will be the cheapest accommodation you find in Switzerland but the best view!
If you are planning to stay at a lot of mountain huts you can buy a Swiss Alpine Club (SAC) membership, which also involves a rescue service if you get stuck on the mountain. This membership gives you a discount of usually 40-50% off the regular price of the hut price. It costs about $80 USD for the yearly membership so after three overnight stays you have made your money back and you are supporting the mountain hut owners of Switzerland, who you will see are all really nice families.
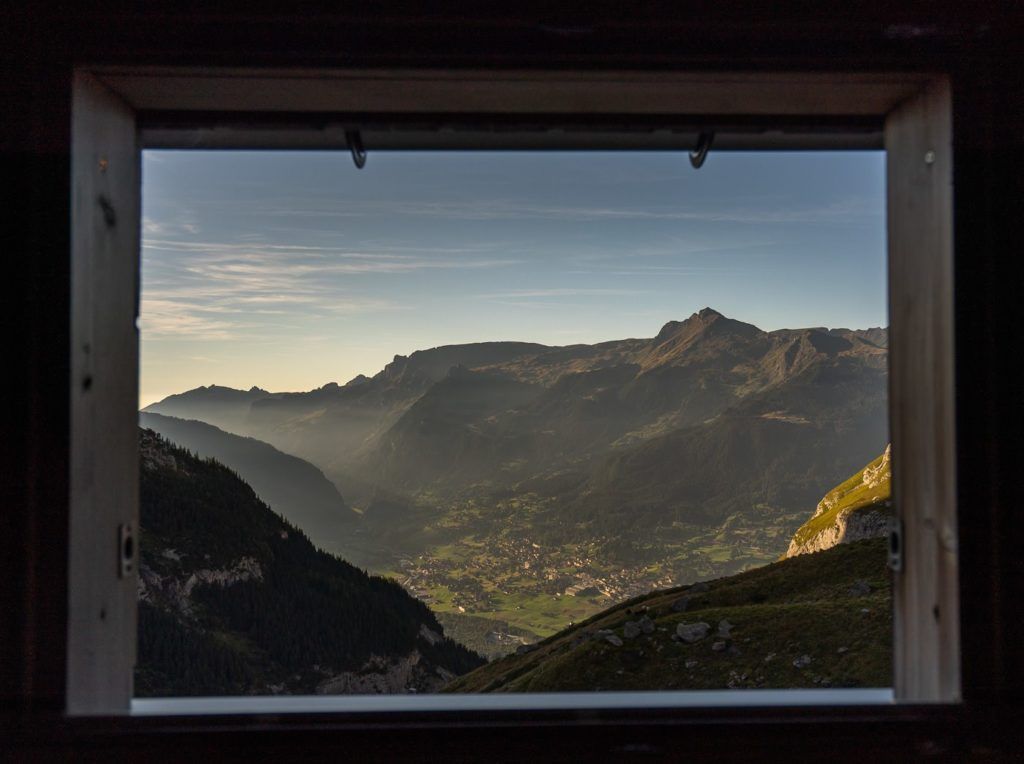
SAC HIKING SCALE -DIFFICULTY RATING GUIDE
Below you can see the Swiss Alpine Club (SAC) difficulty rating scale I mentioned earlier in the article. Each level from T1 to T6 is explained in detail so you can understand what to expect when you see that terminology during your time in Switzerland.
| PATH | TERRAIN | REQUIREMENTS | |
| T1
| Well developed, signposted and marked. Somewhat exposed places very well secured. | Flat or slightly inclined. No danger of falling with appropriate behaviour. | No steady footing necessary. Can be walked in trainers. Navigation without a map possible. |
| T2
| Continuous route and passage marking. | Steep in parts. Danger of falling not excluded. | Some steady footing Trekking shoes recommended. Basic navigation skills. |
| T3
| A footpath is usually available. Exposed places mostly secured with ropes or chains. | Partially exposed areas with danger of falling, gravel plains, pathless steep terrain. | Good steady footing Good trekking shoes. Average navigation skills. Basic Alpine experience. |
| T4
| Path not necessarily available. Sometimes need to use hands to keep going. | Mostly exposed. Tricky grass heaps, rocky slopes, simple firn fields and snow covered glacier passages. | Familiarity in exposed terrain. Stable trekking shoes. Terrain assessment and good navigation skills. Alpine experience. |
| T5
| Often without a path. Individual, simple climbing sections. | Exposed. Challenging terrain, steep rocky slopes, snow covered glaciers and firn fields with danger of slipping. | Mountaineering boots. Secure terrain assessment and very good navigation skills. Good Alpine experience also in high Alpine terrain. Elementary knowledge in handling a pickaxe and rope. |
| T6
| Mostly without a path and unmarked. Climbing sections up to II. | Often very exposed. Tricky rocky slopes, snow covered glaciers with increased danger of slipping. | Excellent navigation skills. Proven alpine experience and familiarity with alpine equipment. |
HIKING IN SWITZERLAND IN SPRING
Hiking in Switzerland in the Spring is between April to June.
- Pros:
- Alpine flowers begin to bloom, offering beautiful scenery.
- Snow starts melting, gradually opening up more trails.
- Fewer crowds than in summer.
- Cons:
- Higher altitude trails may still be covered in snow, especially in early spring.
- Unpredictable weather – it can vary from warm and sunny to rainy and cold within a short span.
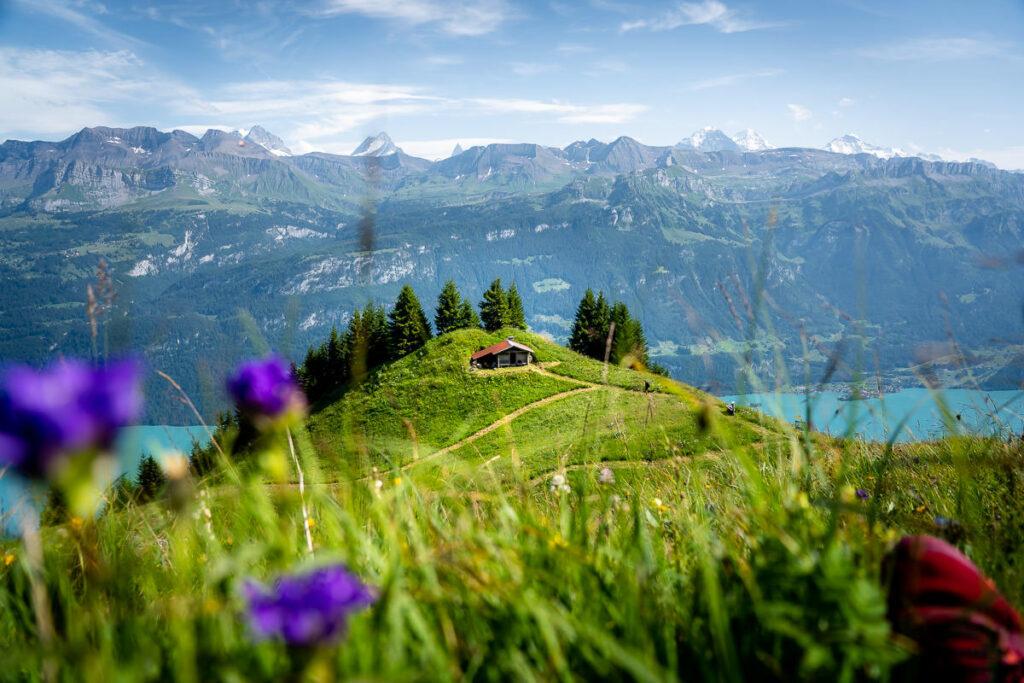
HIKING IN SWITZERLAND IN THE SUMMER
The summer season for hiking in Switzerland is June to August.
Pros:
- Most hiking trails, including high-altitude routes in the Alps, are open and accessible.
- Warm and generally stable weather, with temperatures suitable for hiking in various regions.
- Alpine meadows are in full bloom, providing colorful and picturesque landscapes.
- Long daylight hours, which allows for extended hikes.
Cons:
- Peak tourist season, especially in popular areas like the Jungfrau region, Zermatt, and Interlaken. This can mean crowded trails and higher prices for accommodations.
- Some areas, especially in the south, can get quite hot in mid-summer.
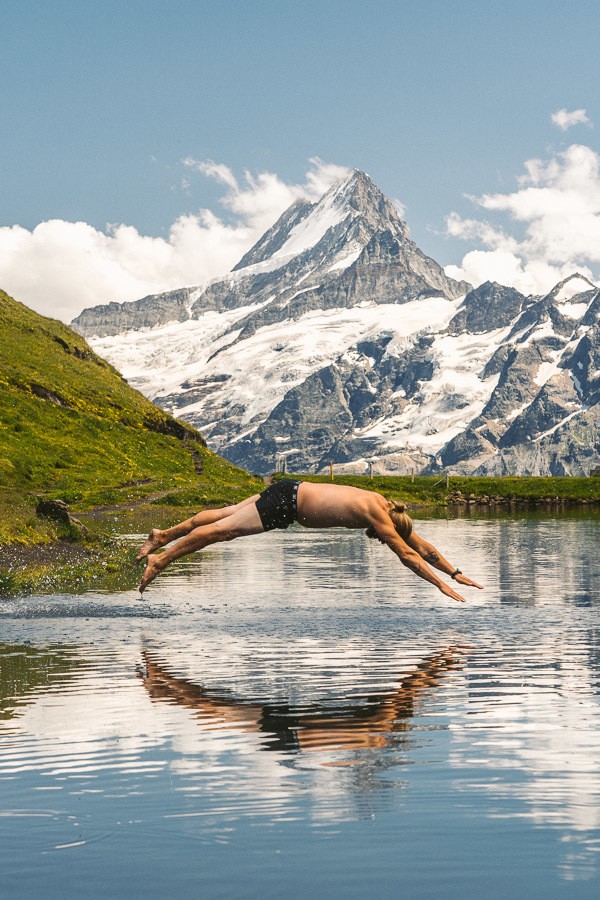
HIKING IN SWITZERLAND IN AUTUMN
Hiking in Switzerland in the autumn is between September to November.
- Pros:
- Fall foliage offers stunning colors, especially in lower altitudes.
- Cooler temperatures, which many hikers might find more comfortable.
- Fewer crowds compared to the summer months.
- Cons:
- Snow can start to fall in higher altitudes as early as October, making some trails inaccessible.
- Days start to get shorter, meaning less daylight for hiking.
Well, that’s it. Some have called it a book and it may as well be. I hope you have enjoyed my Switzerland Hiking Guide and appreciate the effort that has gone into the documentation of all of the featured hikes. I had an amazing time creating this guide and attempting all of the hikes in Switzerland look forward to returning to attempt some more technical hikes and some beginner climbing! Stay safe and adventure hard!
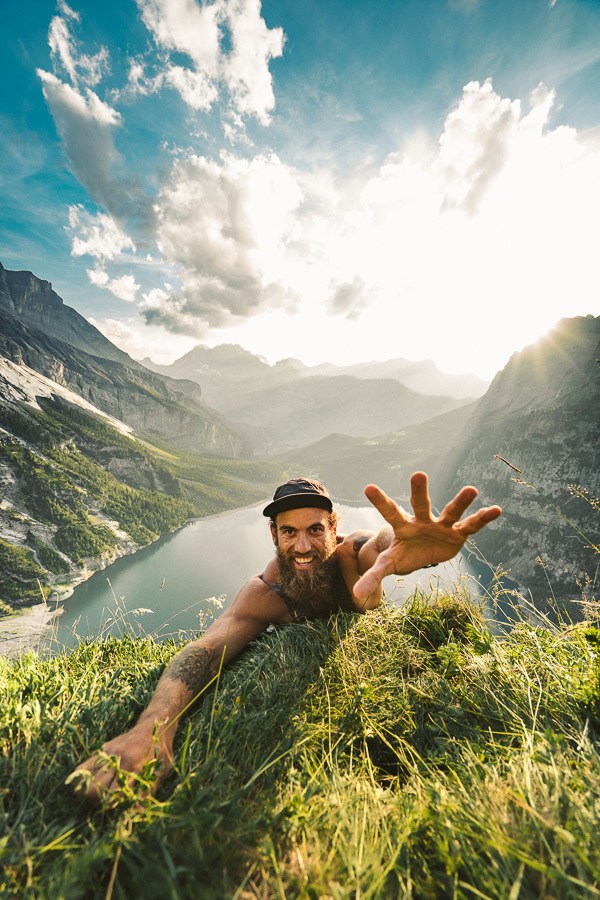
MY SWITZERLAND HIKING GUIDES
I spent 100 days hiking in Switzerland and created a guide for different regions around the country. You can click on one of my Switzerland hiking guides below to help you plan your trip.
- The Complete Guide: 50 AWESOME HIKES IN IN SWITZERLAND
- The Via Ferrata Guide: 4 EPIC SWITZERLAND VIA FERRATA COURSES
- Lauterbrunnen Guide: 10 AWESOME HIKES NEAR LAUTERBRUNNEN
- Interlaken Guide: 15 AWESOME HIKES IN INTERLAKEN
- Grindelwald Guide: 12 AWESOME HIKES NEAR GRINDELWALD:
- Mürren Guide: 7 AWESOME HIKES IN MURREN
- Appenzell Guide: 9 AWESOME HIKES NEAR APPENZELL
- Chur Guide: 7 AWESOME HIKES NEAR CHUR
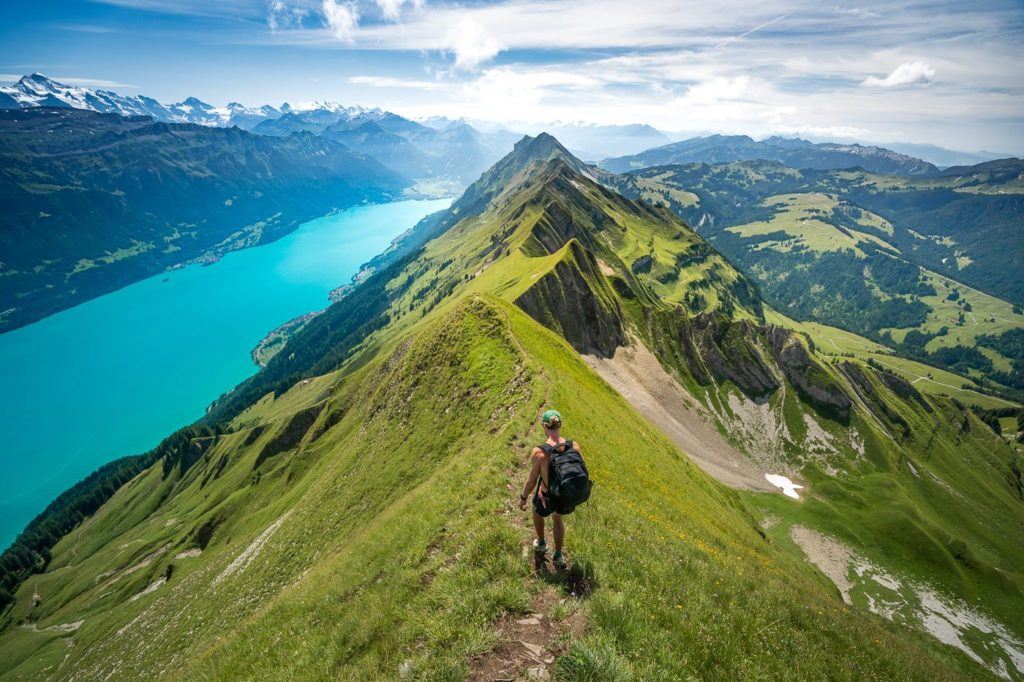
MY SWITZERLAND TRAVEL TIPS
- For Backpackers: SWITZERLAND BUDGET BACKPACKING GUIDE
- Travel Tips: 20 THINGS TO KNOW BEFORE VISITING SWITZERLAND
- Transport Tips: RENTING AND DRIVING A CAR IN SWITZERLAND
- Accommodation Guide: 30 BEST PLACES TO STAY IN SWITZERLAND
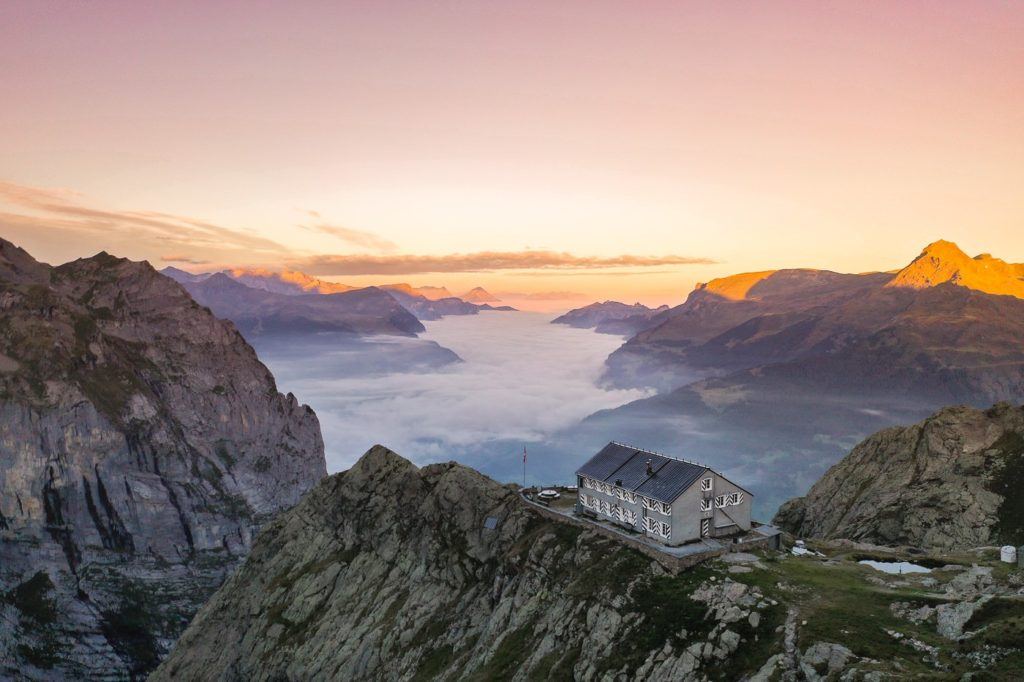
Eric Tholomé
Monday 30th of June 2025
Hey Jackson!
Thanks a ton for your inspiring content. I just organised an epic 4 day hike in Alpstein for/with a group of old friends which was awesome: Appenzell, Fehlensee, Saxer Lücke, slept at Bollenwees, Meglisalp, Seealpsee, slept at Forelle, Messmer, Schäffler ridge, slept at Schäffler, Äscher, cave, back to Appenzell. I knew the area already from day hikes but this was my first multi-day hike there and your content really helped design it.
I'm now looking for other multi-day hikes of similar length, difficulty and beauty (varied incredible mountain views, beautiful mountain lakes which you can swim in, far from civilization, nice huts) in Switzerland. I've started going through your content again and search the web, but it's not easy to find multi-day hikes. Based on your experience, what would you recommend? I'm thinking possibly in Ticino with all the beautiful valleys and lakes, or maybe Grinenwald area but interested in any/all options of similar caliber as incredible Alpstein.
Thanks in advance for your pointers!
Eric
Mariko
Thursday 9th of November 2023
Thank you so much for putting this up! Very insightful and great photos! Now I have 50 more hikes on my bucketlist :) Can you recommend which camera to use if you're using one (that takes photos like yours! I was thinking of a handsfree if that's even doable for these hikes) and selfie sticks that's foldable and durable? Many thanks in advance.
Georgie
Friday 8th of September 2023
Thank you so much for sharing this information and beautiful pictures of your adventures. This has been extremely helpful for planning our trip.
Ryan
Tuesday 8th of August 2023
Hi Jackson,
I do love your page. It would be very helpful to add dates to your photos, to show conditions during different times of the year.
Thank you!
Paul
Saturday 12th of November 2022
Thank you for posting this!