

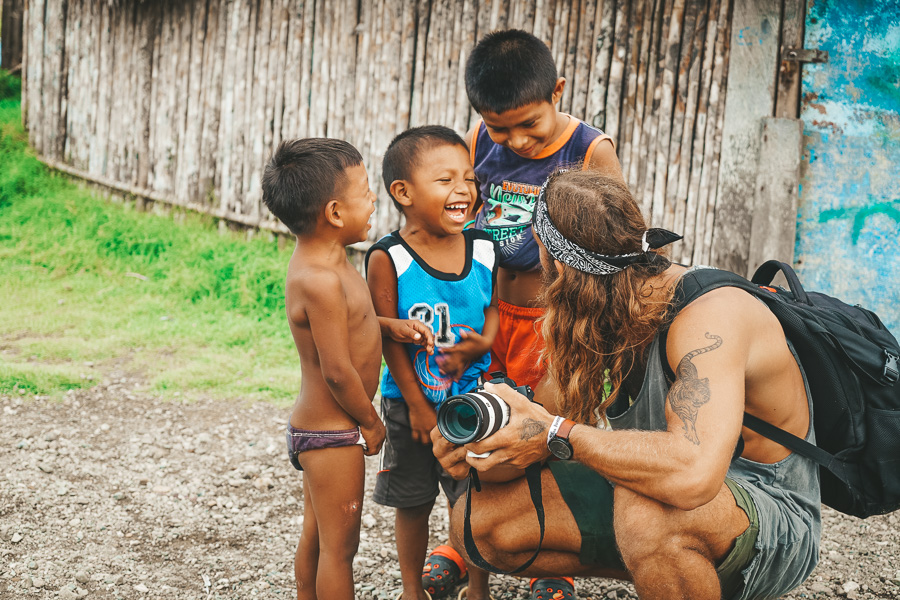
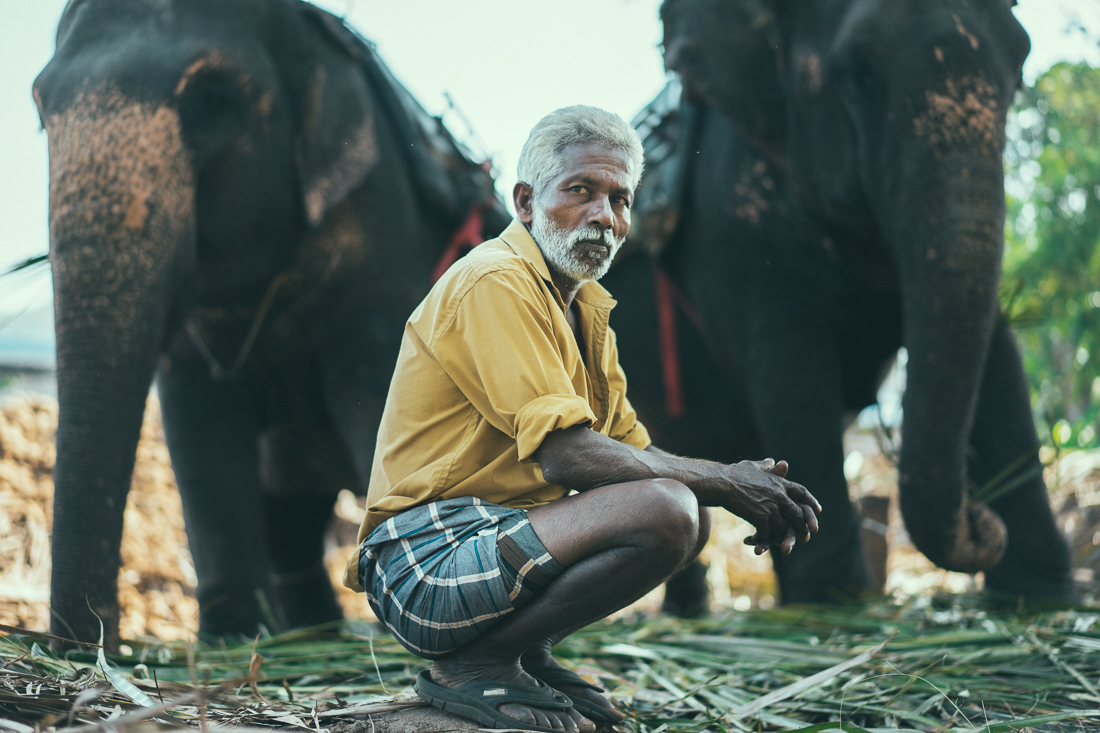
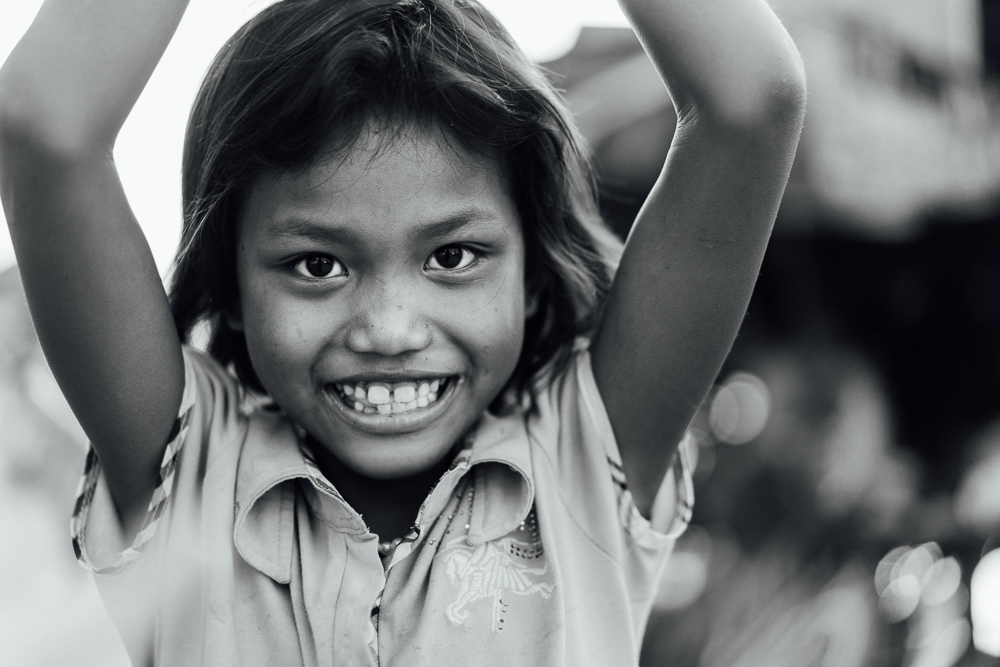
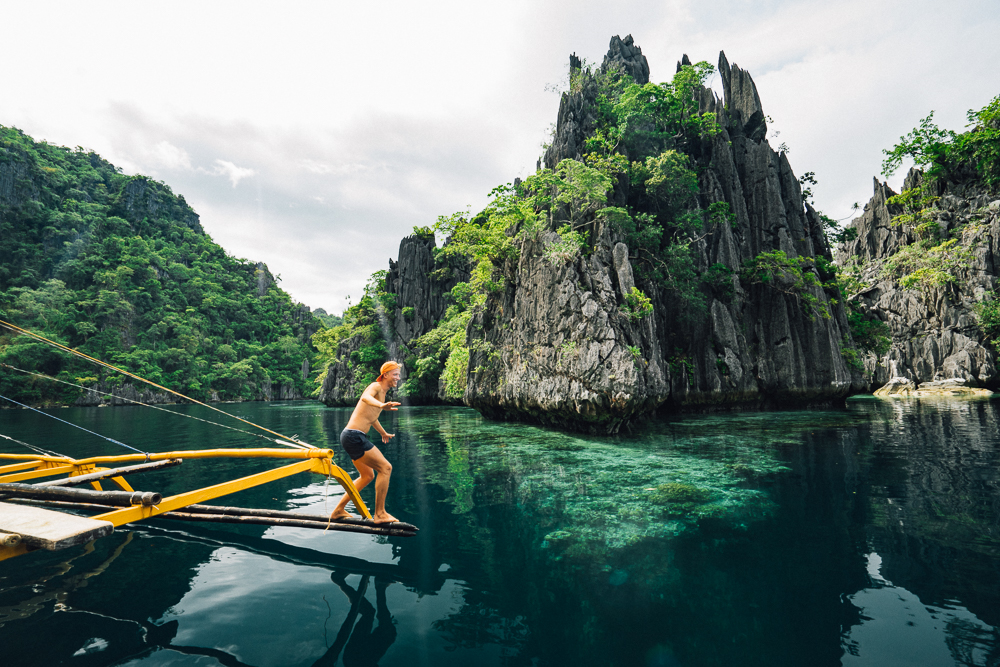
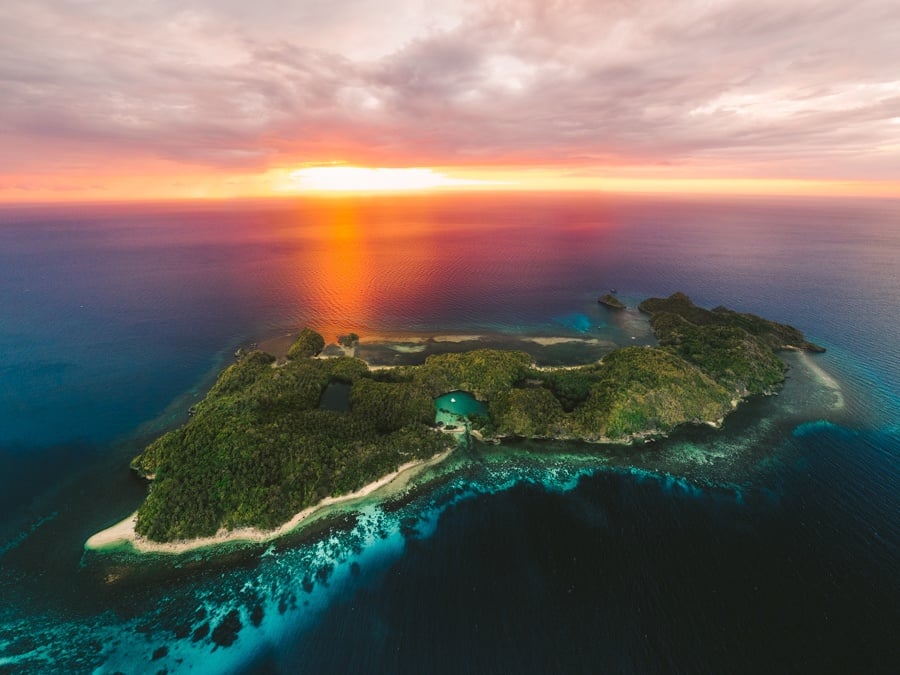
For the last six years, I have been traveling all around the world taking photographs and writing travel. Throughout this time I’ve tried a lot of different travel camera gear and also different backpacks and organization methods to keep it all sorted efficiently. In this blog post, I’m going to walk you through everything that’s in my camera backpack and other accessories I use. I’ll always keep this blog post up to date, adding and removing any travel photography gear as I upgrade or find better alternatives, so you know this is the actual gear I am using right now.
I usually buy my travel photography gear from Amazon as it is cheaper than the stores but also has a high level of reliability compared to some sites. You’ll find links to each item I recommend in this article but buying second-hand or from your local camera stores are a good option too.
MY TRAVEL PHOTOGRAPHY GEAR
First up here is a summary of all the travel camera gear in my bag then further below I will give a short explanation about each piece of travel photography gear in my bag, why I chose it, and what it is primarily used for.
| Camera Body: Sony A7riii |
| Camera Backpack: Atlas Athlete Backpack |
| Wide Landscape Lens: Sony 16-35mm F4 |
| Favorite Hiking CameraLens: Sony 24-105mm F4 |
| Telephoto Camera Lens: Sony 100-40mm F4 |
| Portrait Lens: 55mm F1.8 Sonnar T FE ZA Prime Lens |
| Drone: DJI Mavic Air2S |
| Circular Polarizer: Hoya 72mm HRT Circular PL Polarizer |
| Action Camera: GoPro Hero 9 |
| 360 Camera: Insta360 One X2 |
| Selfie Stick: Sandmarc Pole Metal Edition |
| Camera Backpack Clip: Peak Design Clip |
| Phone Case: Lifeproof Phone Case |
| Waterproof Bag: Earth Pak Dry Bag |
| Powerbank: Anker Powerbank |
| Memory Card: SanDisk Extreme PRO SD |
| Travel Adapter: Worldwide Adapter |
Mirrorless Camera: Sony A7riii & Sony A7iii
The most important piece of equipment for a travel blogger or photographer is a camera. The main thing to consider about a camera, other than the quality of the image, is the weight and size of the camera because you’re going to be carrying it around on your back every day. Secondly, you want to make sure you buy a camera you are comfortable trekking with, taking on boats, and into risky situations. If you purchase a very expensive camera and are too afraid to take it on your adventures you are quite simply missing the shot. For me, the Sony A7 series is the best for combining performance and quality within a lightweight, mirrorless camera. I currently use the Sony A7riii and have the Sony A7iii as a backup body in case the primary body fails on an expedition or in a country where no replacement is available.
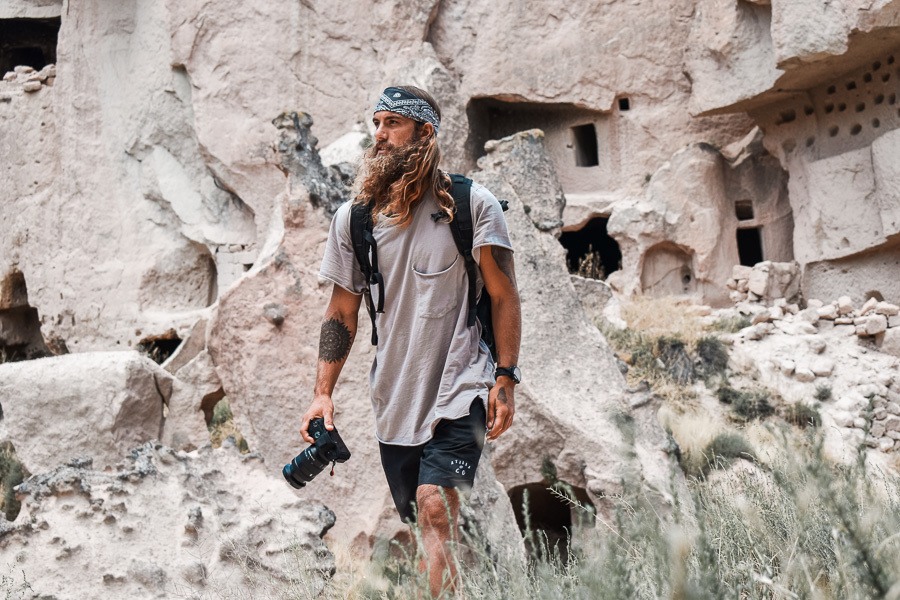
I wanted a light camera, one that I would be able to carry on hikes and all of my travel adventures. The Sony A7 series does a great job at matching Canon and Nikon for quality while weighing half as much. Canon and Nikon have now released competitive mirrorless options aswell but I’m sticking with Sony. Almost every single photo you see on this blog was shot with a Sony A7ii (for my first three years) and now a Sony A7iii and now a Sony A7riii. I switched back to a Canon 5dmkiv for a few months but switched back to Sony in a hurry.
The Sony A7iii weighs less than 1 kilogram! It has 24.4 megapixels and is a full-frame camera with interchangeable lenses so you can change up your shooting style with a variety of lenses, which I will cover further in this blog post.
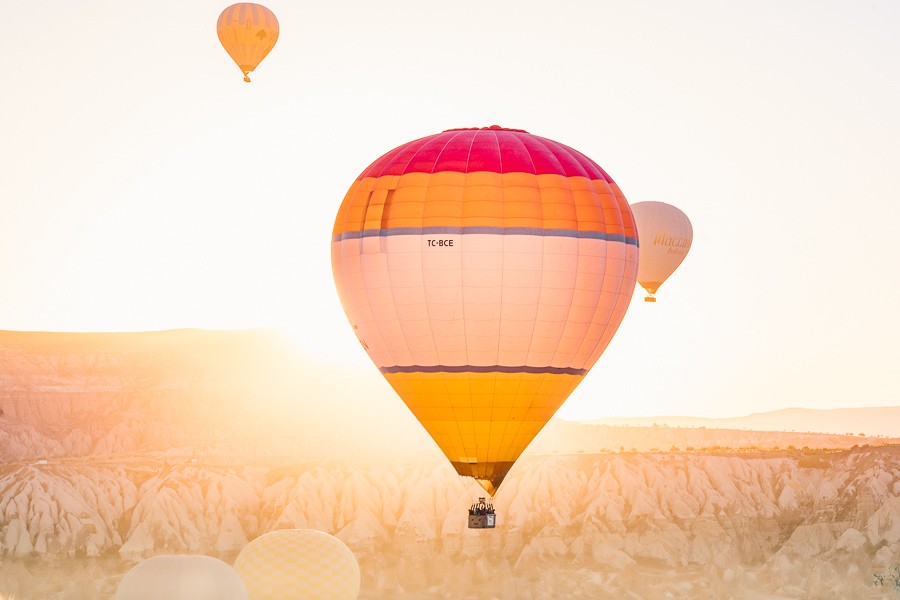
Here’s a photo of me cruising around Cappadocia with my Sony A7iii with my 24-105mm lens. Browse through any blog post of mine and you can see what type of photos I am creating with this camera over the past four years.
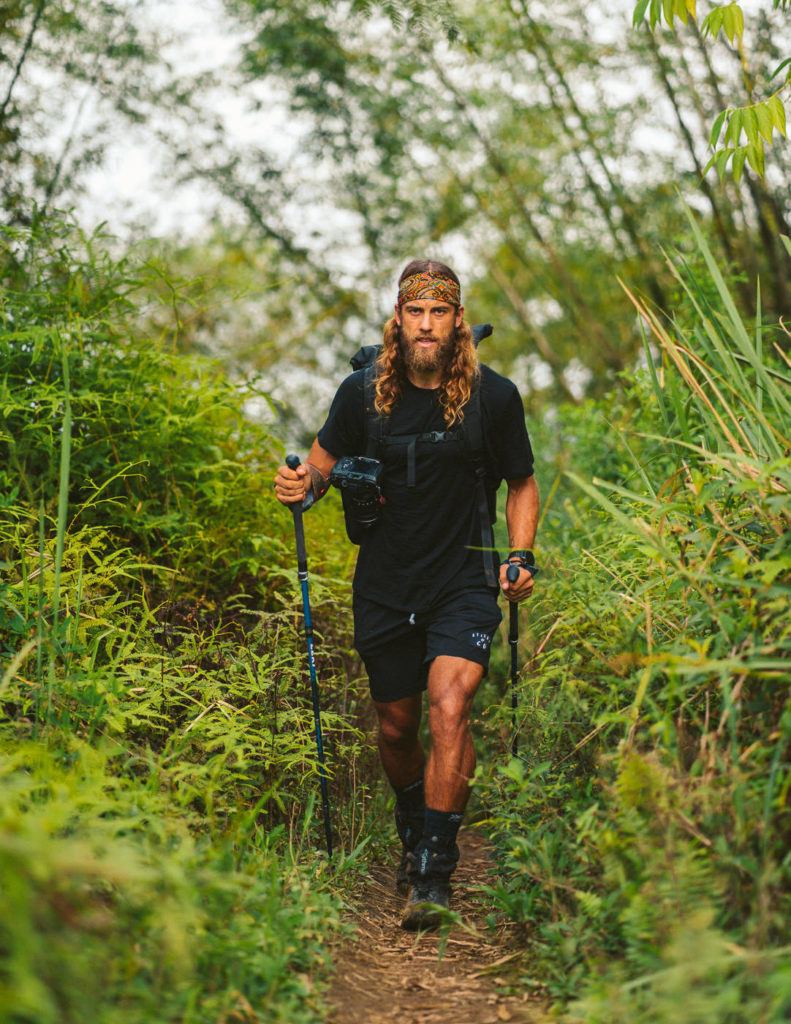
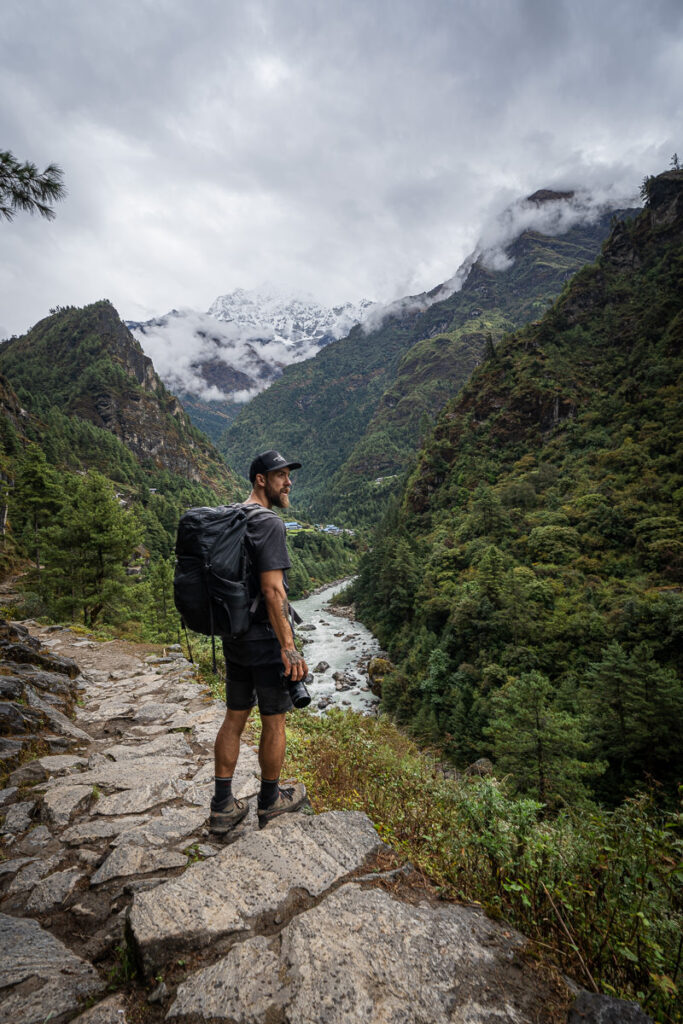
Camera Backpack: Atlas Athlete Backpack
The Atlas Athlete Backpack has been a revelation for me. I used the Wandrd PRVKE 31L for two years and it was great for small adventures and city cruising but once it came to real adventures like longer hikes, multi-day treks, or climbing, the Wandrd was simply hurting my back. Enter the Atlas Athlete, this bag is not cheap but is so durable it will literally outlast you. To sum it up, it fits like a hiking pack but works like a camera bag. I did the entire 12-day Manaslu Circuit in Nepal with just the Atlas Athlete while carrying a drone, camera, three lenses including a 100-400mm, and all of my extra clothes, gear, and jackets. I’ve overnight camped with it on multiple occasions.
It has been pushed to the limits and never ripped or had broken zippers while carrying all of my travel photography gear. I truly love this pack and you can see that when all of my friends buy the same bag because they don’t hear the end of it from me. It even carried my oxygen tank in the death zone on Manaslu. Here’s what this backpack offers.
- Laptop Pouch
- Camera Body compartment
- Padded area for 2-3 Lenses
- Padded area for Dji Mavic Drone
- Padded area for Dji Mavic Drone Batteries
- 2L external water bottle holders
- Room for camera accessories, cords and hard drives
- Extra room for clothes, jackets, and food for overnight hiking missions.
- Easy to cahnge the size of the pack from 20L to 40L
The co-owner of Atlas Packs, Allan, is the most passionate person I’ve ever met when it comes to Backpacks and that shines through from the personalization of the packs to his intense design process. Highly recommend the Atlas Athlete Backpack.

Landscape Lens: Sony F4 16-35MM
The Sony 16-35mm F4 Lens was on my camera 90% of the time in my first three years of travel blogging. It is my go-to lens for most hikes and for many of my Instagram posts. However, depending on the type of adventure, I now use my 24-105mm a lot aswell. I’d say it’s 50/50 splits between my F4 24-105mm and F4 16-35mm.
The focal length of 35mm is equivalent to what you see with a naked eye. A focal length of 16mm is much wider and enables me to capture an entire scene, a vast range of mountains, or an entire beach in one shot. The Sony F4 16-35mm is my primary lens and It enables me to shoot some portraits but also the flexibility to fit an entire landscape into my frame. It’s perfect for travel photography for those who are outdoors a lot of shooting landscapes in the mountains or on beautiful beaches.
There is also a 16-35mm F2.8 model, which means you can create a little bit more depth of field and shoot in lower light. However, it is almost double the price, is heavier, and shooting with a wide aperture of 2.8 isn’t that handy for the type of landscape photos I take so I stuck with the lighter, cheaper version for my travel photography kit.
Travel Blogging Lens: Sony F4 24-105mm
For my first three years of blogging, I mainly used my F4 16-35mm but it was limited at times in terms of reach/zoom and I didn’t enjoy changing lenses to throw a 70-200mm or 55mm on while I was on a boat, on a sweaty hike or other areas where dust and moisture would get inside my camera sensor.
At the start of 2019, I bought a Sony F4 24-105mm, and it has been one of the best decisions I’ve ever made. I honestly don’t know why I wasn’t using this lens earlier. Having the ability to zoom in to 105mm and shoot details, compress backgrounds and target specific elements of a scene is a breath of fresh air for me and has reinvigorated my photography. It’s definitely the most versatile piece of travel photography gear in my lens collection. I still love getting those super wide-angle landscape shots, but at 24mm I can shoot most hiking scenes and adventure scenes while having the ability to quickly zoom in to 105mm for compression a moment later. It has now become my most used lens just ahead of the F4 16-35mm.
Sony 100-400mm F4-5.6
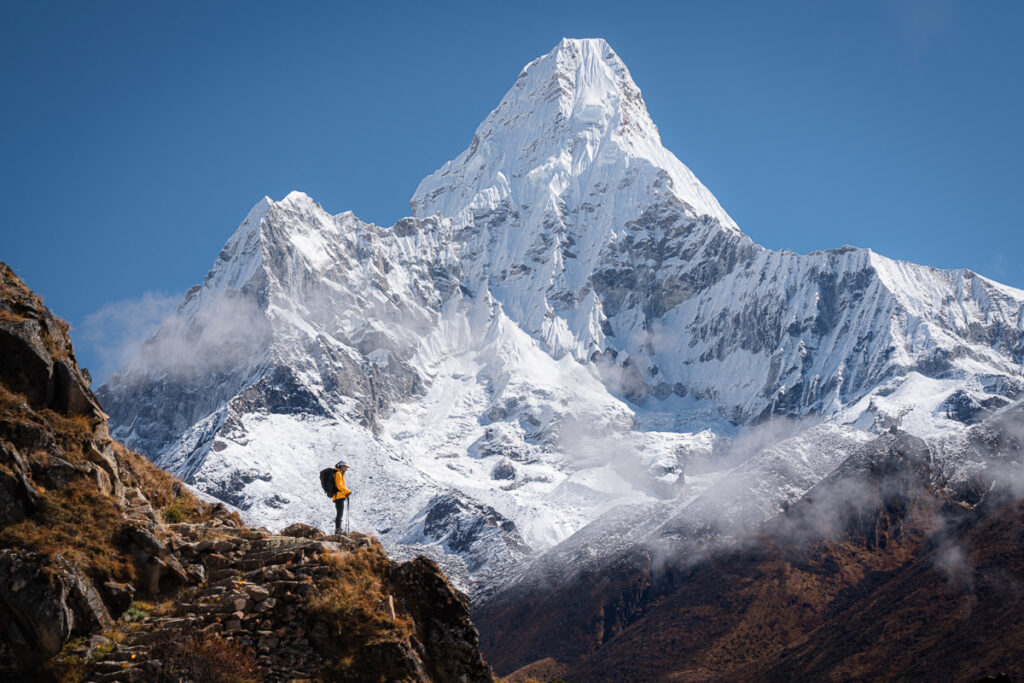
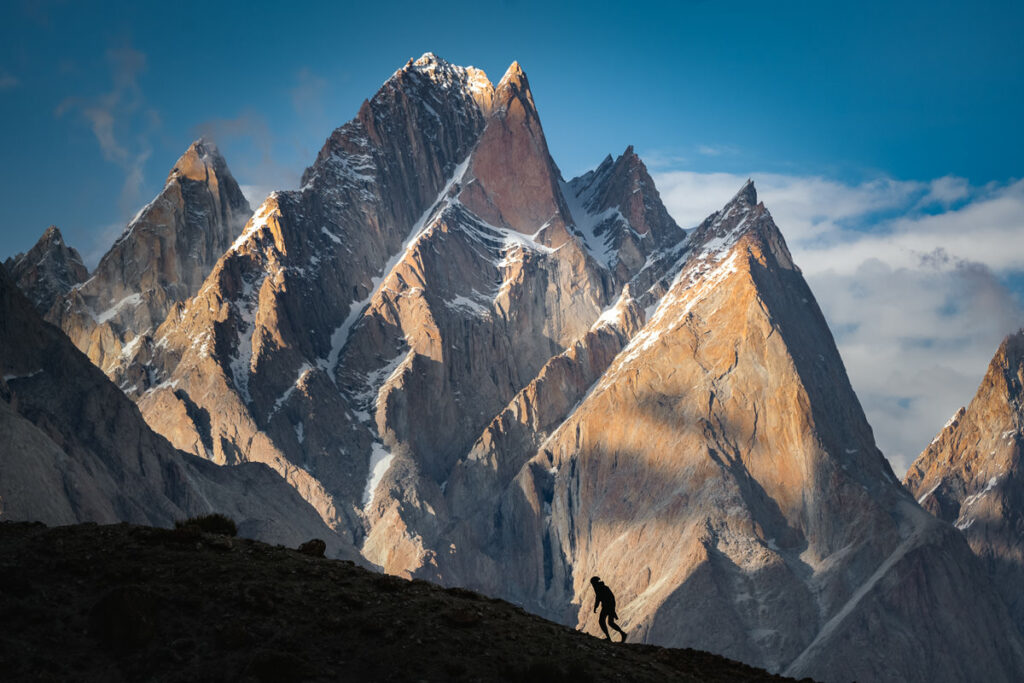
A little over a year ago I made the decision to go big. I grabbed a Sony 100-400mm lens for shooting those faraway peaks in the mountains and for generating extra compression of backdrops while hiking. It’s heavy, I won’t lie but it also creates a compression that smaller lenses just can’t compete with. Every time I hike, climb, or adventure, I have to ask myself what type of shots I will need and if it is worth carrying. It’s been awesome up in the big mountains but I often leave it behind if it is a smaller hike with fewer ‘long distance’ shots available and use the 105mm range of my 24-105mm to get a small amount of compression. Below is a photo of a hiker in the Karakoram Range nicely compressed and the second photo is of the second tallest mountain in the world, K2. While not a vital piece of travel photography gear, it can definitely enhance the variety of photos you can create with extra reach an compression.
Portrait Lens: 55mm f1.8 Sony- Zeiss
A prime lens has a fixed focal length and a much wider aperture, which enables low light shooting and a much smaller depth of field. I purchased the Sony 55mm F1.8 Sonnar T FE ZA Prime Lens. I ended up doing a few paid jobs and paying off this lens quickly. My favorite time with this lens was in Indonesia where I tried my hand at travel portrait photography for the first time, which turned out to be really fun especially with the small depth of field the Sony 55m F1.8 delivered. Taking portraits is something I do now in every country I visit and it is because of this lens.
Hoya Polarizer Filter
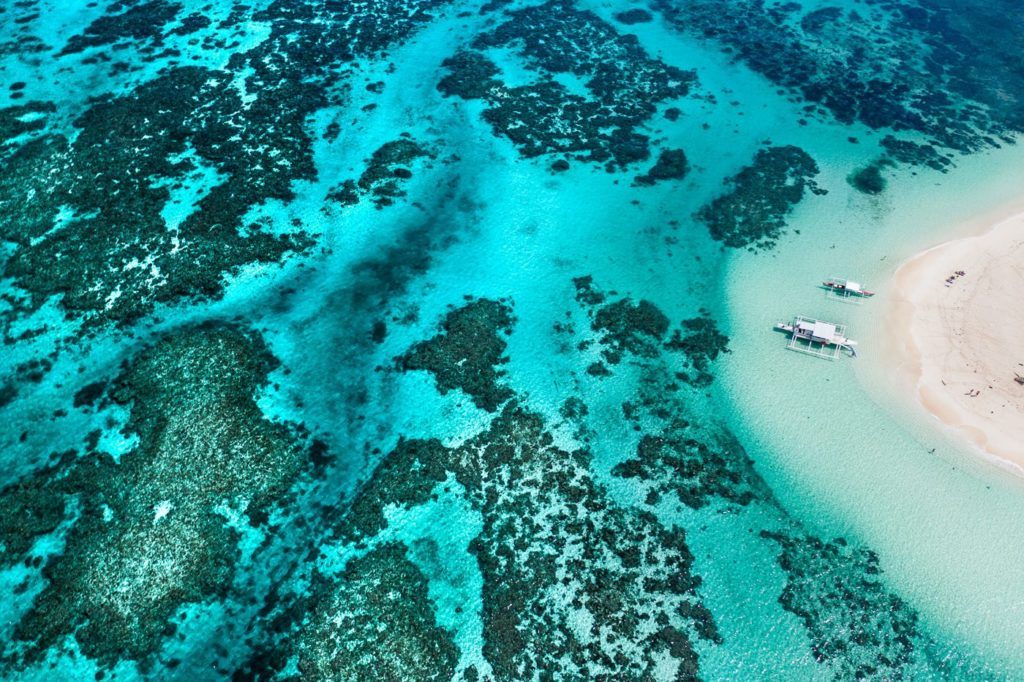
Almost all of my landscape photos involve the bright sun and the ocean. The harsh light from the sun often blows out the water with awful reflections. I bought a Hoya 72mm HRT Circular PL Polarizer for my Sony F4 16-35mm landscape lens and with a small twist before taking a photo I was now able to reduce or eliminate the reflections on the ocean. All of a sudden I could see the reef below the water and bring out the turquoise color of the Pacific Ocean. Even on hikes the polarizer really brings out the greens of the trees and is so handy when shooting a waterfall. My polarizer is on my camera 90% of the time and is one of my favorite accessories. It also protects your expensive lens glass from scratches.
Dji Mavic Air2S
Buying a drone is the single best thing I’ve done during my travels. I absolutely love flying my drone at all of the amazing places I get to visit. I flew the DJI Mavic Pro and then the DJI Mavic Pro 2 before and enjoyed both of them a lot. I think I clocked over 3000 flights between these two drones, so I definitely got my money’s worth. However, I crashed the Mavic 2 in Pakistan at an altitude of 6000m (double the recommended maximum). I decided to switch to the DJI Mavic Air2S for a couple of reasons.
Firstly, it is so much lighter than the Mavic Pro series, which for hiking and adventures is a major plus because I carry the damn thing everywhere. Secondly, it seems to handle way better at altitude as it is lighter but seemingly just as powerful as the Mavic Pro series. I think its power to weight ratio must be better. I was the first person to fly a drone from the summit of Manaslu at 8,163m and then flew again at 6,200m on Ama Dablam. Thirdly, the photo quality seems to be similar to the Mavic Pro series despite its slightly lower specs. Finally, the price is almost half that of the Mavic Pro series, so it’s value for money.
The one MAJOR negative for the DJI Mavic Air2S is that it’s a fixed aperture so that can be tough for videographers. If you want to film a lot of videos, I would stick to the DJI Mavic Pro 3 but if you want a lightweight drone primarily for photos go to the Mavic Air2s like me. A drone has fast become my favorite piece of travel photography gear due to the unique angles it can capture.


Insta360 ONE X2
As 360 cameras began to grow in popularity, I thought they would be great for solo travel and for hiking shots. It turned out it’s awesome for hiking on ridges and super easy to capture yourself in action rather than filming with a drone or having a friend take photos or video of yourself. The Insta360 One X2 is the camera I use and it comes out with great quality and is super easy to edit in the app. The actual camera is really lightweight and small and the stick is very long (necessary) and all folds down to fit in the side pocket of my camera. I literally pull it out from the pocket and then extend the stick, take the shot, and can do all that within a minute so it doesn’t slow down the hike or make a big fuss if you’re with a mate or in a group. Here’s one of the many videos I’ve captured with this camera.
GoPro Hero 9
The GoPro Hero 9 is a serious bang for your buck. It allows you to take amazing underwater photos at a very affordable price and the size makes it practical for travel. Pair this with a selfie stick or a dome port and you’ll be able to capture some incredible angles. GoPros are also extremely durable, they’ll be able to take a lot more hits than you will so you don’t have to be afraid where you can and can’t take it. It’s also pretty handy for casual travel vlogging and I’ve made a number of my hiking vlogs with the GoPro as it simply fits in your pocket and doesn’t weigh much!
Sandmarc Extra Long Selfie Pole
Don’t be ashamed of using your selfie stick. They capture some of the best and most engaging angles. I use the Sandmarc GoPro pole because of a couple of reasons. The Sandmarc pole is longer than the default stick GoPro sells and it also doesn’t have the three-arm bend. It is for holding out during a cliff jump, on a moped. It doesn’t bend or need adjusting just whip it out, get the shot, and put it away before anyone notices!!
Lifeproof Phone Case
Whether you’re island hopping or tip-toeing behind enormous waterfalls, it’s a wise investment to get yourself a waterproof phone cover. I use a Lifeproof Waterproof Case, so I never have to worry about dust, water, sand, and scratching my phone. It also handles being dropped all the time. Not only do they keep your phone safe from water damage, but you’ll also be able to take photos on the move too. If you want to use your phone near water a cheap phone pouch or case will do the job, but one of them is a definite must.
Peak Design Camera Strap Clip
I often got sick of having a camera strap attached to my camera 24/7, so I finally purchased the Peak Design clip-on strap, which lets me clip it and unclip the camera strap when I don’t want it on. I don’t really use it when I’m hiking, I just hold my camera steady and prefer not to have the strap swinging around but sometimes you want the strap for safety. With the Peak Design clips, you don’t need to undo the whole thing you can just unclip it in seconds. Practicality!

GorillaPod
I quickly figured out that carrying a tripod everywhere was not fun at all. In fact, I often left it at the hostel because I didn’t want to hike with it. So when I did need a tripod I didn’t even have one. I decided to buy myself a GorillaPod, which is super small, lightweight, and fits inside my backpack easily. It is bendable and you can attach it to almost anything. Unlike the tripod, which has a maximum height, you can attach the camera to poles, tree branches, or street signs to grab a steady shot. It’s perfect for vlogging and setting up photos of yourself if no one else is around.
EarthPak Waterproof Dry Bag
You got it, another tropical essential. When you’ve seen as many people lose their phones or camera gear to water damage as I have, you’ll understand why I place so much importance on a waterproof dry bag. A quality dry bag will do as it suggests by keeping your belongings air-tight even if the bag happens to become fully immersed in water during snorkeling, a boat trip, or waterfall adventures.

Anker Powerbank
A few hours on Google Maps is a sure way to drain your phone battery, alas, a power bank is a necessity for me. This year I started using an Anker Powerbank and it was a life-changer. It stays charged when I’ve charged it, is super reliable, and gives me 3-4 cycles of phone charge or camera battery charge. It guarantees I always have the battery charged on my phone, plus it has another USB point for other electronics like your GoPro. If you are a photographer, digital nomad, or just love your tech this is a necessity.
Worldwide Power Adapter
Charging all your gear can be difficult enough in the Philippines, it pays to get yourself a good quality adapter that will plug into any wall without fail. If you get yourself a worldwide adapter, like mine, it will come in handy for the rest of your travels too. There’s nothing worse than traveling around Southeast Asia and having to buy a new adaptor for every single country. Get a universal adaptor and simplify your travels.
Memory Cards
I have multiple SanDisk Extreme PRO SD cards, which have worked perfectly for me. They come in different storage amounts but the 64GB or 128GB means you will literally never run out unless you are shooting insane amounts of video.
robert morgan
Sunday 11th of December 2022
Thanks for sharing. I travel quite a bit but I don't really take the time to get really good shots like you have. I will be visiting Coron for 4 or 5 days in Jan 2023. Any tips not already in your blog? Really enjoy your pics. Also, any recommendations for a compact drone? I usually only travel with 1 backpack and a very small personal item.
Robert
Sarah
Tuesday 15th of November 2022
Thanks so much for sharing! I’ve been traveling quite a bit this year and want to keep practicing my photography so I can blog more seriously.
This post was so helpful that I even purchased a few of the recommendations you listed above!
Stefan
Monday 1st of August 2022
Hey Jackson, thanks for sharing this. What do you use for travelling between countries/places - 2 backpacks or a suitcase?
Thomas
Saturday 28th of May 2022
Hi,
I have the peak design capture clip system and would love to combine it with the gorillapod, but how do you manage to use the peak design quick release plate on the gorillapod (without having to unscrew it all the time)?
Ramiro
Tuesday 11th of July 2023
Hey @Thomas,
I know you asked this over a year ago, but this worked for me
Neewer DC-38Q Screw Knob Clamp Quick Release Plate + Metal PU-50 Universal Quick Release Plate
https://a.co/d/cTqTgPm
Addison
Monday 8th of November 2021
such an incredible blog and amazing picture, Thank you so much for sharing your travel blog. keep sharing, your positivity is infectious.