
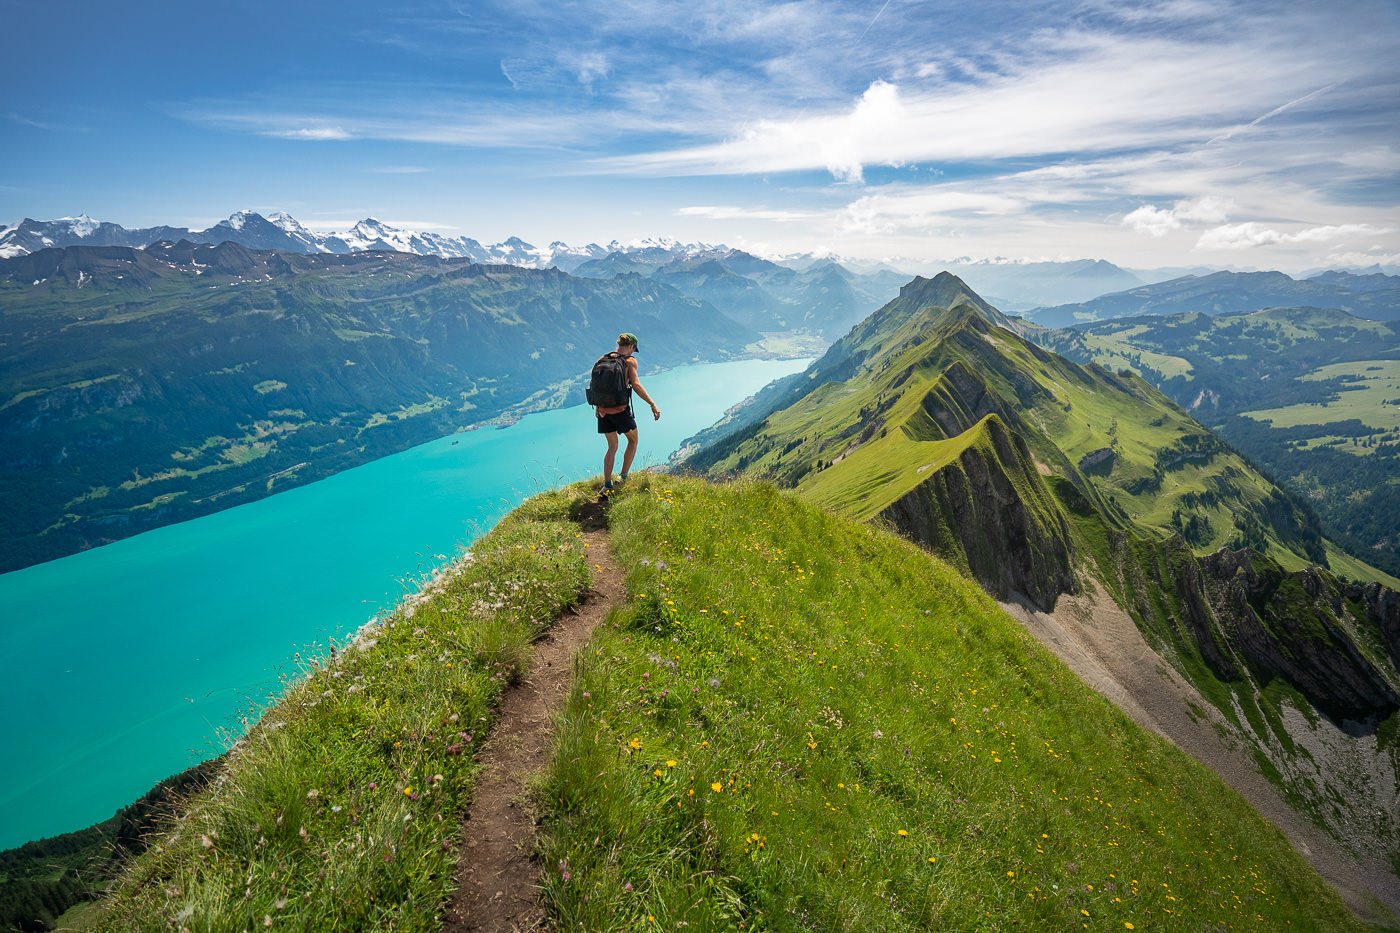
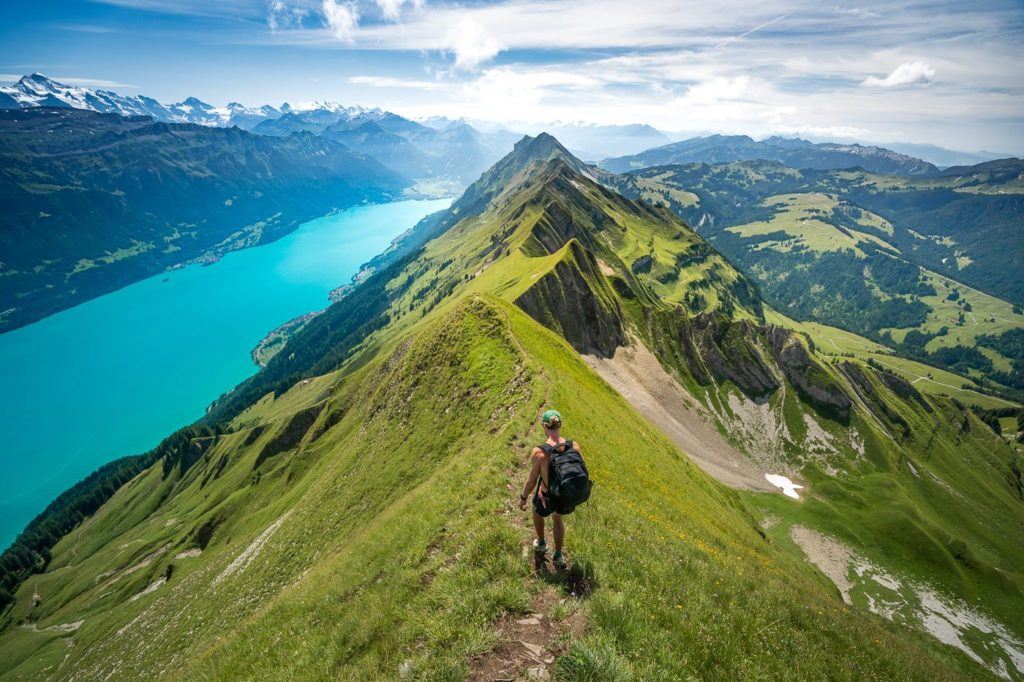
The Hardergrat Trail is one of the most iconic hiking routes in Switzerland. In fact, it is commonly rated as one of the top ridge hikes in the whole world. This 24km trail runs alongside the stunning Lake Brienz guiding hikers and trail runners from the beautiful town of Interlaken down to the finish point at Brienz. It’s a tough route with 3000m of incline, no shade, and no water sources along the way.

The Hardergrat Trail Hike
It takes a big effort to complete this hike and it can be dangerous with injuries and deaths occurring every year. However, with the right preparation and approach, this is one of the best day hikes in all of Switzerland. In this blog post, I’ll share everything you need to know about hiking the Hardergrat Trail in order to be successfully prepared for your attempt.

There are a few different options about which direction to hike, and where to start and finish that can make a big impact on your incline and total distance. In this blog post, I will discuss the trail options, how to get there, cable car details, and what you should pack everything you need to know before attempting the Hardergrat Trail.
HARDERGRAT TRAIL DETAILS
- Hike Distance: The total distance of the Hardergrat Trail can vary depending on whether you take a train up or down on either side or hike the extra distance. However, most hikers will catch the funicular up to Harder Kulm and the train down from Brienzer Rothorn Station. This makes the official distance 24km.
- Hike Duration: The hike will take you about 6-8 hours due to the steep incline, narrow ridges, and some technical areas.
- Hike Difficulty: This trail is often dramatized online but I feel that for experienced hikers, this trail is relatively safe. The key factors to consider are mostly related to the weather. Try not to do the hike on a windy day, when it has rained or snowed in the days prior. There are fatalities on this trail most years so it obviously can be dangerous. However, if you are hiking on a dry, sunny day with no wind, I think most experienced hikes will enjoy the route.
- Hike Incline: Total incline for the hike is 3000 meters when hiking from Harder Kulm to Brienzer Rothorn Station. If you reverse the route to hike from Brienzer Rothorn Station and finish at Harder Kulm on the exact same route, the incline is just 1400m. When hiking in the opposite direction, the trail is often referred to as the Brienzergrat.
HARDERGRAT TRAIL ROUTE OPTIONS
There are a few options for hiking along this beautiful ridgeline. I’ll give you the lowdown on them all and provide the pros and cons of each option.
- Interlaken to Brienzer Rothorn Station: The first option is the most official version of Hardergrat. It’s tough with 3000m of incline as you need to climb up to join the ridge at Harder Kulm and then traverse the ridge to Brienzer Rothorn. Having done the hike up from Interlaken to Harder Kulm, I would suggest bypassing this part of the hike and starting at Harder Kulm after having caught the funicular up.
- Brienzer Rothorn Station to Harder Kulm: This ‘reverse route’ is known as the Brienzergrat. It offers a nice bonus as you can catch the early train up to Brienzer Rothorn for half price and then start the trail early. You will have more than enough time to make it Harder Kulm for the last funicular down. Hiking in this direction is also less steep with just 1400m of incline for the day.
- The Full Loop: For intense trail runners trying to do the holy grail this is it. Starting in Interlaken, climbing to Harder Kulm before traversing the ridge to Brienzer Rothorn, and then hiking down to Brienz before making the journey along the lake back to Interlaken. A massive day that needs to be run not hiked.
HOW TO GET TO THE HARDERGRAT TRAILHEAD
In this section, I’ll explain how to get to the trailhead on either side. You may have chosen to hike from Brienzergrat or from Harder Kulm or Interlaken directly. This will impact your trailhead and transportation needs.
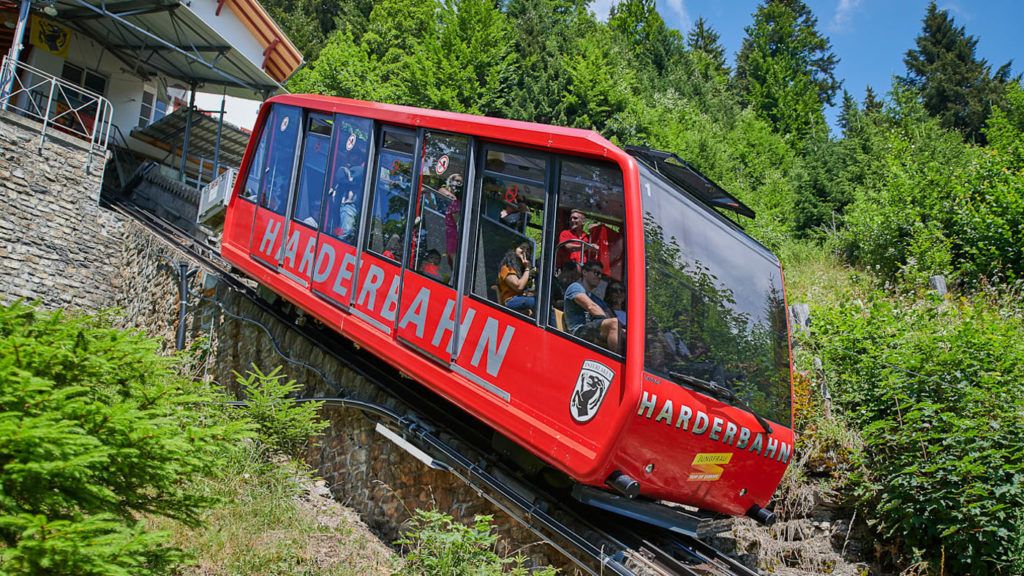
- Take the Harderbahn (Harder Kulm Funicular) up to the ridge. Depending on the time of year, this will have its first ride up at different hours. Children aged between 6-16 years and travelers with Swiss Travel half-fare cards can enjoy reduced Harder Kulm ticket pricing. To give you an idea of the schedule as of 2021, In the summer the first ride up was 9:10 am and the last ride down was 9:10 pm or 9:40 pm. In the winter months, the cable car comes down at 5:10 pm for the last ride. Skip the line for the Funicular and book your ticket in advance online at no extra cost.
- If you are hiking up to Harder Kulm, you simply head to the Harderbahn station and the trail begins on the left-hand side of the station. There are signs the whole way up to Harder Kulm through the forest.
HOW TO GET TO THE BRIENZERGRAT TRAILHEAD
Given that the Brienzergrat is the exact same hike in reverse, many hikers choose this route as it is slightly less intense due to the route not being as steep. I prefer the trail from Brienzer Rothorn to Harder Kulm as the incline is almost half and you start with some of the best views of the hike.
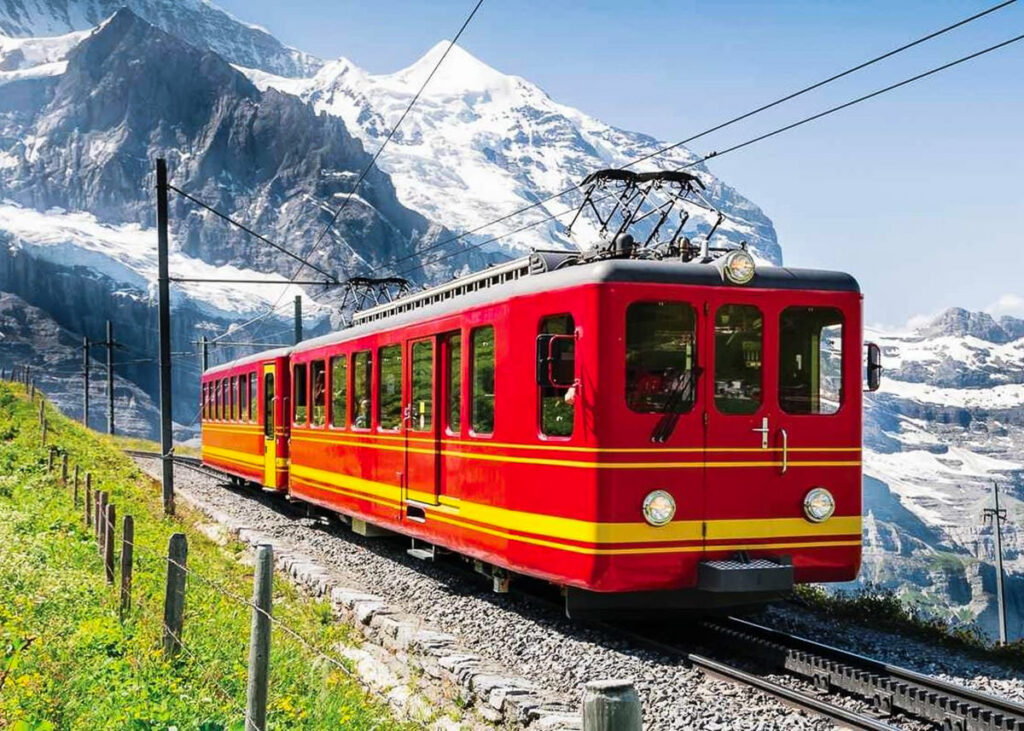
- The first train up to Brienzer Rothorn is usually at 7:36 am. This early ticket is half-price, but you should get there 30 minutes prior to guarantee your ticket. The train leaves once every hour thereafter and the ride up is about 50 minutes. You can check the timetable and book your ticket on the official site here.

THINGS TO KNOW ABOUT THE HARDEGRAT TRAIL
- It is highly advised NOT to do this trail if it is wet or rained the day prior.
- There have been a number of deaths on the Hardergrat Trail from hikers slipping and falling. There are a few scramble sections but mostly this can be put down to difficult conditions. In dry conditions with no wind, it is okay to navigate.
- Avoid high-wind days as it can be tough getting blown around on the narrow ridges.
- There are no water sources on the actual trail so make sure you carry at least 4L of water but potentially 6L if it is a hot day. There is no shade except for a couple of kilometers near Harder Kulm so you will be sweating a lot. Many people don’t pack enough and get dehydrated and that is when incidents can occur.
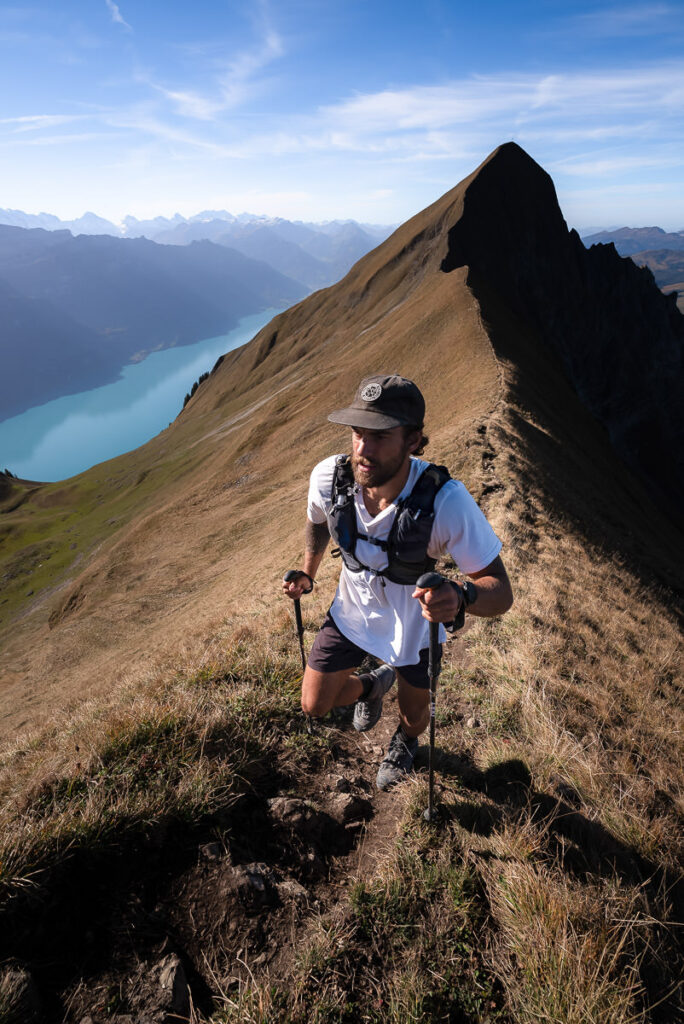
- Hiking shoes or trail running shoes are fine. I would advise hiking poles for this route as there is a lot of incline and decline.
- You can find reliable maps on Switzerland Mobility here or Alltrails but it is a pretty straightforward route.
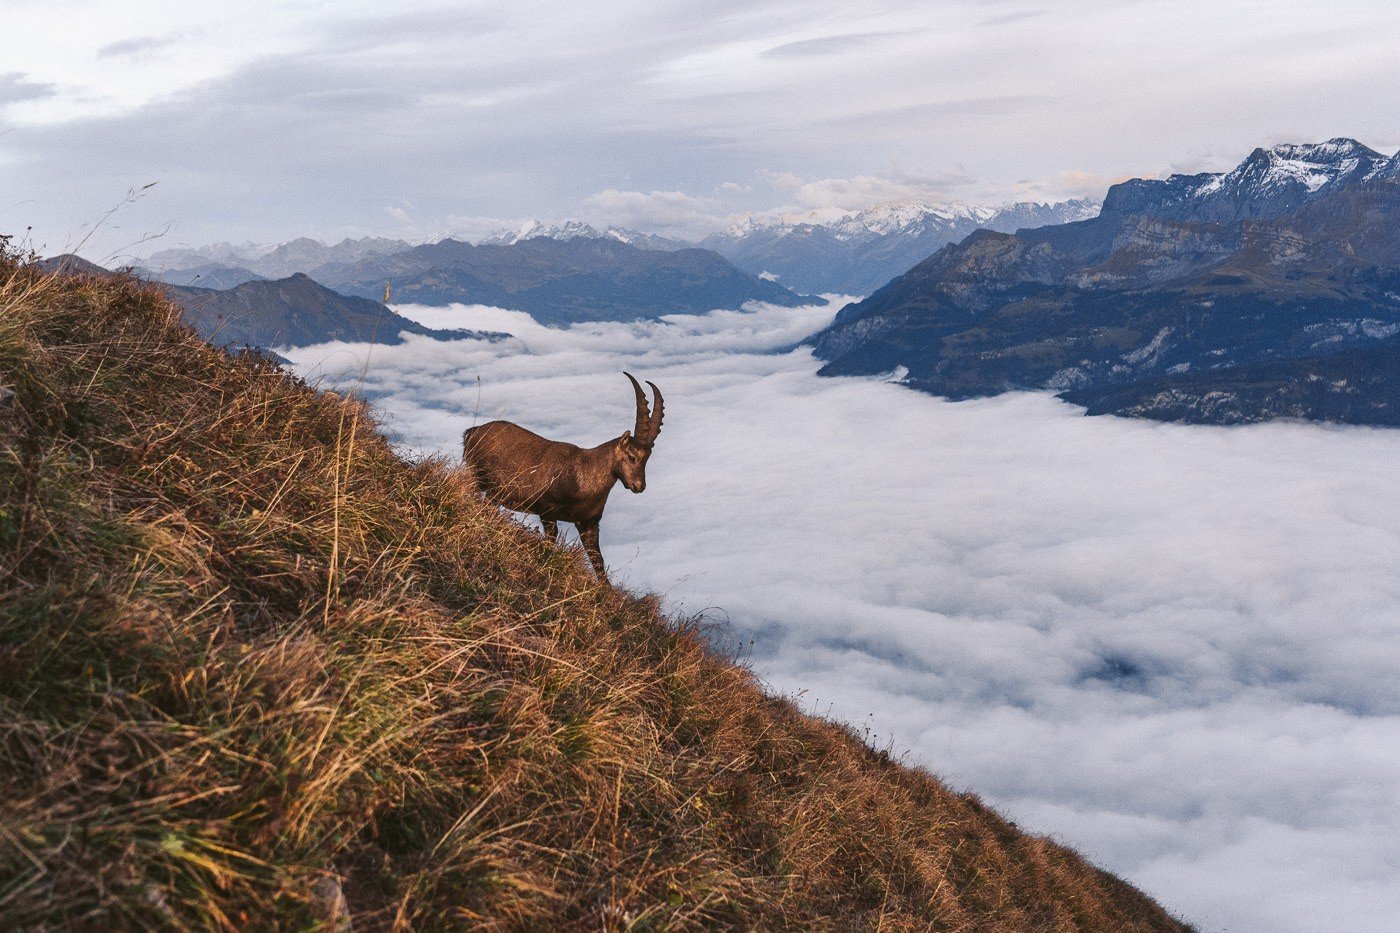
- Later in the afternoon and around dusk, the ibex colony can usually be spotted around Augstmatthorn.
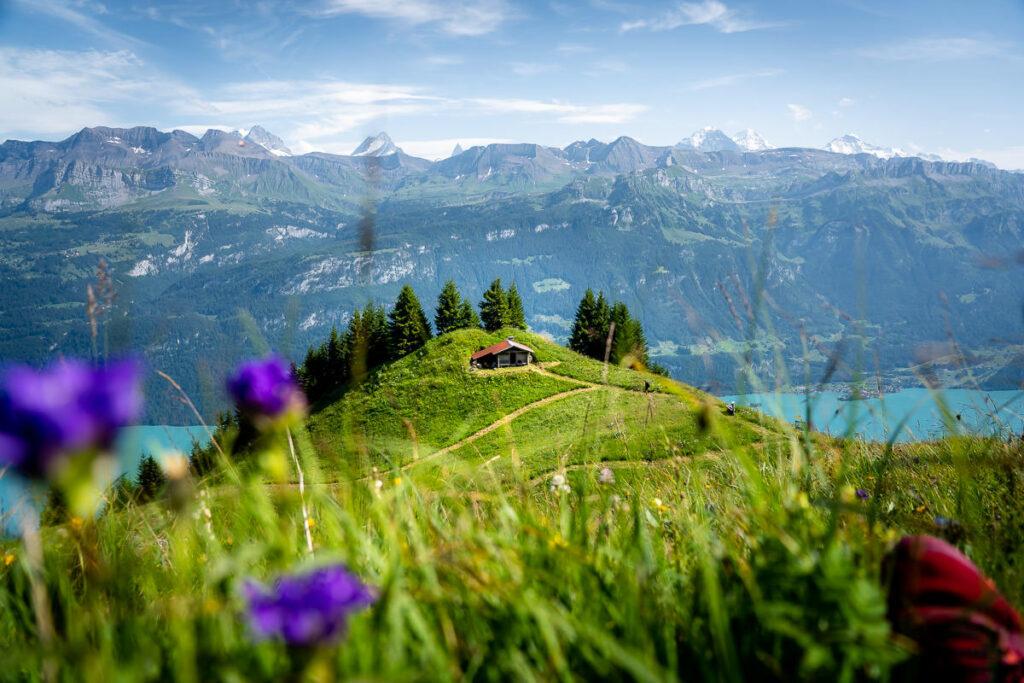
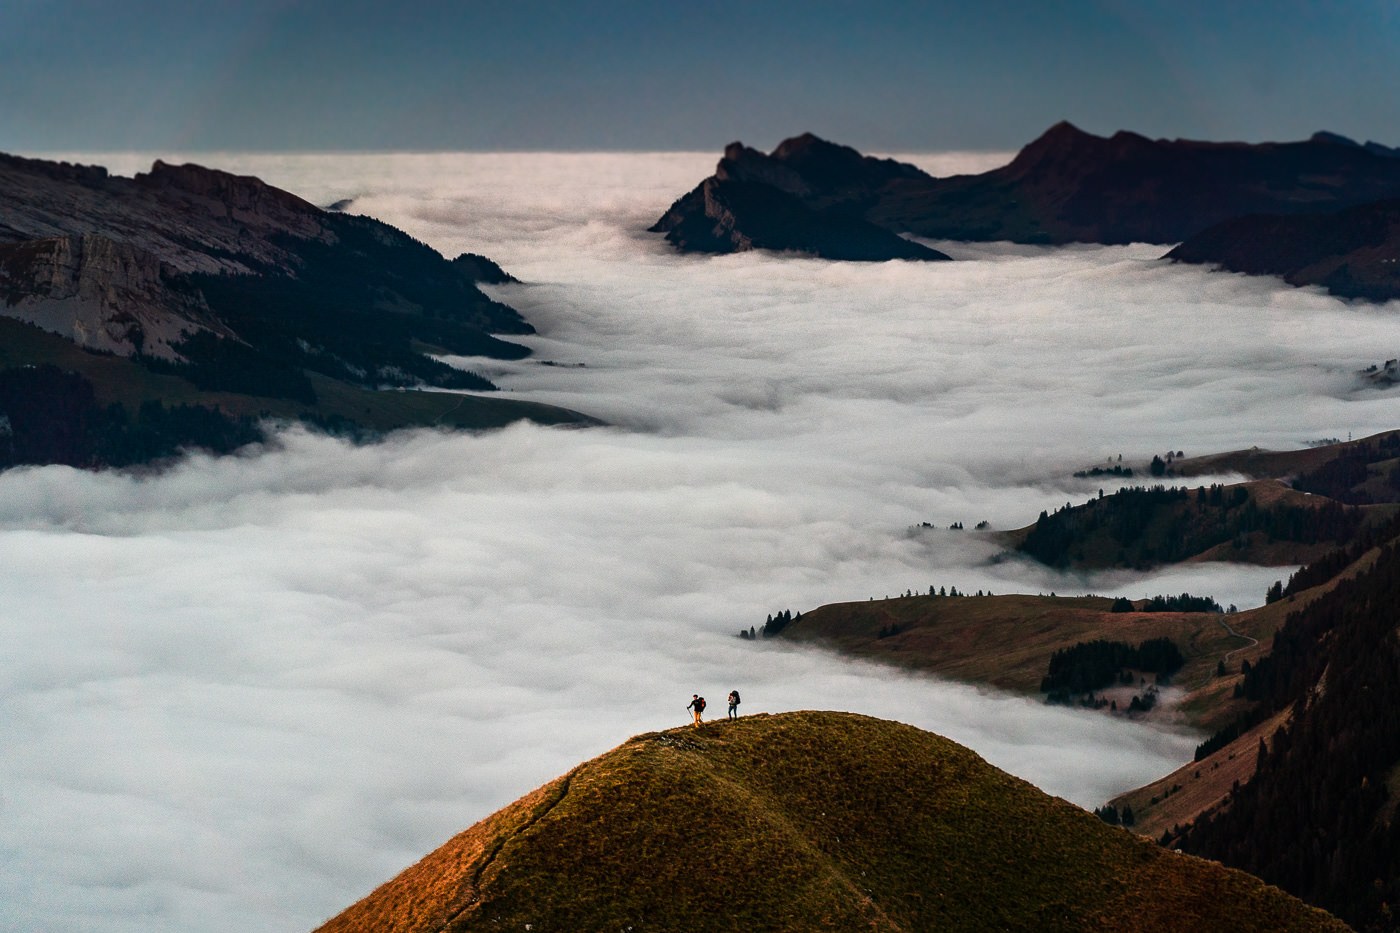
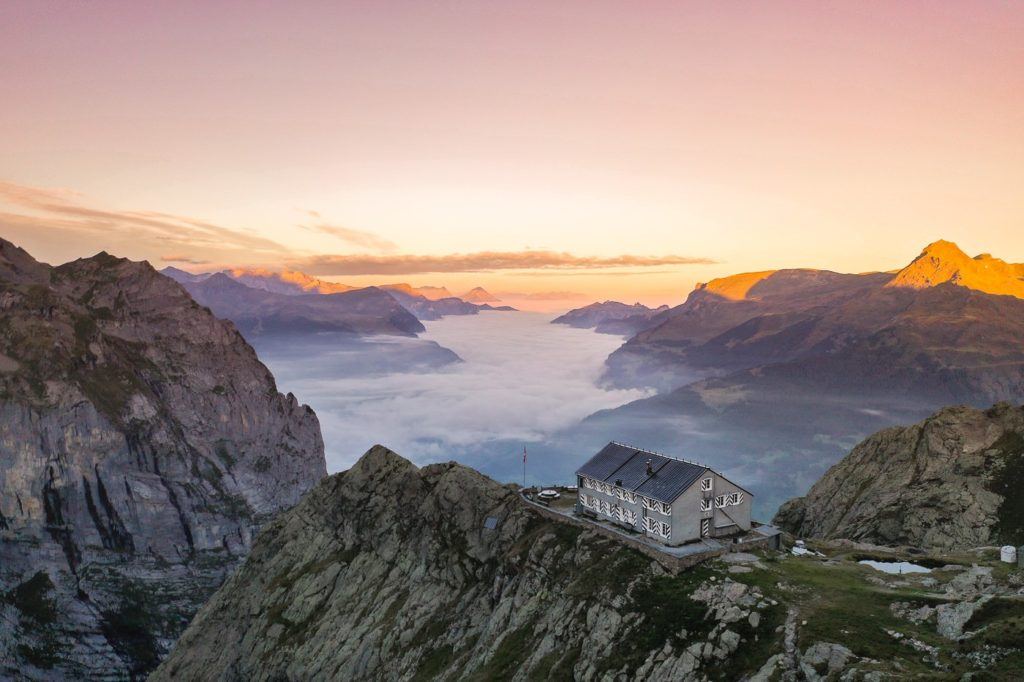
- The scenery changes year-round. I’ve been up on this ridge in summer when the grass is very green and then just before the end of the season a week after snow when the grass is brown. I think the green grass makes for the best scenery and/or a cloud inversion. That’s why you can see a mix of different weather conditions in all of the photos in this blog post.

MY EXPERIENCE ON THE HARDERGRAT TRAIL
The Hardergrat Trail is a route that haunted me for a year or two. I had a couple of failed attempts on my first trip to Switzerland in 2019. One time we began to slow, ran out of water and then a member of our group dropped his bag down the ridge costing us too much time.
On a second occasion, the weather was too unsure and a bit wet so we just hiked Augstmatthorn. However, I returned in 2022 for a third attempt. This time, I gave myself a long weather window in Interlaken and picked the clearest day of the week.

I decided to do the Hardergrat in reverse, also known as the Brienzergrat. It is the exact same route along the ridge just in the opposite direction. However, hiking from Brienzer Rothorn to Harder Kulm removes almost 1000m of incline. Our journey from Brienzer Rothorn to Harder Kulm would still have 1400m of incline, which is enough for me on this trip.
We made sure to arrive early at the Brienz train station so that we could secure tickets on the ‘early bird’ train at 7:36 am. For some reason, this train is half-price, which is an added bonus. In the summer, it can be very busy.
However, we were then in the last week of the season for the train even operating so the line was quite small, although, in the end, the train was basically full. I’d advise arriving 30 minutes early as you can’t really afford to waste an hour and then have to rush your hike.

The train journey up from Brienz Station to Brienzer Rothorn is actually quite long. Through tunnels and many switchbacks, the ride takes about 50 minutes. Therefore, once you reach Brienzer Rothorn it is already 8:30 and you’ve got a half marathon of 21km in the distance before you can reach Harder Kulm.
We knew the last funicular down from Harder Kulm was at 9 pm so, we weren’t too worried about the time as we had 11 hours to complete the traverse. Alternatively, if we did miss it, we could just hike down to Interlaken from Harder Kulm.
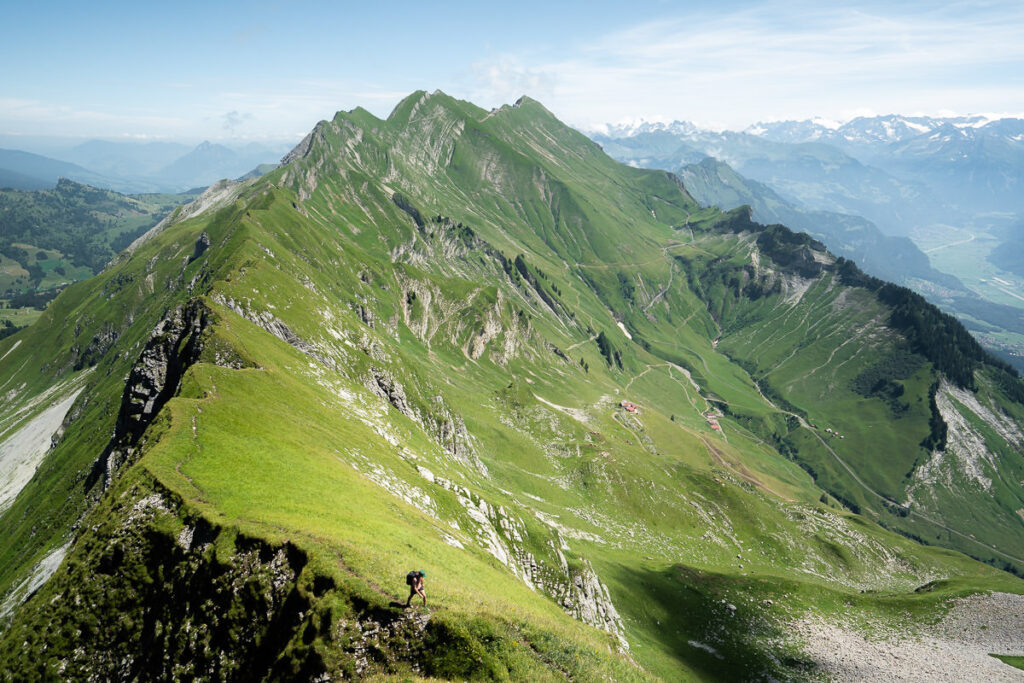
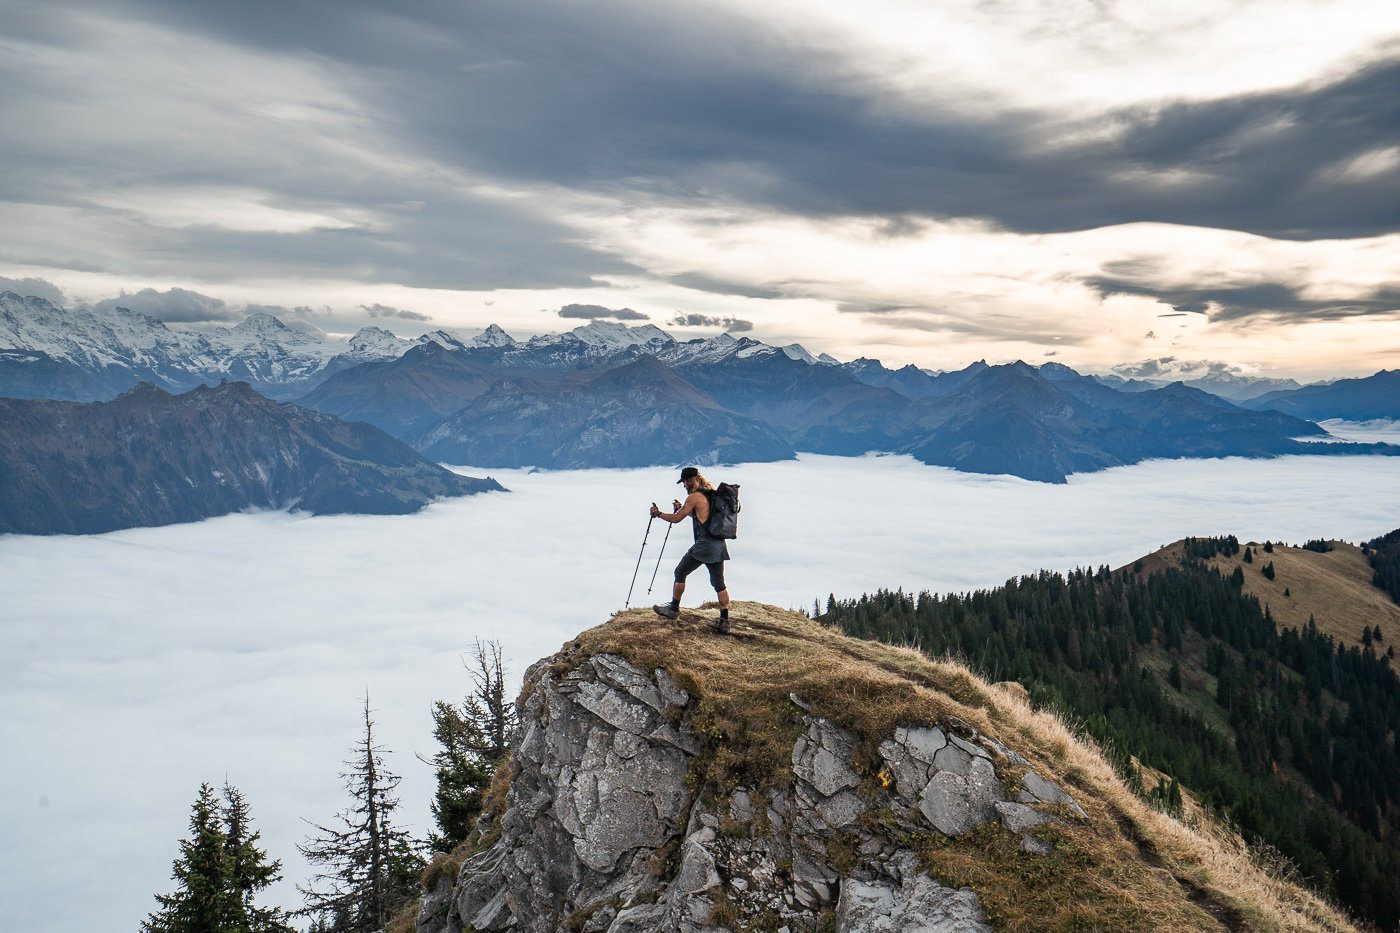
The first few kilometers from Brienzer Rothorn are phenomenal. I prefer the first half of the Brienzergrat as the ridgeline seems more dramatic and there are continual undulations over each horn. We steadily got into the rhythm of the hike and found the trail safe in dry conditions.

The first major checkpoint of the hike comes about one-third of the way through the route. Reaching the Tannhorn, 2,221m in height, feels like the halfway mark but in reality, you still have a long way to go. However, the Tannhorn is a great place to stop for a rest and your first refueling break with incredible views of Lake Brienz and down the rest of the trail.
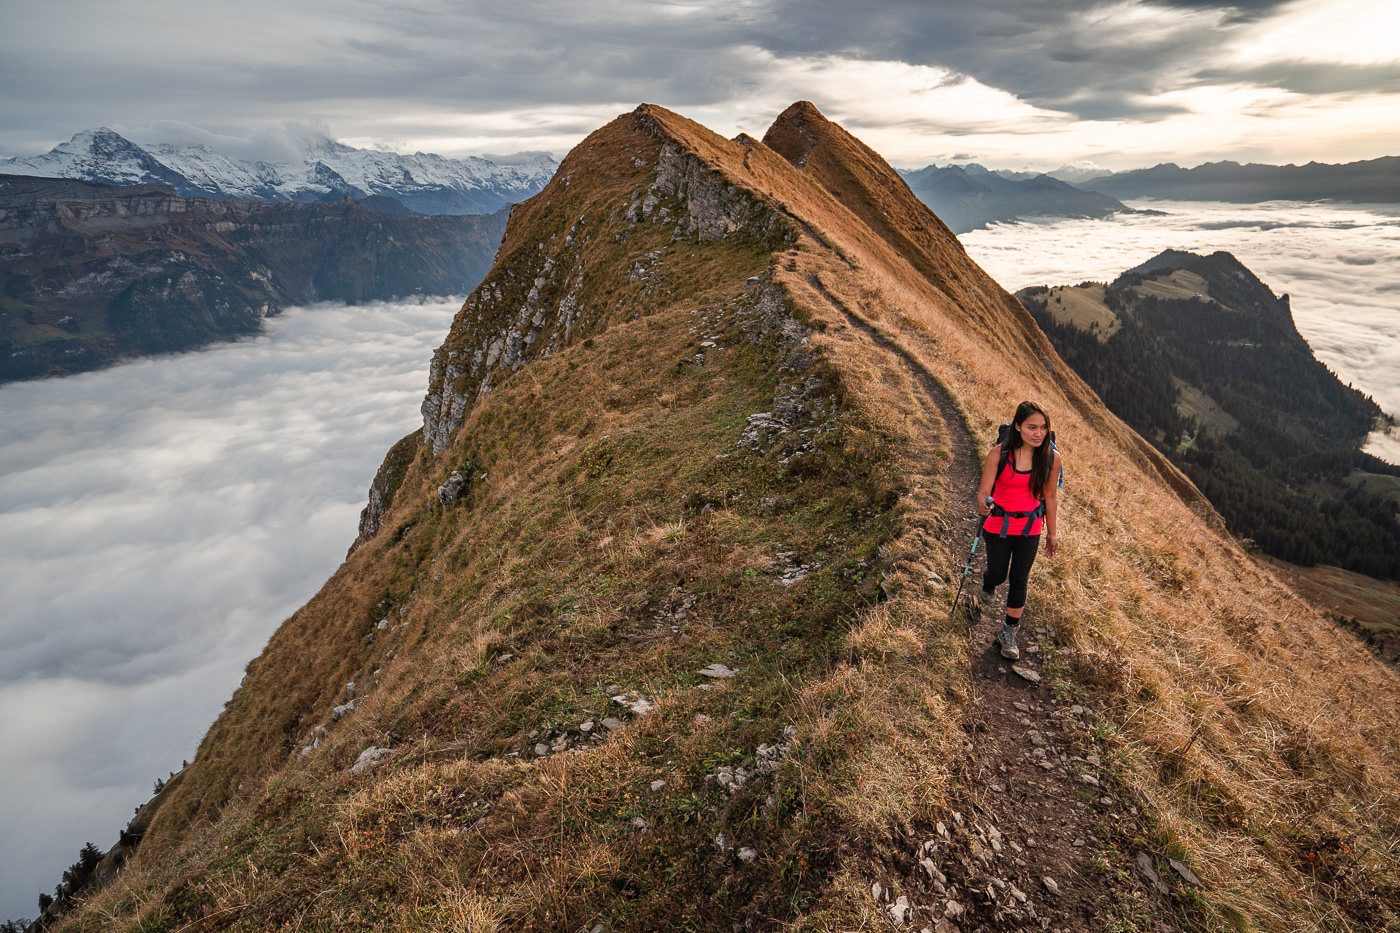
I think this is one of the most photogenic spots as you continue just over the crest of the Tannhorn towards Augsmatthorn. The spine is very impressive from this spot and it encapsulates what this ridge hike is all about.


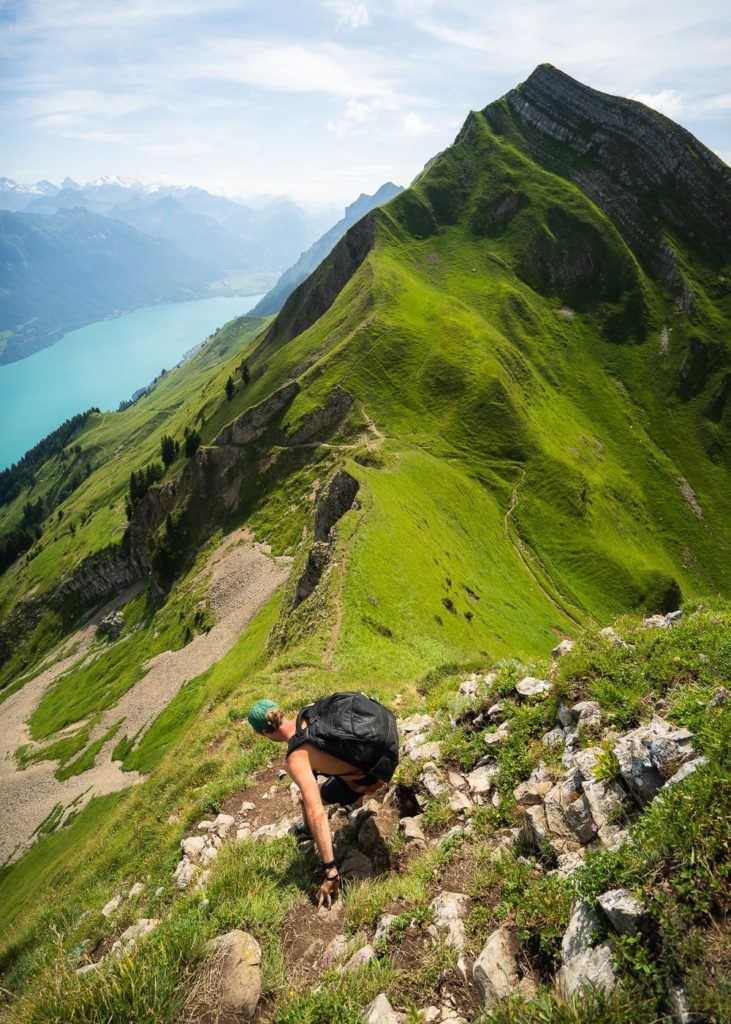
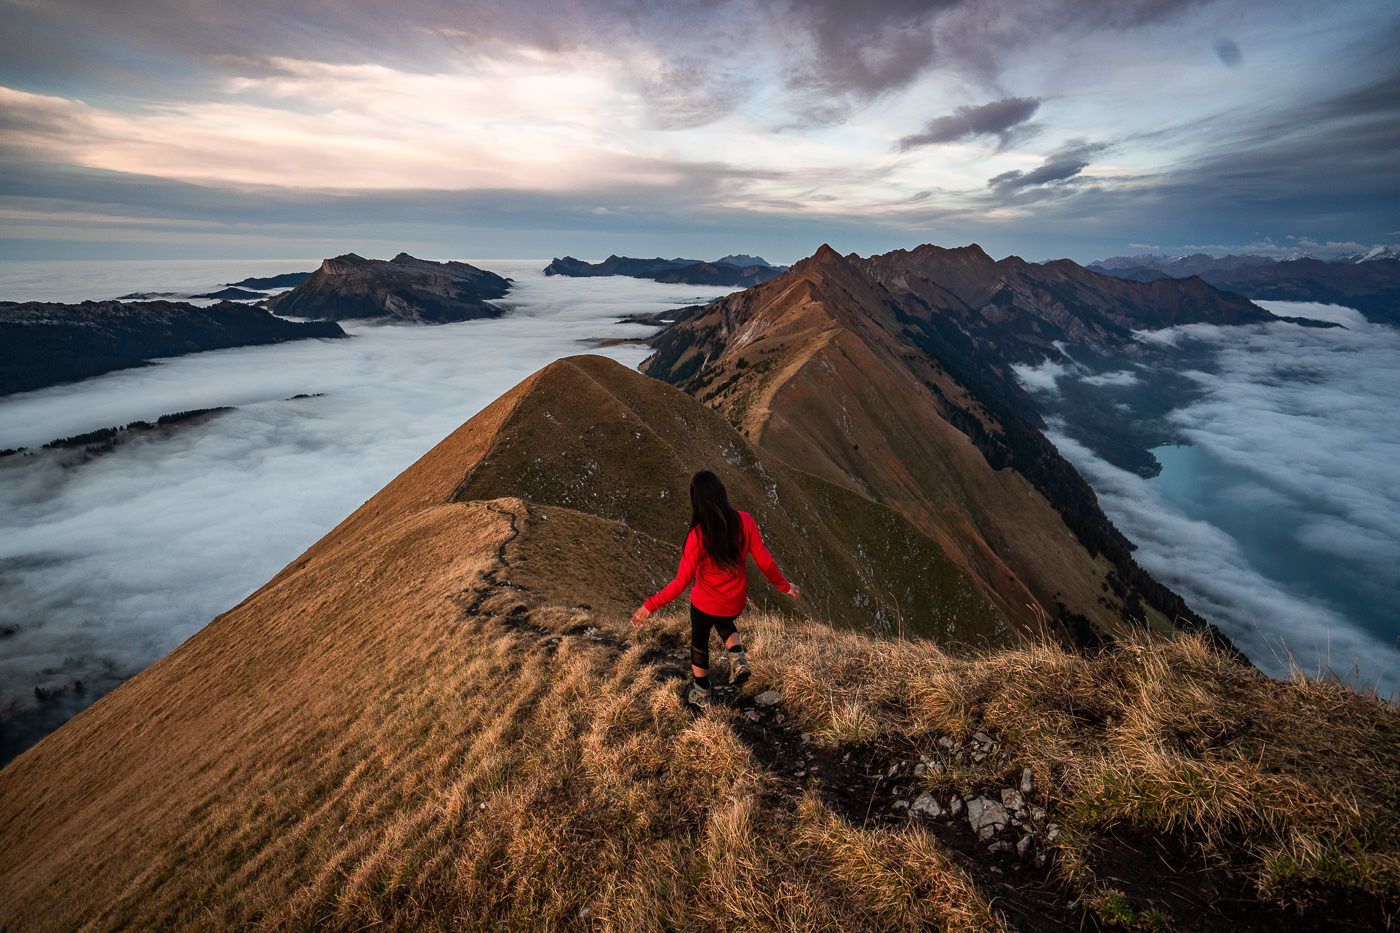
From the Tannhorn to Augstmatthorn is a pretty hard slog. This is where you will find yourself on a knife-edge trail while navigating the undulating Hardergrat.
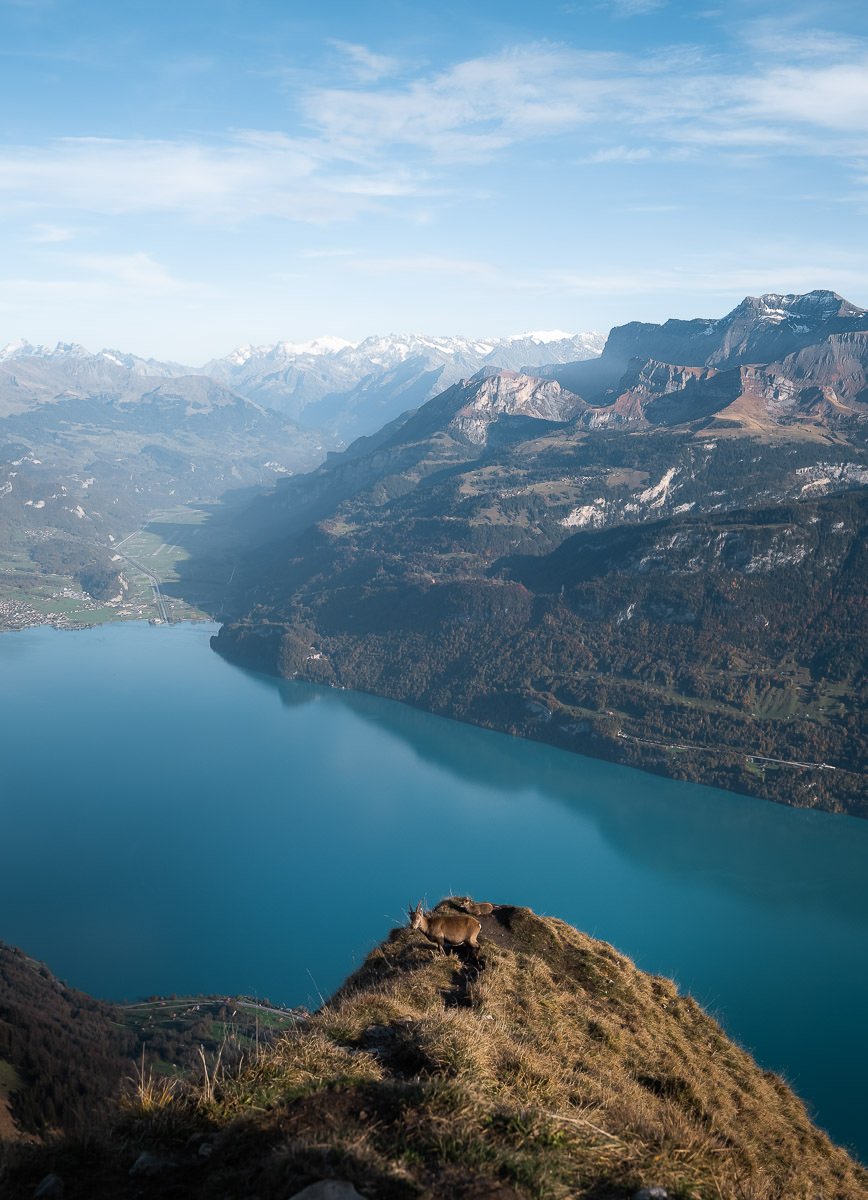
There are few moments where you walk along a flat section of path with the trail seemingly on a steep incline or decline for the middle part of the trail. Having said that, it is unbelievably beautiful. You are looking down over Lake Brienz and Jungfrau, Monch, and Eiger float in the background on a clear day.


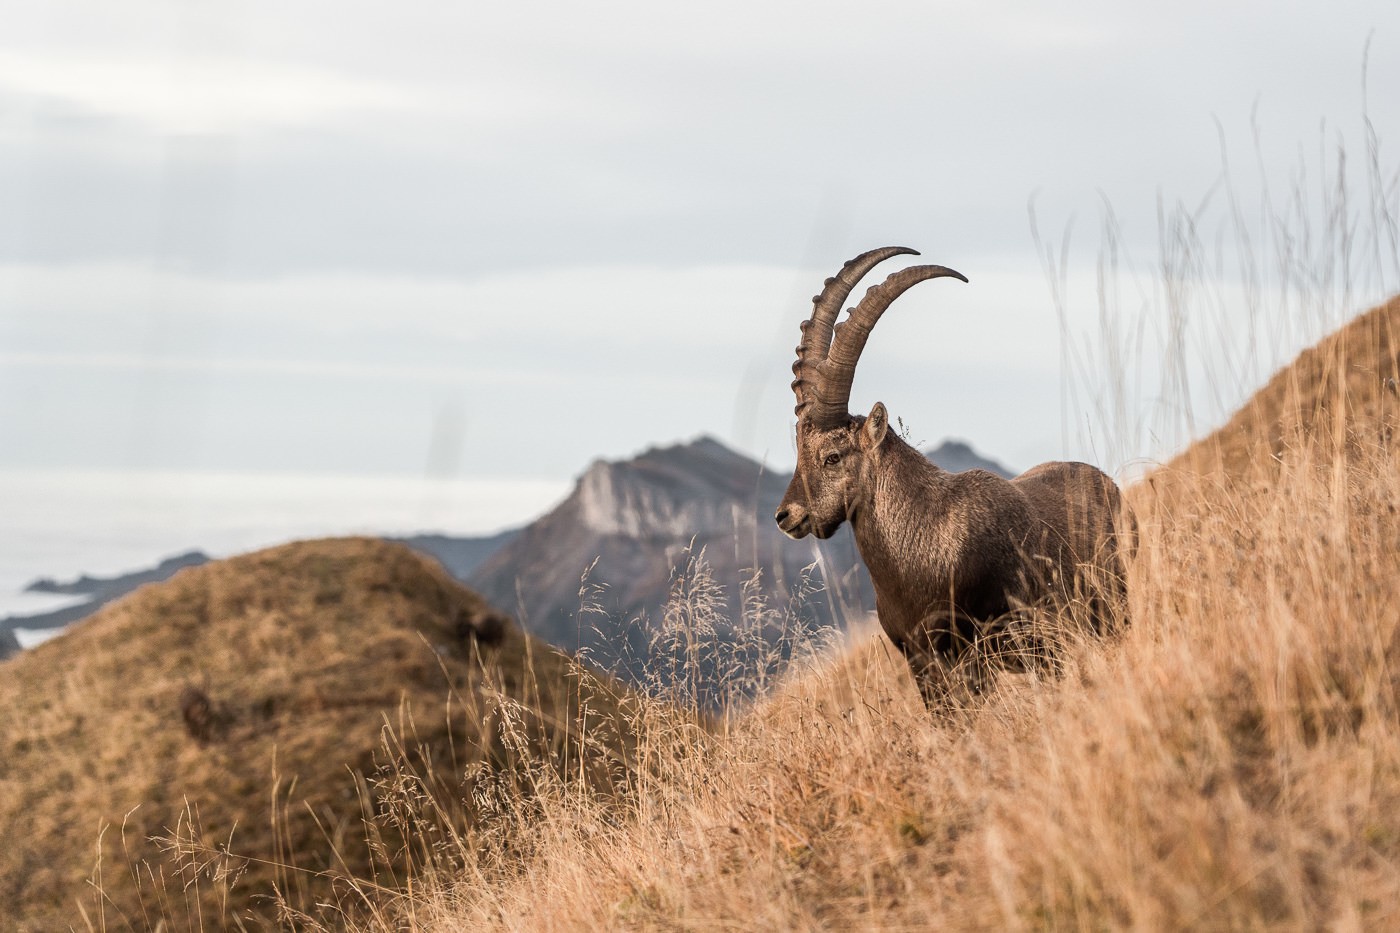
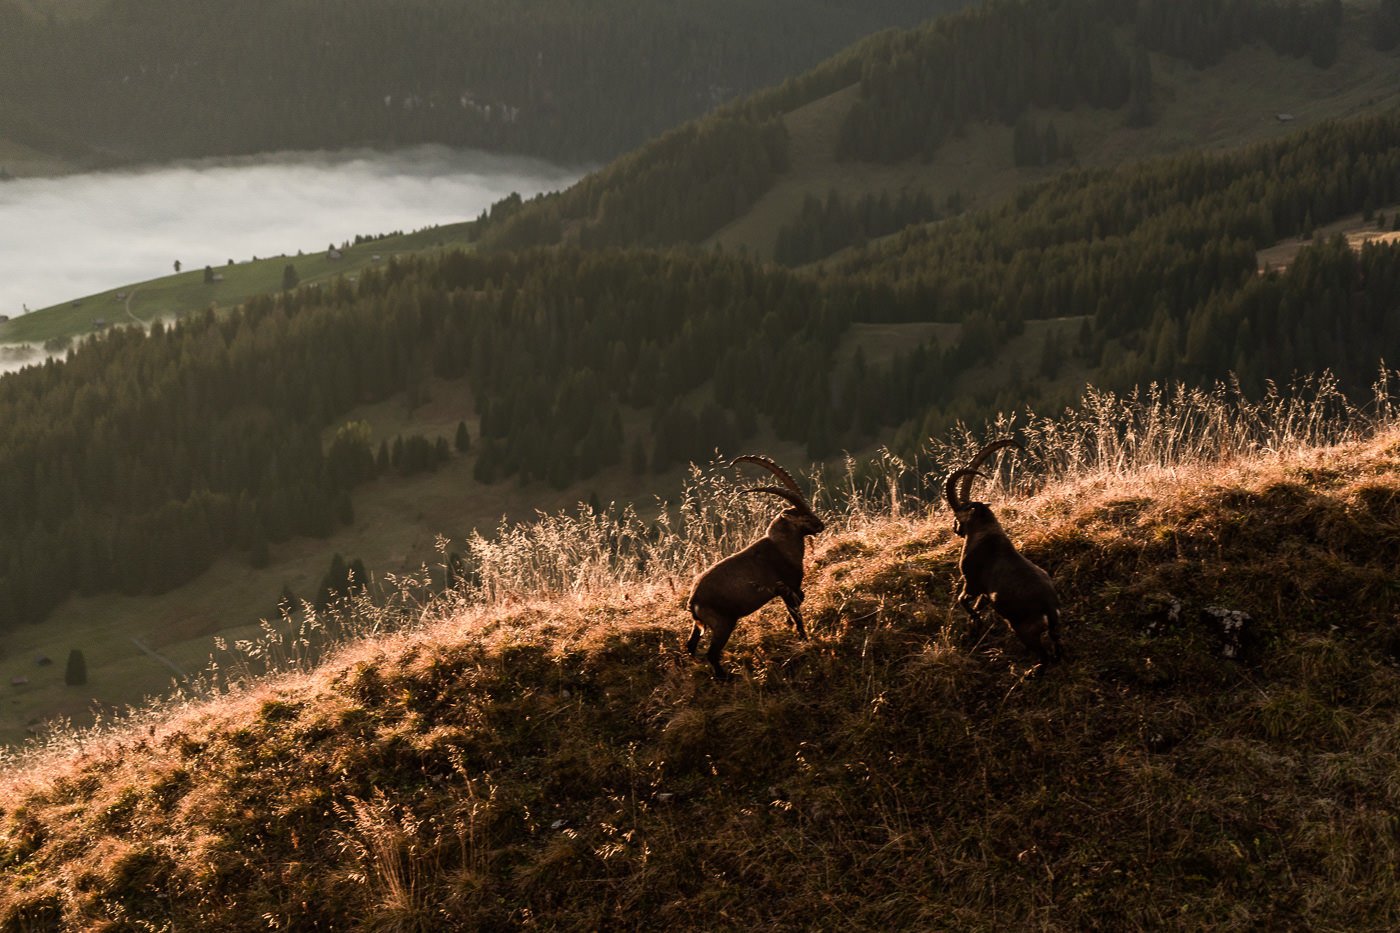
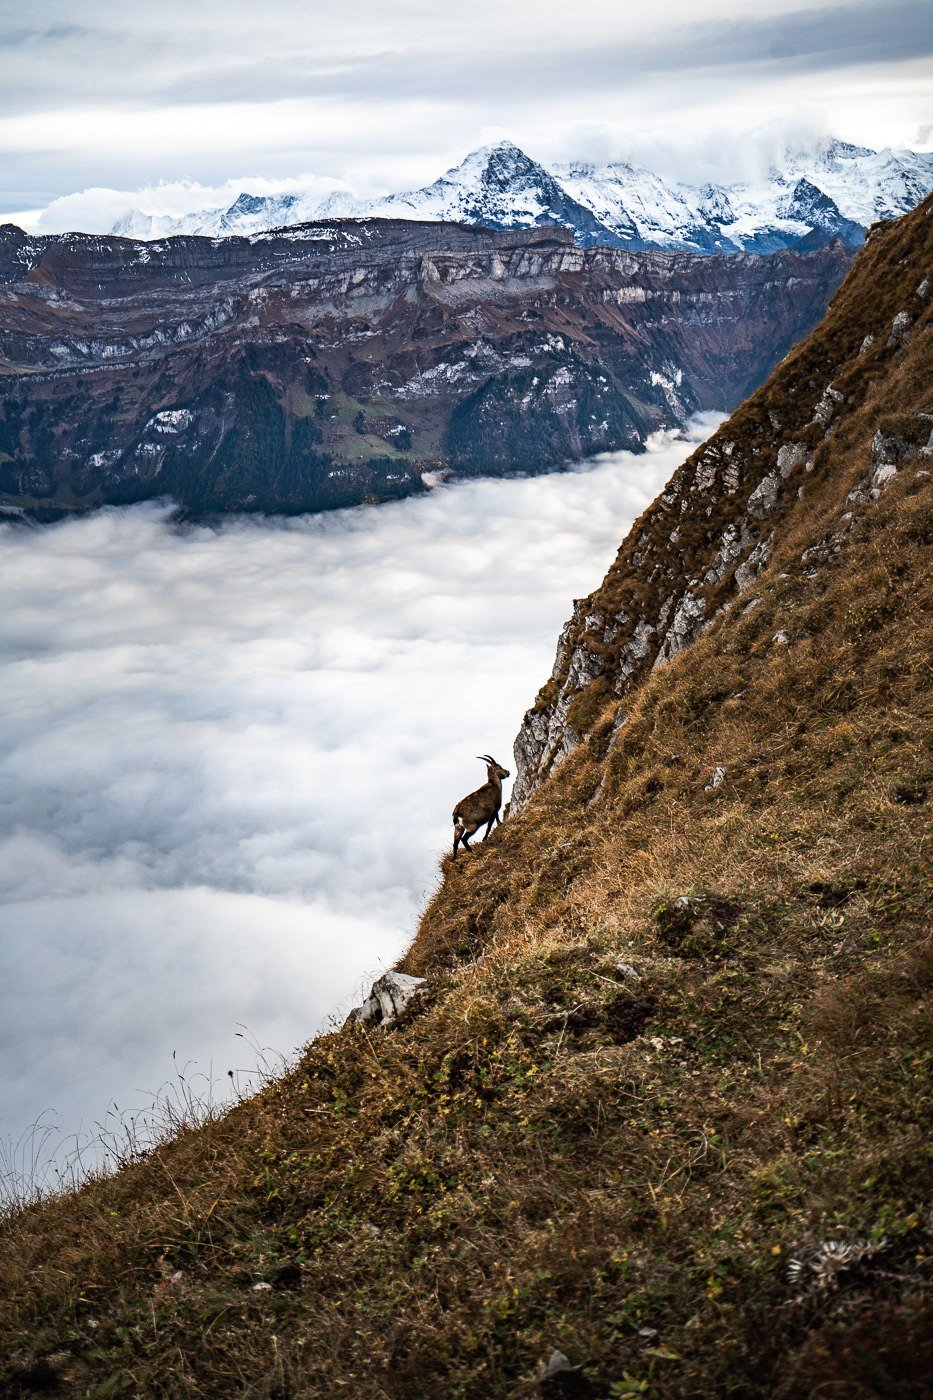
Once you reach Augstmatthorn, there’s a fair chance you will encounter some other day hikers. It’s a great option to hike out and back to Augstmatthorn from Harder Kulm as you get a great feel for the Hardergrat trail without having to do a massive mission. The Augstmatthorn is also very popular around dusk and sunset because the resident Ibex colony loves to gather around this area.
The Ibex are quite casual and will often graze very close to tourists. It’s best to stay out of their path and don’t block them in. Always stay a good distance from the Ibex and give them the right of way along the path where possible.
Augstmatthorn is a great spot for sunset, but do be mindful that you still have a couple of hours to get back to Harder Kulm so you may need a headlamp. Also, keep an eye on the clock so you don’t miss the last funicular down from Harder Kulm.

The final trek back from Augstmatthorn to Harder Kulm is probably the least exciting portion of the trail. The knife-edge ridge line slowly dissolves into a meander through the forest along relatively flat terrain. While still beautiful, the adrenaline of the Hardergrat Trail will begin to subside as you make the final push toward the Harder Kulm Station.

After reaching Harder Kulm Station, you can either hike down if you still have the energy or take the Harderbahn back to where you are staying in Interlaken to complete your journey along the Hardergrat/Brienzergrat Trail.

DOING A SHORTER SEGMENT OF THE HARDERGRAT TRAIL
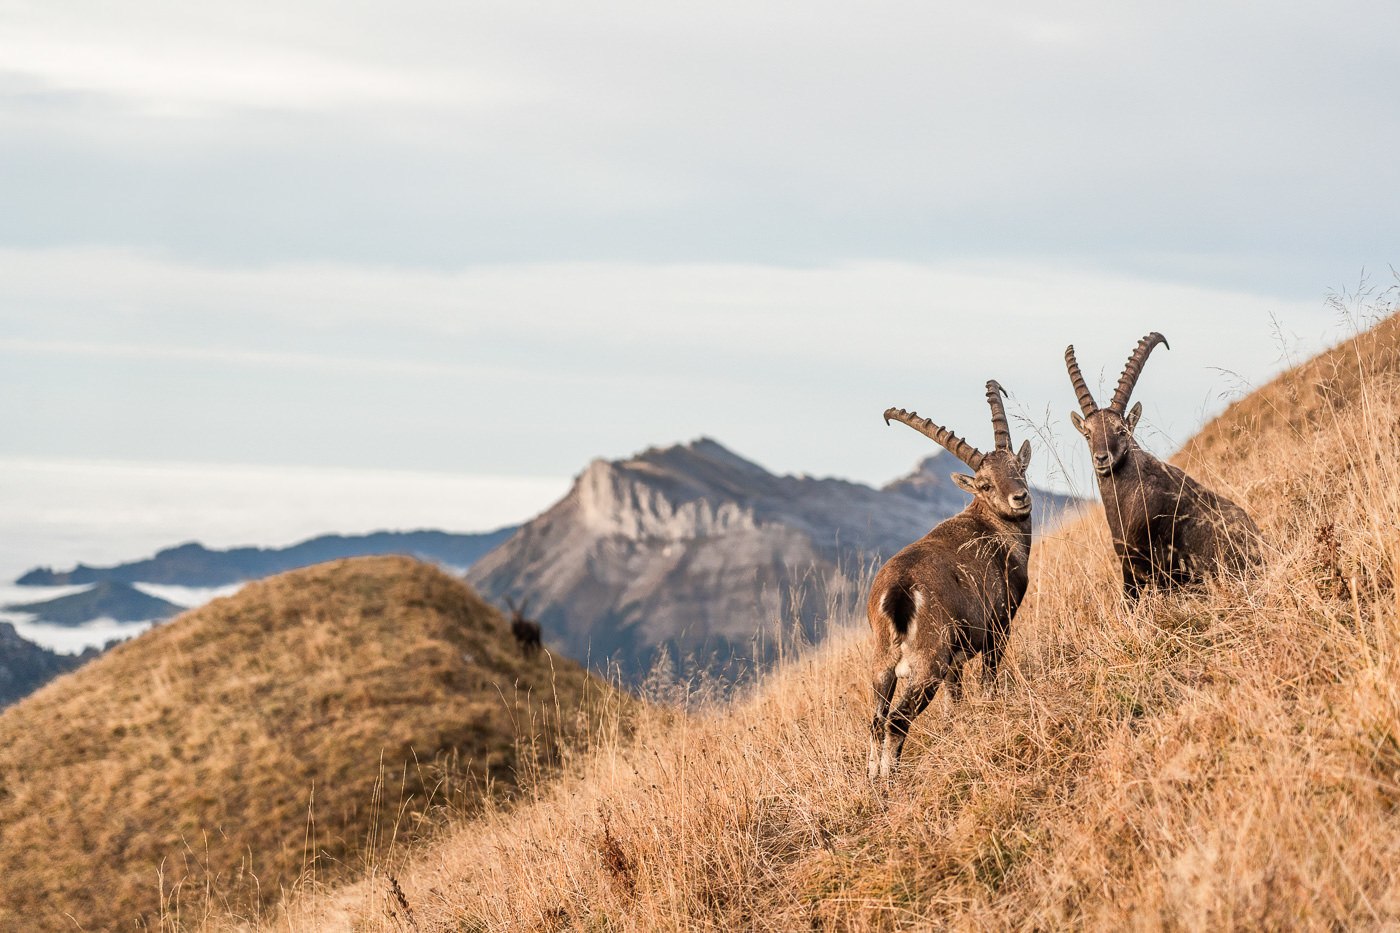
Augstmatthorn is one of the most spectacular summits along the Hardergrat Ridge. It’s famous not only for the stunning views but for the Ibex colony that calls Augstmatthorn home. There are several ways to reach Augstmatthorn but the most popular route is to begin at Harder Kulm and walk along the ridge to the summit.
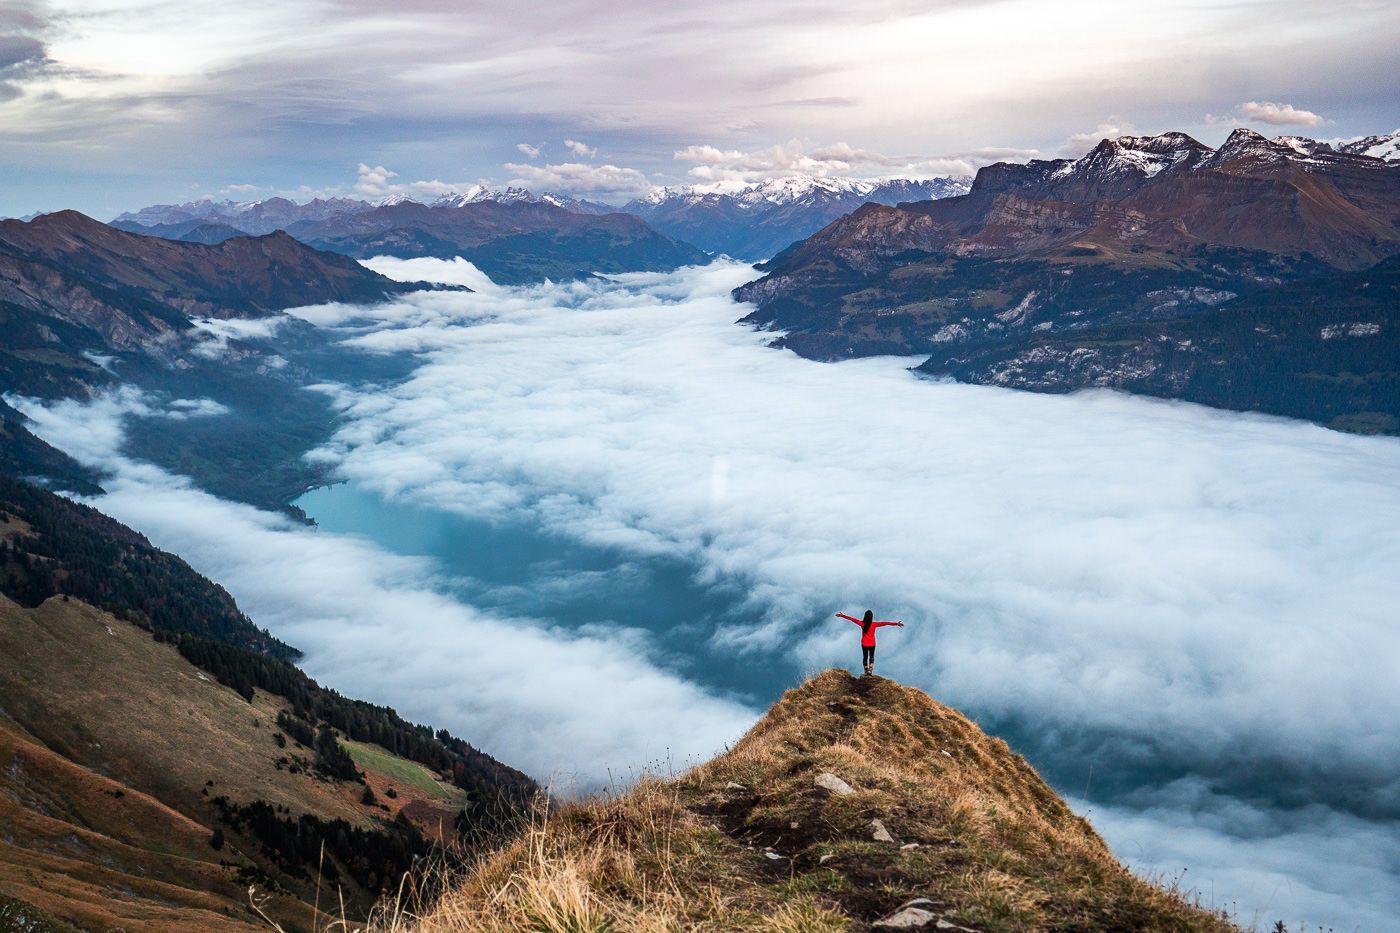
The view up at Augstmatthorn with the clouds beneath us was just incredible. We could see all the way down the Hardergrat ridge, had epic views of Brienzersee, and across to the Swiss Alps. The Ibex colony was hanging around without too much care for us as hikers and it was pretty magical to watch these amazing creatures in such an epic location.
Want more details and photos? View the full blog post here: AUGSTMATTHORN HIKE FROM HARDER KULM
I hope you enjoyed this blog post and guide for the Hardergrat Trail and Brienzergrat Trail in Interlaken, Switzerland. Happy Hiking!
MY HARDERGRAT HIKING VIDEO

SWISS TRAVEL PASS or HALF-FARE CARD
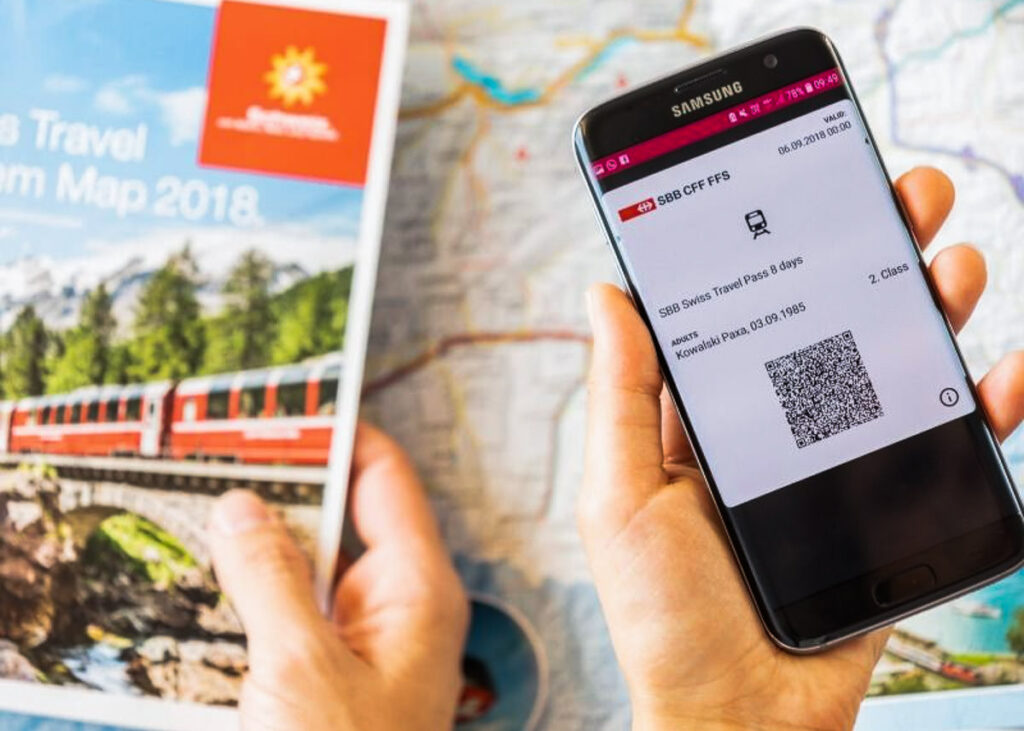
OPTION 1: Buy the Swiss Half Fare Card: Switzerland trains, buses, and cable cars are EXPENSIVE! I found the best way to get around cheaply was to buy the Swiss Half-Fare Card before I arrived. It gives you 50% off every regular train, bus, and even many cable cars. It only costs $150 USD but pays itself off in just a few days with many train tickets in Switzerland costing close to $100 alone. If you are staying for more than 5 days, I suggest buying the Swiss Half-Fare Card.
OPTION 2: Buy the Swiss Travel Pass: The second option is to get the Swiss Travel Pass, which gives you unlimited train, bus, and (many) cable car rides but it’s pretty expensive at around $100 USD per day so if you don’t travel each day it isn’t worth it.
OPTION 3: Buy the FLEXI Swiss Travel Pass: The final (BEST) option is to get the FLEXI Swiss Travel Pass, which allows you to buy 8 days’ worth of transit but you can choose the night before if you want to activate the next day. That way you don’t need to travel every day to get your money’s worth, you can just activate the FLEXI Swiss Travel Pass on the days when you are doing sizeable transits. My advice is to book the Swiss Half-Fare Card or the FLEXI Swiss Travel Pass in advance before your trip so it’s ready to go when you arrive.
GET A SWISS TRAVEL PASS!
Enjoy UNLIMITED train, boat, and bus rides in Switzerland for up to 15 days. Click to book a flex Swiss Travel Pass or choose the Consecutive Swiss Travel Pass.
The Swiss Travel Pass starts at $260 for 3 days. Click here to check if it’s available on your travel dates.
MY SWITZERLAND HIKING GUIDES
I spent 100 days hiking in Switzerland and created a guide for different regions around the country. You can click on one of my Switzerland hiking guides below to help you plan your trip.
- The Complete Guide: 50 AWESOME HIKES IN IN SWITZERLAND
- The Via Ferrata Guide: 4 EPIC SWITZERLAND VIA FERRATA COURSES
- Lauterbrunnen Guide: 10 AWESOME HIKES NEAR LAUTERBRUNNEN
- Interlaken Guide: 15 AWESOME HIKES IN INTERLAKEN
- Grindelwald Guide: 12 AWESOME HIKES NEAR GRINDELWALD:
- Mürren Guide: 7 AWESOME HIKES IN MURREN
- Appenzell Guide: 9 AWESOME HIKES NEAR APPENZELL
- Chur Guide: 7 AWESOME HIKES NEAR CHUR
MY SWITZERLAND TRAVEL TIPS
- For Backpackers: SWITZERLAND BUDGET BACKPACKING GUIDE
- Travel Tips: 20 THINGS TO KNOW BEFORE VISITING SWITZERLAND
- Transport Tips: RENTING AND DRIVING A CAR IN SWITZERLAND
- Accommodation Guide: 30 BEST PLACES TO STAY IN SWITZERLAND
James Healy
Friday 20th of January 2023
Can this be hicked in winter (jan) Thanks
Monday 6th of October 2025
@James Healy, of course not. are you crazy?