

Yala Peak is one of the most popular ‘trekking peaks’ in the Langtang Valley Region. At 5,500m in height, it presents a challenge for newcomer climbers and a great acclimatization opportunity. The expedition begins with three days of trekking along the Langtang Valley Trek before a two-day summit attempt of the peak itself. The highlight of climbing Yala Peak is catching a view of Shisapangma (8,027m) from the summit.

In this blog post, I will cover everything you need to know about the logistics of climbing Yala Peak. I’ve already created a lengthy guide for the Langtang Valley Trek and nearby viewpoints such as Kyanjin Ri and Tserko Ri.
BEST NEPAL TREKKING COMPANY
Interested in trekking in Nepal or doing the Everest Base Camp Trek?
I recommend booking your trek with Himalayan Masters, which is the company I use for all of my treks in Nepal. Use my code JACKSON5 when you book to receive a 5% DISCOUNT.

YALA PEAK CLIMB DETAILS
- Distance: 18km return trip from Kyanjin Gompa
- Days required: 2 days with overnight stay at Yala Kharka Basecamp
- Total Incline: 1,560 meters from Kyanjin Gompa
- Total Decline: 1,560 meters from Kyanjin Gompa
- The highest point of the climb: 5,500m
- Difficulty: Yala Peak is a ‘trekking peak’. There is no technical gear or technical ability required. You will travel across snow and scramble up rocks but we didn’t need ice axe, harness or helmet for our ascent. It depends on the time of year for what conditions you will encounter but it was easier than other comparable peaks such as Island Peak.
- Permits: You will need a TIMS card and Park Entrance Permit for the Langtang Valley Trek, both can be purchased when entering the park. There is no permit required for climbing Yala Peak.
- Guide: A guide is not required for this climb. However, the route is not clear when covered in snow and the guides are able to manage a safe route depending on the conditions. They also manage all of the logistics, distances, food, campsite and directions.
- Accommodation: After leaving Kyanjin Gompa, we camped one night at Yala Peak Base Camp.
TRY THE 3 BEST TREKS IN NEPAL
Manaslu Circuit: My personal favorite 2-week trek through Tibetan villages and stunning scenery with less crowds.
Annapurna Circuit: The most beautiful & scenic 2-week trek in Nepal although can be crowded at times.
Everest Base Camp Trek: The most iconic 2-week route reaching the famous (EBC) Everest Base Camp at 5,300m.
YALA PEAK EXPEDITION ITINERARY
The expedition begins with a six-hour drive from Kathmandu to Syabrubesi. To reach Yala Peak, climbers will need to first follow the Langtang Valley Trek to Kyanjin Gompa on a three-day trek. From there, there are a few acclimatization day-hikes such as Kyanjin Ri and Tserko Ri. Once Acclimatized, climbers have a two-day expedition to climb Yala Peak.
A two-day trek back out along the Langtang Valley Trek completes the expedition. The expedition finishes with a six-hour drive from Syabrubesi to Kathmandu.
- Day 1: Drive from Kathmandu to Syabrubesi (1550m) 7 hours
- Day 2: Syabrubesi to Lama Hotel (2,380m) 6 hours
- Day 3: Lama Hotel to Mundu via Langtang Village (3,430) 6 hours
- Day 4: Mundu to Kyanjin Gompa (3,870m) 3 hours
- Day 5: Kyanjin Gompa to Kyanjin Ri to Kyanjin Gompa (4,770m) 5 hour
- Day 6: Kyanjin Gompa to Tserko Ri to Kyanjin Gompa (5000m) 7 hours
- Day 7: Rest Day
- Day 8: Kyanjin Gompa to Yala Kharka Base Camp (4,750m) 5 hours
- Day 9: Yala Kharka Base Camp to Yala Peak to Kyanjin Gompa (5,500m) 12 hours
- Day 10: Kyanjin Gompa to Lama Hotel (2,380m) 6 hours
- Day 10: Lama Hotel to Syabrubesi (1550m) 6 hours
- Day 11: Drive from Syabrubesi to Kathmandu 7 hours
BOOKING A GUIDE FOR YALA PEAK & LANGTANG VALLEY TREK
The Langtang Valley Trek doesn’t require a guide but it’s great to have a guide managing the logistics such as directions, tea-houses, distances, medical issues, and the overall organization. I’d say 80% of trekkers go with a guide. I did the trek with Himalayan Masters which is one of the top trekking companies when it comes to the Langtang Valley Trek.
Almost all climbers hire a guide for climbing Yala Peak so they can safely ascend the route. We climbed with local guide Galbyu as part of a complete Langtang Valley Trek & Yala Peak Climb package booked through Himalayan Masters.
The Langtang Valley Trek costs around $800 USD with Himalayan Masters as of 2022 and includes all transfers, accommodation, meals, drinks, permits, and even the hotel stay before and after the trek at a high-quality hotel. The Yala Peak Climb & Langtang Valley Trek combination package is priced at $1200 as of 2022. I honestly had a great time on this trek and I can wholeheartedly recommend Himalayan Masters.
You can use my discount code ‘JACKSON5‘ for 5% off the total price of your trek with Himalayan Masters which is a pretty handy saving.
Email: info@himalayan-masters.com
THE FULL VLOG FROM OUR YALA PEAK CLIMB

MY EXPERIENCE CLIMBING YALA PEAK
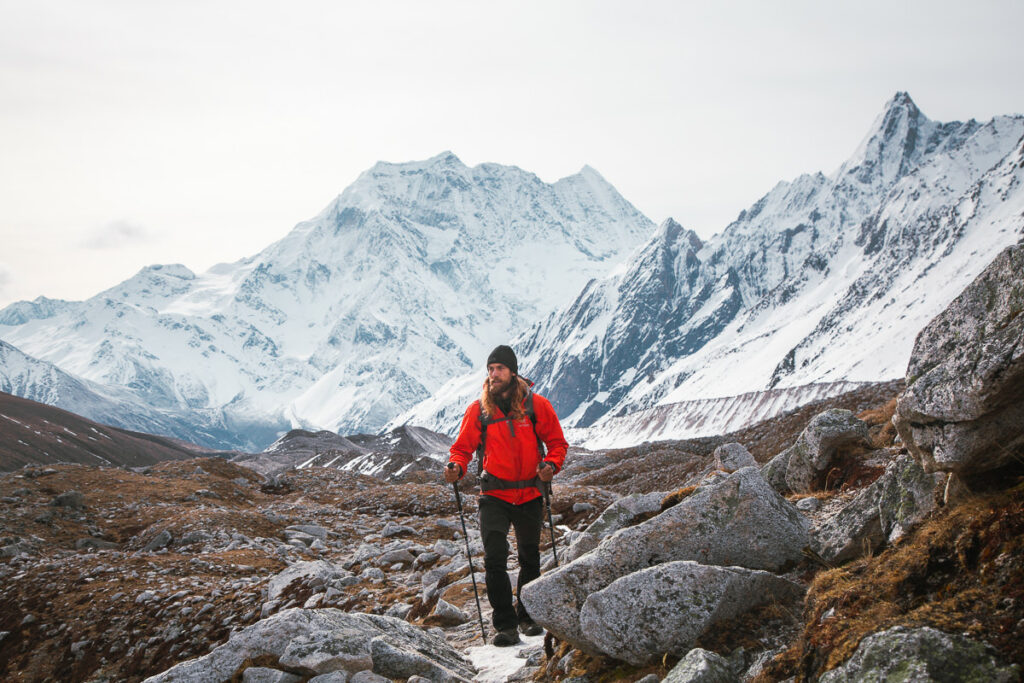
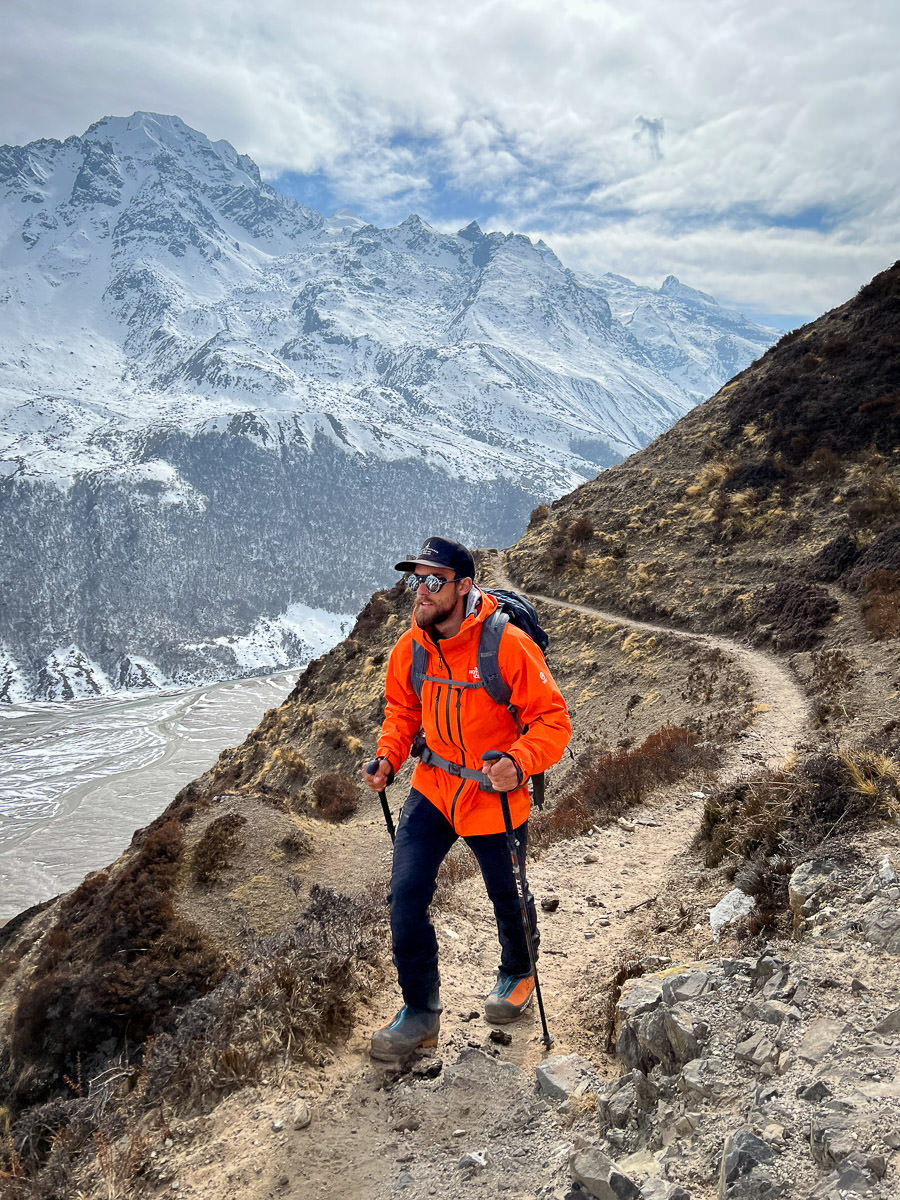
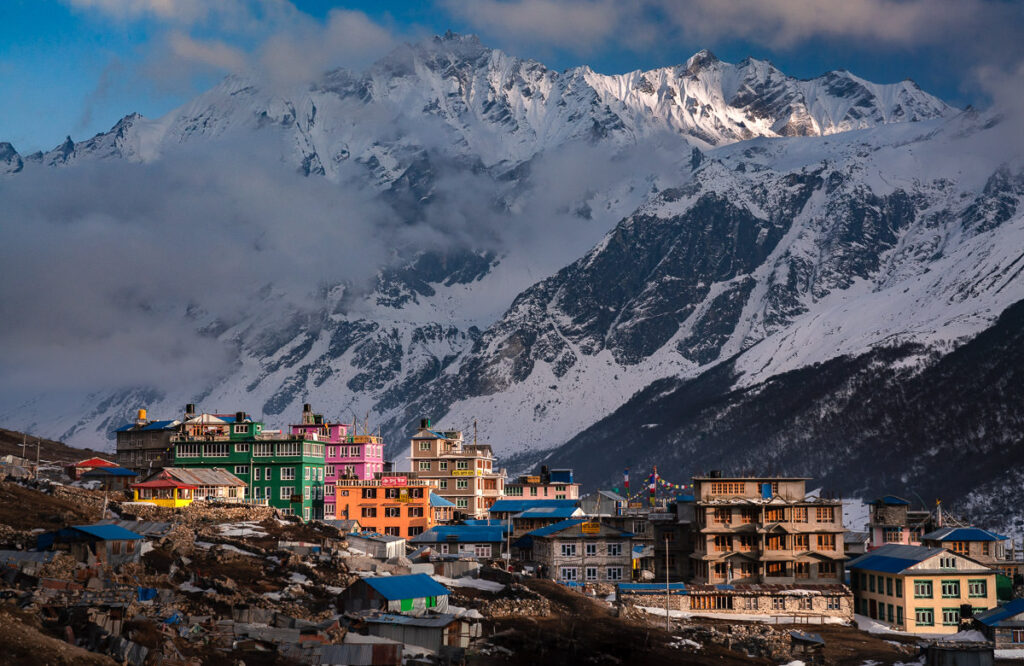
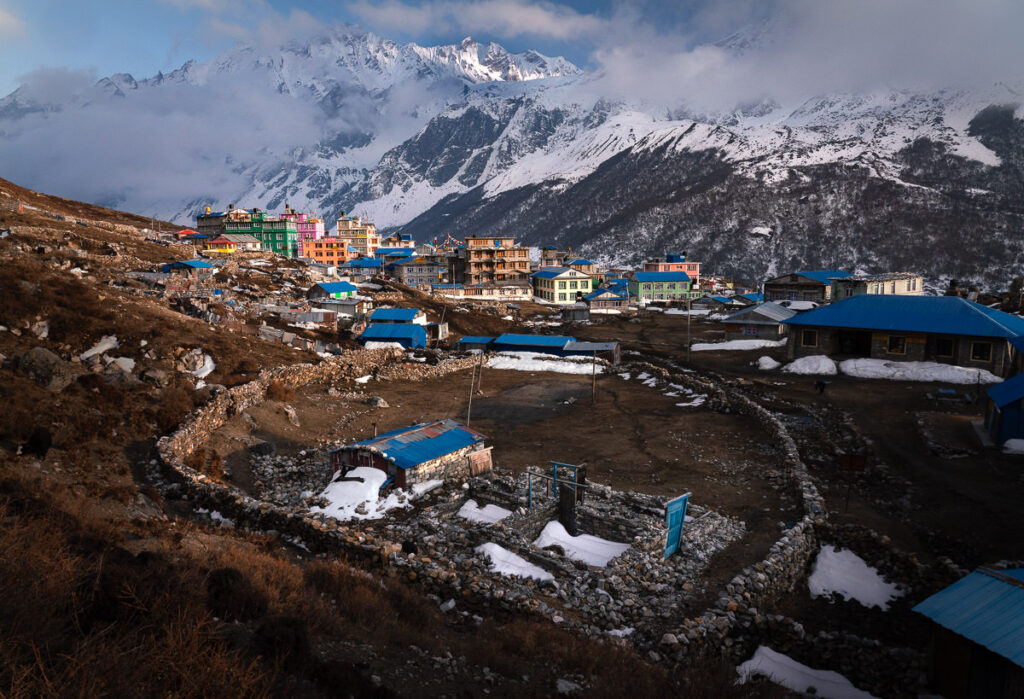
Our journey began with the Langtang Valley Trek leading us to Kyanjin Gompa. Once we settled in this iconic and immensely scenic mountain village, our Yala Peak mission was underway. I’ve written in greater detail about the Langtang Valley Trek, so in this blog post, I will focus on climbing Yala Peak once you are based in Kyanjin Gompa.
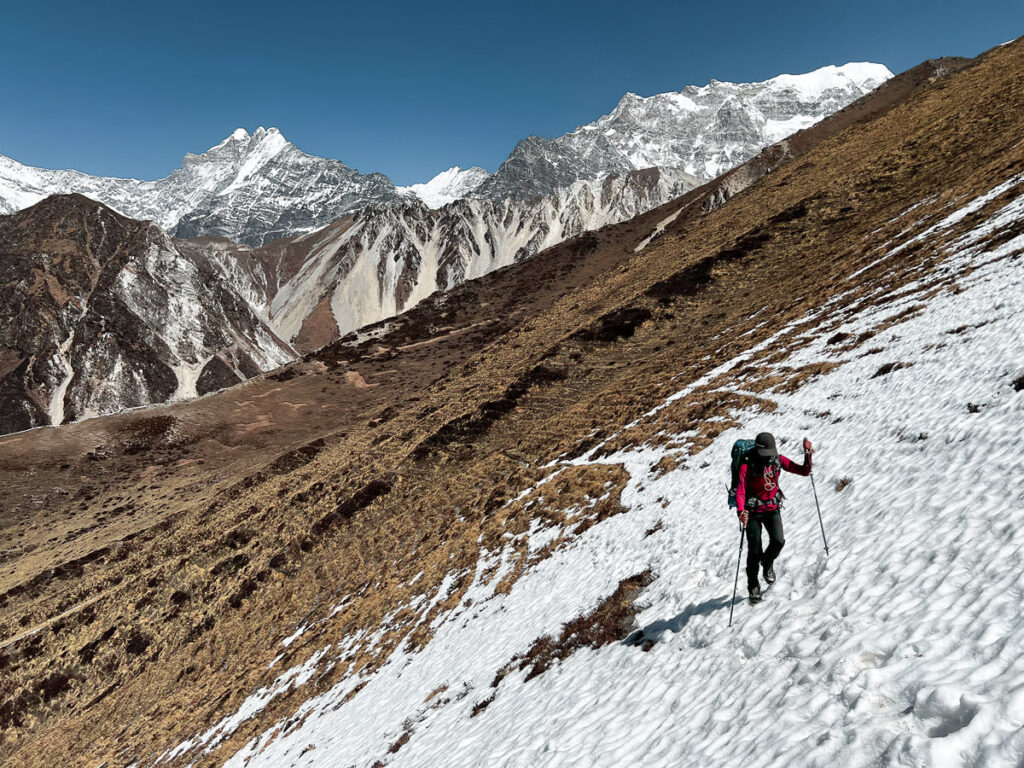
Our stay in Kyanjin Gompa ended up lengthening to a total of six nights spent in the village. We decided to acclimatize slowly by hiking Kyanjin Ri and Tserko Ri with a rest day after each day hike. We then felt ready to head up for our two-day expedition of Yala Peak. It’s possible to climb Yala Peak in one day from Kyanjin Gompa but it increases the difficulty and likelihood of altitude sickness.
We met our guide, Galbyu, who is one of the most experienced in the region. When we arrived, there had been two teams attempting the summit and neither had even reached base camp due to the snow. However, Galbyu assured us he knew the route that would work and we set off for the first ascent of the season.
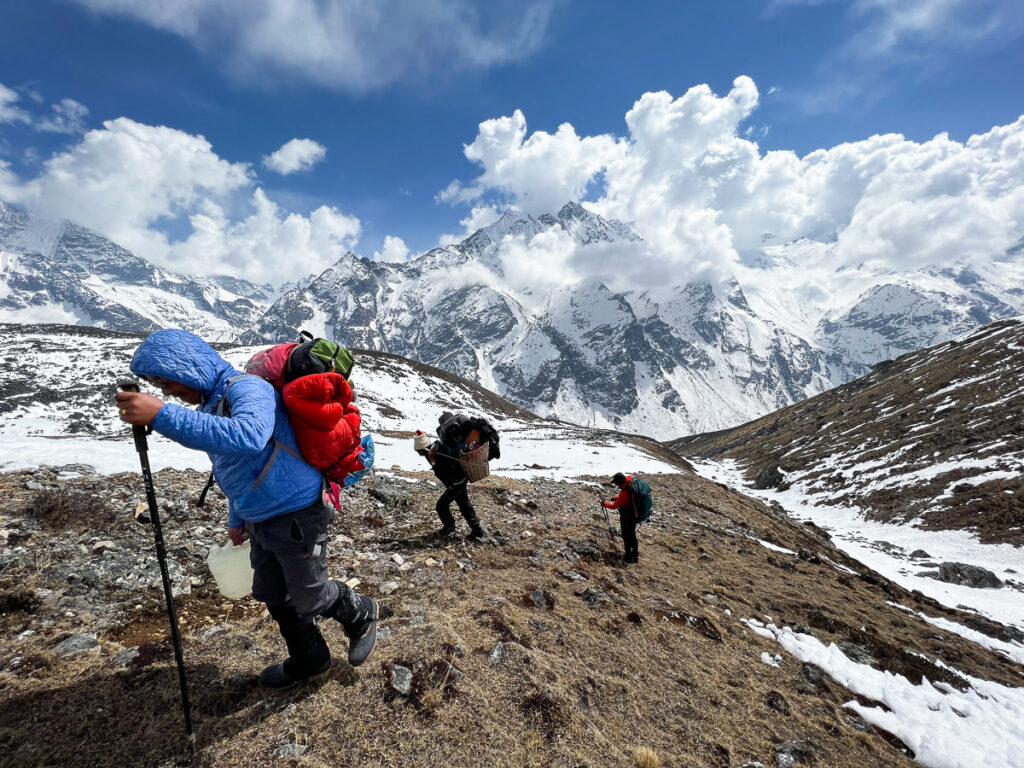
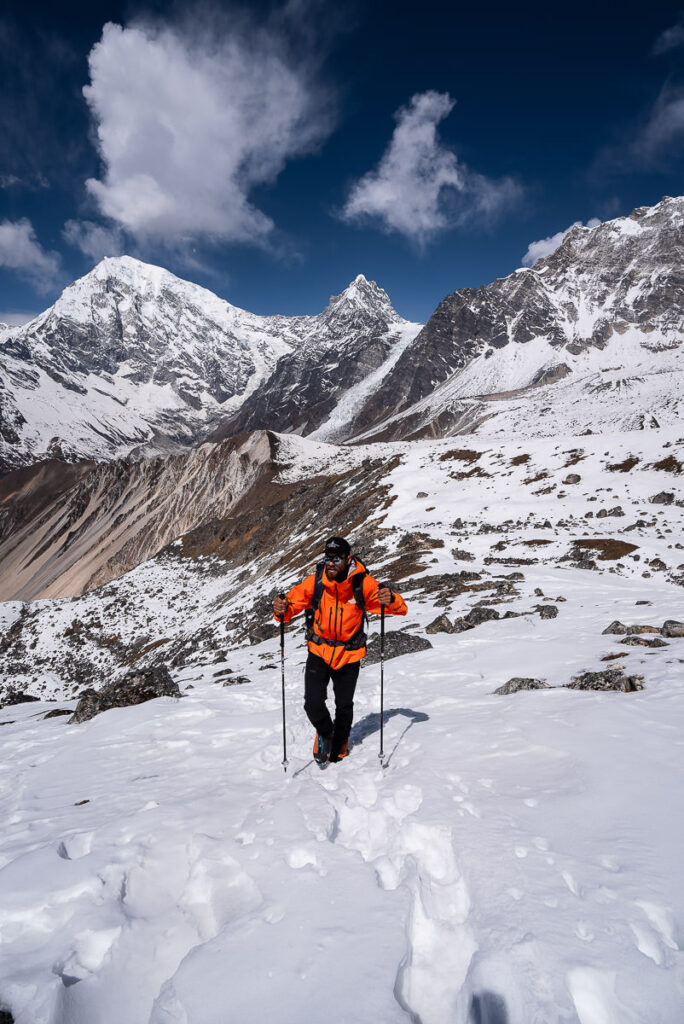
Along with Galbyu, one porter carrying the sleeping system and food joined us to complete our team of four. Given that it’s only a one-night stay, we traveled pretty light. I carried my climbing boots strapped to my bag and hiked up to basecamp in regular trekking boots.

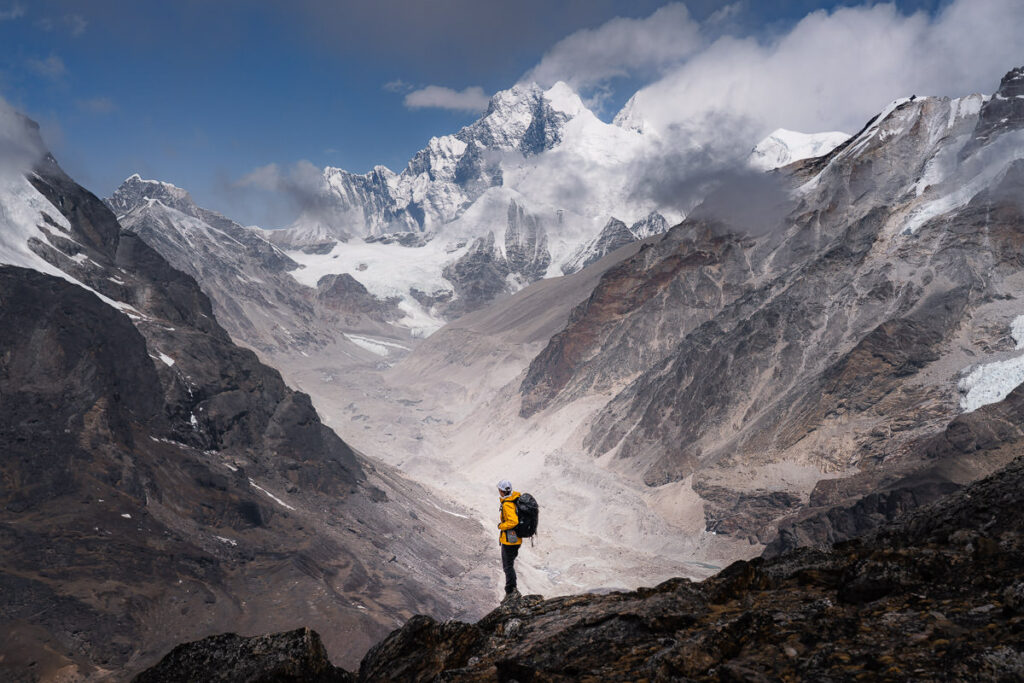
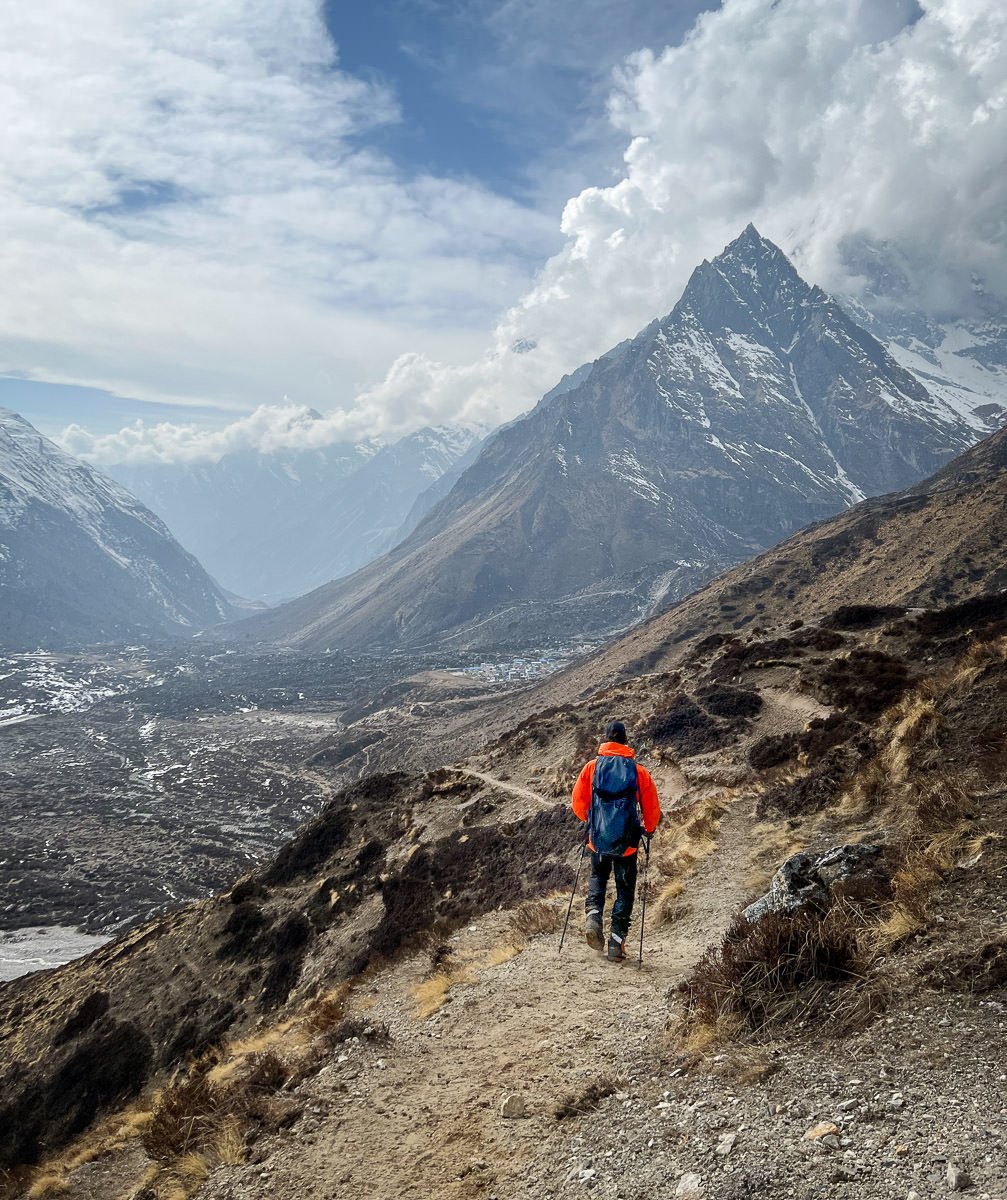
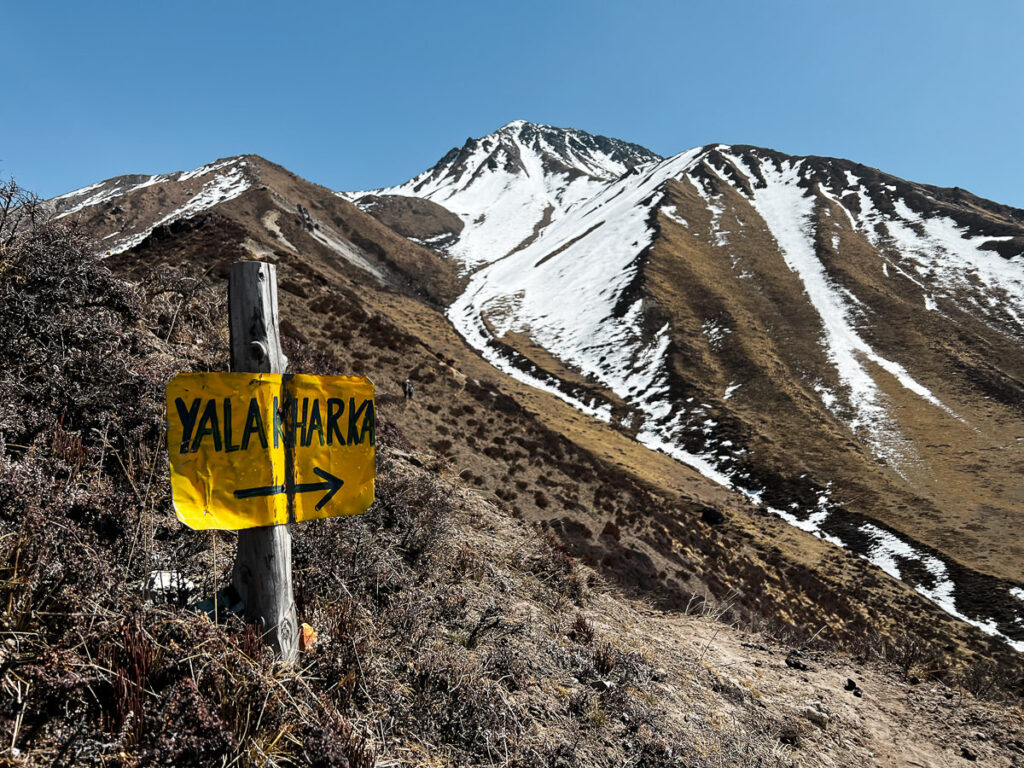
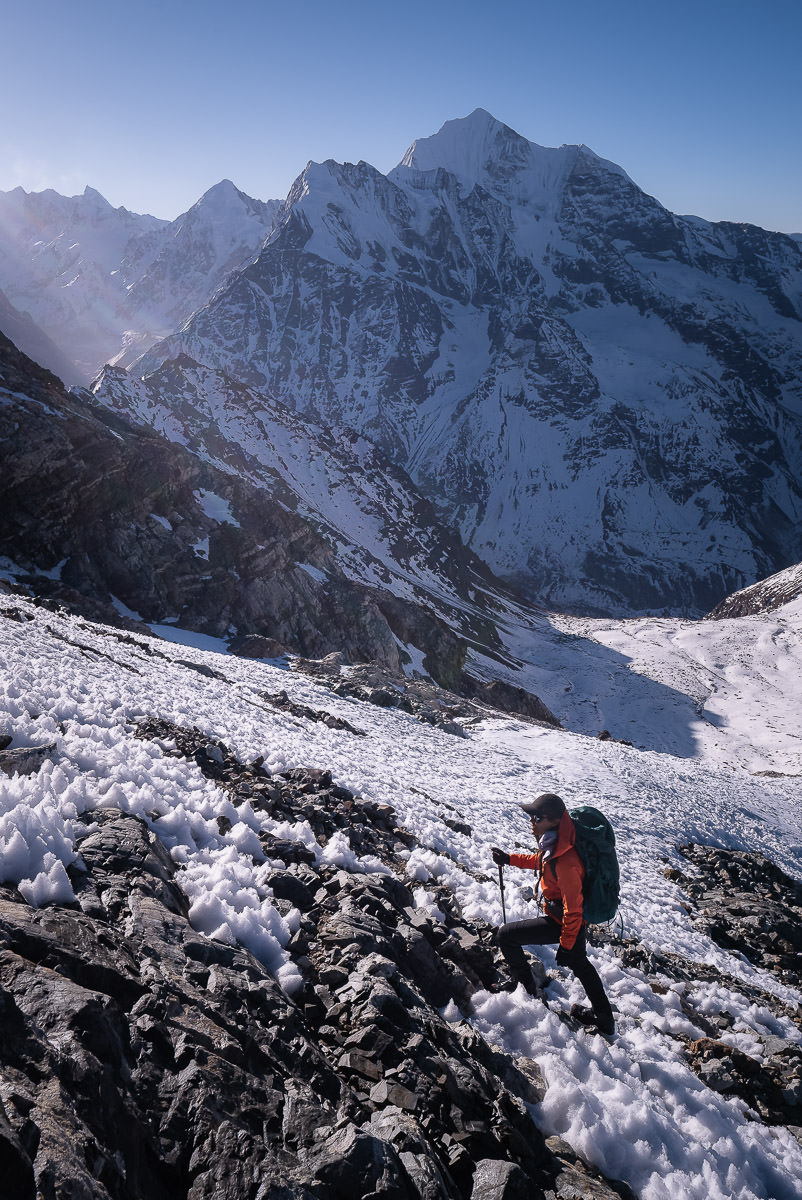
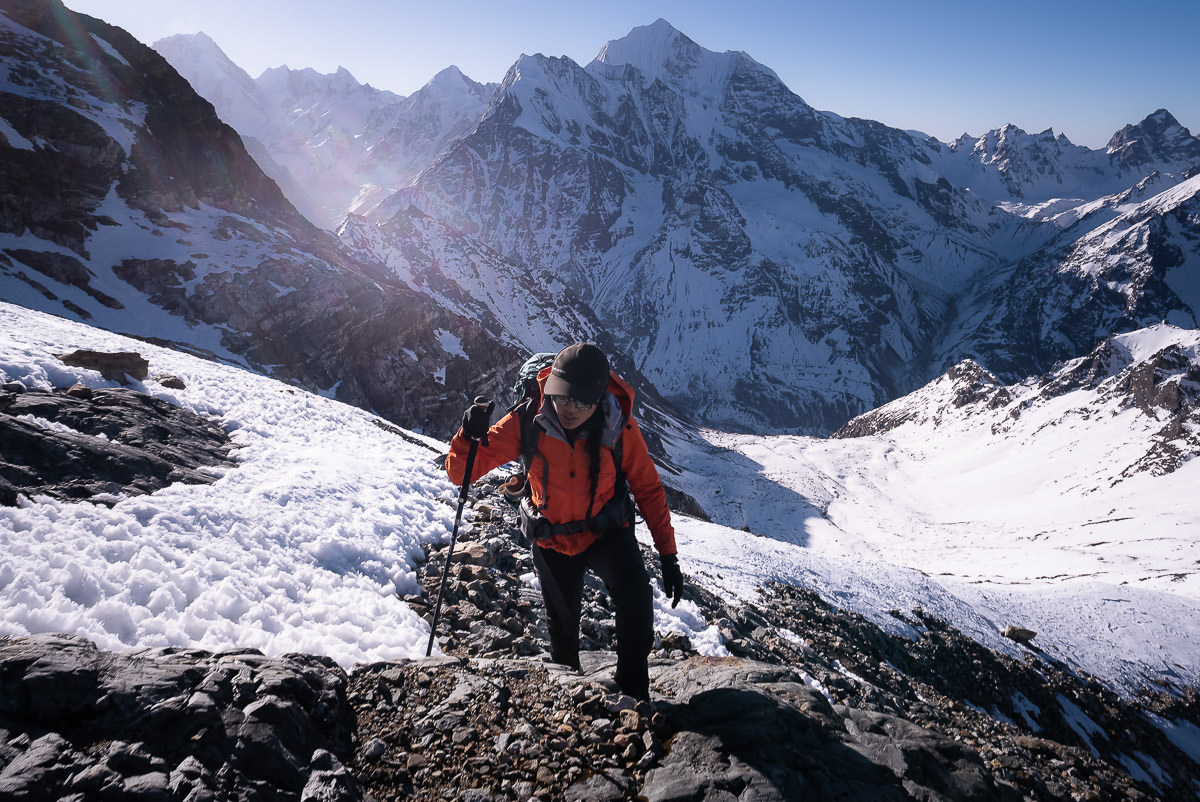
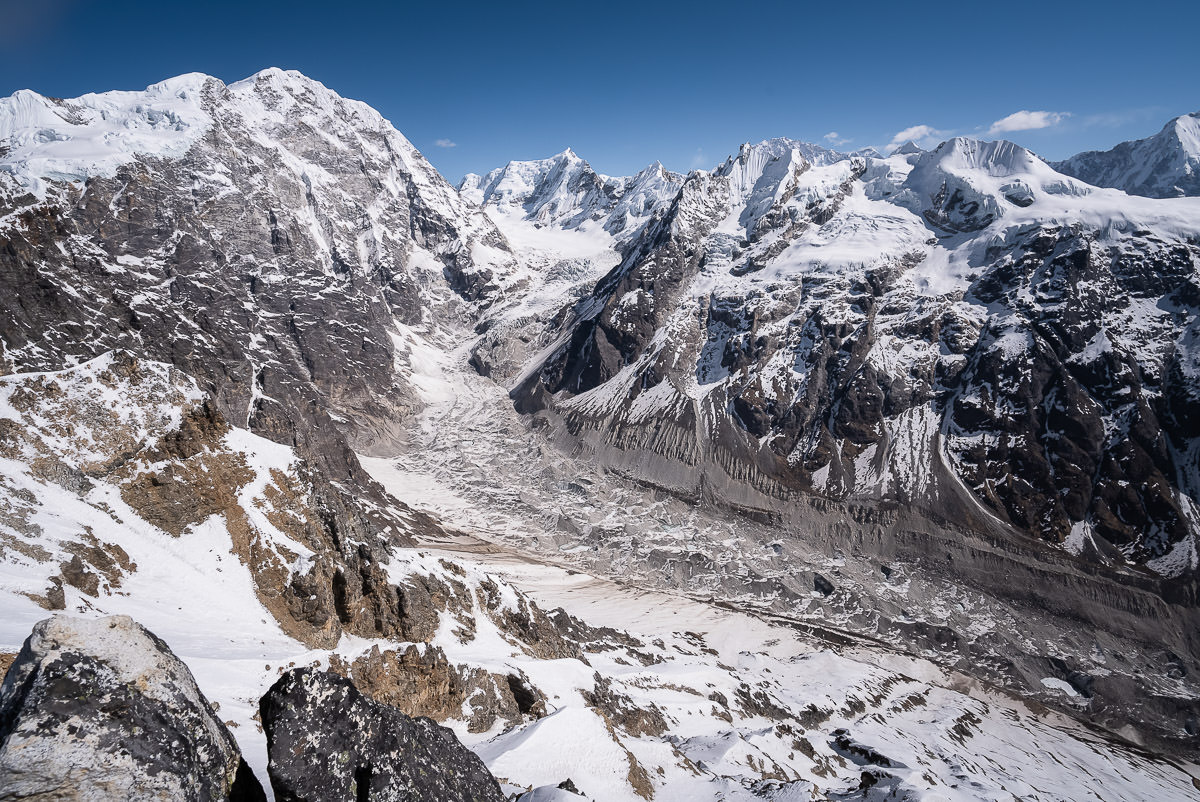
The route to Yala Kharka Basecamp begins by following the same path as Tserko Ri. We came underneath the ridge of Kyanjin Ri, crossed the glacial river, and then began up the switchbacks beneath the Tserko Ri ridge.
There is an alternate ‘new’ route to Yala Peak that is more direct and heads up the Tserko Ri ridge before traversing the glacial valley. However, with deep snow, we headed to Yala Kharka Basecamp the traditional way by following the yellow signs and cutting across from the Tserko Ri ridge to make a route beneath the base of Tserko Ri.
The climb to basecamp is quite comfortable because of the gradual incline. We claimed 950 meters of incline throughout the slow and steady journey but rarely had a steep ascent throughout the trek. We undulated along the flank, looking down over the old airport and up to the horizon of peaks on our right. It’s a beautiful trek and had us arriving in the early afternoon to set up camp.
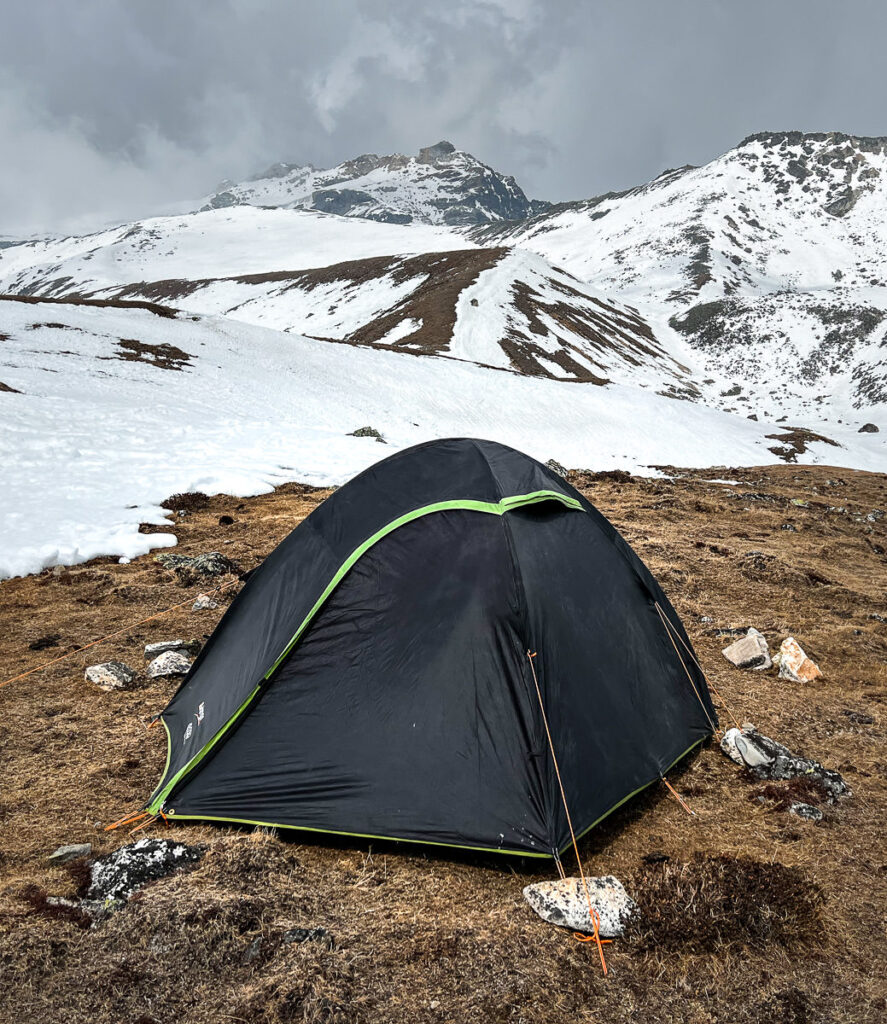
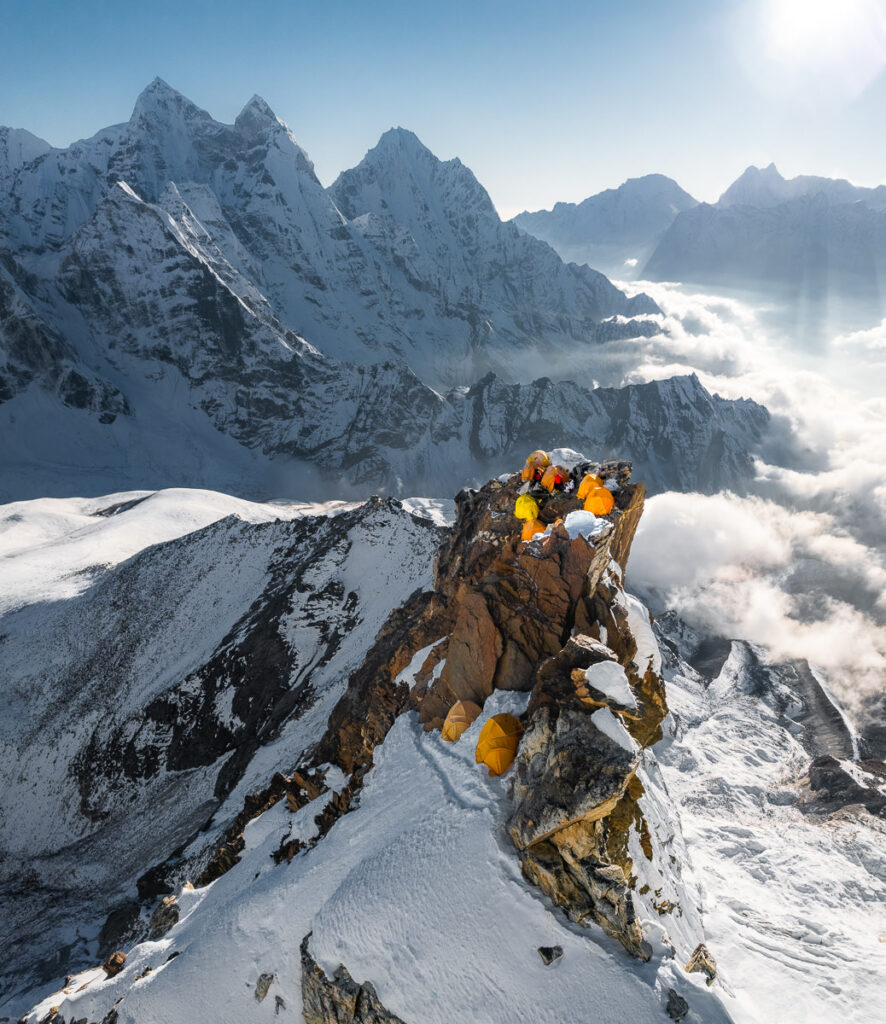
We stayed slightly higher than the original base camp, which was still covered in snow. A small patch of grass a few hundred meters beyond the defined camp made for a perfect campsite. After an hour or so, we were all set up with our tents and gear.
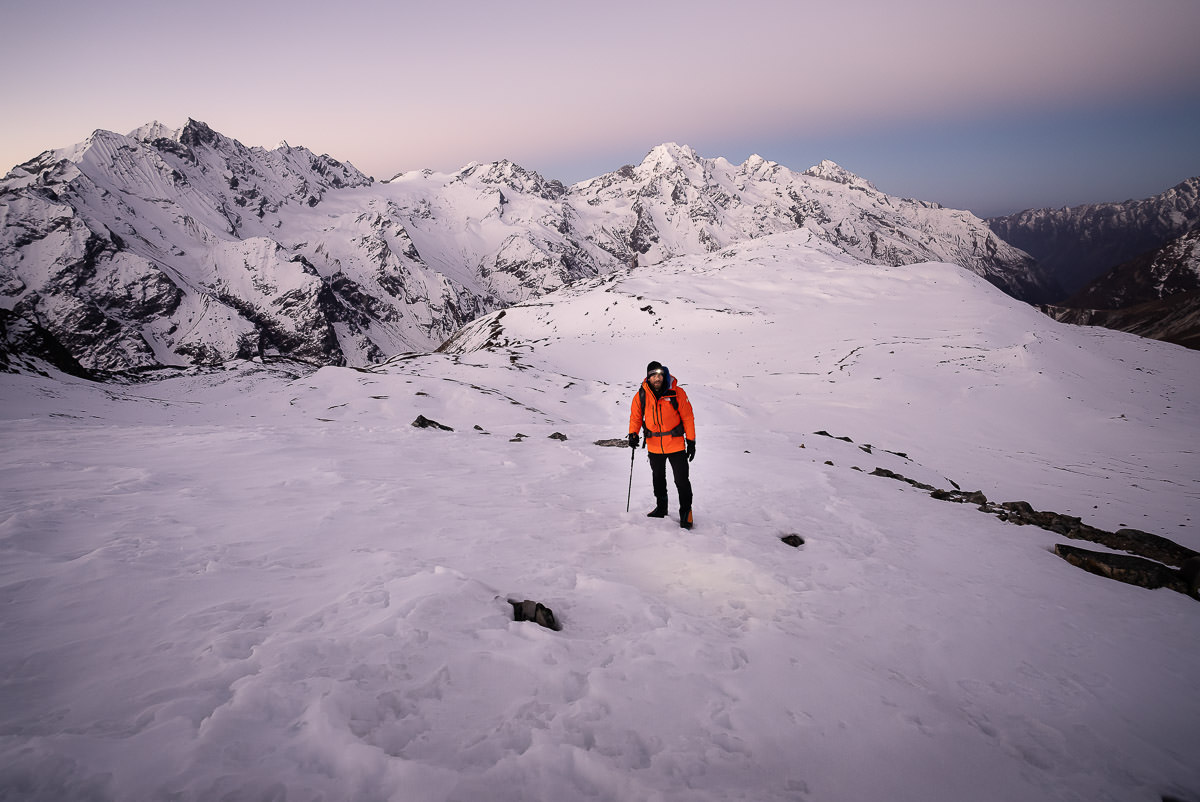
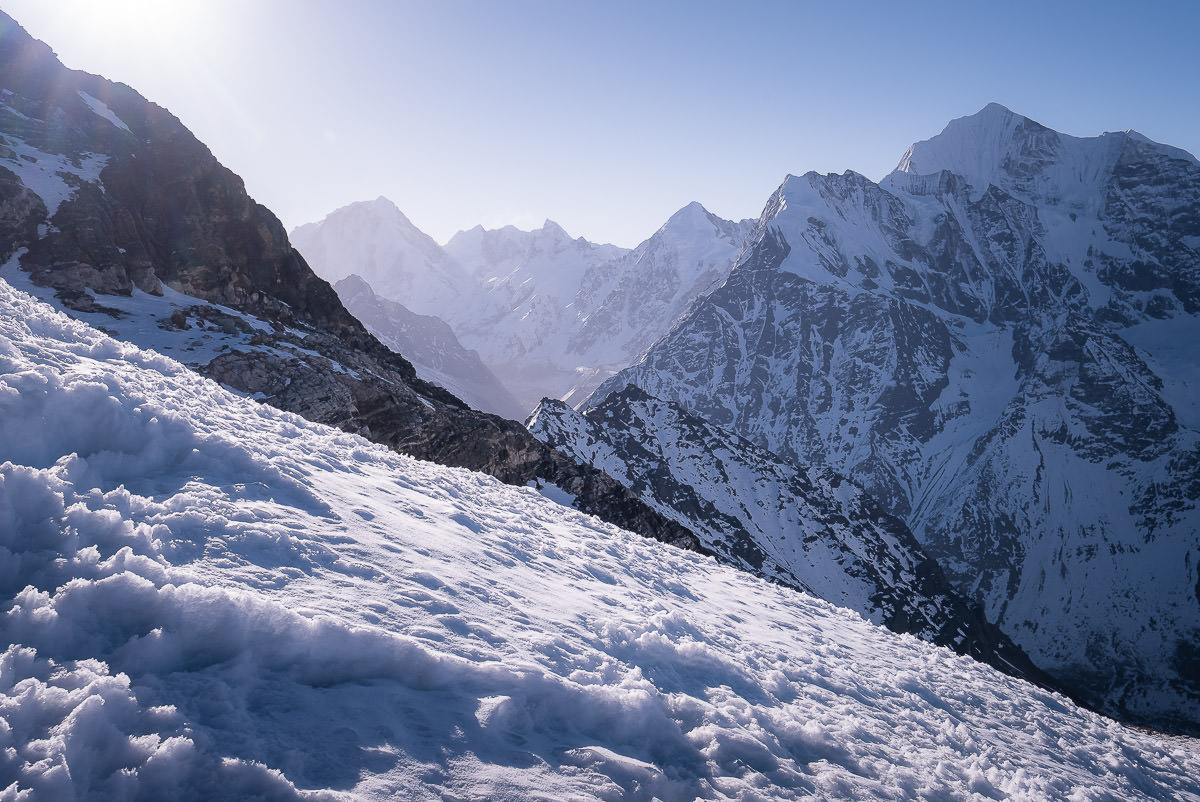
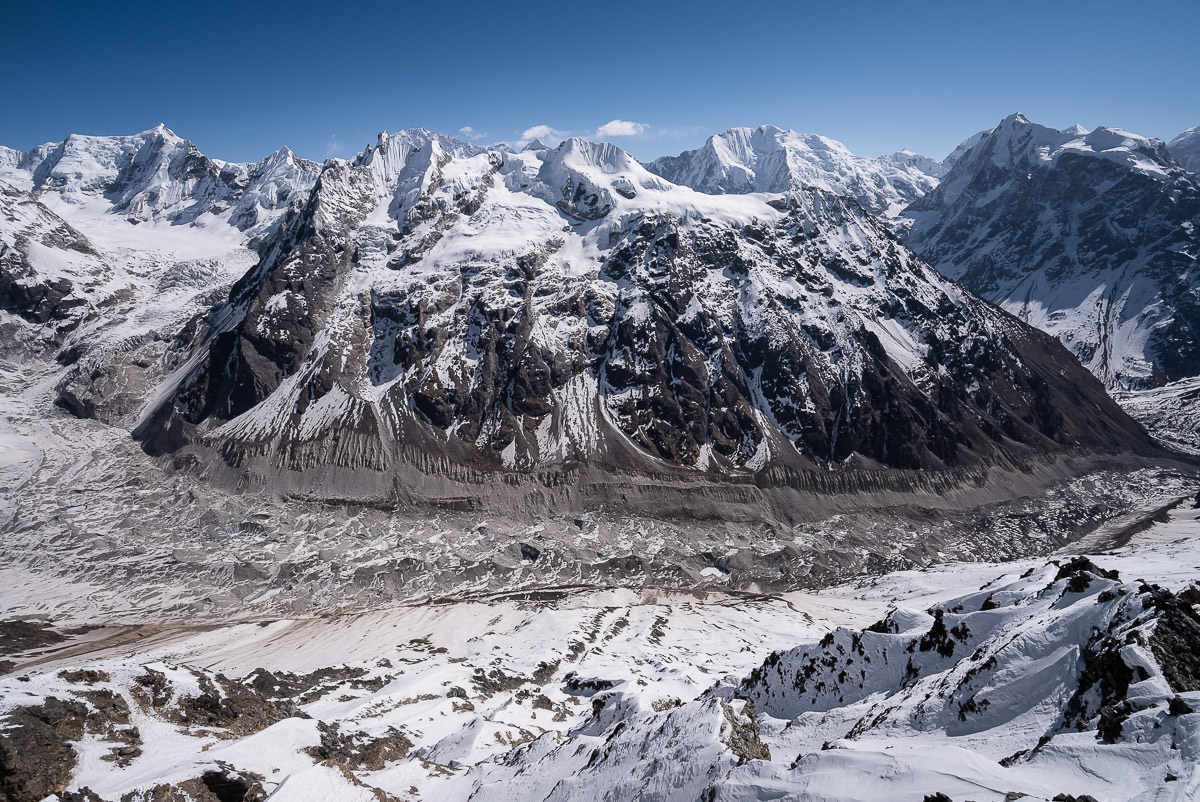
Yala Peak was engulfed by clouds for most of the day but peaked out to give a beautiful backdrop to the campsite. As you can see, our route to the summit was going to involve a lot of snow.
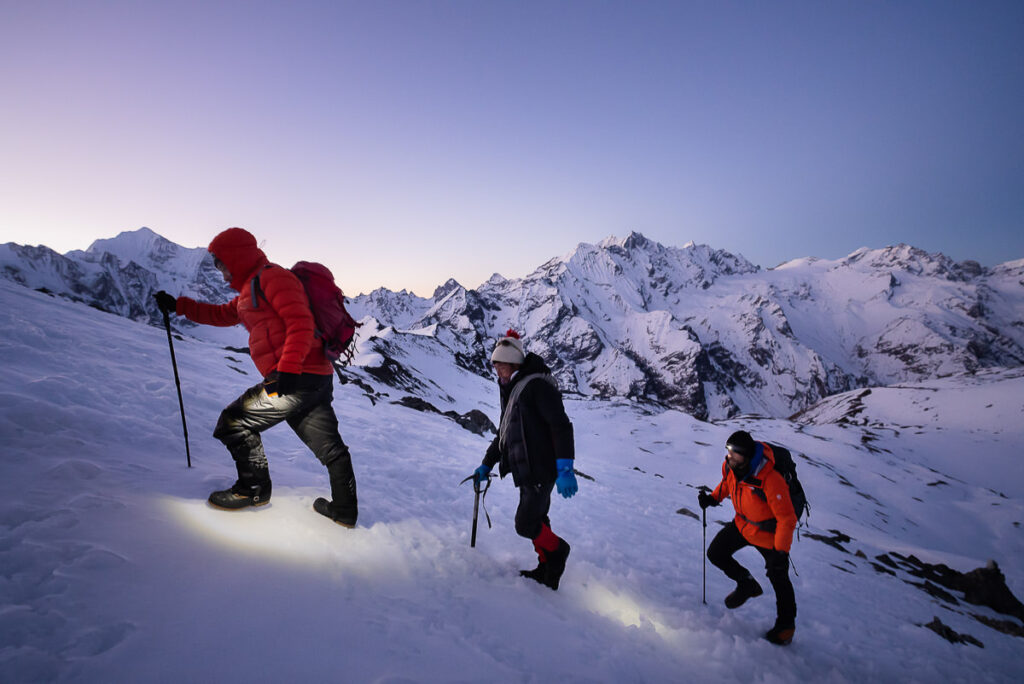
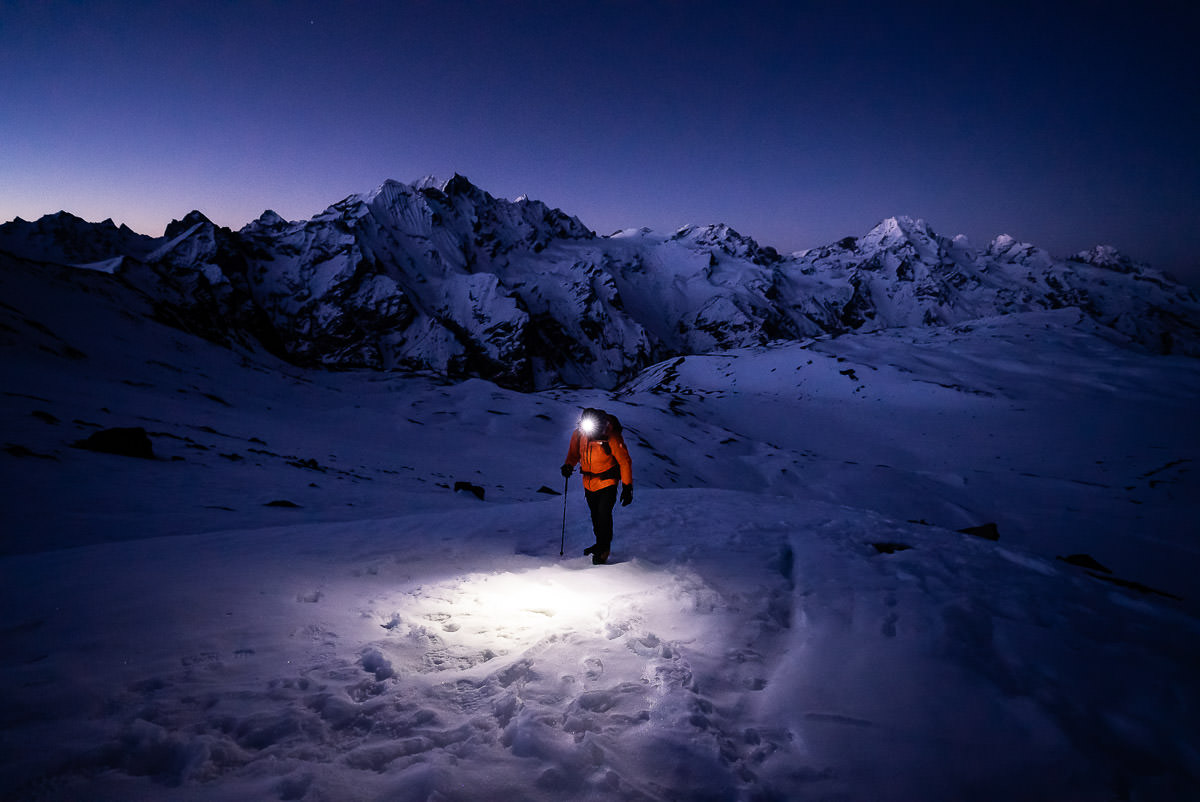
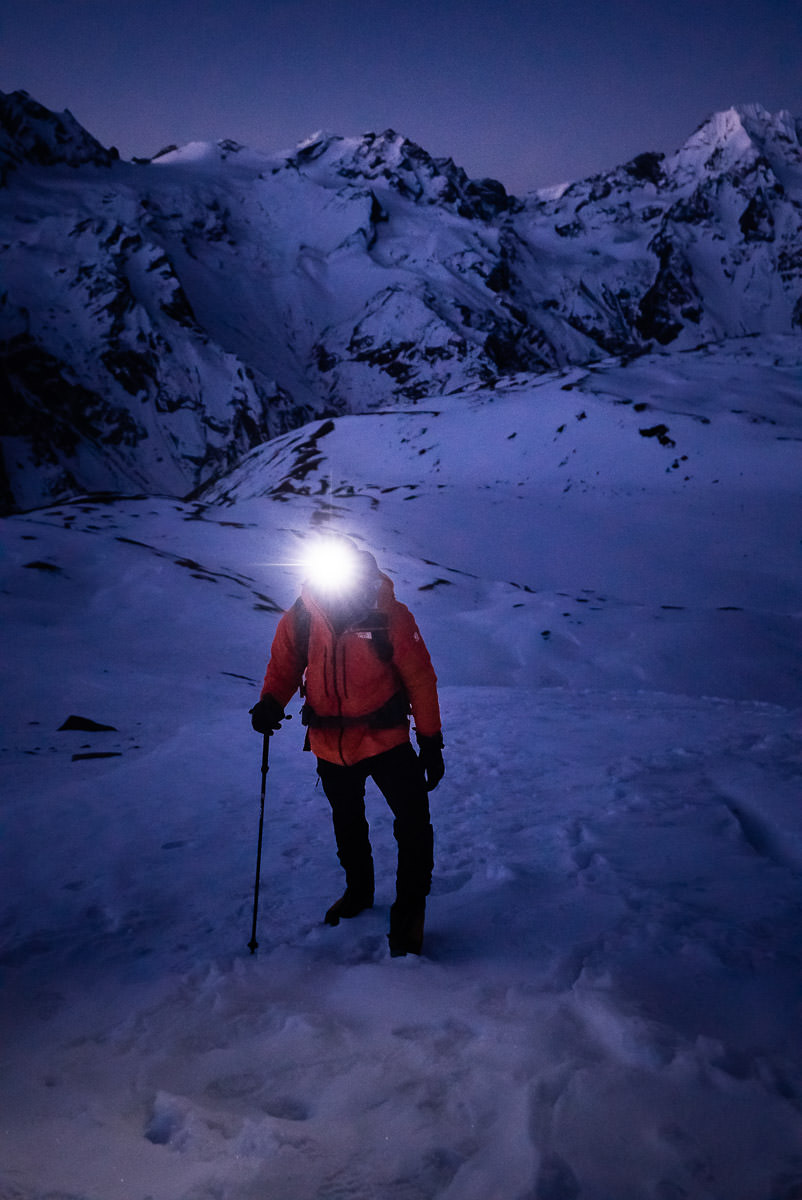
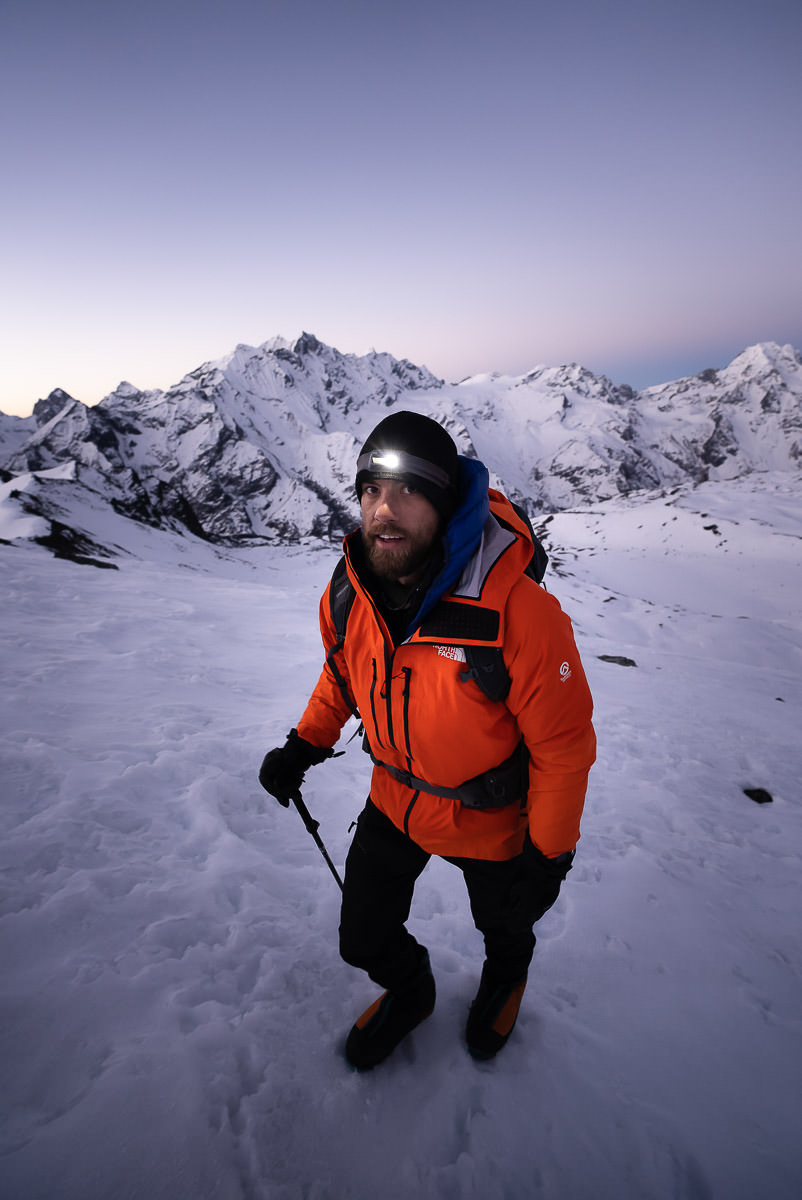
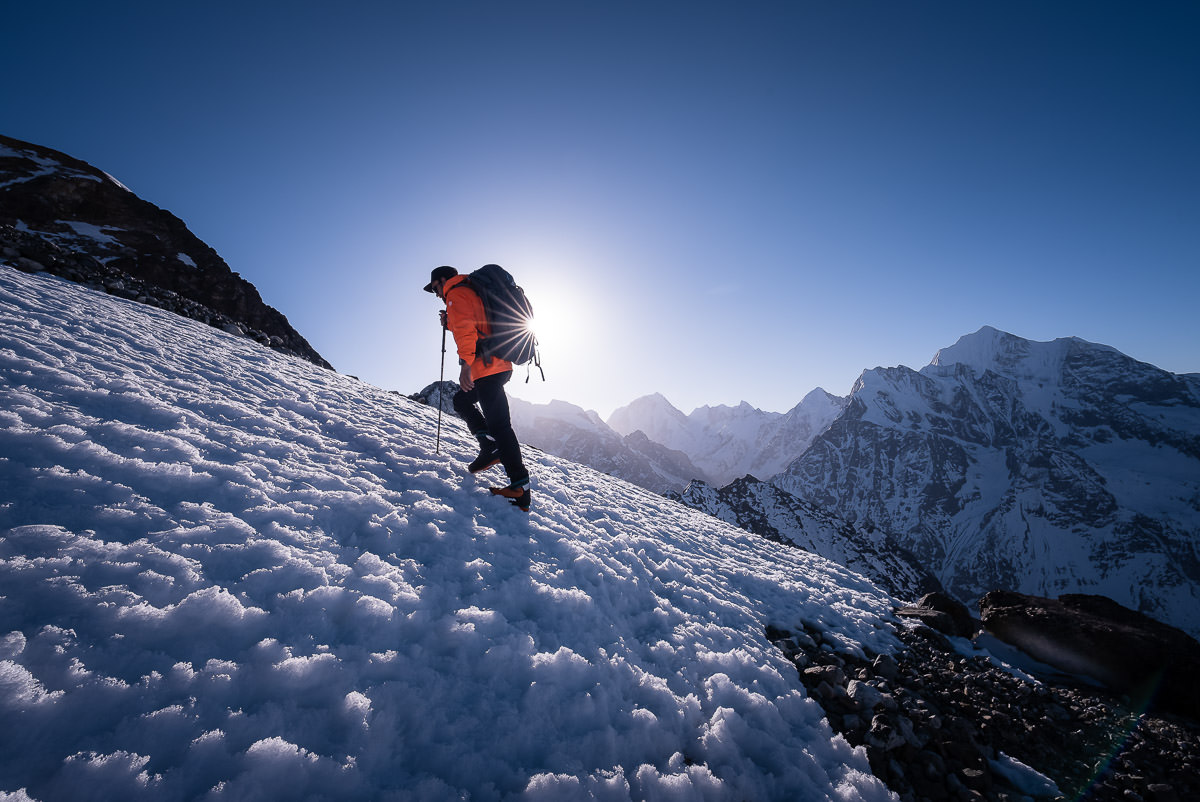
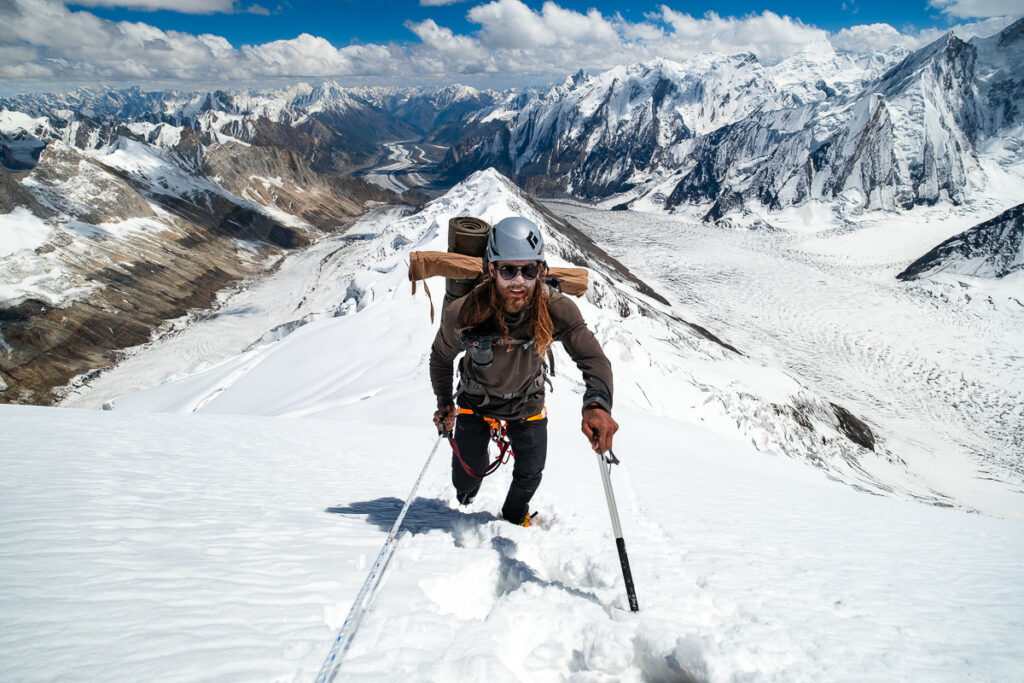
At 4:30 am we set off on our summit push for Yala Peak. With a clear sky and Galbyu to lead the way, we were confident of our chances to have a successful climb.
We knew there would be some difficulties due to the soft snow. It had been the cause of failure for the two prior groups and their summit attempts.
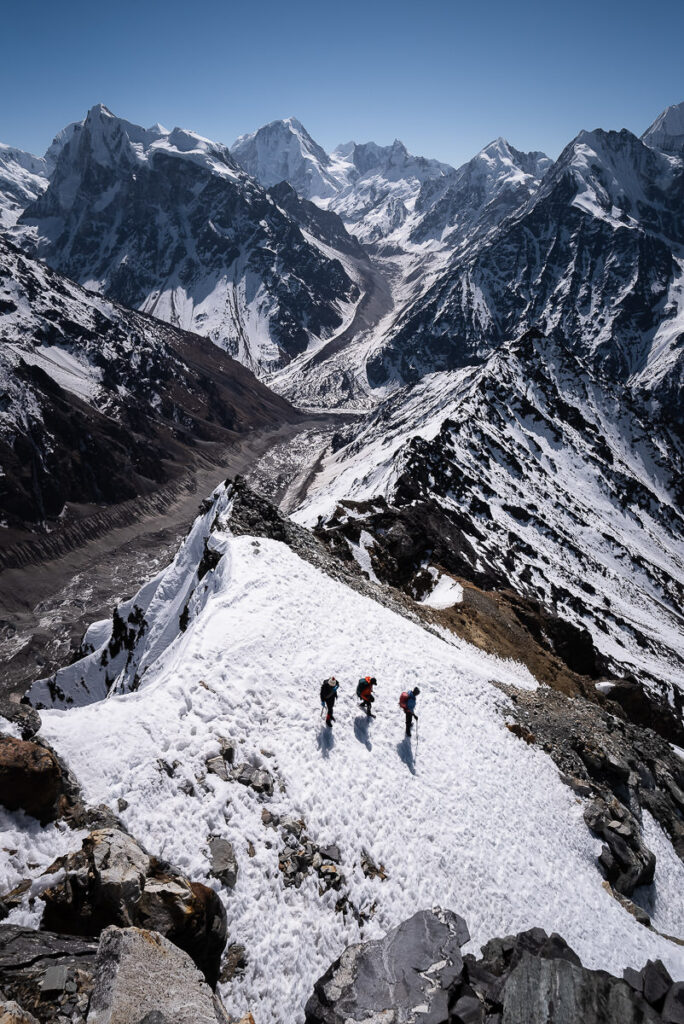
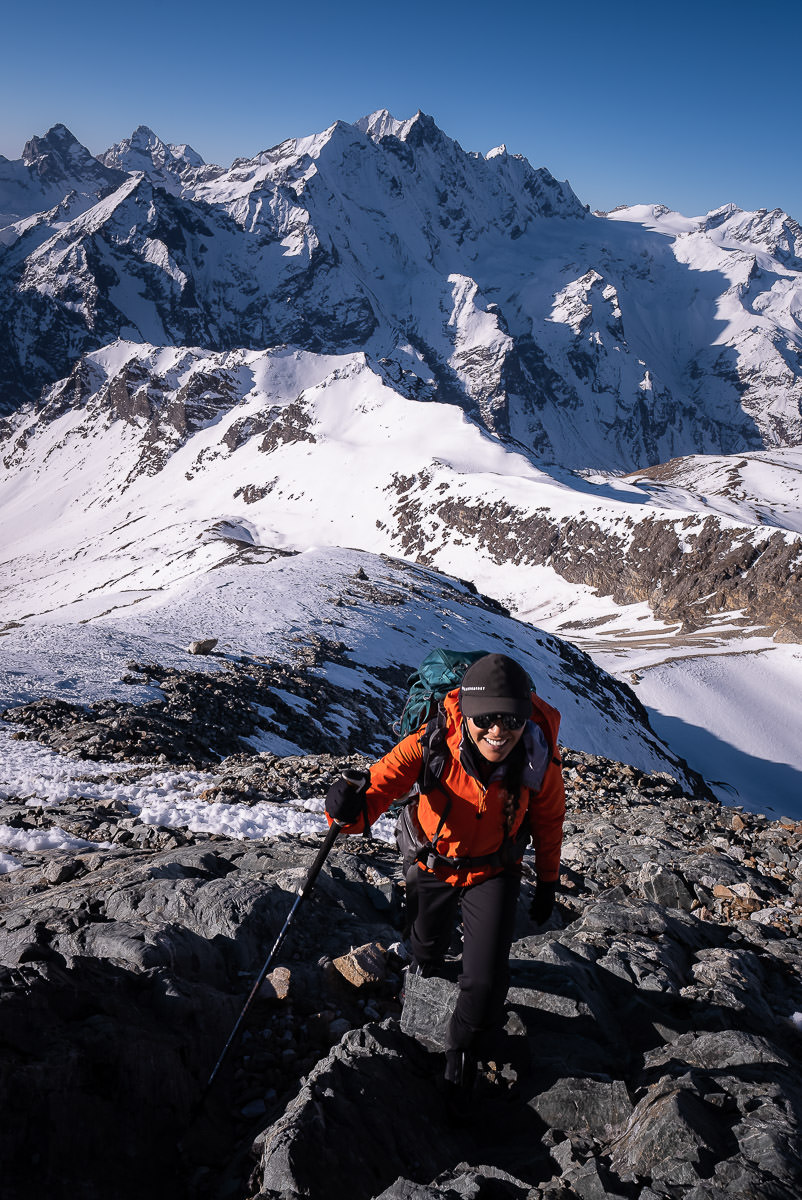
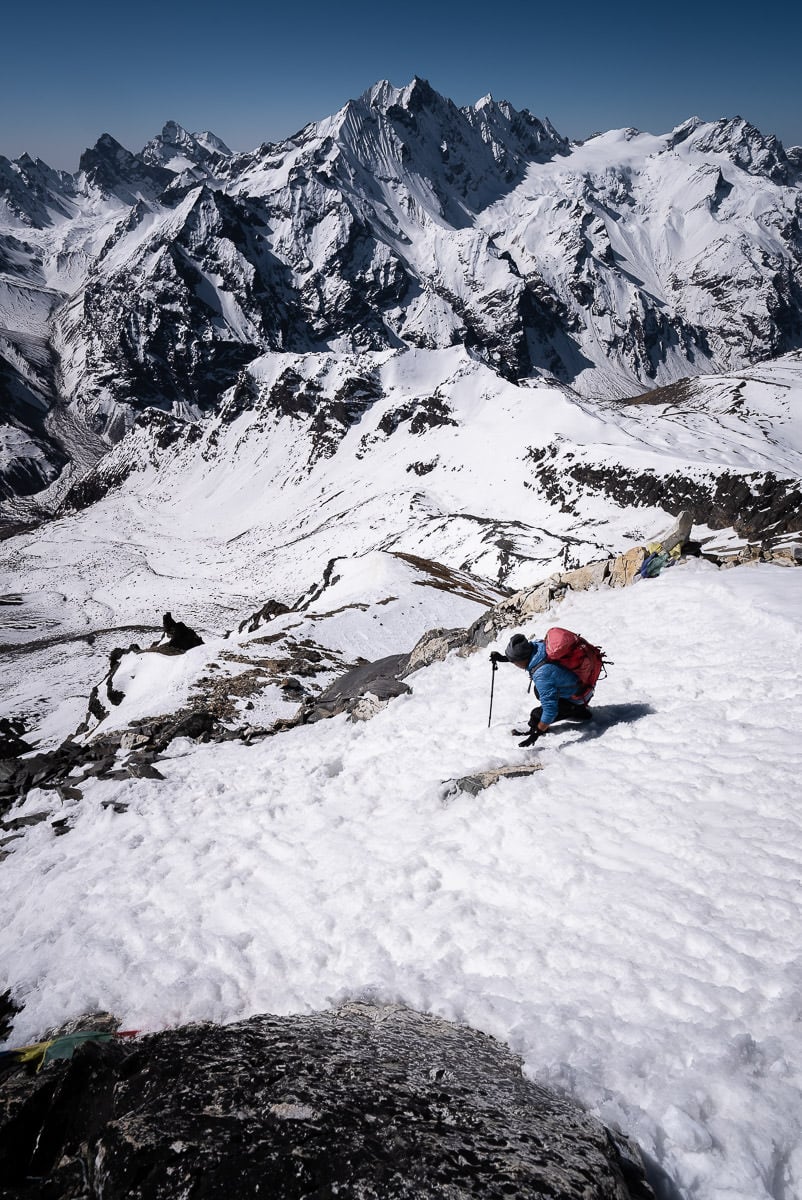
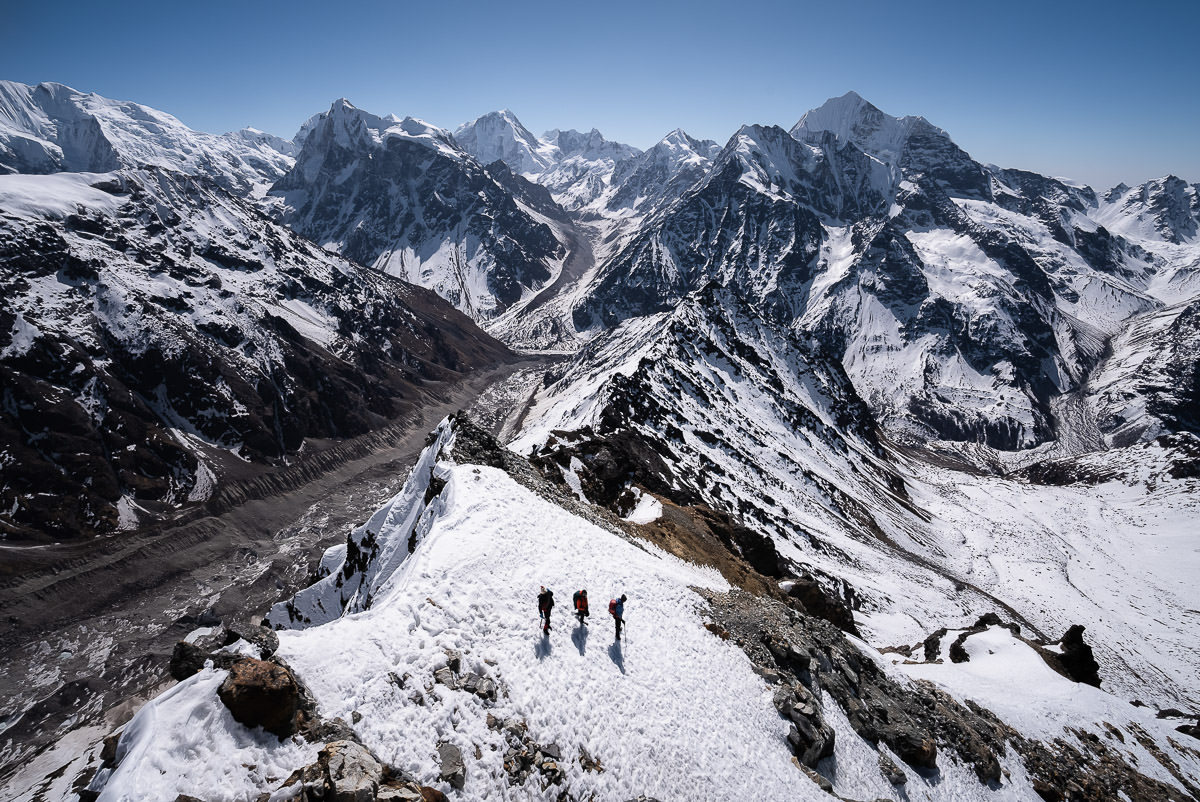
Our plan was to move strongly early on the hard snow. This seemed to work well for the most part but there were still a number of sections of the ascent where the snow gave way to knee-deep or slightly further. Throughout the climb did our best to stay on the ridges and find the rocky lines but sometimes crossing in the snowy valleys was inevitable.
The first half of the summit push is a zig-zag journey from one ridge to the next as we pushed up the snowy undulation. Yala Peak always seemed within reach but we never seemed to reach the base of its rocky summit structure. It can be deceptive in that way.
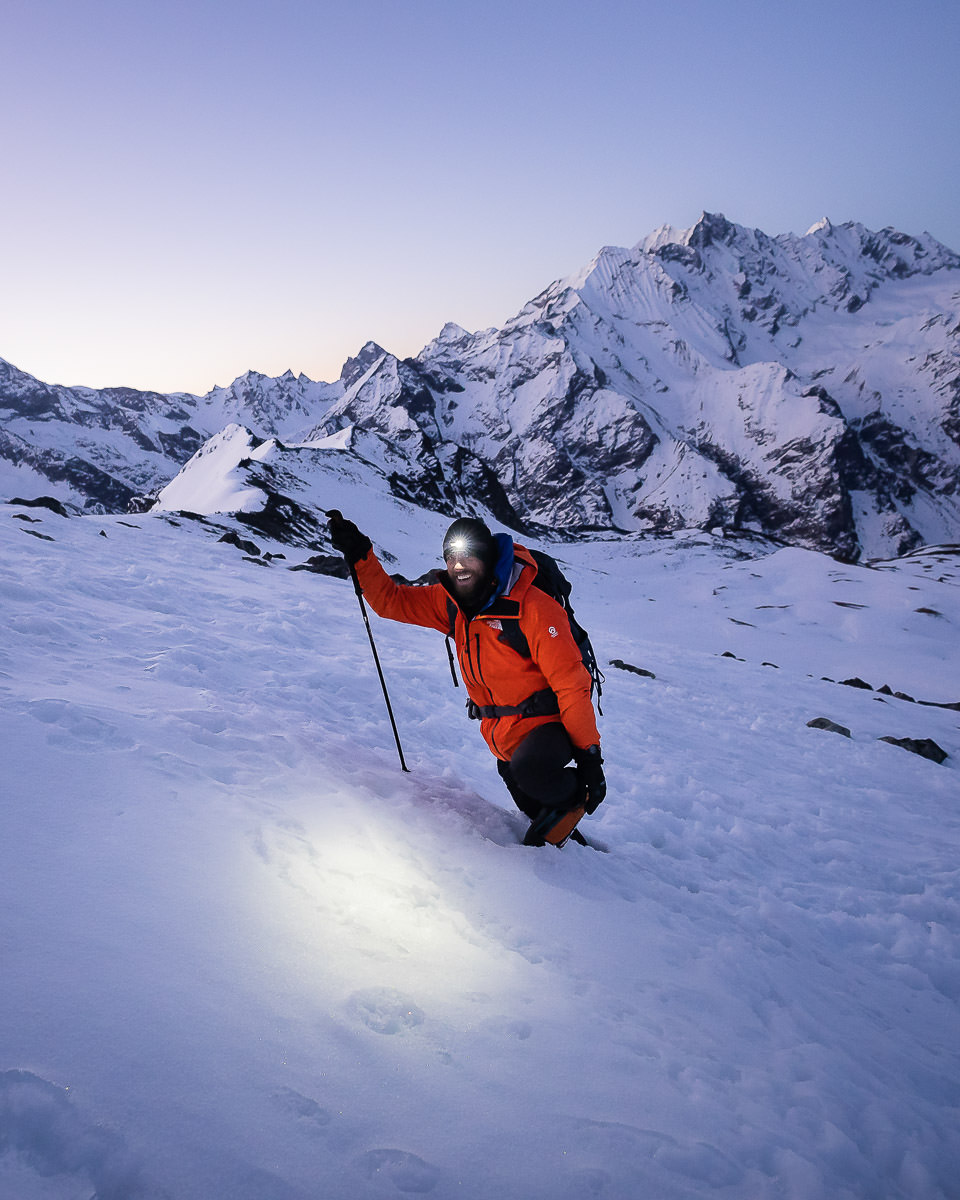
Our morning was blessed with beautiful clear skies and purple hues sweeping over the mountain peaks as sunrise came upon us.

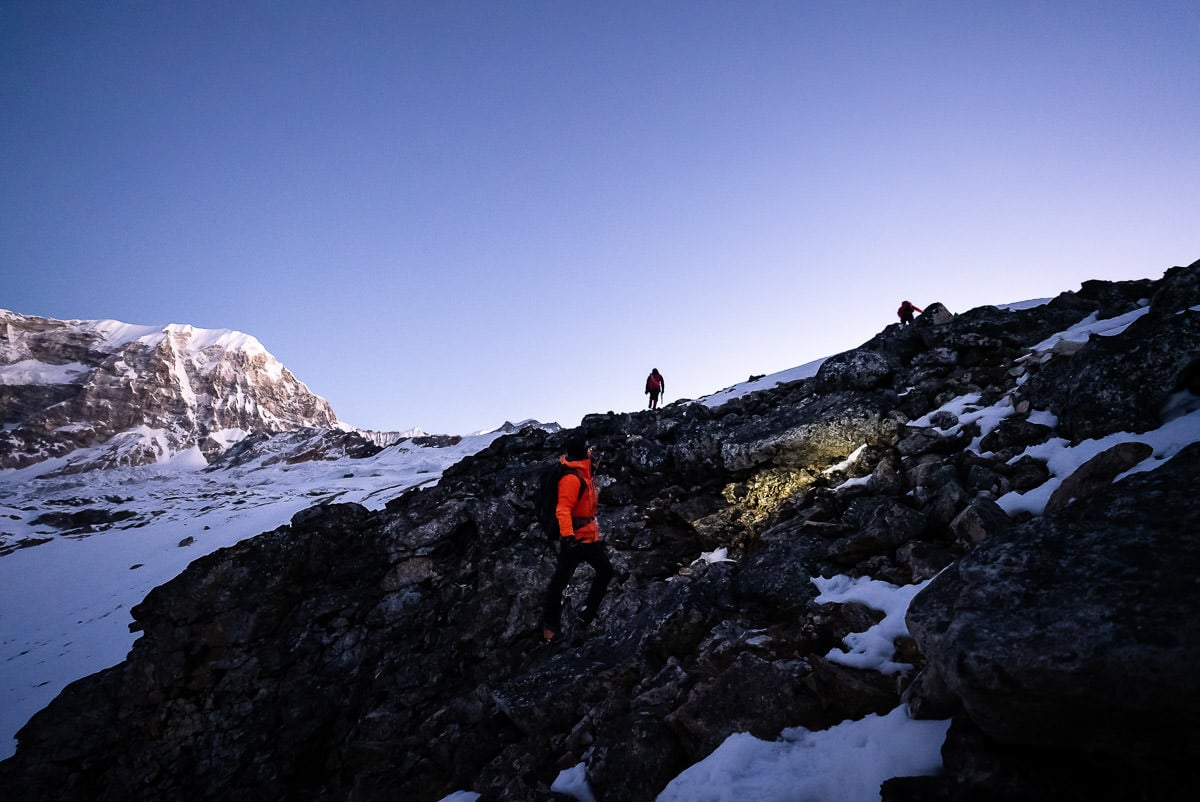
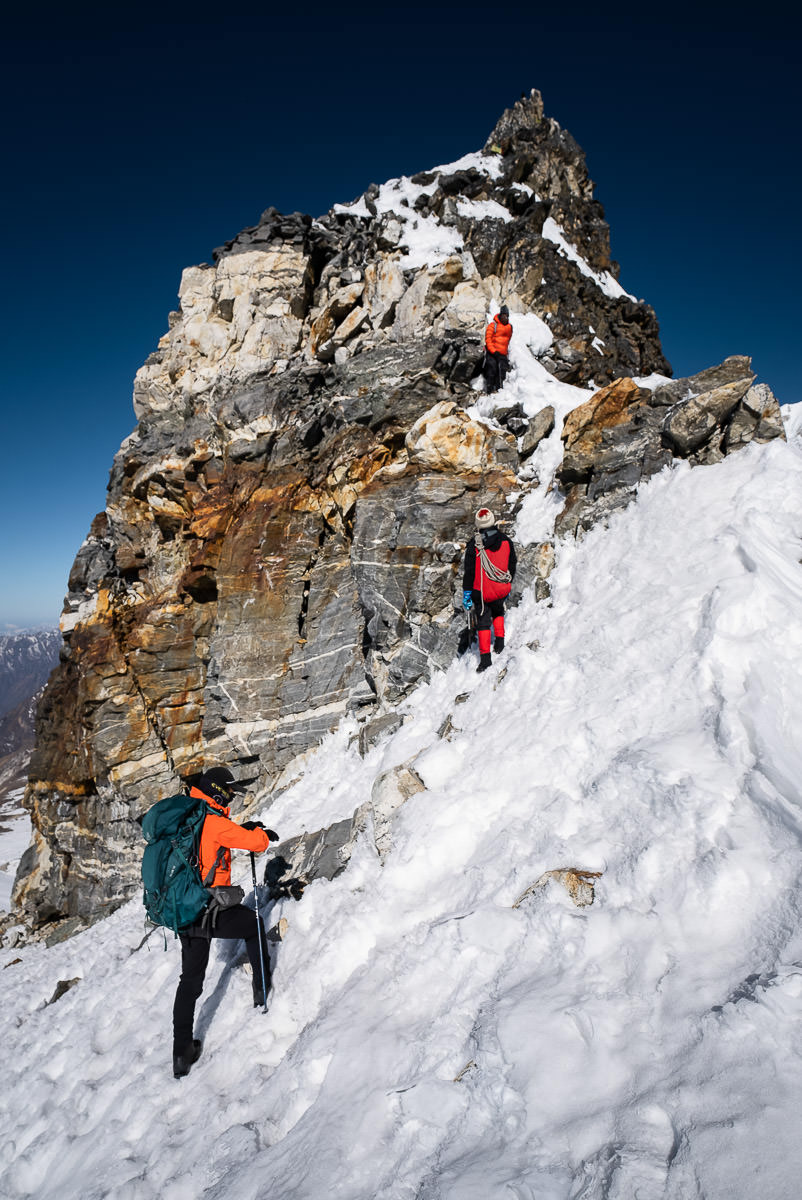
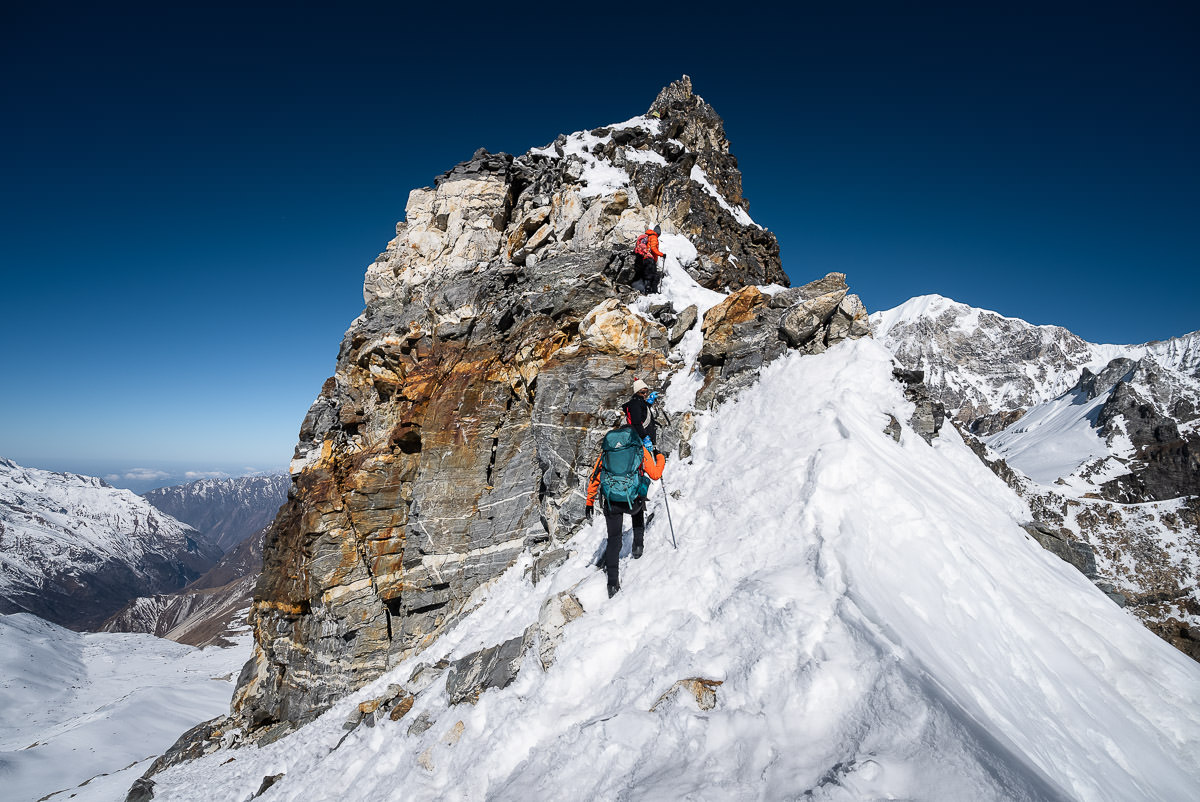
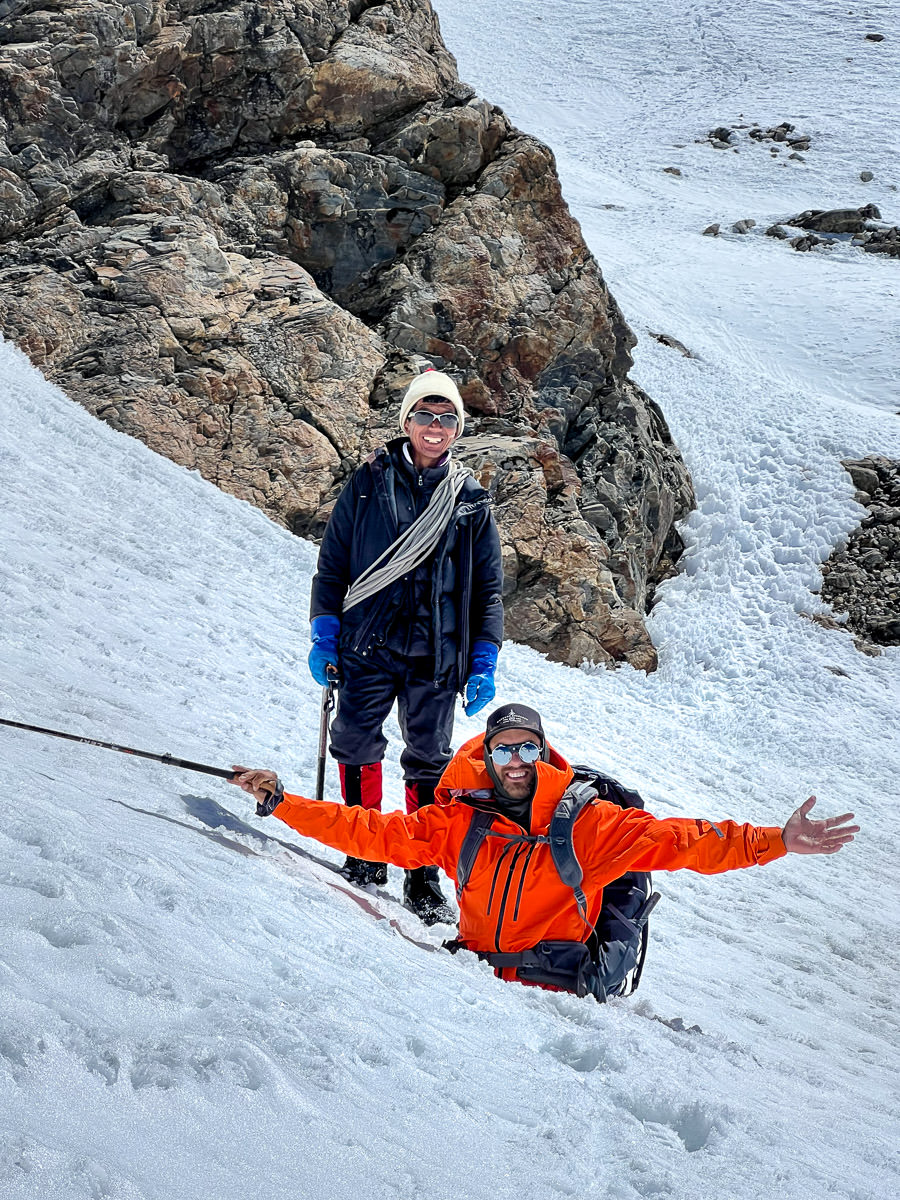
There are seemingly two sections to the summit push. The first involves the vast, snowy approach and the second is the scramble and climb up the rocky formation of the pointed, Yala Peak. In the summer, this second, rocky part of the climb can be completely dry and exposed.
However, for us, the snow was still thick, soft, and deep. We managed to maneuver our way up the regular route with some basic scrambling, sideways traversing, and cautious stepping. Rockfall is the big issue here so slow, steady steps are key for the safety of yourself and your group.
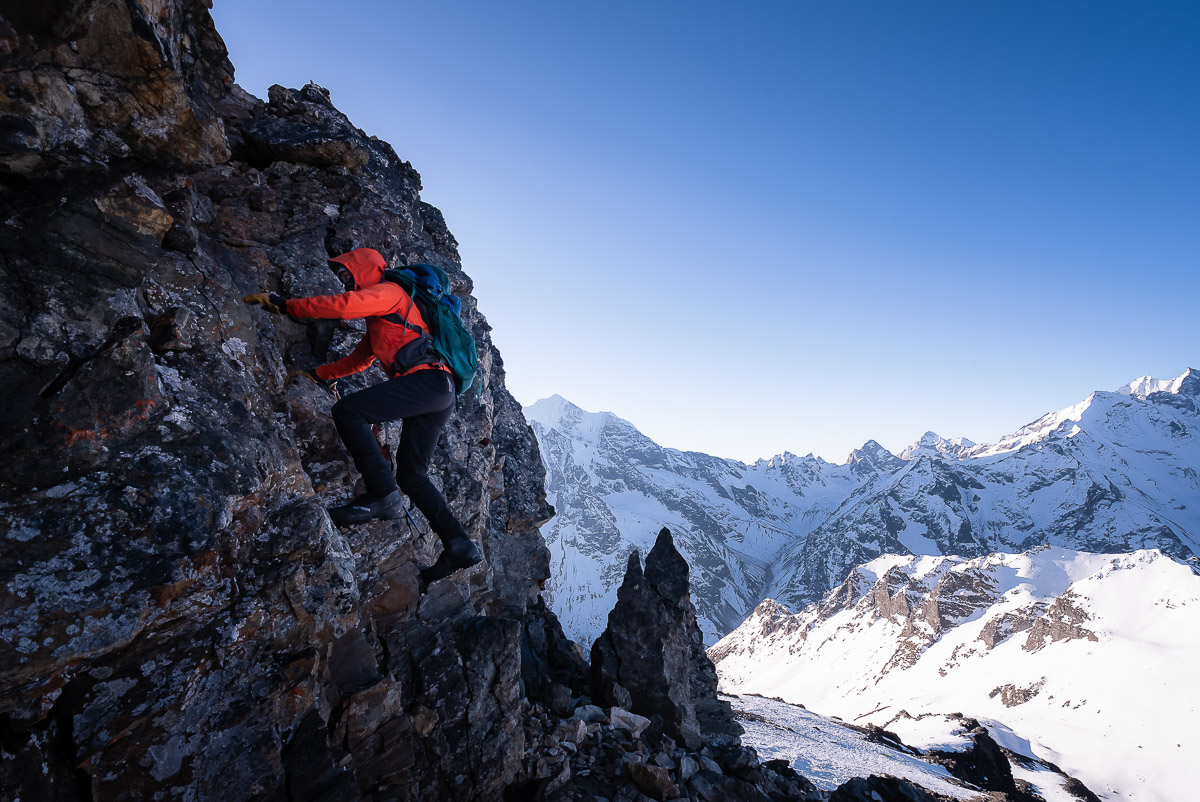
The final climb of Yala Peak is short but also the most exposed part of the route. It’s also getting quite high up at this point of 5,450m so the air is thin. All of the elements combine for an adrenaline-filled finale. I don’t want to overexaggerate this final ascent, but while covered in snow it seemed like the only part of the trek with any imminent danger or risk of falling.
The chimney climb to the top is at an abruptly steep angle with drops to either side. The main difficulty here is that half of the rocks are solid and half are ready to crumble and snap off with any serious pressure. A slow, measured approach is required. A solid handle on heights is necessary for this final little climb.
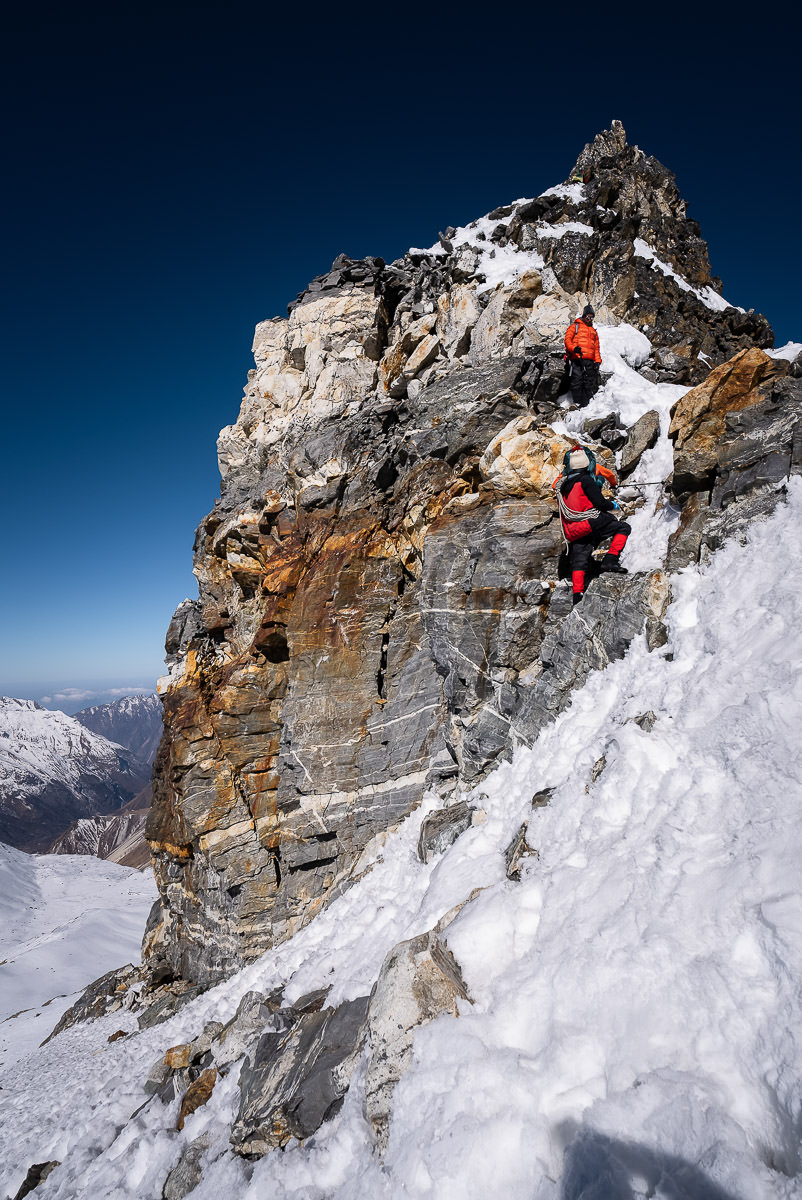
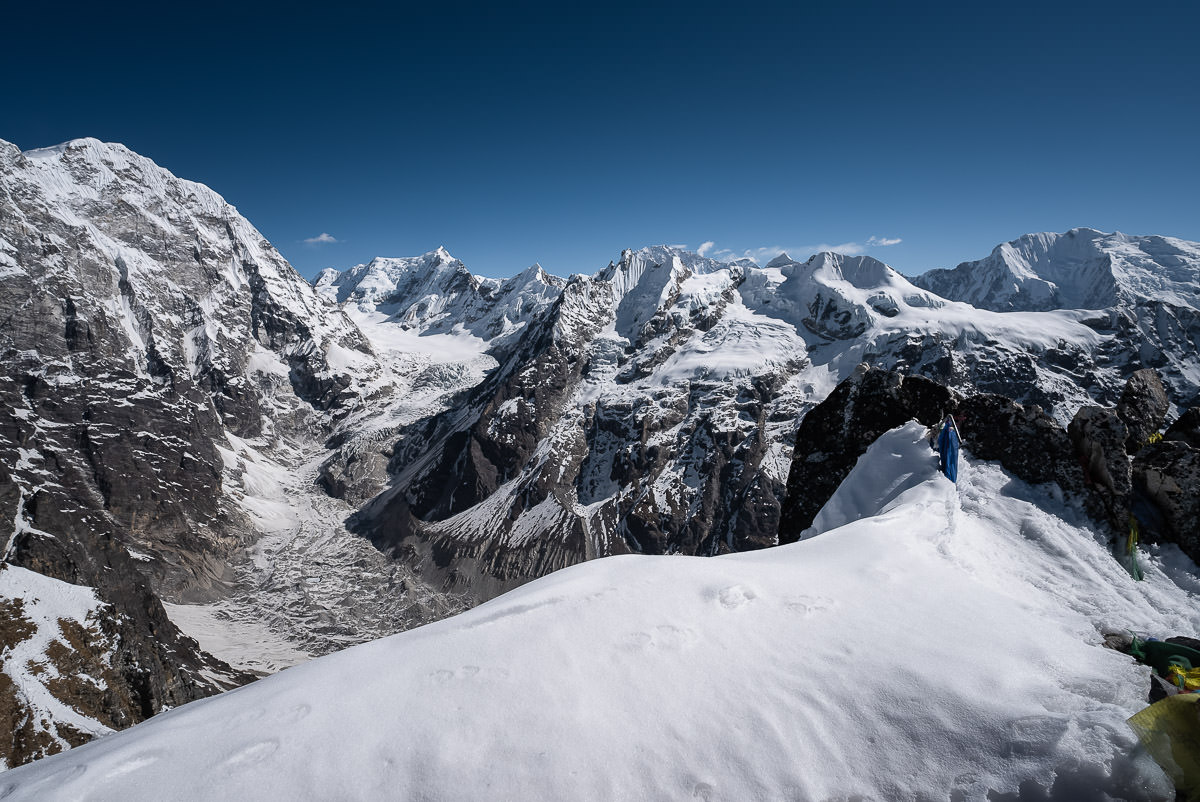

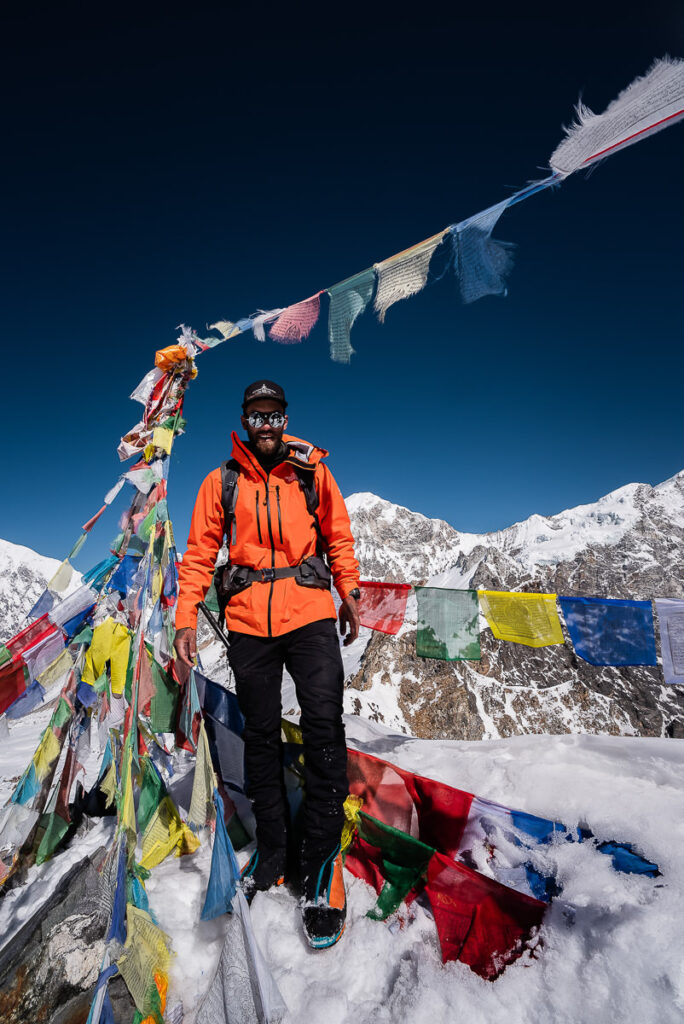
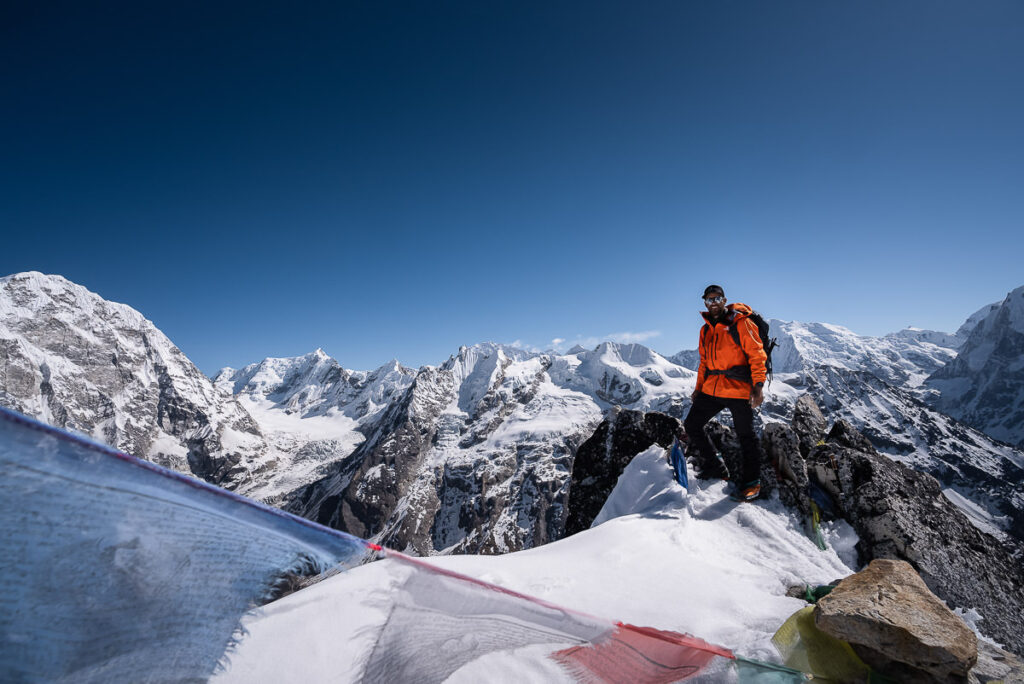
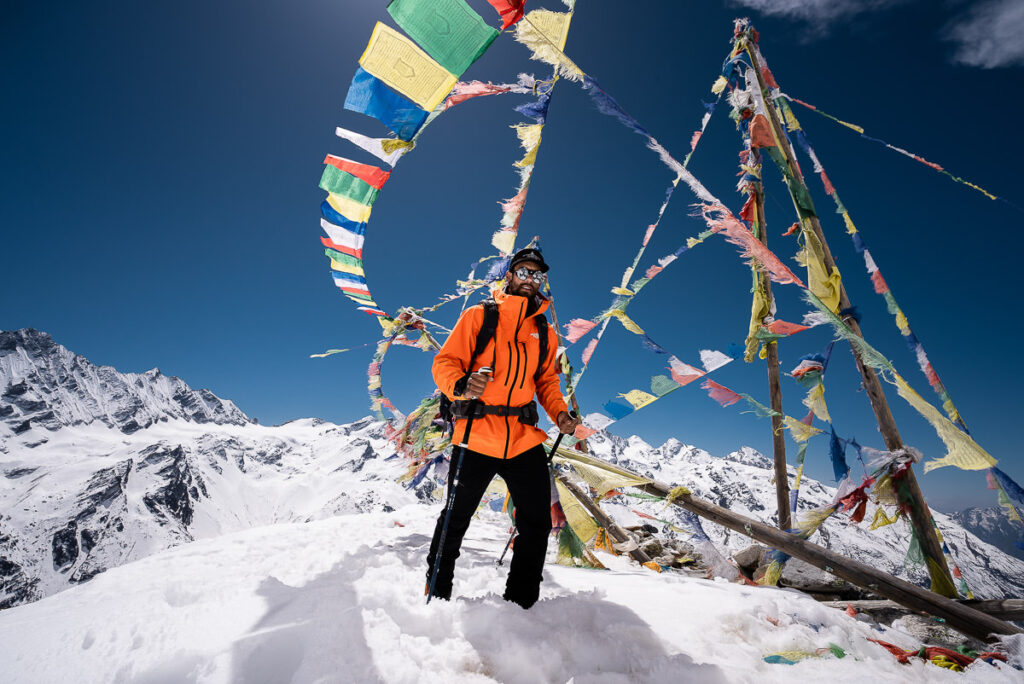
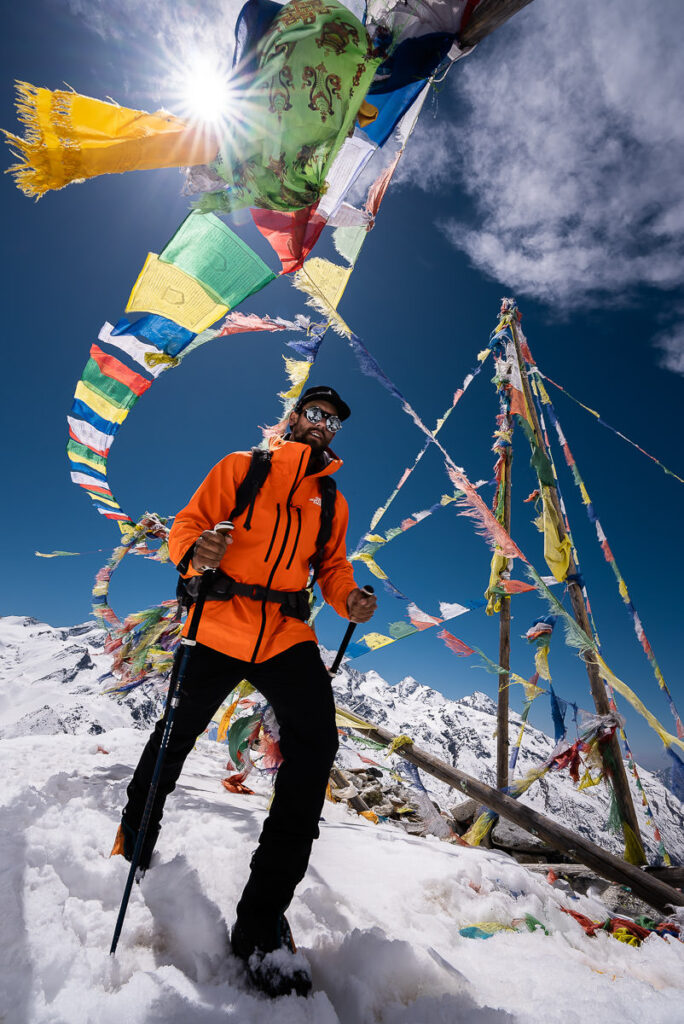
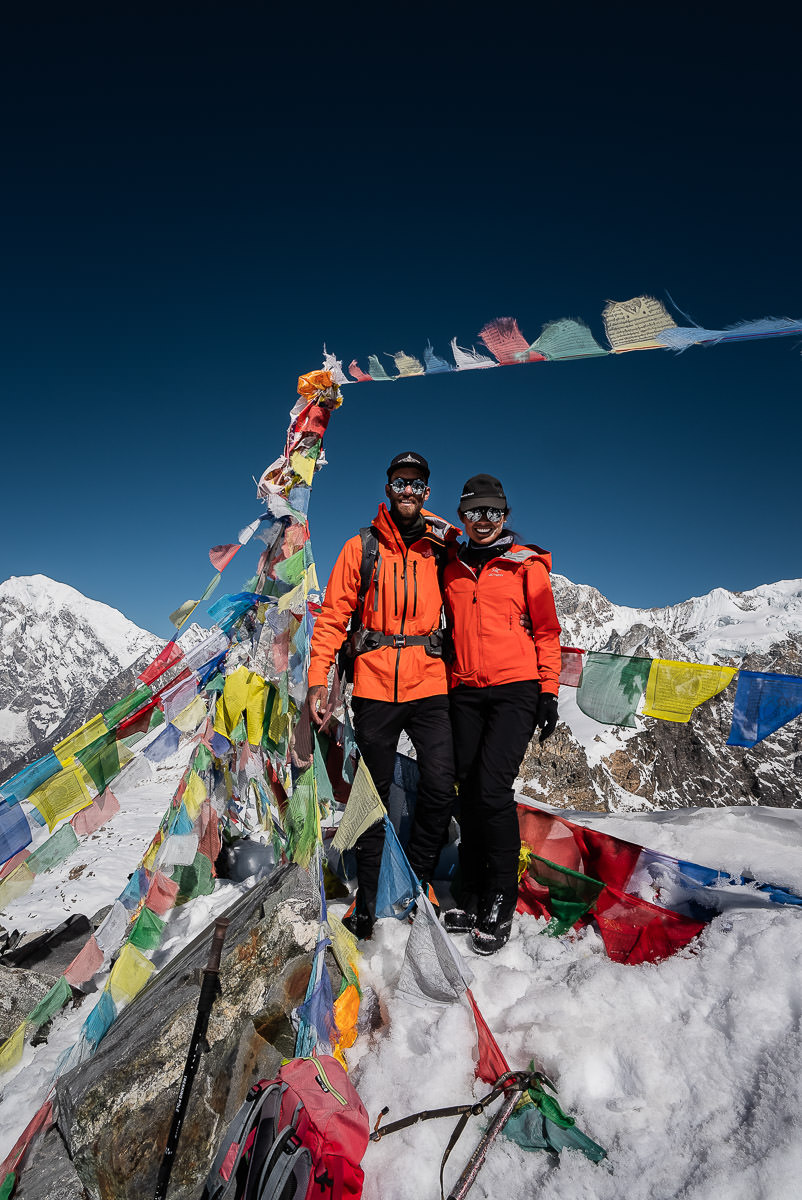
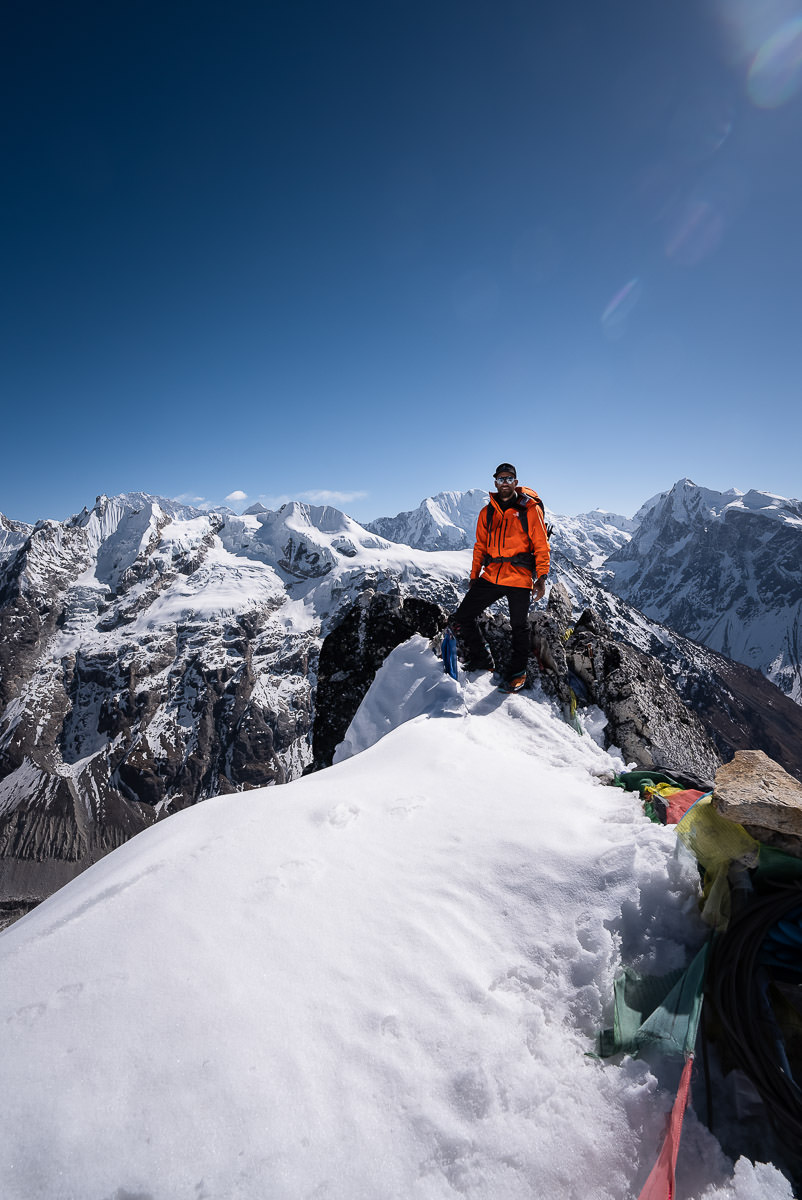
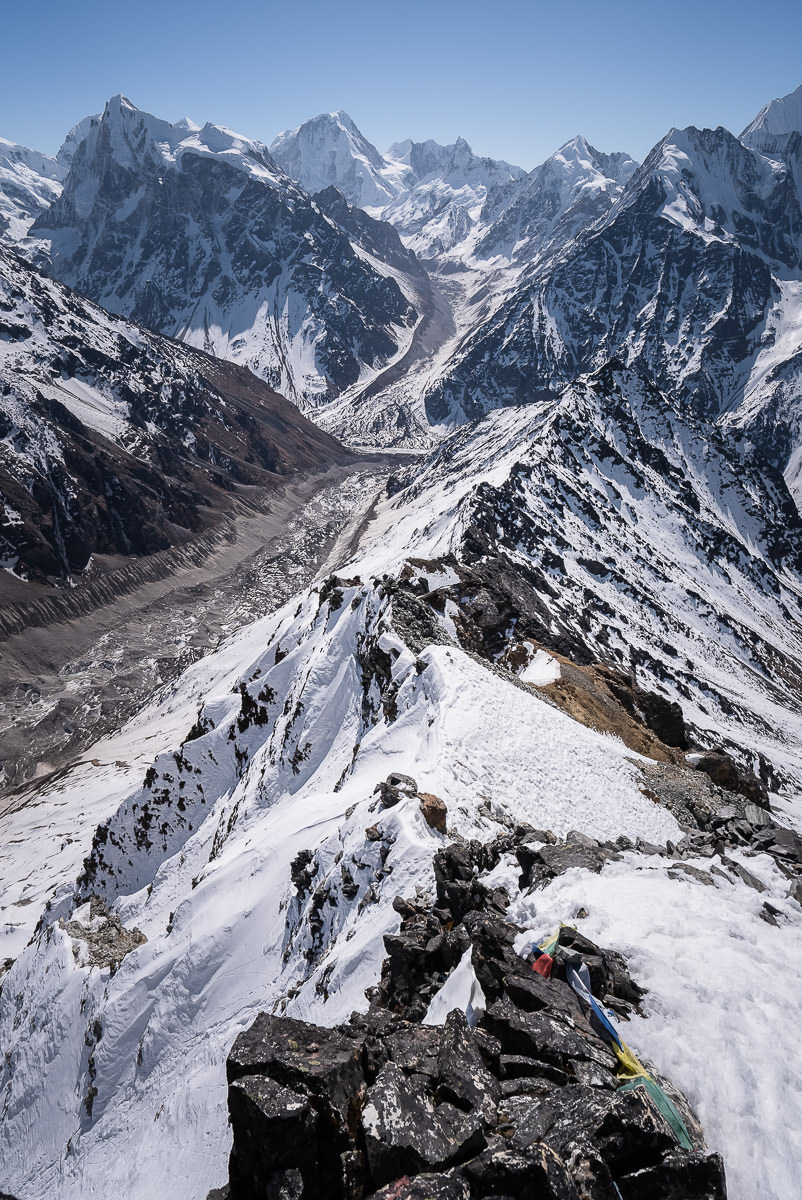
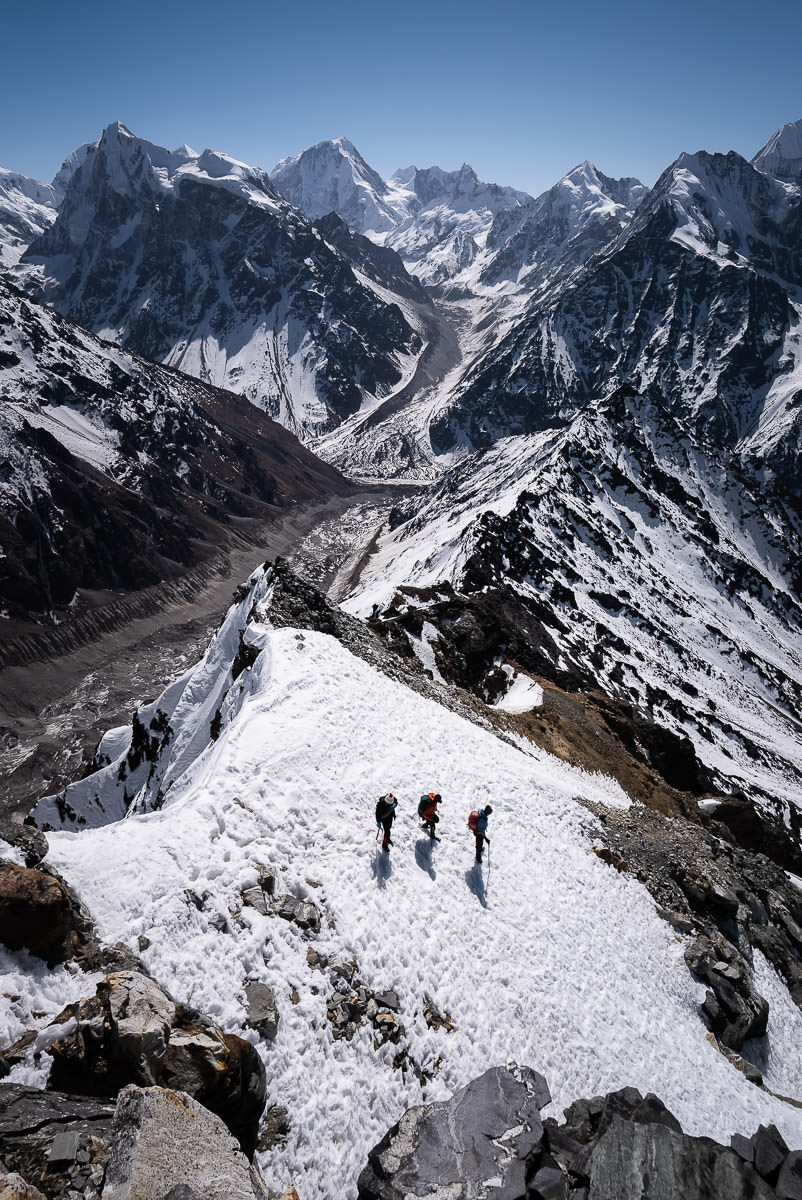
With no fixed rope, we safely made our way to the summit, scrambling up the narrow path. The view opened up on all sides for a panoramic scene of beautiful peaks in all directions. From the summit you can observe Langtang Lirung (7,246m), Dorje Lakpa (6,990m), Gangchempo (6,388m) and most importantly, Sishapangma (8,027m).
Our guides were busy setting up multiple lines of Tibetan prayer flags before we held a short ceremony atop the summit. With perfectly clear skies and very little wind, we could really take in the view and enjoy the scenery. This isn’t always the case atop peaks in the Himalayas.
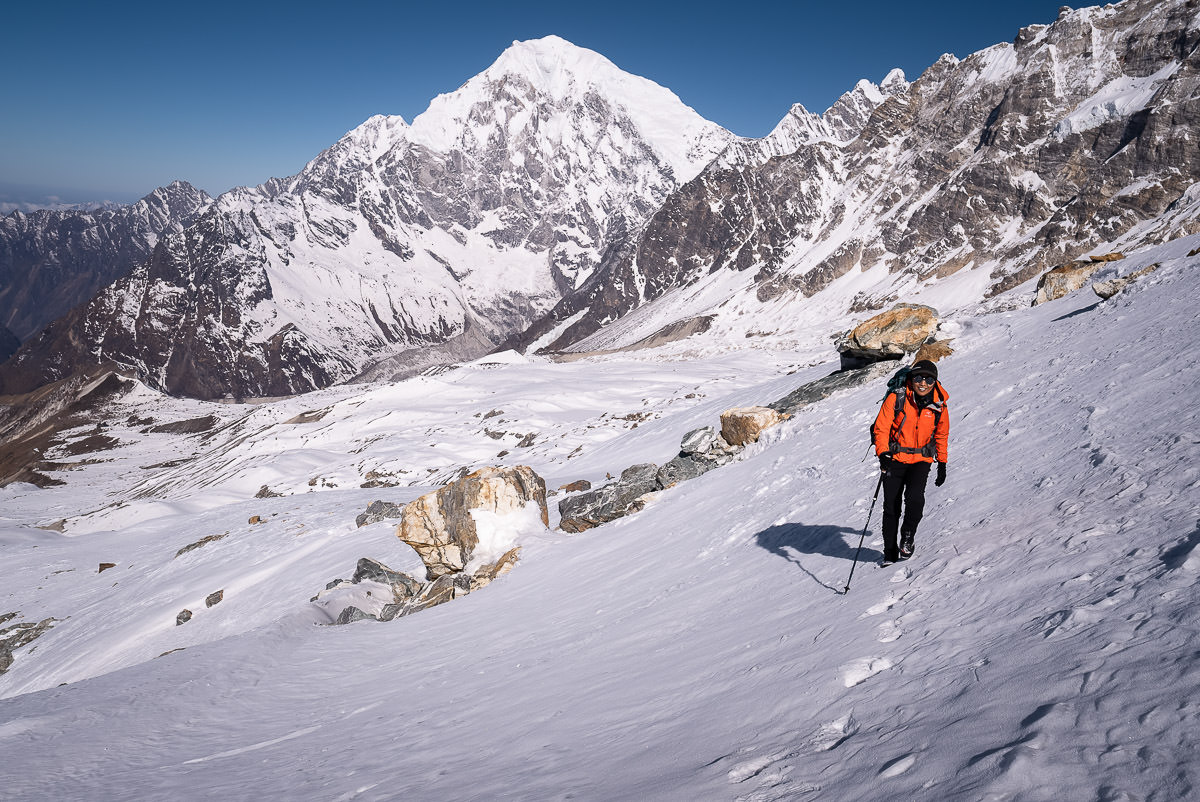
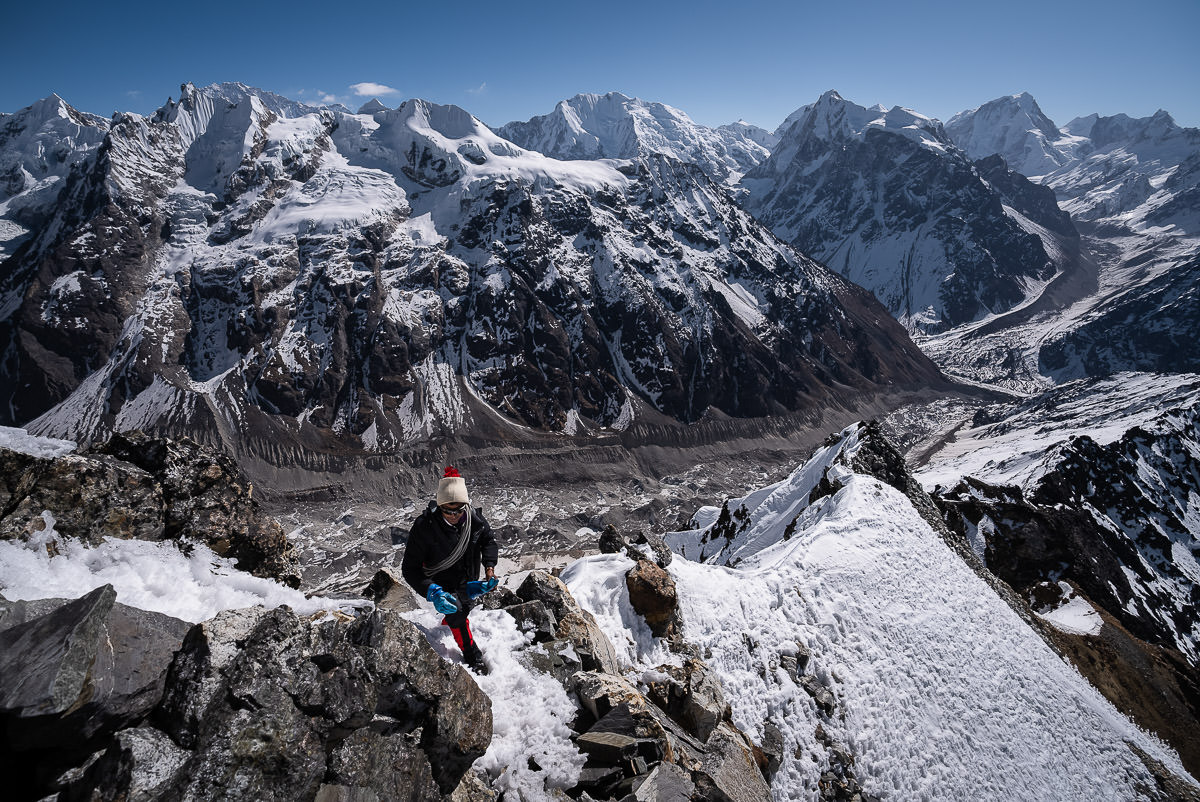
Once making it back down the slippery chimney, the descent was ‘relatively’ straightforward. Had it not been for the soft snow, that was now softening either further due to the sun, we would have made it down in no time. However, our progress was diminished as we wasted several hours battling the ever-softening snow.
Once back to Yala Kharka Basecamp we had a soup, packed up, and began the trek back to Kyanjin Gompa. The total time for our summit push was twelve hours. However, in times of better conditions and less snow, this could easily come down to 7-8 hours comfortably.
I highly recommend Yala Peak as an expedition for those looking to get some acclimatization for the upcoming season or some experience in mountaineering. It’s a cheap, easy, and fun peak to have an adventurous experience out in the Himalayas of Nepal.
GETTING TO YALA PEAK: LANGTANG VALLEY TREK DETAILS
- Distance: 77km or 48 miles
- Days required: 9 days including 2 days of transit to and from Kathmandu (7 days trekking)
- Total Incline: 4000 meters
- Total Decline: 4000 meters
- The highest point on the trek: From Kyanjin Gompa you can reach Kyanjin Ri (4,773m) or Tserko Ri viewpoint (5,033m). Additionally, you can climb Yala Peak from Kyanjin Gompa, which has an altitude of 5,500m.
- Difficulty: The Langtang Valley Trek is much shorter than Everest Base Camp Trek or the Annapurna Circuit although relativley similair. You will reach an altitude of 5000m, which will challenge many. Altitude sickness can be common. The route ascends quite quickly with several days having more than 1000m of altitude gain. These days of ascent are tiring and also require the body to adjust quickly. It is a good beginner trek in Nepal but not one to be taken lightly.
- Permits: You will need a TIMS card and Park Entrance Permit, both can be purchased when entering the park.
- Guide: A guide is not required on this trek. However, the guide manages all of the logistics, distances, directions, and tea houses for your group. I used maps.me to navigate from tea-house to tea-house and found the paths easy to follow. If it’s your first time trekking in Nepal, I would suggest having a guide.
- Accommodation: Guest Houses, also known as Tea Houses, are available along the way where you will sleep in a comfortable bed and have access to showers (extra charge) and restaurant facilities. It was very comfortable accommodation and great after a long day of hiking. Most of the villages were Tibetan, which gave us a great insight into their unique culture.
YALA PEAK PACKING LIST
I packed pretty light and managed to wash most of my clothes each afternoon/night for the first half of the trip. In the latter stages of the trip, it was pretty cold so we weren’t sweating as much and we wore our warm gear basically nonstop while at the teahouses. There was no real need for multiple outfits.
This is just a guide and it worked quite well for me with no complaints from my set-up. You won’t need a sleeping bag as there are blankets in each guesthouse and when it got cold I just wore my down jacket to bed. This meant I didn’t have to carry a sleeping bag for the entire trek.
- 1 pair of pants that maybe convert to shorts
- 1 pair of shorts
- 1 Warm or thicker pair of hiking pants
- 1 Long sleeve quick-dry shirt
- 1 Long-sleeve thermal shirt
- 2 Short-sleeve t-shirts
- 1 Thermal long underwear
- 4 pairs of quick-dry underwear
- 1 Lightweight down jacket
- 1 Heavy-duty summit down jacket
- 1 Beanie
- 1 Cap
- Sunglasses
- 1 Neck Buff
- Gloves
- Hiking boots
- 6000m boots
- Thick summit socks
- Headtorch
- 1 pair of warm summit socks
- 2-3 pairs of regular socks
- Sunscreen
- Trekking poles
- Water filter
- Powerbank
All of this should fit into a backpack no bigger than 50L and should be less than 20kg including climbing gear. We carried all of our own gear in except the tent, sleeping bag, and mat. These extra items were provided by our Yala Peak guide.
INSURANCE FOR THE YALA PEAK CLIMB
Nepal can be a dangerous place for trekking or hiking because the high altitude can lead to many illnesses, weakness in trekkers, and misjudgments. There is also a risk on trails for falls, avalanches, or other mishaps. Your regular travel insurance probably won’t cover you at high altitude and won’t cover a helicopter evacuation. There is a solution though.
Need extra protection?
Regular travel insurance is great but won’t cover you for high altitude hikes or for helicopter evacuation. Each year, I purchase a Global Rescue Subscription.
For less than $500 per year or $100 per expedition, you can purchase a Global Rescue subscription and be covered no matter how extreme the hike or how high the climb is.
WIFI/ELECTRICITY AVAILABILITY ON THE LANGTANG VALLEY TREK
- Wifi: Costs anywhere from $free to $4 to use wifi at the guesthouses. Buy an NTC Sim before you go. It worked in most spots after Lama Hotel with a weak signal but we were able to send emails, watch Youtube, and message friends from Langtang and Kyanjin Gompa.
- Electricity: You will have to pay anywhere from $free at low elevation to $5 to charge your power banks, cameras, and phones. The key is to get a big power bank. Pay to charge it then charge everything from your power bank. My power bank lets me charge my phone and four camera batteries before it dies. Most of the places we stayed let us charge our gear for free but when it is busy they usually charge a fee as many teahouses run off gas or solar.
DRINKING WATER ON THE LANGTANG VALLEY TREK
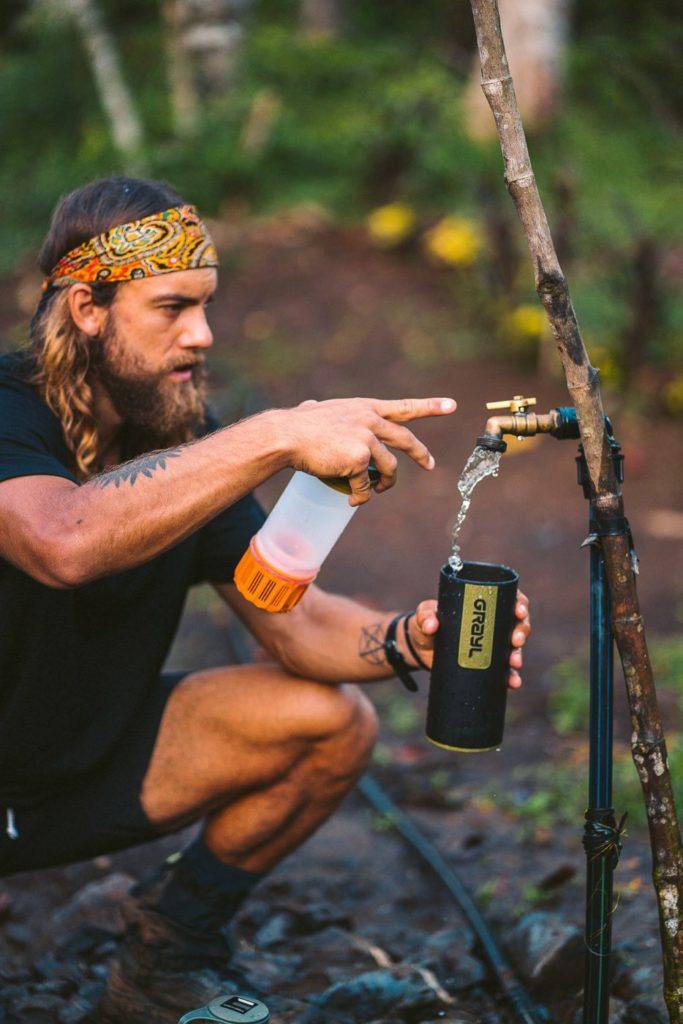
I use the Grayl Ultralight Water Purifier and it is a game-changer for hiking in Nepal, making this super easy and cheap. The Grayl Ultralight Water Purifier removes 99.9999% of viruses of disease-causing bacteria. The best thing about it is it only takes 15 seconds and one press to purify water from any fresh water source. You don’t need to buy bottled water at every tea-house contributing to large amounts of plastic waste and costing you $4+ per day.
Along the Langtang Valley Trek, we filled up at tea-houses, rivers, and local village taps. Unlike aqua purification tablets which require you to wait 30 minutes before drinking, you can have rehydrated yourself immediately with the Grayl Ultralight Water Purifier.
GrayL Water Purifier
- Never pay for water on the trek
- Save 3-4 plastic water bottles a day
- Turns any water into drinking water
BEST TIME AND SEASON FOR CLIMBING YALA PEAK
The peak season for the Langtang Valley Trek and Yala Peak climb is March to April and October to November.
During the winter from December to February, this region gets very cold and there will be snow cover in the higher parts of the trek. Many of the guesthouses actually close up for the winter and re-open in late February to March. However, it is possible to hike the Langtang Valley Trek on the fringe of the season in late February/early March and it can be quite beautiful with snow cover.
I hiked the Langtang Valley Trek in early March and it was warm during the day and got pretty cold at night. We experienced some heavy snow on Tserko Ri and Yala Peak but the trekking routes were clear. Even in the second week of March, we were the first Yala Peak climb to be successful for the year as e opened the route. The snow was still quite heavy but it changes year to year.
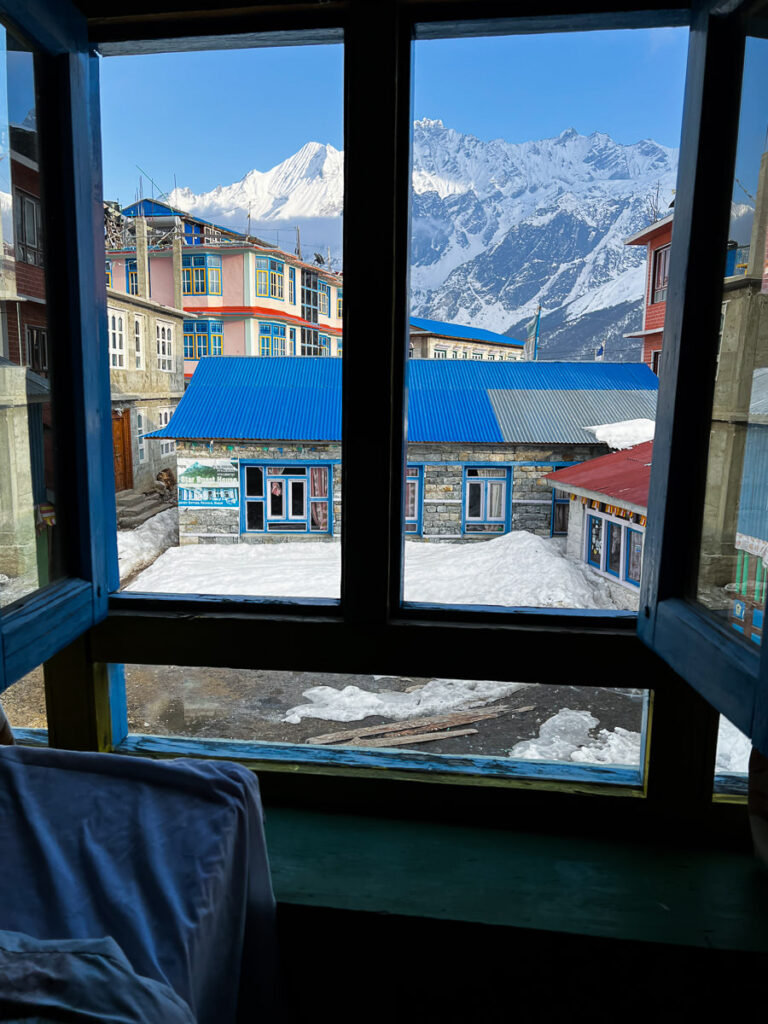
WHERE TO STAY IN KYANJIN GOMPA
I stayed at Mountain View Hotel while in Kyanjin Gompa. It’s one of the smaller, older guest houses and I really enjoyed it here. Unlike many of the new multi-story hotels in the village, this hotel just had two floors and a cozy dining room.
Mipsang, the owner, is one of the kindest and most caring guys we’ve met in Nepal. Say hello to him for us if you end up staying there.
At Mountain View Hotel we had had water showers, internet connection from our sim card, great food, comfortable beds and blankets, and electrical outlets available in the room.
HAVE YOU READ MY OTHER NEPAL BLOGS?
I’ve been lucky enough to have many awesome adventures in Nepal, which you can check out below where I’ve listed some of my favorite blog poss from Nepal.
- The Most Iconic route: Everest Base Camp Trek
- The Most Scenic Route: Annapurna Circuit Trek
- My Favorite Trek in Nepal: Manaslu Circuit Trek
- An Easy Nepal Trek: Langtang Valley Trek
- A great beginner peak: Island Peak Climb (6,165m)
- My Favorite Climb in Nepal: Climbing Ama Dablam (6,812m)
- My first 8000er: Climbing Manaslu (8,163m)
- My toughest climb in Nepal: Climbing Makalu (8,463m)
- Where to stay: 16 Best Places to Stay in Kathmandu
TOP 3 PLACES TO STAY IN KATHMANDU

- Ultimate Luxury: The Dwarika’s Hotel – Luxury, Spa-service, Pool
- Best Value: Aloft Kathmandu Thamel – Swimming Pool, Gym & Great Restuarant
- Budget Choice: Hotel Jampa is easily the top cheap hotel in Kathmandu
Justin
Wednesday 28th of February 2024
I've finally narrowed my first trek in Nepal to Langtang Valley with the Yala Peak climb. I want to save money and so initially thought of going solo for Langtang, but it seems a guide plus someone with a tent would be require for Yala. How should I find a guide? Buying online seems more expensive, so I hope to find one in Kathmandu or closer to the trailhead. How many days total should I plan my entire trip to ensure I don't miss my flight home? Thank you for the enlightening blog on this trip.
Jackson
Saturday 23rd of March 2024
you need a guide these days for treks over 3000m and yes you can rent the yala peak guide and gear in kyanjin gompa
Himal
Tuesday 14th of November 2023
This blog beautifully captures the allure of Yala Peak in the Langtang Valley Region. The description of the trekking experience and the strategic acclimatization opportunity at 5,500m height adds a practical perspective for both novice and seasoned climbers. The mention of the three-day trek along the Langtang Valley adds context to the journey, making it not just about reaching the summit but also enjoying the scenic beauty of the region. The two-day summit attempt builds anticipation and excitement for the climax of the expedition, and the reward is more than just personal accomplishment—the breathtaking view of Shisapangma (8,027m) from the summit elevates the entire experience. This unique aspect makes Yala Peak not just a physical challenge but a visual feast, connecting climbers with the awe-inspiring grandeur of the Himalayas. Overall, the blog effectively combines practical information with the inherent beauty and adventure of the Yala Peak trek, making it an enticing read for both adventure enthusiasts and those seeking a deeper connection with the natural wonders of the Langtang Valley.
Ben
Thursday 17th of November 2022
I am so psyched for this trek! Having done Annapurna in 2010, I have been waiting to get back to Nepal and combine a hike with a reasonable ascent. Thanks for all the info!