
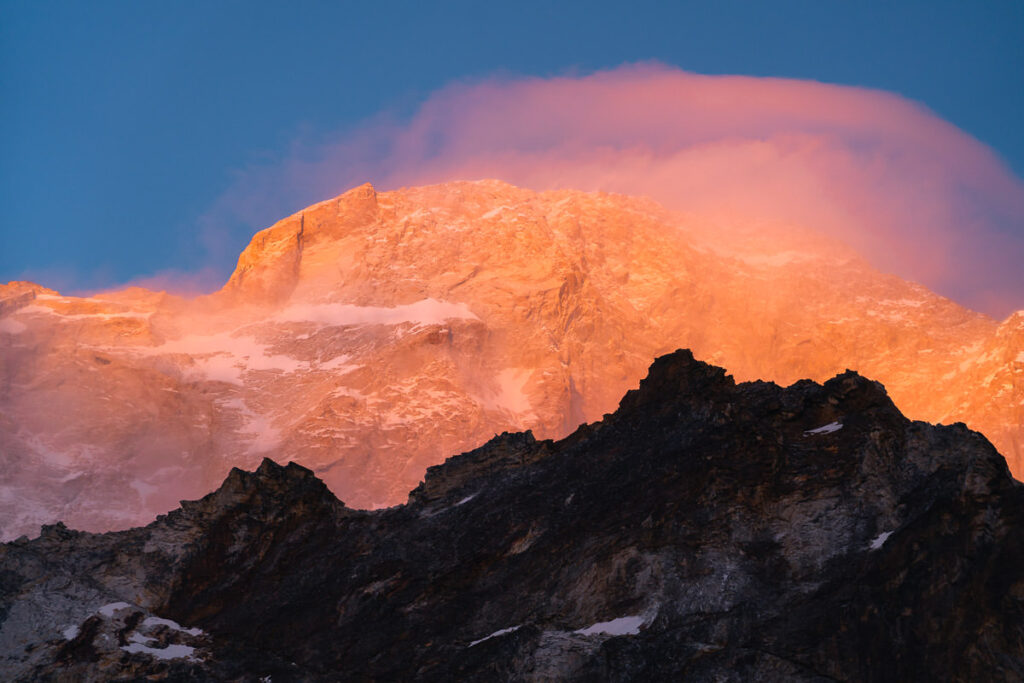
Mount Makalu, is the world’s fifth-highest mountain, reaching a lofty height of 8,463m. Located in the Mahalangur Himalayas on the border between Nepal and the Tibet Autonomous Region (China), it is situated twelve miles from Mount Everest. Makalu means ‘Great Black One’, due to its dark rock formation although it is mostly covered in snow and ice.

CLIMBING MOUNT MAKALU
I trekked into Makalu Advanced Base Camp and then successfully sumitted the peak in May of 2022. In this blog post, I will cover everything you need to know about the logistics of climbing Makalu Mountain. I’ll also share with you my stories and photos from the climb. This will give you an idea of what to expect and a great insight into the scenery you will find at each camp en route to the summit.
Before sharing my experience of the climb in the second section of this blog post, I will detail all of the information you need to know in this complete guide about climbing Manaslu Mountain.
MAKALU MOUNTAIN DETAILS
- Days required: 35-50 days
- Height of Makalu Summit: 8,463m
- Cost: $20,000
- Season to climb Manaslu: May
- Difficulty: Makalu is known as one of the more taxing 8000m peaks among the fourteen. While not extremely technical, the mountain is relentlessly steep. The advanced base camp is one of the highest in the world at 5,700m. This makes it tough to recover between rotations. As my second 8000er, I can only compare Makalu to Manaslu and it was much, much tougher. It’s important to note that I summitted with Sherpa assistance and with the use of oxygen. If you remove either or both of those factors, this climb will become significantly harder. Our summit push was base camp to base camp in 51 hours and we had favorable weather and conditions.
- Recommended prior climbs: While there are many climbs you can do to warm up for Makalu, some common options are Island Peak (6,189), Baruntse Peak (7,129m), Spantik Peak (7,030) and Himlung Himal (7,126m). In addition to these acclimatization peaks, I would recommend climbing at least one or two ‘easier’ 8000m peaks before attempting Makalu.
TRY THE 3 BEST TREKS IN NEPAL

Manaslu Circuit: My personal favorite 2-week trek through Tibetan villages and stunning scenery with less crowds.
Annapurna Circuit: The most beautiful & scenic 2-week trek in Nepal although can be crowded at times.
Everest Base Camp Trek: The most iconic 2-week route reaching the famous (EBC) Everest Base Camp at 5,300m.
GETTING TO AND FROM MAKALU BASECAMP
There are several different options for how to arrive and depart from Makalu Advanced Base Camp (5,700m). I’ve actually used both options listed below.
- Helicopter: These days many mountaineers can afford to fly into Advanced Base Camp via helicopter. The flight runs from Lukla. Most tour operators will organize this helicopter option as part of the package. Many in our group trekked in to acclimatize, but then flew out the day after their summit.
- Trekking in from Num: One of the most scenic ways to reach base camp is to trek on the established Makalu Base Camp Trek. This route guides you to the lower base camp and takes about 9-10 days. I did this trek with my group and wrote a comprehensive guide to Trekking to Makalu Base Camp. It’s much more remote than Everest Base Camp Trek or Langtang Valley Trek but very scenic and a chance to observe rural, mountain life in Nepal.
TOP 3 PLACES TO STAY IN KATHMANDU

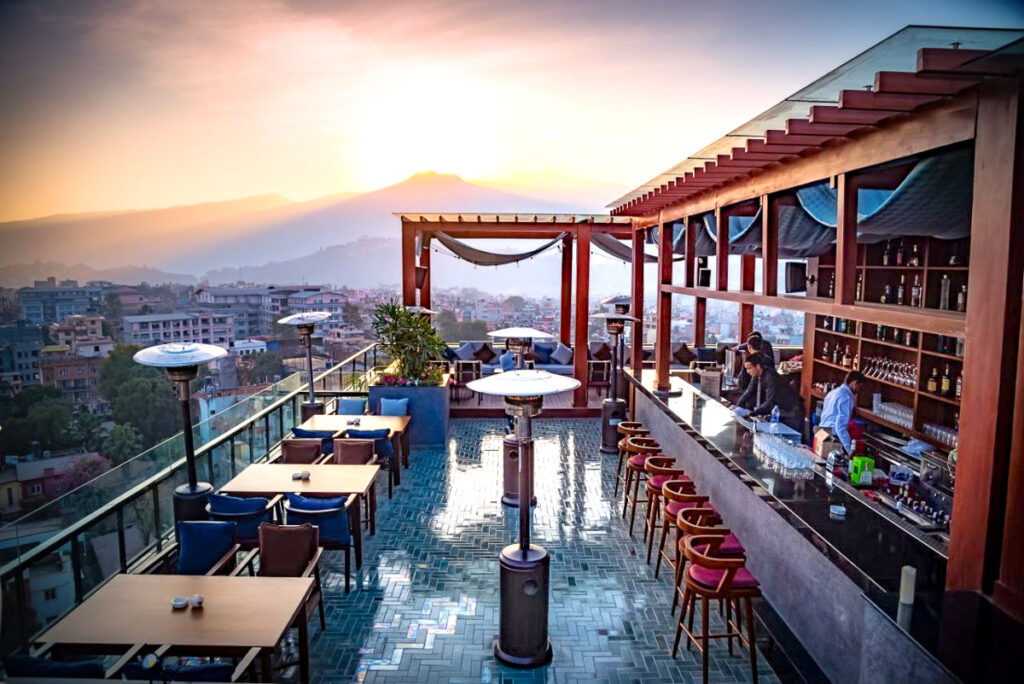
- Ultimate Luxury: The Dwarika’s Hotel – Luxury, Spa-service, Pool
- Best Value: Aloft Kathmandu Thamel – Swimming Pool, Gym & Great Restuarant
- Budget Choice: Hotel Jampa is easily the top cheap hotel in Kathmandu
IS CLIMBING MAKALU MOUNTAIN DANGEROUS?
Whenever you climb to heights above 8000m, you are in the death zone. Lower oxygen, harsh weather conditions, unpredictable mountains, and tired bodies can often make for tragic circumstances.
During our expedition in 2022, there were no deaths but several serious injuries. According to statistics up until 2020, from 234 ascents there were 26 deaths making Makalu the 7th deadliest mountain with roughly a 10% death rate. This figure has dramatically improved in recent years with better conditions, equipment, and logistics provided to climbers.
WHICH COMPANY I CLIMBED WITH FOR MAKALU
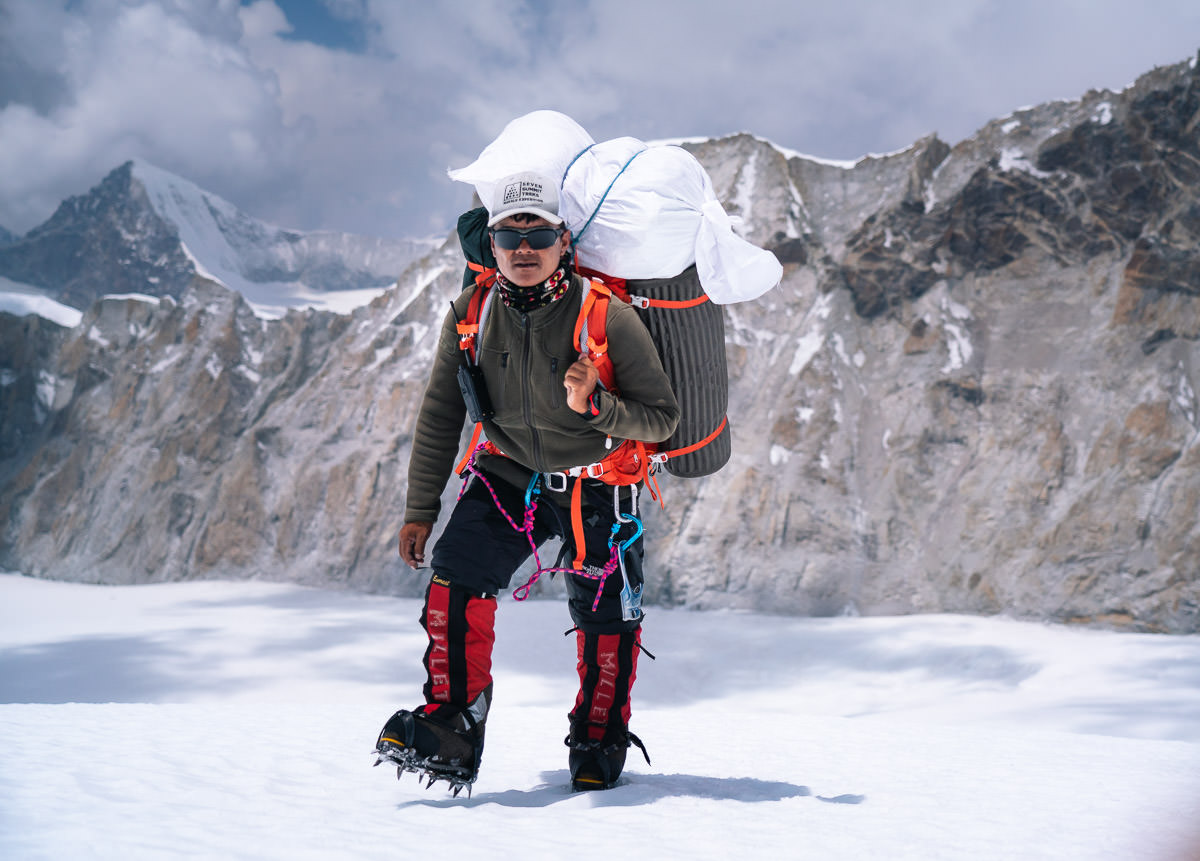
I climbed Makalu with Seven Summit Treks, which is the top Nepali climbing company in the country. They offer expeditions to all of the 8000m peaks and many other climbs, treks, and logistical services. This was my fifth expedition in Nepal and Pakistan and definitely the best and most well-organized.
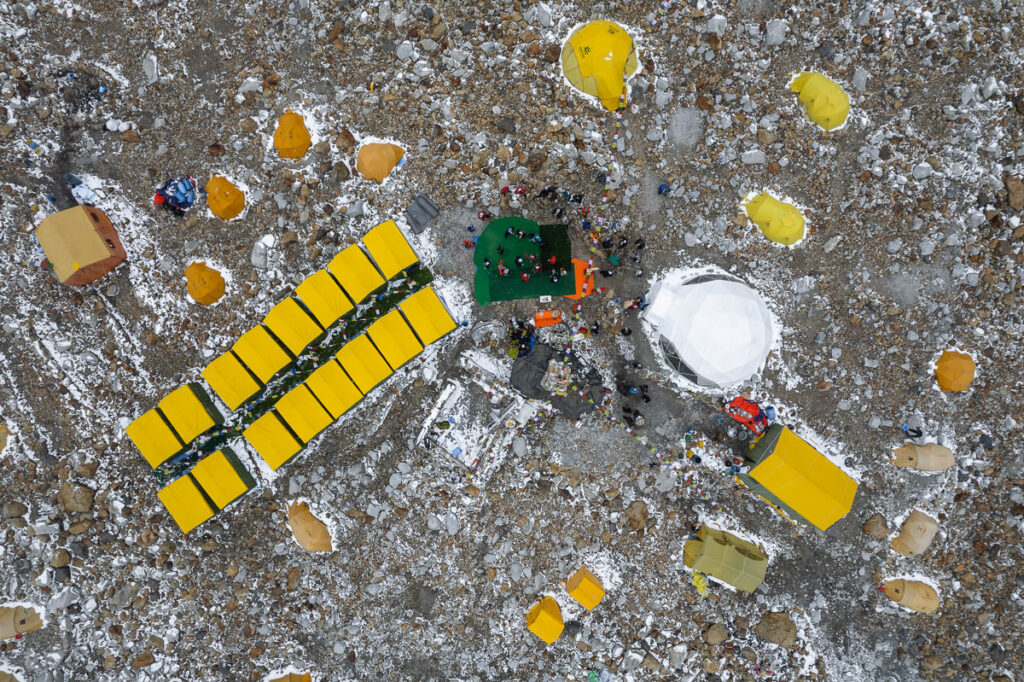
Seven Summit Treks were very detailed and had everything sorted. Their basecamp setup at Makalu was by far the most extensive with a dome tent for the mess hall, great food at mealtimes, and snacks always available.
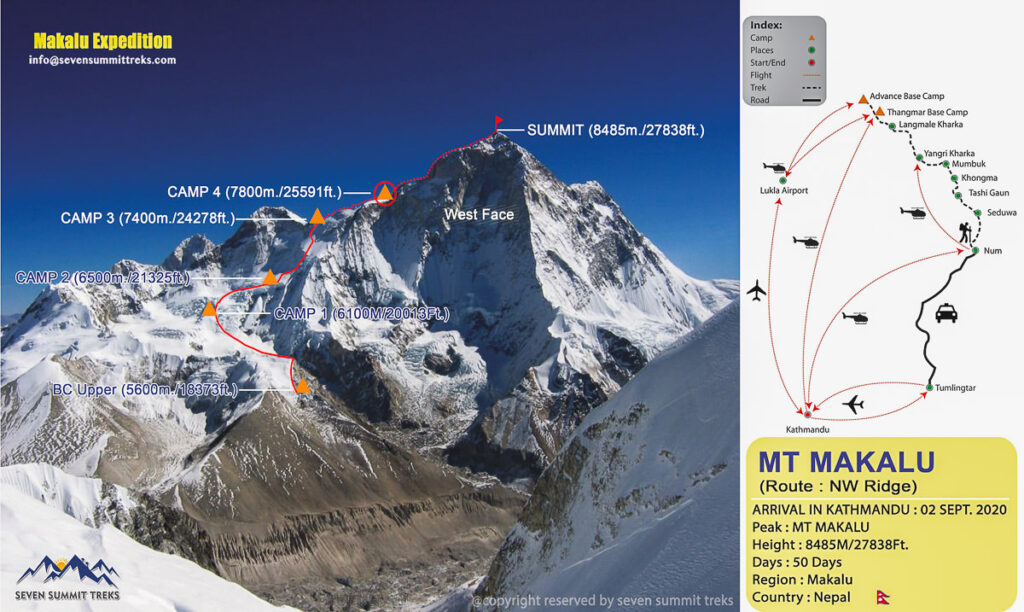
MOUNT MAKALU HEIGHT
Mount Makalu is the fifth highest peak in the world at 8,463m or 27765.75ft. Below I’ve listed the different heights of each camp to give you an idea of what to expect.
- Lower Base Camp: 4,700m
- Advanced Base Camp: 5,700m
- Camp 1: 6,200m
- Camp 2: 6,600m
- Camp 3: 7,500m
- Camp 4: 7,600m
- Summit: 8,463m
MY EXPERIENCE CLIMBING MOUNT MAKALU
Makalu is known as one of the tougher 8000-meter climbs in the world but also one of the safest. It has relatively low avalanche risk and fewer crevasses than many of the other big mountains throughout the Himalayas and the Karakoram. It may have been a false sense of security, but it felt like the biggest challenge with this climb was going to be against my own body and the stress of the death zone. Time would tell.

GETTING TO THE TRAILHEAD
Our journey began in Kathmandu. We took a flight to Tumlingtar airport to begin our expedition. Unlike most climbs that transit via Lukla, the Makalu climb is much more remote. From Tumlingtar, a 6-hour jeep ride along muddy roads led us to the small village of Num. Here we rested for the night before beginning our trek to base camp the next day.
I’ve written an entire guide to the Makalu Base Camp Trek. In that article, you will find a day-by-day breakdown of the hike through to Makalu Base Camp. With more than 100 photos and descriptions of the route, it’s a handy guide to give you an idea of what to expect.
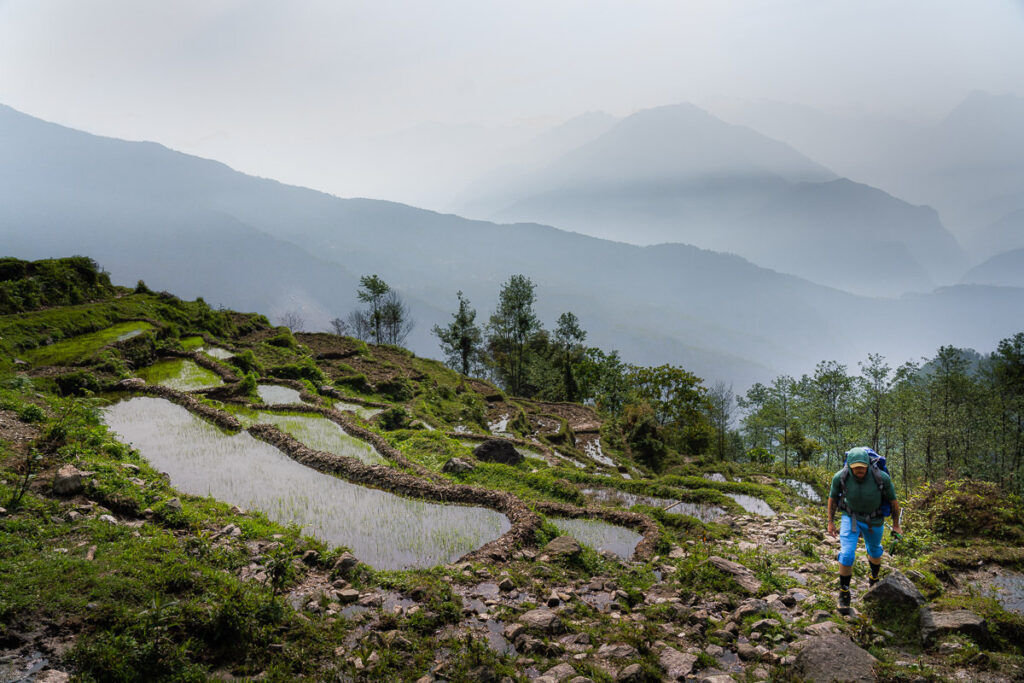
TREKKING TO THE BASE CAMP
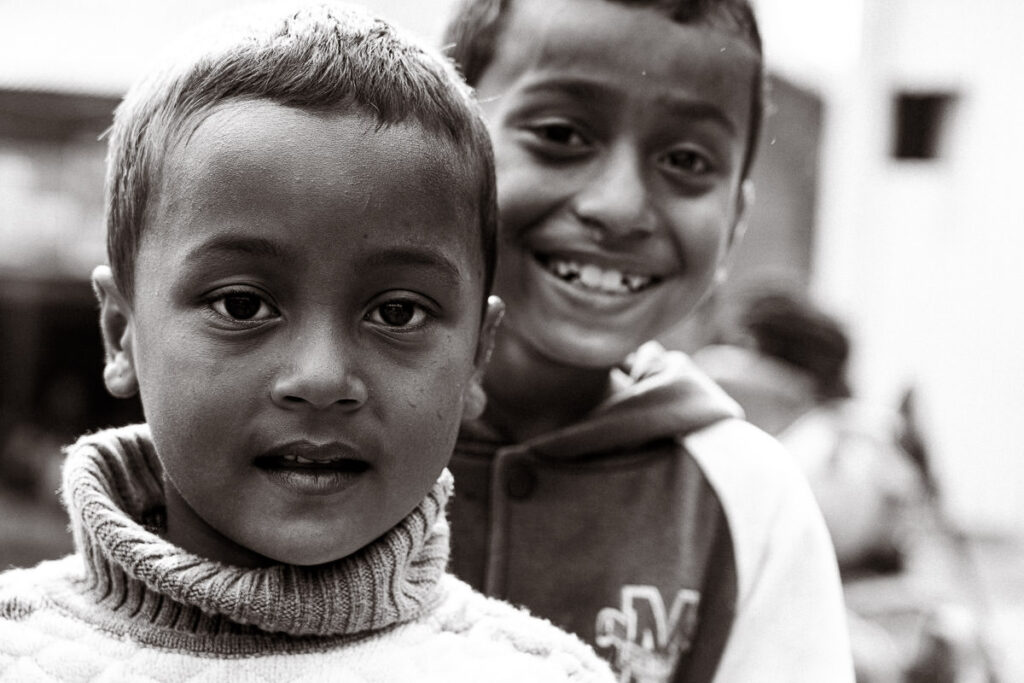
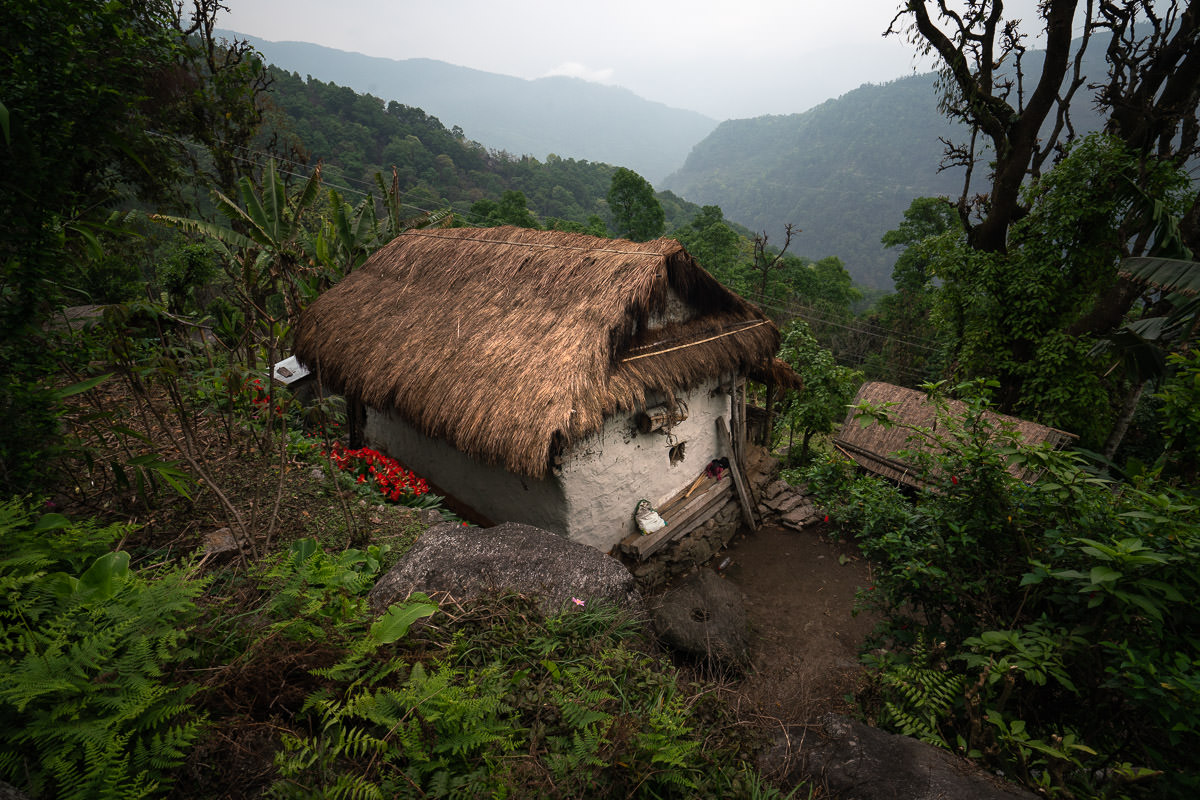
The trek is quite an adventure. There’s usually just one tea-house in each village and very few shops or snack stores along the way. You could say it is much more ‘authentic’ than trekking in the Khumbu where you will find bakeries, bars, internet cafes, and plentiful restaurants along the route to Everest Base Camp. Along this undulating route, life is simple and most families are working the land.

The journey into base camp took us about 10 days, including a few rest/acclimatization days. The trek begins at an elevation of 1500m but actually drops down to 700m immediately. The Makalu Advanced Base Camp sits at 5700m so in altitude change you are grabbing more than 5000m. The actual incline is almost double that with lots of undulation along this trail so expect to work some hills.

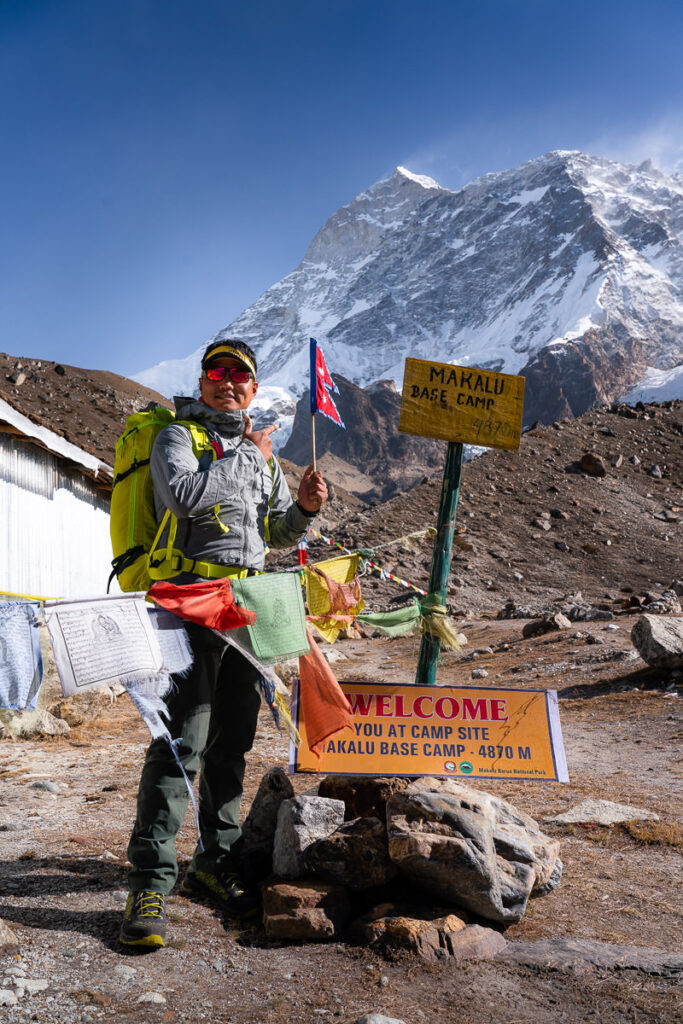
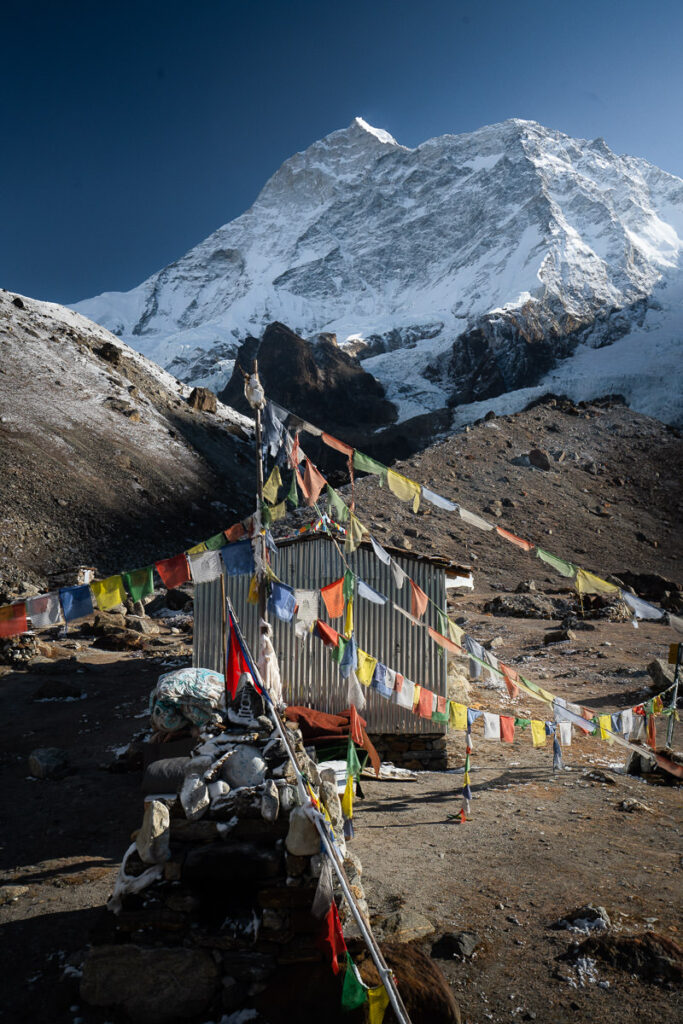
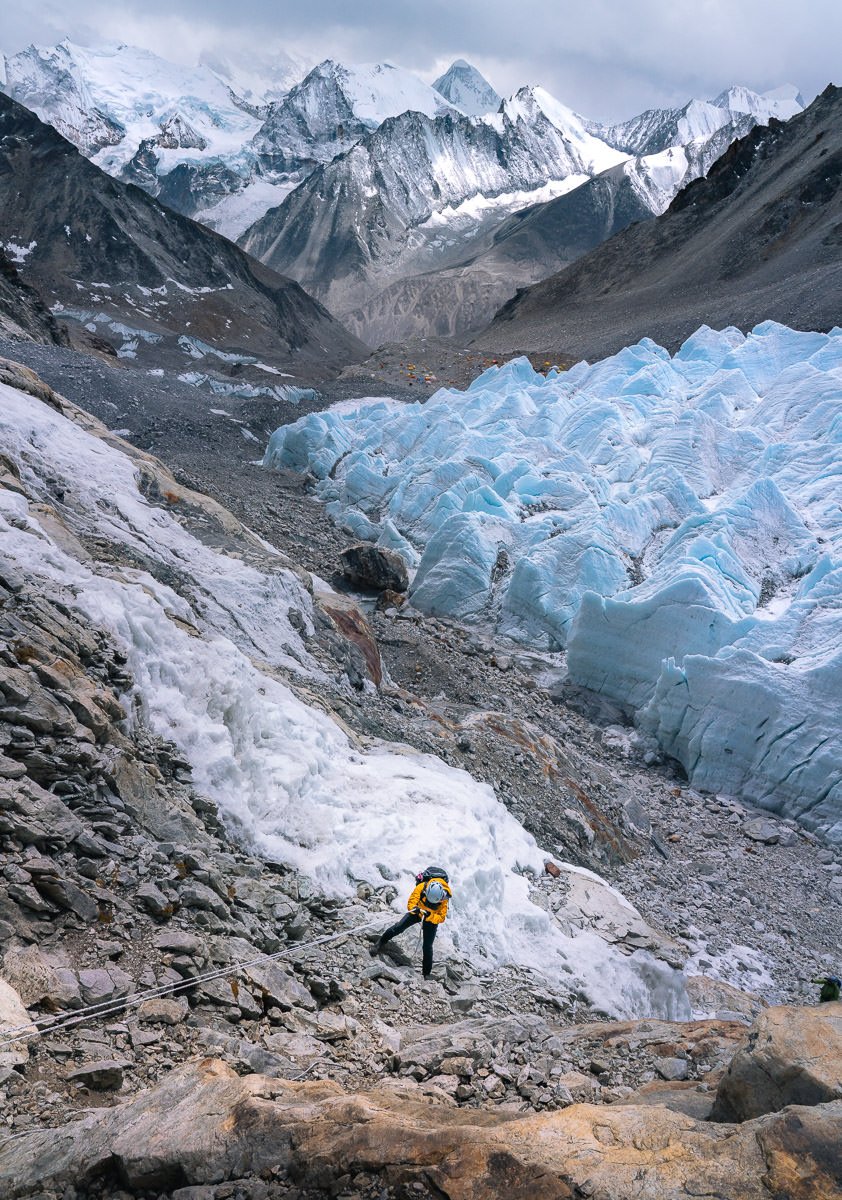
LOWER MAKALU BASE CAMP
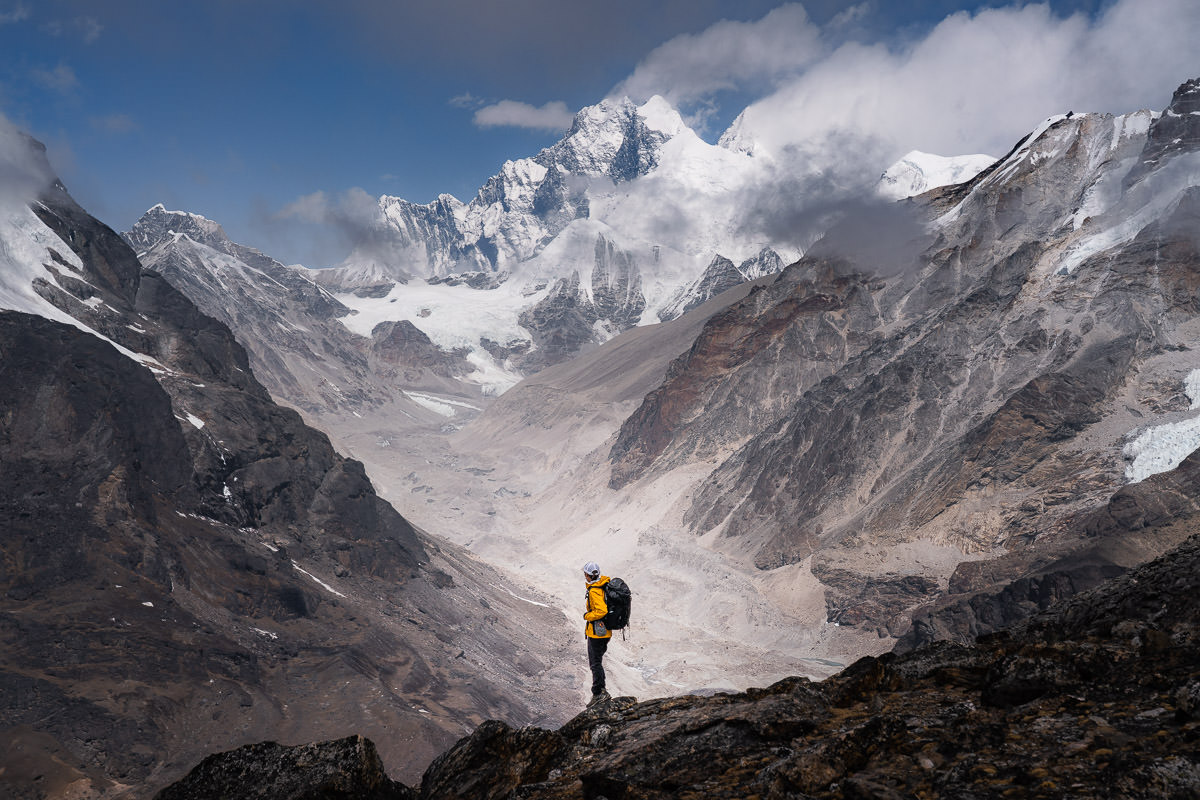
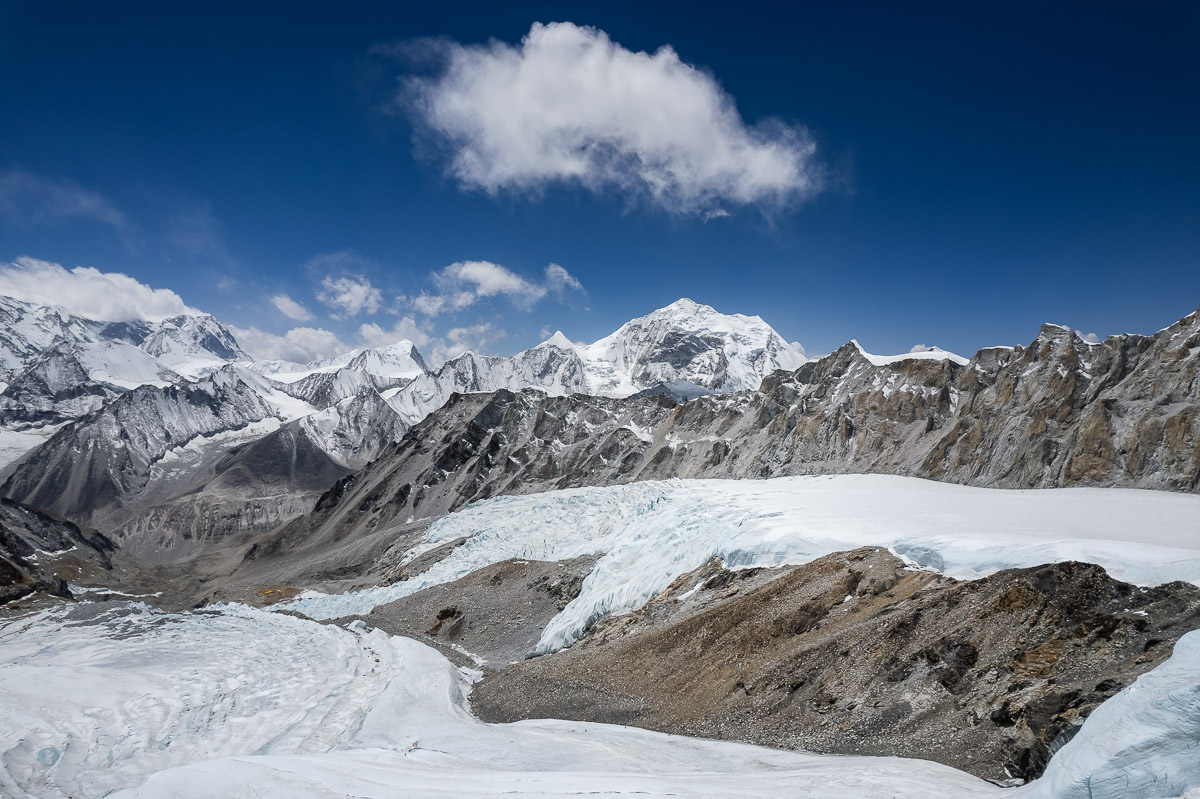
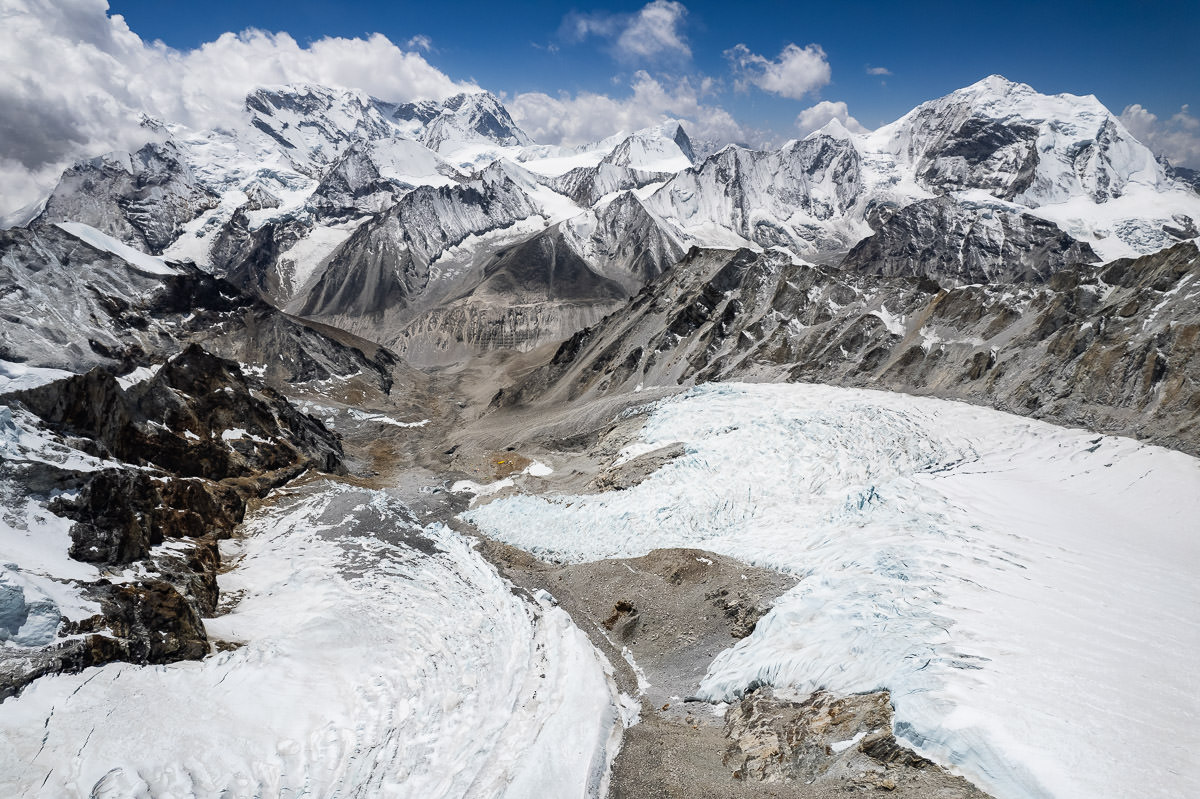
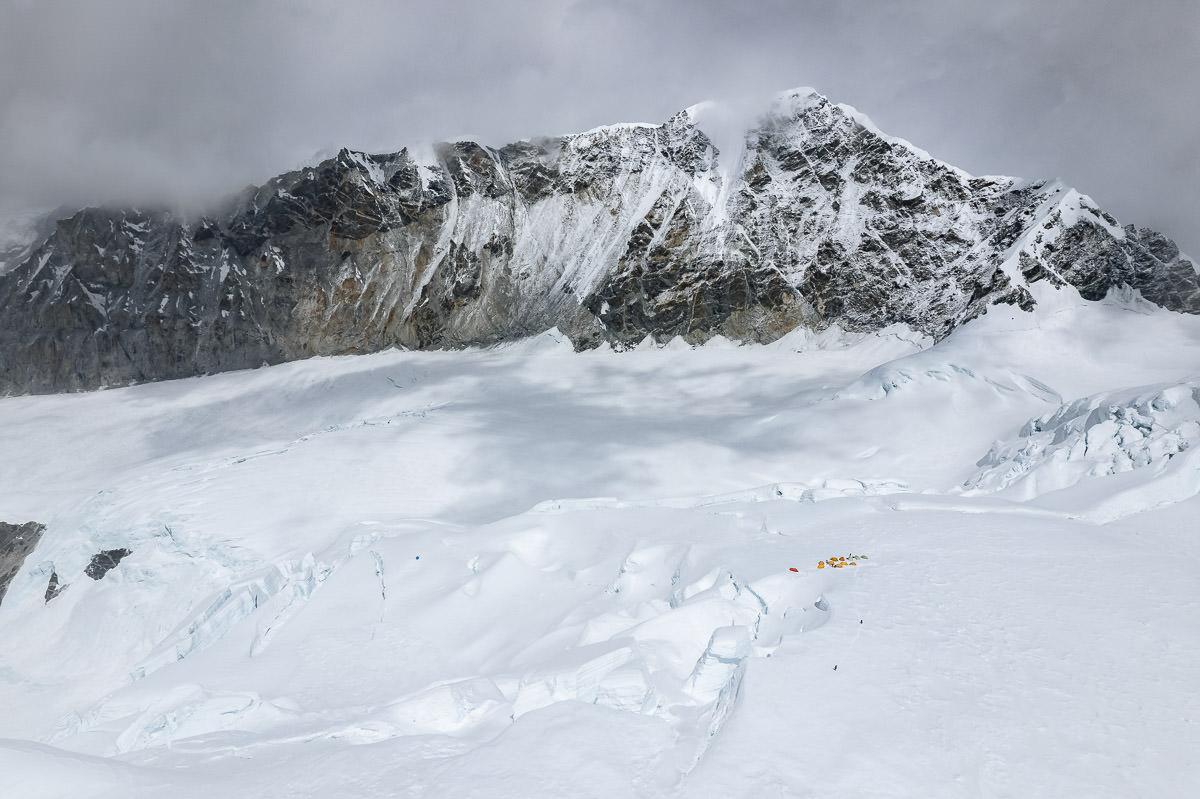
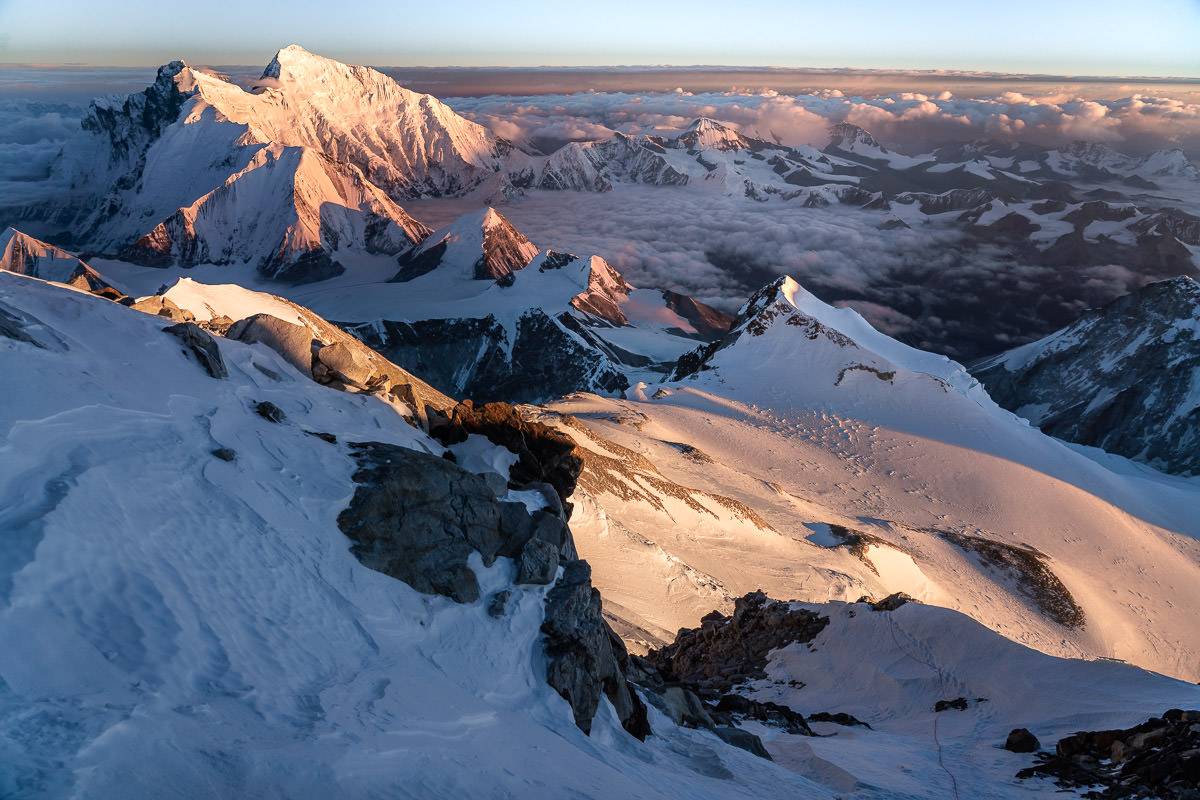
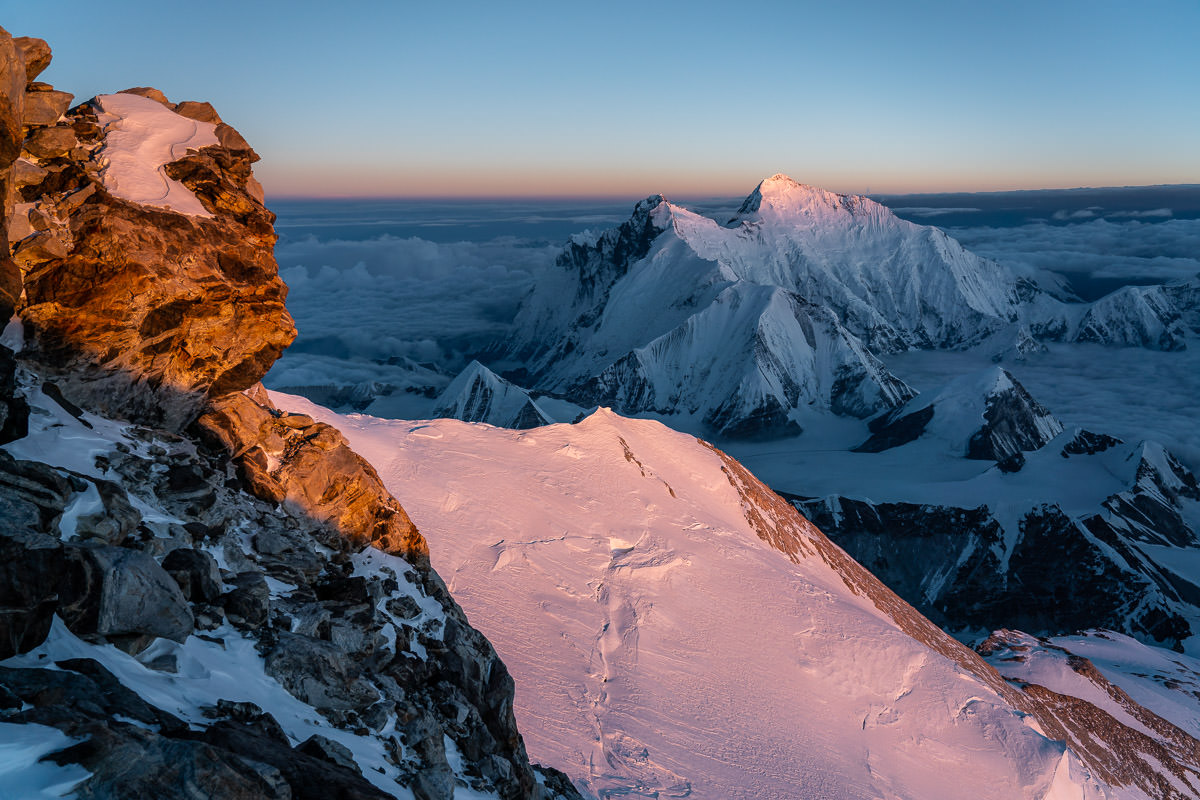
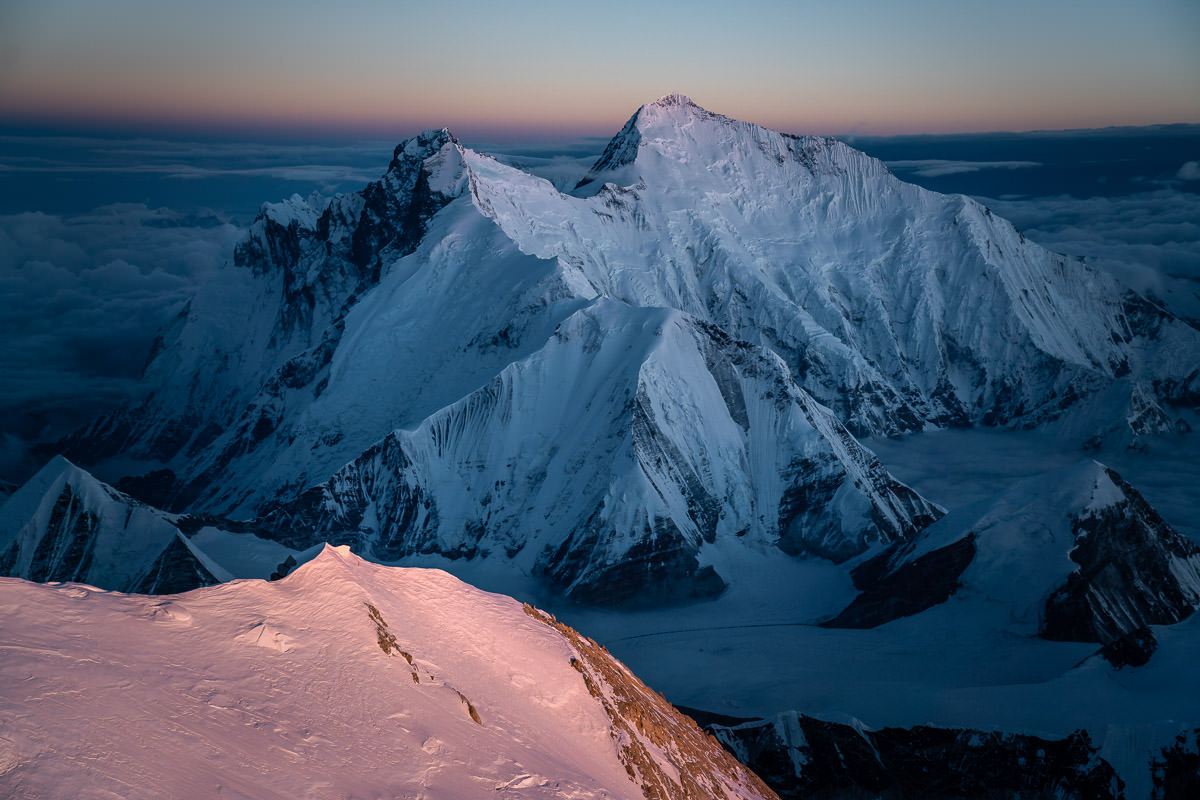
We arrived at Lower/Real Makalu Base Camp (4700m) and stayed for a few nights to rest and acclimatize. From this base camp, you can hike up to a ridge above the camp for an epic view of Everest and Lhotse down the far end of the glacier. The views of Makalu summit are also perfect on most mornings.

At the lower base camp, there’s a tea-house and some cabins but most outfitters bring their own tents as the capacity is limited. This will be the last time you sit around a yak-poop-powered heater and have a ‘stable’ home.
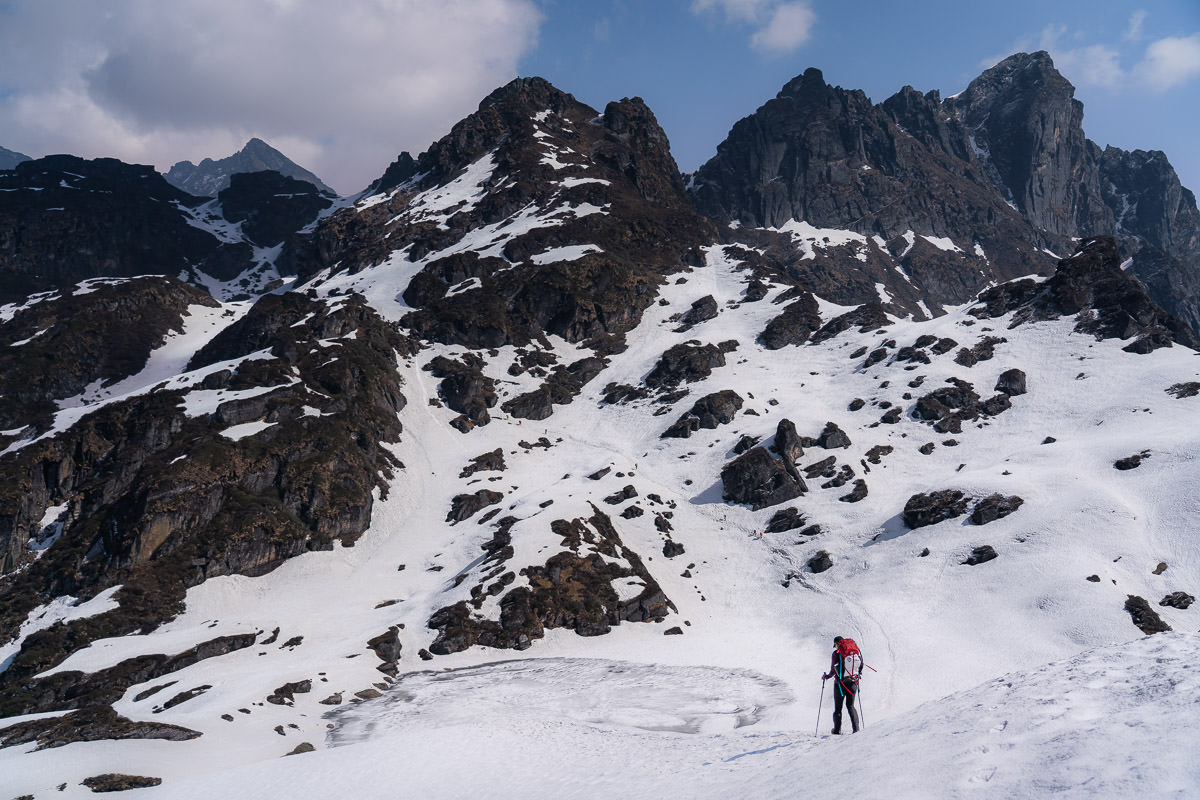
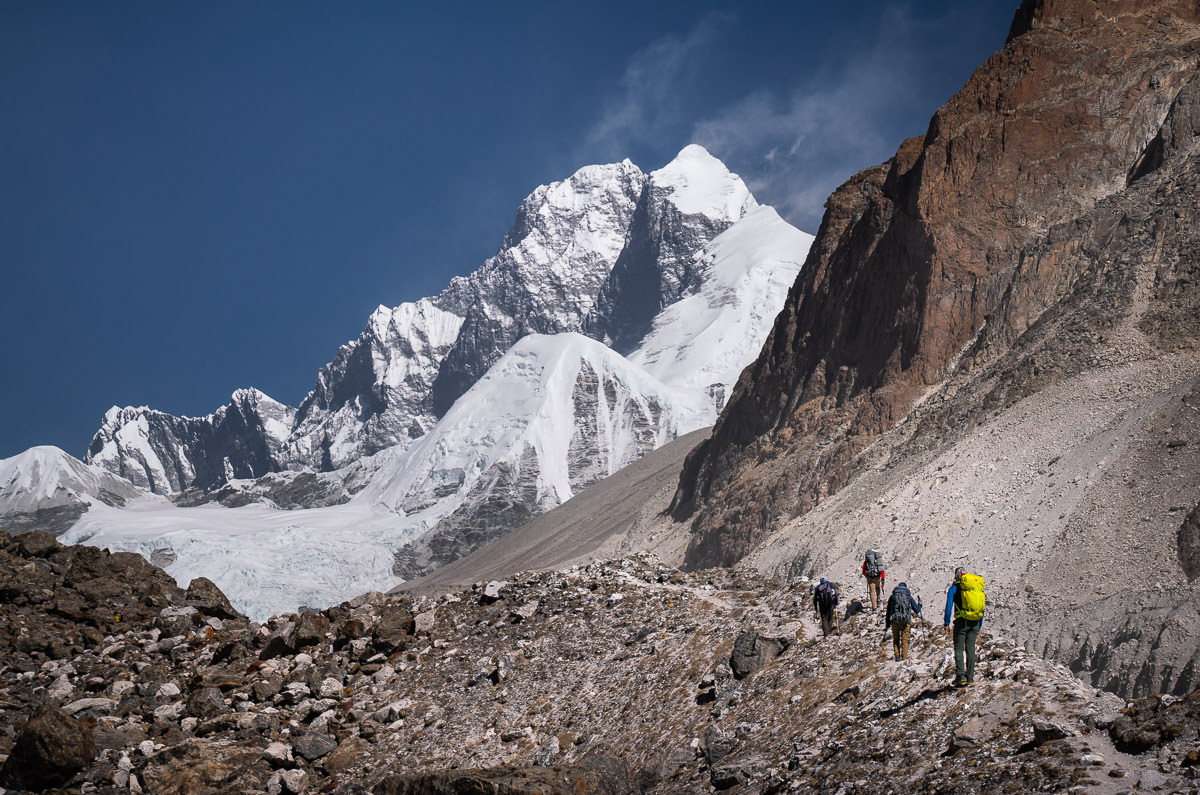
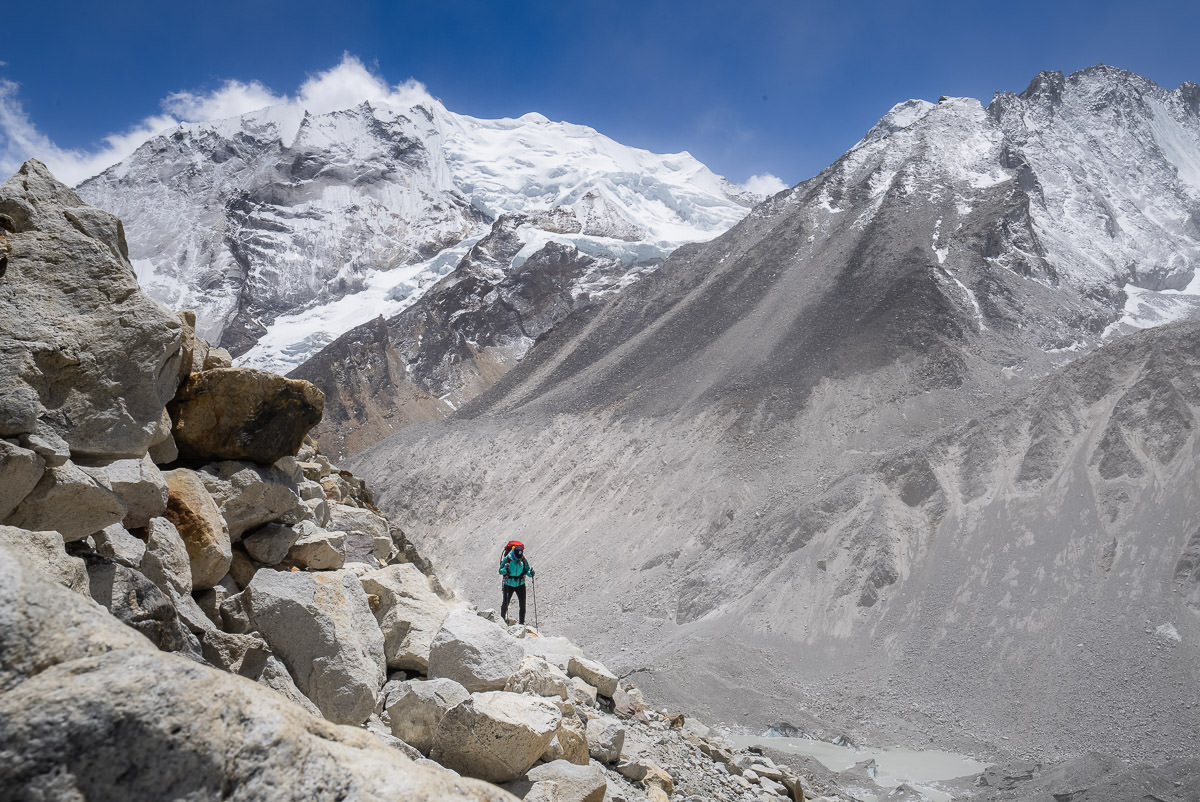
TREKKING TO UPPER MAKALU BASE CAMP
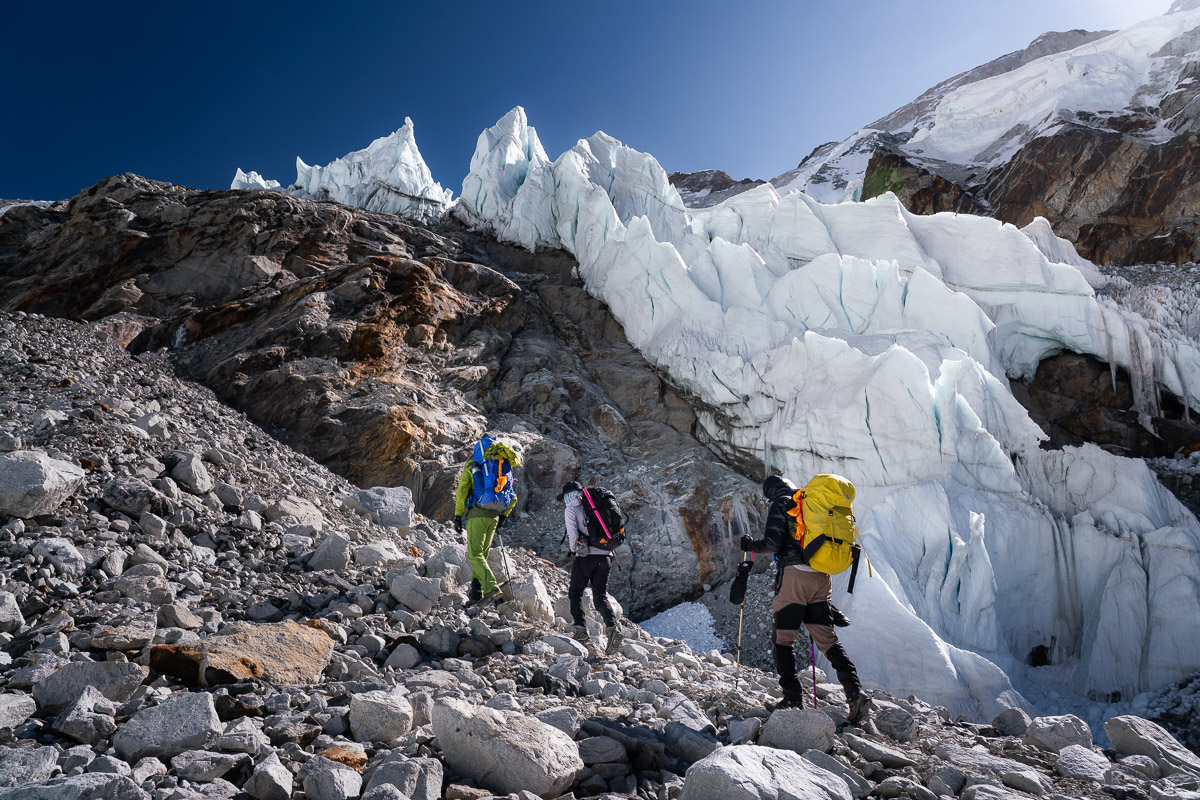
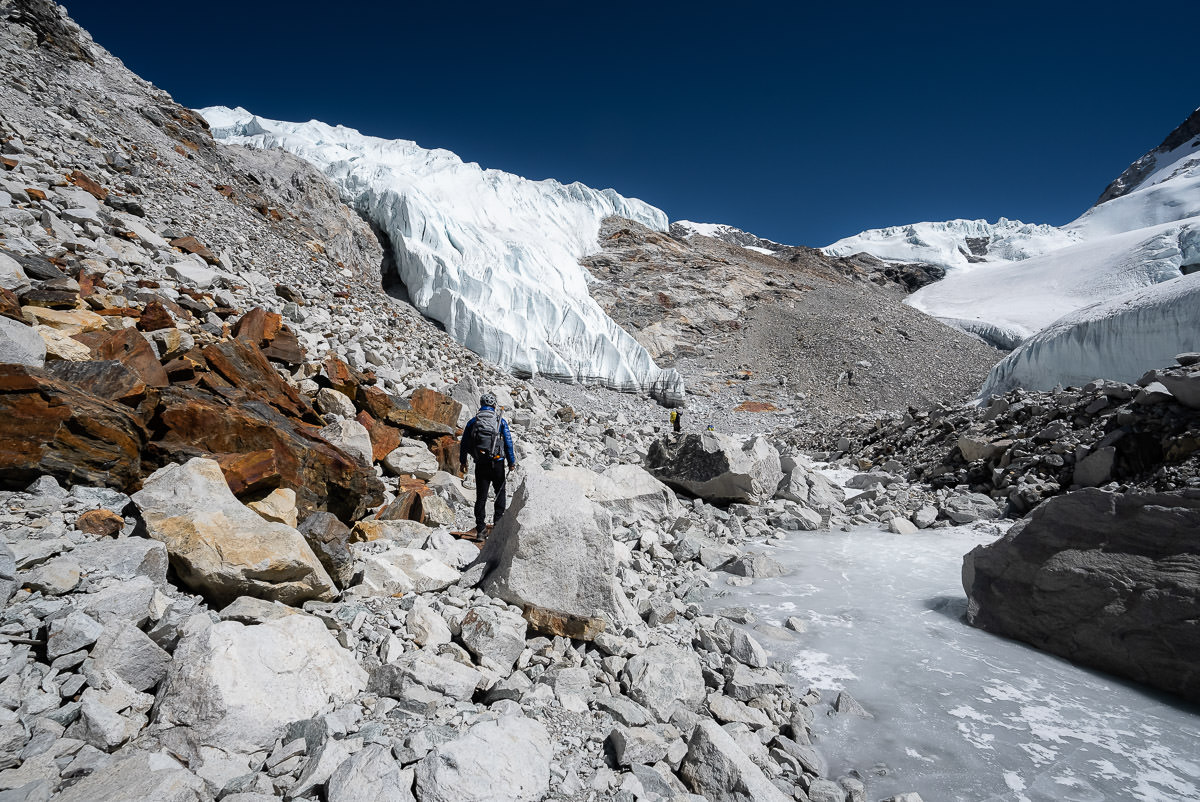
From Lower Base Camp to Upper Base Camp it’s a hard day of trekking. With 1000m of vertical gain reaching a height of 5,700m, it is quite a challenging day. To compound the elevation gain, the terrain is almost entirely comprised of unstable rocks and gravel.
The path is unclear, rockfall prone, and often finds itself blown through by dust storms. It seems to go on forever with a lot of the incline coming late in the day to reach the base camp. Prepare for a tough day and pack at least two liters of water to combat the lack of shade on this route.
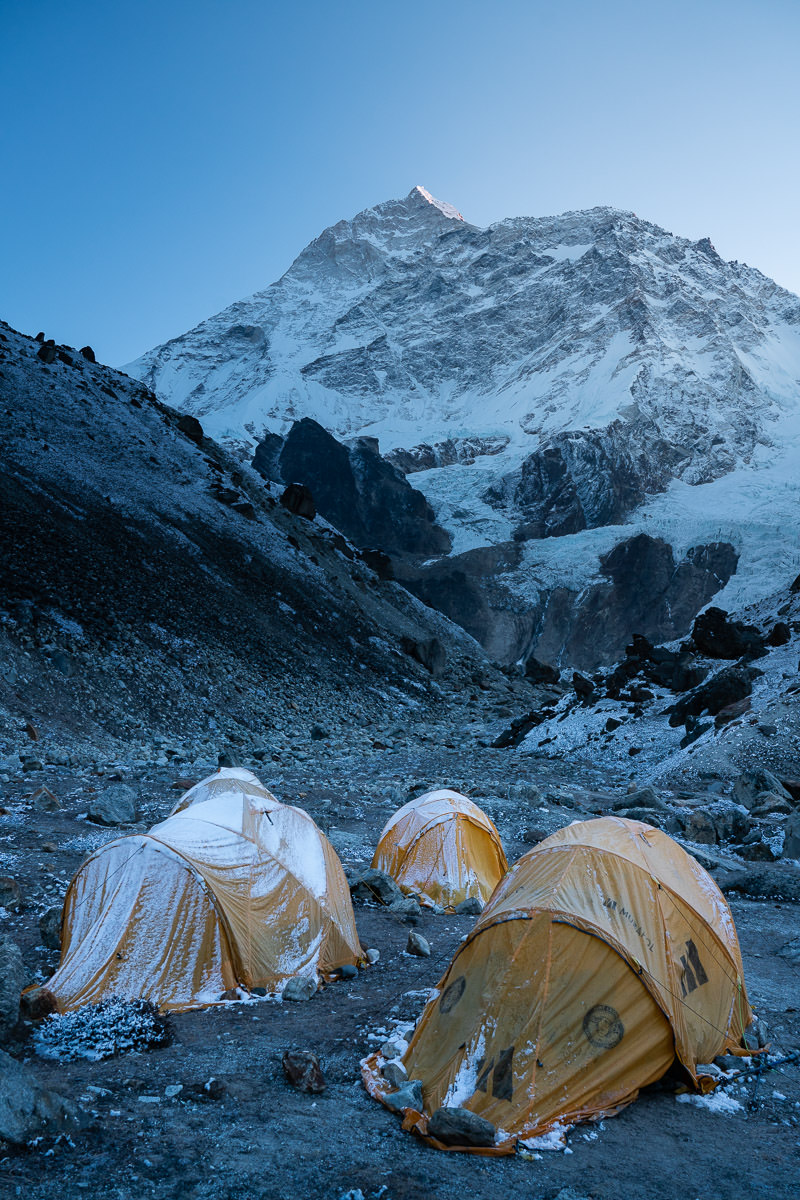
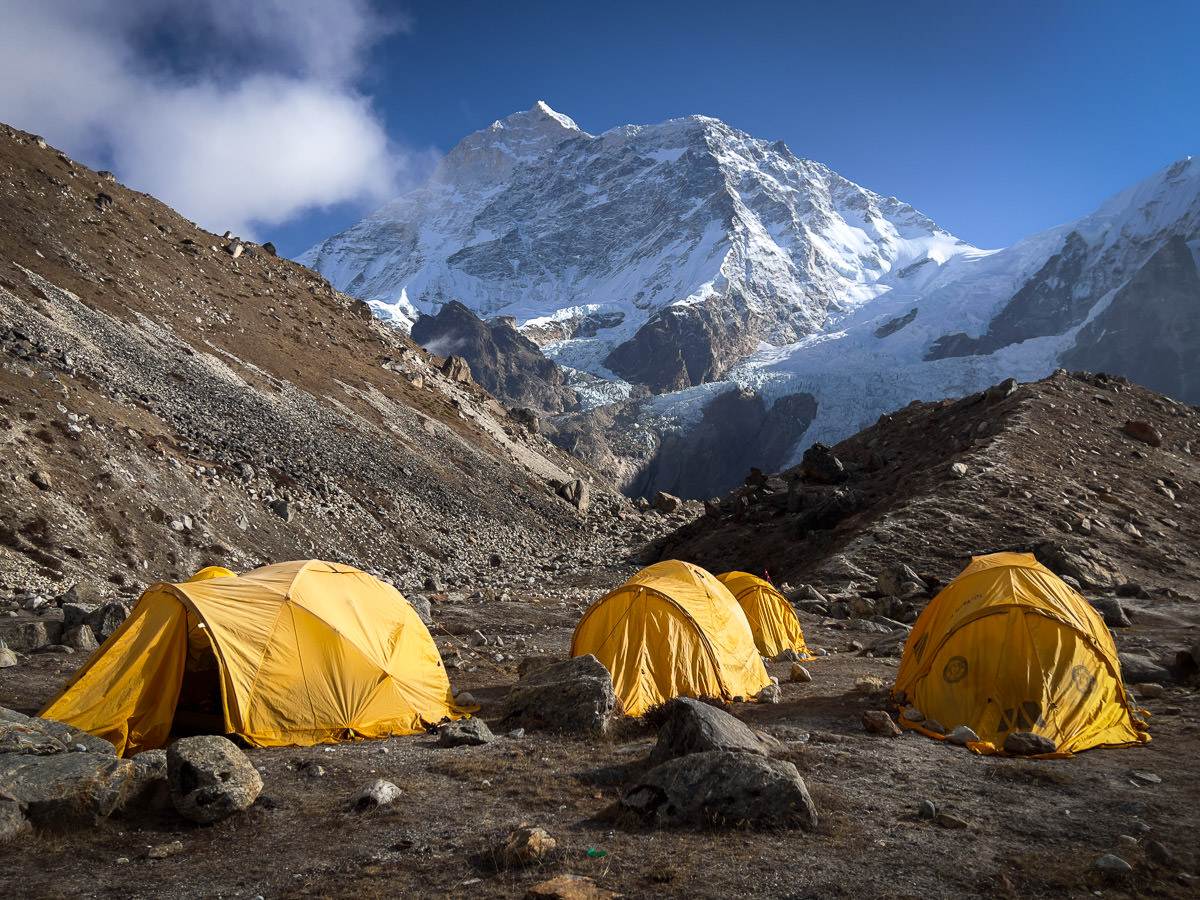
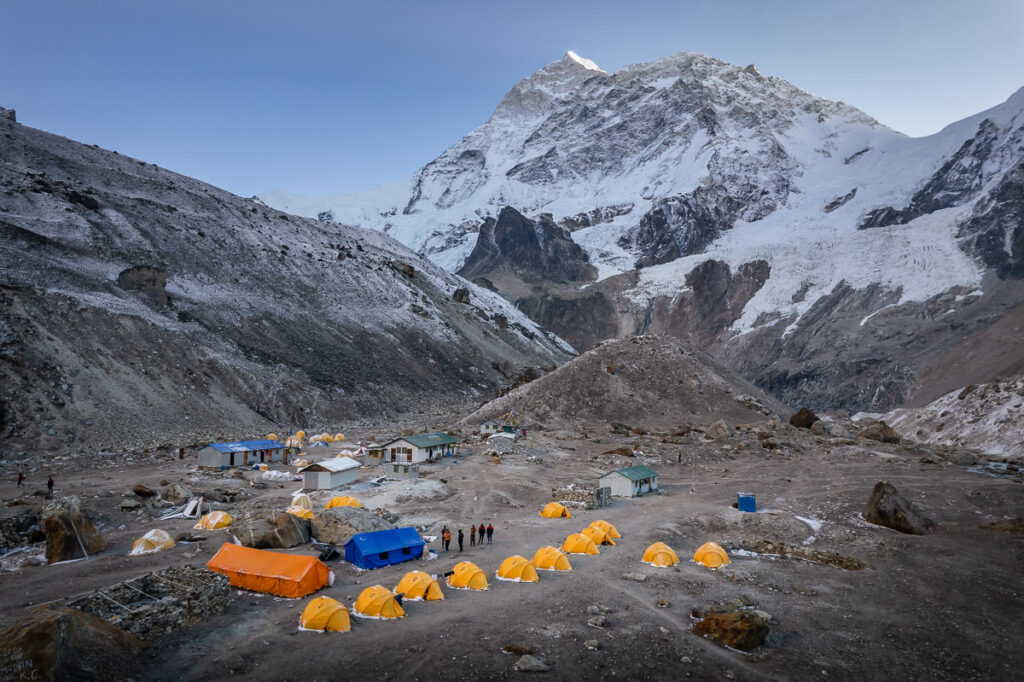
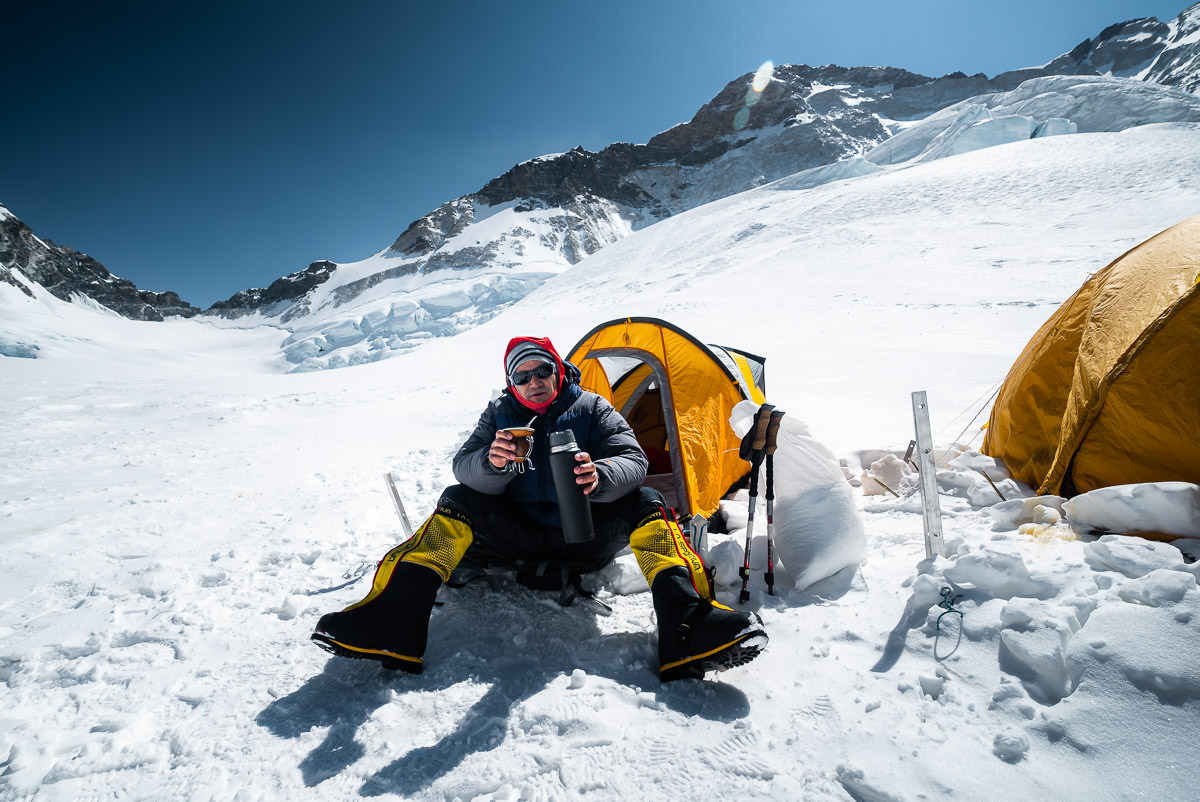
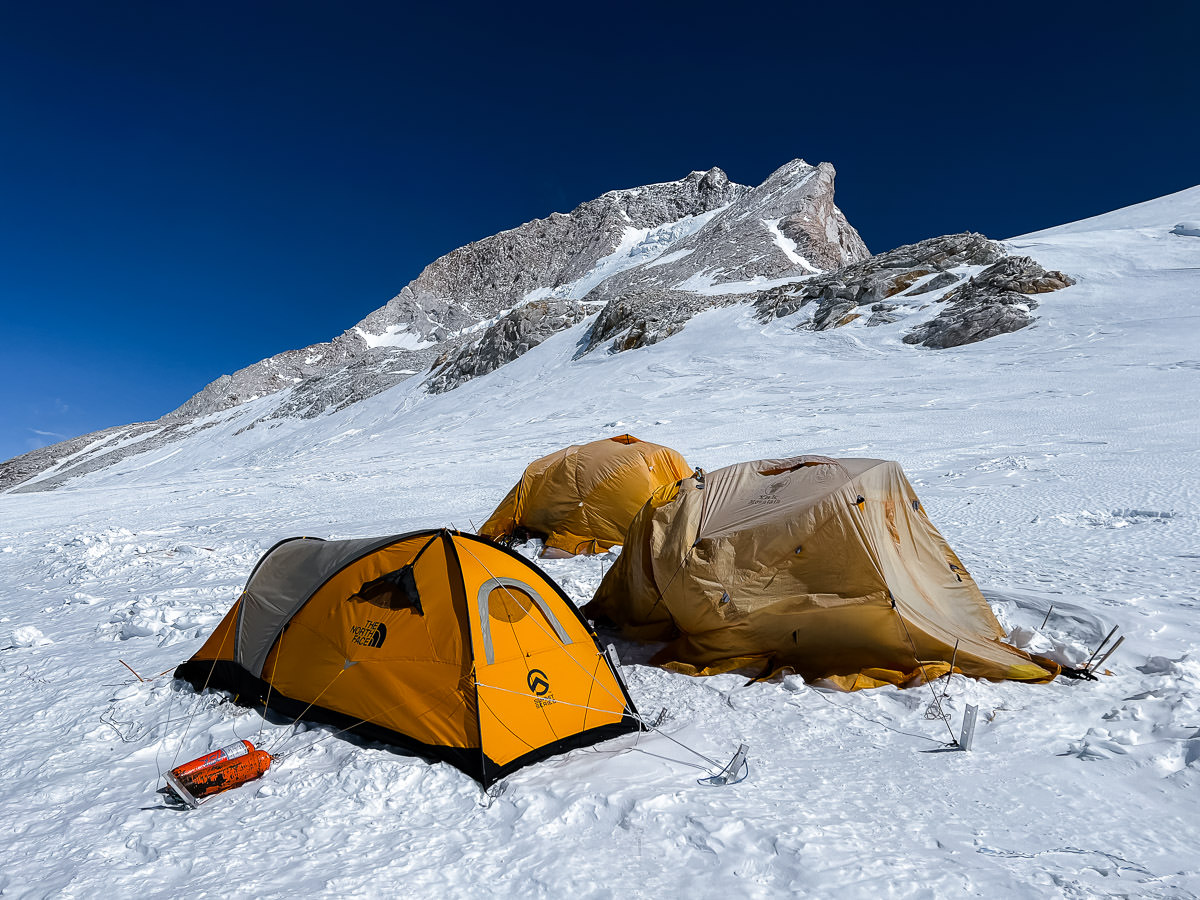
MAKALU UPPER BASE CAMP
After 12 days of trekking, we finally reached our home base. Makalu Upper Base Camp, at an altitude of 5,700m would be our climbing pad for the next 30 days as we tried to make an ascent of Mount Makalu. Seven Summits Treks had set up an awesome little village with two rows of sleeping tents and a large, dome dining tent. It seemed like a relatively safe base camp with views of the glaciers and the summit (on clear days).
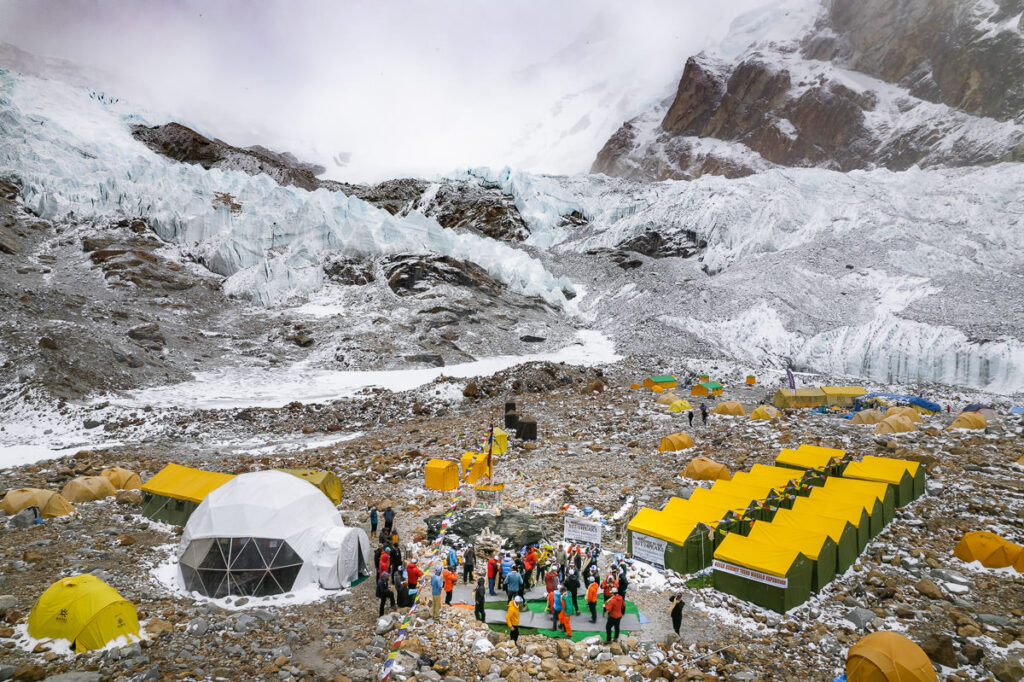
Now, the plan depends on how the climbers in the group feel and the weather conditions for rotations and the summit push. However, first things first. I’ll give you a little description of what to expect at base camp with Seven Summits Treks. Each person has a large, insulated, private tent, which is big enough to house your two duffels of gear and a thick mattress.
The toilet is basically a small tent with a bucket that is beneath the rocks and is emptied regularly. It’s basic but it works.
Each day we had breakfast, lunch and dinner served in a warm dome tent. The quality of the food was great overall and had a good mixture of western dishes and Nepali classics. Throughout the day, snacks and drinks were always ready and available to keep you nourished.
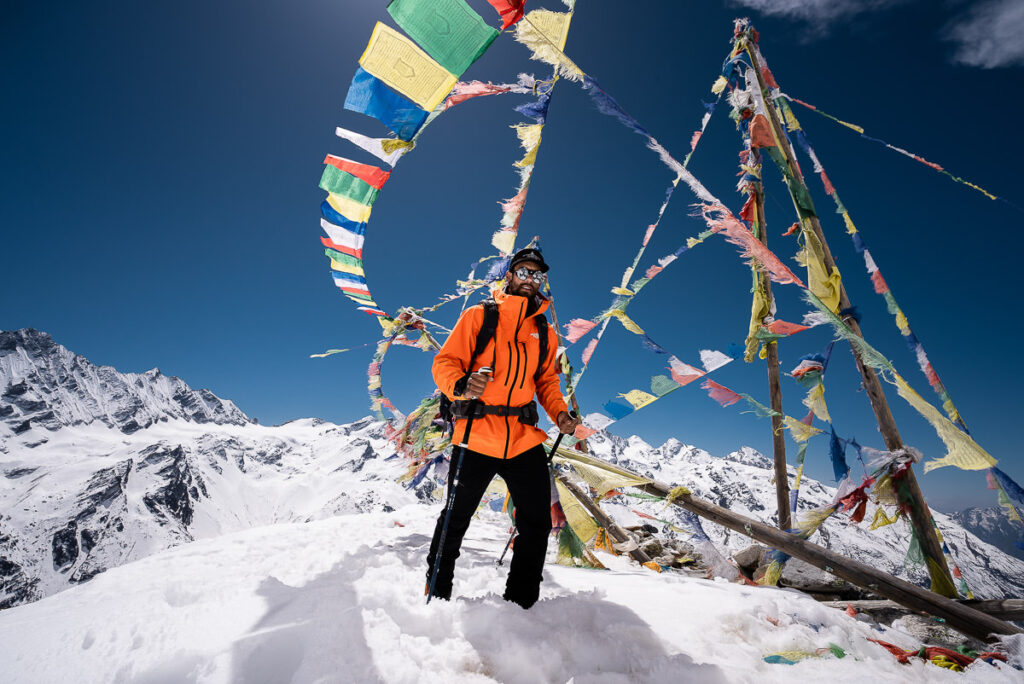
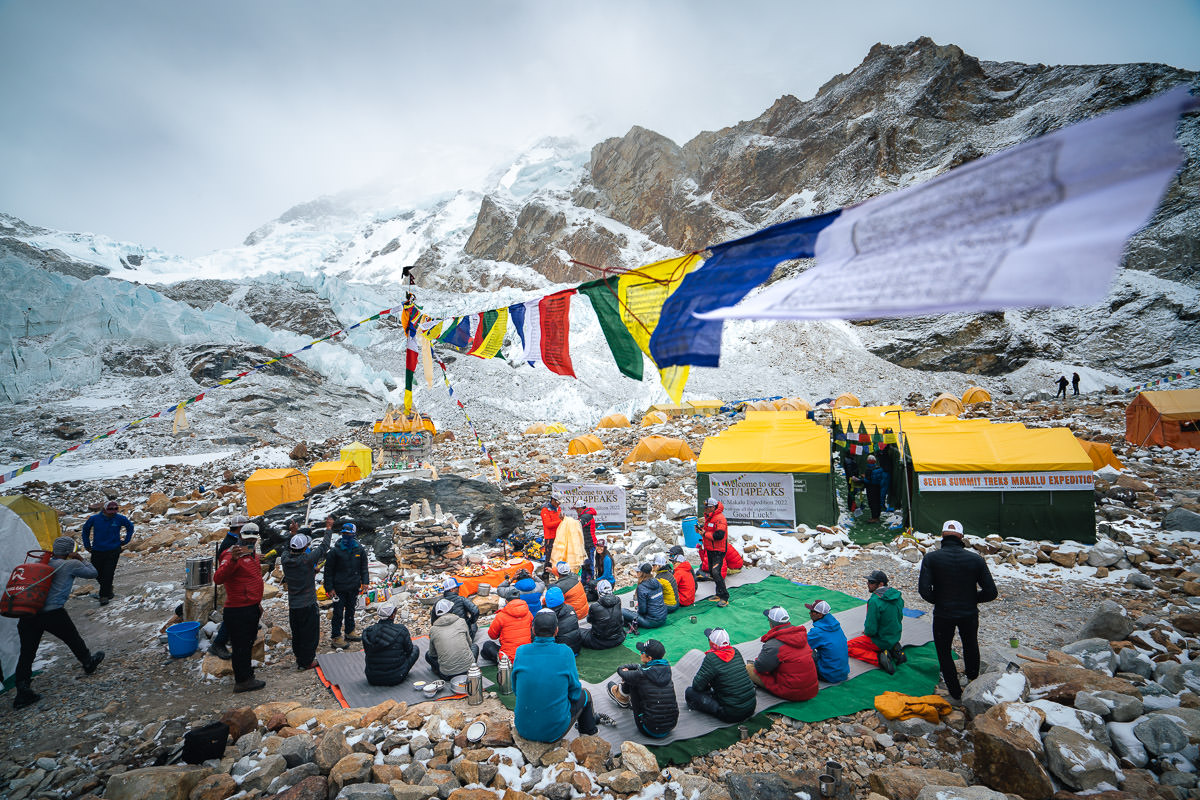
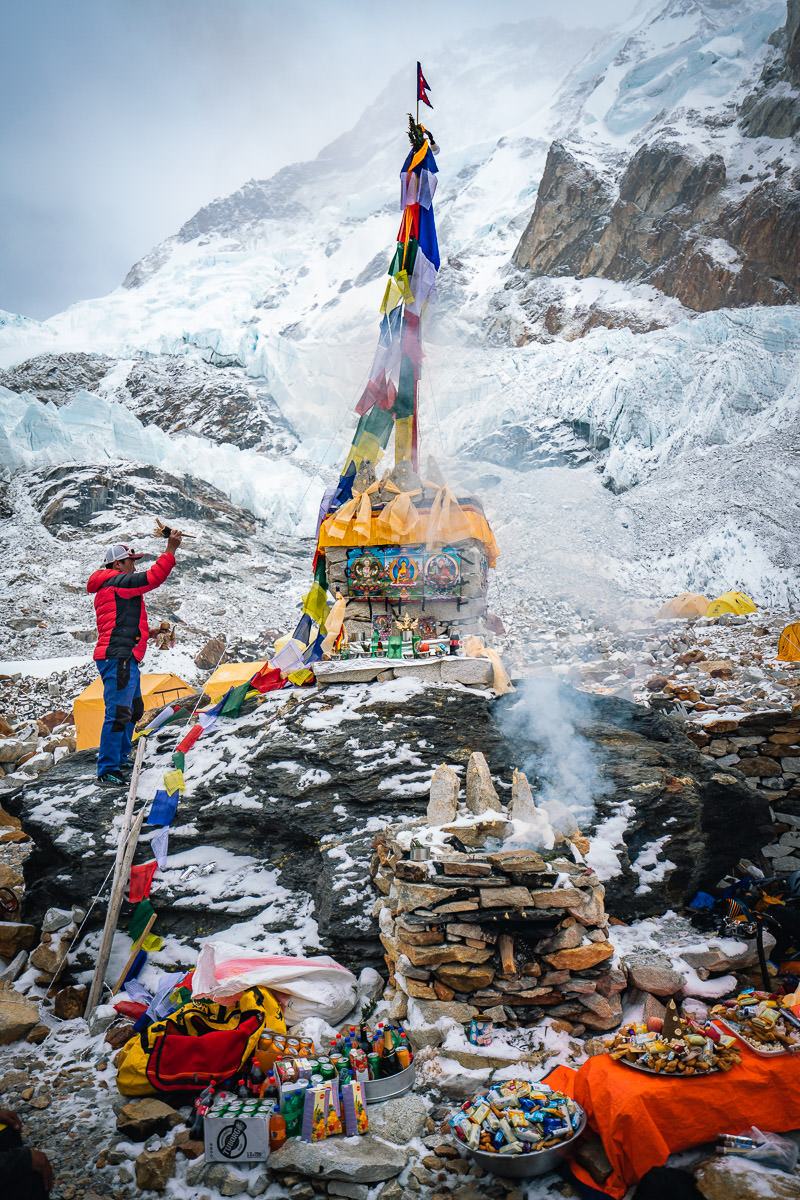
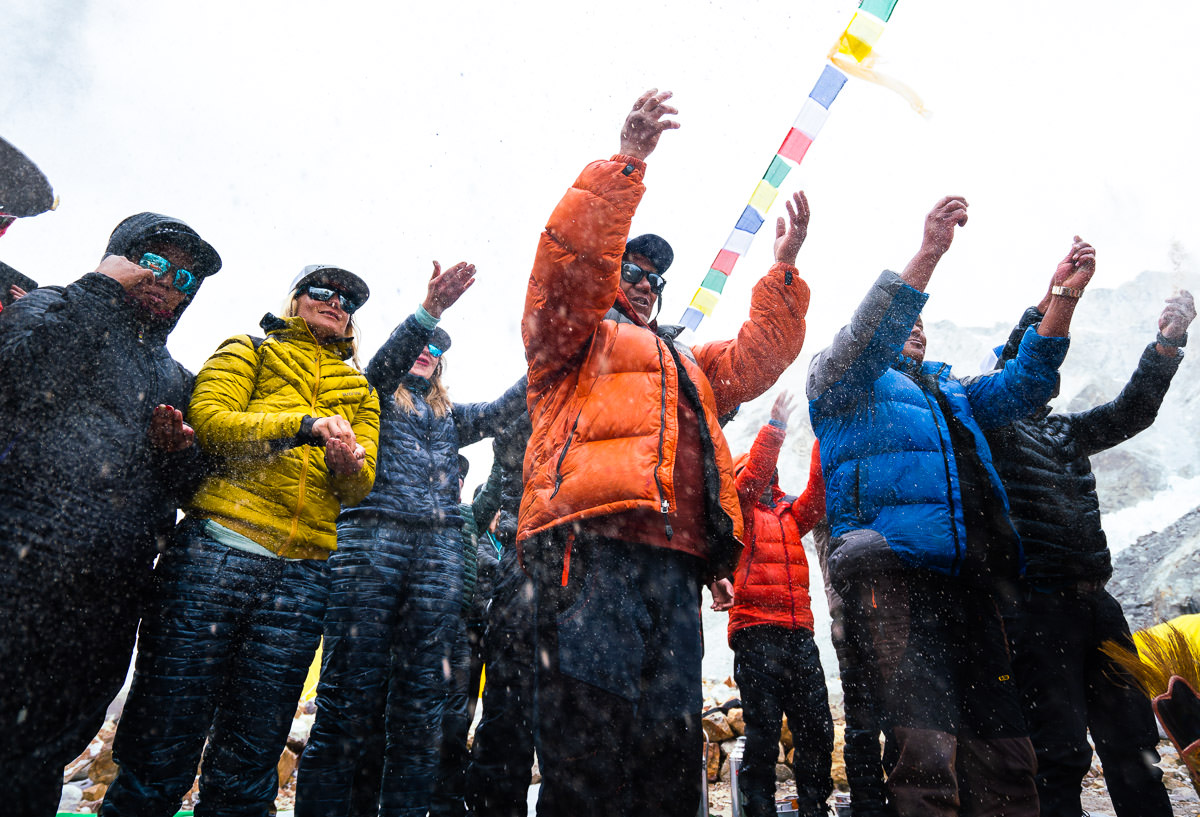
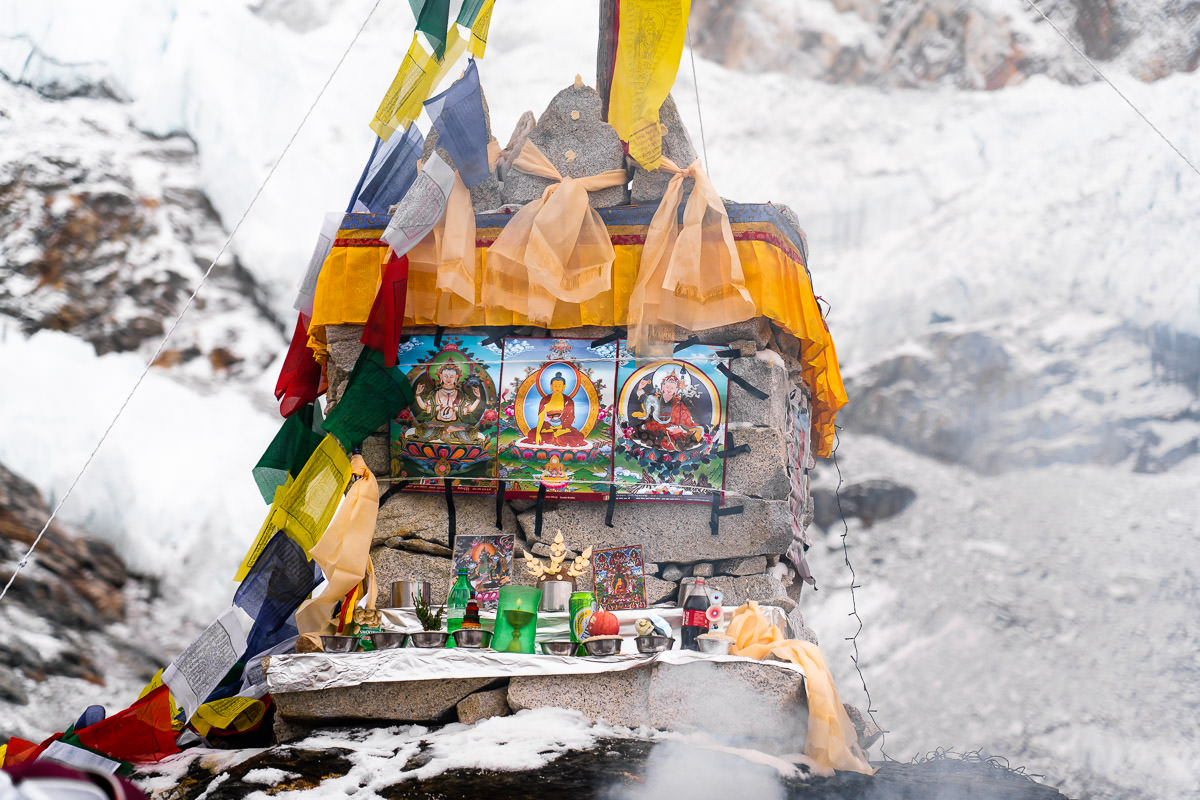
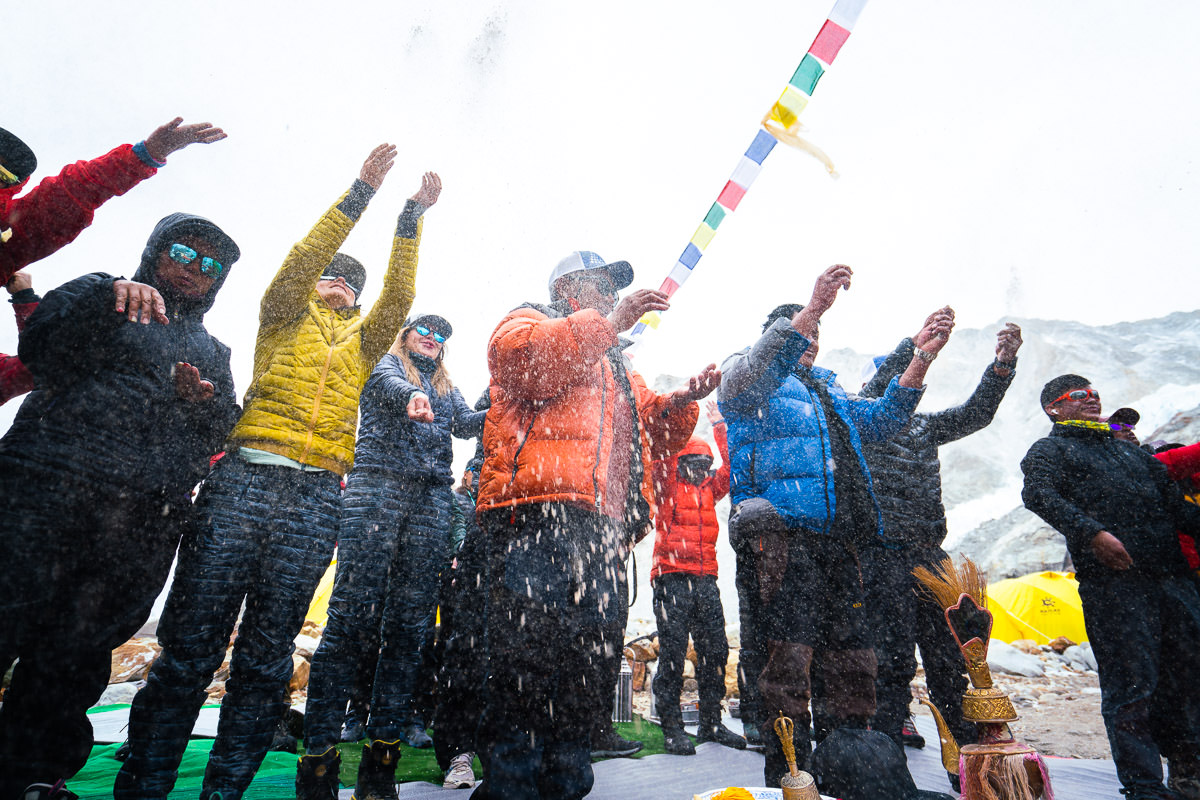
MAKALU PUJA CEREMONY
After a couple of acclimatization days at base camp, our bodies began adjusting to living at 5,700m. It was time for the Puja ceremony. The Puja Ceremony is a tradition where the mountains are honored and we pray for safe passage. Local Sherpa people consider these mighty peaks to be Gods, and so the Puja ceremony is held not only to ask for safe passage but forgiveness for climbing up to these holy places.

THE CLIMB
In this section of the blog post, I will explain what to expect in each section of the climb, and provide ample photos of each part of the route. Most of our group was climbing with oxygen and planned to sleep at Camp 2 for acclimatization and touch a little higher. Many opted for just one rotation before a summit push but others went for two.
SIDE NOTE: I actually had a bit of a crazy experience on this expedition and was evacuated by helicopter halfway through and flown back to base camp for my summit push 12 days later. I’ll add that personal story below at the end of the blog post if you are interested.
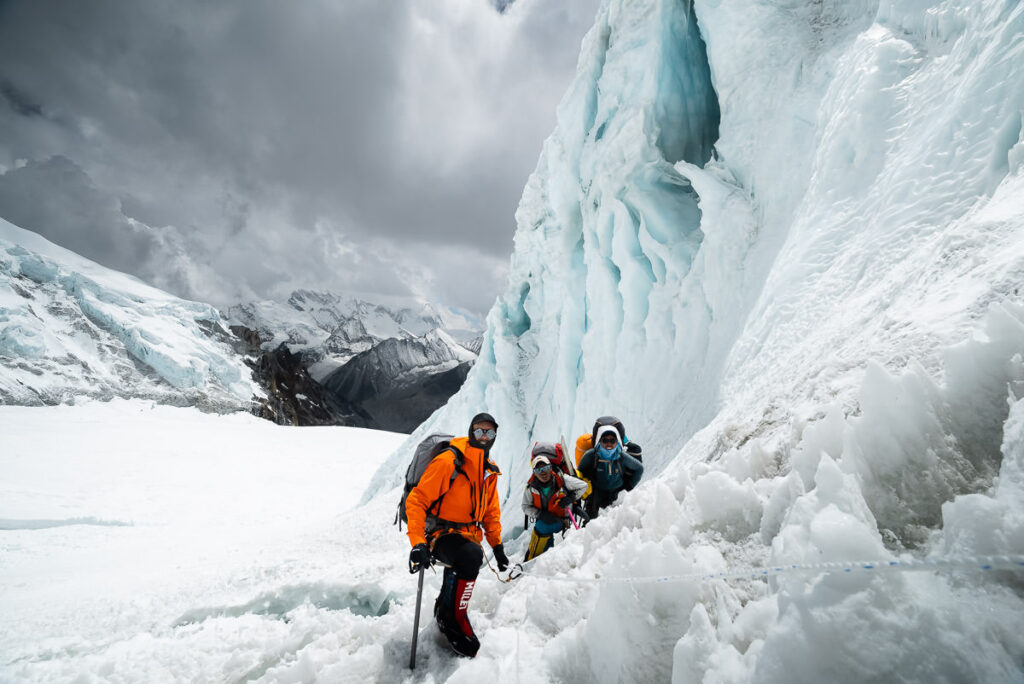
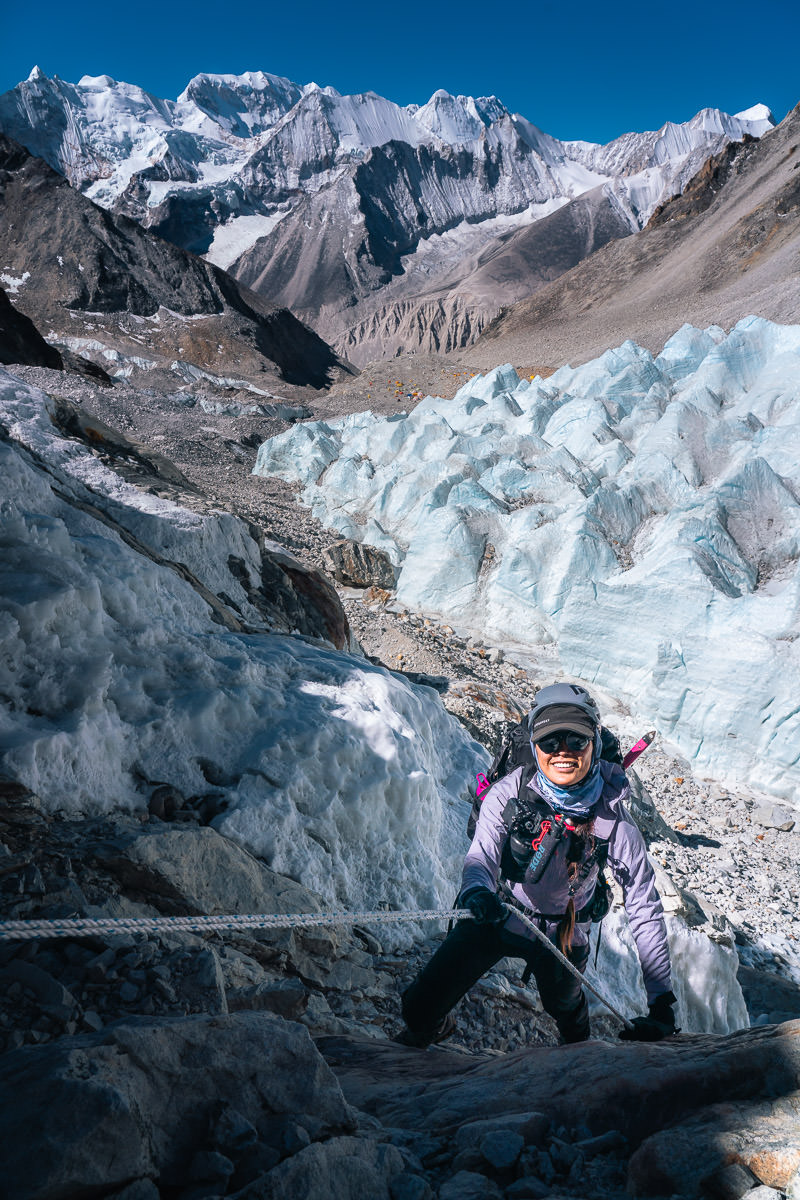
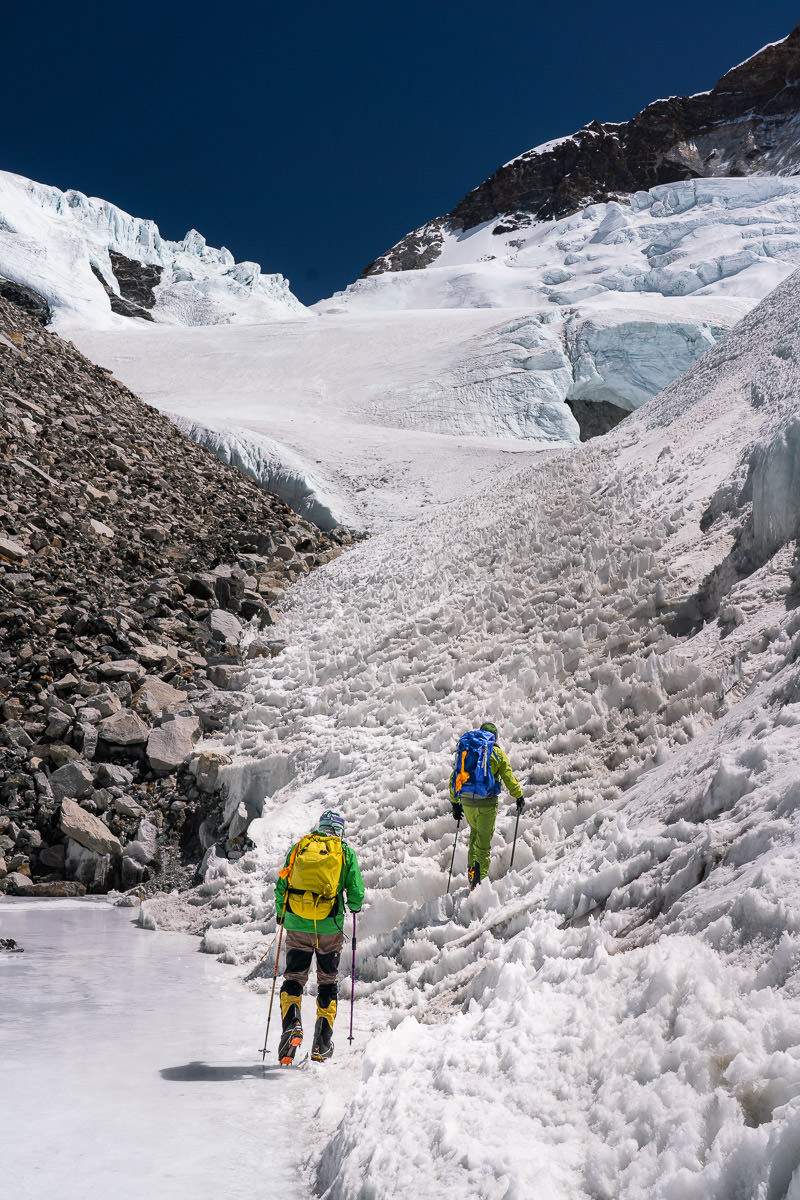
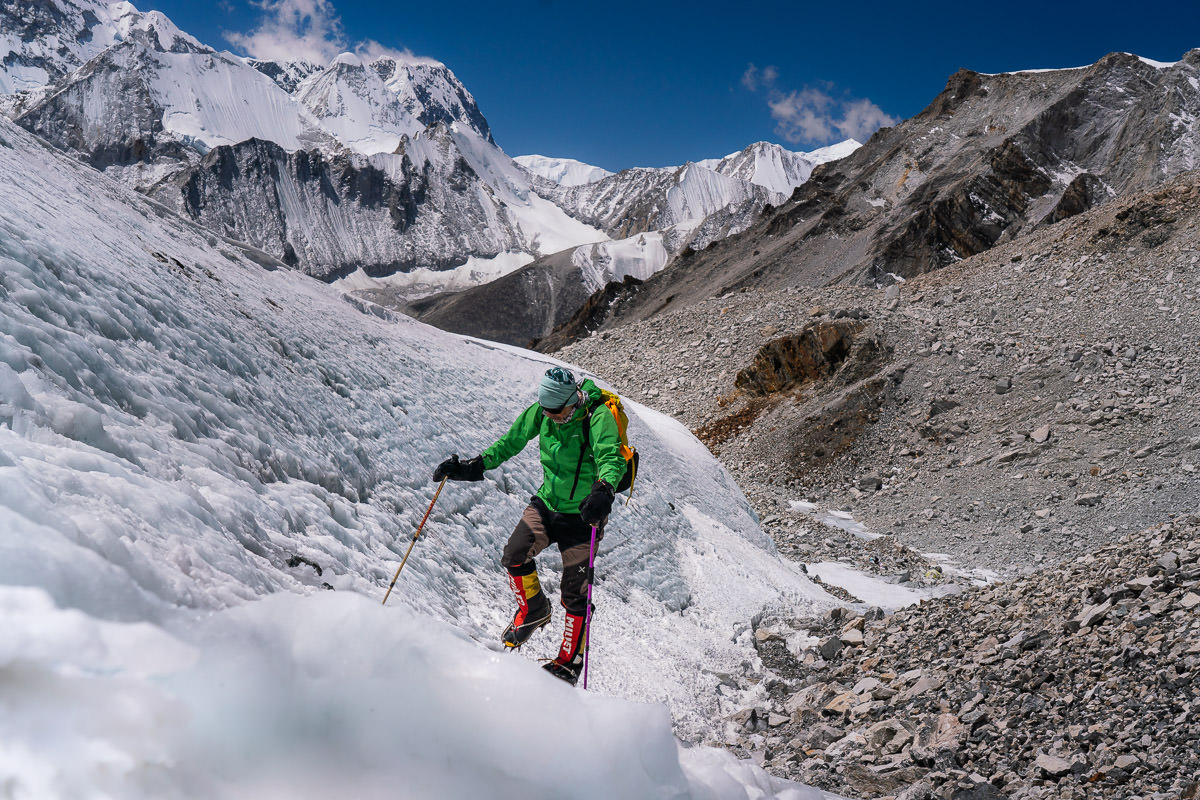
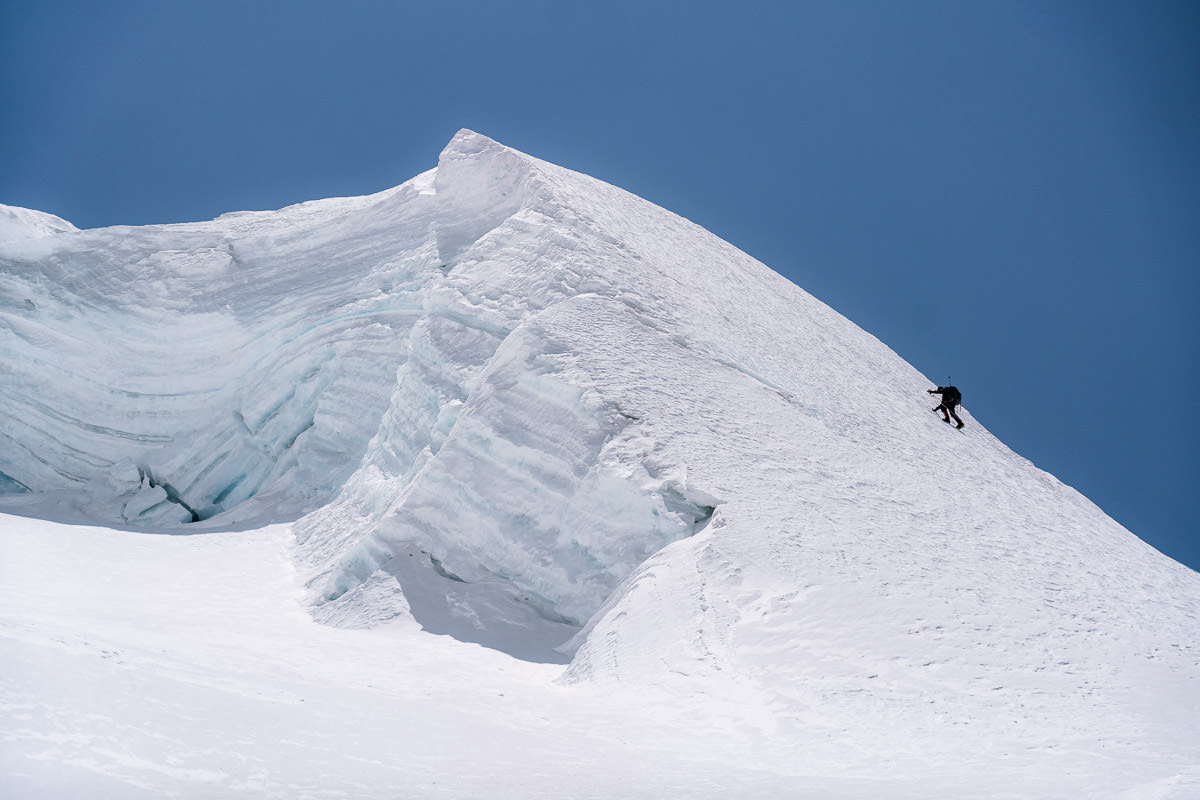
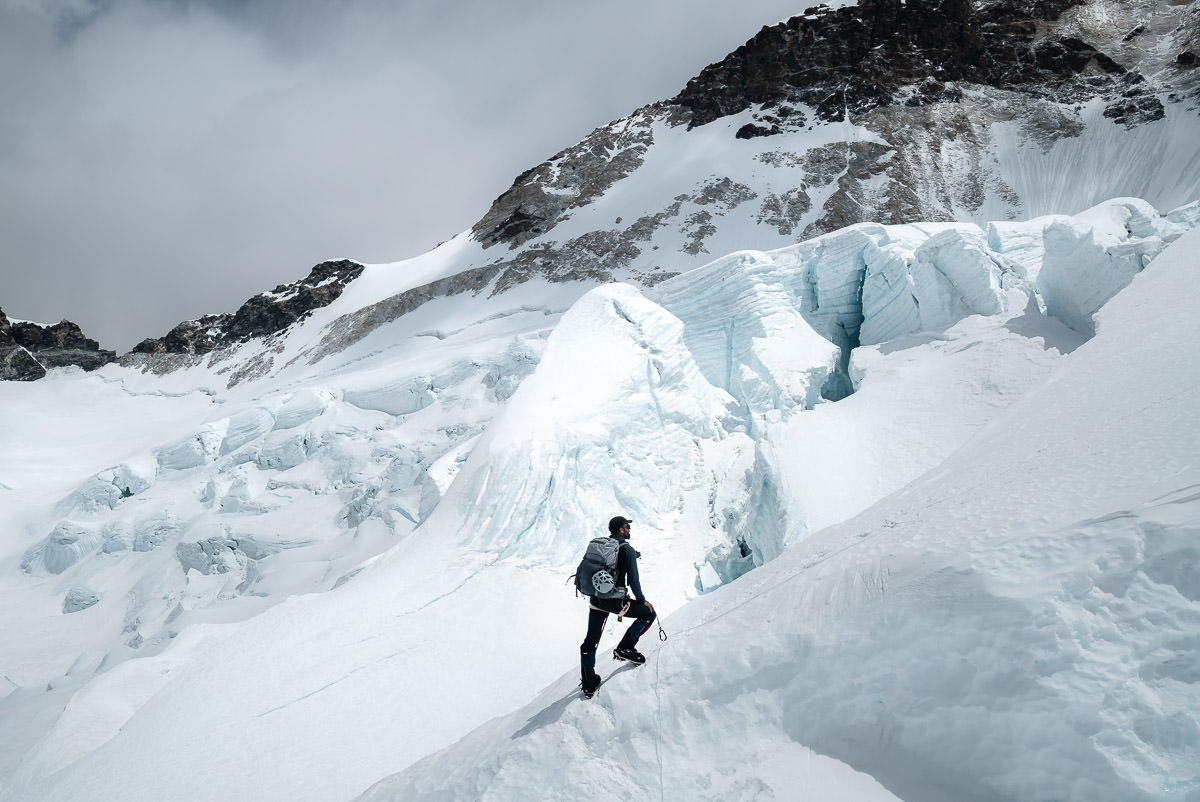
MAKALU UPPER BASE CAMP TO CAMP 1
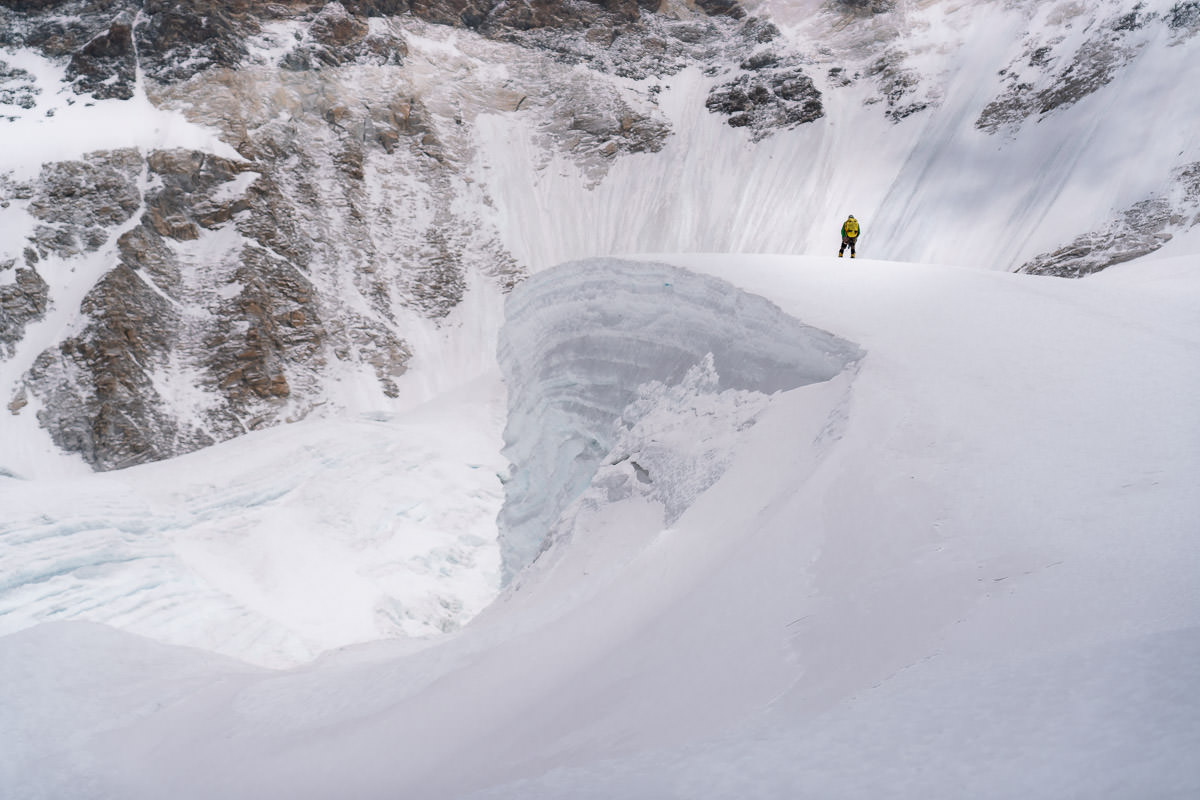
This is a tricky little section as it appears to be quite short but it actually takes about four hours for many average-paced climbers. Camp 1 used to be on a lower plateau but an ‘Upper’ Camp 1 is now the standard position. It involves about an extra hour and now includes a steep climb underneath a massive cornice.
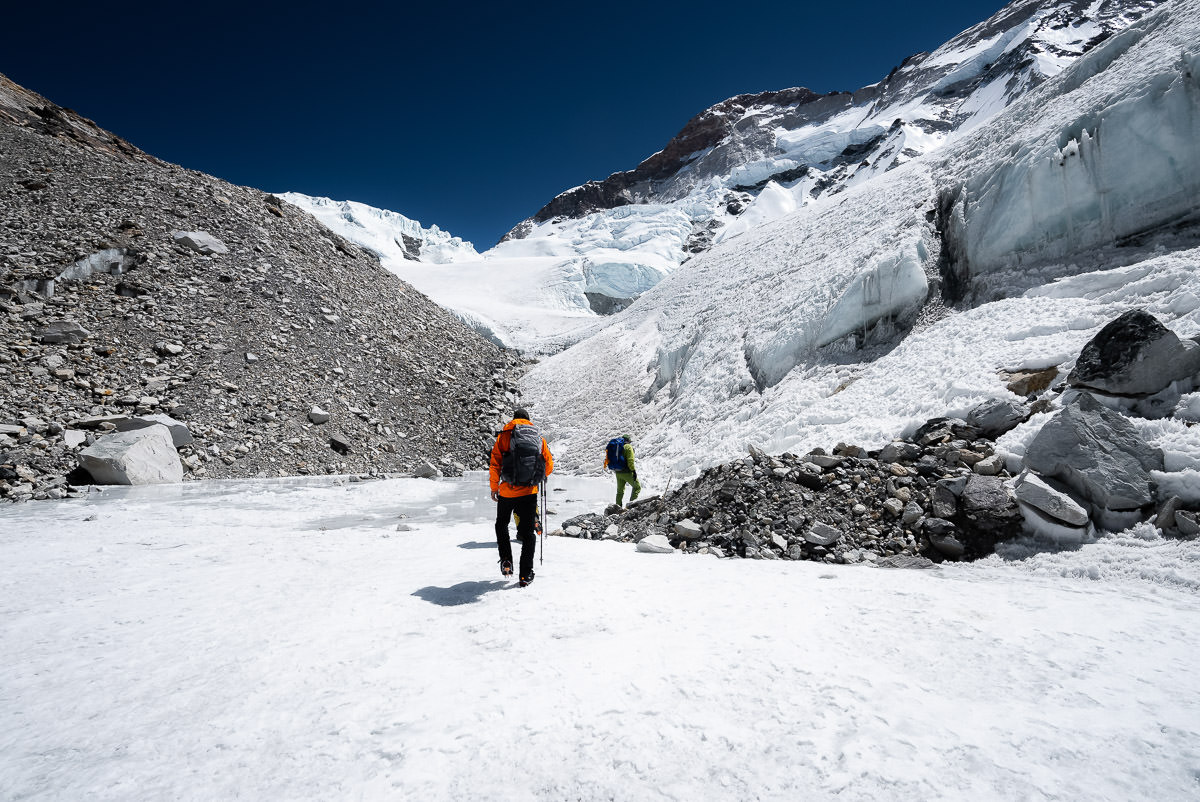
From 5,700m at Upper Base Camp, you will reach 6,300m at the ‘real’ Camp 1. The journey begins out of Upper Base Camp across the frozen lake. By the end of the expedition, several members were falling in here up to their knees so watch out for that fun!
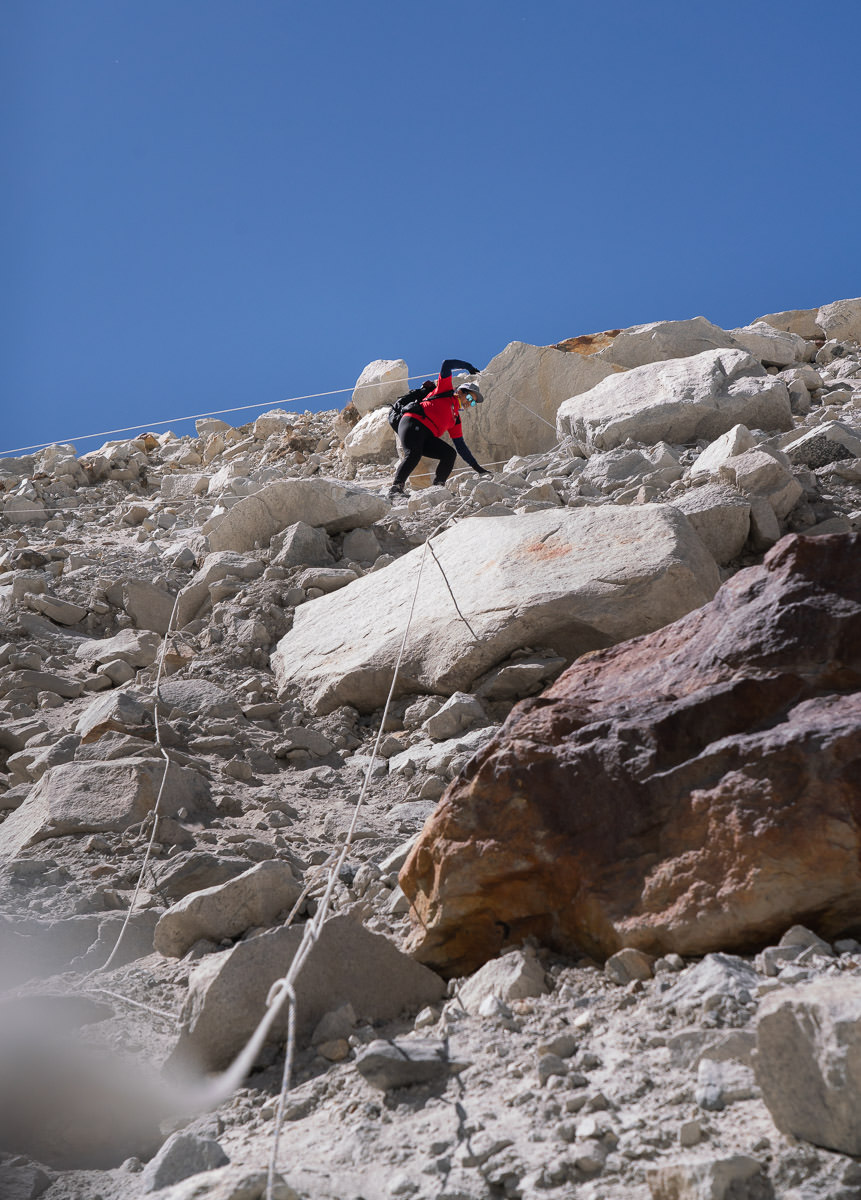
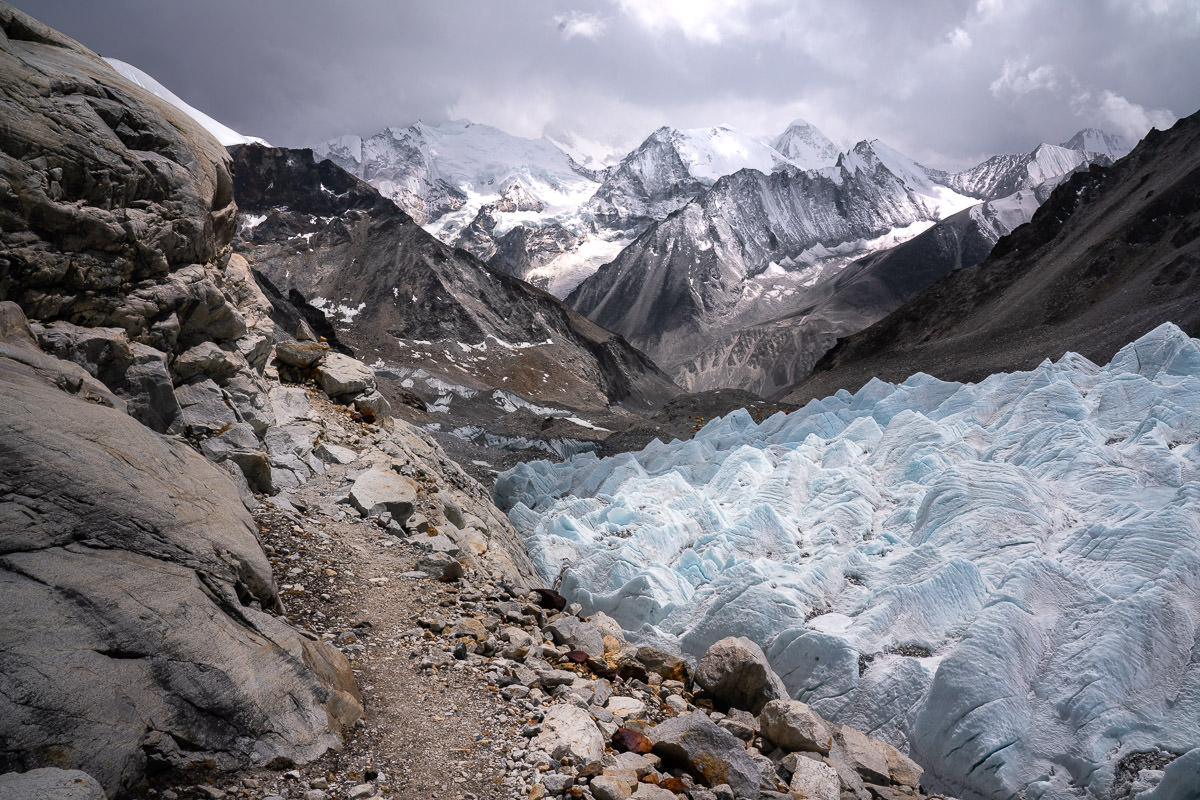
Once across the lake, you follow the rocky path along the edge of the glacier. It’s a beautiful scene looking back across the glacier towards the camp, which slowly fades away into the distance.

After about forty minutes, you reach a steep rocky wall that requires the use of ropes for most people. You won’t need to clip in here but just use the ropes as safety as you clamber up the cliff face for twenty meters. One of our members fell here on the descent and cracked their skull open, nearly dying. It may look easy and dry but can still pose a danger.
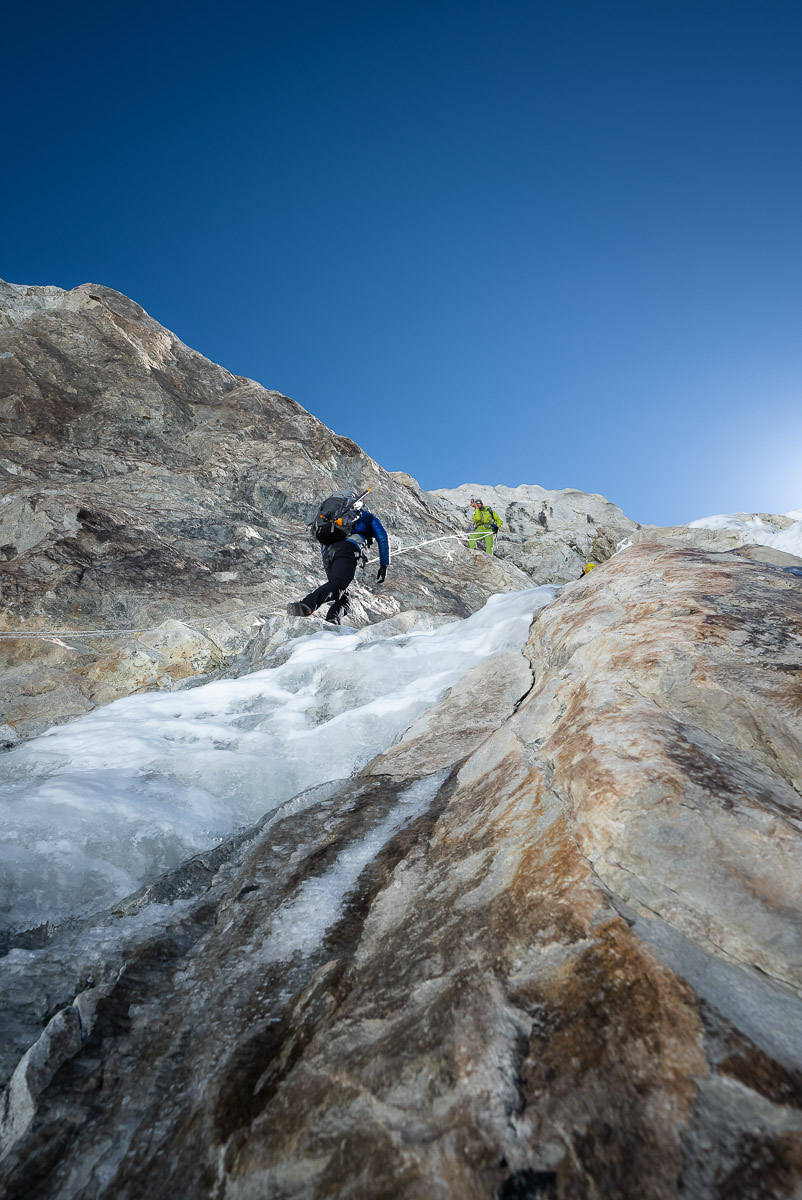
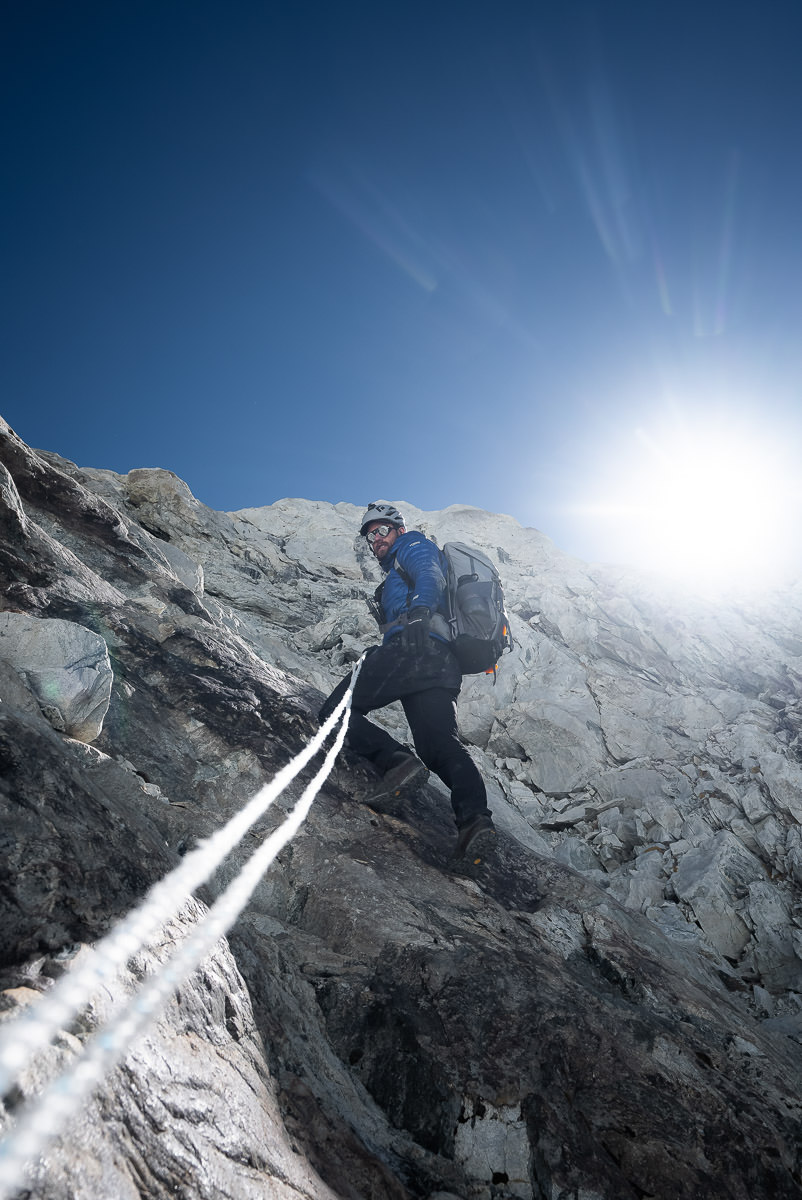

Once atop the cliff wall, you now walk for another 25 minutes up the ridge to reach the crampon point. Here Seven Summit Treks had installed a tent where we could store our 8000m boots, harness, and crampons. There were a few heavenly snacks and drinks tucked away in there for summit day descents also!
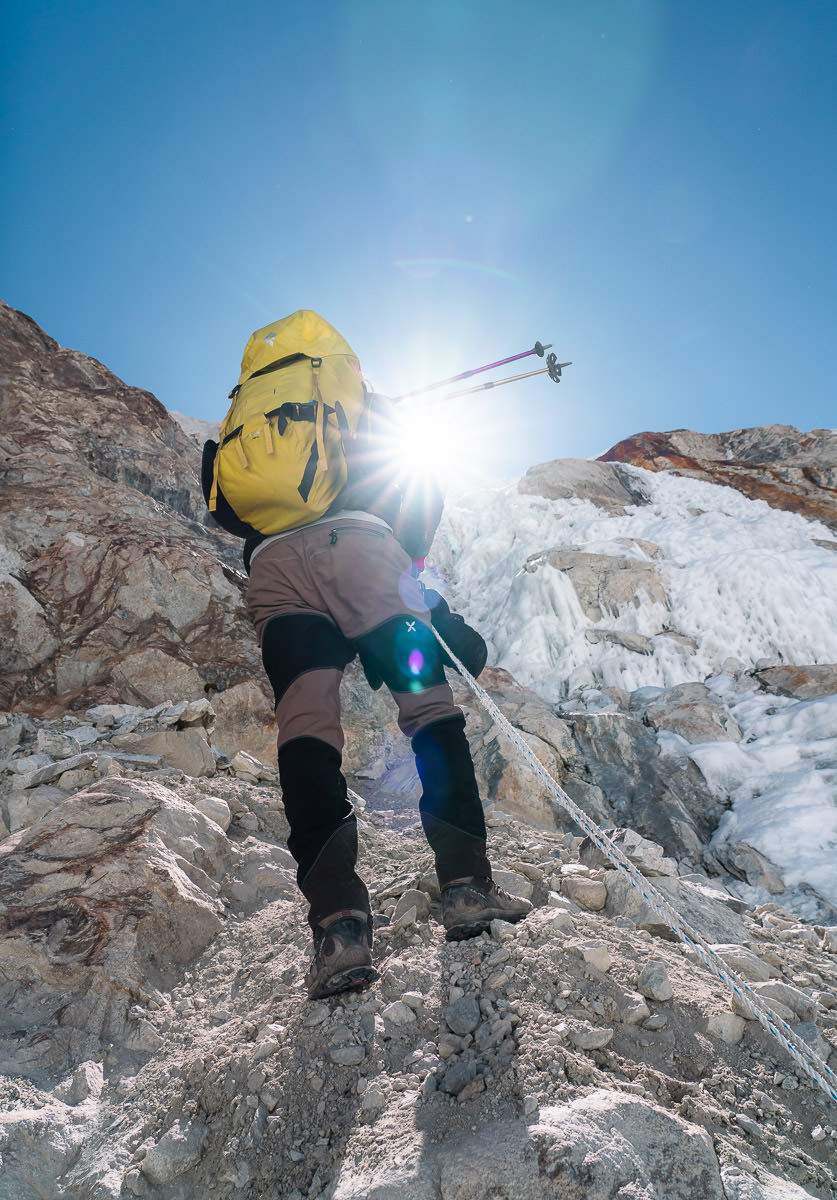
Just after crampon point is a small lake, where more members of our team actually fell hip deep into the water. Don’t take these frozen lakes lightly. You now step onto the snow for the first time and make your way up the left-hand side of the glacier, hugging the rocky cliffside all the way up to the Lower Camp One plateau. This section can be brutally hot and exposed.

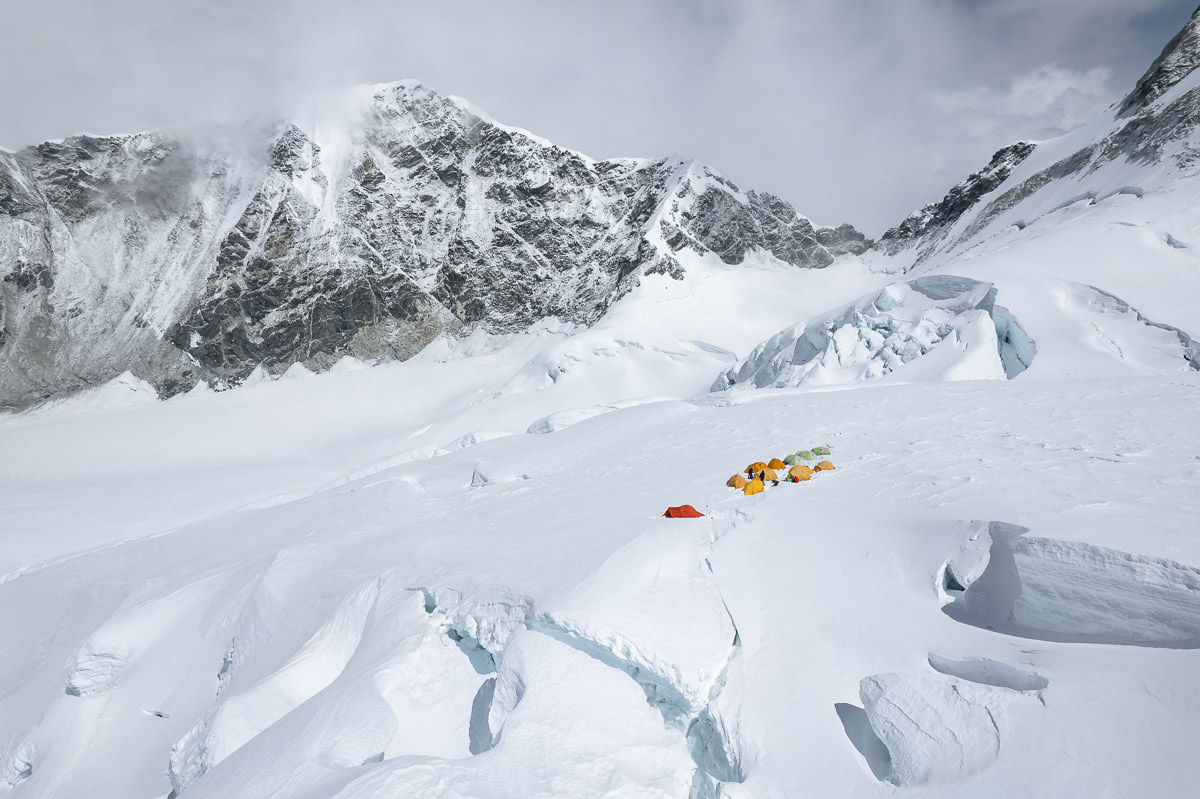
A wide-open space signals Lower Camp One, but nowadays you still need to head up the steep ice underneath the cornice to reach the official Camp One. This is the only time you will use your jumar on the way to Camp One and only for several pitches.
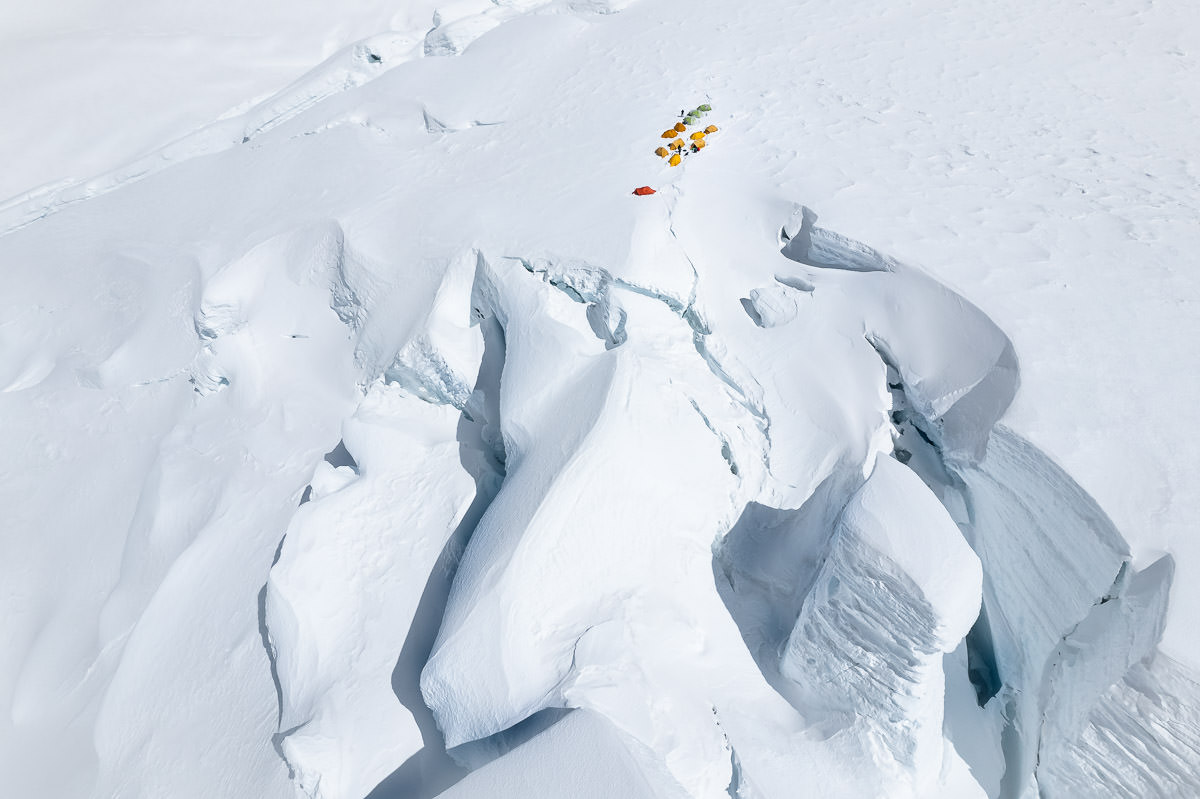
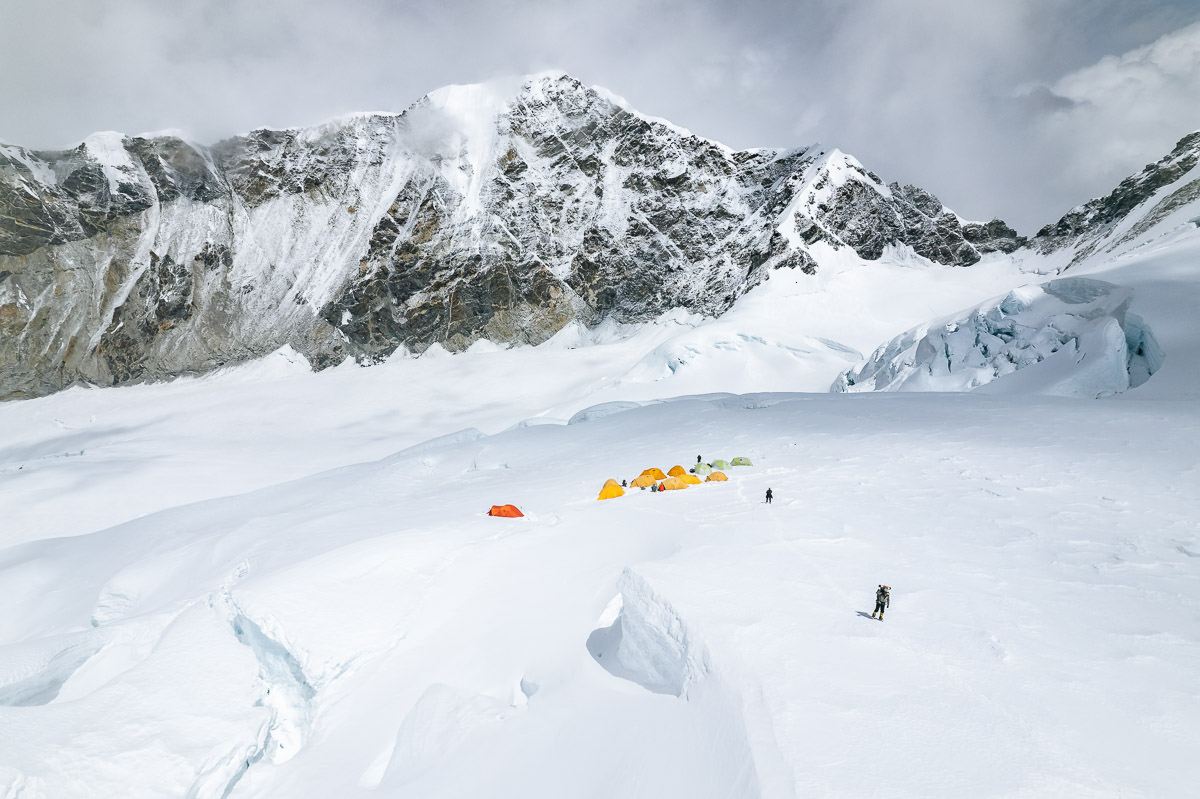
At the top of the climb, you will walk just another fifty meters to reach the tents. It sits on the edge of a huge plateau and we actually slept here one night, although most go directly to Camp Two as it is only another 1.5-2 hours to reach the next camp at 6,600m.
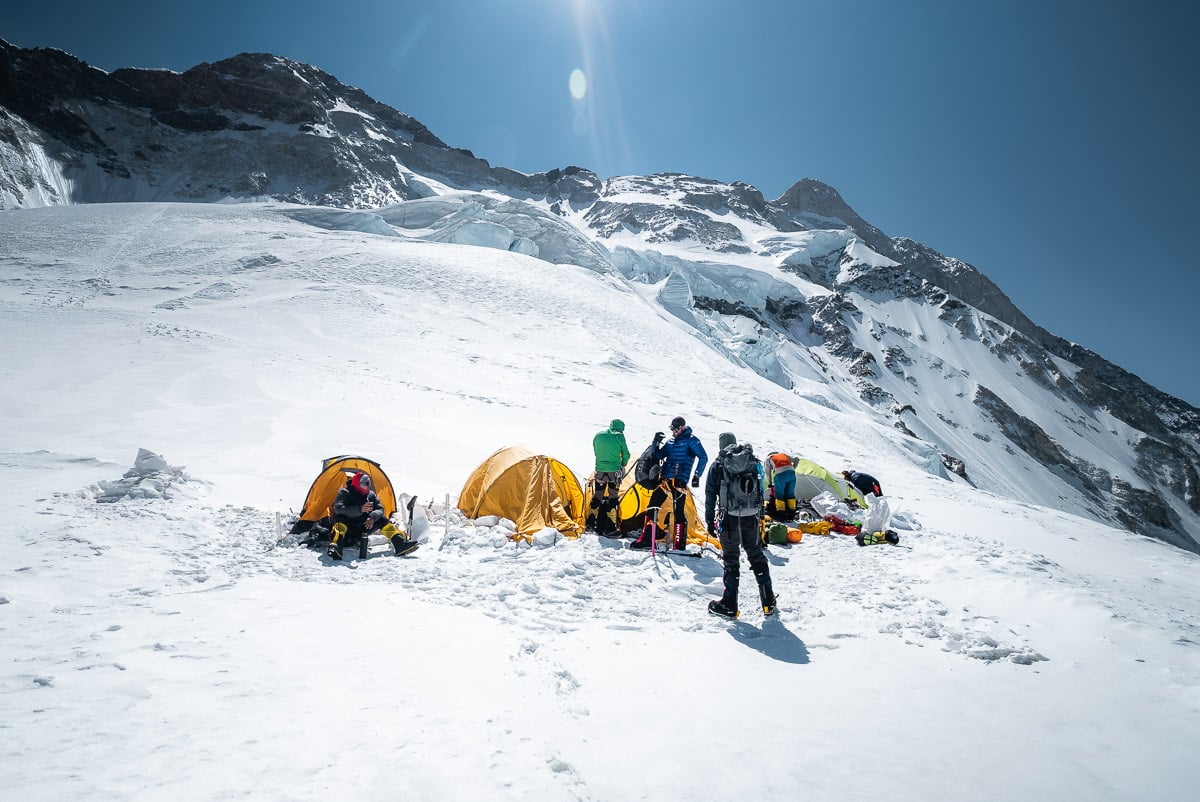
CAMP 1 TO CAMP 2
This is by far the shortest and easiest camp-to-camp journey on the whole route. It takes about 1.5 hours to reach Camp 2 from Camp 1.
You’ll find a couple of steep snowy slopes that can require the use of a jumar but otherwise, you are just clipped in for a few sections to be safe from drop-offs and crevasses. It’s about 300m of incline to the second camp, which sits at 6,600m. Most people skip Camp 1 and head straight from advanced base camp to Camp 2 on their rotations and during their summit push.
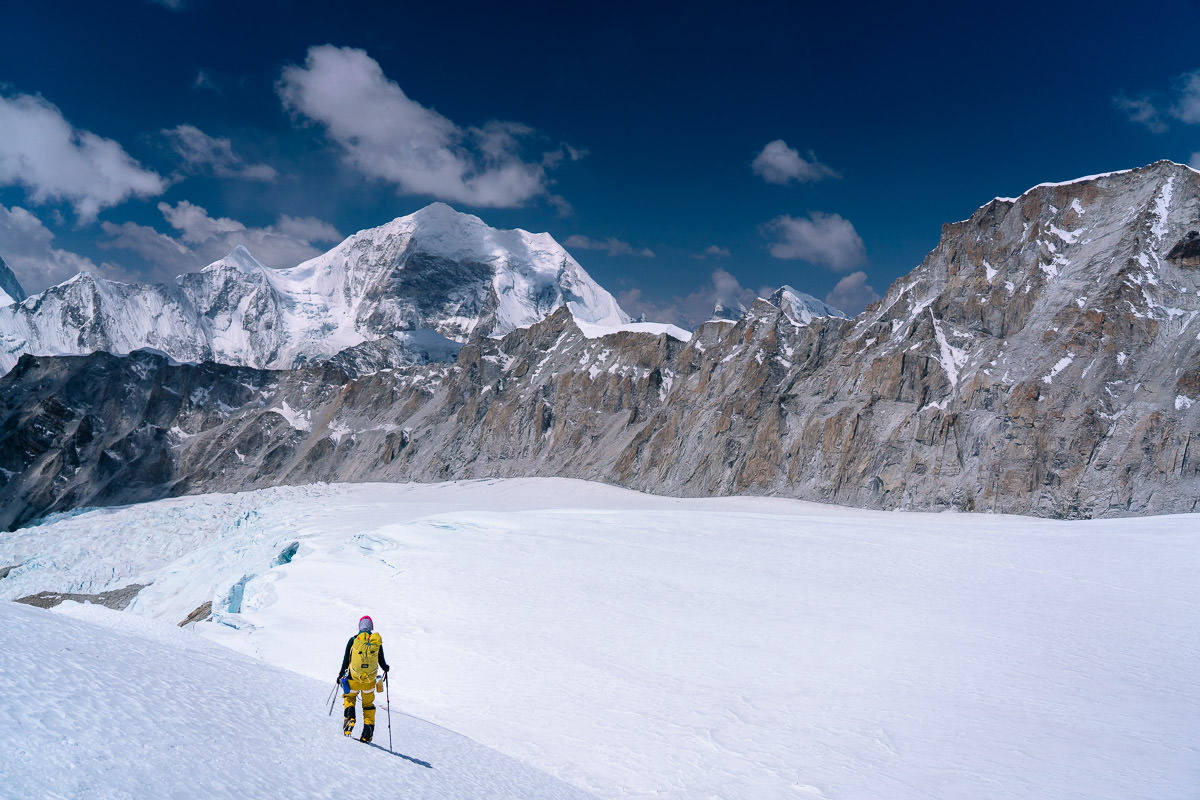
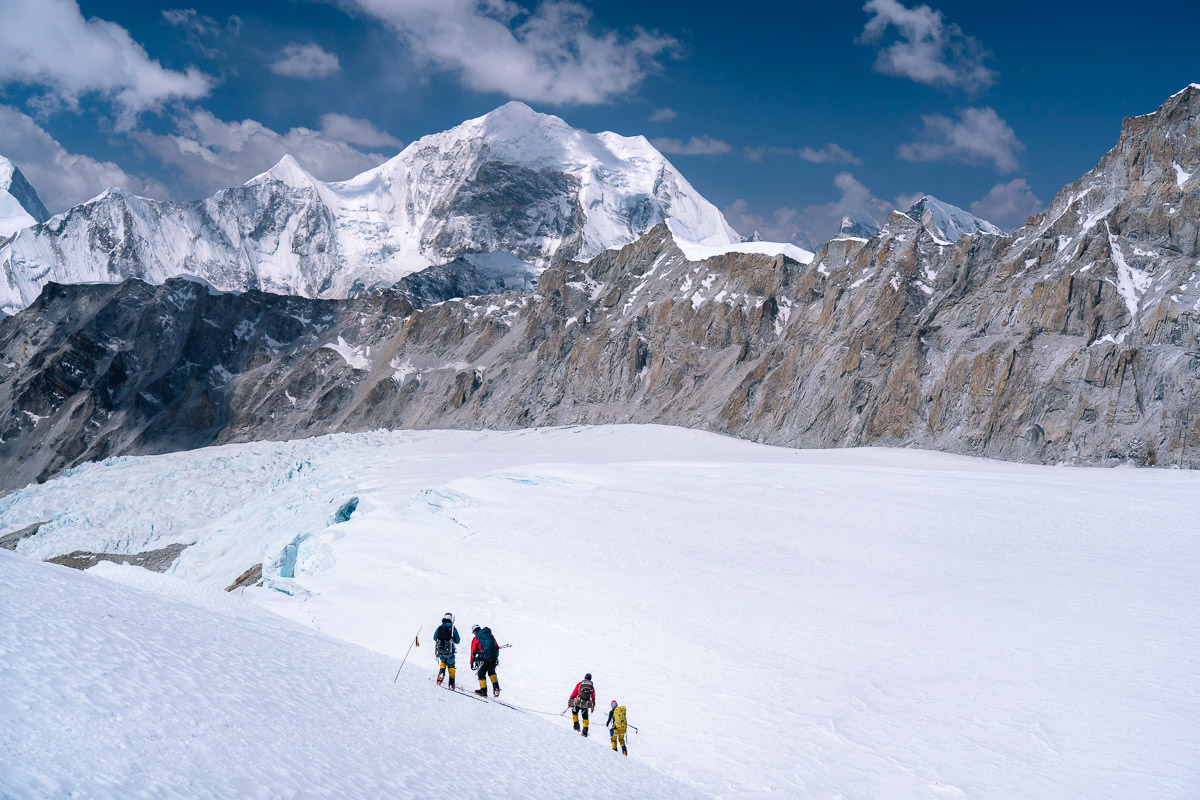
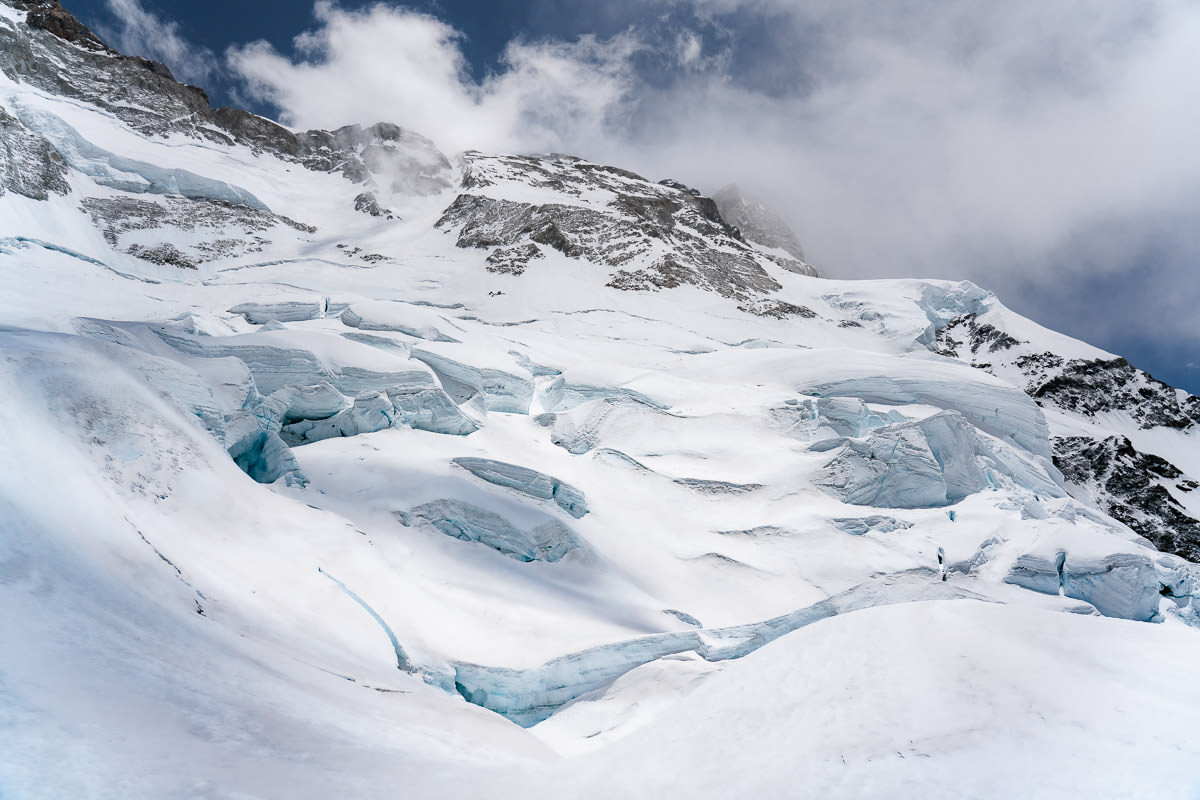

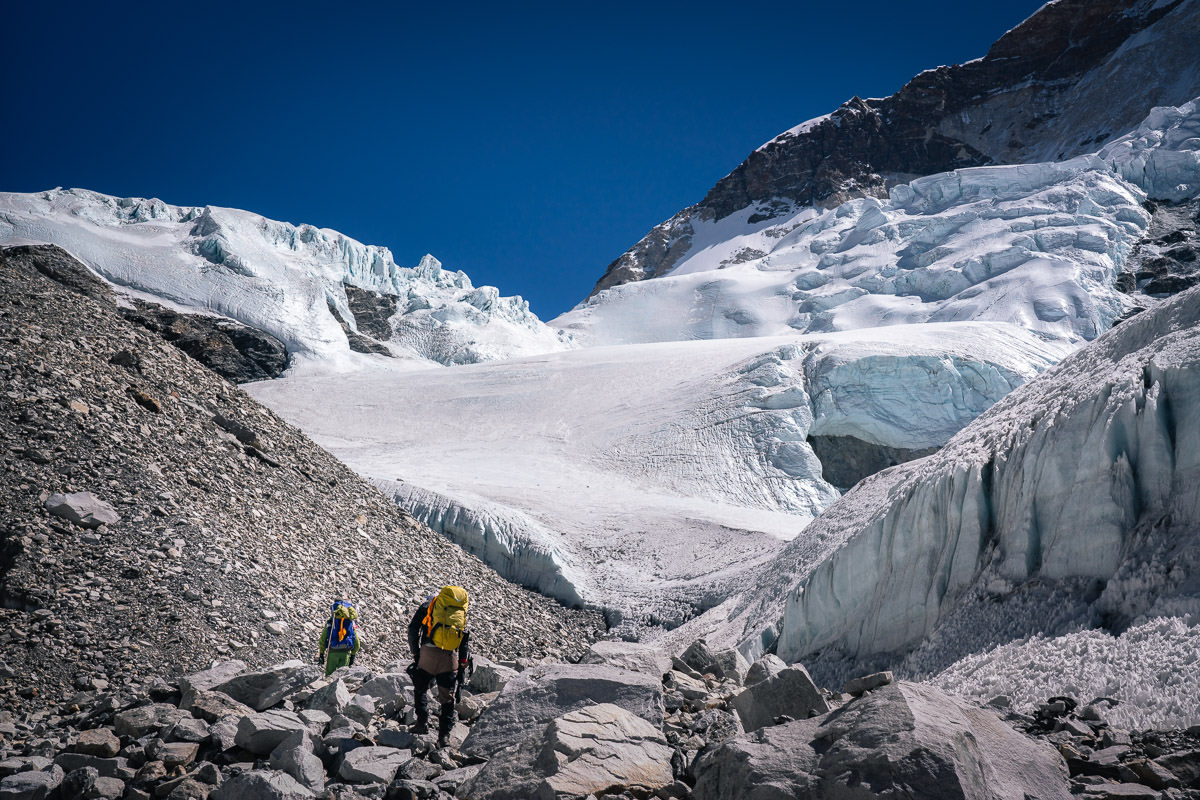
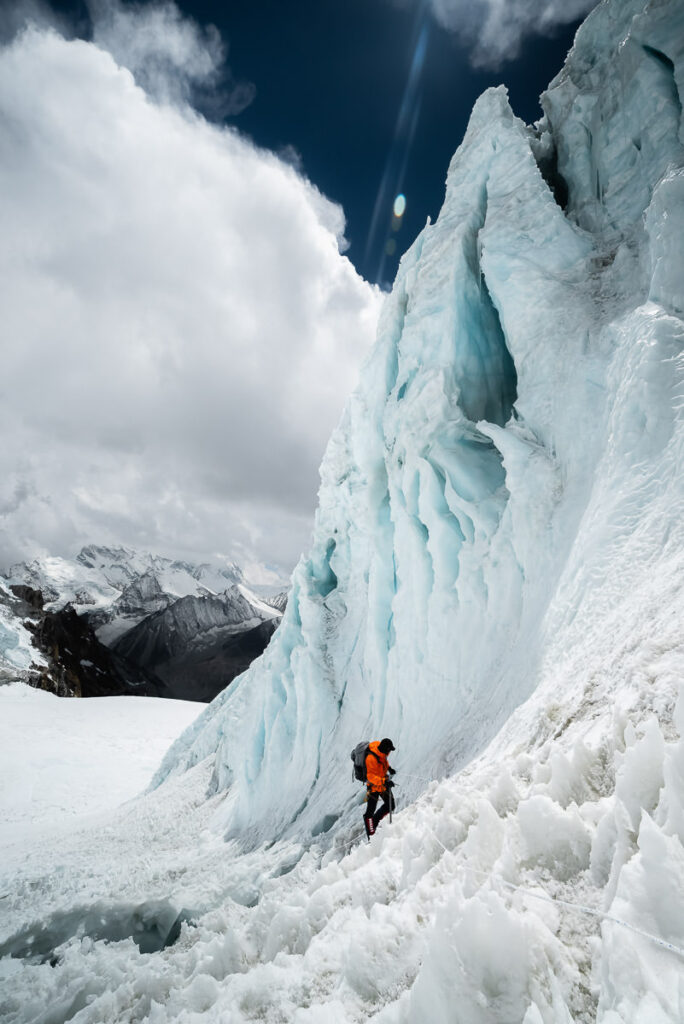
CAMP 2 TO CAMP 3
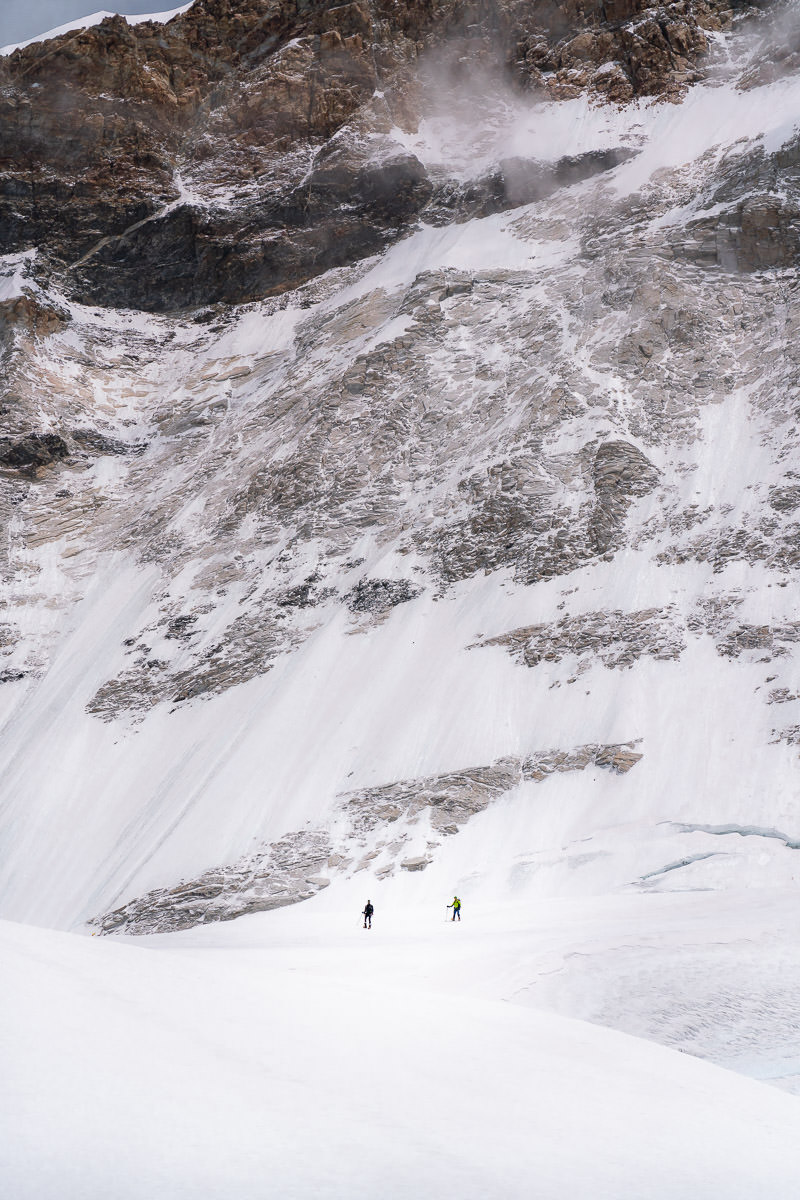
Aside from the summit push, this is the toughest part of the climb. It’s also very likely that you will climb this section without oxygen even if you are attempting to climb with oxygen. This makes it even more challenging as you will ascend from 6,600m to 7,500m to reach Camp 3 in very thin air. Those decisions are up to you, but no oxygen at 7,500m climbing steep slopes is starting to get intense.
The journey begins out of Camp 2 with a relentlessly steep slope up towards the rocky incline. Fixed ropes will lead you to the start of the rock and ice section. Once there, the terrain becomes quite challenging with a mixture of hard ice, rocks, and snow.
The route twists and turns and you could say this section requires some technical know-how. From maneuvering through the rocky terrain to selecting the correct ropes, it is physically and mentally draining to ascend through this part of the route.
Several times on the route from Camp 2 to Camp 3 you will reach a plateau, only to be thrown back into the same steep, rocky incline. For quick climbers, you can expect a 6-7 hour journey and for slower climbers, it will take closer to 9-10 hours.
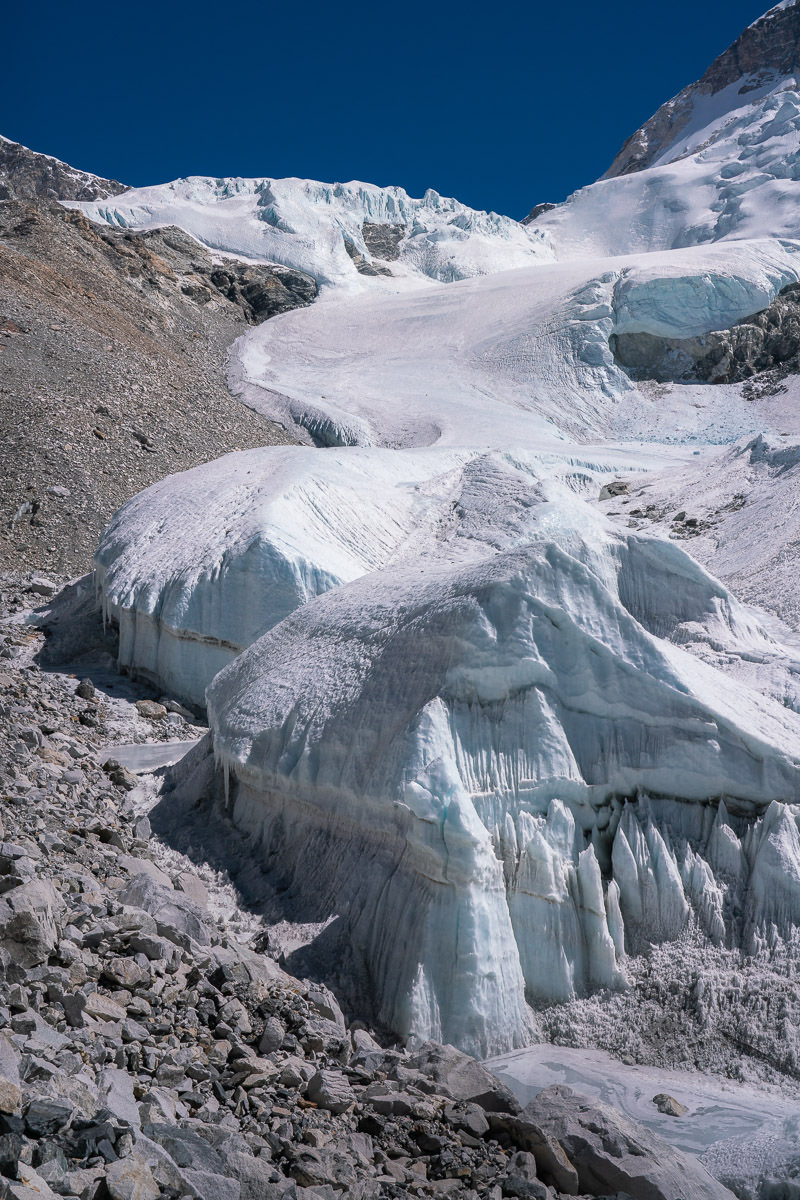
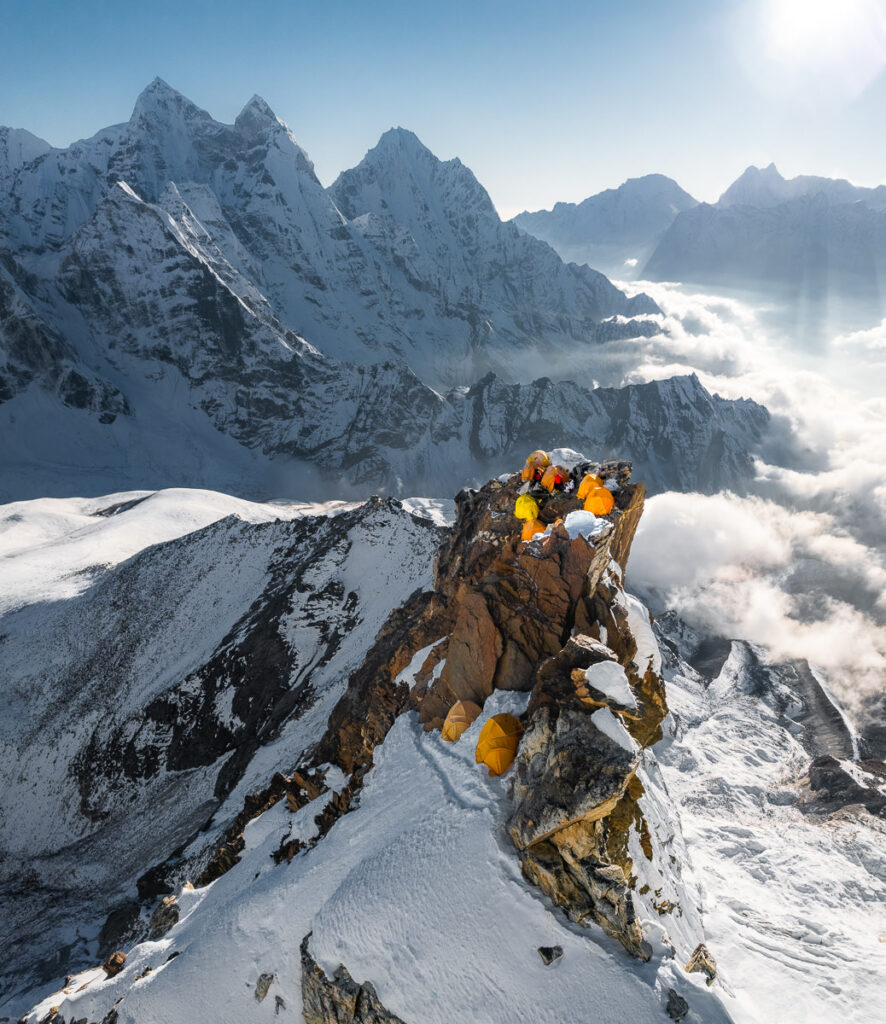
Camp 3 sits on the Makalu La, which is the ridge you often look up to from an advanced base camp. Once you reach the ridge, the campsite is just a few minutes away in a small clearing.
CAMP 3 TO SUMMIT (SUMMIT PUSH)
There are many ways to do the summit push of Makalu and it all depends on the weather, your ability, and conditions. We decided to sleep for two hours once we reached Camp 3 and then set off at 8 pm on our summit push. It seems that very few people use Camp 4 as it is only a simple, one-hour traverse from Camp 3.
The journey from Camp 3 to the summit will take fast experienced climbers anywhere from 6-8 hours. For slower and more inexperienced climbers you could expect closer to 9-10 hours but of course, these are just estimates. On the day I summited it was just myself and my Sherpa and one other group of two, who were quite experienced climbers. It took me nine hours to reach the summit while they made it up there an hour earlier.
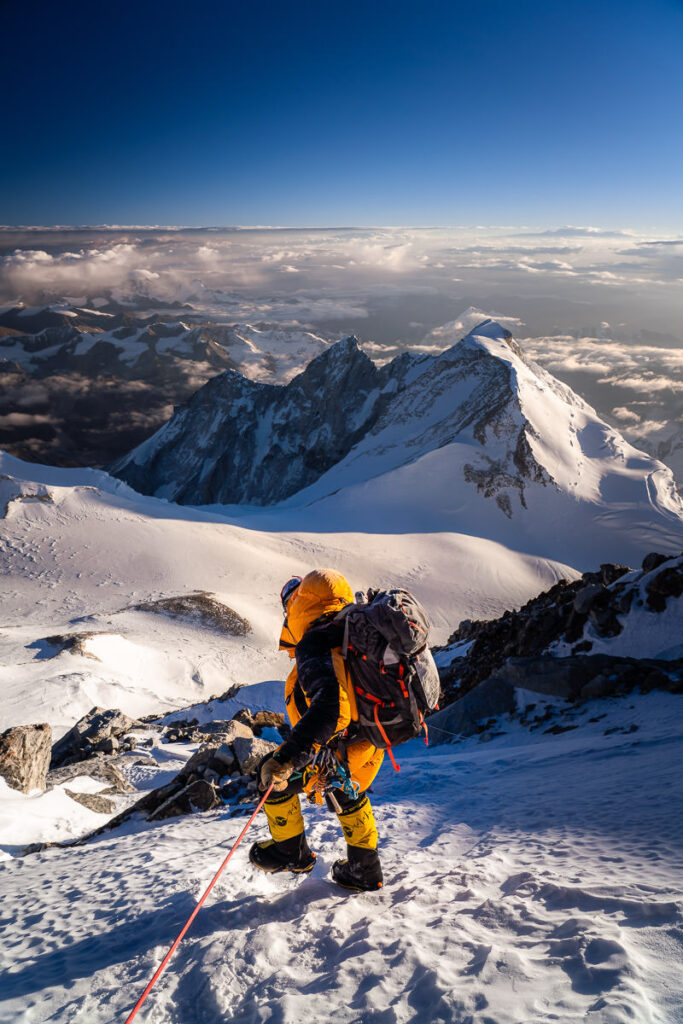
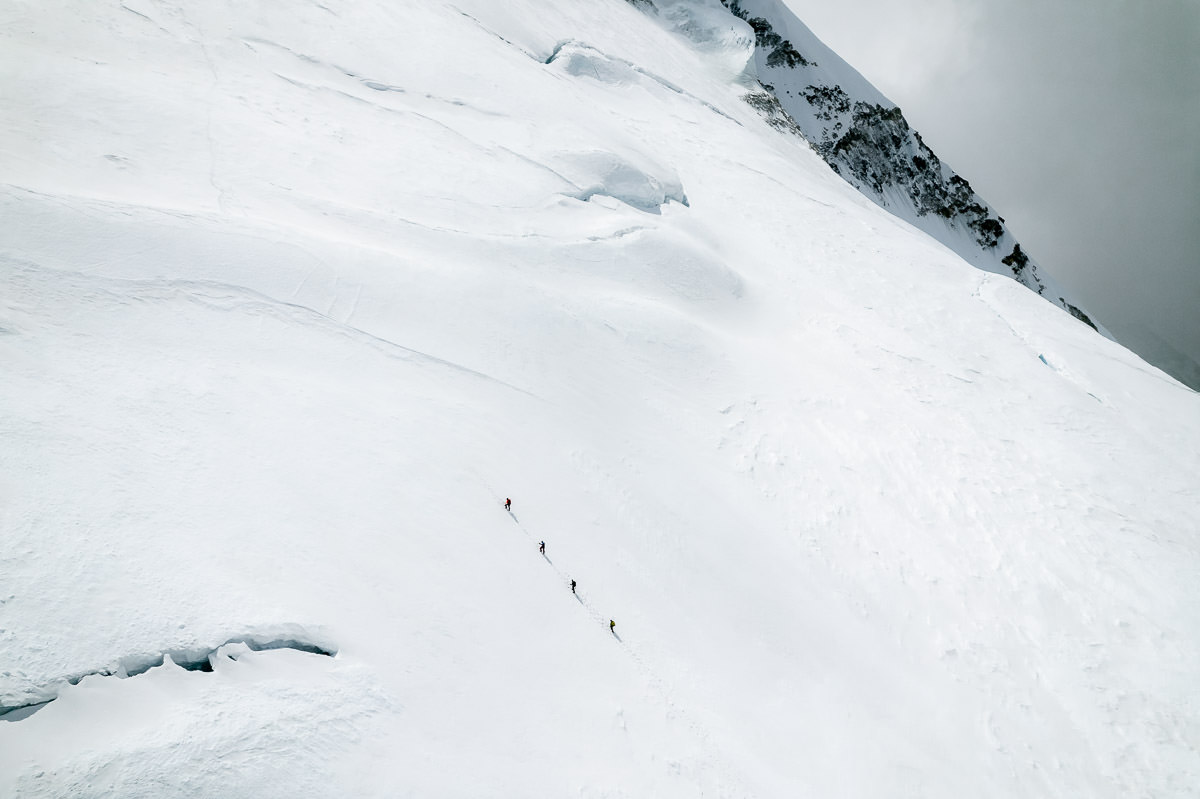
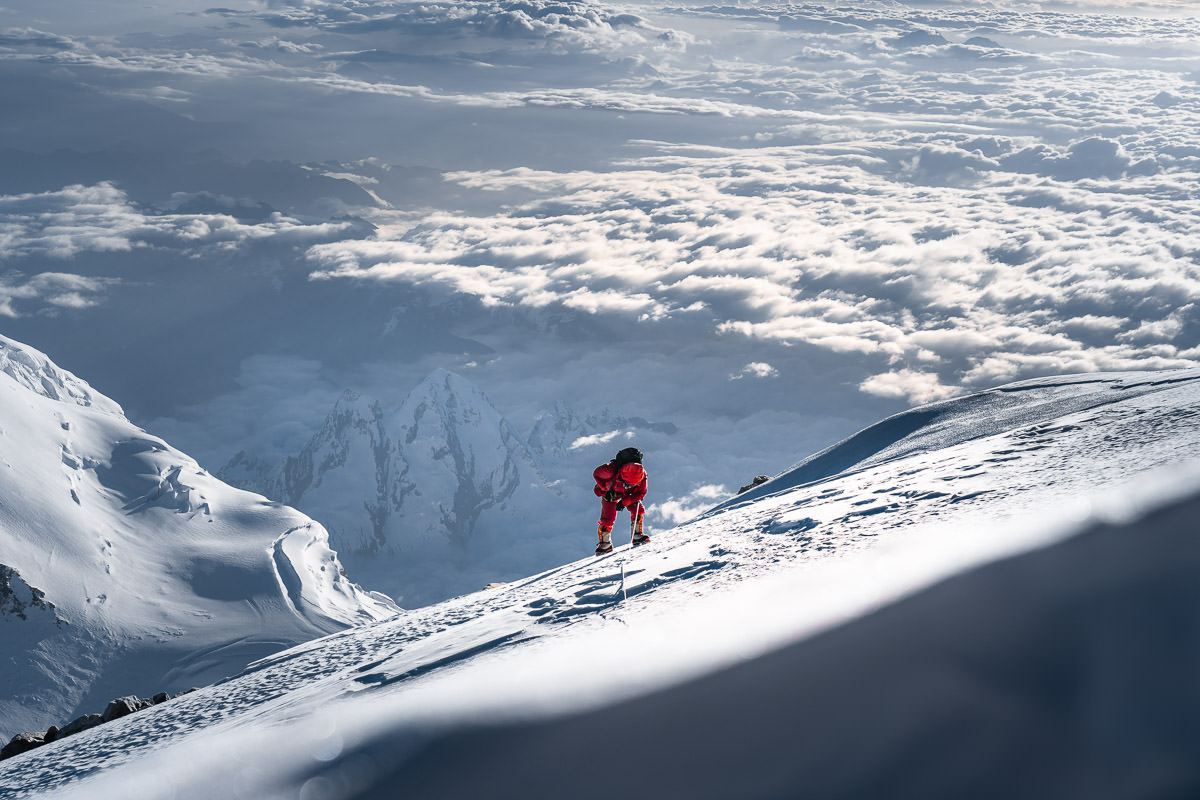
The route begins with the relatively flat traverse to Camp 4. Once we passed Camp 4, we navigate a blue ice section before the steep climbing begins. The incline on this day never seems to end and there were few plateaus or flat areas to rest. It was very steep all morning.
The route weaves in and out of the ridges with no rock or technical work until the final French Couloir. There were minimal crevasse fields and we had fixed ropes throughout the route to navigate any ominous areas. Basically, until the sun began to rise at the French Couloir, it was a slow slog up the steep, snowy slopes.
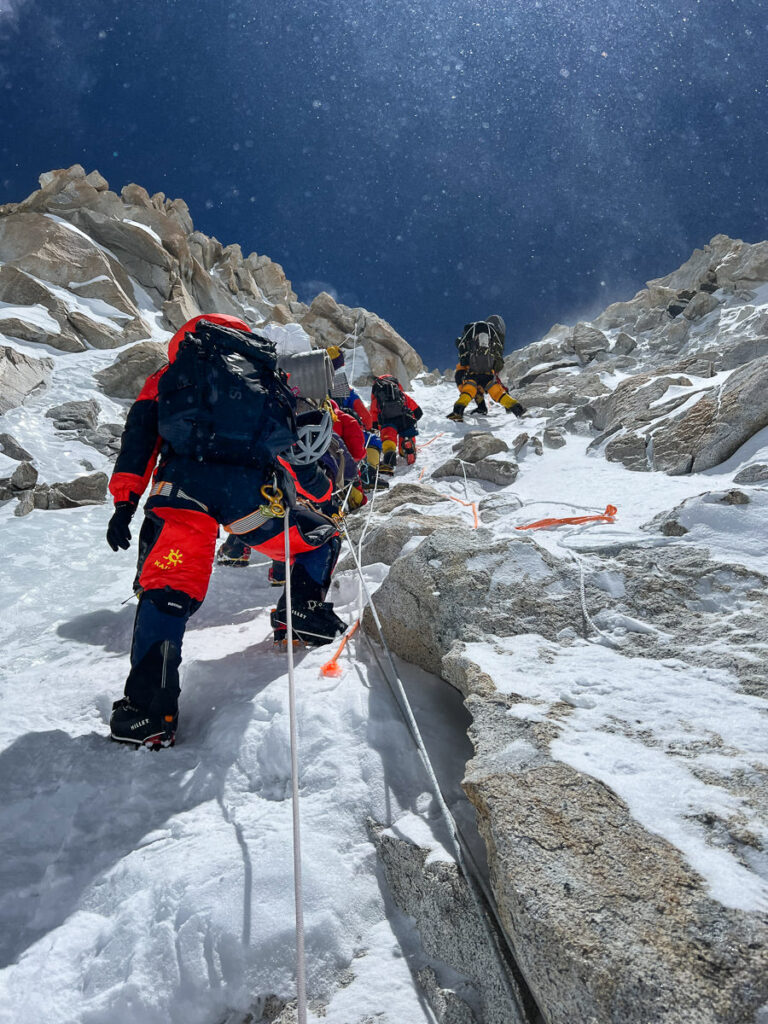
At the French Couloir, you need to switch on and direct your focus to the technical terrain. It’s a short climbing section with ten or more pitches on the ropes. The interesting part here is that you are tired and trying to focus on technical movements all while at 8,300 meters. This is a challenging part of the route but not vertical at any point and handholds are plentiful.
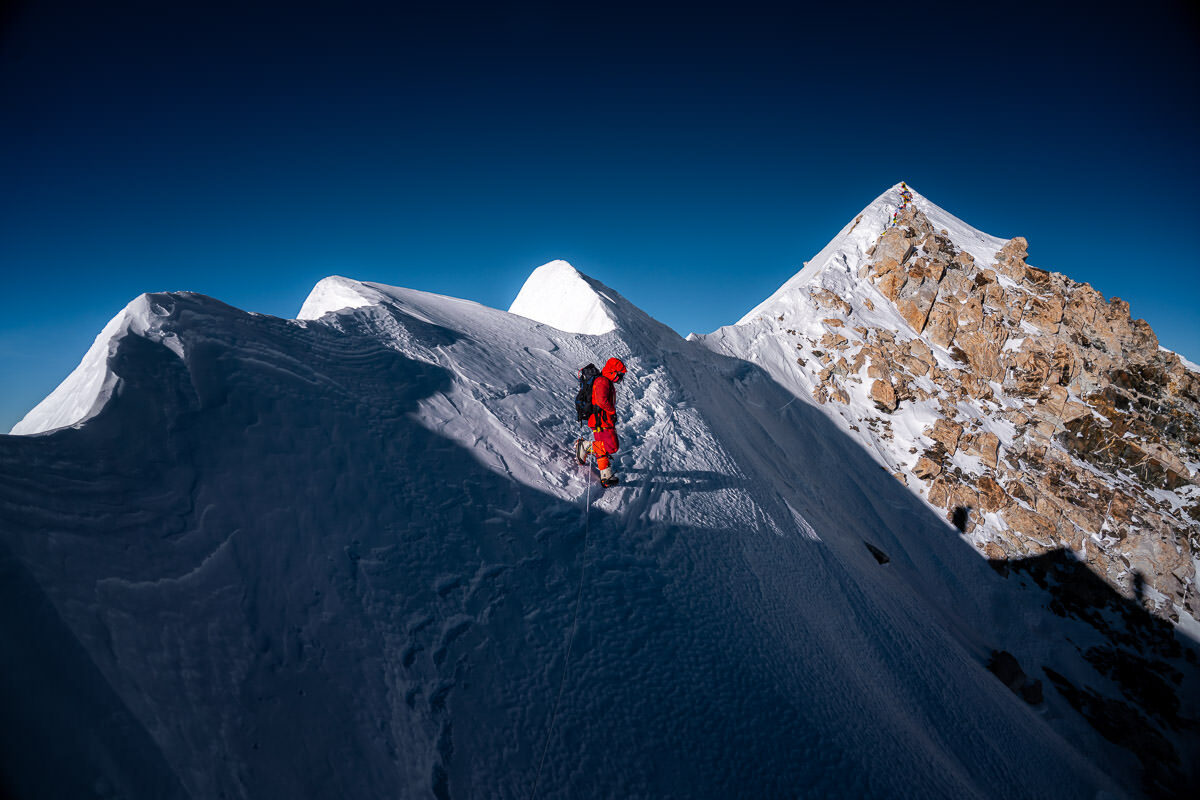
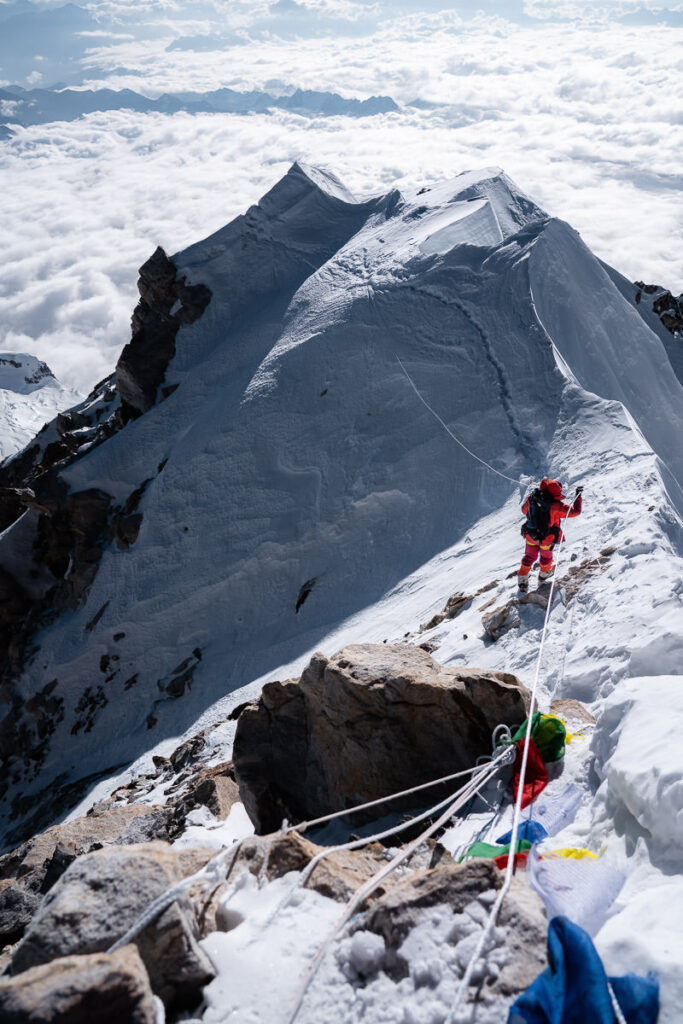
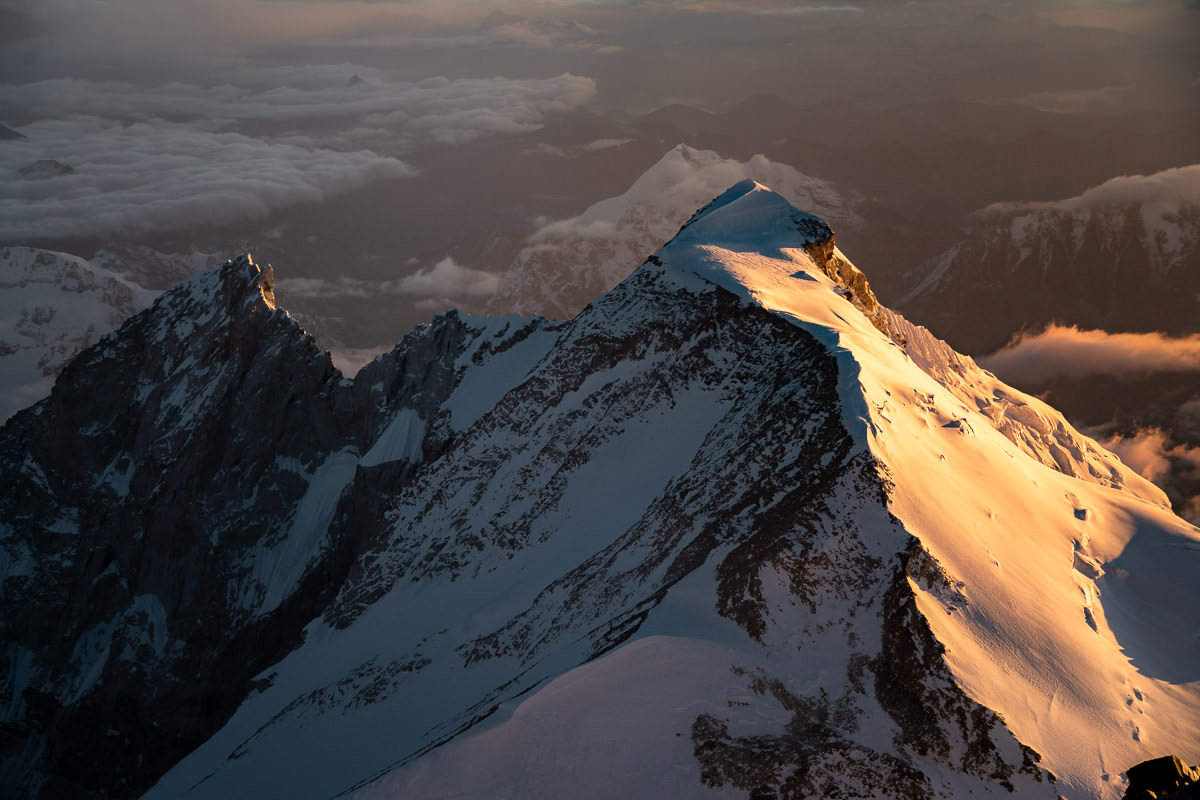
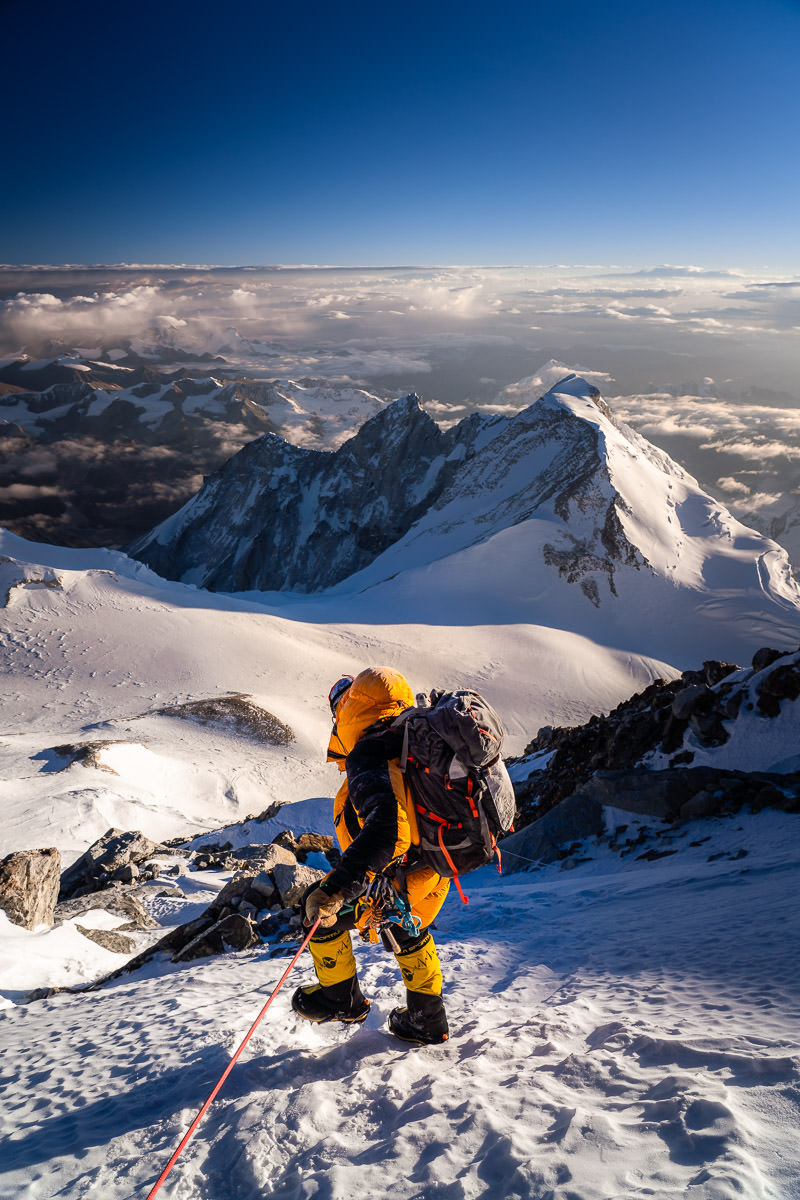
Once passing the French Couloir, the view opens up and you have reached the summit ridge. Everest and Lhotse appear and you have panoramic views. Once reaching this point it seems that you have ‘made it’.
However, when you look to the right, you may think you are looking at the final summit but it is the false summit. The true summit is hidden on the other side. Once you reach the summit ridge, you still have about 15-20 minutes of traversing to reach the actual summit.
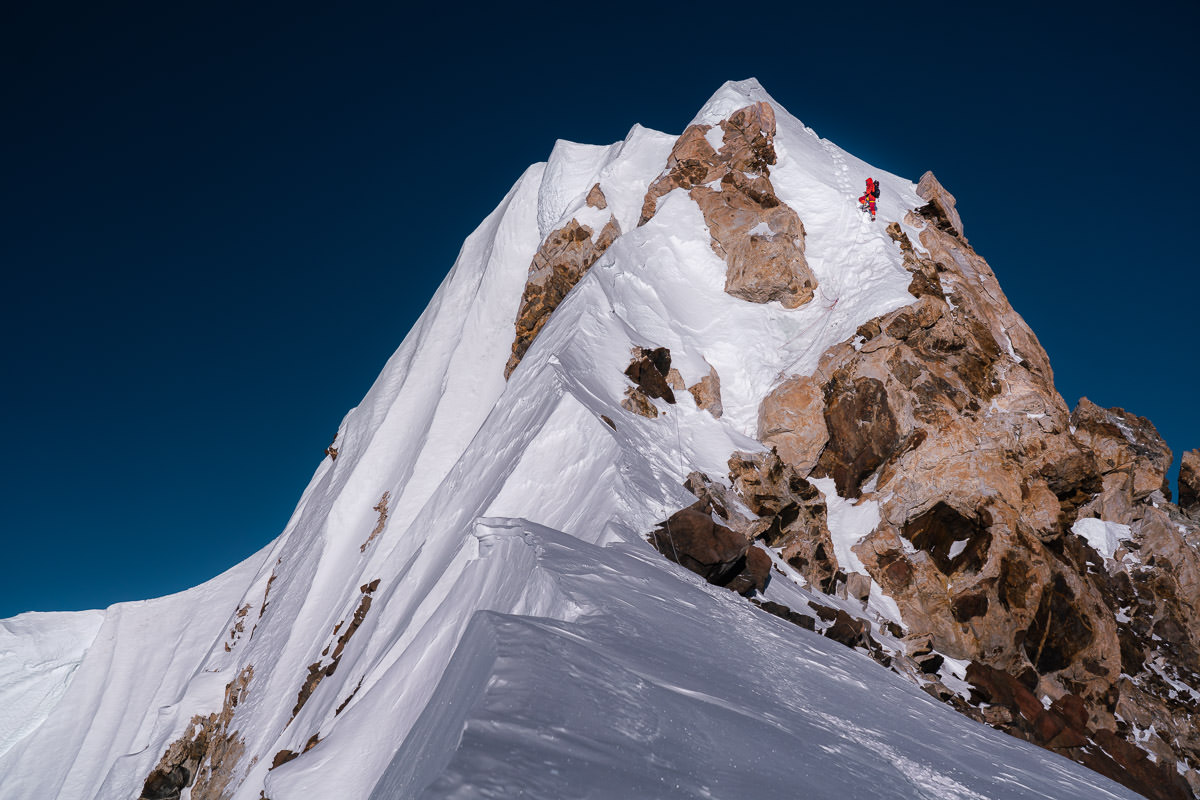
The traverse along the summit ridge is at times very narrow. Quite literally it is a single step cut into the cliffside. With a rope for safety to clip in, it may feel safe but this is still a big drop. Many stories of people only reaching the false summit due to no fixed ropes had circulated before our climb.
Thankfully for our team, the Sherpa rope fixing team had fixed all the way to the false summit and then continued to the true summit, making it a much easier task for our team.

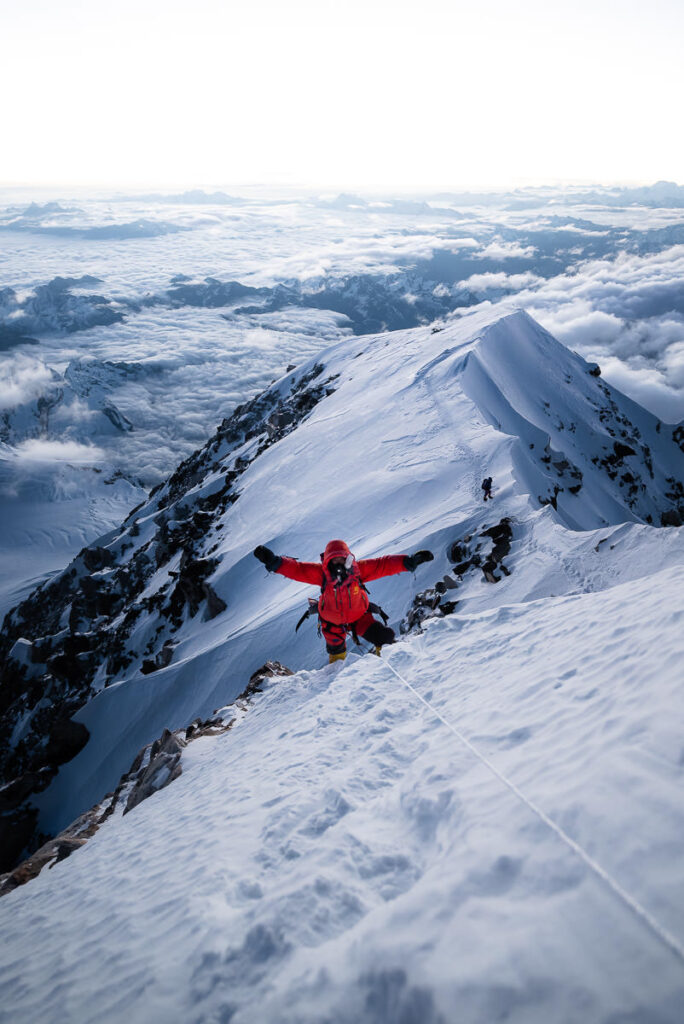

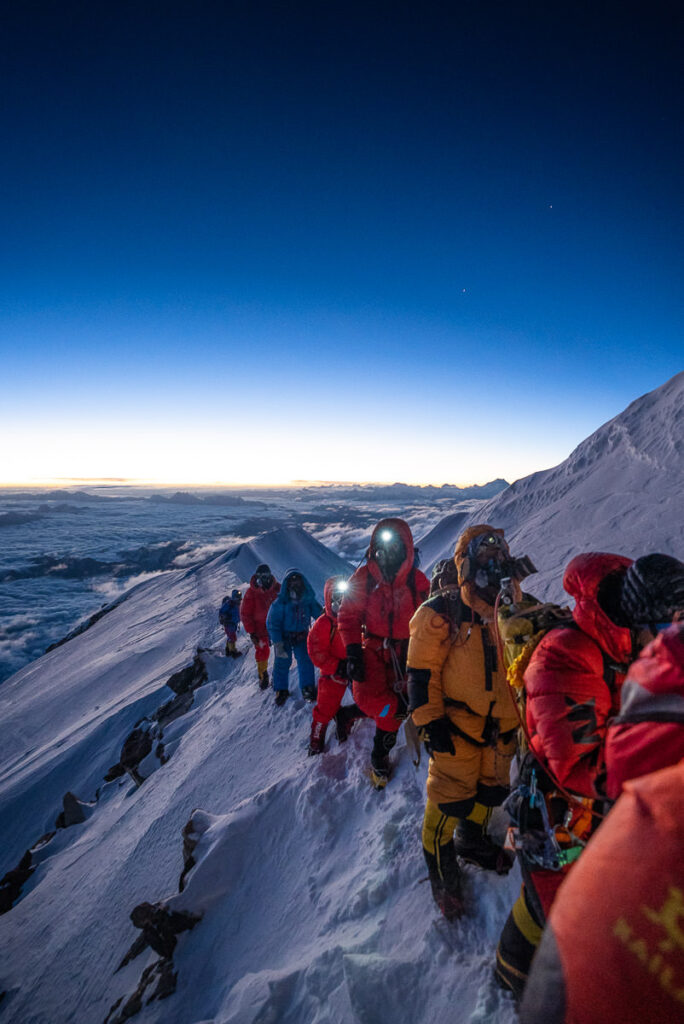
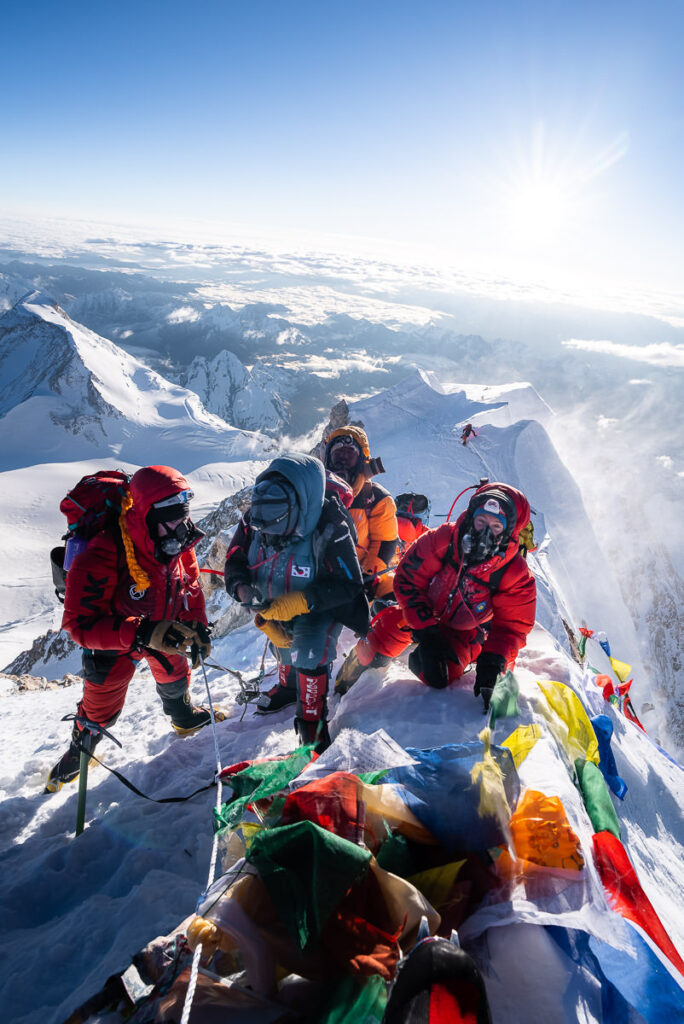
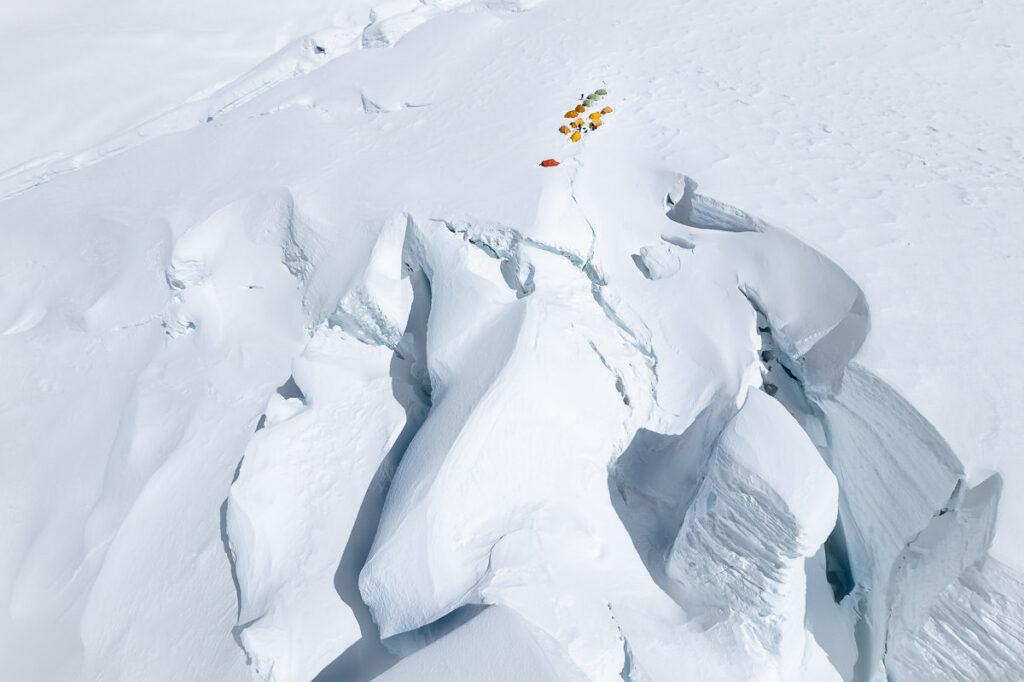
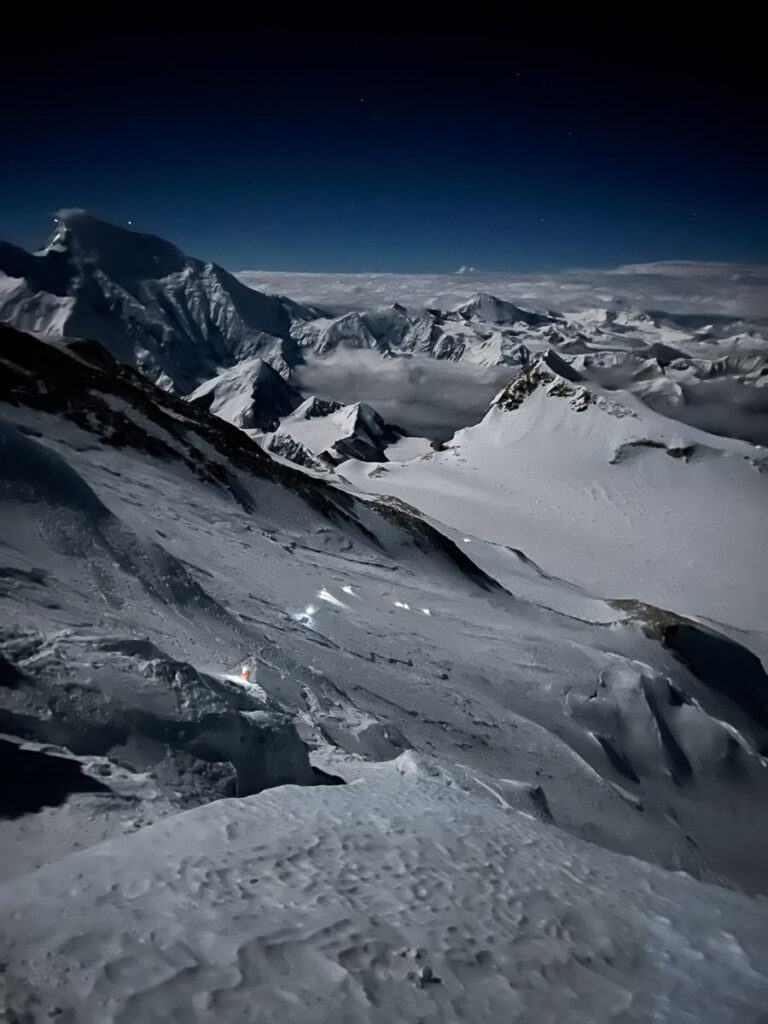
About an hour after sunrise, Tashi Sherpa and I arrived at the true summit to enjoy the experience with no crowd, in complete peace. The photo above is from Pema’s summit push with her group, which is why there is a crowd. We had seen the lights on Everest earlier and knew there were climbers on top of the world looking back at us also. We had made it to the top of the fifth highest peak in the world.

The journey down is quite long and we actually descended all the way back to base camp by 3 pm that day. It was a 51-hr summit push from base camp to base camp and one of the biggest mental and physical challenges of my life. Incredibly tough but incredibly rewarding.
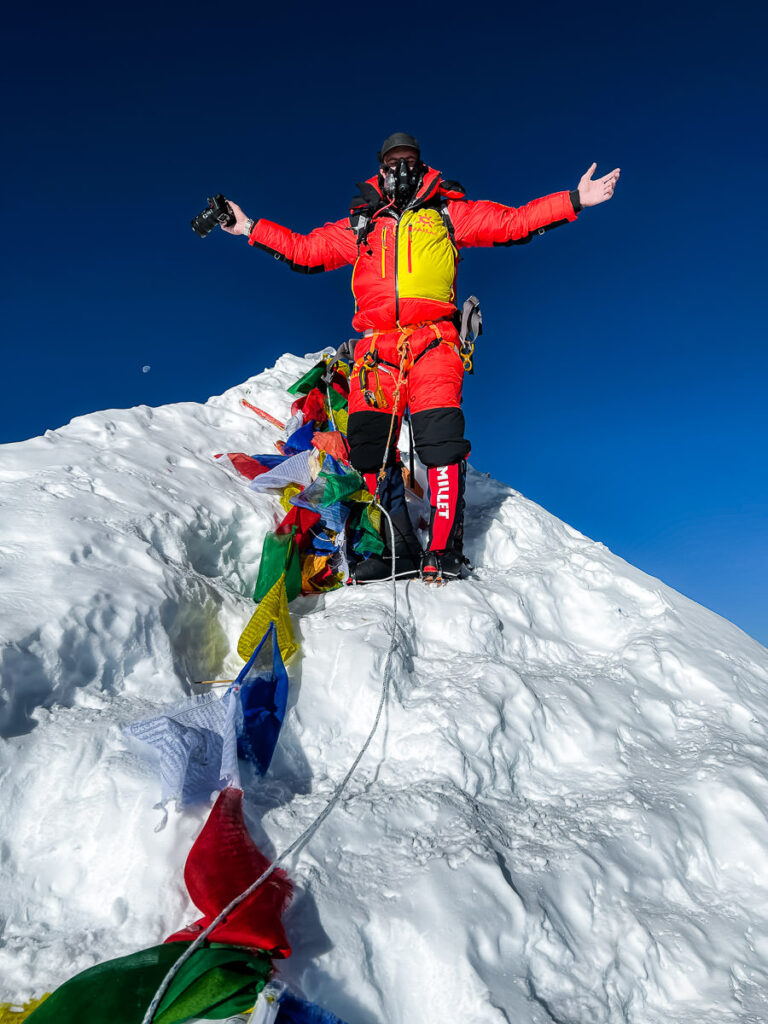
MY EXPERIENCE TO REACH THE SUMMIT OF MAKALU
The summit of Makalu (8,463m) 🙏🏽 I almost didn’t make it but here I am. I had to leave the expedition in a heli-evacuation after 20 days, having slept at Camp 2 (6,600m) with the left side of my face numb. I couldn’t sleep and had constant headaches. I had no choice but to leave the expedition.
I landed back in Kathmandu and had MRI, X-ray, and multiple other scans. It turns out the pressure from altitude had exposed necrosis/infection in my gum from a previous motorbike crash 10 years ago.
I had surgery immediately and was taking a handful of drugs day and night. I was doubtful, but not ready to give up on my Makalu Expedition.
3 days later I flew back to Lukla (2,860m) and waited 9 long days for a helicopter back to the advanced base camp (5,700m). With just one solid weather window left, I didn’t have a good chance for another rotation before the summit push.
So on the 18th, I set off with Tashi Sherpa to Camp 2. On the 19th we climbed nine hours to reach Camp 3 (7500m). After a one-hour sleep at Camp 3, we set off on our summit push at 8 pm. Up the relentlessly steep slopes of Makalu, I battled mentally but knew I would never turn back.
Tired but defiant, we reached the empty summit just after sunrise to take in all of the incredible Himalayas. Behind me (end of the video) you can see Everest and Lhotse from our perch of 8,463m on top of the mighty Makalu Mountain 🏔
HAVE YOU READ MY OTHER NEPAL BLOGS?
I’ve been lucky enough to have many awesome adventures in Nepal, which you can check out below where I’ve listed some of my favorite blog poss from Nepal.
- The Most Iconic route: Everest Base Camp Trek
- The Most Scenic Route: Annapurna Circuit Trek
- My Favorite Trek in Nepal: Manaslu Circuit Trek
- An Easy Nepal Trek: Langtang Valley Trek
- A great beginner peak: Island Peak Climb (6,165m)
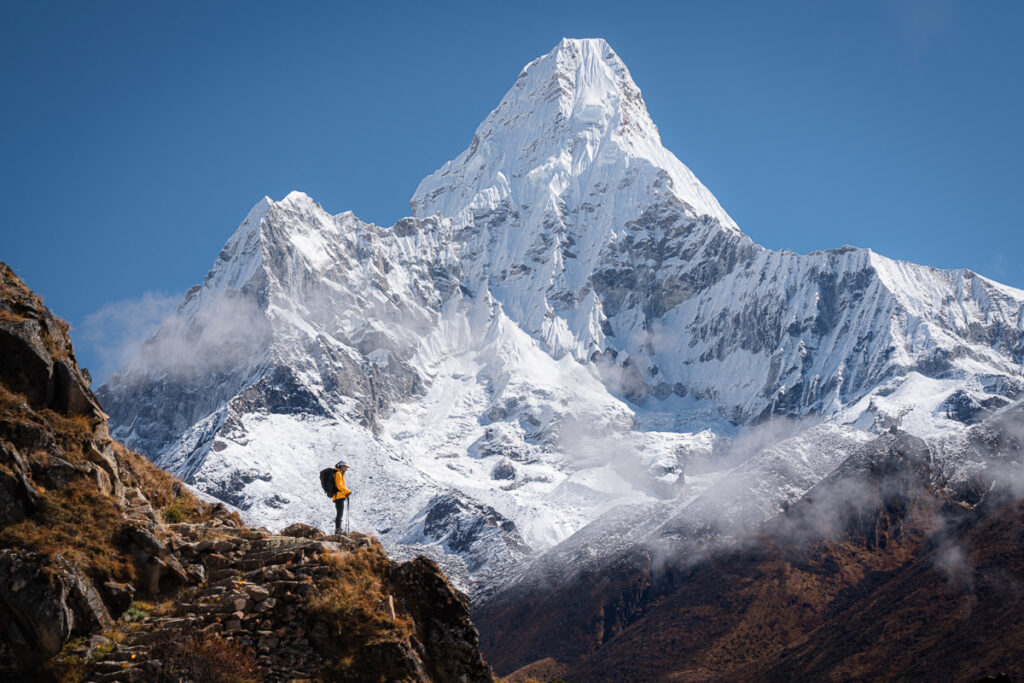
- My Favorite Climb in Nepal: Climbing Ama Dablam (6,812m)
- My first 8000er: Climbing Manaslu (8,163m)
- My toughest climb in Nepal: Climbing Makalu (8,463m)
- Where to stay: 16 Best Places to Stay in Kathmandu
hays
Tuesday 14th of April 2026
@Escape Tsunami for Brainrots I really enjoyed this mountain climbing!
Sisca
Monday 20th of October 2025
Hi Jackson,
Thank you for your informative blog. I plan to climb Makalu in 2026 with seven summit treks.
May I know how many sherpa and free oxygen bottles are included in your package? And did you have to pay for the evacuation?
Thank you for time. Looking forward to your reply.
Regards, Sisca
Dan
Wednesday 19th of March 2025
Great story and pics. Well Done on your climb and summit!!!