
From the small, mountain village of Kyanjin Gompa in Langtang, there are two awesome day-hikes. The smaller and most popular hike is Kyanjin Ri while the longer and more strenuous option is Tserko Ri. The Kyanjin Ri viewpoint towers over Kyanjin Gompa and has more than 750m of vertical gain in just a few kilometers. While short in distance, don’t underestimate this hike as it is incredibly steep and reaches heights of 4,700 meters.
HIKING TO THE KYANJIN RI VIEWPOINT
In this blog post, I will share with you all of the details about hiking to the Kyanjin Ri Viewpoint. I’ll detail how to get there, what to expect, the gear you will need, the best time of year for the hike, other adventures nearby, and where to stay in Kyanjin Gompa. I’ll also share my experience on the hike and all of my photos from the adventure. I’ve already created a lengthy guide for the Langtang Valley Trek and nearby viewpoints such as Tserko Ri or the climb of Yala Peak.
BEST NEPAL TREKKING COMPANY
Interested in trekking in Nepal or doing the Everest Base Camp Trek?
I recommend booking your trek with Himalayan Masters, which is the company I use for all of my treks in Nepal. Use my code JACKSON5 when you book to receive a 5% DISCOUNT.
KYANJIN RI HIKE DETAILS
- Hike Distance: The total distance of the hike is four kilometers up and down on this out and back route.
- Hike Duration: The hike will take you about 3-4 hours depending on your speed. The incline is quite steep and you are at altitude so expect to go pretty slow. You’ll also want a long time at the two viewpoints to take it all in.
- Hike Incline: Total incline for the hike was 750 meters at a very steep rate given that it all comes within the two-kilometer ascent.
- Hike Difficulty: This is the easiest day hike from Kyanjin Gompa and most trekkers can handle it. However, it takes you to an altitude of 4,700m and has a very, very steep grade. These two factors make it quite difficult but at a slow pace, most trekkers can manage their way up the ridge. There are no real dangers as the track is quite wide and there are very few points with drop-offs on both sides. Compared to Tserko Ri, this is the easy option while staying in Kyanjin Gompa.
- Highest Altitude: 4700m is the highest point at Upper Kyanjin Ri.

TRY THE 3 BEST TREKS IN NEPAL
Manaslu Circuit: My personal favorite 2-week trek through Tibetan villages and stunning scenery with less crowds.
Annapurna Circuit: The most beautiful & scenic 2-week trek in Nepal although can be crowded at times.
Everest Base Camp Trek: The most iconic 2-week route reaching the famous (EBC) Everest Base Camp at 5,300m.
THINGS TO KNOW ABOUT KYANJIN GOMPA
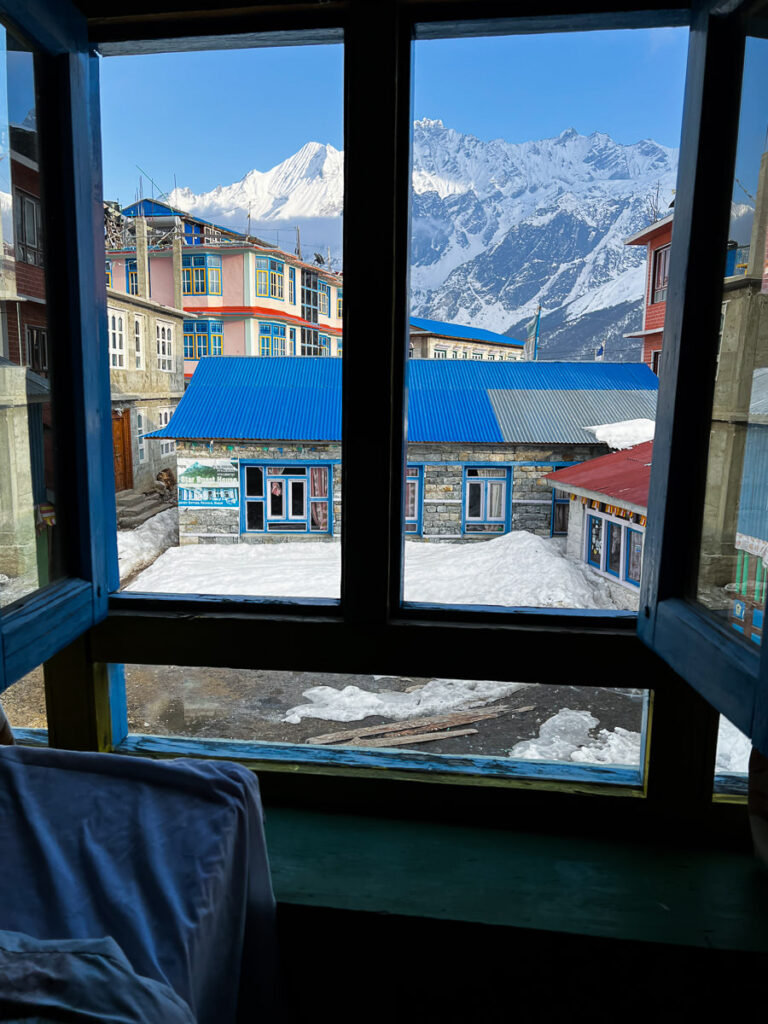
Kyanjin Gompa is the end of the Langtang Valley Trek for most people. It’s a beautiful town with an incredible backdrop of snow peaks in all directions. The biggest mistake you can make on the Langtang Valley Trek is to stay one night and turn around and hike back down.
The absolute highlight of this trek is to base in Kyanjin Gompa for a few nights and spend one day hiking up Kyanjin Ri and one day hiking up Tserko Ri. We also spent another day climbing Yala Peak but that requires certain gear and experience.
I ended up staying six nights in Kyanjin Gompa. My itinerary was the following:
- Kyanjin Ri
- Rest Day
- Tserko Ri
- Rest day
- Yala Peak Base Camp
- Yala Peak/Sleep at Kyanjin Gompa
Understandably that is a lot of time but we were also trying to acclimatize for Yala Peak so we added in the rest days. The trek to Kyanjin Gompa was good but not amazing. I really found that the time spent in Kyanjin Gompa was what made this trek is so great not the actual trek in itself. This is different from many other treks such as the Everest Base Camp Trek or the Annapurna Circuit where each day of trekking is the highlight rather than a specific destination or a specific town.
BOOKING A GUIDE FOR THE LANGTANG VALLEY TREK
The Langtang Valley Trek doesn’t require a guide but it’s great to have a guide managing the logistics such as directions, tea-houses, distances, medical issues, and the overall organization. I’d say 80% of trekkers go with a guide. I did the trek with Himalayan Masters which is one of the top trekking companies when it comes to the Langtang Valley Trek.
The trek costs around $800 USD with Himalayan Masters as of 2022 and includes all transfers, accommodation, meals, drinks, permits, and even the hotel stay before and after the trek at a high-quality hotel. I honestly had a great time on this trek and I can wholeheartedly recommend Himalayan Masters.
You can use my discount code ‘JACKSON5‘ for 5% off the total price of your trek with Himalayan Masters which is a pretty handy saving.
Email: info@himalayan-masters.com
WHERE TO STAY IN KYANJIN GOMPA
I stayed at Mountain View Hotel while in Kyanjin Gompa. It’s one of the smaller, older guest houses and I really enjoyed it here. Unlike many of the new multi-story hotels in the village, this hotel just had two floors and a cozy dining room.
Mipsang, the owner, is one of the kindest and most caring guys we’ve met in Nepal. Say hello to him for us if you end up staying there.
At Mountain View Hotel we had had water showers, internet connection from our sim card, great food, comfortable beds and blankets, and electrical outlets available in the room.
TOP 3 PLACES TO STAY IN KATHMANDU

- Ultimate Luxury: The Dwarika’s Hotel – Luxury, Spa-service, Pool
- Best Value: Aloft Kathmandu Thamel – Swimming Pool, Gym & Great Restuarant
- Budget Choice: Hotel Jampa is easily the top cheap hotel in Kathmandu
THE FULL VLOG FROM OUR LANGTANG VALLEY TREK

MY EXPERIENCE HIKING TO KYANJIN RI
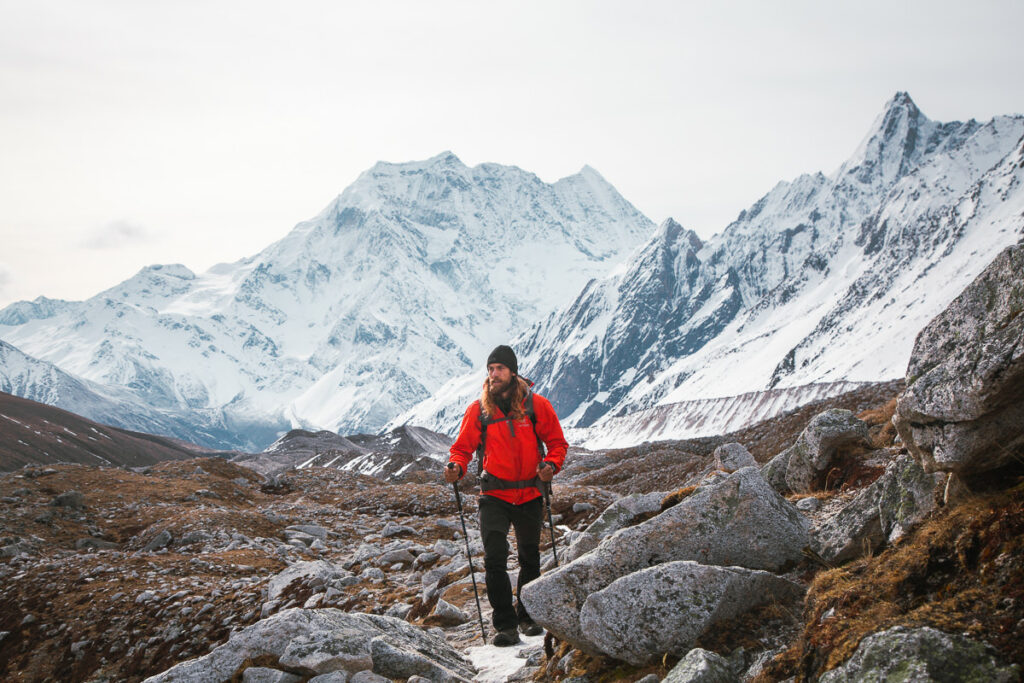
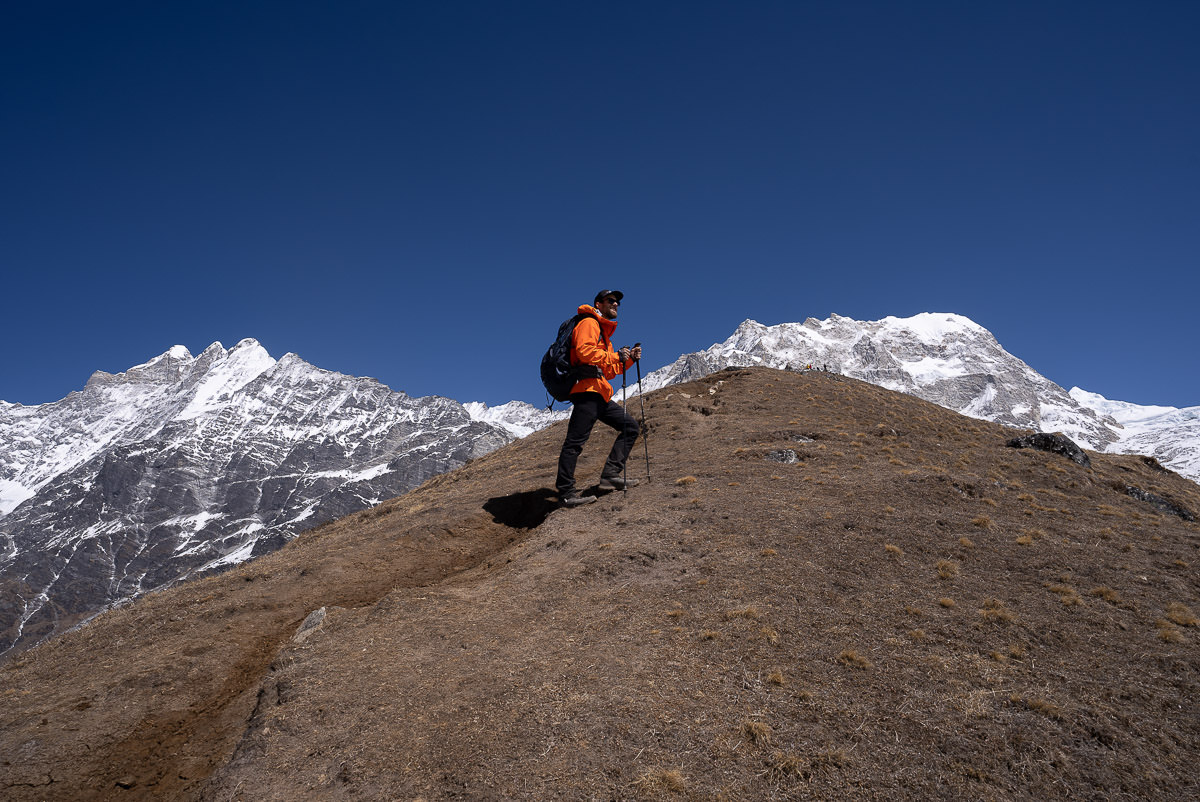
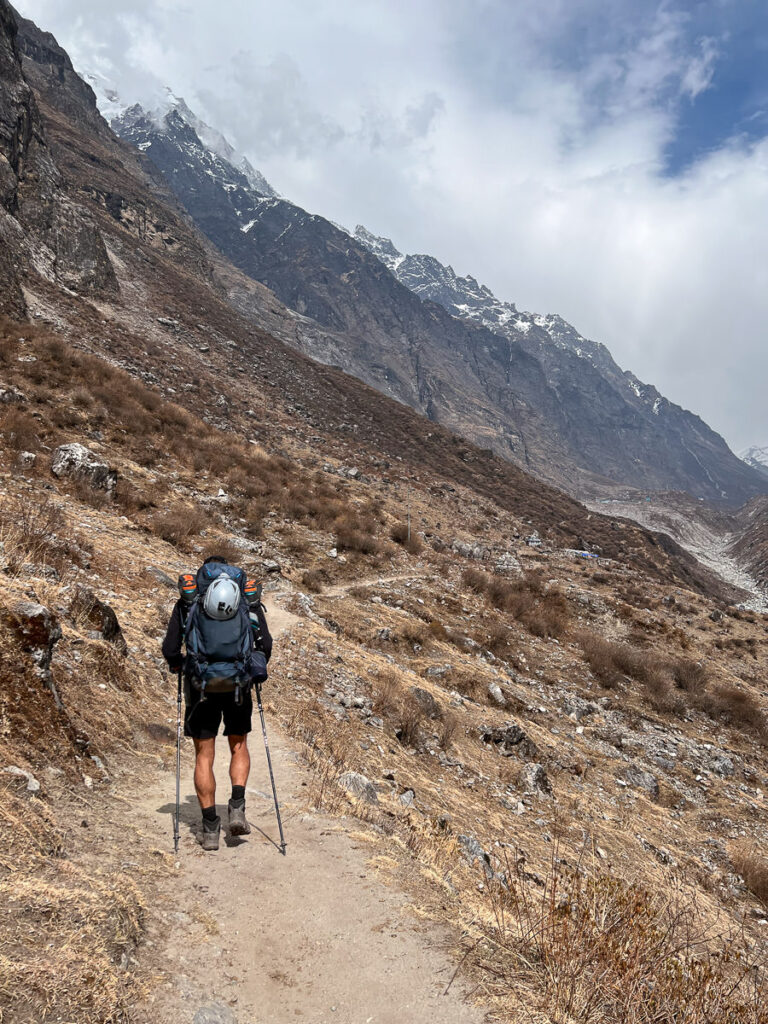
After trekking up to Kyanjin Gompa on the Langtang Valley Trek, we were excited to get up high to a viewpoint for a panoramic view of the region. The Kyanjin Gompa hike is short but not to be underestimated. Therefore, we had breakfast at our guesthouse before leaving but also took a packed lunch of Tibetan bread and omelet for a snack at the top.
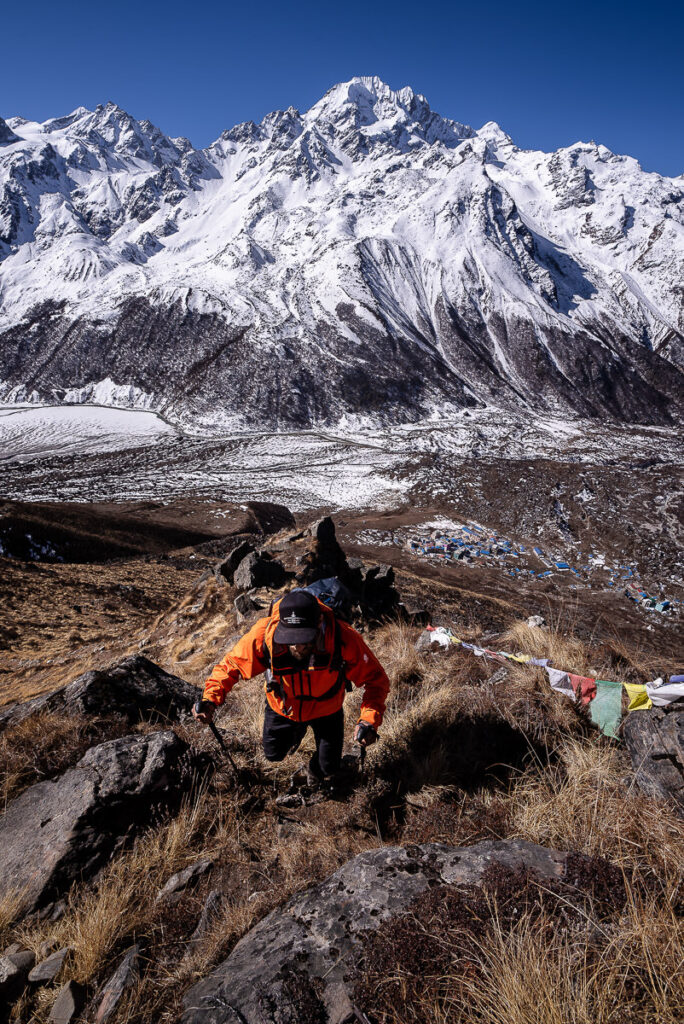
The route starts right from the town near the Panorama Guest House. It’s a pretty obvious trail but I had the Maps.me route downloaded as a backup in case we got lost. The trail starts pretty aggressively with a series of switchbacks up the very steep slopes of the hill. You will find yourself moving quite slowly due to the altitude and the incline as your body gets warmed up.
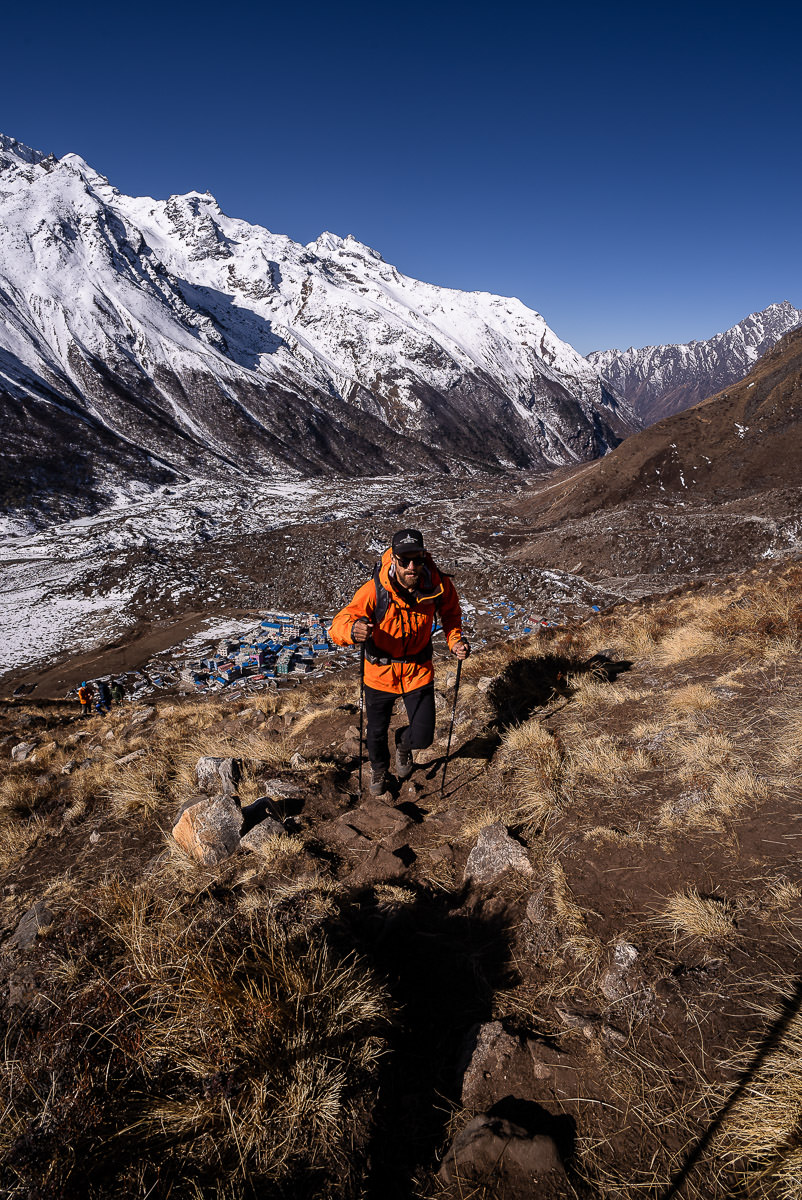
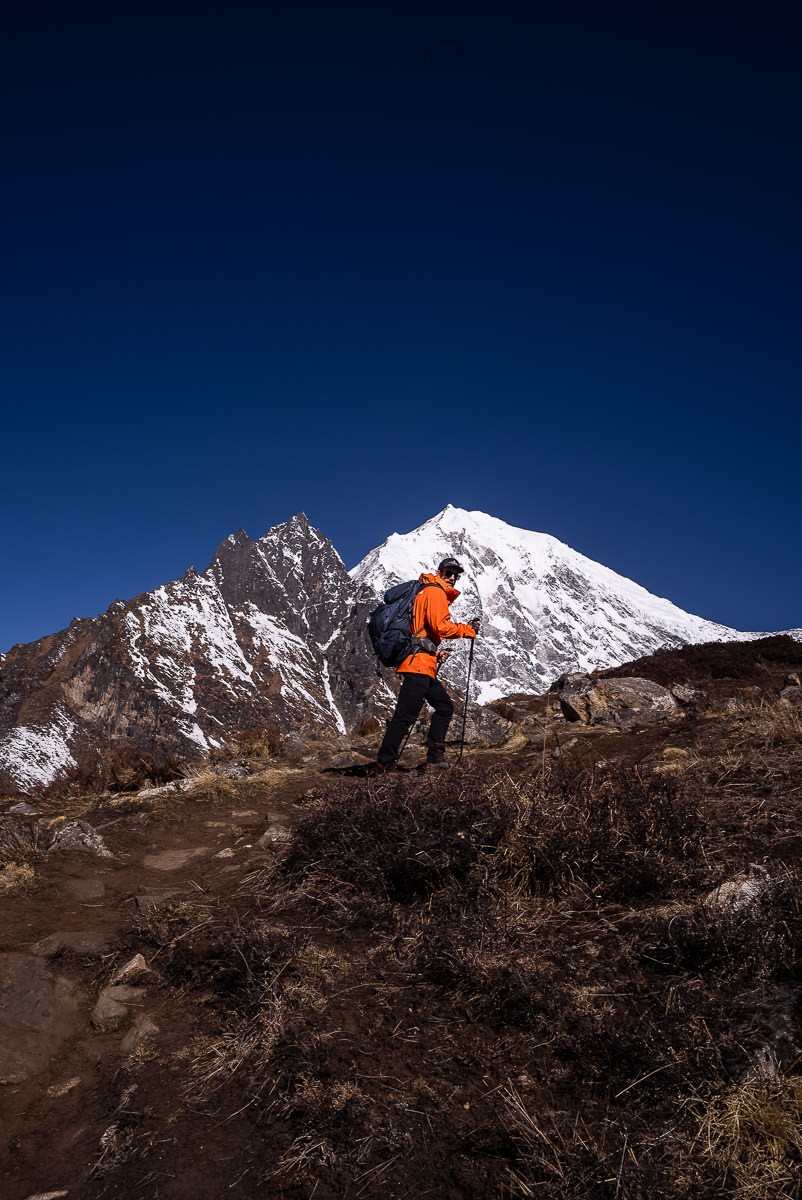
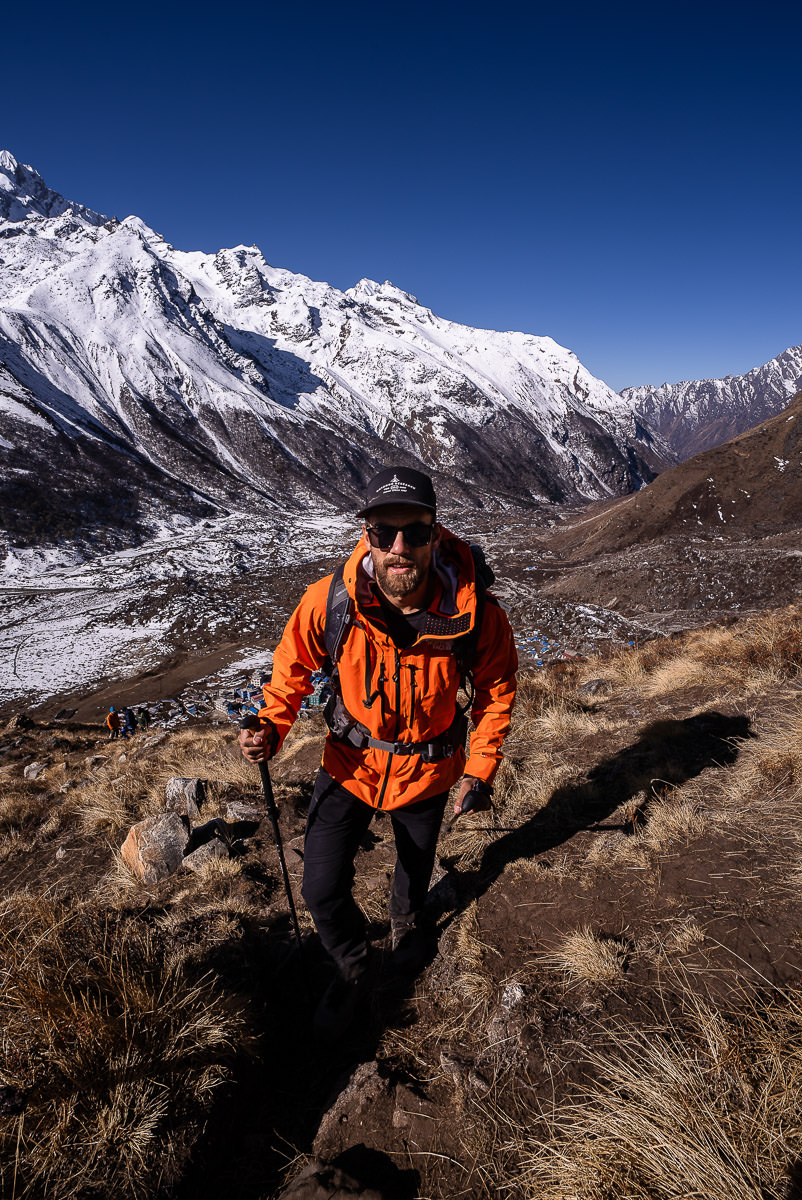
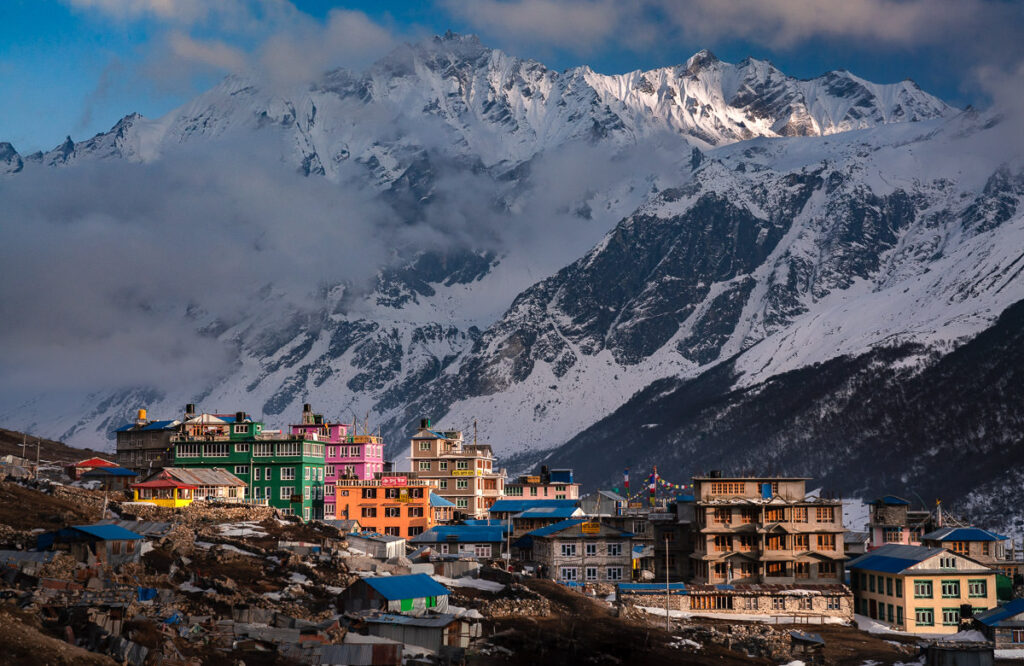
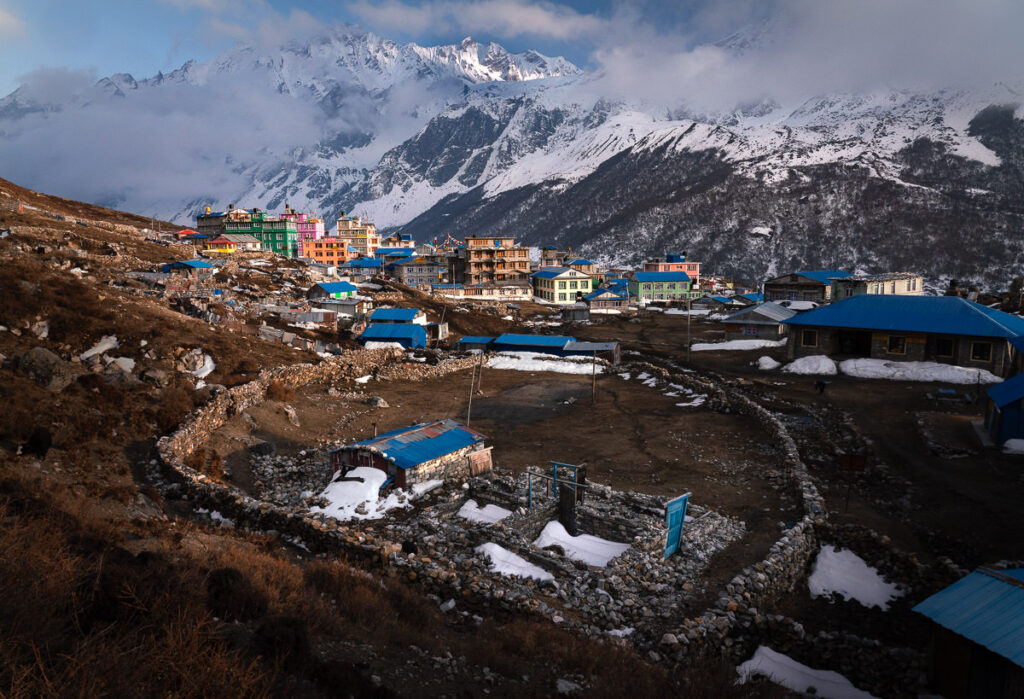
After just 20 minutes on the trail, you will have already risen above Kyanjin Gompa and can get a great idea of how the village sits hidden amidst the surrounding mountains.

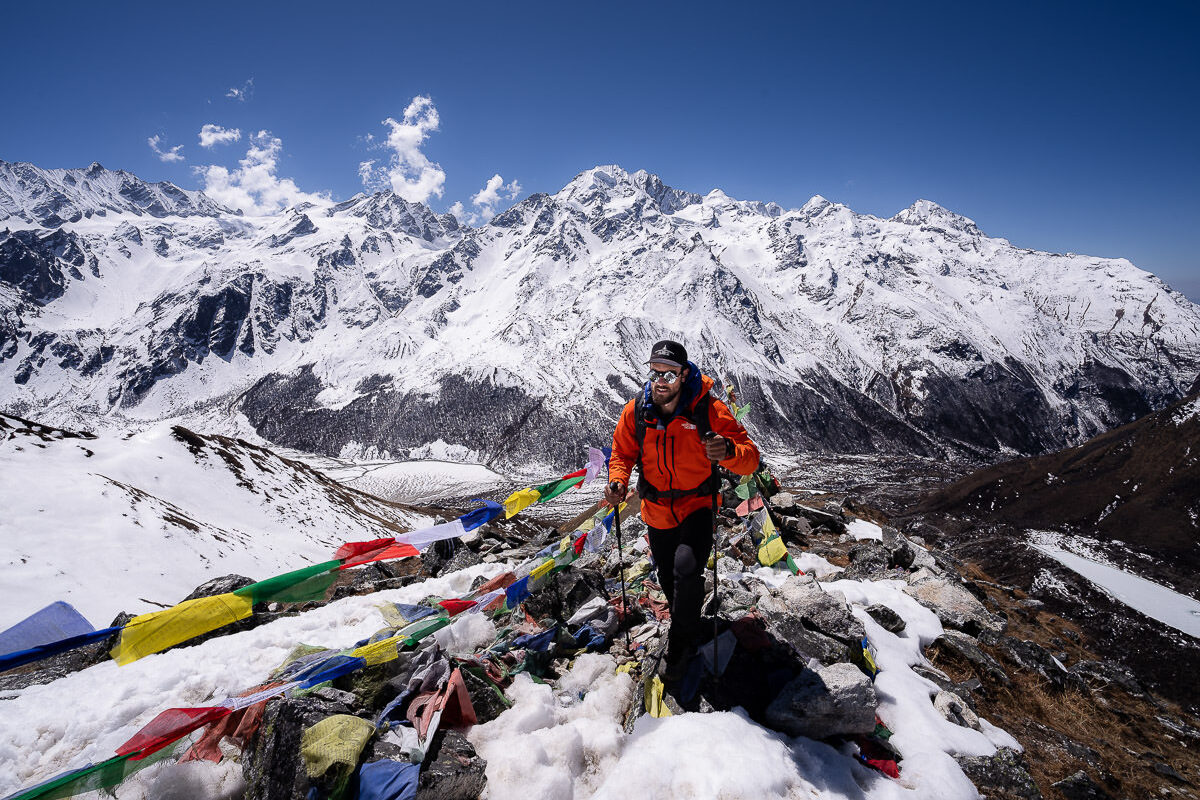
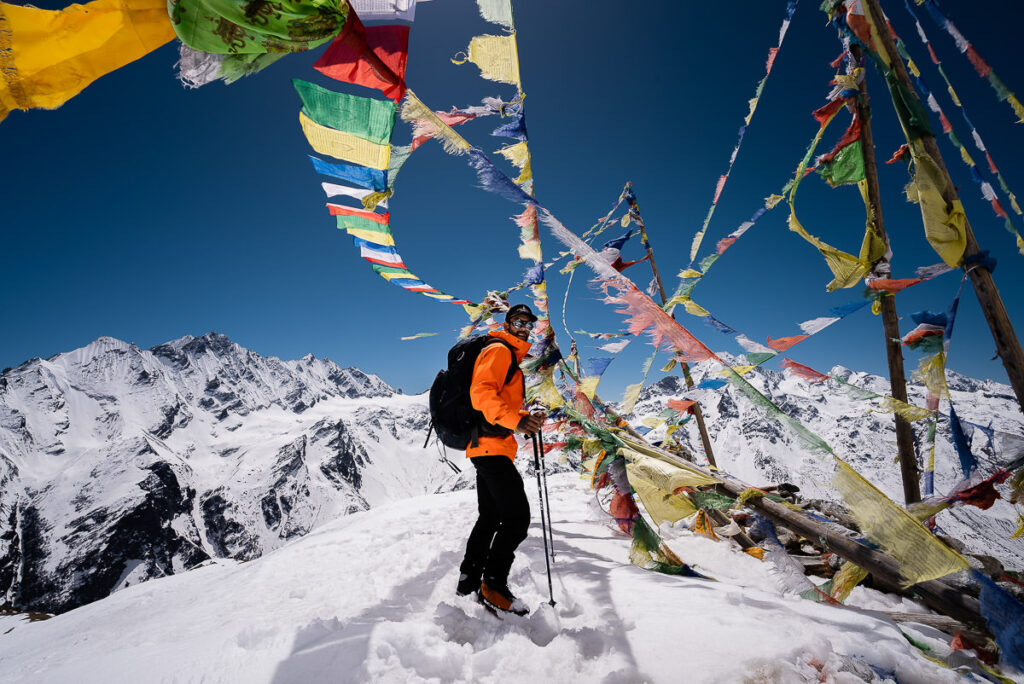
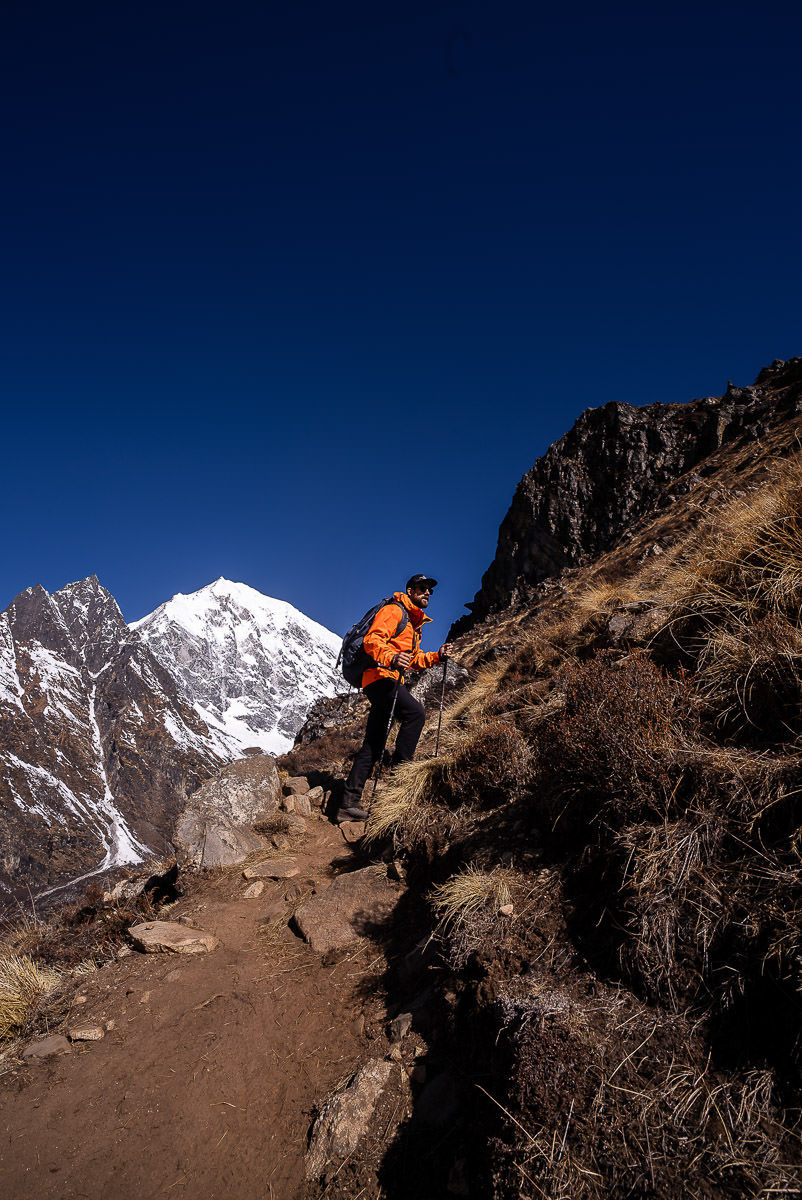
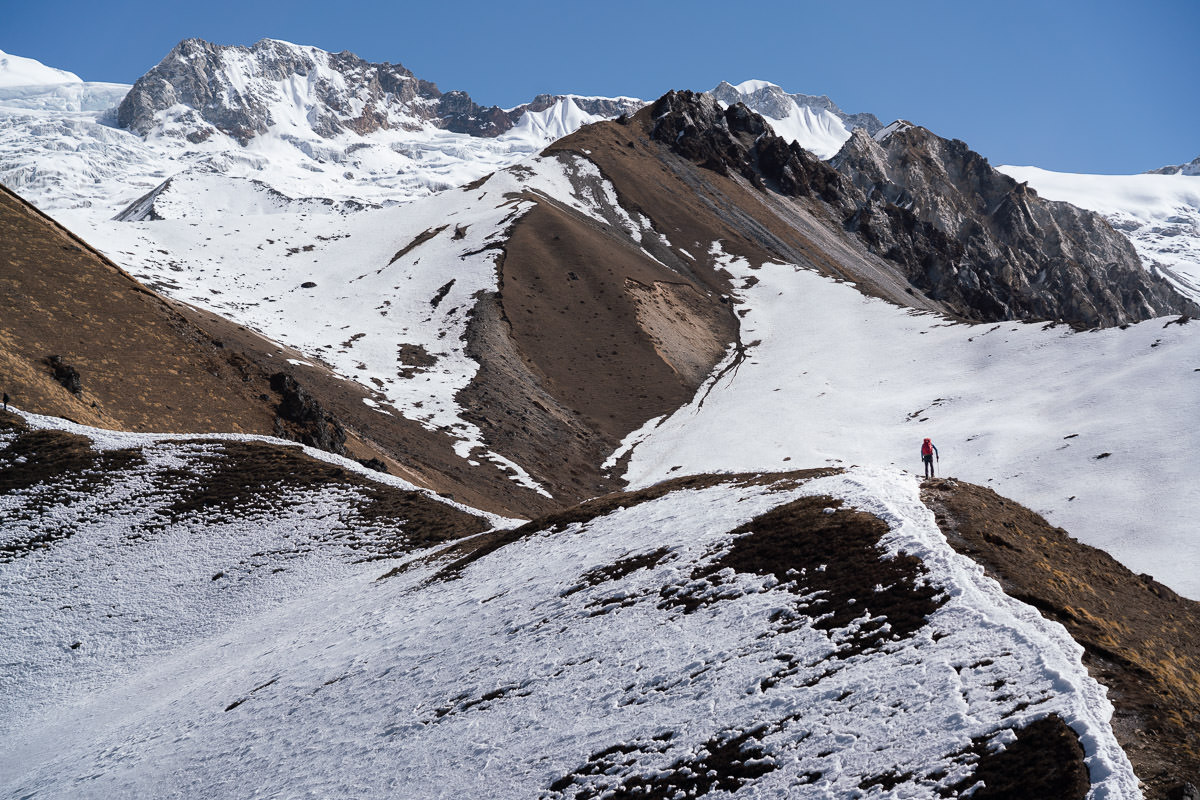
The first objective of the Kyanjin Ri hike is to reach Lower Kyanjin Ri. This is the jagged, rocky, outcrop you can see from the town.
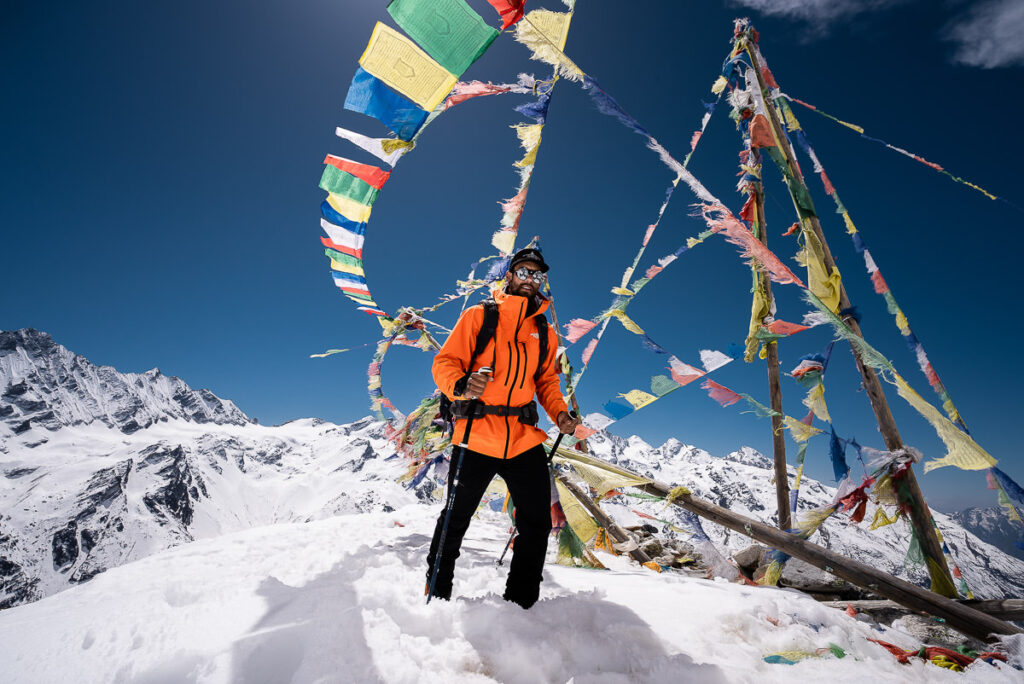
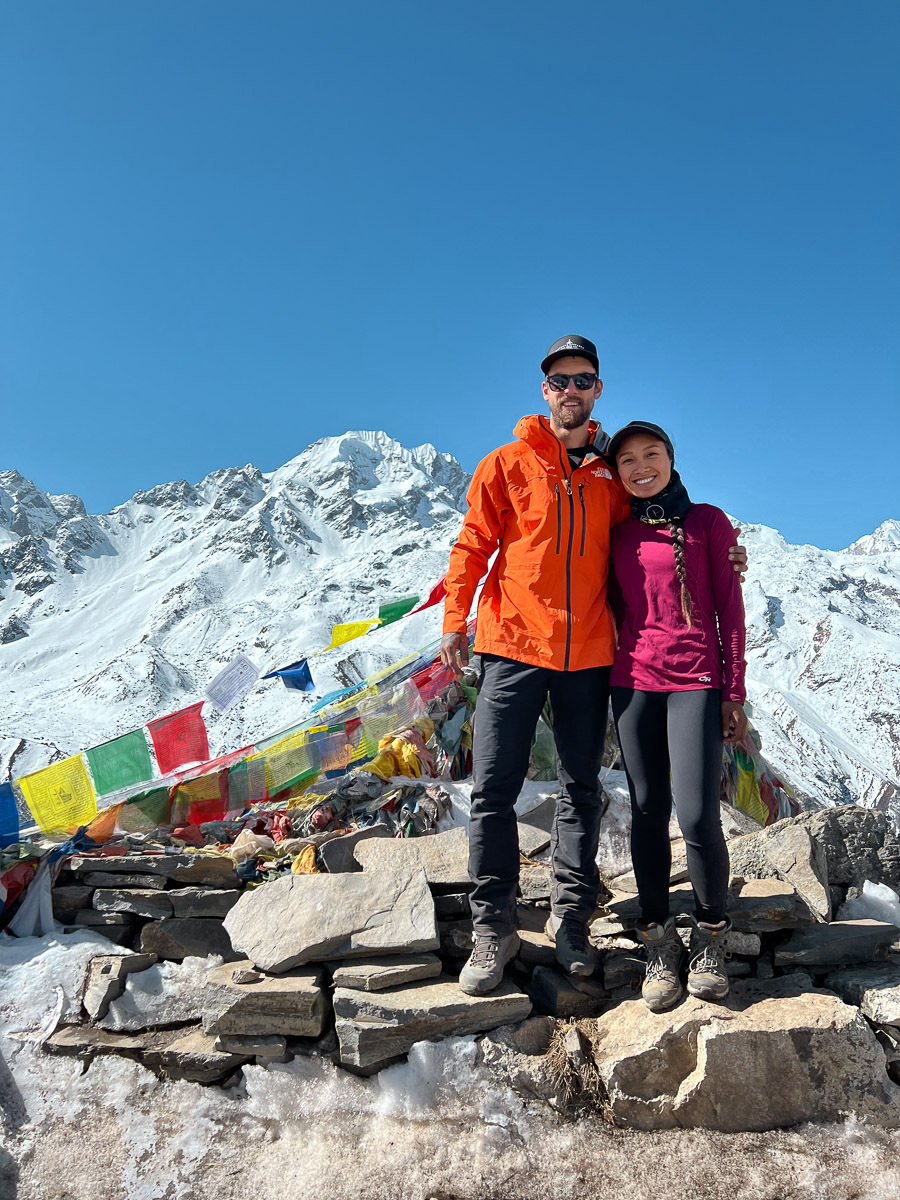
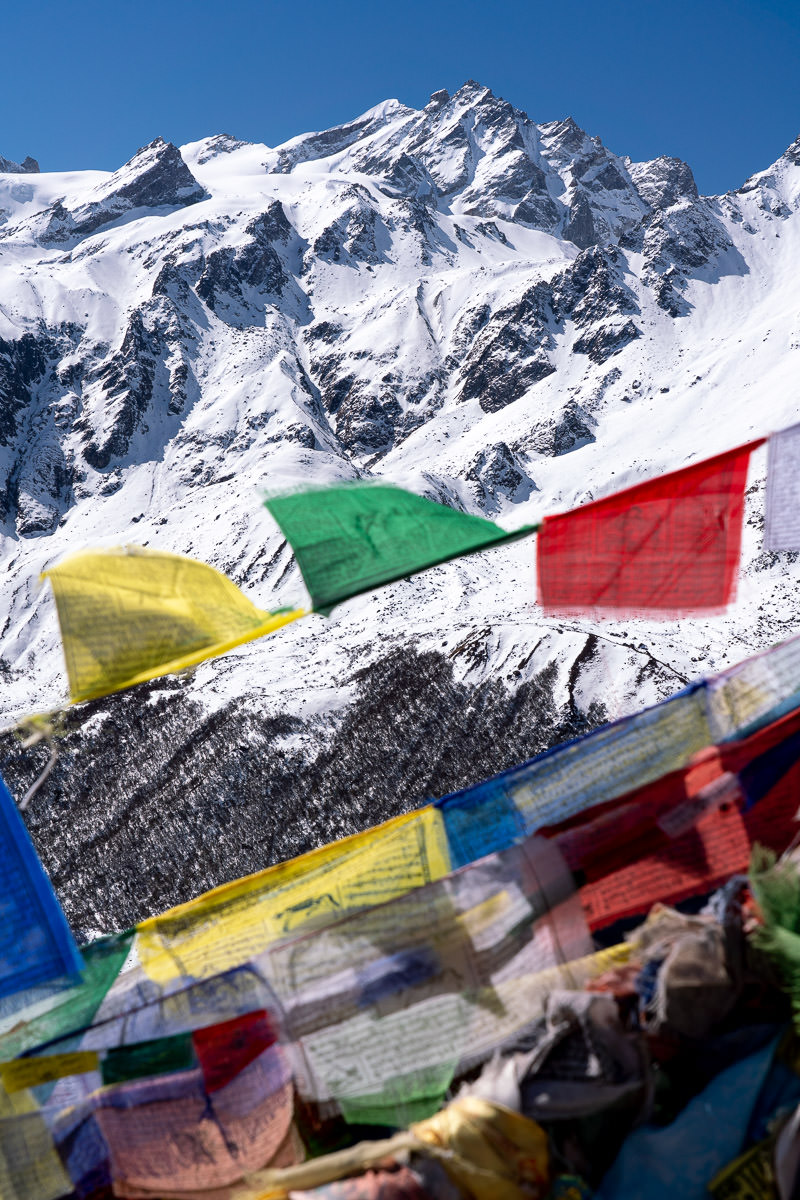
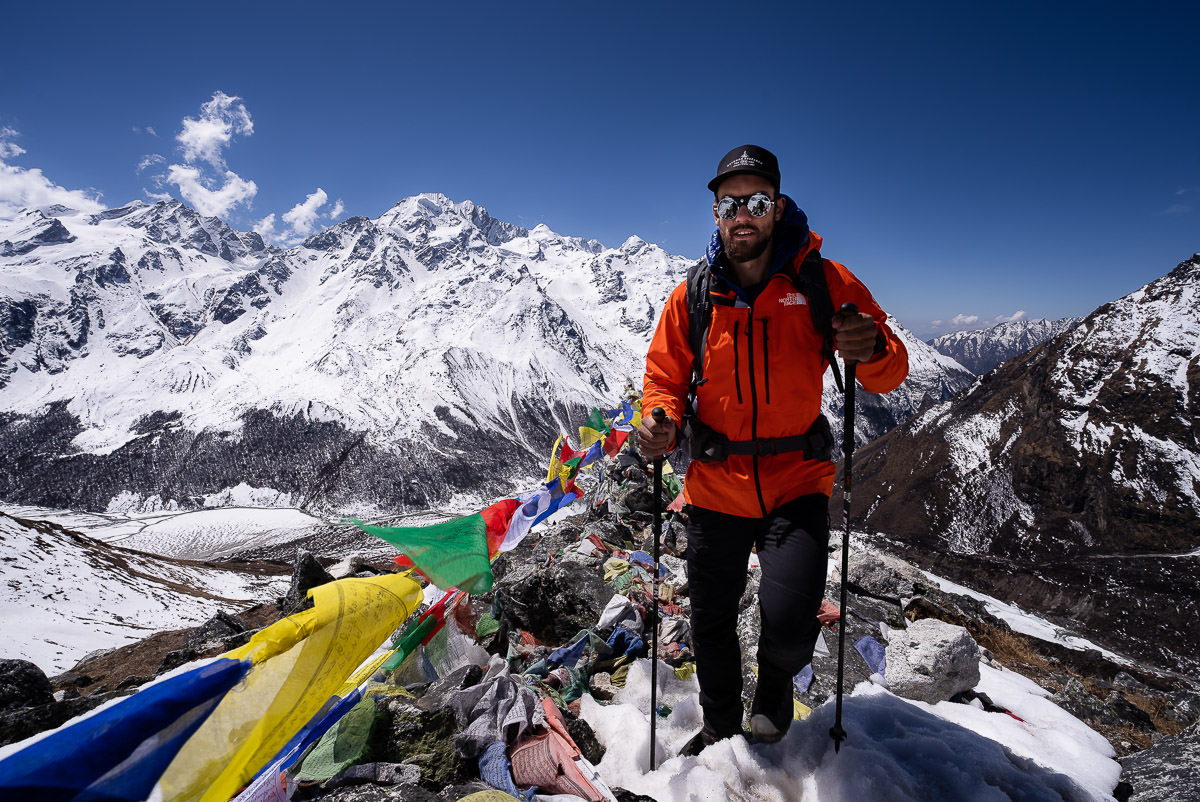
It’s essentially a false peak because it is the halfway point of the hike. Many hikers will actually stop here, which is fair enough. The views are already incredible and with a collection of Tibetan prayer flags at Lower Kyanjin Ri, it even feels a bit like the summit.
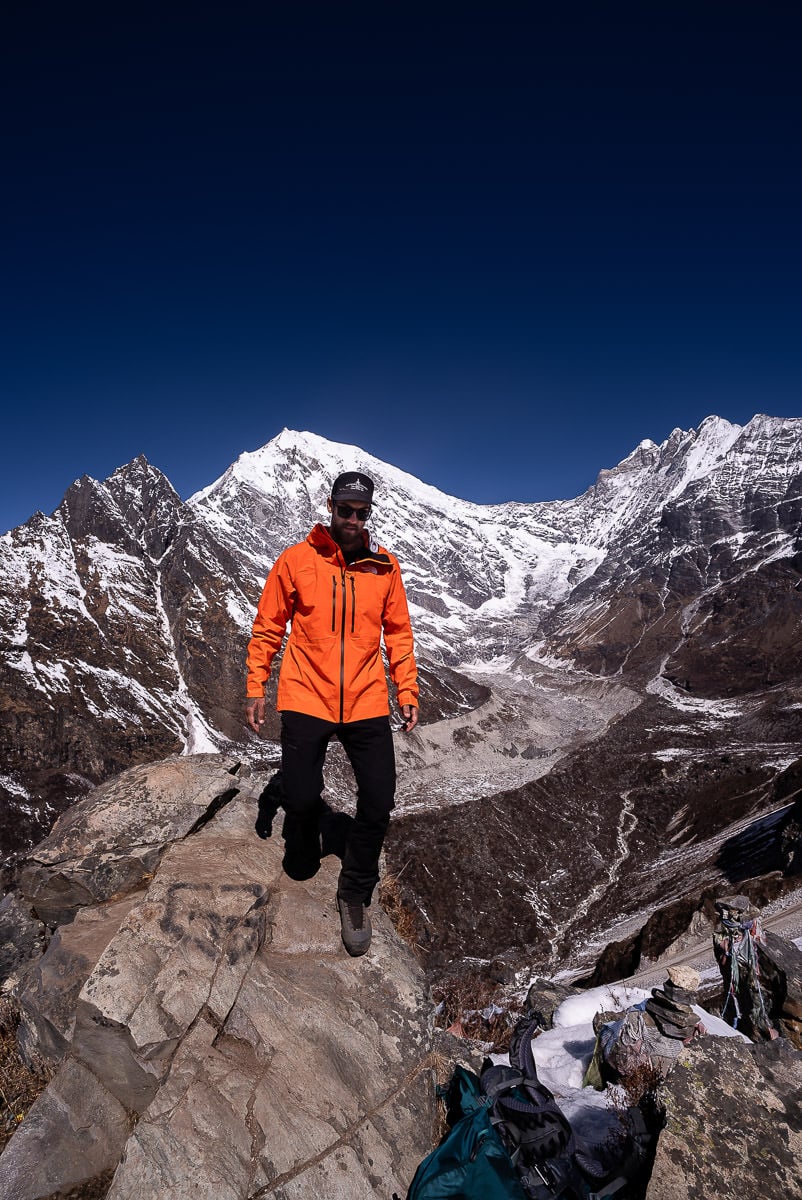
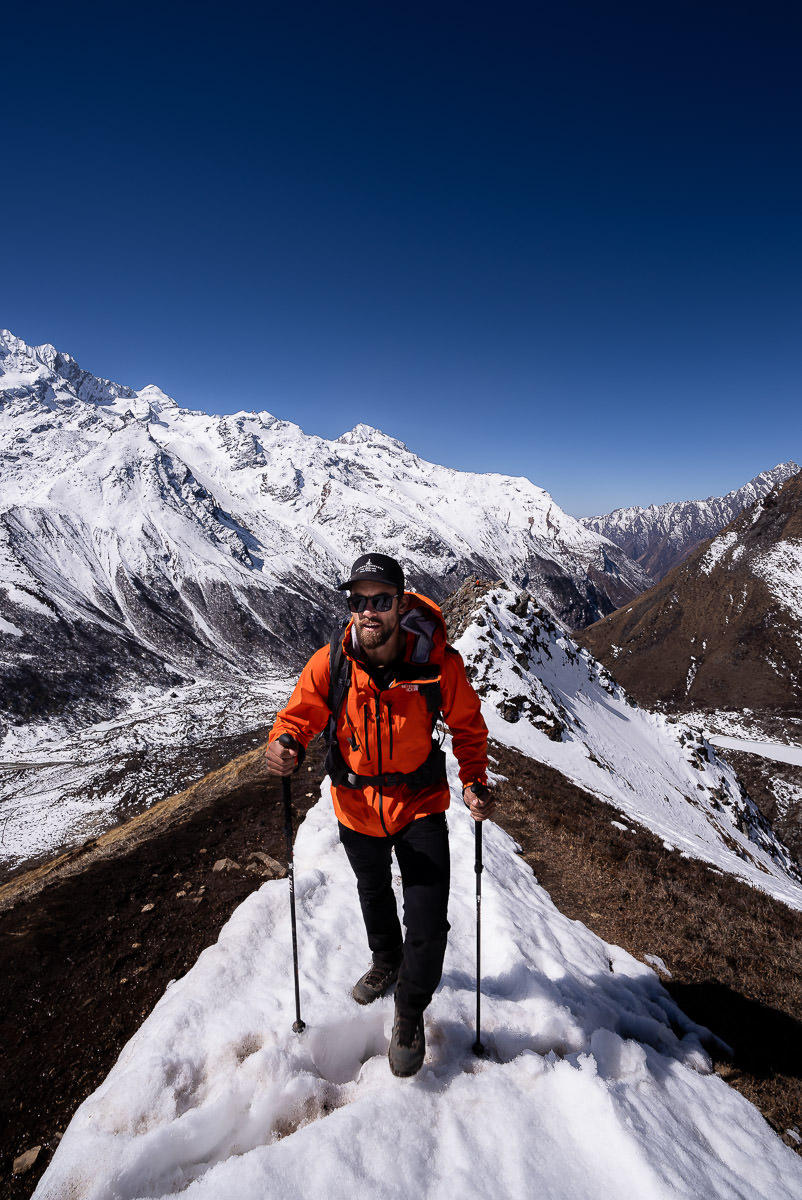
However, the journey continues as we push on to reach the true Kyanjin Ri summit. The trail becomes a little bit wilder after leaving Lower Kyanjin Ri with the path following the ridge further up the mountain. We trekked in early March and found quite a bit of snow on the trail but in the summer months, this is definitely a dry hike.
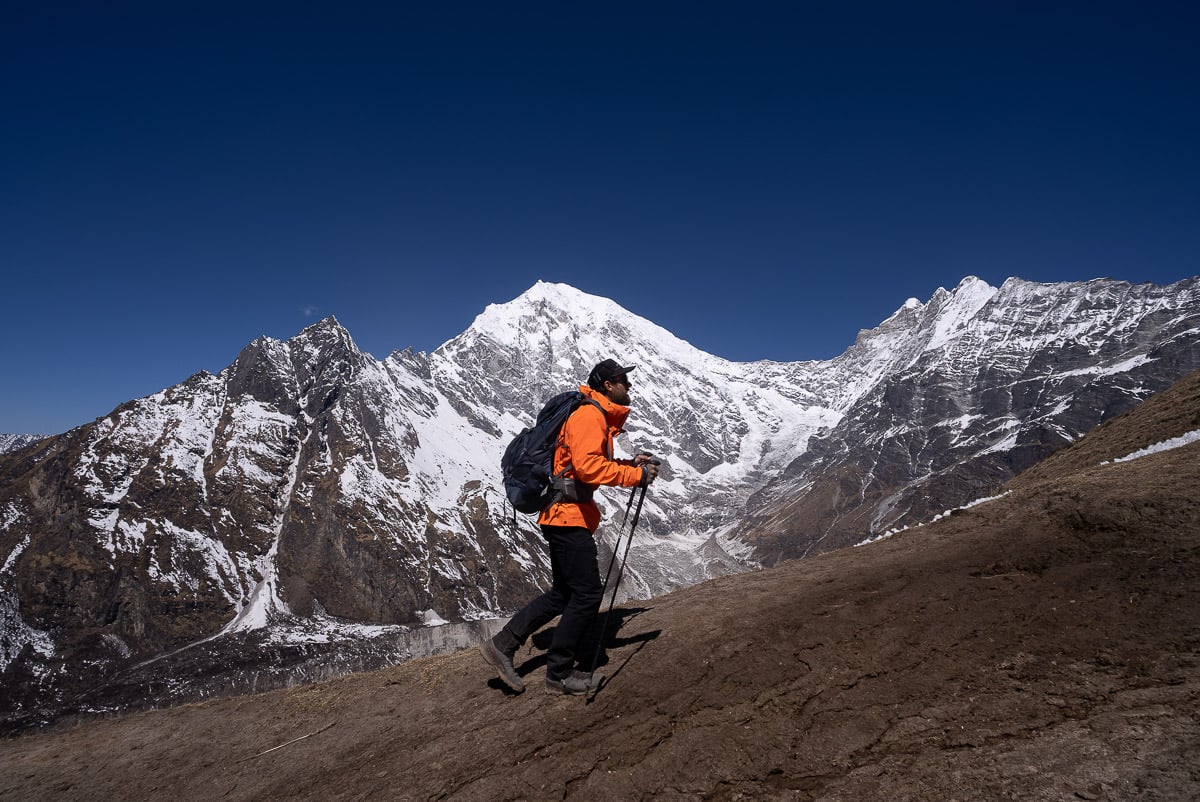
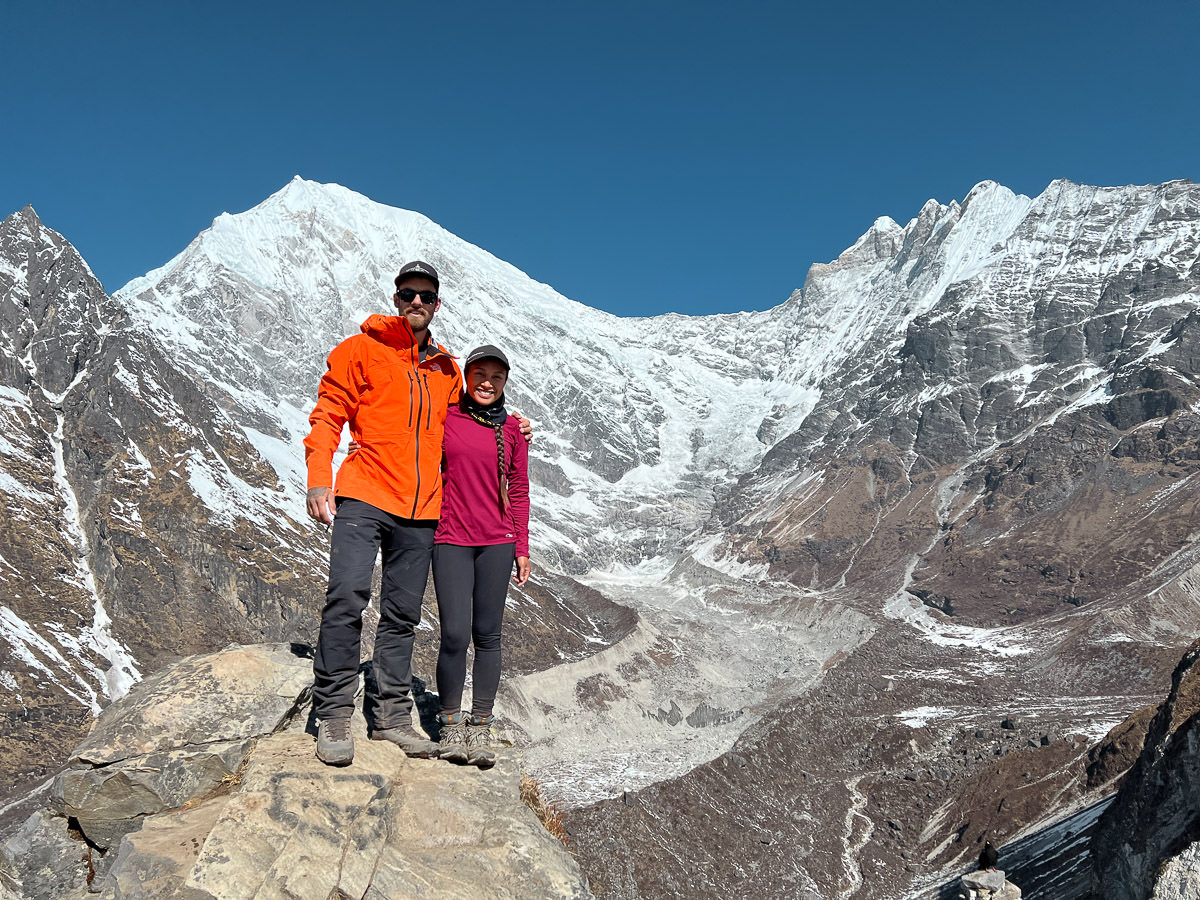
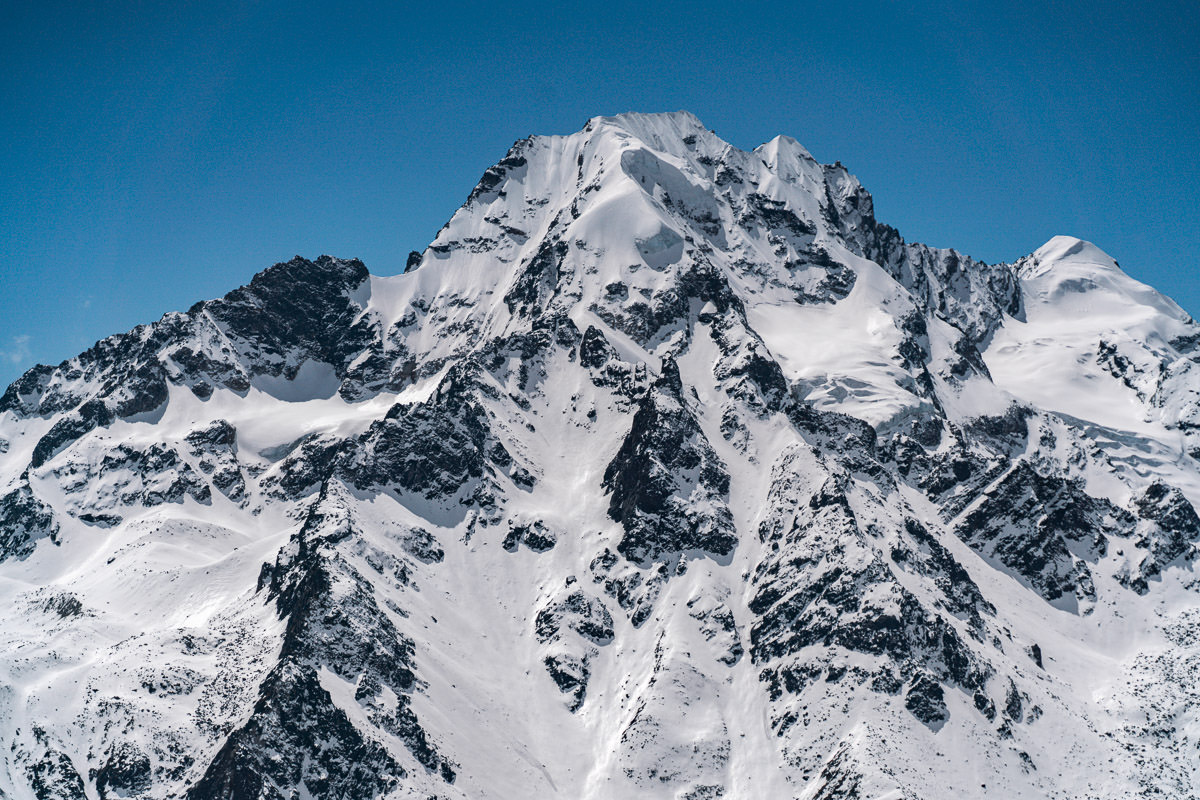
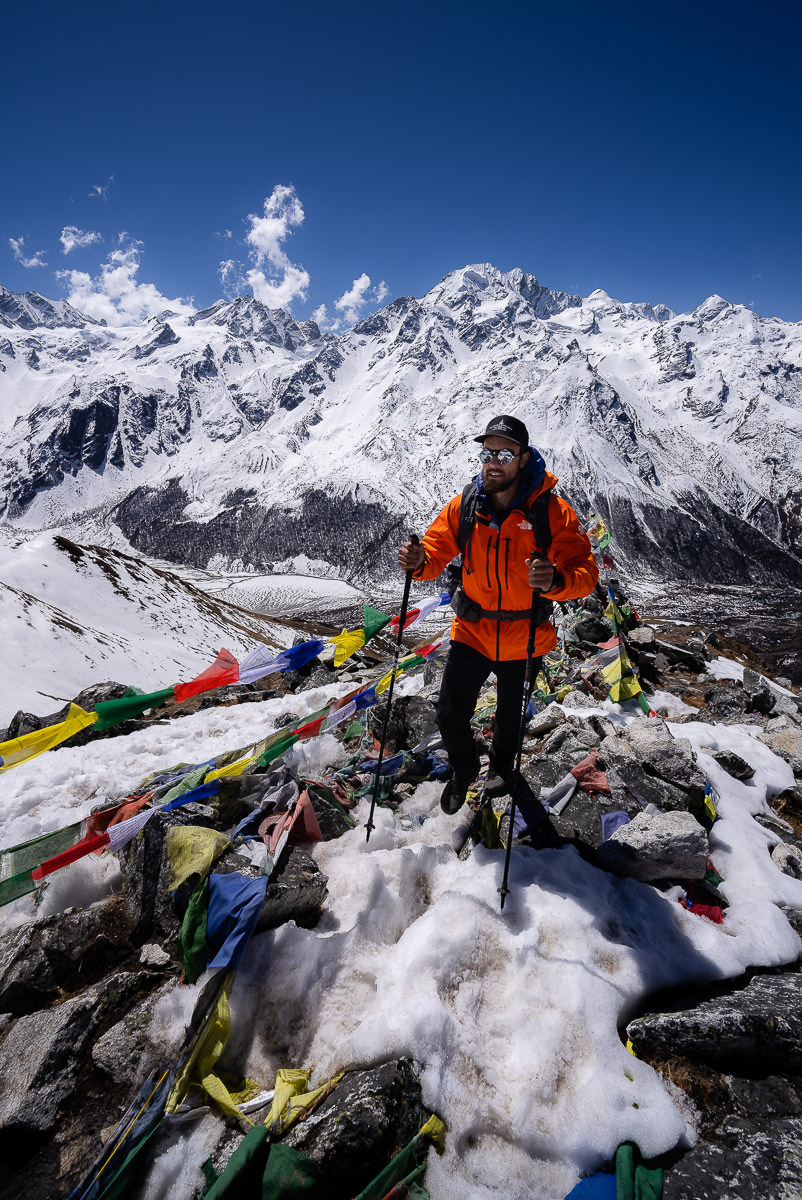
After a couple of hours, we reached Kyanjin Ri to take in the spectacular views. From the summit of Kyanjin Ri, we were walking across the snow at 4700m on a ridge overlooking the Langtang Lirung Glacier and the Langtang Lirung Peak (7,227m).
To the right of Langtang Lirung you can find Changbu (6251m) and Yubra (6264m). You can also spot Yala Peak (5,500m), which is the peak we ended up climbing on our trip to Kyanjin Gompa. And finally, across to the nearest peak, you can see Tserko Ri (5,000m).

The journey down is much quicker without the steep incline to manage. It took us less than an hour to get back down to the village. We promptly stopped off at the bakery for a well-deserved brownie!

GEAR YOU WILL NEED TO HIKE KYANJIN RI
By the time you have made it to Kyanjin Gompa, it is assumed you have all of your trekking gear with you already. The nice part about hiking up to Kyanjin Ri is that you can leave most of your gear at the tea house and carry a light pack up to the viewpoint and back down. These are the essential pieces of gear to take with you on the Kyanjin Ri hike.
- Trekking Poles
- Down Jacket
- Fleece
- Trekking Boots
- Rain Jacket
- Sunglasses
- Sunscreen
- Gloves
- Snacks/Lunch
- Water Bottle (1-2 Liters)
- Camera
BEST TIME AND SEASON FOR HIKING TO KYANJIN RI
The peak season for hiking in the Langtang Valley region is March to April and October to November. The time to avoid trekking in this region is during the rainy season from June to August.
During the winter from December to February, this region gets very cold and there will be snow cover in the higher parts of the trek. Many of the guesthouses actually close up for the winter and re-open in late February to March. However, it is possible to hike the Langtang Valley Trek on the fringe of the season in late February/early March and it can be quite beautiful with snow cover.
I hiked the Langtang Valley Trek in early March and it was warm during the day and got pretty cold at night. We experienced some heavy snow on Tserko Ri and Yala Peak but the lower trekking routes, such as Kyanjin Ri, were clear.

DRINKING WATER ON THE LANGTANG VALLEY TREK
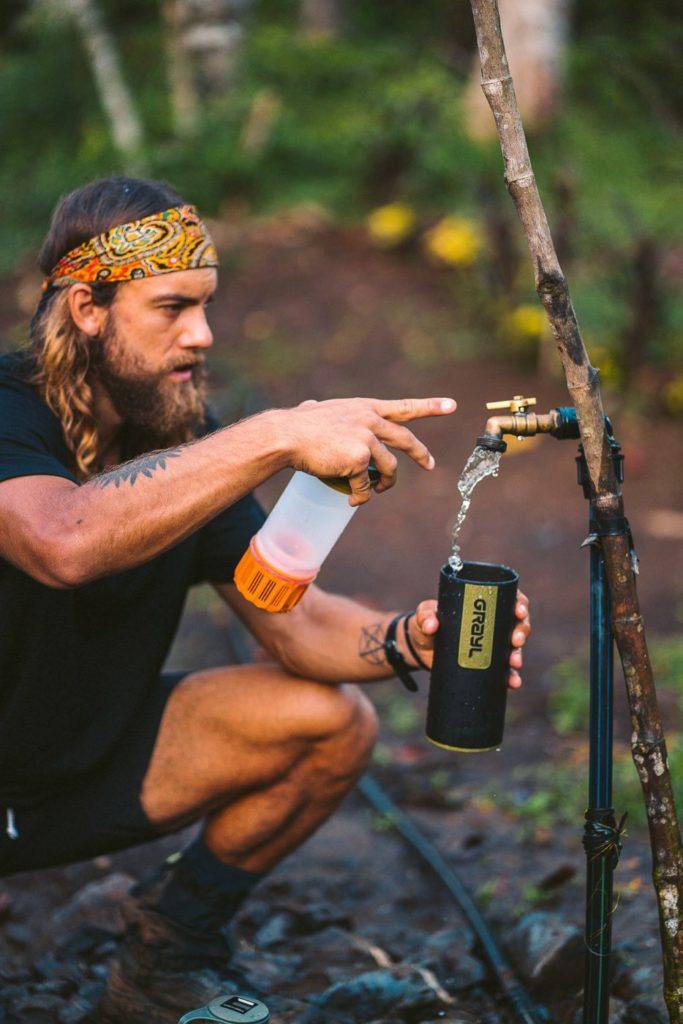
I use the Grayl Ultralight Water Purifier and it is a game-changer for hiking in Nepal, making this super easy and cheap. The Grayl Ultralight Water Purifier removes 99.9999% of viruses of disease-causing bacteria. The best thing about it is it only takes 15 seconds and one press to purify water from any fresh water source. You don’t need to buy bottled water at every tea-house contributing to large amounts of plastic waste and costing you $4+ per day.
Along the Langtang Valley Trek, we filled up at tea-houses, rivers, and local village taps. Unlike aqua purification tablets which require you to wait 30 minutes before drinking, you can have rehydrated yourself immediately with the Grayl Ultralight Water Purifier.
GrayL Water Purifier
- Never pay for water on the trek
- Save 3-4 plastic water bottles a day
- Turns any water into drinking water
HAVE YOU READ MY OTHER NEPAL BLOGS?
I’ve been lucky enough to have many awesome adventures in Nepal, which you can check out below where I’ve listed some of my favorite blog poss from Nepal.
- The Most Iconic route: Everest Base Camp Trek
- The Most Scenic Route: Annapurna Circuit Trek
- My Favorite Trek in Nepal: Manaslu Circuit Trek
- An Easy Nepal Trek: Langtang Valley Trek
- A great beginner peak: Island Peak Climb (6,165m)
- My Favorite Climb in Nepal: Climbing Ama Dablam (6,812m)
- My first 8000er: Climbing Manaslu (8,163m)
- My toughest climb in Nepal: Climbing Makalu (8,463m)
- Where to stay: 16 Best Places to Stay in Kathmandu
Billy Mayo
Thursday 12th of February 2026
@ skeletal shenanigans: I did a trek here before the earthquake and climbed Tserko Ri. Thank you for this beautiful film of your hike. It brought back good memories.
Boundless Himalayas
Friday 27th of September 2024
Great guide on the Kyanjin Ri hike! The views from the top must be breathtaking. For those who have done both this hike and the Gokyo Lake trek, how do the views and experiences compare? I'd love to hear how the two treks stack up against each other!