

The Annapurna Circuit Trek is one of the most popular expeditions in the Himalayas of Nepal. While Everest Base Camp may be the most well-known trek in Nepal, the Annapurna Circuit Trek is definitely a close second! I’ve done both the EBC and the Annapurna Circuit Trek among many other routes in Nepal.
BEST NEPAL TREKKING COMPANY
Interested in trekking in Nepal or doing the Everest Base Camp Trek?
I recommend booking your trek with Himalayan Masters, which is the company I use for all of my treks in Nepal. Use my code JACKSON5 when you book to receive a 5% DISCOUNT.
In this guide, I will share with you my experience on multiple routes throughout the Himalayas to help prepare you for your trekking experience. Overall I would rate the Annapurna Circuit as the most scenic trek in Nepal from the first day to the last.
We looked at 7000m and 8000m peaks from the first to the last day, had amazing tea house locations, and were blown away by the scenery every single day. However, there are some negatives that modernization and commercialism have brought to the Annapurna Trekking Circuit with roads, infrastructure, and pollution. I’ll cover all aspects of this route to give you an honest insight into what to expect and why you may want to choose this route for your trip.
In this blog post, I will cover everything you need to know about the logistics of the Annapurna Circuit Trek. I’ve also created guides for the following treks and climbs in Nepal if you are interested to check those out as well.
- Manaslu Circuit Trek
- Everest Base Camp Trek
- Makalu Base Camp Trek
- Langtang Valley Trek
- Island Peak Climb
- Yala Peak Climb
- Ama Dablam Climb
- Manaslu Climb
- Makalu Climb
TRY THE 3 BEST TREKS IN NEPAL
Manaslu Circuit: My personal favorite 2-week trek through Tibetan villages and stunning scenery with less crowds.
Annapurna Circuit: The most beautiful & scenic 2-week trek in Nepal although can be crowded at times.
Everest Base Camp Trek: The most iconic 2-week route reaching the famous (EBC) Everest Base Camp at 5,300m.
A GUIDE TO THE ANNAPURNA CIRCUIT TREK
In this guide, you will find all of the valuable information you need to plan your trek as well as my personal experience on the entire trek including the detour to Tilicho Lake
ANNAPURNA CIRCUIT TREK DETAILS
- Distance: 130km or 80 miles
- Days required: 10-13 days
- Total Incline: 8000 meters
- Total Decline: 7000 meters
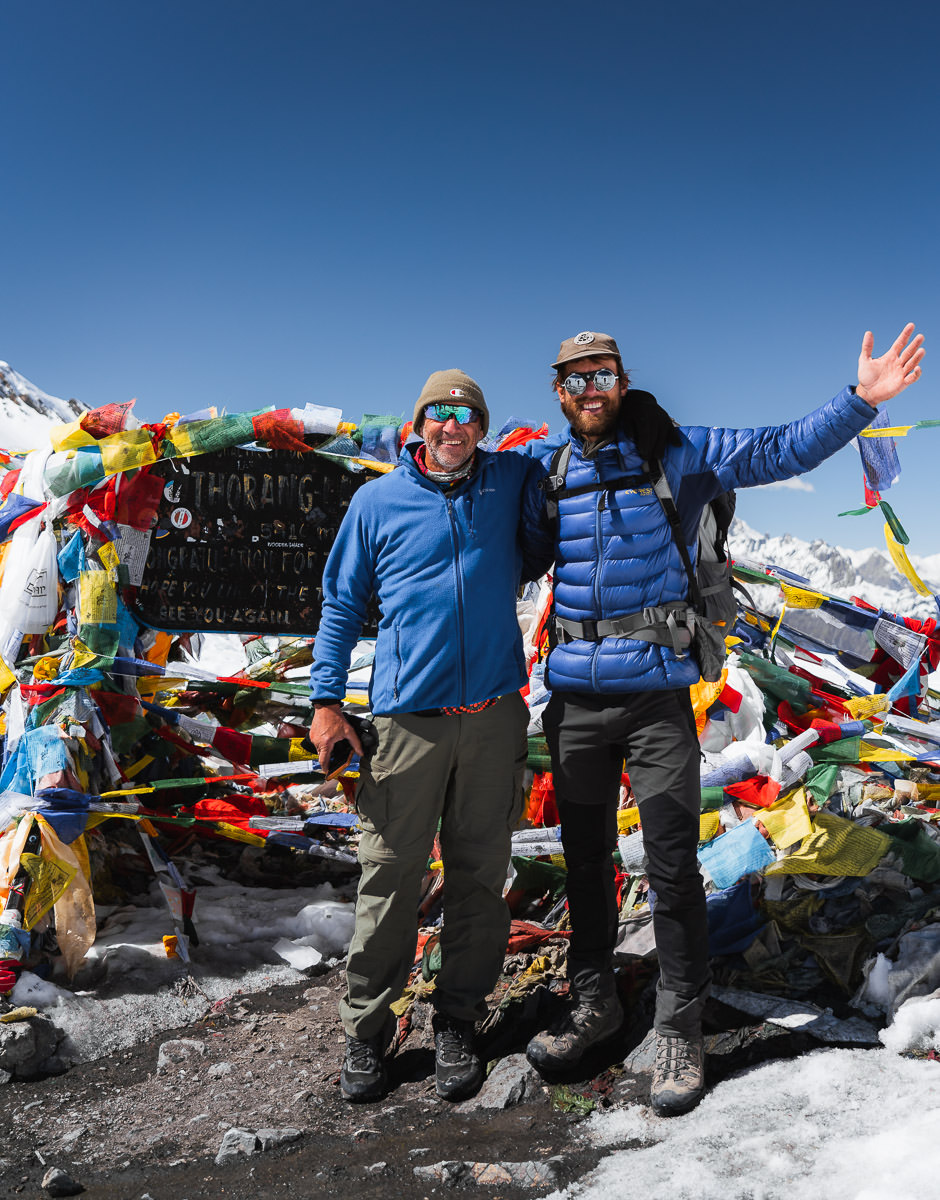
- The highest point on the trek: The two highest points on the trek are Tilicho Lake (4,919m) and the Thorong La Pass (5,416m).
- Difficulty: The difficulty of the Annapurna Circuit Trek depends a lot on how many days you have. If you break it up over 12-14 days, it will be similar to the difficulty of EBC. However, we took only one acclimatization/rest day in Manang and the itinerary was quite tough for us given we squeezed into Tilicho Lake. Many days were about 20km of distance with 1000m of incline.
- Permits: You will need a TIMS card and Park Entrance Permit, both can be purchased when entering the park.
- Guide: A guide is not required on this trek. However, the guide manages all of the logistics, distances, directions, and tea houses for your group. I used maps.me to navigate from tea house to tea house and found the paths easy to follow. If it’s your first time trekking in Nepal, I would suggest having a guide.
- Accommodation: Guest Houses, also known as Tea Houses, are available along the way where you will sleep in a comfortable bed and have access to showers (at extra charge) and restaurant facilities. It was very comfortable accommodation and great after a long day of hiking.

KEY POINTS ABOUT THE ANNAPURNA CIRCUIT TREK
- This circuit is less crowded than Everest Base Camp Trek but still quite busy. Especially around Tilicho Base Camp as many locals just come to trek to the Lake and don’t do the full circuit.
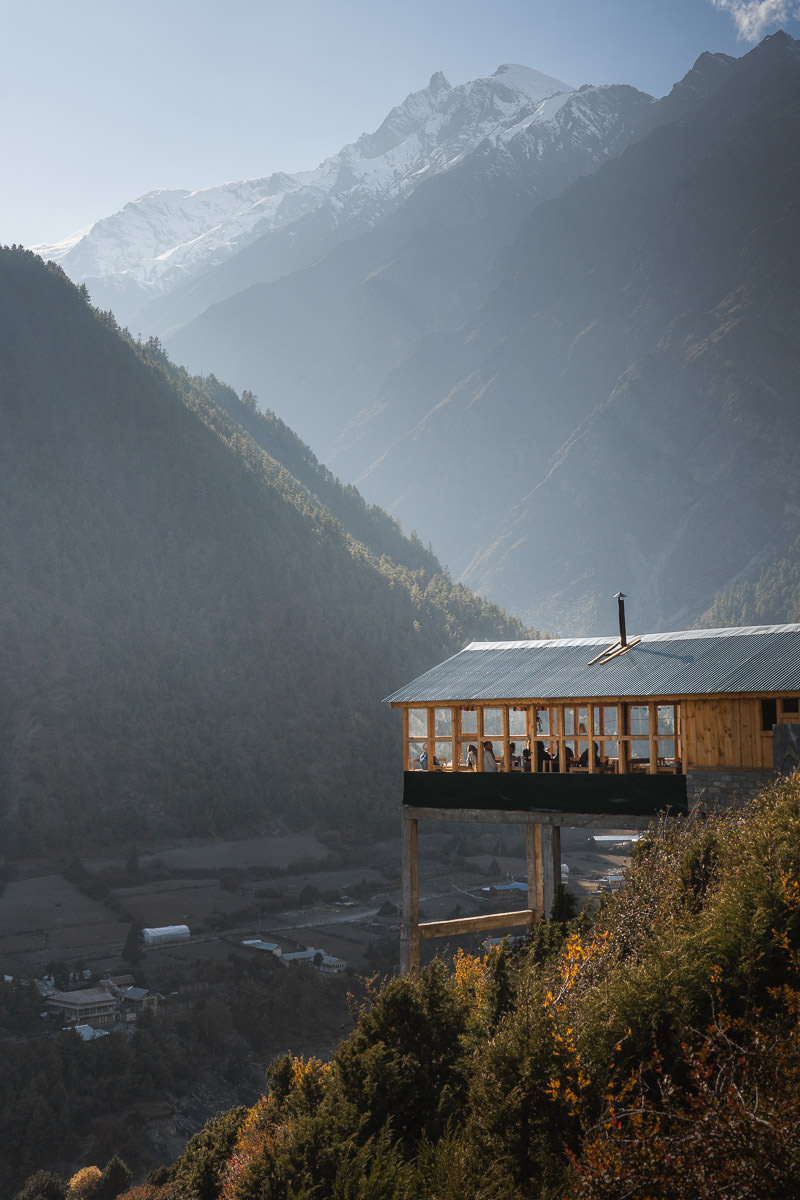
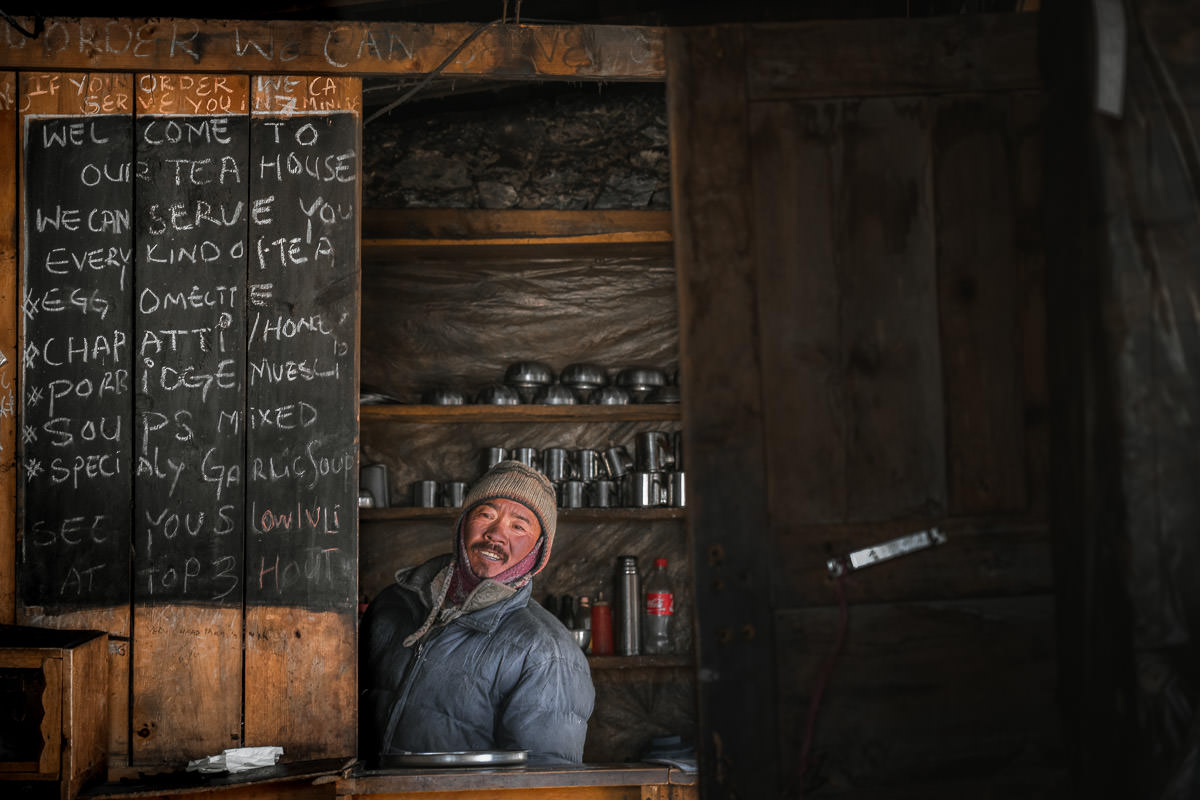
- There are teahouses in each village along the way so each night you get a great sleep in a bed with blankets, have access to showers, eat great meals in a restaurant, and can charge your electronics and cameras.
- The trailhead can be reached by car so there is no need to pay for expensive domestic flights.
- The road reached all the way to Khangsar, which means it isn’t quite as remote, peaceful and natural as you may be expected until the latter stages of the hike. There are side trails most hikers take for better views and to avoid the cars but nonetheless, it can be demoralizing to see a car full of tourists drive past as you eat their dust.
TOP 3 PLACES TO STAY IN KATHMANDU

- Ultimate Luxury: The Dwarika’s Hotel – Luxury, Spa-service, Pool
- Best Value: Aloft Kathmandu Thamel – Swimming Pool, Gym & Great Restuarant
- Budget Choice: Hotel Jampa is easily the top cheap hotel in Kathmandu
BOOKING A GUIDE FOR THE ANNAPURNA CIRCUIT TREK
The Annapurna Circuit Trek doesn’t require a guide but it’s great to have a guide managing the logistics such as directions, tea houses, distances, medical issues, and the overall organization. I’d say 80% of trekkers go with a guide. I did the trek with Himalayan Masters which is one of the top trekking companies when it comes to the Annapurna Circuit Trek.
The trek costs around $1400 USD with Himalayan Masters as of 2022 and includes all transfers, accommodation, meals, drinks, permits, and even the hotel stay before and after the trek at a high-quality hotel. I honestly had a great time on this trek and I can wholeheartedly recommend Himalayan Masters.
You can use my discount code ‘JACKSON5‘ for 5% off the total price of your trek with Himalayan Masters which is a pretty handy saving.
Email: info@himalayan-masters.com

ANNAPURNA CIRCUIT TREK PACKING LIST
I packed pretty light and managed to wash most of my clothes each afternoon/night for the first half of the trip. In the latter stages of the trip, it was pretty cold so we weren’t sweating as much and we wore our warm gear basically nonstop while at the teahouses. There was no real need for multiple outfits.
This is just a guide and it worked quite well for me with no complaints from my set-up. You won’t need a sleeping bag as there are blankets in each guesthouse and when it got cold I just wore my down jacket to bed. This meant I didn’t have to carry a sleeping bag for the entire trek.
- 1 pair of pants that maybe convert to shorts
- 1 pair of shorts
- 1 Warm or thicker pair of hiking pants
- 1 Long sleeve quick-dry shirt
- 1 Long-sleeve thermal shirt
- 2 Short-sleeve t-shirts
- 1 Thermal long underwear
- 4 pairs of quick-dry underwear
- 1 Lightweight down jacket
- 1 Heavy-duty summit down jacket
- 1 Beanie
- 1 Cap
- Sunglasses
- 1 Neck Buff
- Gloves
- Hiking boots
- Headtorch
- 1 pair of warm summit socks
- 2-3 pairs of regular socks
- Sunscreen
- Trekking poles
- Water filter
- Powerbank
All of this should fit into a backpack no bigger than 50L and should be less than 14kg.
WIFI/ELECTRICITY AVAILABILITY ON THE ANNAPURNA CIRCUIT TREK
- Wifi: Costs anywhere from $0 to $4 to use wifi at the guesthouses. Buy an NTC Sim before you go. It worked in some spots but after Pisang, the service dropped and it was mostly WiFi until we got across the pass to Muktinath.
- Electricity: You will have to pay anywhere from $0 at low elevations to $5 to charge your power banks, cameras, and phones. I found that most rooms had free electricity powerpoints in the room. The key is to get a big power bank. Pay to charge it then charge everything from your power bank. My power bank lets me charge my phone and four camera batteries before it dies. Most of the places we stayed let us charge our gear for free but when it is busy they usually charge a fee as many teahouses run off gas or solar.

ANNAPURNA CIRCUIT TREK ITINERARY
The below itinerary was the exact journey I did but I would suggest adding in an extra day or two to account for rest days or being able to break up the day when you get up to Tilicho Base Camp. This was quite a strenuous activity. I also recommend not hiking to Dharapani from Besishar as the road is full of trucks and vehicles. Similarly, once you reach Muktinath, I suggest driving to Jomsom as it is quite built up from there with main, paved roads.
- Day 1: Drive Kathmandu to Dharapani (1,960m)
- Day 2: Trek to Chame (2,710m) Duration: 5-6 hours trek
- Day 4: Trek to Pisang (3,300m) Duration: 5-6 hours trek
- Day 5: Trek to Manang (3,500m) Duration: 6-7 hours
- Day 6: Acclimatization Day at Manang
- Day 7: Trek to Tilicho Base Camp (4000m) Duration 6-8 hours
- Day 8: Trek to Tilicho Lake & Trek to Shreekharka (4080m) Duration 10 hours
- Day 9: Trek to Thorong Phedi (4600m) Duration 6-7 hours
- Day 10: Trek to Thorong La & Trek down to Muktinath
- Day 11: Drive to Jomsom
- Day 12: Fly to Pokhara
INSURANCE FOR THE ANNAPURNA CIRCUIT TREK
Nepal can be a dangerous place for trekking or hiking because the high altitude can lead to many illnesses, weakness in trekkers, and misjudgments. There is also a risk on trails for falls, avalanches, or other mishaps. Your regular travel insurance probably won’t cover you at high altitudes and won’t cover a helicopter evacuation. There is a solution though.
Need extra protection?
Regular travel insurance is great but won’t cover you for high altitude hikes or for helicopter evacuation. Each year, I purchase a Global Rescue Subscription.
For less than $500 per year or $100 per expedition, you can purchase a Global Rescue subscription and be covered no matter how extreme the hike or how high the climb is.
DRINKING WATER ON THE ANNAPURNA VALLEY TREK
I use the Grayl Ultralight Water Purifier and it is a game-changer for hiking in Nepal, making this super easy and cheap. The Grayl Ultralight Water Purifier removes 99.9999% of viruses of disease-causing bacteria. The best thing about it is it only takes 15 seconds and one press to purify water from any fresh water source. You don’t need to buy bottled water at every tea house contributes to large amounts of plastic waste and costing you $4+ per day.
Along the Annapurna Circuit Trek, we filled up tea houses, rivers, and local village taps. Unlike aqua purification tablets which require you to wait 30 minutes before drinking, you can have rehydrated yourself immediately with the Grayl Ultralight Water Purifier.
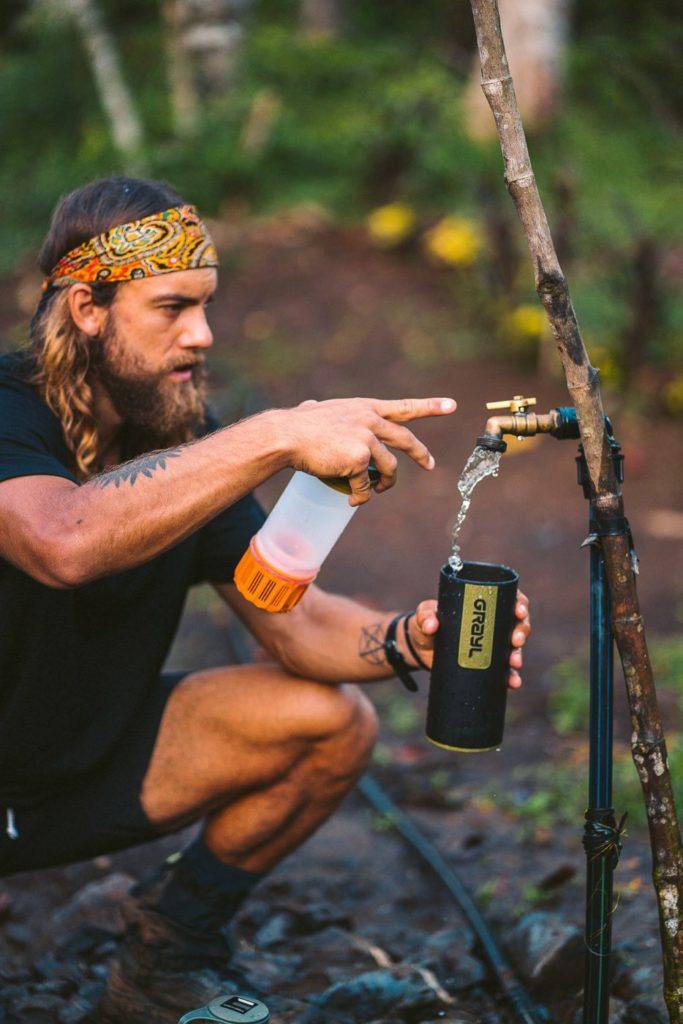
GrayL Water Purifier
- Never pay for water on the trek
- Save 3-4 plastic water bottles a day
- Turns any water into drinking water
BEST TIME AND SEASON FOR THE ANNAPURNA CIRCUIT TREK
The peak season for the Annapurna Circuit Trek is March to April and October to November. The time to avoid this trek is during the rainy season from June to August. Having said that, I often found that off-season or shoulder seasons have been my best (uncrowded) trekking experiences in Nepal
During the winter from December to February, this region gets very cold and there will be snow cover in the higher parts of the trek. Many of the guesthouses actually close up for the winter and re-open in late February to March.
I hiked the Annapurna Circuit Trek in late October/early November and we had 12 days of constant sun. Not a single day with clouds and no chance of rain. Lucky us.
HOW TO GET TO THE ANNAPURNA CIRCUIT TREK
There are two main ways to reach Dharapani, which is the small town at the starting point of the trek. Despite the distance from Kathmandu to Besishar only being 125km, the journey takes a long time due to the traffic and quality of the road.
Jeep: We went by private Jeep organized by our tour company Himalayan Masters. It costs about $180 to hire the vehicle out for the drive so can be split between your group. It’s not cheap but much less brutal than the lengthy bus journey.
Public Bus: The bus costs about $12 USD and can take anywhere from 7-12 hours depending on the traffic and if there are any roadworks or landslides recently. The bus station in Kathmandu is called ‘New Bus Station‘.
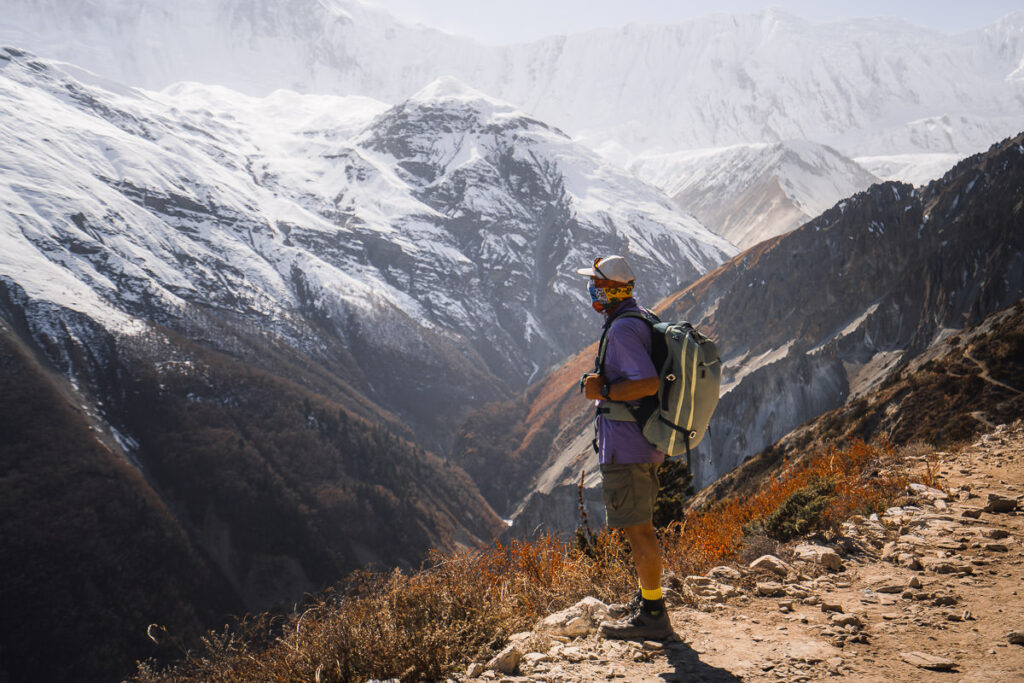
MY EXPERIENCE ON THE ANNAPURNA CIRCUIT TREK
Throughout this section of this guide, I will share my experience with each part of this trek and give my thoughts on the increased level of infrastructure and road access throughout the Annapurna Circuit Trek.
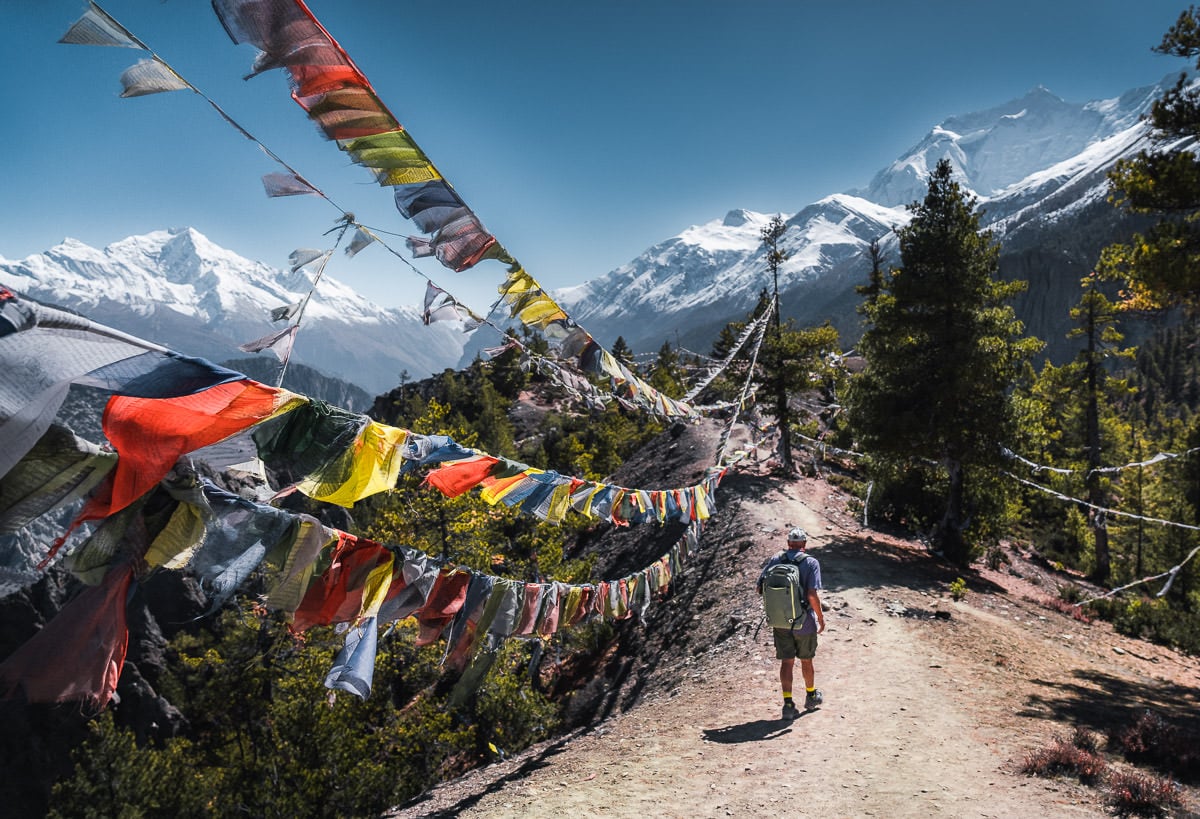
TREKKING FROM DHARAPANI TO MANANG
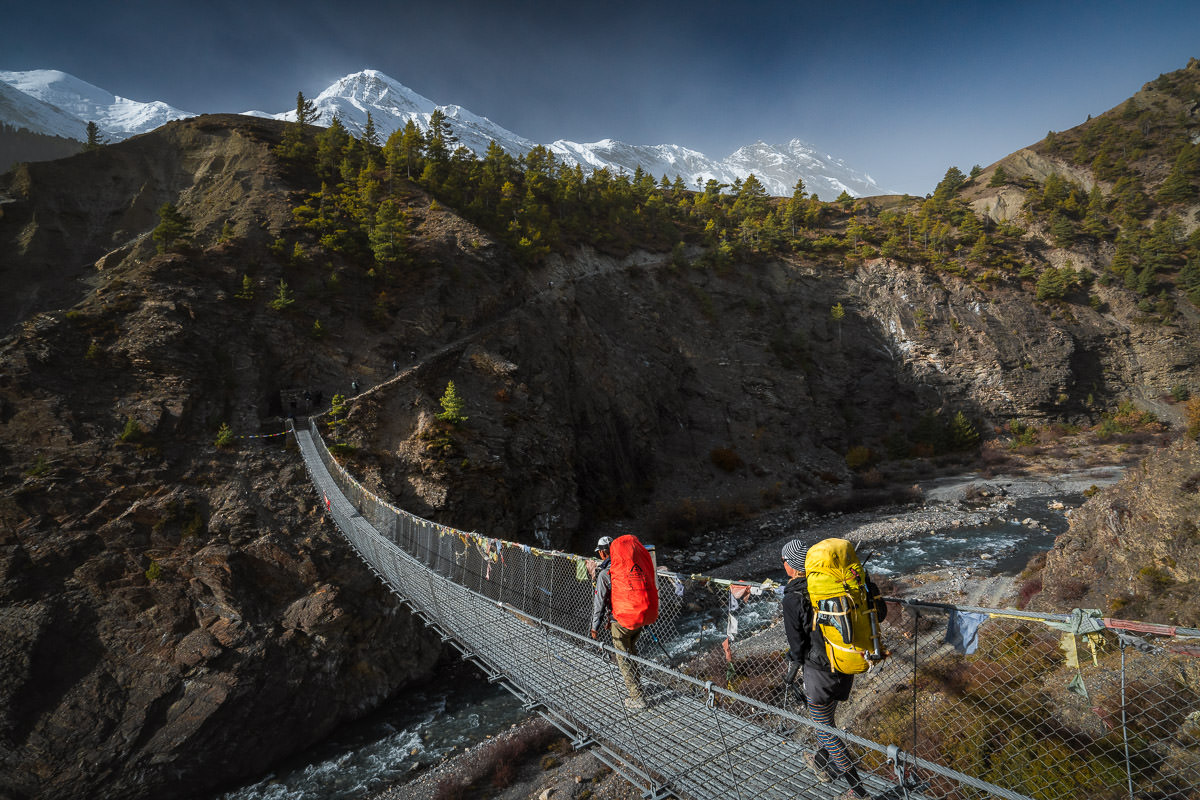
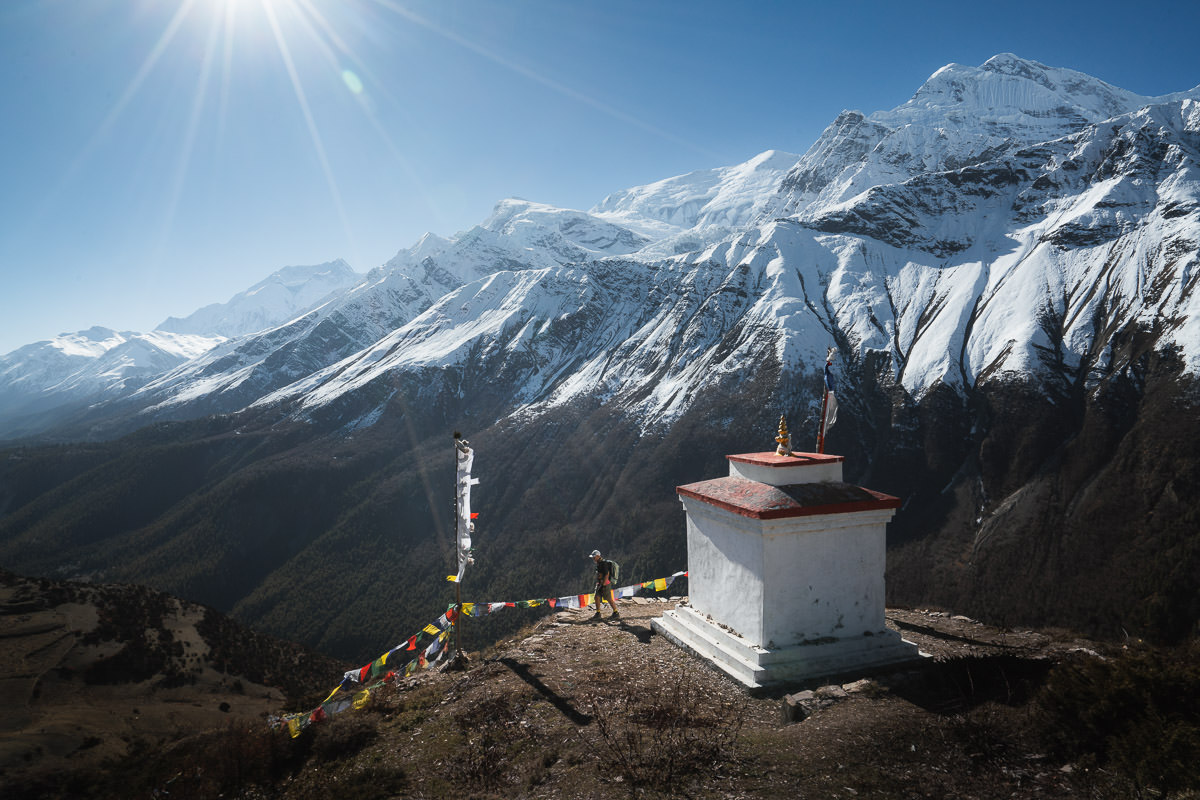
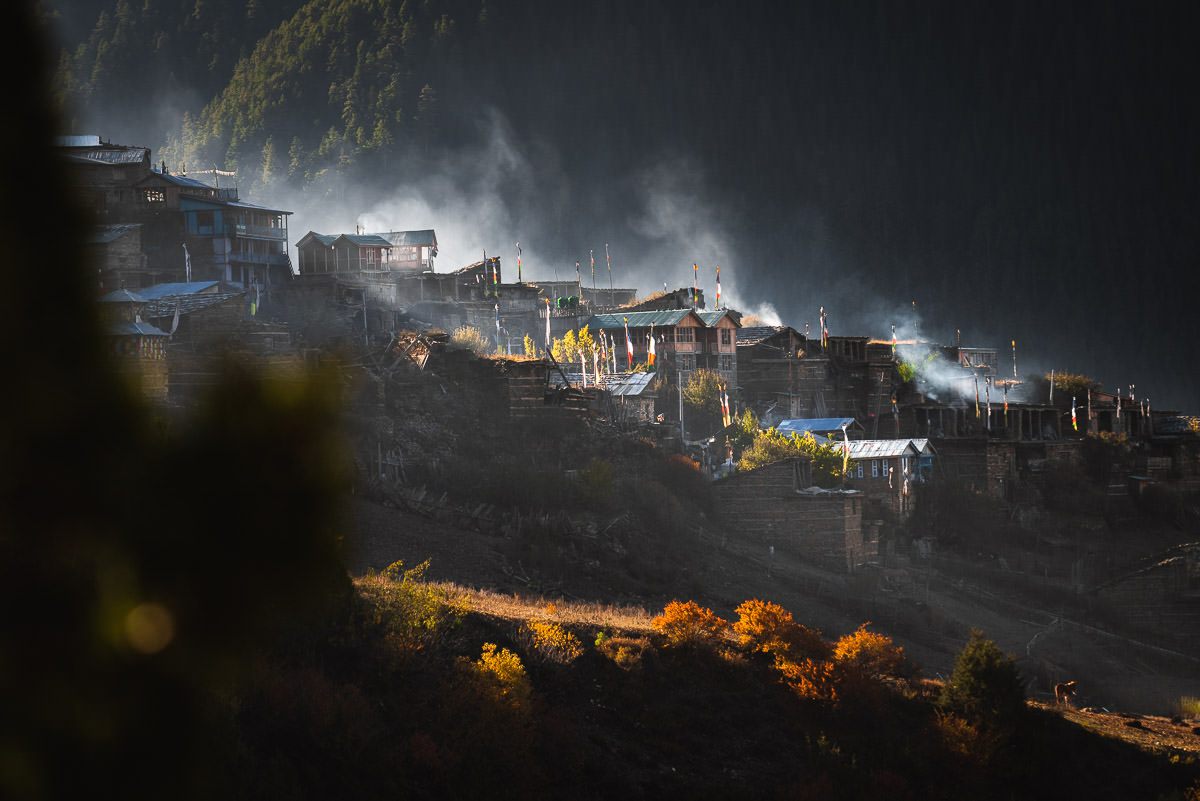
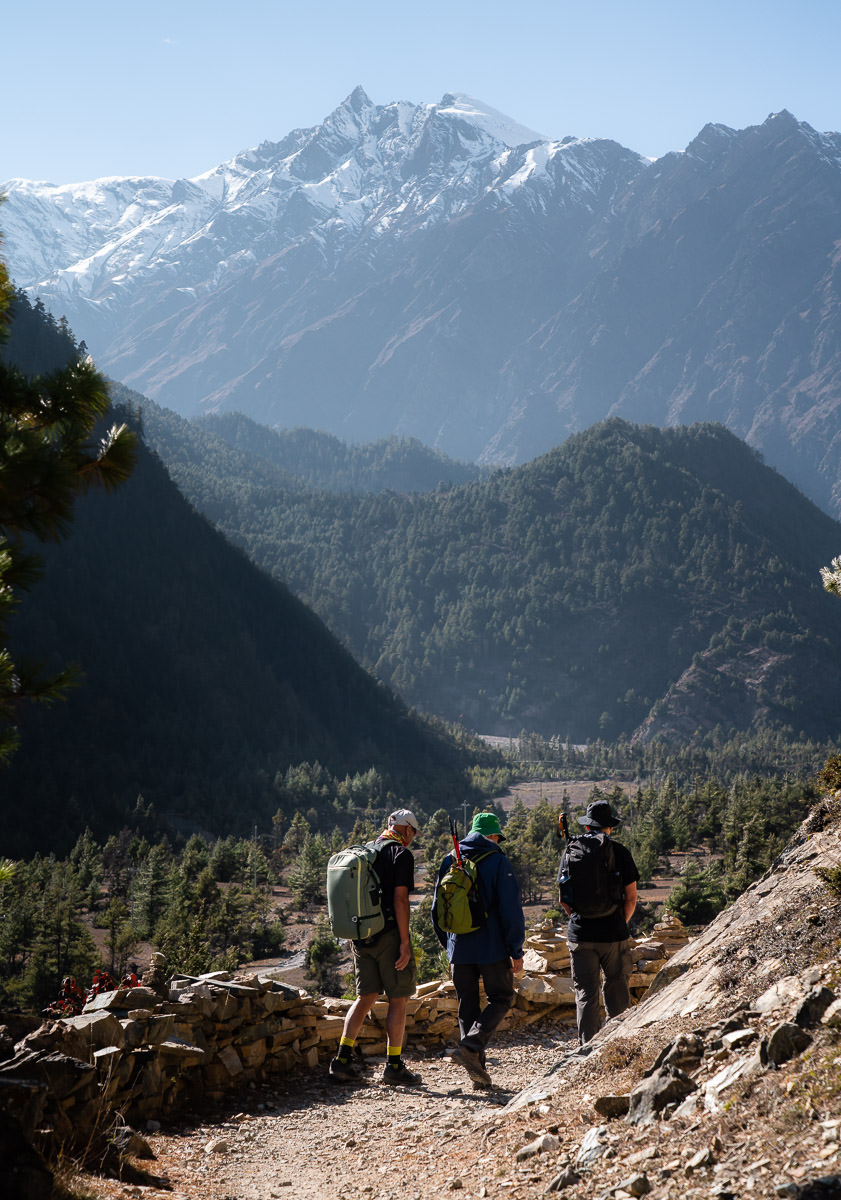
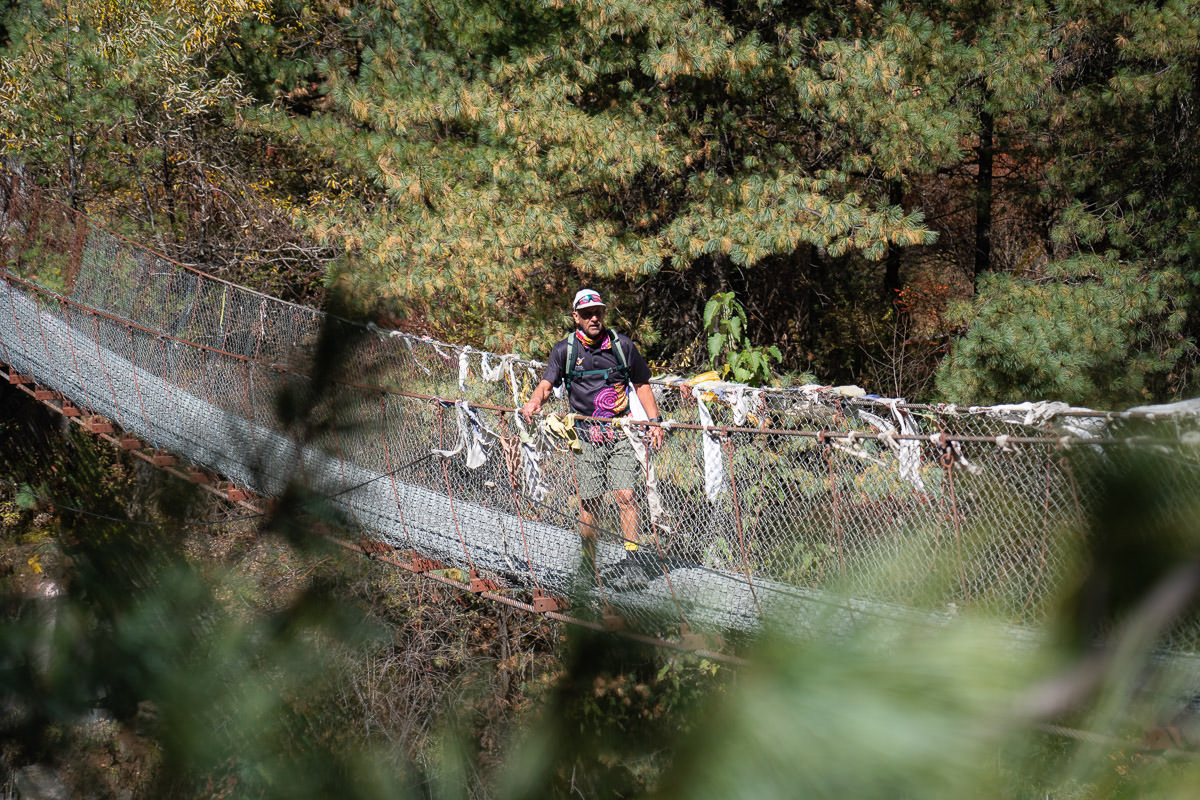
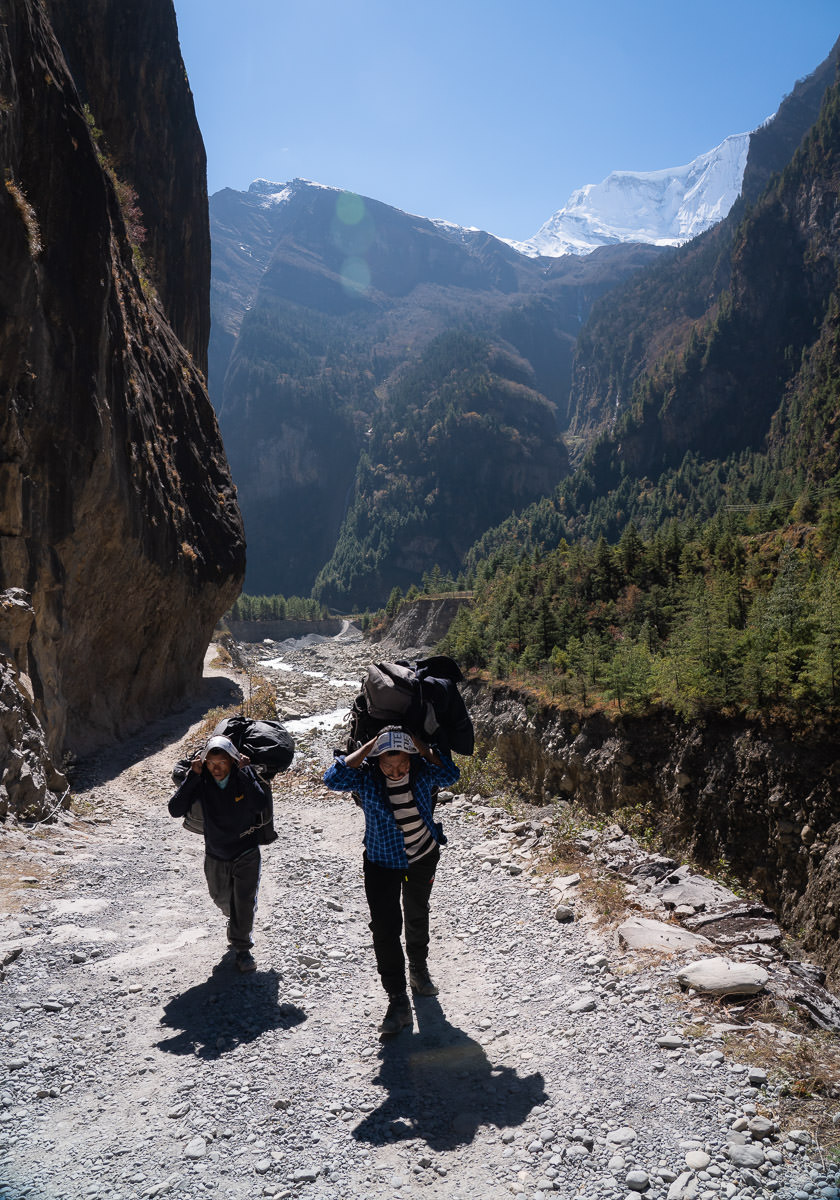
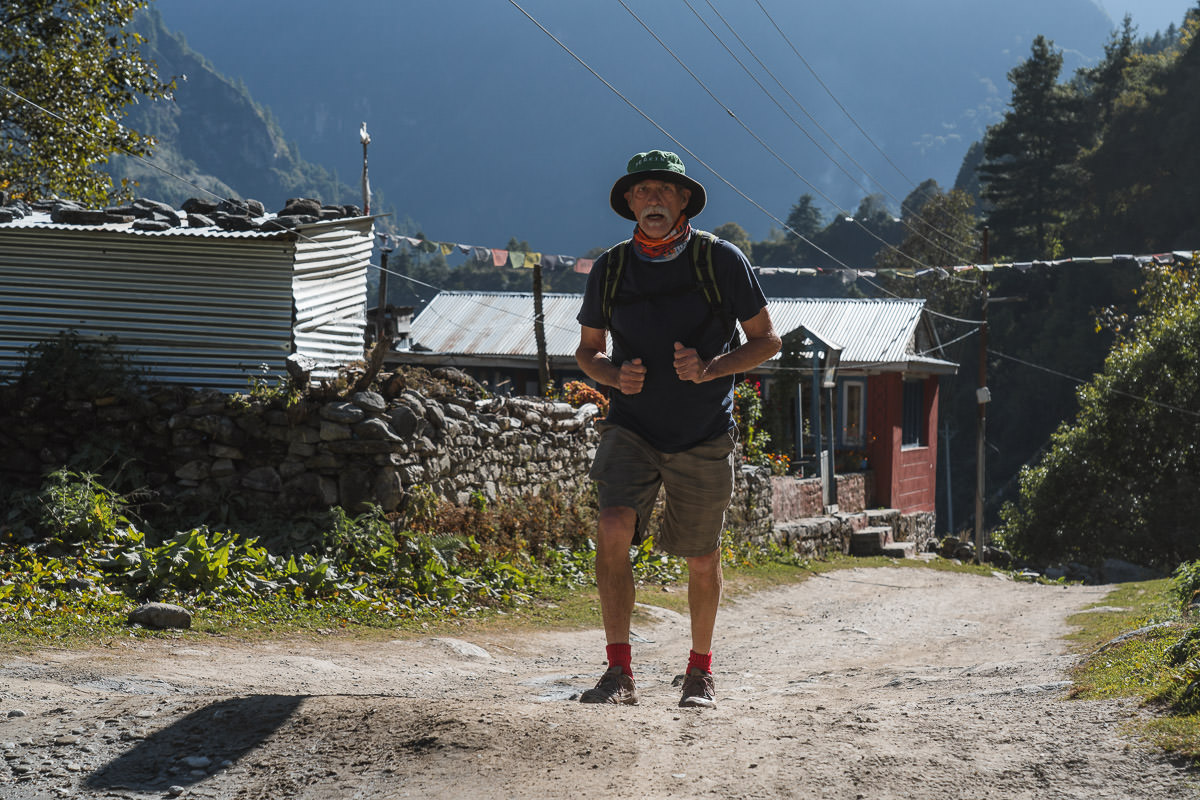
After surviving the bumpy ride along the cliff-side roads to Dharapani, we spent the night in a small teahouse before beginning our trek the next morning. Dharapani is actually where the Manaslu Circuit Trek finishes, so I had been in this small river-side town on several occasions previously. The trail for the Annpurna Circuit doesn’t overlap with that route at all and actually follows a road for the opening parts of the journey.
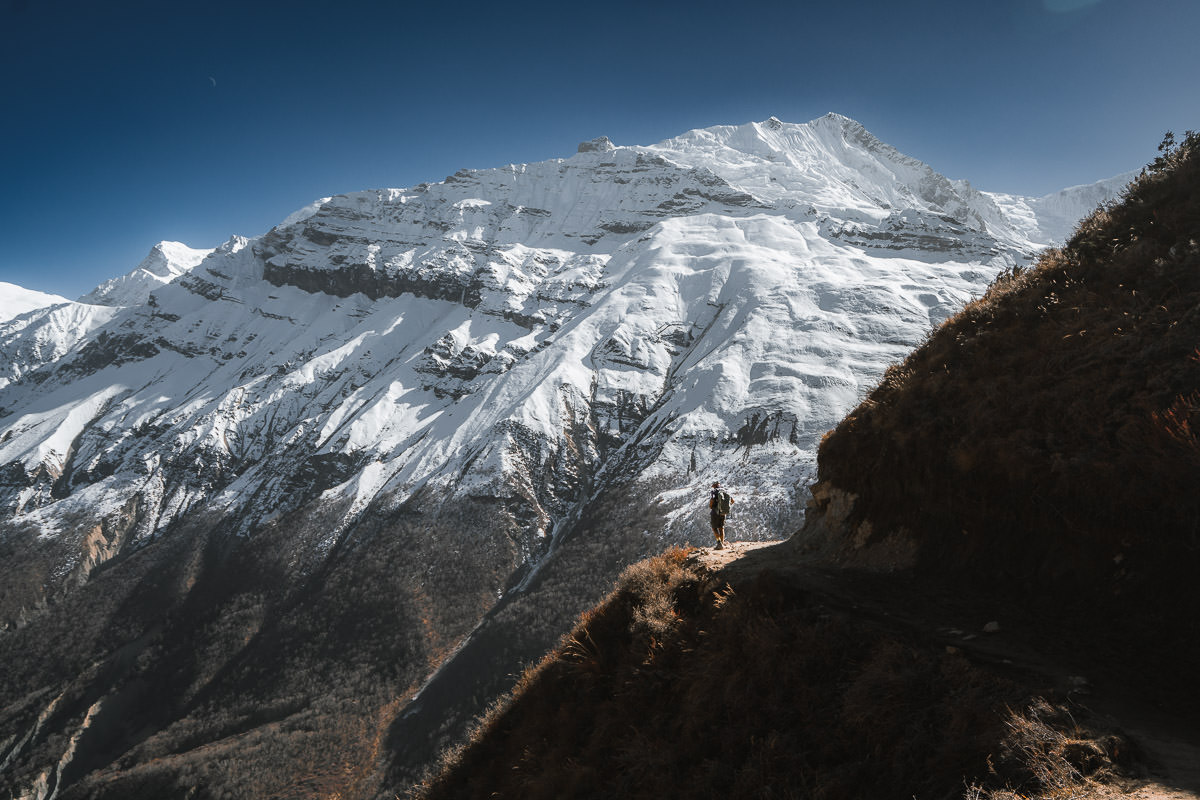
The first few days of the Annapurna Circuit Trek, are not the most peaceful or remote. Trekkers will find themselves being overtaken by Jeeps full of tourists driving deeper into the circuit or being dropped closer for a quick summit attempt at Tilicho Lake. I always hate when cars can drive past me while I’m working hard trekking but it’s unfortunately just part of this route now.
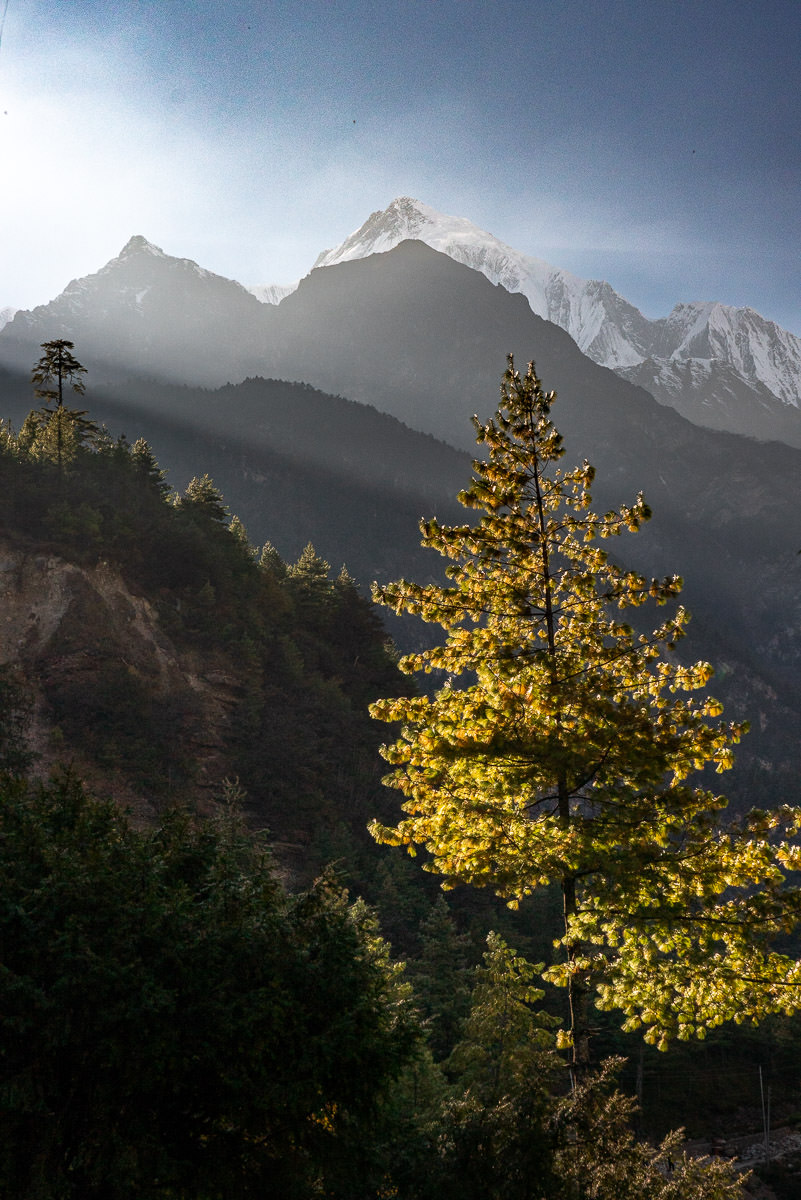
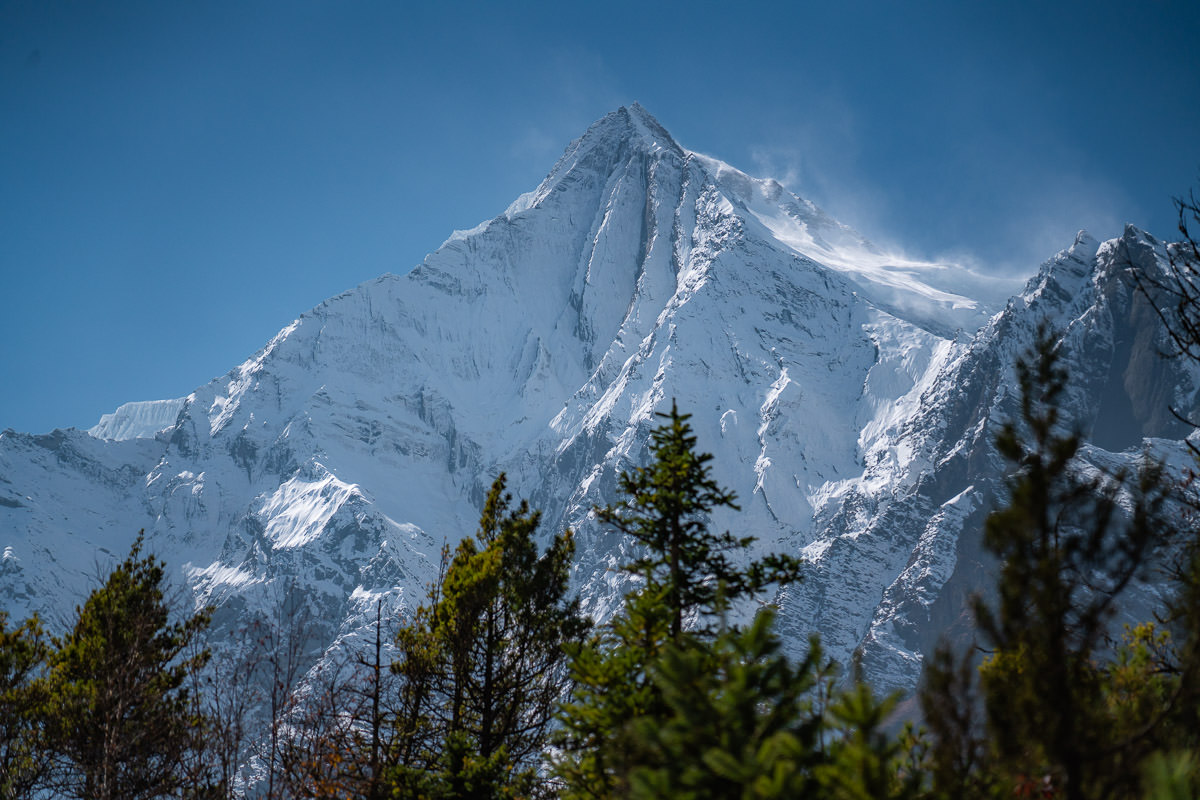
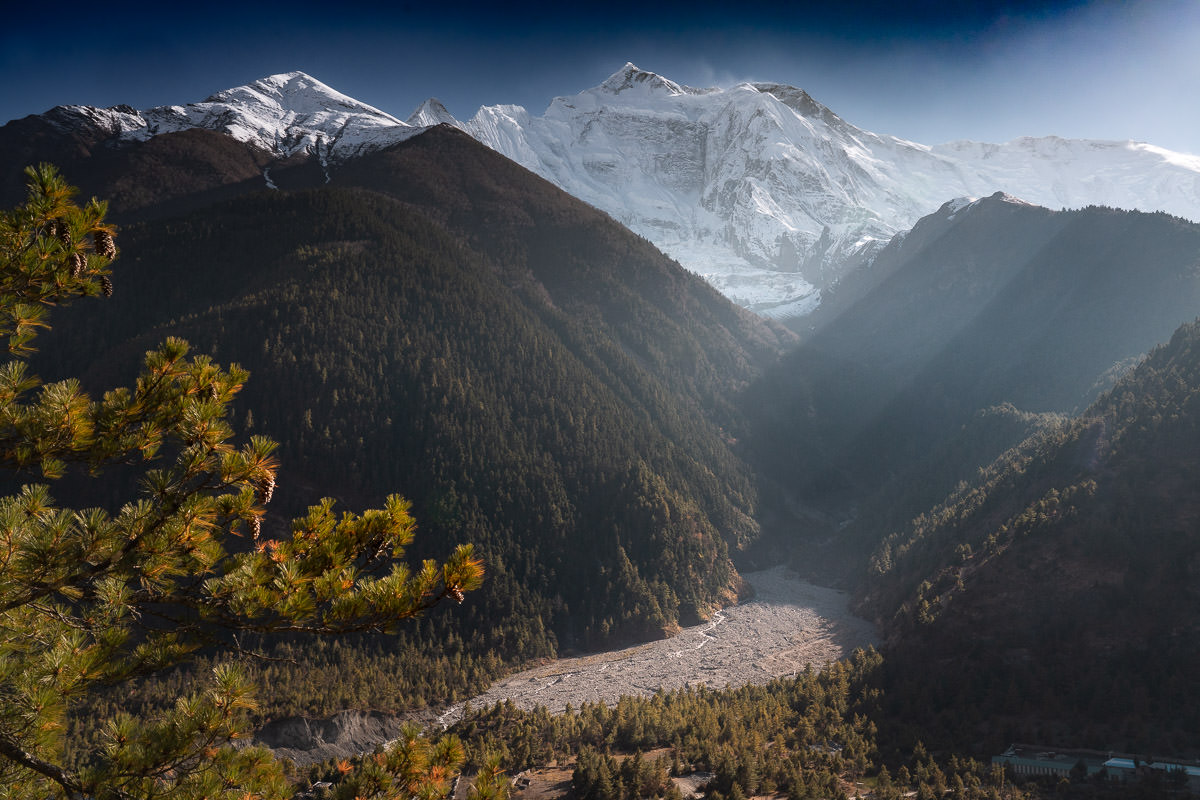
Despite trekking on a road for a fair portion of the first day, there are many side trails that quickly immerse you into the natural surroundings. We found ourselves on steep stairs in the forest and walking through small villages as we wound our way on and off of the road throughout the days. The highlights when it came to views early on in the trek was that from the very first morning, we had views of Manaslu (8,163m). This qas quite nostalgic for me and actually pretty incredible to have Manaslu as a constant backdrop given that I’d stood atop the mighty mountain a year earlier.
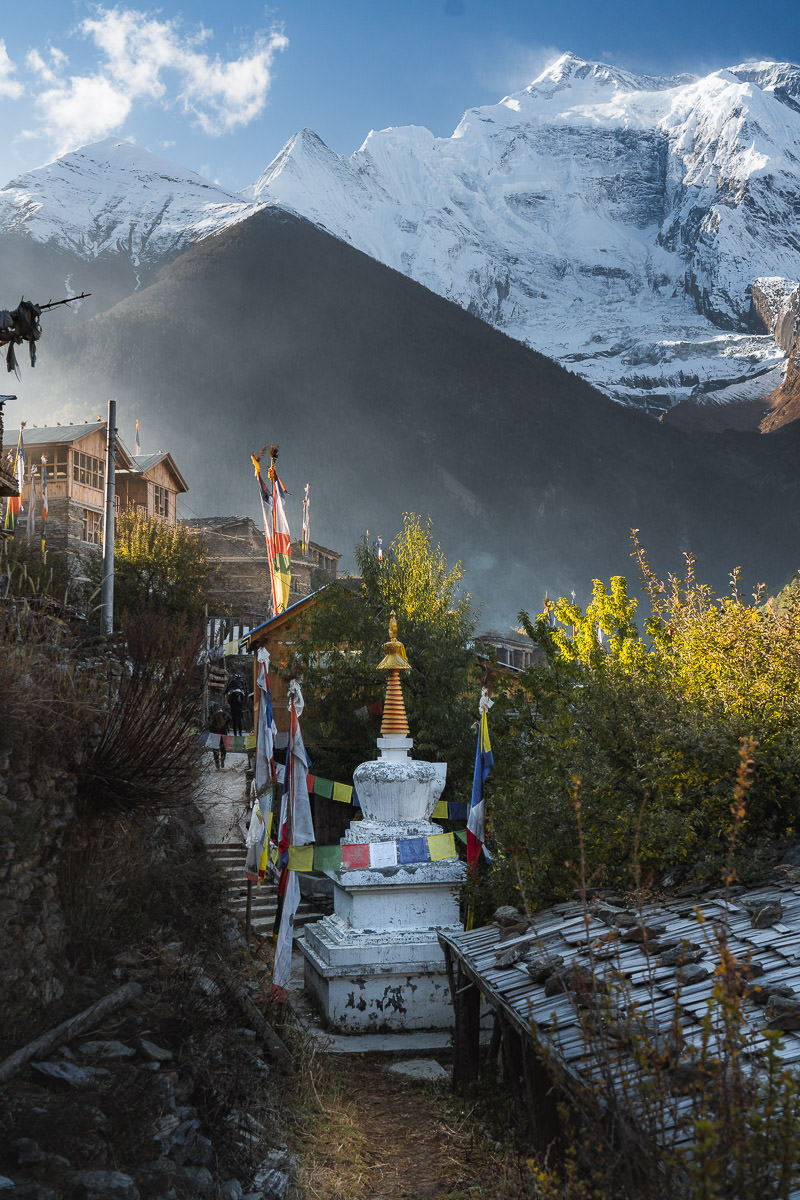
Chame was our first stop for the night and was probably my least favorite town of the lot. This is often to be expected when you are just getting started on the trail. The second night in Upper Pisang, we had a direct view from the tea house looking towards Annpurna II. They call it the unlucky mountain as it just misses out on being one of the 14 revered 8000ers. At 7,937m, it is an imposing peak, providing an unbelievable view right from the doorstep of the tea house.
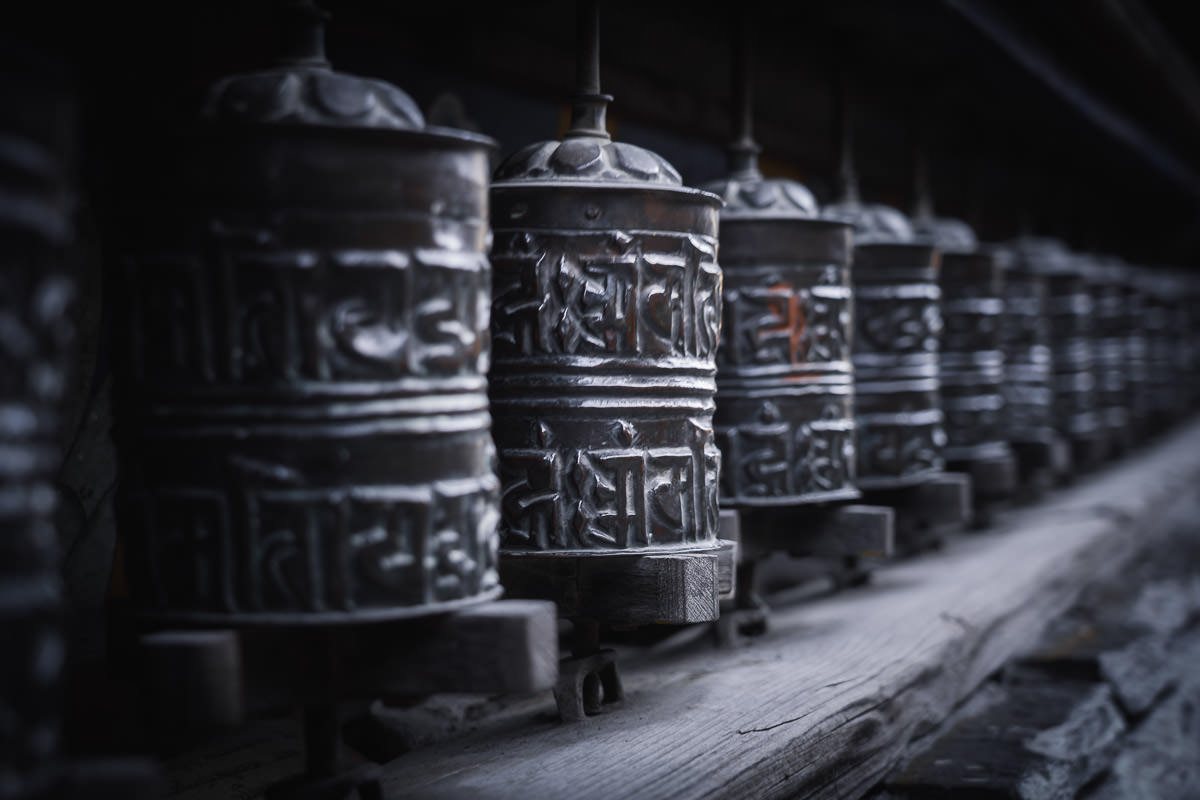
Manang was the first town that felt quite remote and had a bit of atmosphere. In Manang there were several bakeries, religious sites, sacred lakes and monasteries. We spent two nights in Manang, as do many trekkers, and used the ‘rest’ day to head up to Chonggen Viewpoint for more incredible views over Manang and the surrounding mountains.
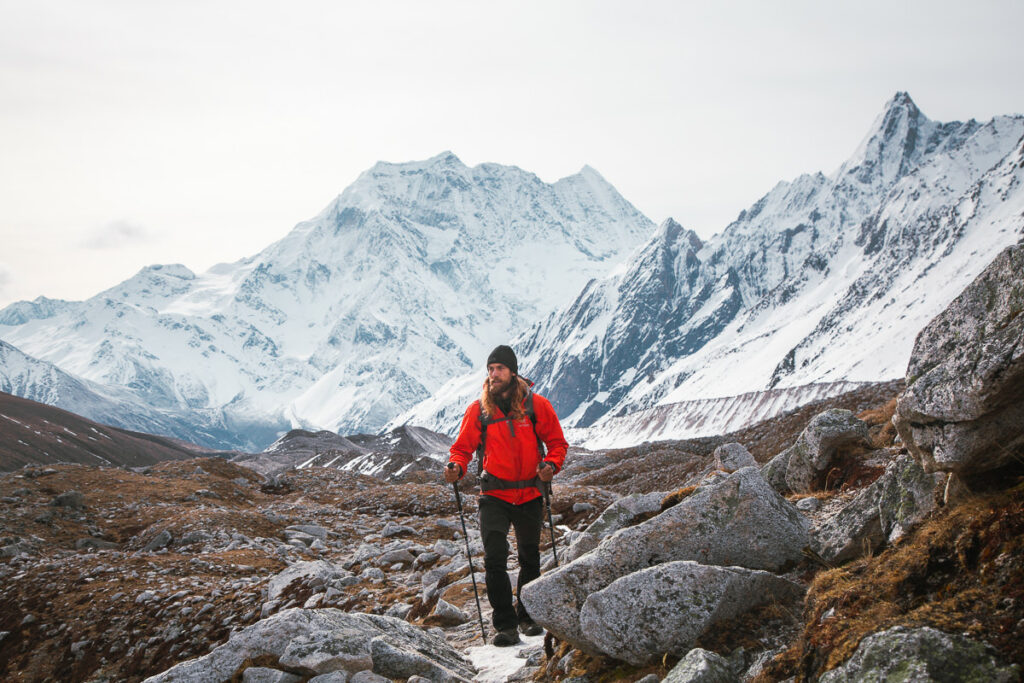
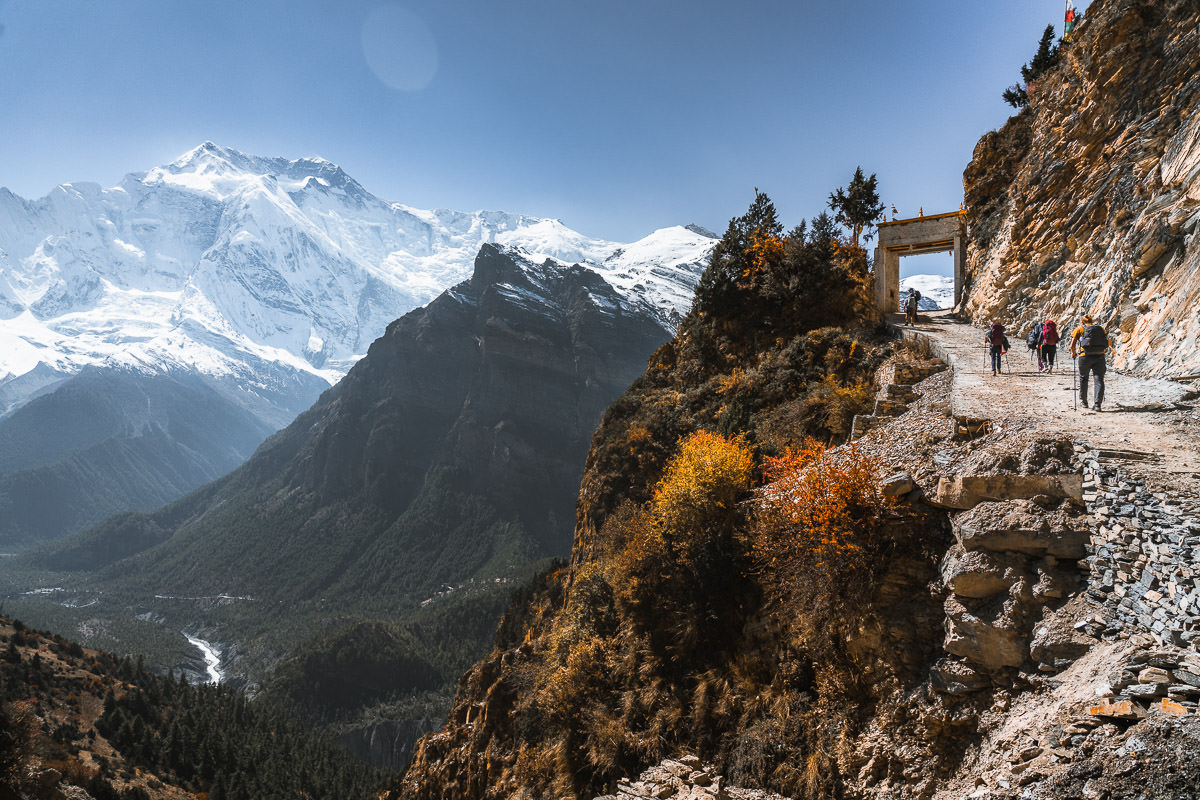
The scenery alongside the trail had become incredible by day three. While cars can still access to Manang, there was much less traffic and that rural, remote feeling had replace the chaotic, touristic vibe from the early moments of the trek.


TREKKING TO TILICHO LAKE
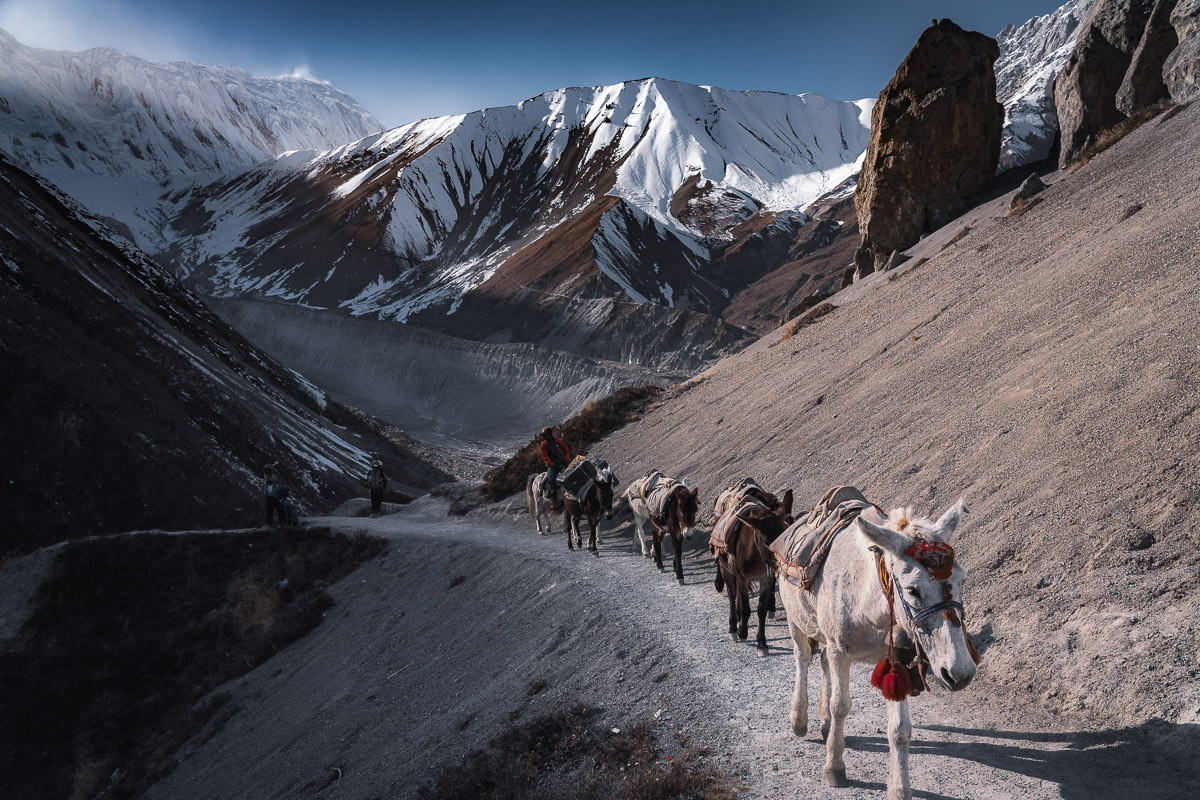
After a rest day in Manang, it was time to put in a few ‘big effort’ days as we head some serious distance and elevation gain ahead of us. Many groups head from Manang to Yakharka and continue on to the pass. However, it is possible to make a two-day or preferably three-day detour with a mission of hiking up to Tilicho Lake.
The lake is marketed as the highest lake in the world although given some research, you will find that there are about twenty different lakes that are higher than it such as Lake Titicaca. Others claim it is the highest glacial lake in the world but just across the border at 6,216 meters above sea level is the Changtse Pool in Tibet.
Despite being a bit over-hyped and falsely advertised to pull in more tourism, the lake is an incredible natural site. You might curse me for the extra few days of effort to get there but I think it’s well worth making the detour for a few reasons.
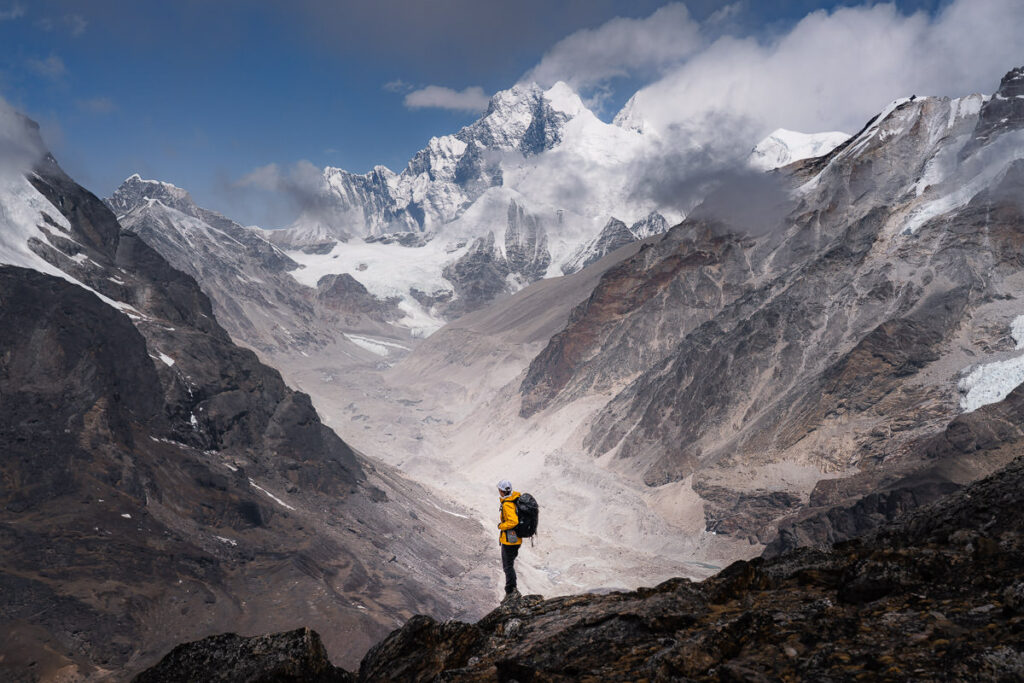
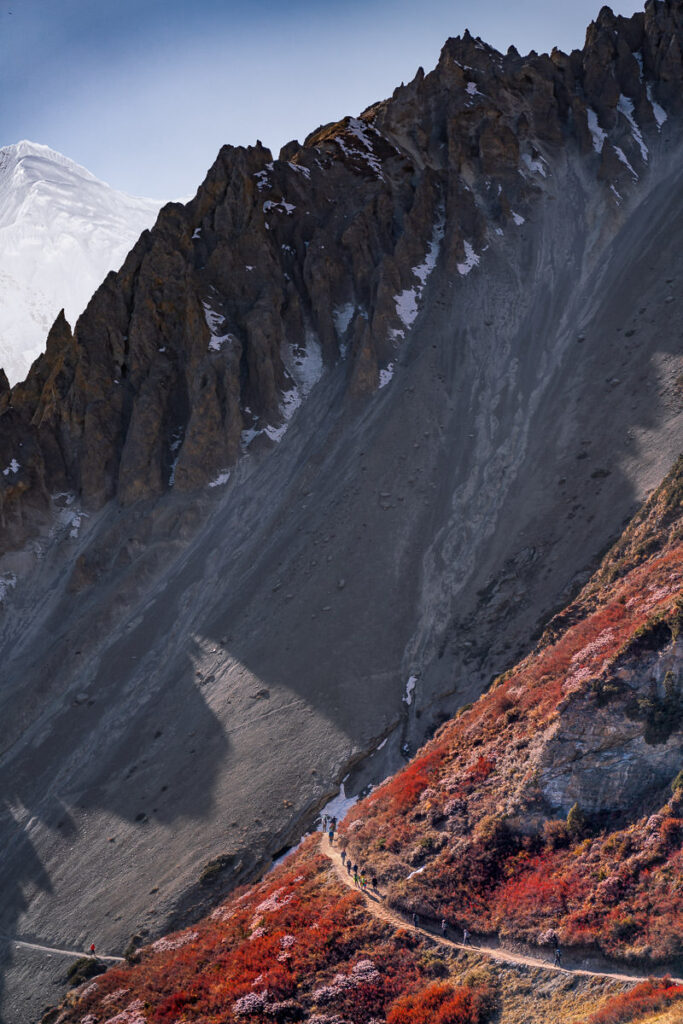
The trek into Tilicho Base Camp was one of the best sections of the entire trail. The vegetation faded away and the terrain began to evolve into an outer-space, moon-like scene. Huge slops of gravel were segregated by rock archways and sharp ridgelines. It was like no other part of the trail.
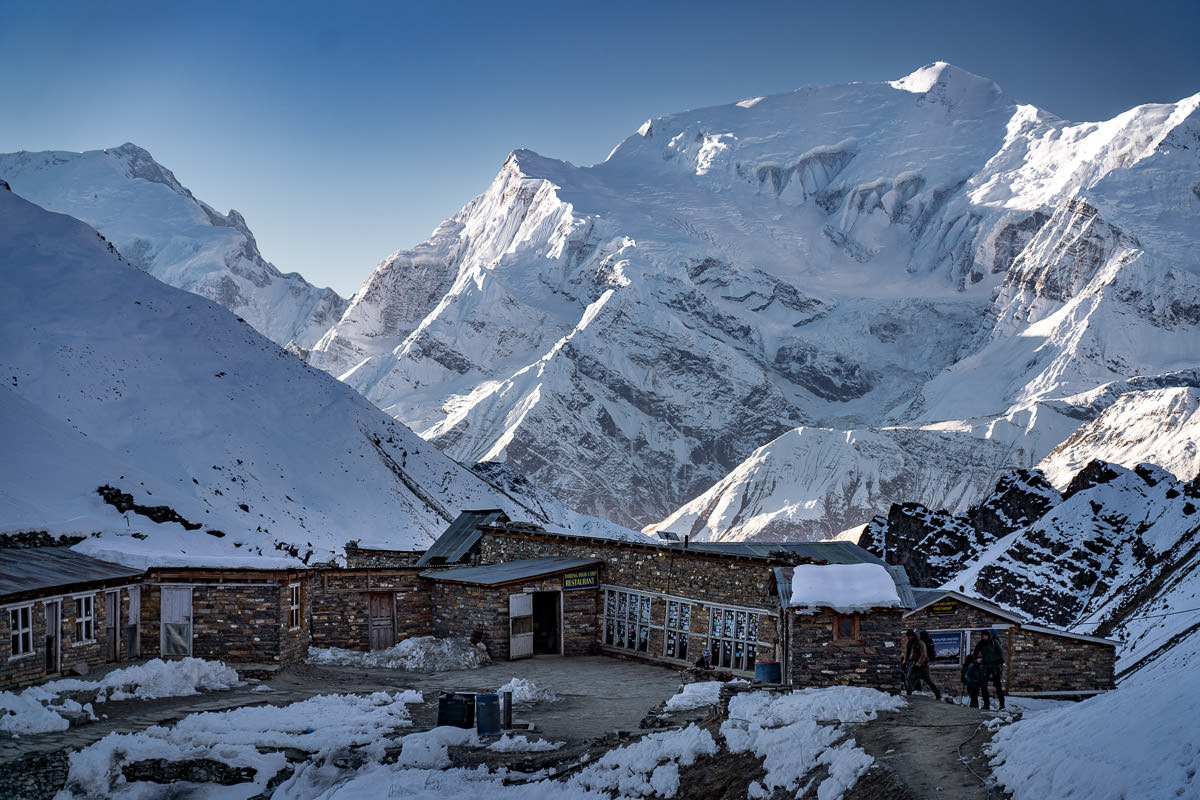
Once you reach Tilicho Base Camp, you’ll find that it isn’t a town and is an opportunistic collection of tea houses set up to meet the demand of those on a mission to reach the high-altitude lake. Hundreds of trekkers wake early to attempt to climb 900m of vertical gain to almost 5000m for a viewpoint at the rim of the lake. It’s pretty steep and a consistent set of switchbacks make the path a tough route, especially after just a few days at high altitude.
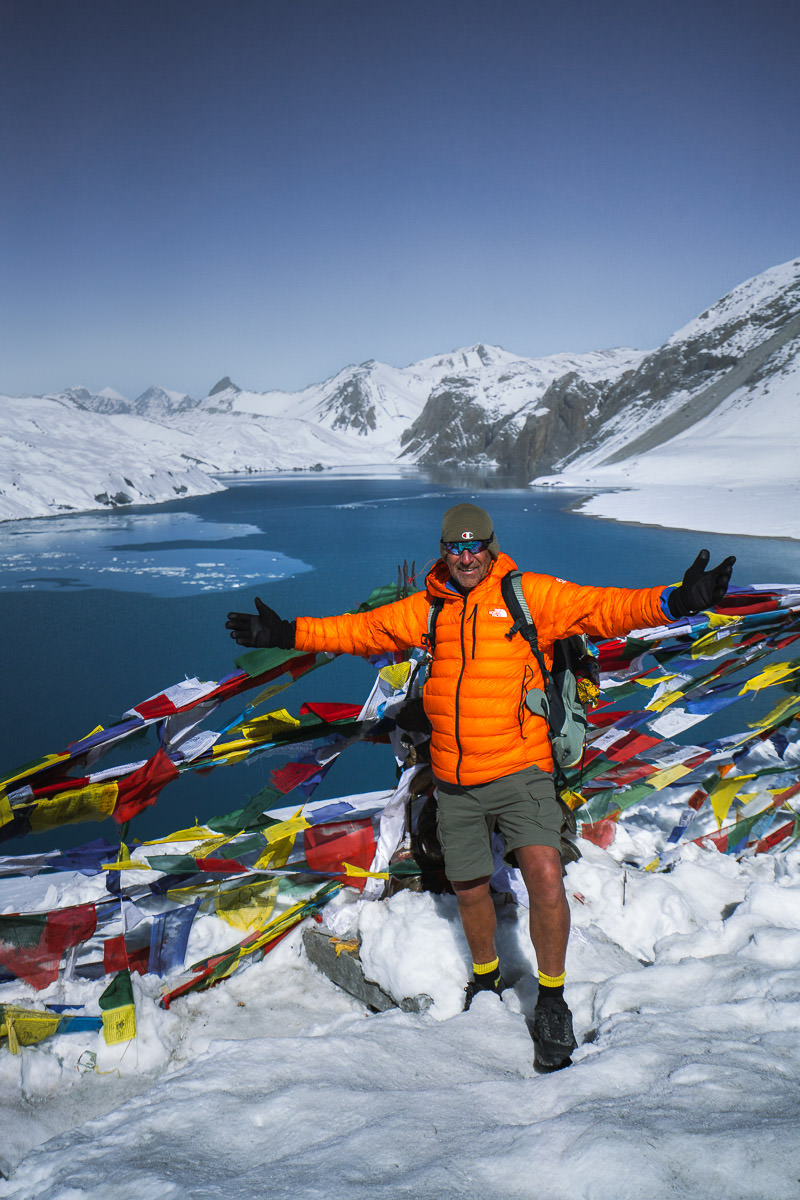
After a few hours, trekkers reach the lakeside to find a small teahouse serving coffee and tea. Taking a seat on the stone wall, it’s truly incredible to look out across the vivid blue water completely surrounded by snowy peaks and ridges.
The tough part about trekking to Tilicho Lake is that it is a 12-kilometer round trip journey with 900 meters of incline to get to the lake and back to base camp. Most itineraries dictate that you will quickly eat lunch and then walk another few hours to Shreekharka. It could be a suggestion to stay another night at Tilicho Base Camp to ease the difficult of the trek itinerary.


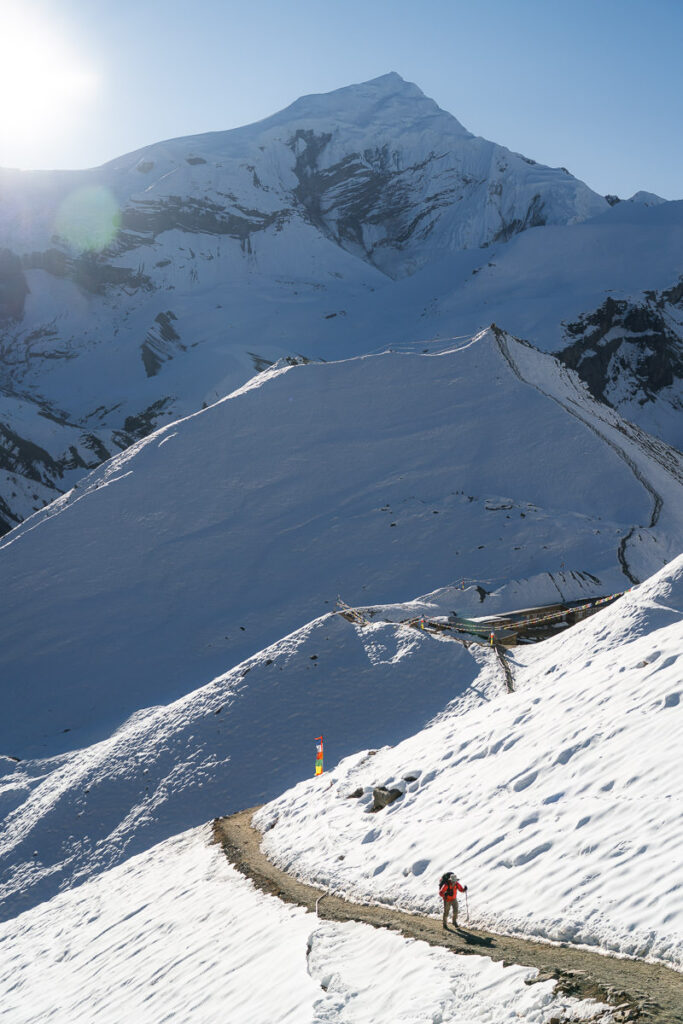
TREKKING ACROSS THORONG LA PASS
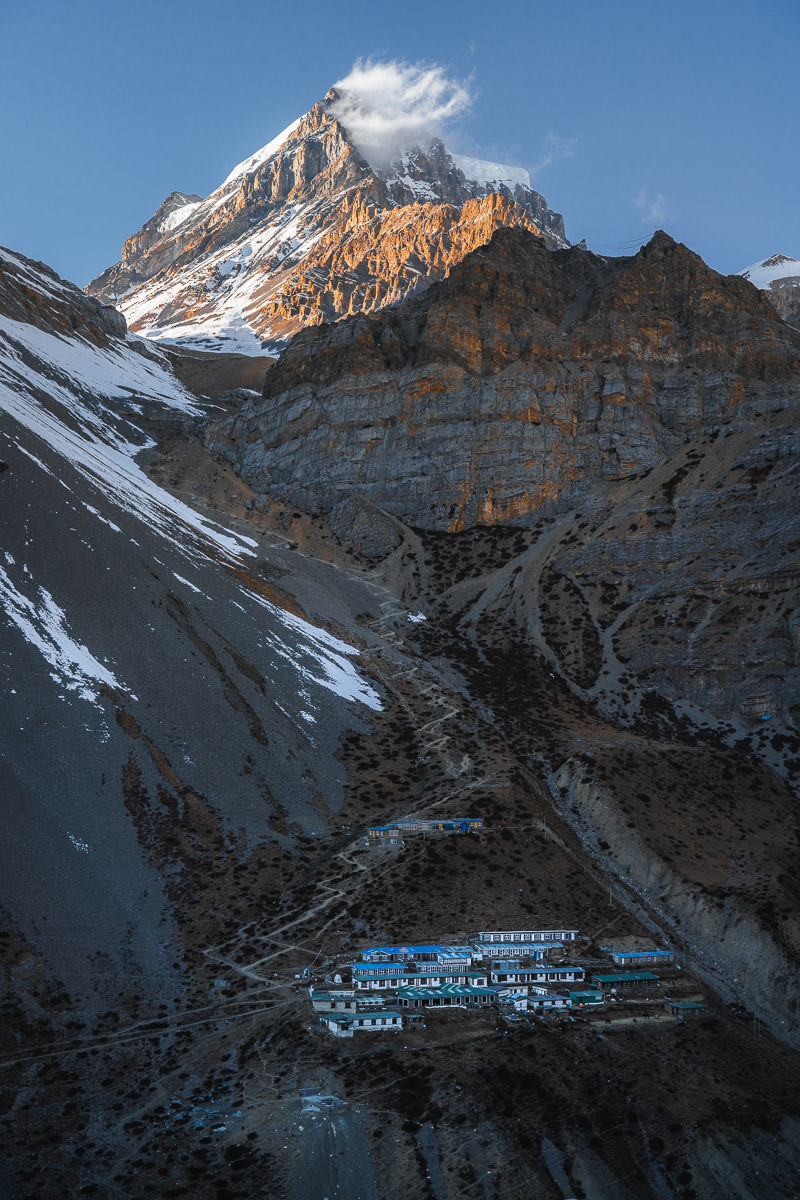
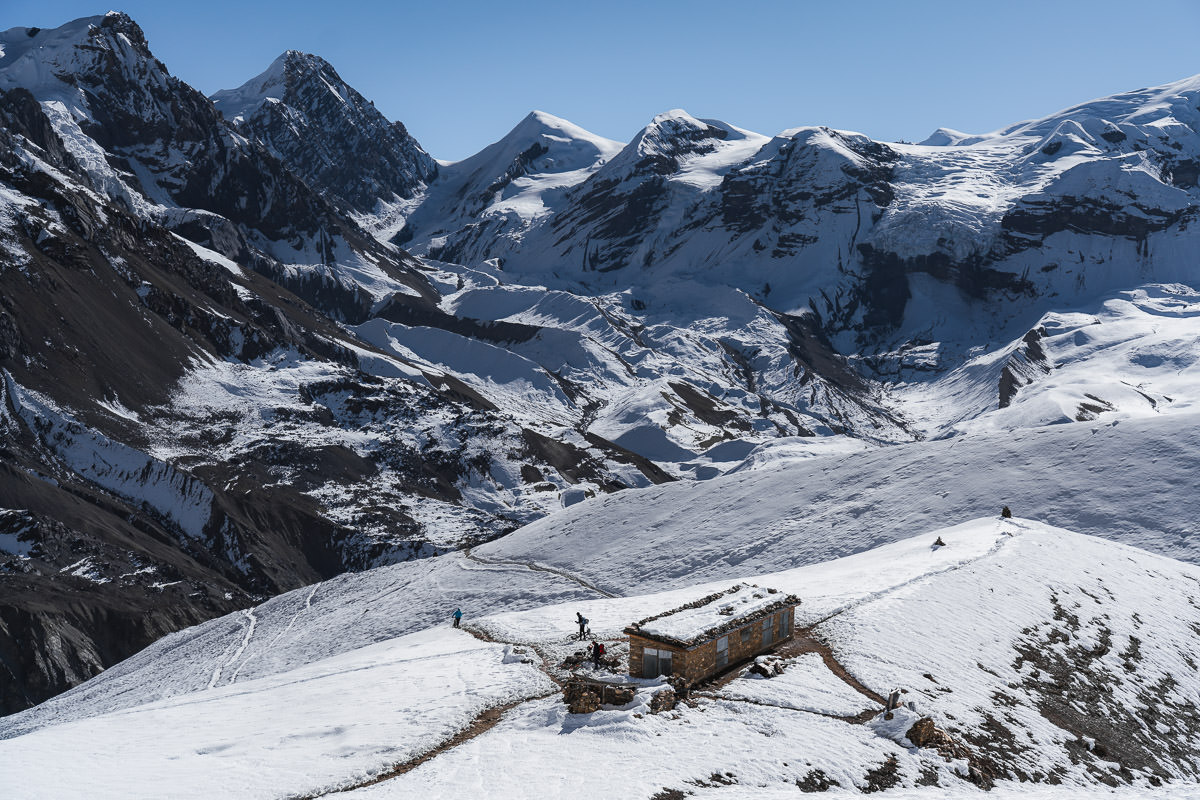
The long day up and down from Tilicho Lake and then from Tilicho Base Camp really took it out of us. However, the show must go on and we made a big effort to push all the way through from Shreekharka to Thorong Phedi. This is the base camp for the Thorong La Pass, which is the penultimate point and highest elevation of the trip.
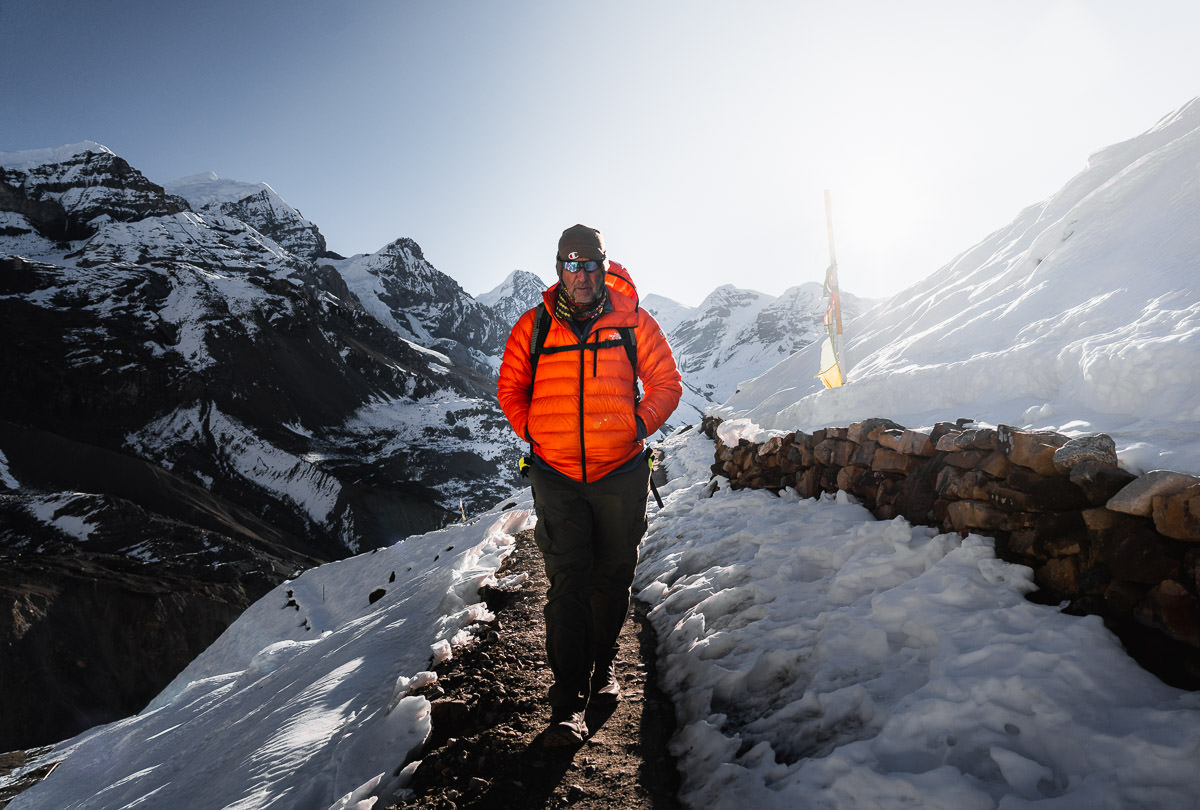
The views continued to be immense on the journey to Thorong Phedi, but a third straight day with a vertical kilometer of incline and 20km of distance took its toll. We arrived late to Thorong Phedi, just before the sunset as you can see in the first image below.
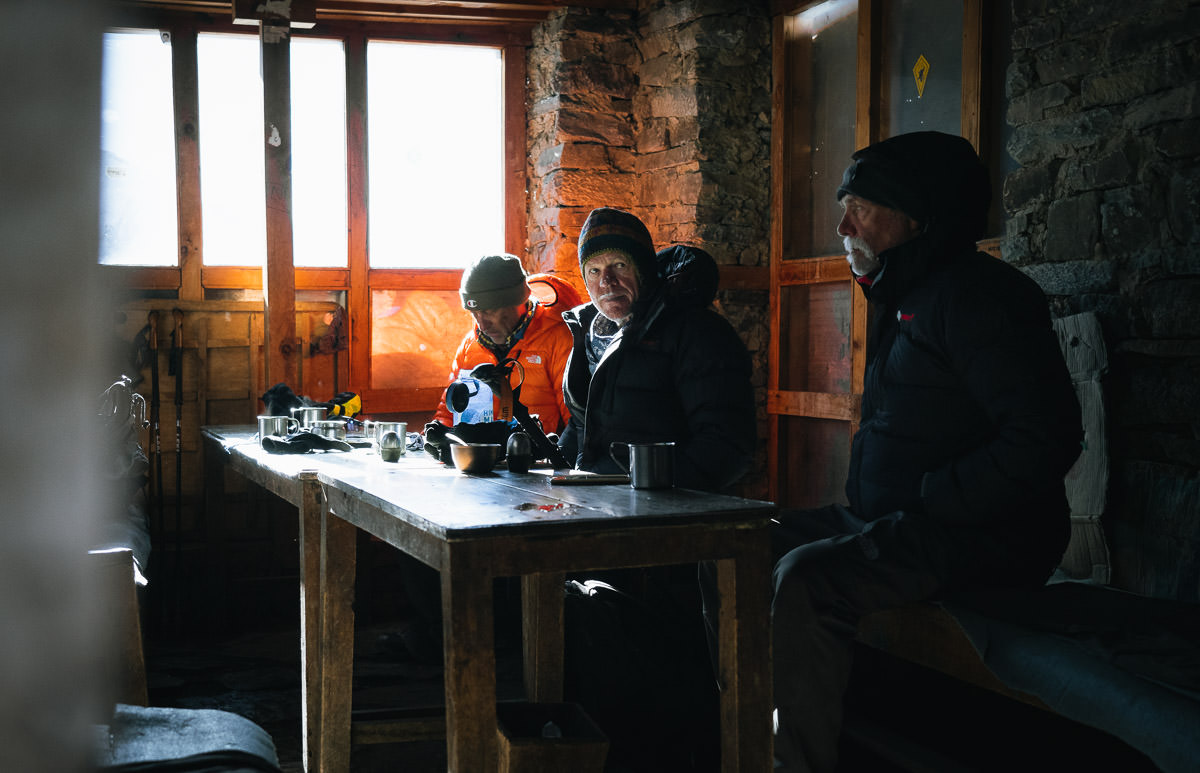
The tea house at Thorong Phedi was buzzing, packed to the rafters. Many groups set off as early as 2:30 am on their quest to cross the path. We decided to bring up the rear and set off an hour before sunrise at around 5 am after a quick breakfast in the tea house.
The journey across the path begins with about 500m of elevation gain while ascending up relentless switchbacks. You can see the switchbacks from the tea house in the image below. After about 1.5 hours, trekkers reach the ‘high camp’, which is actually where many people stay on their approach to Thorong La Pass. It will make the pass day shorter but the prior day longer. It’s all about preference.
After the high camp, the scenery turns from rock to snow. We are now in a white, winter wonderland as we cross the 5000m mark on our journey across the pass. Up a seemingly never-ending slope, we wind our way around each corner.
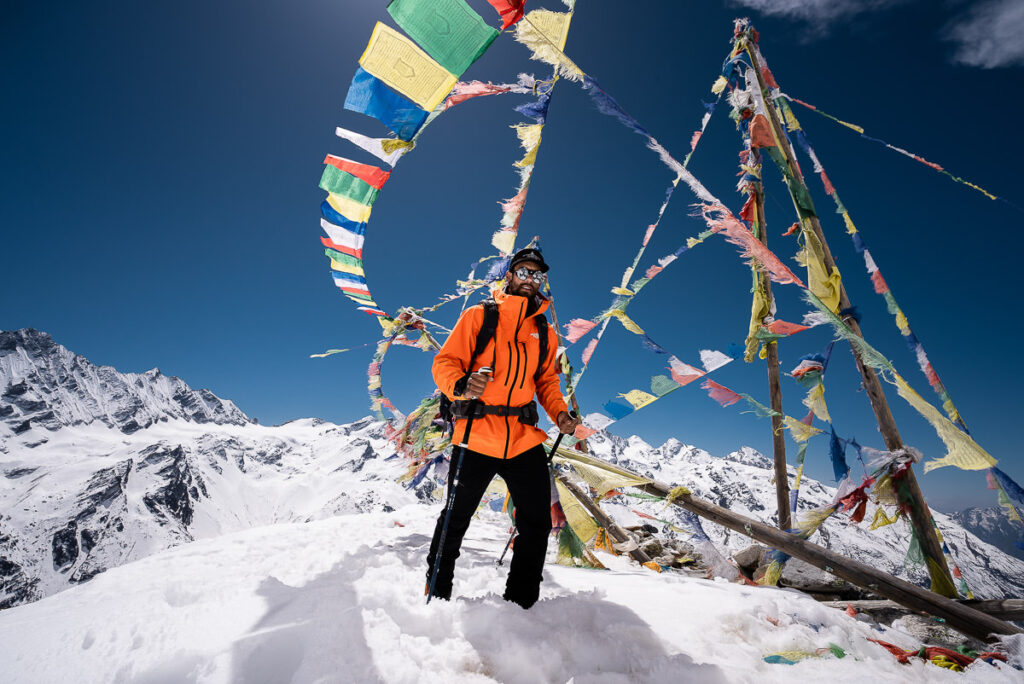
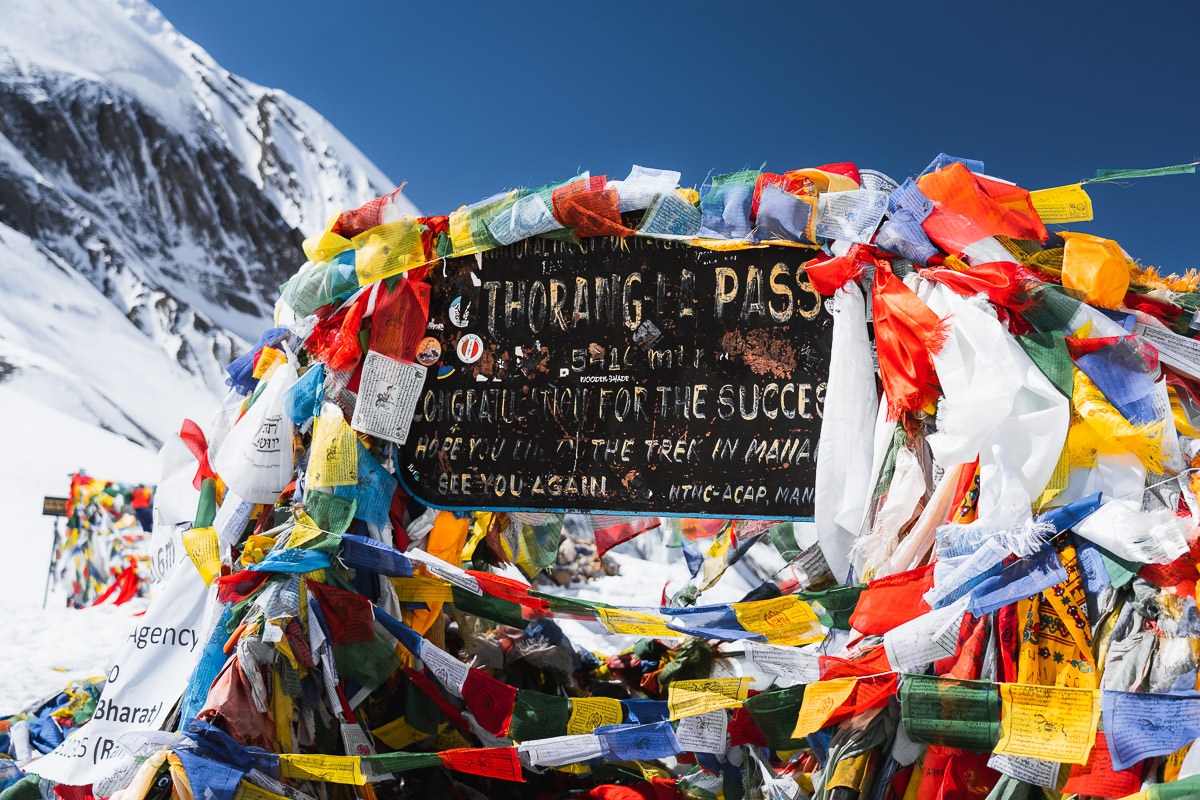
Secretly, we are hoping to see the prayer flags of Thorong La but they never come. What we do find is a tea house serving overpriced but highly necessary instant coffee and tea. Here we recharge for half an hour before making our final push to the pass.
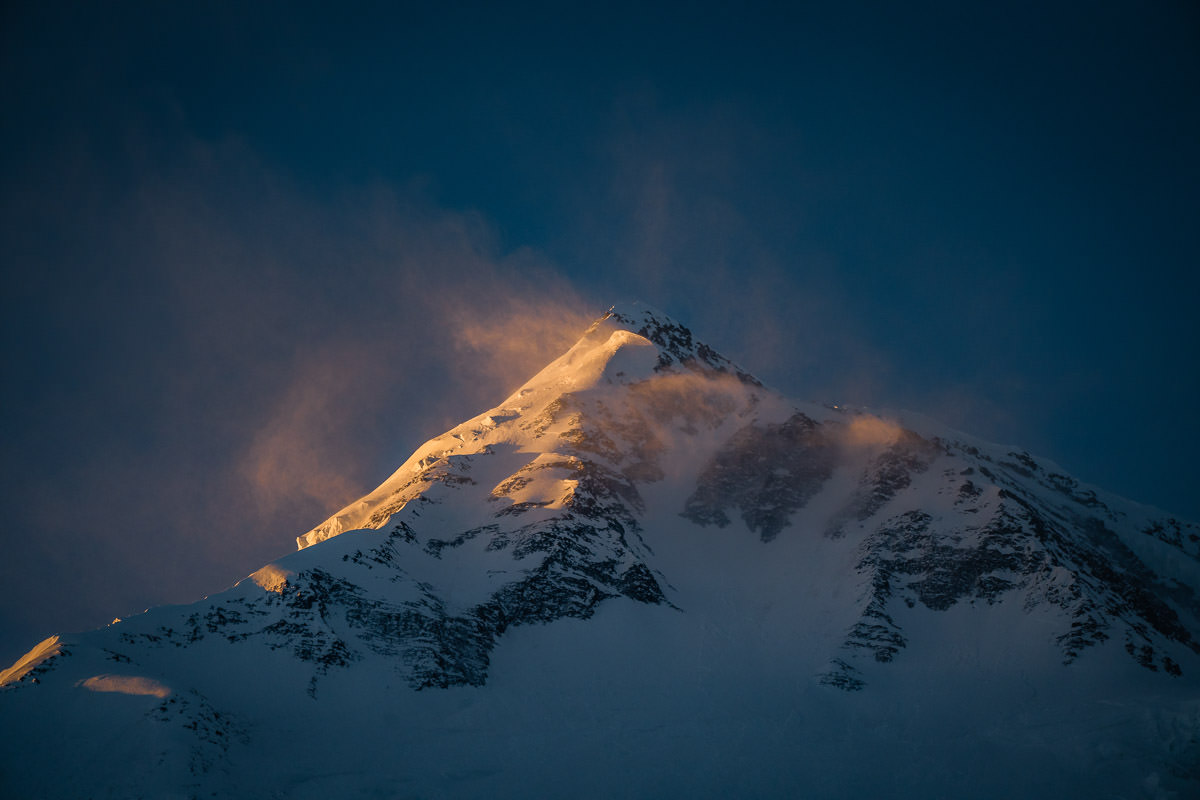
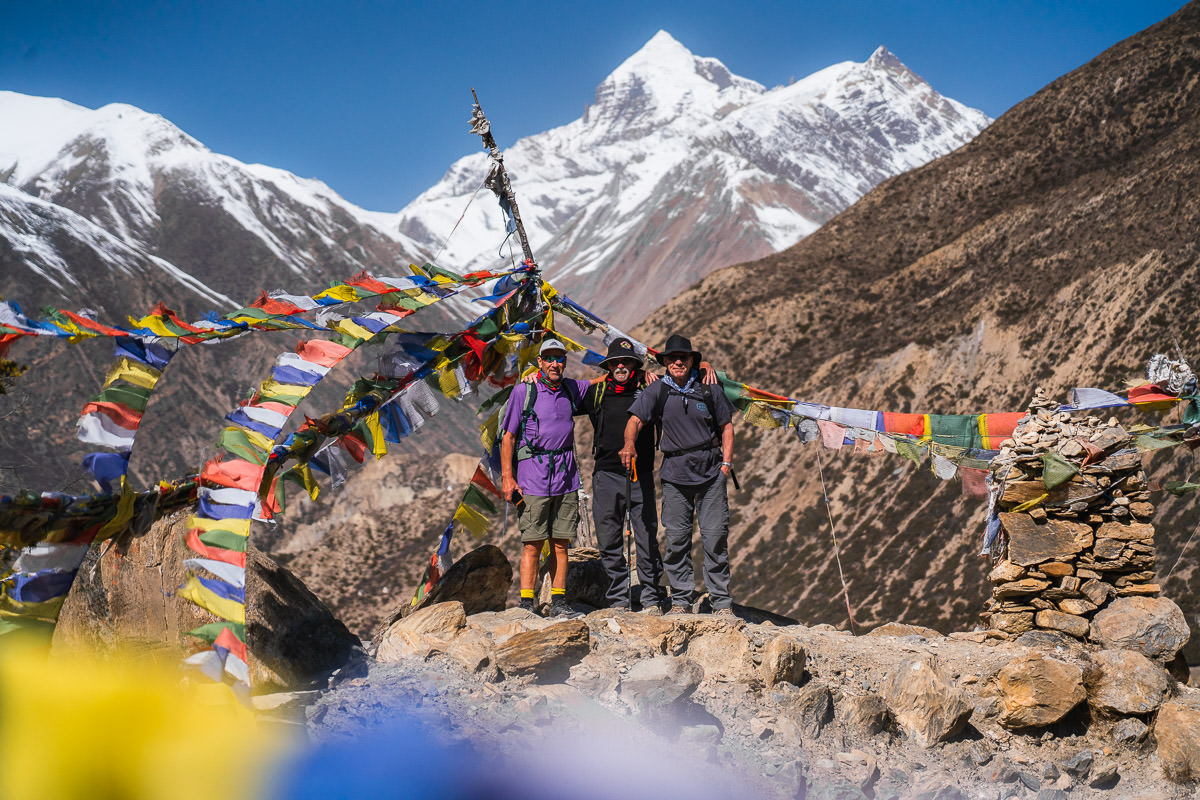
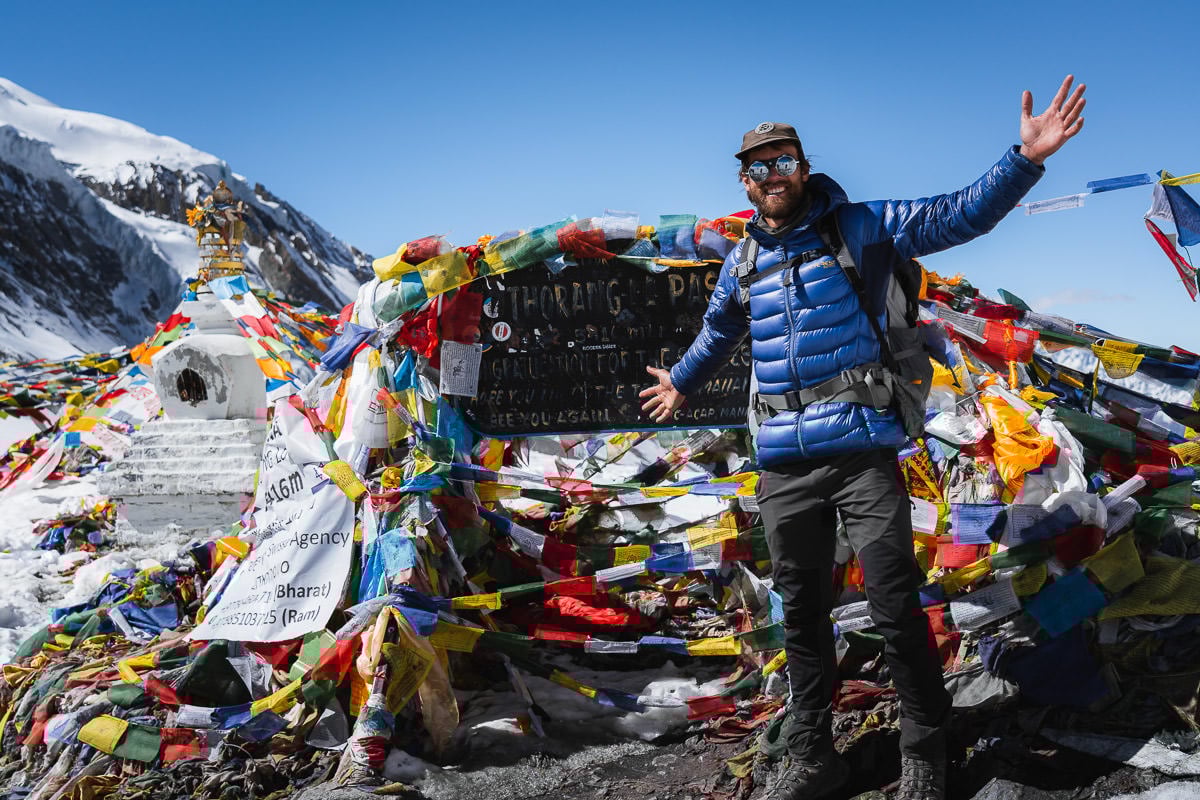
About an hour further and we make it up to the pass after about six hours of trekking. My dad and his mates are gassed but glad to be at the highest point of the trip. We hang out, take a few photos and even witness a huge avalanche from the seracs on the right side. Luckily it dispersed down to the side of the mountain and not toward us.
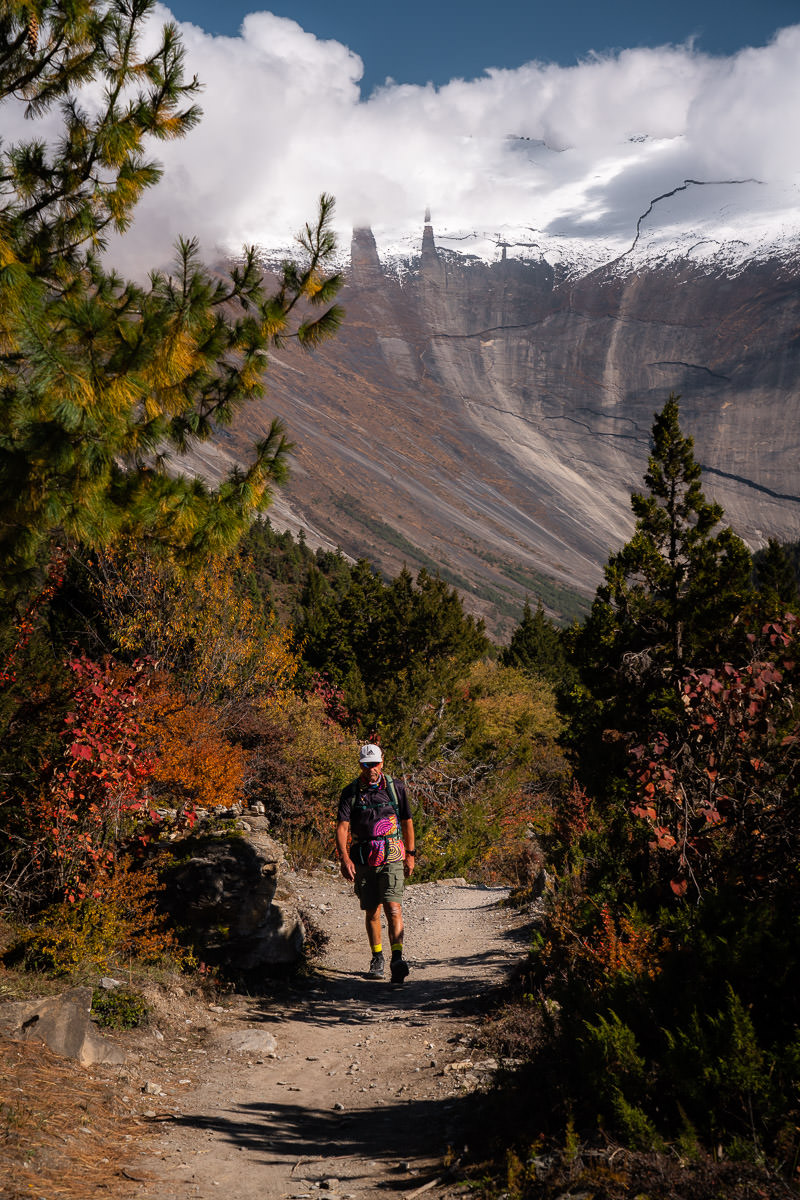
The journey down from Thorong La Pass should be straightforward and is only about eight kilometers. However, with icy conditions and slippery rocks, it was slow-going. It is highly recommended to bring micro spikes for this descent and for the descent from Tilicho Lake. Even though you will only use them twice, they are worth bringing along.
Late in the afternoon, we roll into Muktinath after crossing over into the Mustang region from the Annapurna Sanctuary side. It’s beautiful scenery but we are all just glad to make it to the hotel. It was a pretty tough ‘summit’ day all things being said.
Many trekkers will walk one more day to Jomsom before flying to Pokhara. However, we decided to take a Jeep for about $15 per head. It’s only an hour’s jeep ride to Jomsom.
I’d advise taking the Jeep as the trek looked like it went alongside the road in hot, exposed, dry terrain for twenty kilometers. It’s a brutal and unnecessary section of trail to walk but some purists may like to complete the old ‘original’ circuit. If that is you, make sure you walk all the way to Pokhara, and don’t cheat with any planes from Jomsom!
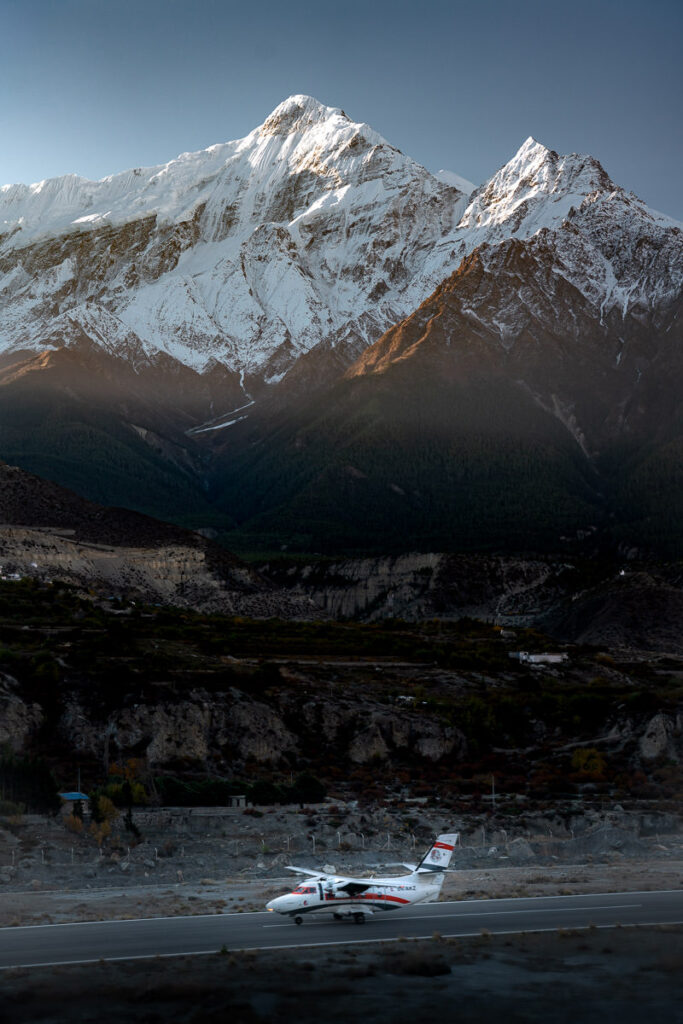
We spent the night in Jomsom and celebrated with a couple of beers. The next morning, we watched as the light planes flew into the airport. It’s a unique landing strip with an amazing backdrop of mountains on all sides. The planes take off and do a full U-turn immediately before flying up and out of the valley with views of Dhaulagiri (8,167m) on the right.
After a few nights in Pokhara, we flew back to Kathmandu to wrap up an incredible journey on the Annapurna Circuit with Himalayan Masters.


I hope you enjoyed this guide to the Annapurna Circuit Trek in Nepal and have a great experience yourself! To finish up, here is a photo from the epic Jomson airport. Not a bad way to end the trip.
TOP 3 PLACES TO STAY IN KATHMANDU
- Ultimate Luxury: The Dwarika’s Hotel – Luxury, Spa-service, Pool
- Best Value: Aloft Kathmandu Thamel – Swimming Pool, Gym & Great Restuarant
- Budget Choice: Hotel Jampa is easily the top cheap hotel in Kathmandu
HAVE YOU READ MY OTHER NEPAL BLOGS?
I’ve been lucky enough to have many awesome adventures in Nepal, which you can check out below where I’ve listed some of my favorite blog poss from Nepal.
- The Most Iconic route: Everest Base Camp Trek
- The Most Scenic Route: Annapurna Circuit Trek
- My Favorite Trek in Nepal: Manaslu Circuit Trek
- An Easy Nepal Trek: Langtang Valley Trek
- A great beginner peak: Island Peak Climb (6,165m)
- My Favorite Climb in Nepal: Climbing Ama Dablam (6,812m)
- My first 8000er: Climbing Manaslu (8,163m)
- My toughest climb in Nepal: Climbing Makalu (8,463m)
- Where to stay: 16 Best Places to Stay in Kathmandu
Babu Karki
Sunday 12th of May 2024
Hi, Jackson Groves, the photography showcasing the grandeur of the Annapurna region is best. The layout was clean and intuitive, with easy navigation allowing me to delve deeper into the content with a mere click.
"Annapurna Circuit Trek in Nepal: The Ultimate Guide" descriptions of the trekking routes and elevation profiles to practical advice on gear selection and acclimatization strategies, every aspect of the trek was meticulously covered.
this guide apart was the personal touch woven into its narrative. Reading through the guide felt like embarking on a journey alongside a knowledgeable and enthusiastic friend.
Reading this post every new trekker will be inspire to be part of this moment to explore the breathtaking beauty of the Annapurna region.
Pavla
Sunday 11th of June 2023
Hi, I noticed a news that Nepal treks should only be allowed only with a guide, starting from April 2023. Your article seems to be from June 2023. Does it mean that Annapurna Circuit has an exemption? Thanks a lot!
Sunday 2nd of July 2023
Thanks, honestly, this is a reason for me not to even think about Nepal and consider e.g. Patagonia
Jackson
Sunday 18th of June 2023
Anything above 3000m I believe you need a guide now
Thursday 9th of March 2023
Please tell me more about your photography set up. Camera, lens, gear etc Thank You! :)