
The Nuuanu Trail starts off on the beautiful Judd Trail, crossing streams and winding through the bamboo forest. Through a series of switchbacks within the forest, hikers climb their way up via Pauoa Flats to the halfway point at the Pali Lookout before returning on the ridge back down to the Judd Trail starting point.
It’s a mix of well-maintained trails and wild single-tracks through the bushes. A great challenge with 500m of incline over the 10km of hiking.
NUUANU TRAIL TO PALI LOOKOUT HIKE
In this blog post, I will share with you all of the details you need in order to enjoy this hike such as distance, incline, best viewpoints along the way, where to park, the best time of day, photo opportunities, and essential gear required.
NUUANU TRAIL TO PALI LOOKOUT HIKE DETAILS
- Hike Distance: The total distance of the hike is 10km (the distance on AllTrails is wrong).
- Hike Duration: The hike will take you about 3-4 hours up and down.
- Hike Incline: Total incline for the hike was 500 meters or 1640ft for the full loop.
- Hike Difficulty: The Judd Trail is a great easy hike on Oahu. However, the Nuuanu Trail is quite steep and is basically an uphill set of switchbacks. Joining the Pauoa Flats Trail is quite muddy, slippery and just like the Nuuanu Trail it has a lot of roots, uneven surfaces and isn’t a straightforward hike. There’s nothing dangerous to the point of the Pali Lookout but it involves some concentration. The hardest part of the hike is returning from the Pali Lookout along the ridge on the Pali Highway side. This single-track route is overgrown and will scratch your legs like most of the KST. You need pants for this part of the hike or you will regret it as it lasts for about 30-minutes. There are a few small spots of exposure and little rope sections but it’s pretty basic and nothing that actually needs ropes unless the weather turns the trail to sludge.

3 MOST POPULAR OAHU TOURS
- Doors-Off Oahu Helicopter Flight Tour: My number one recommendation is to do a heli-flight (doors off) and be blown away when you see Oahu from the air.
- North Shore Shark Cage Tour: The biggest adrenaline rush you can have in Hawaii is beneath the surface with sharks!
- Turtle Canyon Snorkel Cruise by Catamaran: The number 1 MOST POPULAR snorkel tour on Oahu. GUARANTEED Turtles!
WHERE IS THE NUUANU TRAIL
The Nuuanu Trail begins at the Judd Trail trailhead and uses the Judd Trail as its own for the first kilometer before branching off into its own track. Basically, if you park at the Judd Trailhead on the side of the road and then hike the Judd Trail until halfway around the loop, you will see the Nuuanu Trail sign and that is when your hike on the Nuuanu Trail begins. I’ve added a map below to the trailhead for the Judd Trail.
PARKING AT THE NUUANU TRAIL (JUDD TRAIL) TRAILHEAD
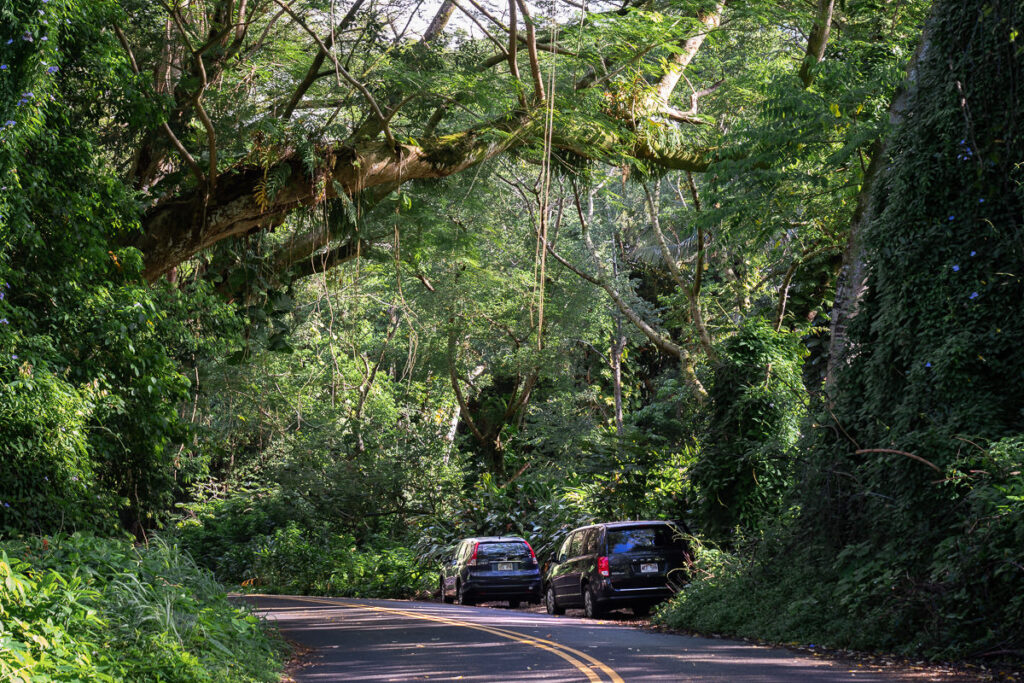
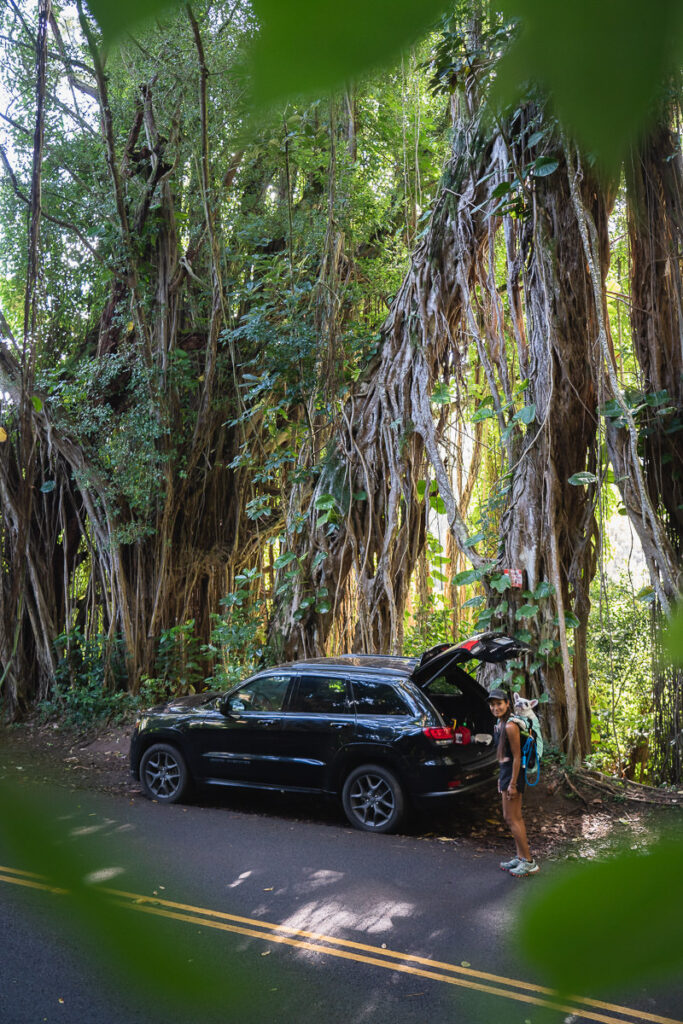
There is parking on the side of the road at the trailhead. It’s not signed or official but basically, you can just find a spot in the dirt where your car fits. This is a hotspot for smashed windows and theft so leave nothing valuable whatsoever in your car. Police patrol this strip but you will see smashed glass on the side of the road. It can get busy so you may have to walk a bit if you need to park further away but there are usually lots of options.
MY EXPERIENCE HIKING THE NUUANU TRAIL TO THE PALI LOOKOUT
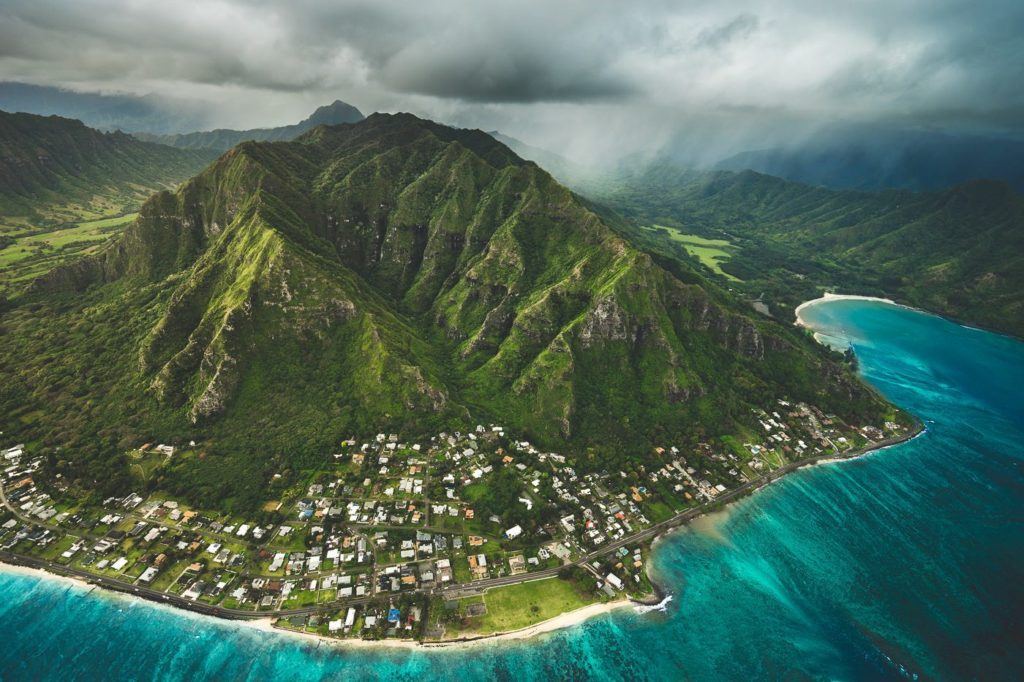
The Judd Trail is a well-known classic when it comes to hiking on Oahu. It’s a short loop with watering holes, cascades, a bamboo forest and enough adventure to satiate the appetite of those looking for a quick taste of nature. However, if you have the motivation to delve further into the forest, the Nuuanu Trail detours off the Judd Trail. Up the side of the mountain and onto the ridge, the trail leads you all the way to the Pali Lookout to take in those famous jagged ridges of Oahu.
After parking in the beautiful tree tunnel at the trailhead, we set off on the Judd Trail. It’s an immediate immersion into tranquility with a small stream glistening under a thick blanket of dense foliage. Roots are intertwined and reaching up past the trunks and consuming entire trees.
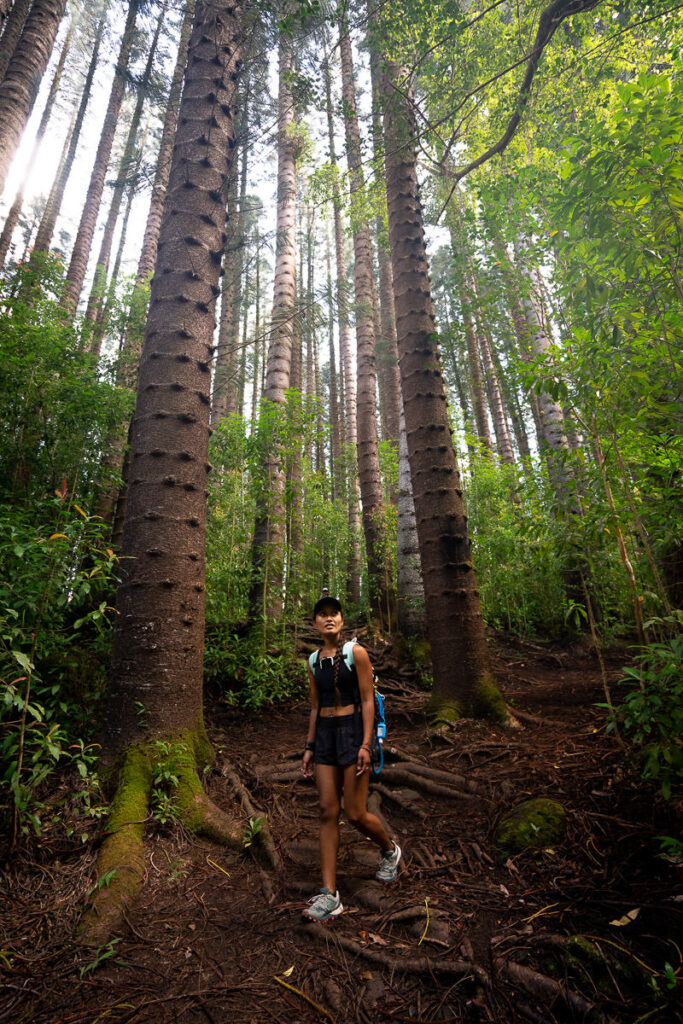
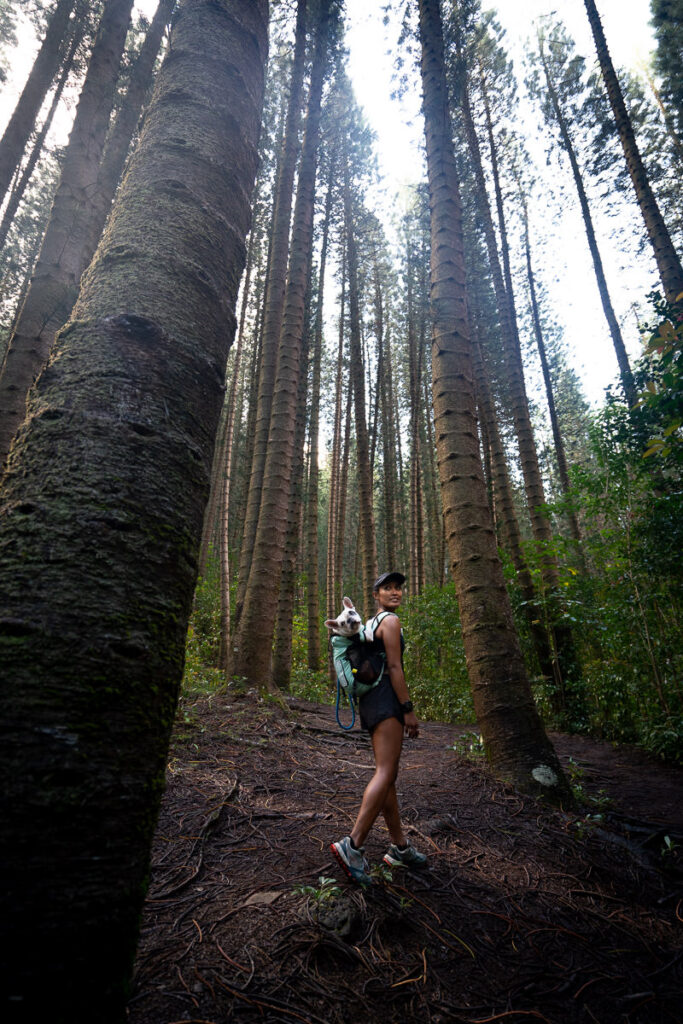
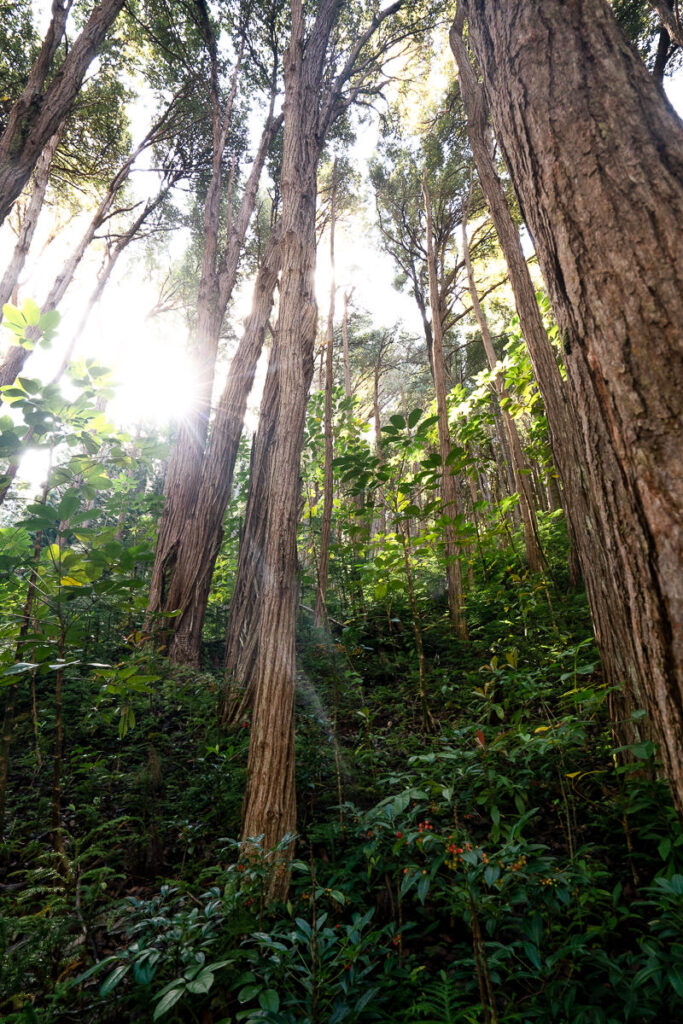
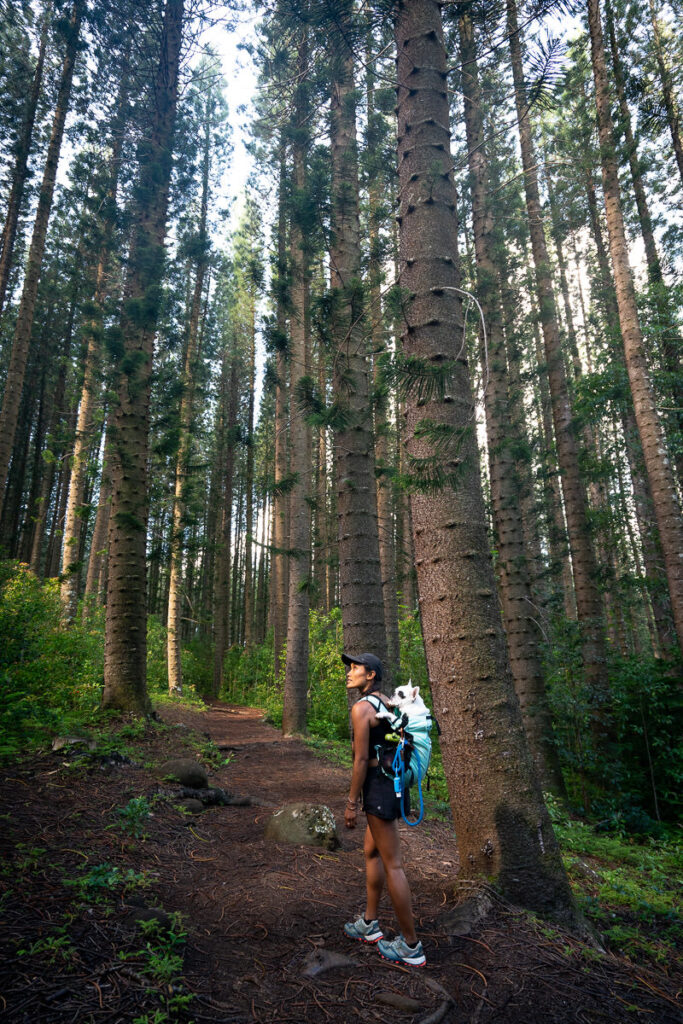
We need to cross a small river, hopping our way across the stepping stones. On the other side, a bamboo-forest tunnel leads us into the pine forest. Here we stretch our necks looking up to trying to find an end to the enormous trees. This is a forest scene not many expect on Oahu but it is more common than you think with a number of similar plantations found across the island.
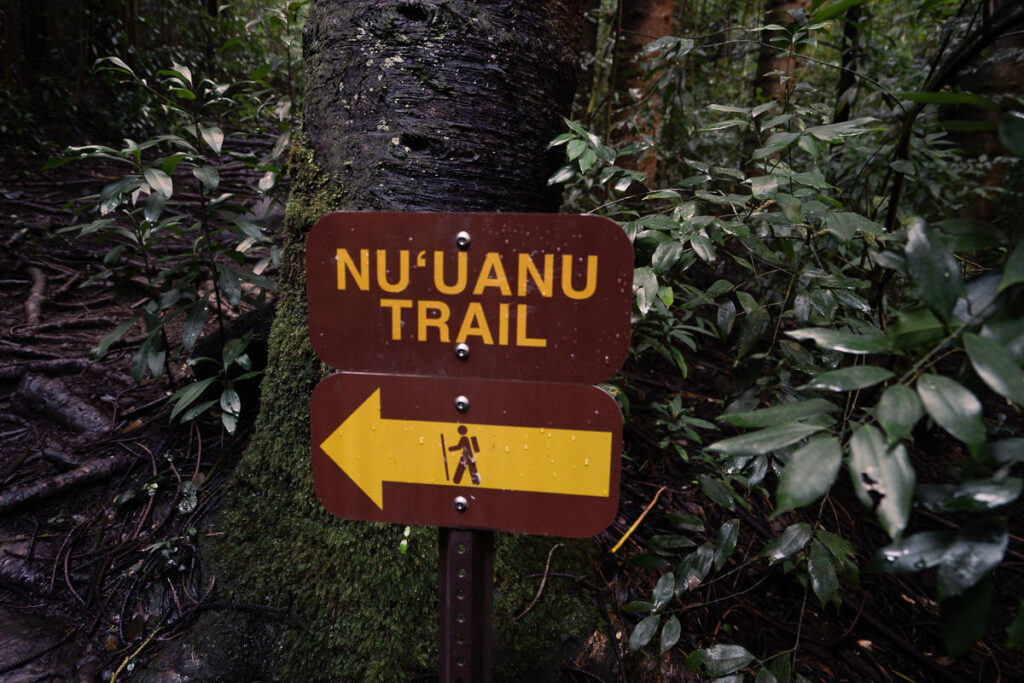
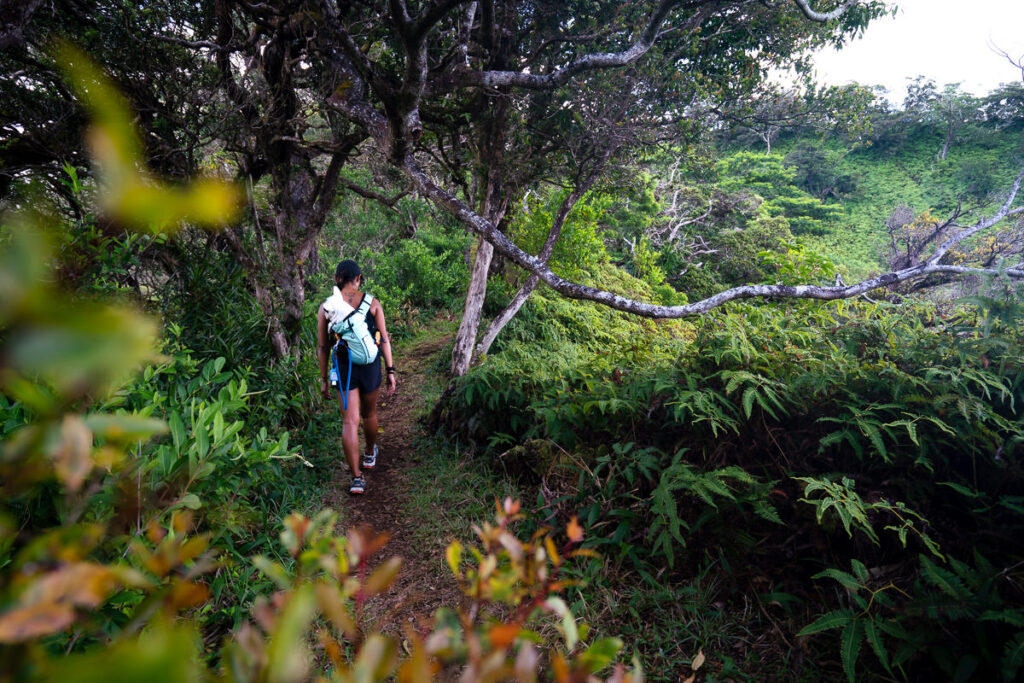
After enjoying one half of the Judd Trail, we reach the junction to find the Nuuanu Trail sign. This is where we hit the real trail and begin the incline as we head up to the ridge.

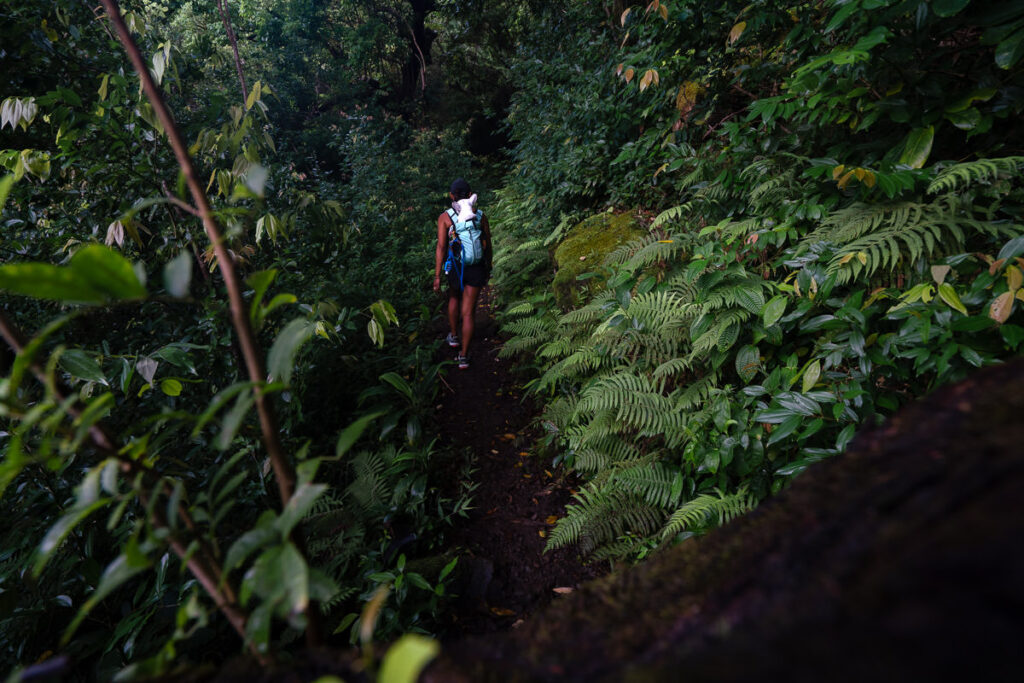
The trail becomes a little bit more technical with incline, tree roots covering the track and caked mud making for a slipery surface. There is five hundred meters of incline on this route, most of which comes throughout the series of switchbacks leading up to the ridge and the Pali Lookout.
Due to the muddy trail, roots and several bouldering spots, this trail is best done in dry conditons unless you are an experienced hiker. It’s fine for families and even okay for dogs on a leash. However, we packed our dog in a pack and let him enjoy several flatter sections of the trail.


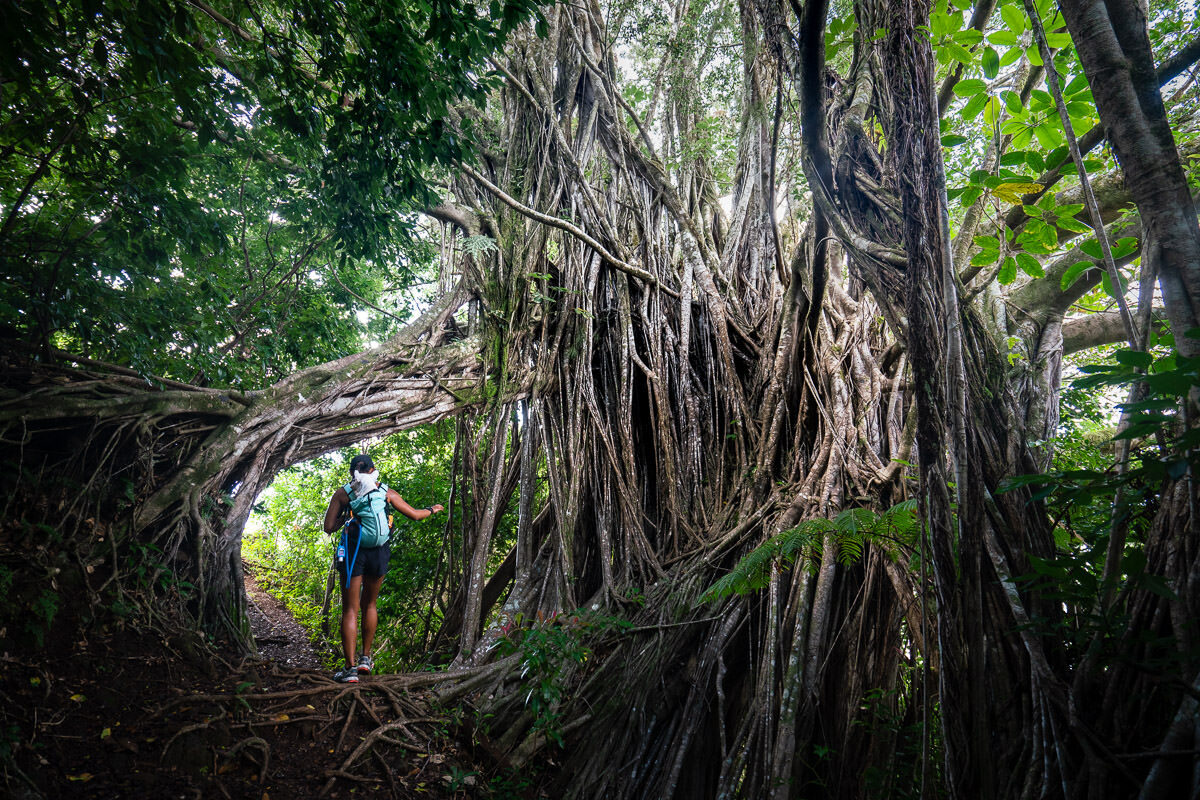
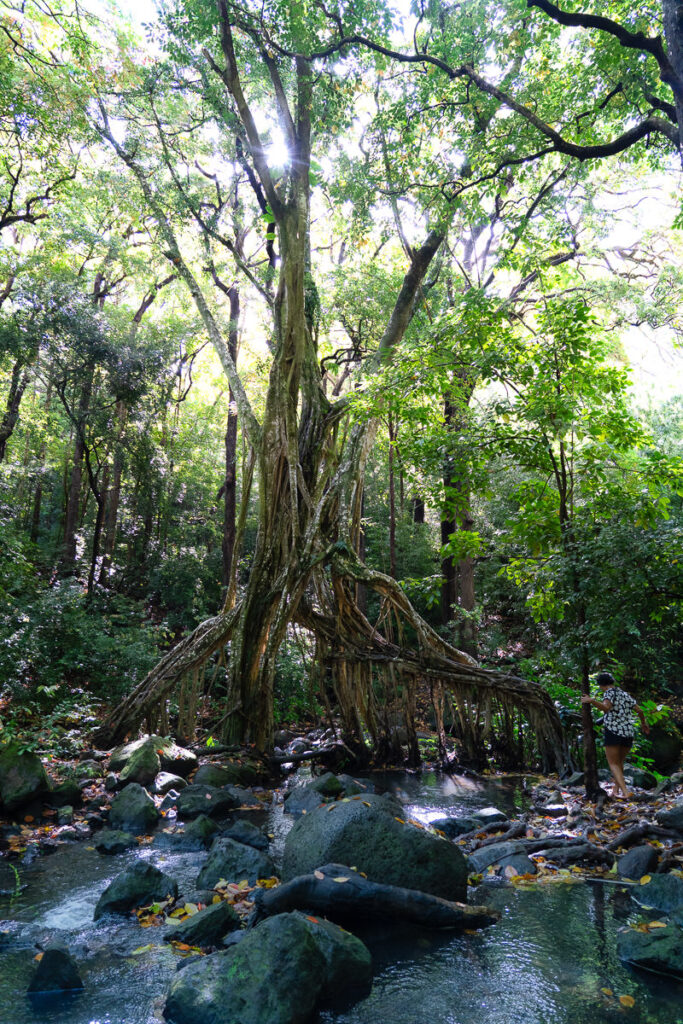
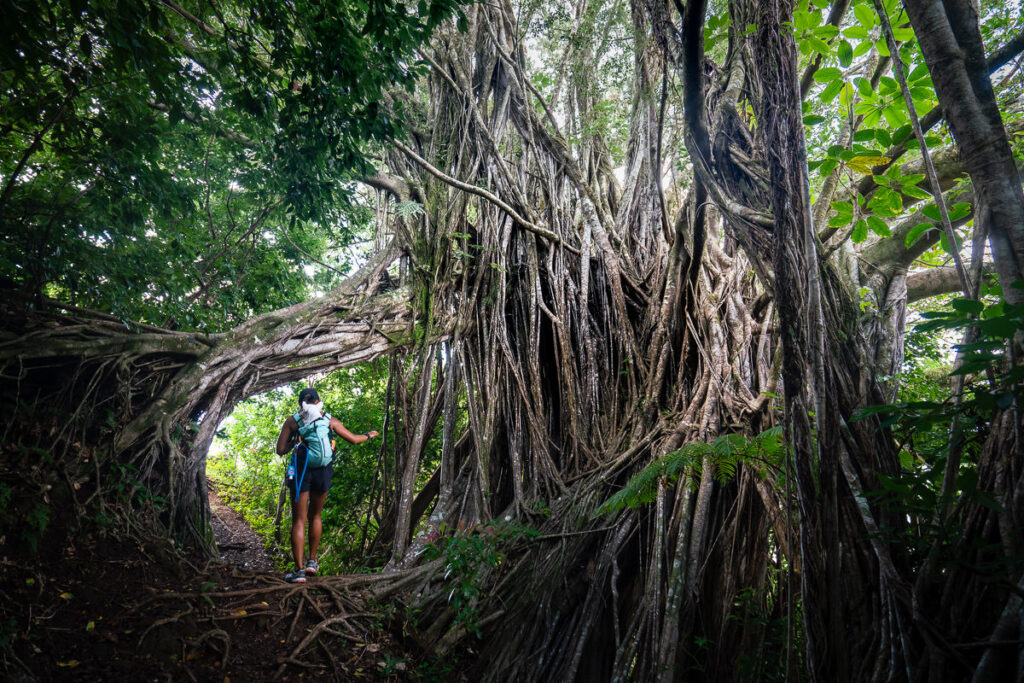
One of my favorite spots on the rise up to the ridge was this incredible tree, completely draped in roots. Entirely engulfed. A small window makes it possible for hikers to pass underneath. It was one of many beautiful parts of this trail, which is home to many native plants, berries and trees.

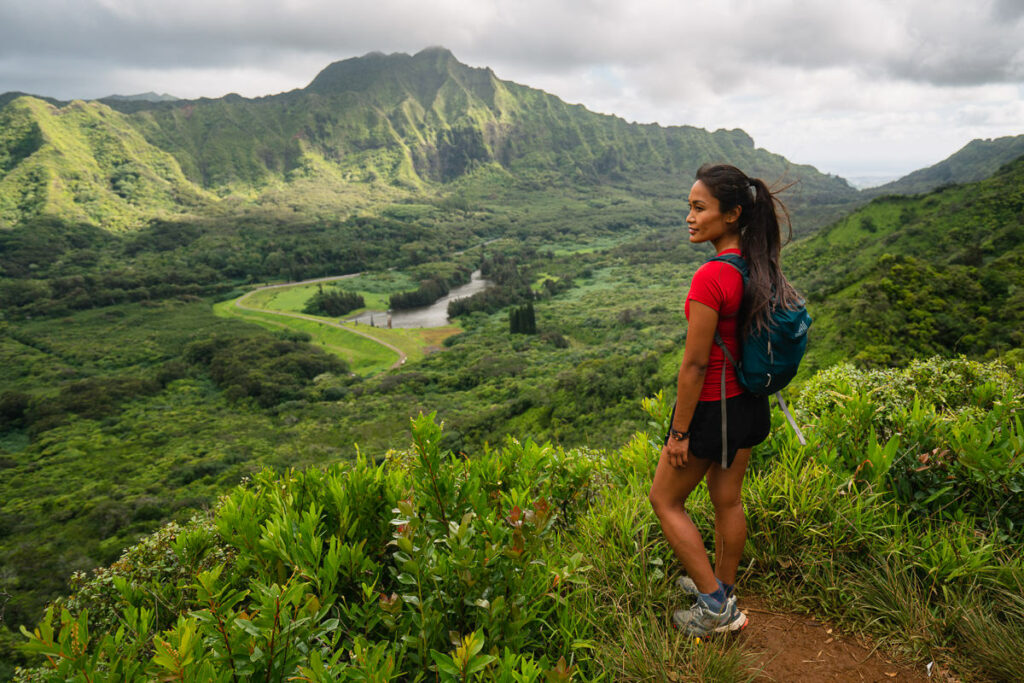
The switchbacks finally end after a few kilometers and we now enter a steady rise with small clearings offering city views. Other mountains appear in the distance and a small breeze cools us off after the humidity from within the trees. It’s not long now before we reach the turn-off at Pauoa Flats.
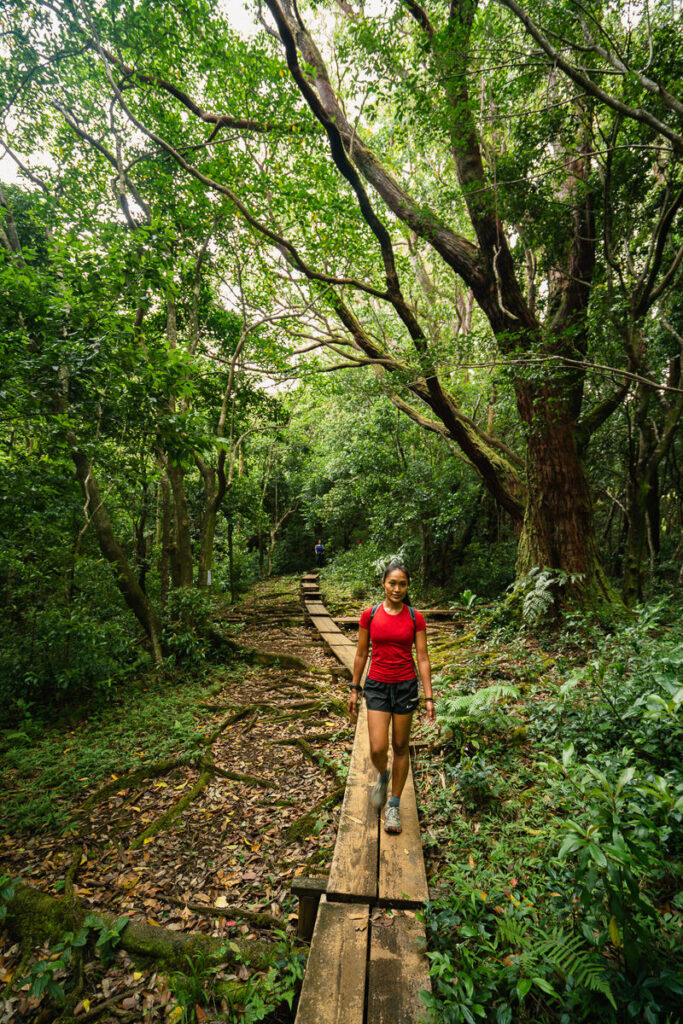
There is a loop part of the trail here to the Pali Lookout and it is best to take the right trail, which is the most obvious one. This leads you to the boardwalk and muddiest section of the trail. You will reach the Pauoa Flats trail and follow that through the mud canyon to the Pali Lookout.
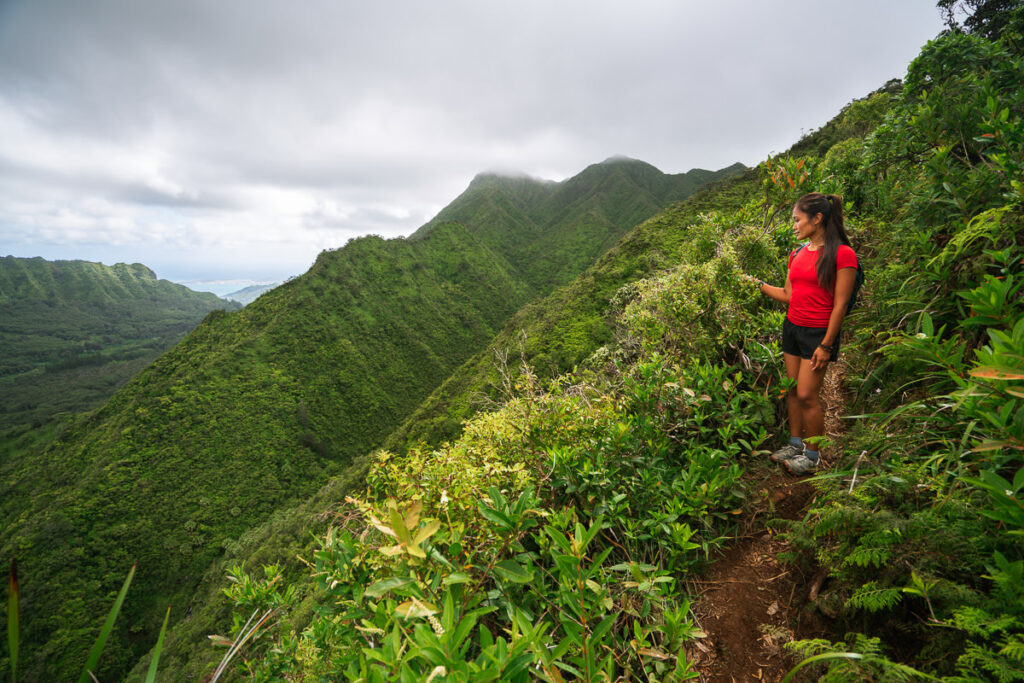
Once on the Pauoa Flats Trail, it’s just not far til you will reach your rest spot and lunch break. The Pali Lookout is an incredible viewpoint, with the highway and all of the surrounding ridges creating a beautiful scene. To your right you can spot Oahu’s second tallest peak, Pu’u Konahuanui Peak and then lower down the Pali Notches and Pali Puka hikes come into view.
A solitary bench and small clearing make it a nice place to sit down for lunch, which in our case was a well deserved musubi. The Pali Lookout is basically the halfway point of the Nuuanu Trail but most of the incline is behind you.
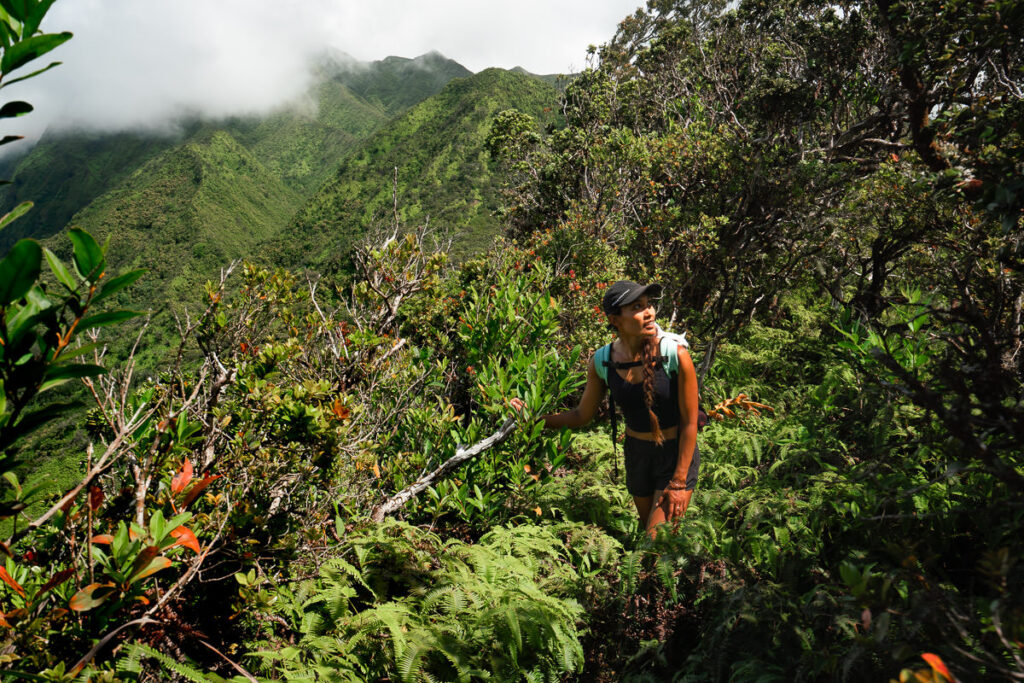
Although most of the incline is done, it’s not over yet. On the left hand side (south) side of the Pali Lookout is your exit route for the loopback. It is uphill and very overgrown. If you don’t have pants on or gaiters, this section will draw blood. It’s very similar to the conditions on the KST and can be unforgiving. The trail conditions are muddy, uneven and hard to handle at times.
The views on your left get better and better just as the drop gets bigger and bigger. While there is never any risky moments, the drop is large and you can’t afford any big mistakes. However, the dense nature of the trees and bushes mean that the drop is usually covered by a large natural fence. In one section, you have a bit of exposure with a rope and a small scramble but I won’t over exaggerate it. It’s basic for a regular hiker.
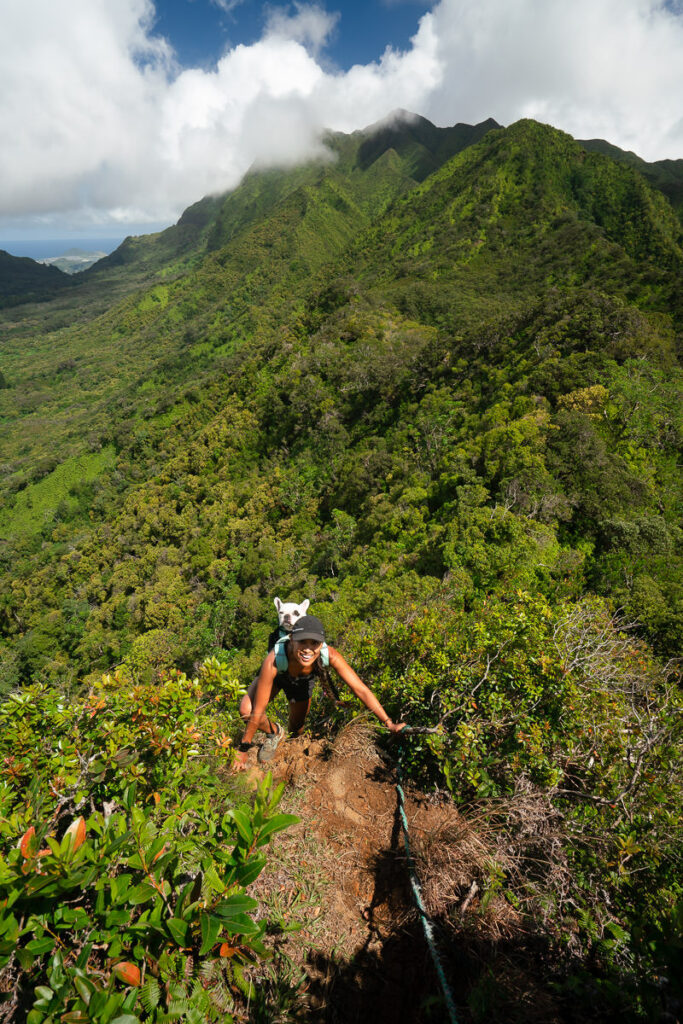
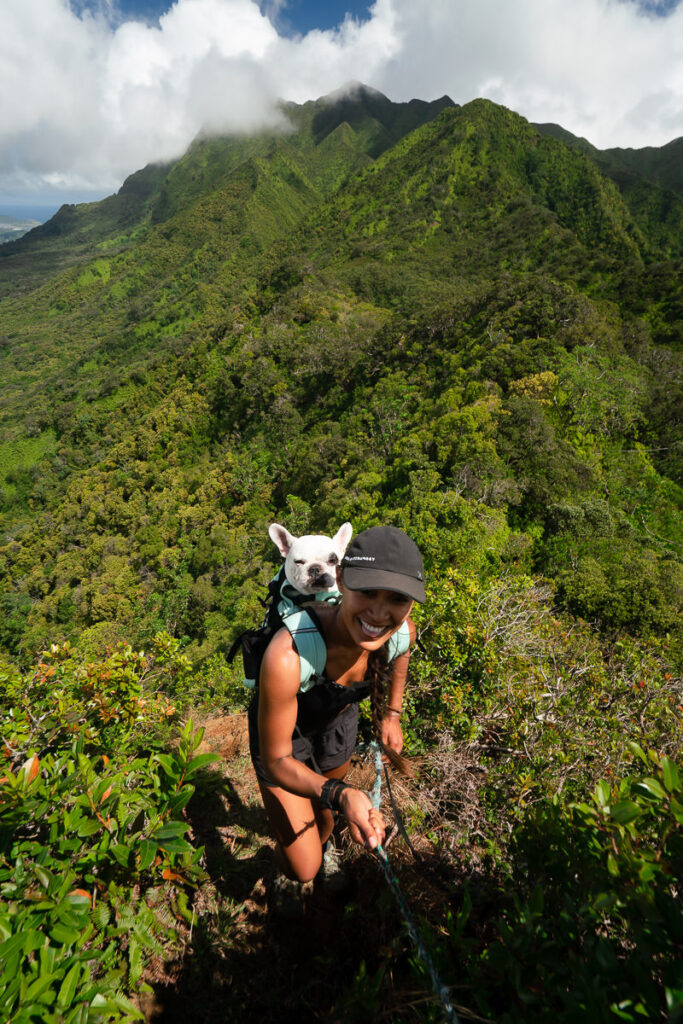
The trail links back up with at the intersection (where you stayed right on the way up) and then you head back down the way you came. The descent is slippery so take care. Once reaching the Judd Trail, you can take the opposite direction along this track so you complete the full loop of the Judd Trail aswell. Two hikes for the prices of one.
If you are muddy or sore, take a few moments to soak your feet and wash away any mud in the stream. It has magical healing powers I’ve heard.
I hope you enjoyed this guide about the Nuuanu Trail to the Pali Lookout hike and have a great time out on the trails of Oahu.

WHERE TO STAY ON OAHU
- Hilton Hawaiian Village Beach Resort (Overall Favorite): In the heart of Waikiki, this high-end resort is right on the beach with a private lagoon.
- Sheraton Waikiki (Luxury): A luxury resort with the most amazing infinity pool on the island, which overlooks the beach.
- Ewa Hotel Waikiki: (Value): Ewa Hotel is just one block back from the beach and is just over $150 USD.
- Waikiki Beachside Hostel (Budget Choice): A budget alternative, which is still in an amazing location.
- Disney Aulani Resort (Family Choice): This is a resort your kids will never forget. It honestly feels like you are living in a theme park.
MORE OAHU BLOG POSTS
I lived on Oahu for two years and loved adventuring from the beaches to the mountains to the waterfalls! These are my most popular blog post and guides from the beautiful island of Oahu to help you plan your trip!
- What to pack for Hawaii: THE HAWAII PACKING LIST: WHAT TO PACK
- A helpful guide to choosing accommodation: WHERE TO STAY ON OAHU
- Most epic hike on Oahu: THE STAIRWAY TO HEAVEN OAHU, HAWAII
- The best Waterfalls: AMAZING WATERFALLS ON OAHU, HAWAII
- Ultimate Cliff Jumping Guide: 11 BEST CLIFF JUMPING SPOTS ON OAHU
- Guide to Swimming with Sea Turtles: WHERE TO SEE TURTLES ON OAHU
- The best Waterfall Hikes: TOP WATERFALL HIKES ON OAHU
- Best Tours: 20 BEST TOURS ON OAHU
- The Ultimate Guide to Oahu: 80 AWESOME THINGS TO DO ON OAHU