
The hike from Pico do Arieiro to Pico Ruivo is the most famous hike on the island of Madeira in Portugal. This tunnel route leads hikers along narrow pathways, up and down ominous staircases, and through dark tunnel chambers. It is an adrenaline-filled test of endurance with steep inclines, causing some serious quad and calf burning on the trek. If you are up for the challenge, I promise you it will be the highlight of your trip to Madeira.

PICO TO PICO HIKING TOURS
- Pico to Pico Hike Transfer: Book an organized transfer from either side of the hike so you don’t have to walk out and back. They pick you up from Funchal and take you to Pico do Arieiro and then pick you up later in the day from Achada do Teixeira at the end of the route.
- Pico to Pico Guided Hiking Tour: If you want an experienced guide (booking form linked below) to lead you on this hike, this is the recommended value tour including pick-up and drop-off from Funchal.
- The third option is to organize your own Madeira car rental and do the entire hike without a guide, which is definitely possible.
BEST RENTAL CAR COMPANY ON MADEIRA
When you book your Madeira Rental Car online, I personally recommend and always use Discover Cars. They search for both local and international companies, so you get the best deal! MUST Read: Guide to Renting a Car on Madeira
PICO DO ARIEIRO TO PICO RUIVO HIKE DETAILS
- Hike Distance: The total distance of the hike is 11km out and back (return trip)
- Hike Duration: The hike can be completed in about 3-4 hours depending on how long you relax and enjoy the views from the Pico Ruivo summit at the halfway point of the hike.
- Hike Difficulty: This trail is quite difficult due to the almost 1000m of incline throughout the return trip. I found it relatively safe because of the well-maintained track including the handrails and support. However, it is quite technical with lots of steps, uneven surfaces, dark tunnels, and other factors that make it a little tougher. Regular hikers will find it safe enough and a challenge but nothing too crazy. If it is your first hike in a while, prepare to enter the pain cave.
- Hike Incline: 1000 meters
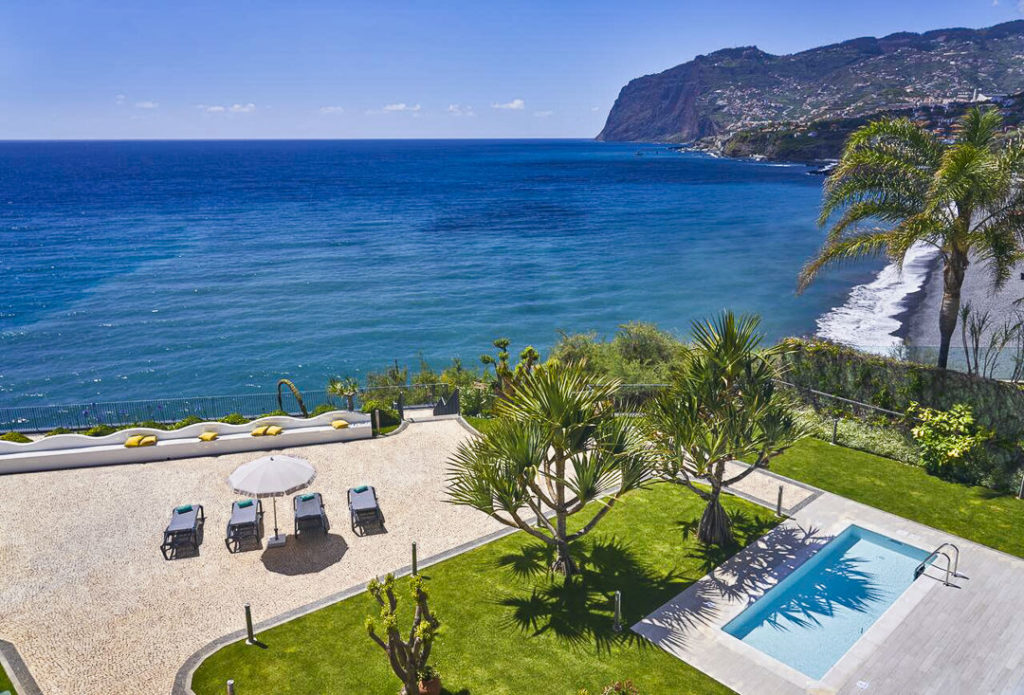
TOP 3 PLACES TO STAY IN MADEIRA
- Ultimate Luxury: Les Suites at Cliff Bay best location and view
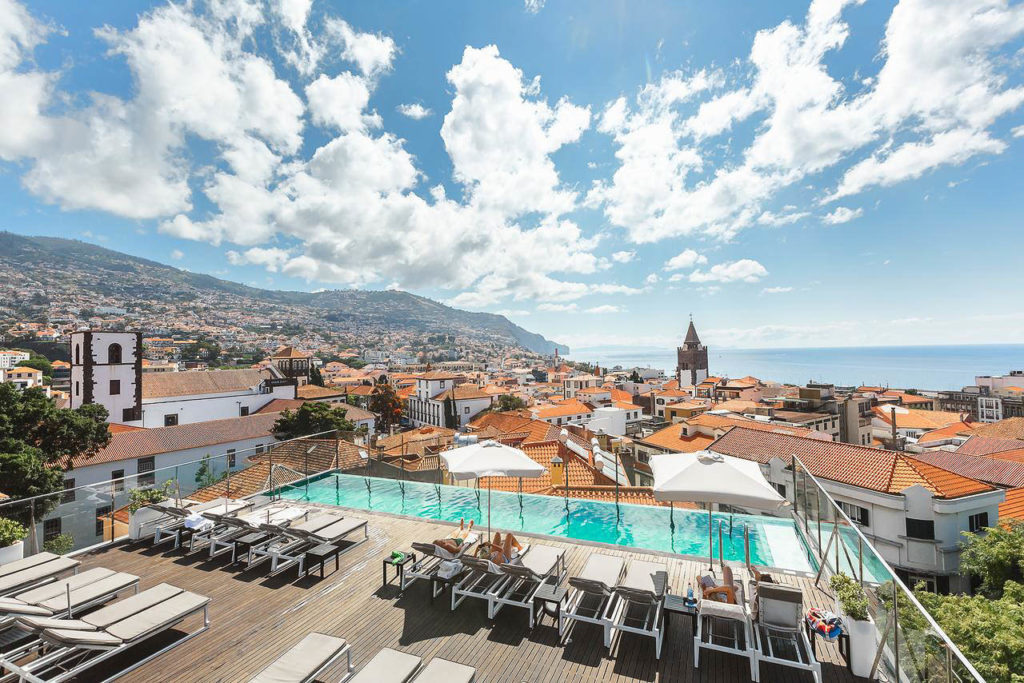
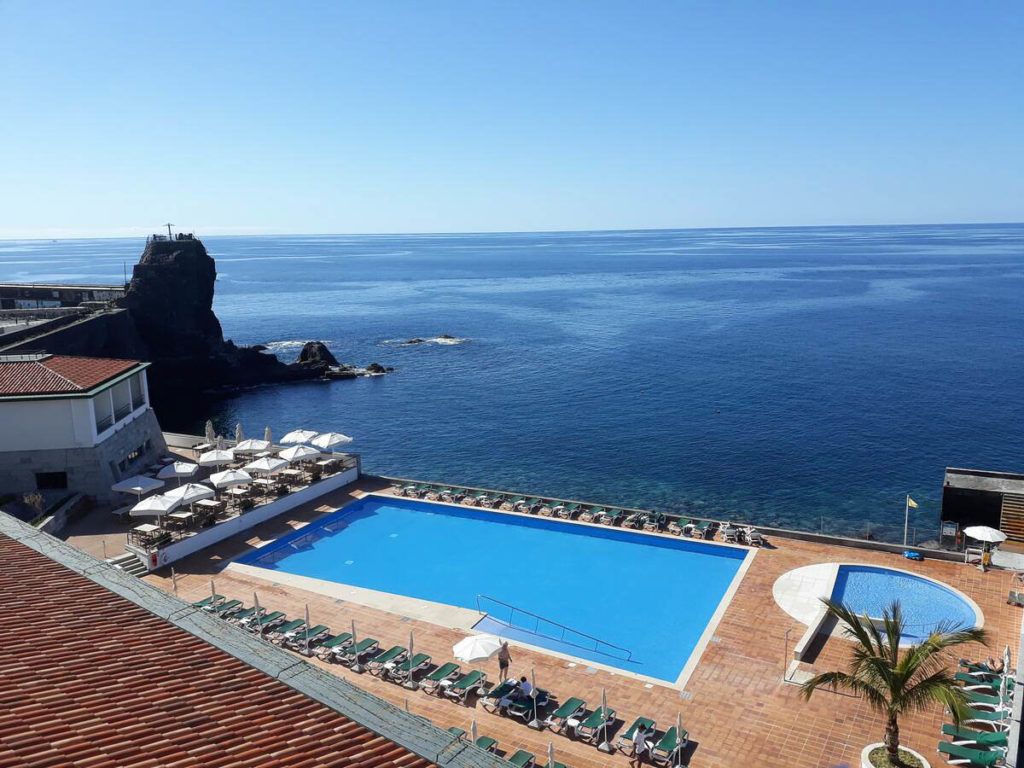
- Best Value: Hotel Alto Lido – Funchal rooftop swimming pool under 100 Euros
- Budget Hostel in Funchal: Santa Maria Hostel is easily the top hostel in Funchal
HOW TO GET TO PICO DO ARIEIRO TO THE PICO RUIVO HIKE TRAILHEAD
There are a few different ways to get to Pico do Arieiro, which is the starting point for the Pico do Arieiro to Pico Ruivo hike. The most obvious way is to drive up in your car but don’t despair if you don’t have your own vehicle. Your Pico do Arieiro sunrise dream is still alive.
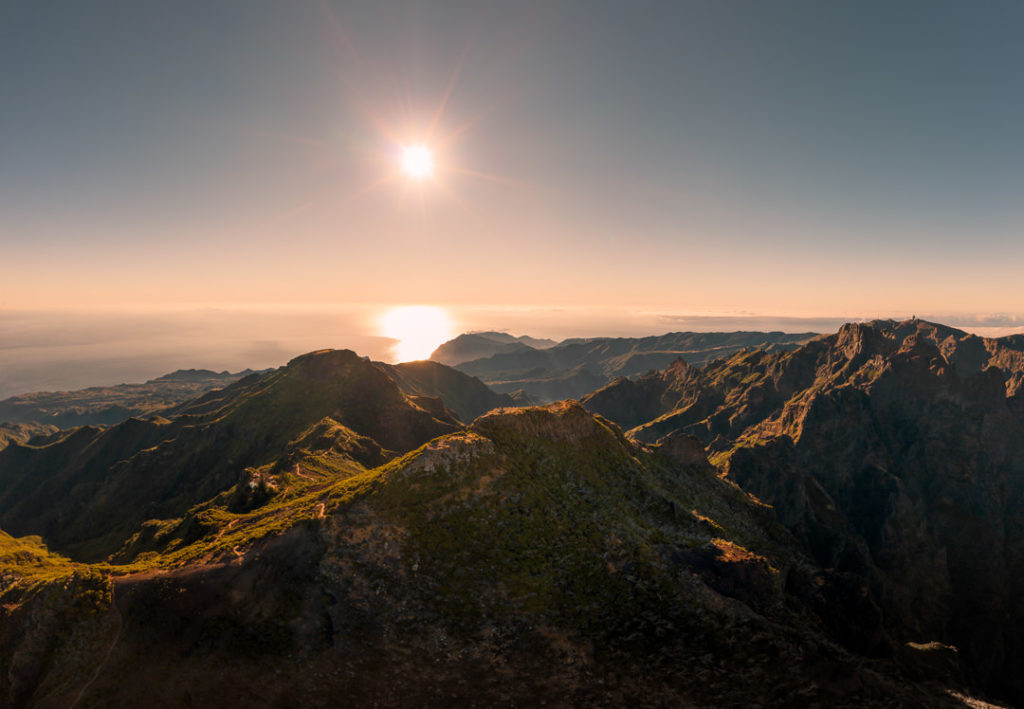
- Driving: One of the reasons it is so popular is because from Funchal it takes just 30 minutes by car to reach the parking lot. From the parking lot, it is just a 2-minute walk to the main sunrise viewpoint. When the sun rises at 7:30 in August you can roll out of bed just before seven and still catch the best sunrise in Madeira without raising a sweat!
- Taxi: The taxi to Pico do Arieiro will cost approximately 40 Euros one-way from Funchal.
- Pico Transfers: The best way to do this hike… book a transfer from either side of the hike so you don’t have to walk out and back: Pico to Pico Hike Transfer. You can put your dates in the calendar below to book your transfer from either side of the hike.
PICO DO ARIEIRO TRAILHEAD MAP
Pico do Arieiro to Pico Ruivo trailhead Map: I have placed the pin on Google Maps below to show you the exact location of Pico do Arieiro viewpoint so you can create your route from where you are located.
WHEN TO START THE PICO DO ARIEIRO TO PICO RUIVO HIKE
There are a couple of different ways you could start off the hike and all of them are pretty epic. The first option is to watch the sunrise at Pico do Arieiro with the rest of the crowd before embarking on the trail in the post-sunrise golden hour. I actually think this is a pretty good option.
The second play is to start the hike half an hour before sunrise and catch the sunbursts and colors in the sky while you are on the trail. You will then arrive at Pico Ruivo a bit after sunrise but there will still be some golden light. This is a great idea if you want to avoid lots of crowds on the trail.
The third option is the most aggressive and takes a sense of adventure. You would leave 2 hours before sunrise and hike in the dark with a headlamp to arrive at Pico Ruivo for sunrise.
Personally, I did the hike by leaving 30-minutes before sunrise but I had seen the sunrise at Pico do Arieiro on a seperate occasion. I think I would choose option 1 or 3 if I only had one chance to visit this region.

MY EXPERIENCE ON THE PICO DO ARIEIRO TO PICO RUIVO HIKE
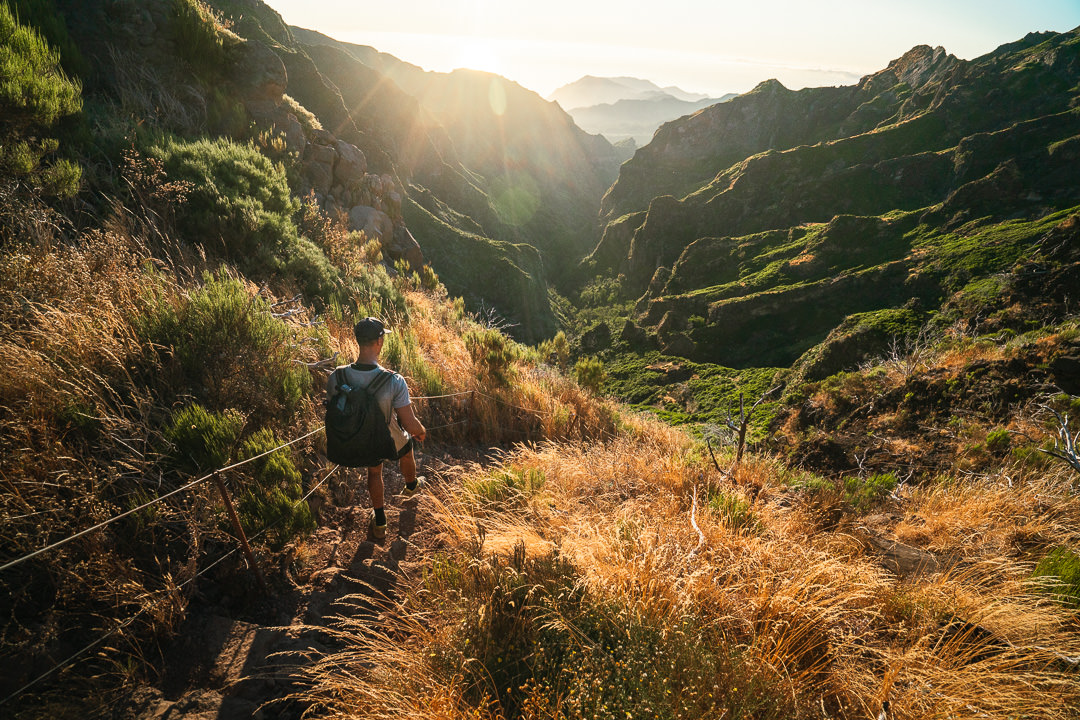
The trail begins at the Pico Arieiro parking lot. I’ve now experienced this viewpoint and trail on several different occasions so the photos will be a mixture of different timeslots in case you are wondering about the varying lights and conditions. From the parking lot, you will head to the left of the weather station and veer directly down the paved path. You may not think much of this decline but when it is the final push on the return leg it will be etched in your mind a day later.
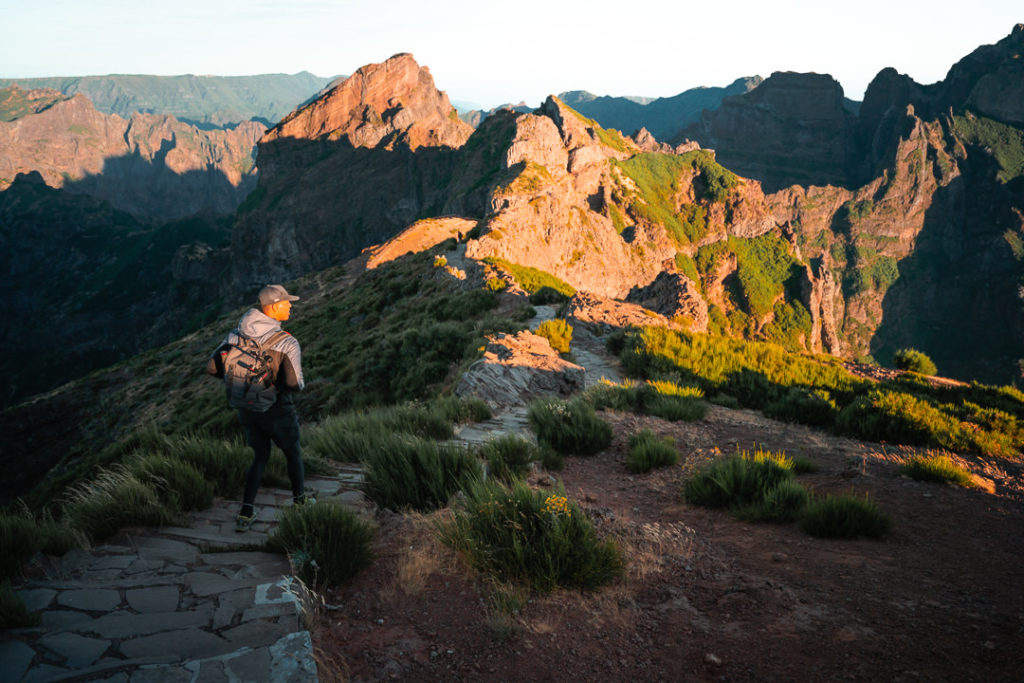
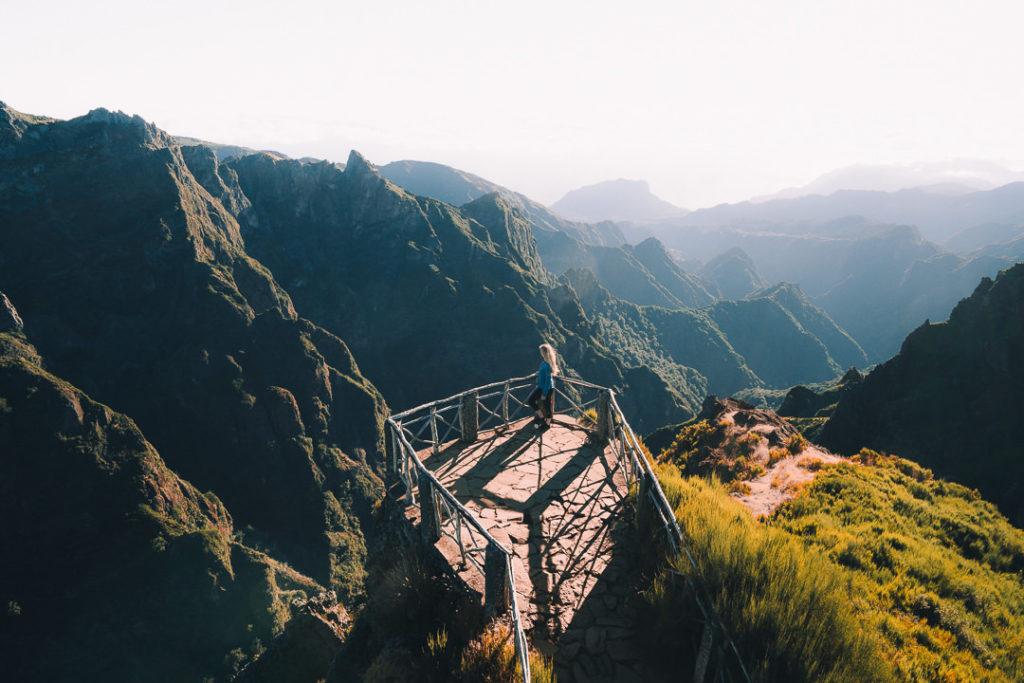
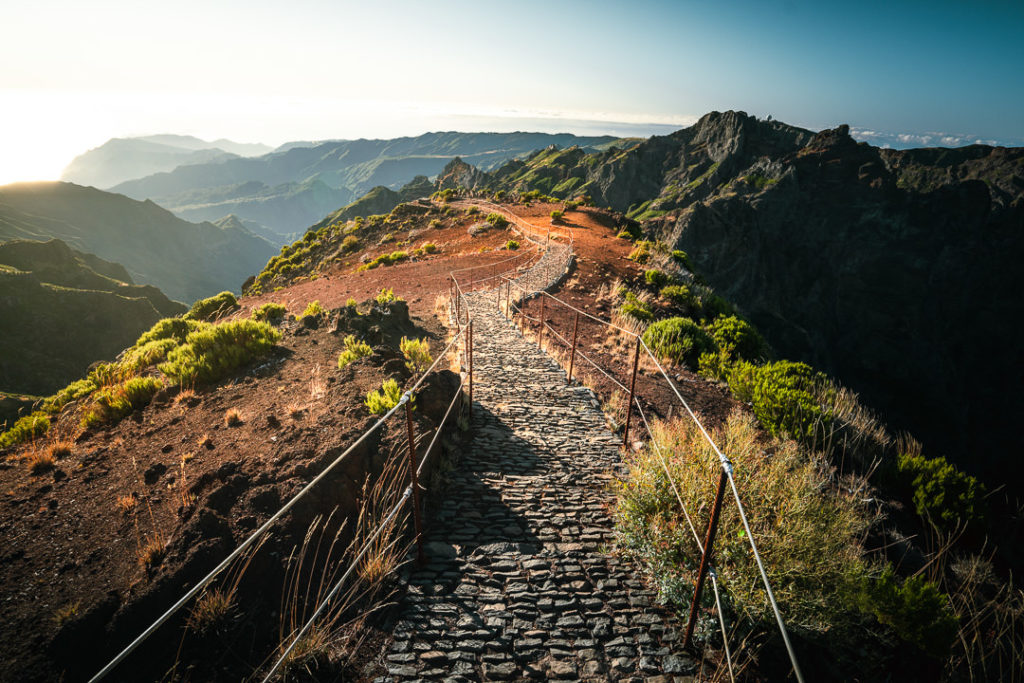
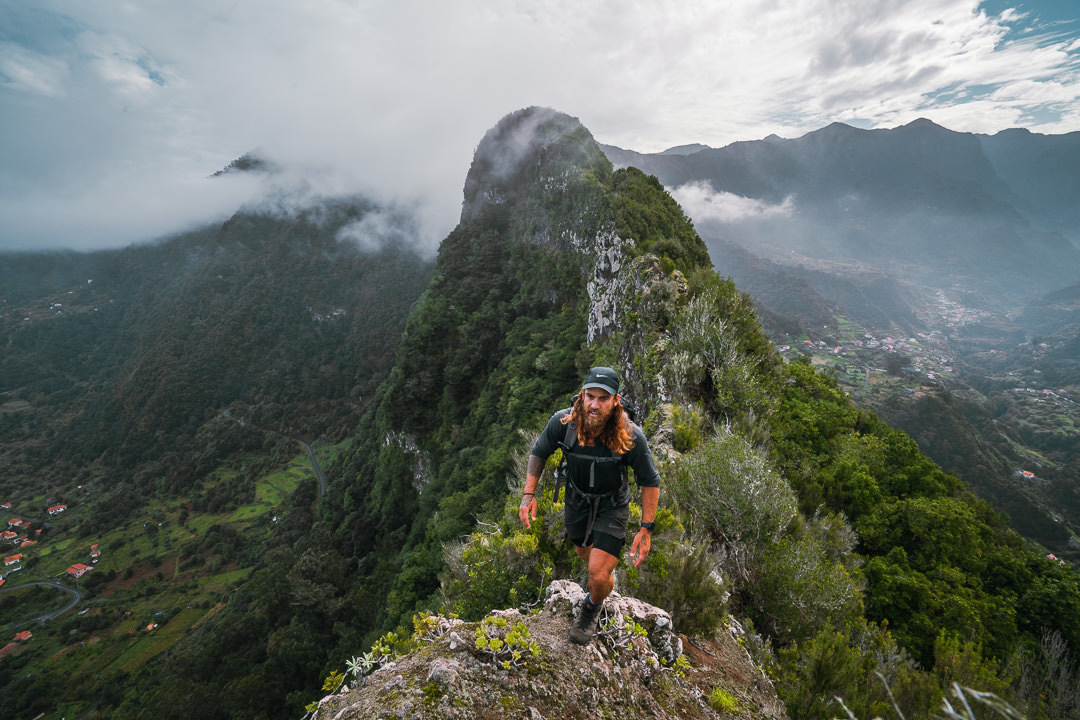
The first 1-kilometer of the trail is probably the most epic in my opinion. I really love the dramatic staircases that wrap themselves along the ridgeline. When there are low-lying clouds, this section truly looks like you are on another planet. Although in some photos it may appear a little dangerous, it is very well supported by hand rails and chains. Therefore, despite the drop-offs, it is relatively safe.
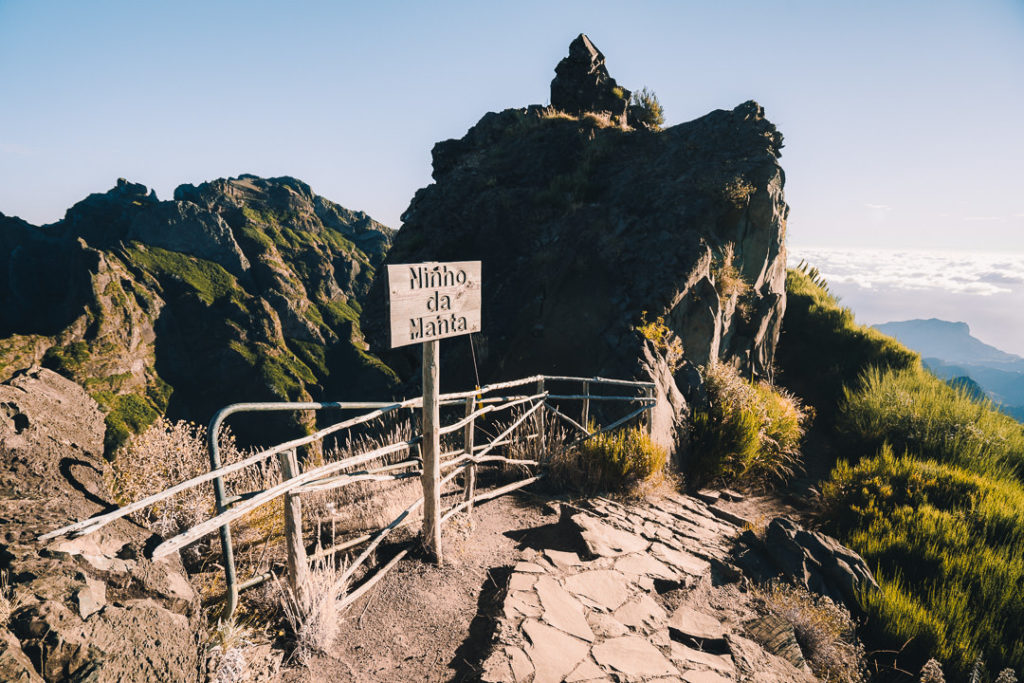
Miradouro do Ninho da Manta
This is the first major viewpoint you will reach. It has a balcony section that looks out over the valley. While it doesn’t face directly to the sun, you can catch the sunrise from this balcony if you wanted. What’s great about this viewpoint is that most tourists can’t be bothered walking 1.2km from the parking lot to the balcony so you have hundreds of people at Miradouro Juncal and hardly anyone at Ninho da Manta.
THE STAIRS
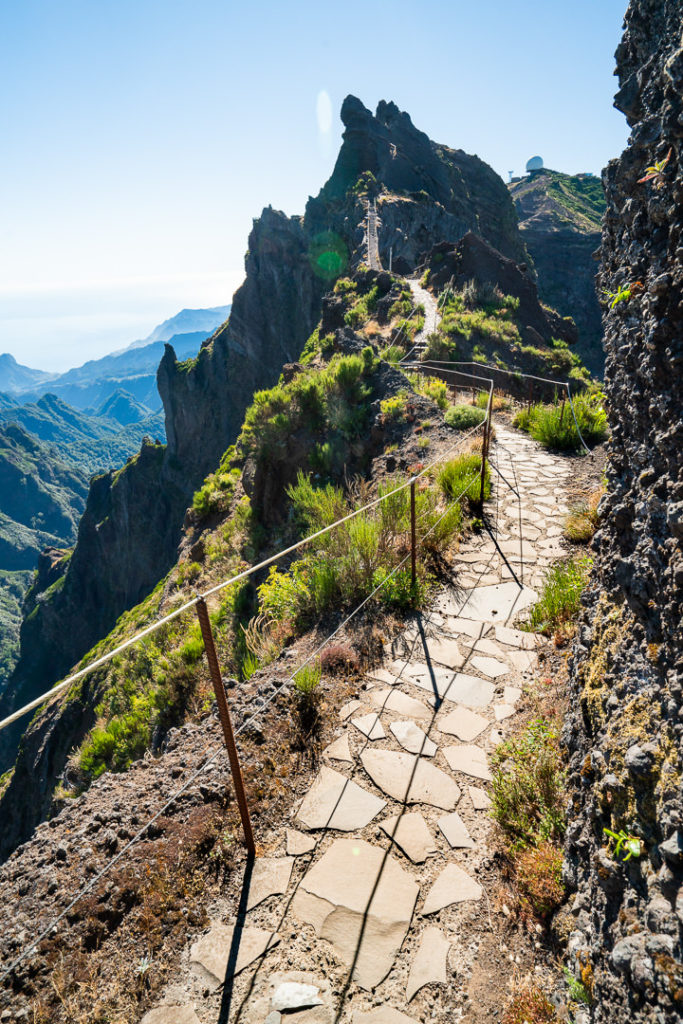
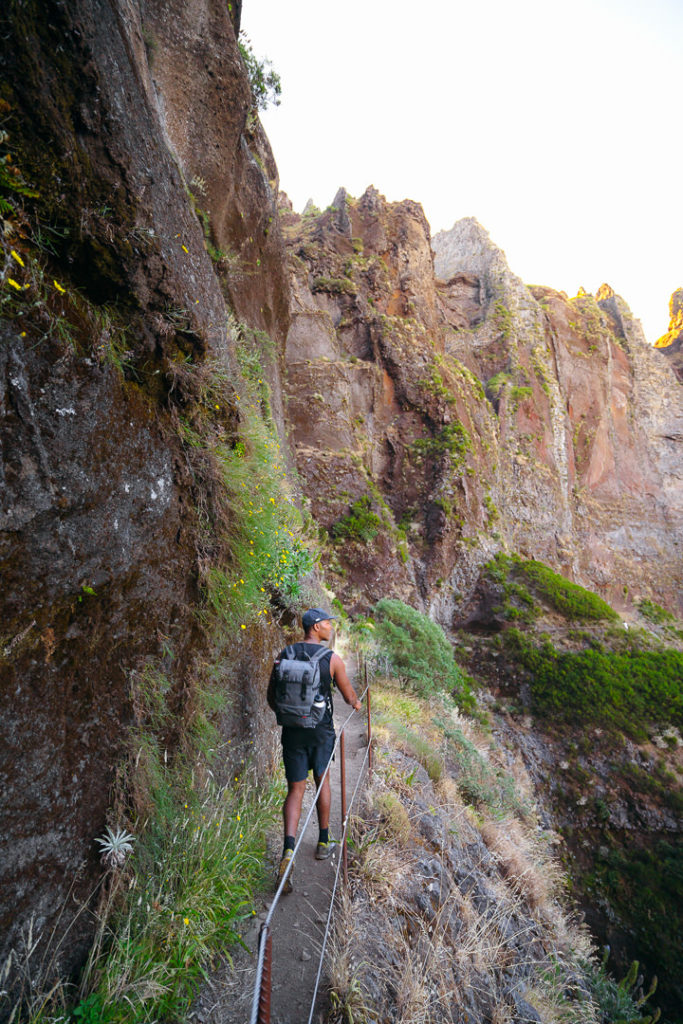
After a quick stop-off at Ninho da Manta, you will quickly descend the stairs and onto the connecting ridge, which acts as a bridge to Pico Ruivo. This section is beautiful at sunset as the cliffs can grow a rich, fiery orange in the last light. It’s in this section that you will encounter the first of the tunnels that have been drilled into the mountains. You will need a headlamp or at least a phone torch (this was enough for us) to make it through these tunnels. The longest one was about 150m in length.
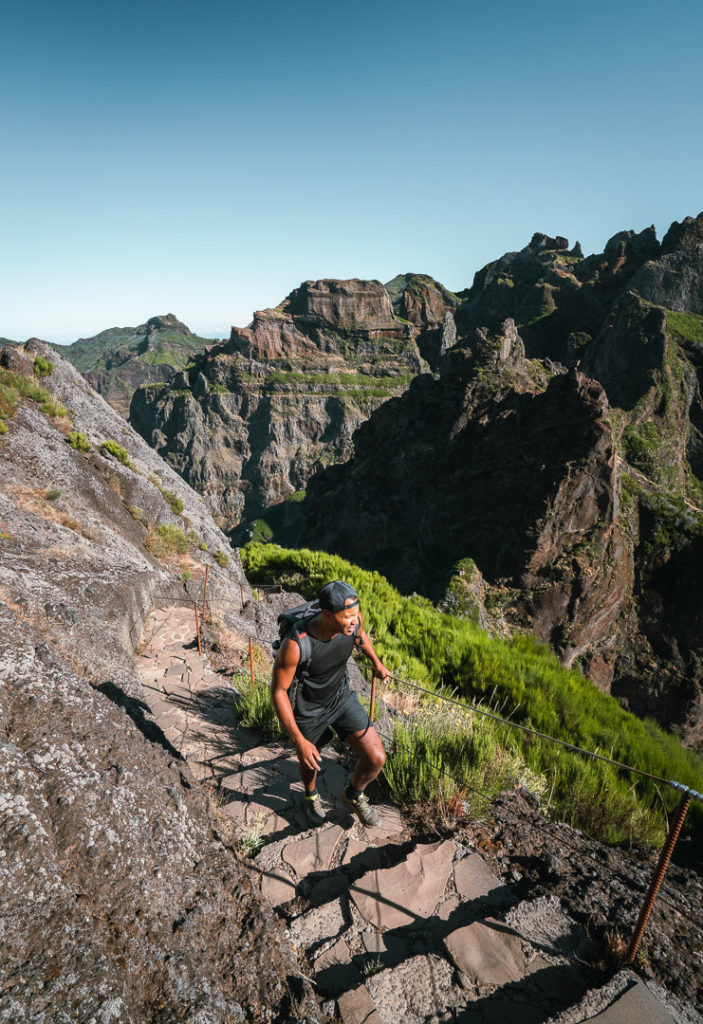
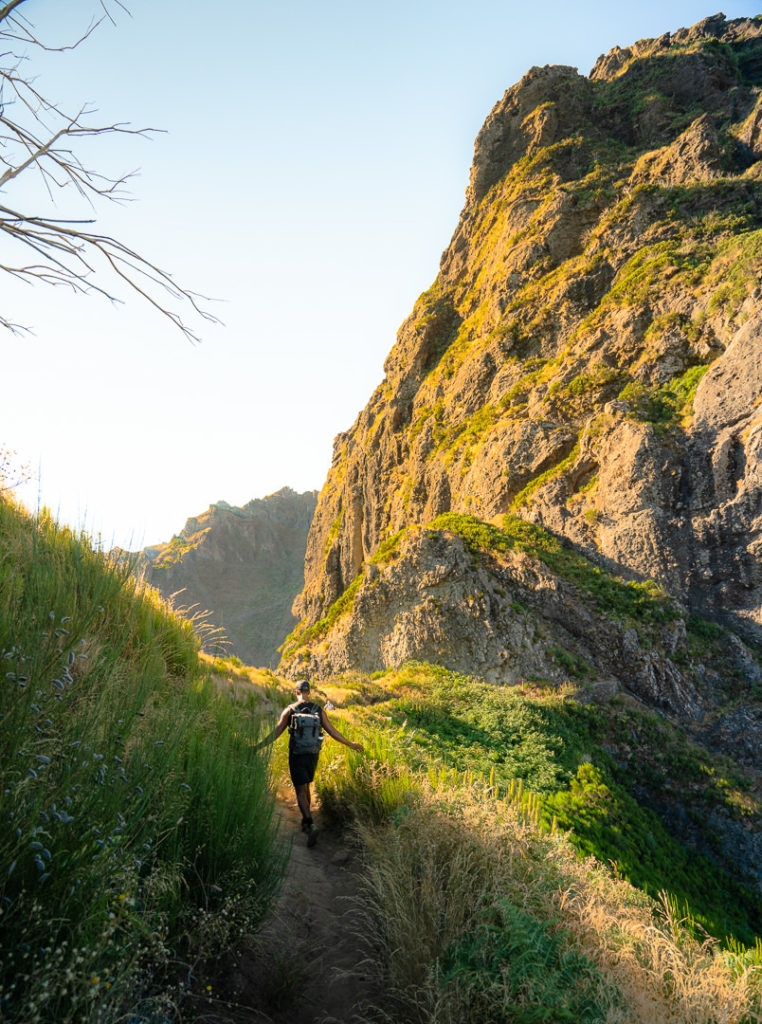
As you continue along the ‘bridge-ridge’ it’s quite a fun bit of trail because it has literally been carved out of the mountain. If you are any taller than 6ft you will have to watch your head because the trail is almost like a bit of a cave with a railing on your left and the cliff wall almost swallowing you on the right. Every now and again you pass through another tunnel before jumping back out onto the narrow path. This was a really unique segment of trail and was on a bit of a plateau so you had a break for any steep climbing or descending. That is about to come.
This section would be best for sunset as the glow on the wall will hit directly from the west. However, if you are in this region for sunset I’m not sure you would want to be down at the lowest point of the hike. Basically don’t expect to see too much action here during sunrise but you won’t be on the ‘wrong’ side of the sun for long if you keep moving.
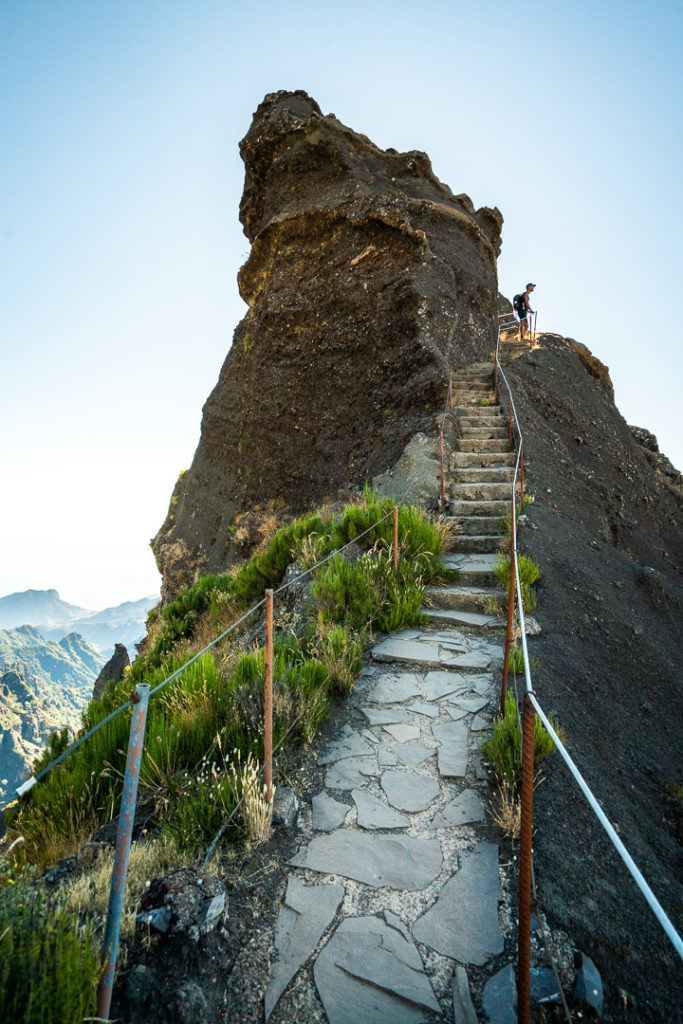
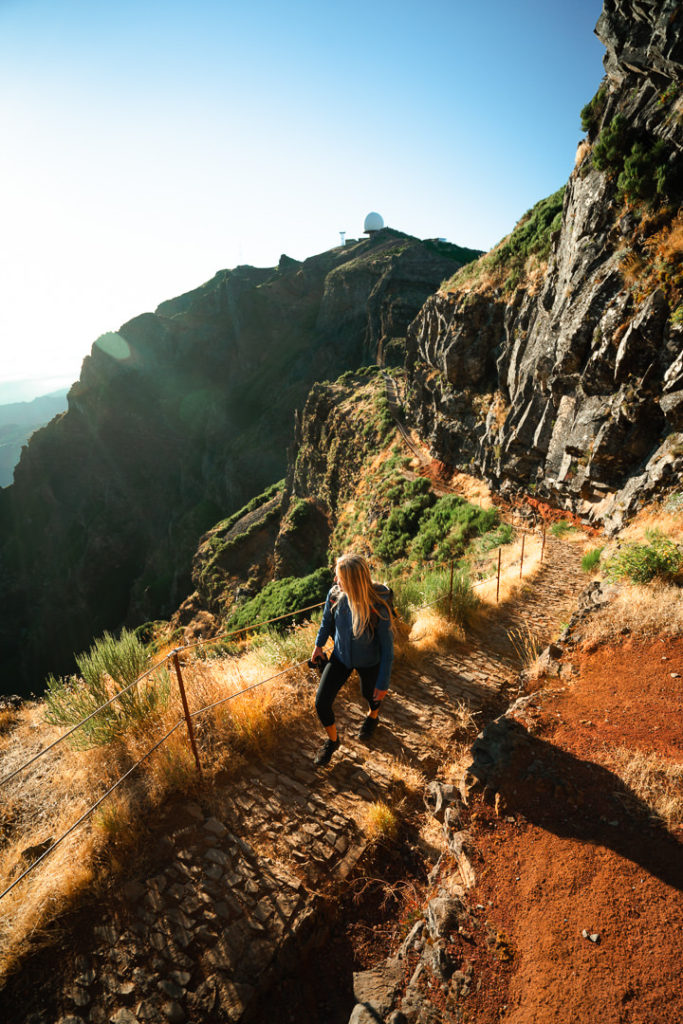
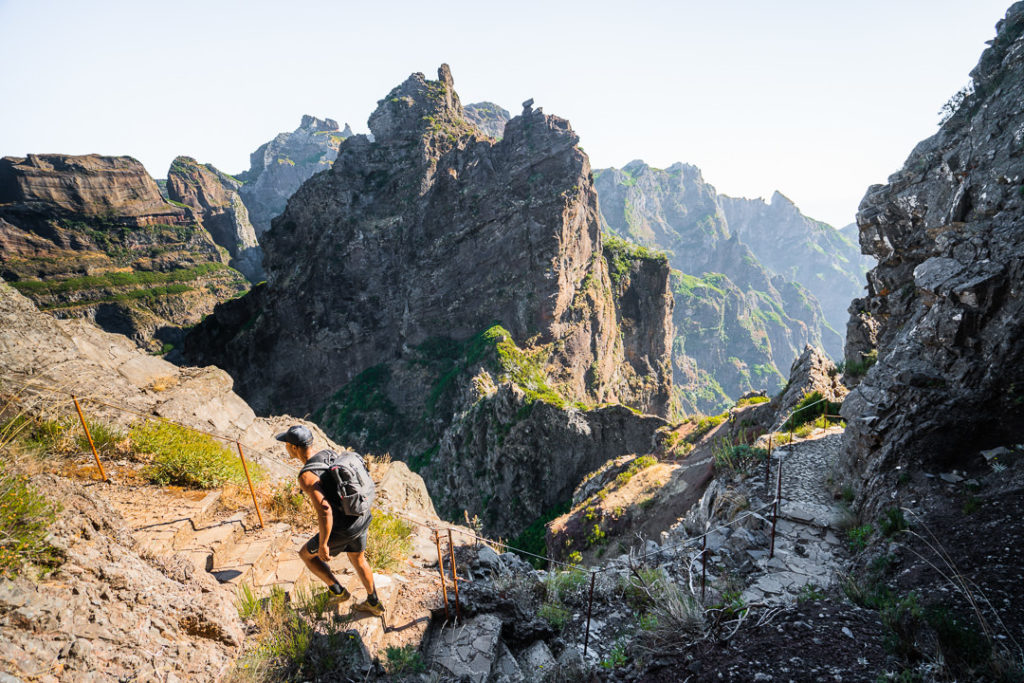
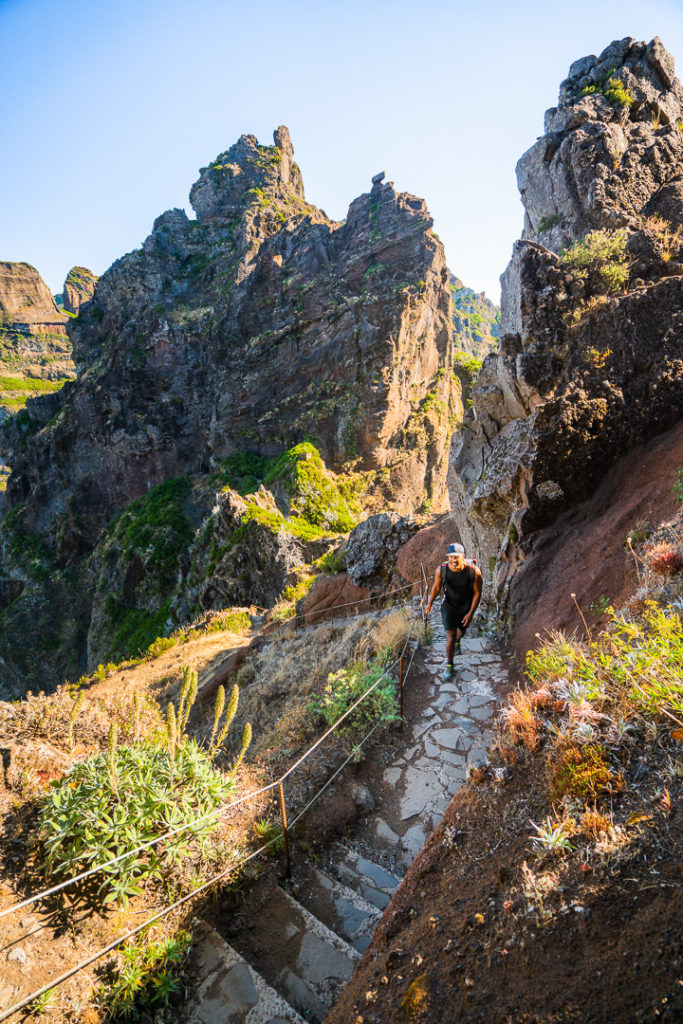
THE CLIMB TO PICO RUIVO
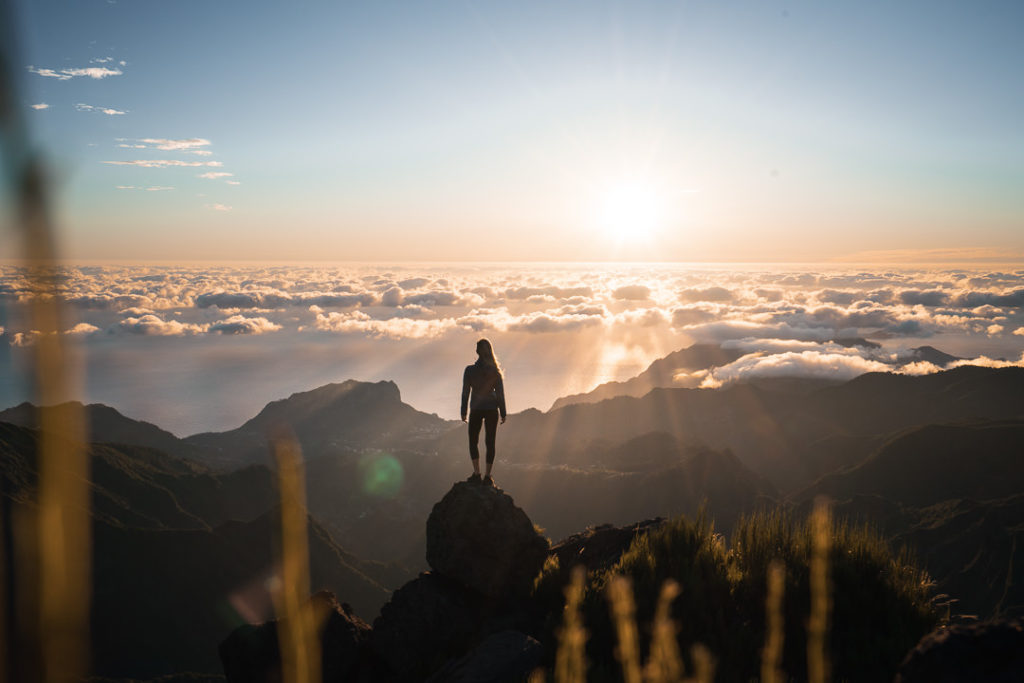
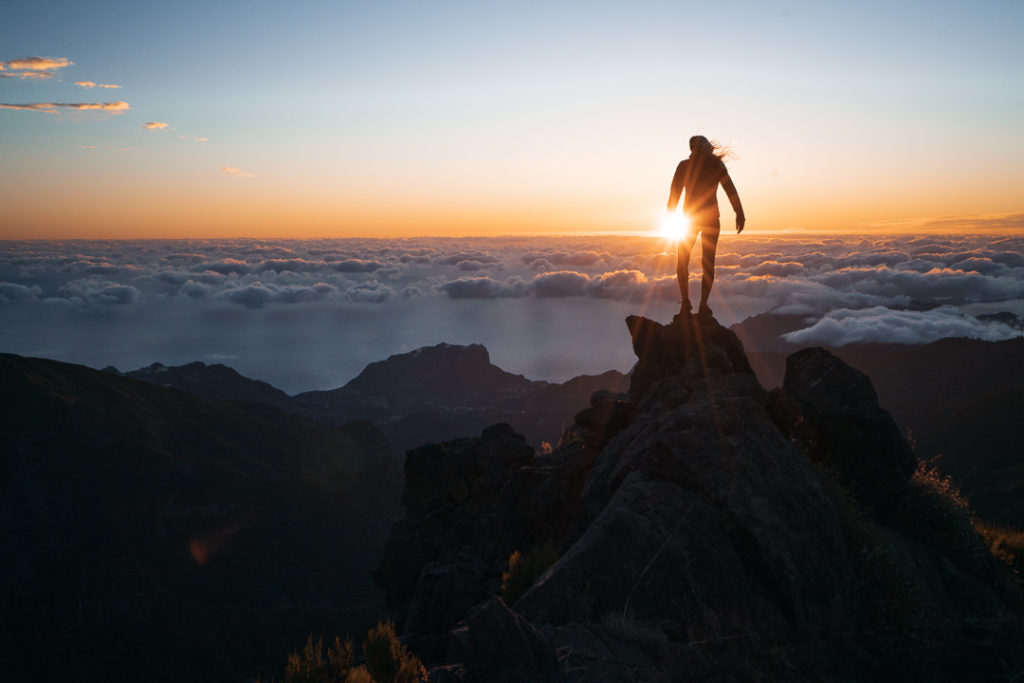
Now comes one of the toughest parts of the journey from Pico do Arieiro to Pico Ruivo. As we were hiking I named it the gauntlet of death, which was a bit dramatic but basically it is a very steep set of winding stairs up a pass in the mountain. When you reach the top of the path the view will open up again to the east and we were greeted with a beaming sun lighting up layers upon layers of ridges. This was one of my favorite moments on the trail.
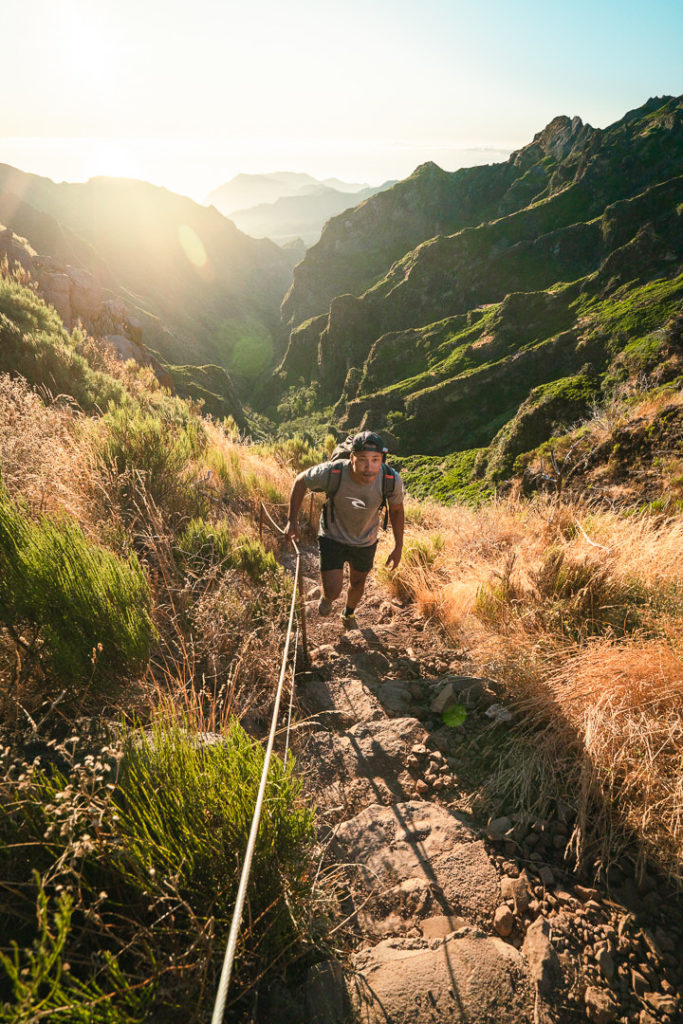
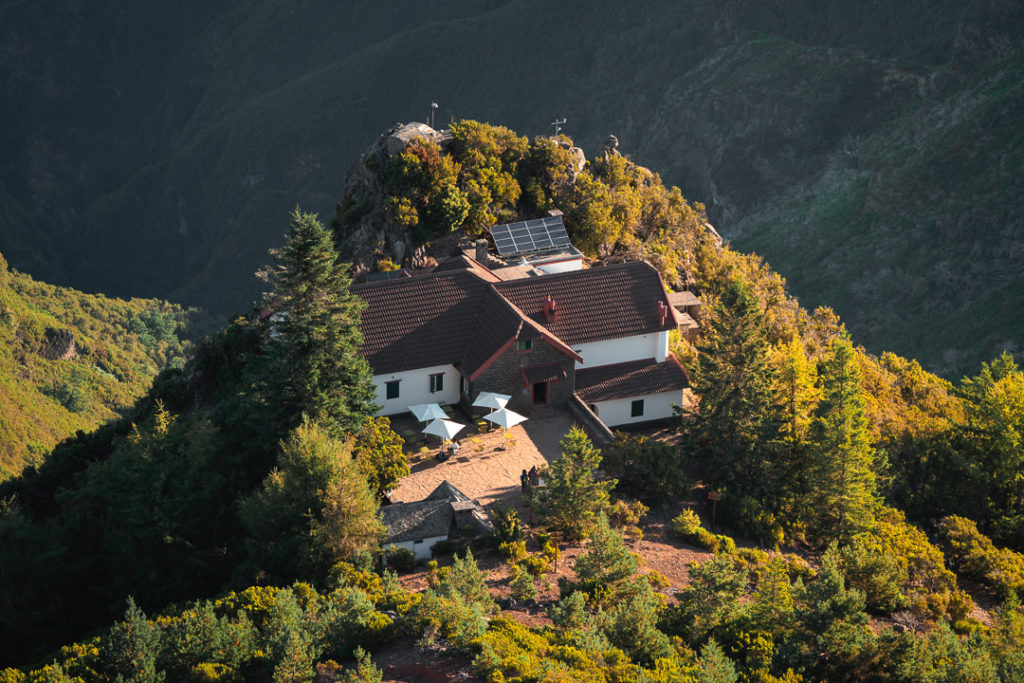
You are now within touching distance of Pico Ruivo, but you will still need to put in 180 meters of incline. However, it is more gradual than the ‘gauntlet of death’ stair section that has undoubtedly left your legs burning and your lungs gasping. Enjoy the morning sunlight as you slowly crawl your way up the Casa de Abrigo Pico Ruivo, which is the mountain hut just below the base of Pico Ruivo.
The sign on the front of the mountain hut said it was constructed in 1939. It now offers basic facilities such as free clean drinking water, toilets, and a functioning bar where you can purchase drinks. By all reports, you cannot sleep in the mountain hut, which was newly re-opened in 2019 although camping nearby is permitted.
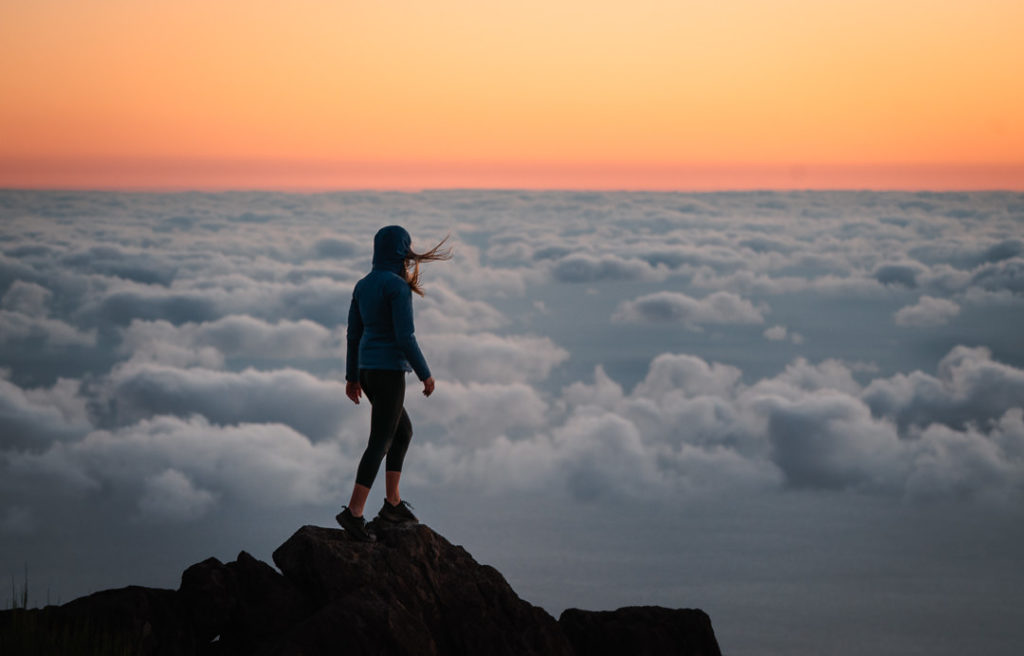
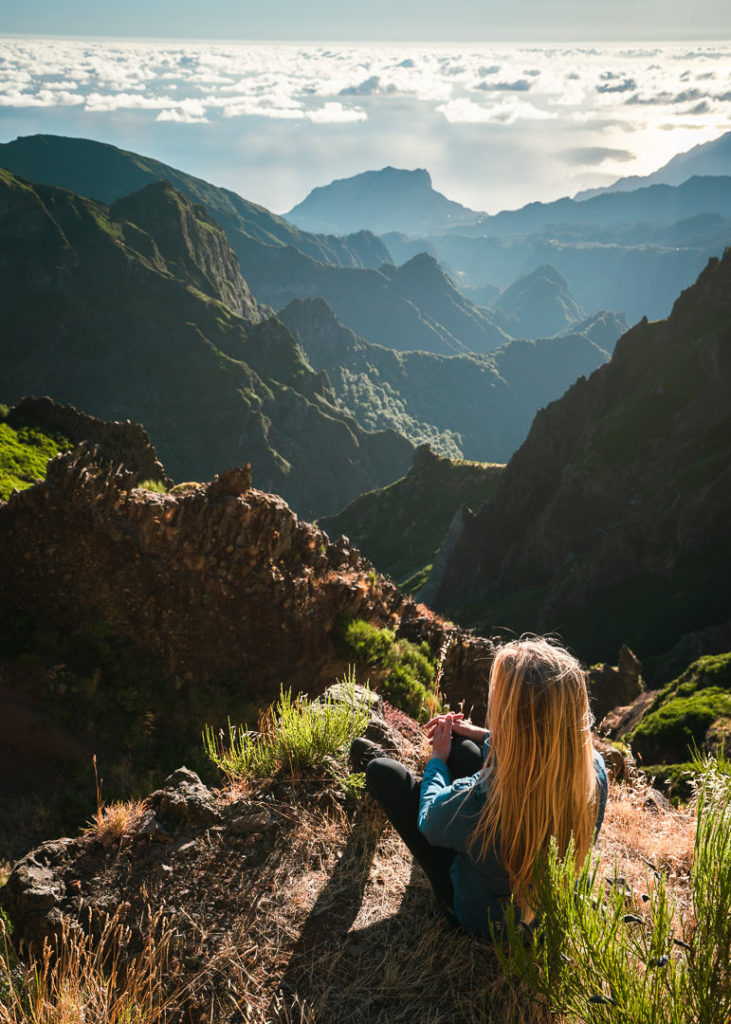
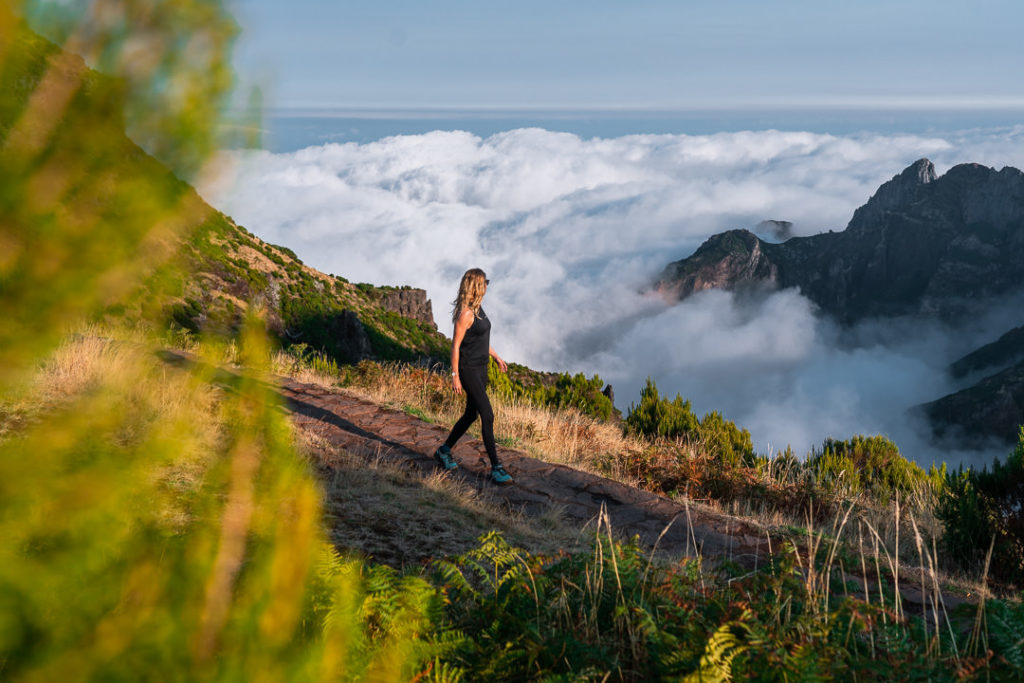
Once you reach the mountain hut the summit of Pico Ruivo is within touching distance. Just another five minutes on the trail, which winds up around the side of Ruivo and eventually leads you up to the mighty summit, which is the highest point on Madeira island at 1,862m above sea level. The best part about Pico Ruivo is that you have panoramic views, which means you can really get a sense of the island. I spent some time at the summit looking at my maps and identifying certain regions and other peaks to gain some knowledge of the geography of the island.
Below you can see a couple of photos of the summit of when we made it to the top!
Even though you are at the highest point on Madeira, the journey back is not downhill. You will pick up another 500m of incline on the return leg back to Pico do Arieiro from Pico Ruivo. The route back is quite challenging because the final 2-kilometers are almost all uphill on the very steep section back towards Ninho da Manta, which is the balcony viewpoint.
Even though you are returning on the same trail, it is a much different experience when you are facing the other way as the backdrop will be entirely different. Even in different lighting conditions at different times of day, you can have an entirely unique experience.
ALTERNATE EXIT TO ACHADA DO TEIXEIRA
Alternatively, you can continue on hiking out to Achada do Teixeira, which is a flat 3km route rather than the 5km, 500m incline route from where you came. However, the problem here is that your car will be be back at Pico do Arieiro. That is why I suggest to people who want to finish at Achada do Teixeira to book from Funchal with Pico to Pico Hike Transfer who pick you up from Funchal and take you to Pico do Arieiro and then pick you up later in the day from Achada do Teixeira at the end of the route.
I hope you enjoyed this guide about the Pico do Arieiro to Pico Ruivo hike and have a safe and epic journey on the most famous trail on Madeira Island. Happy hiking!
WONDERING ABOUT WHERE TO STAY ON MADEIRA?
Throughout my six months on Madeira Island, I stayed in multiple accommodations. My favorite regions to stay in were Funchal and Canico de Baixo. I’ve created several guides to help you find the right region for you and a great hotel or apartment.
- The ultimate guide: WHERE TO STAY ON MADEIRA: WHICH REGION IS RIGHT FOR YOU?
- If you want luxury: BEST 5-STAR LUXURY HOTELS ON MADEIRA ISLAND
- To feel at home: TOP 10 BOUTIQUE HOTELS ON MADEIRA ISLAND
- If you want to base in Funchal: WHERE TO STAY IN FUNCHAL: 15 TOP-RATED HOTELS
HAVE YOU READ MY OTHER MADEIRA BLOGS?
I spent six months exploring Madeira and the nearby island of Porto Santo. These are some of my most popular guides about the region that you may be interested in.
- My favorite hikes: 65 AWESOME HIKES ON MADEIRA
- My favorite levada walks: 25 BEAUTIFUL LEVADA WALKS ON MADEIRA
- The best waterfalls on the island: 25 EPIC WATERFALLS ON MADEIRA
- Guide to the best Accommodation: WHERE TO STAY ON MADEIRA
- Hardest hike: THE MADEIRA ISLAND ULTRA TRAIL IN 4 DAYS (115KM)
- Longest hike: CAMINHO REAL 23: MADEIRA’S ROYAL PATH (180KM)
Leanne
Friday 4th of August 2023
Just to clarify, if we were to park at Pico do Arieiro and hike this as an out-and-back to get back to our car, is the hike 11km or 22km?
Carly
Monday 3rd of April 2023
Hi! We are looking at doing this but would like to know if you think we would need hiking shoes or if a good pair of runners/walking shoes would be enough?
Genevieve
Friday 24th of February 2023
The best Pico to Pico post on the internet! Big on knowing where to park and every detail. Thank you for sharing!
Eszter
Friday 19th of August 2022
Thank you for the detailed description! It helped me a lot to plan our Pico do Arieiro - Pico Ruivo hike.
Lauren
Wednesday 24th of November 2021
Hello! Thanks so much for this informative post. I am wondering how tight the tunnels are? Can you stand in them? Do you need to crawl or squeeze through any of them? Thank you!