

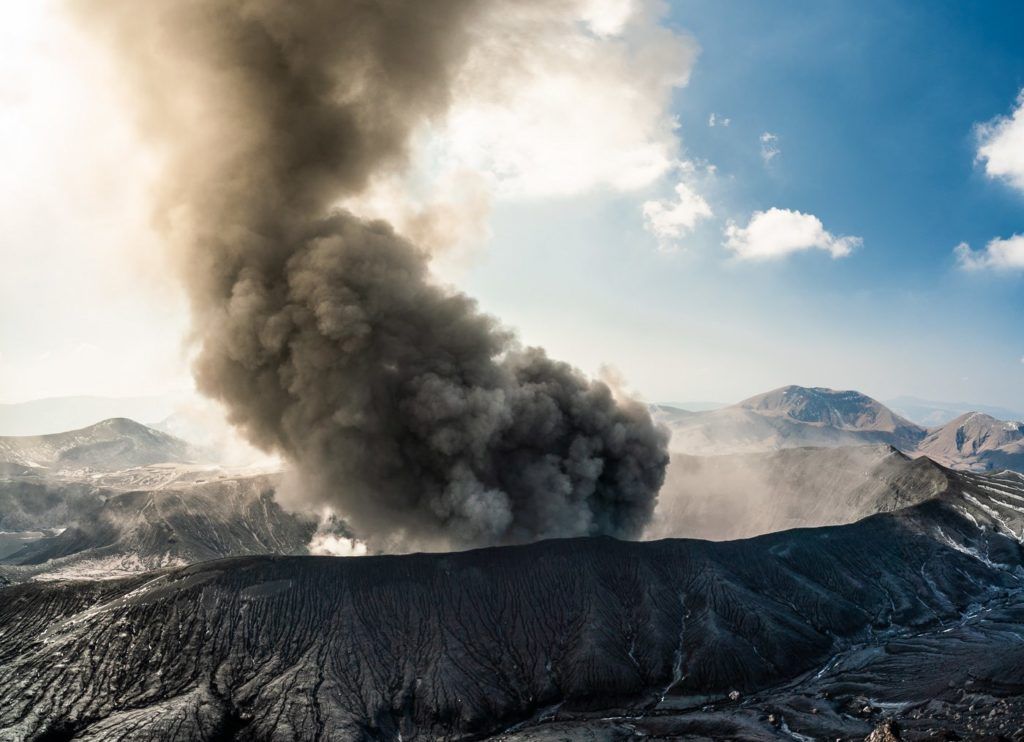
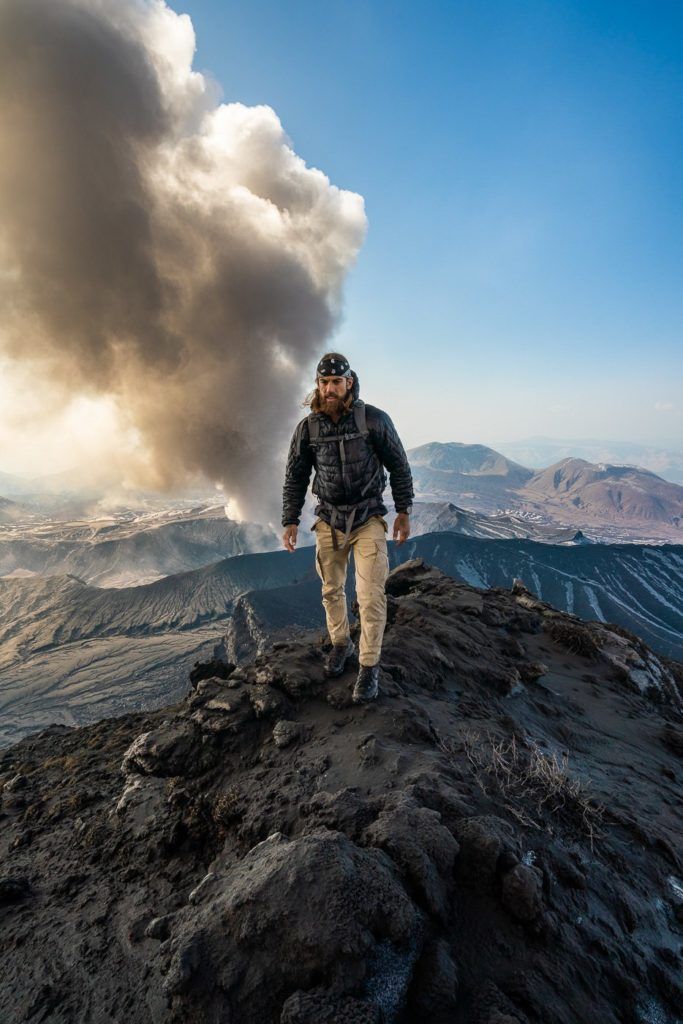
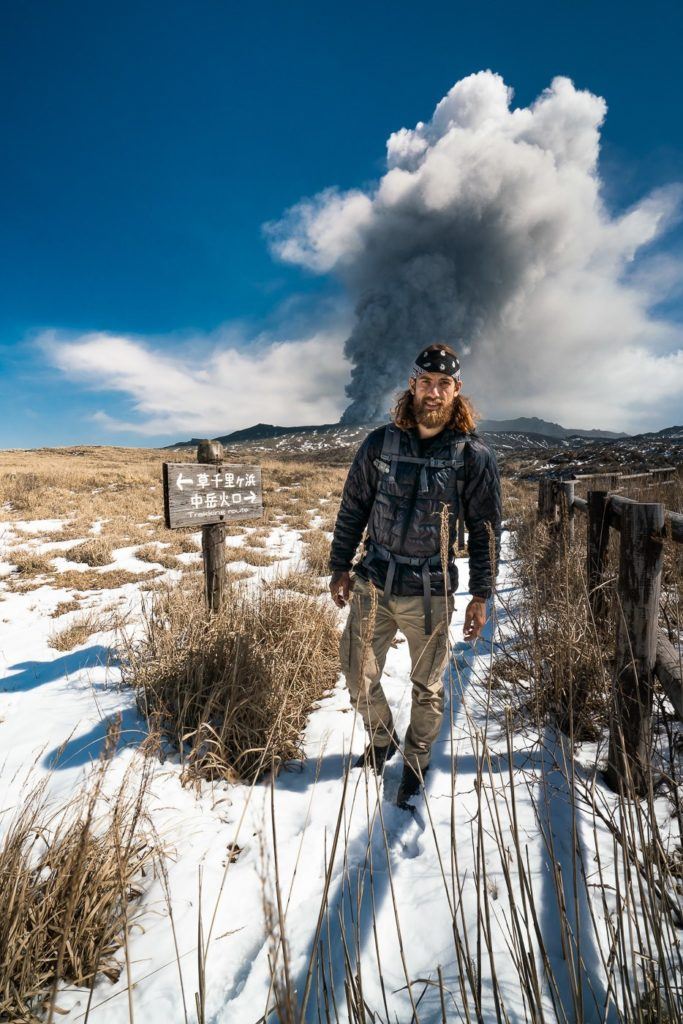
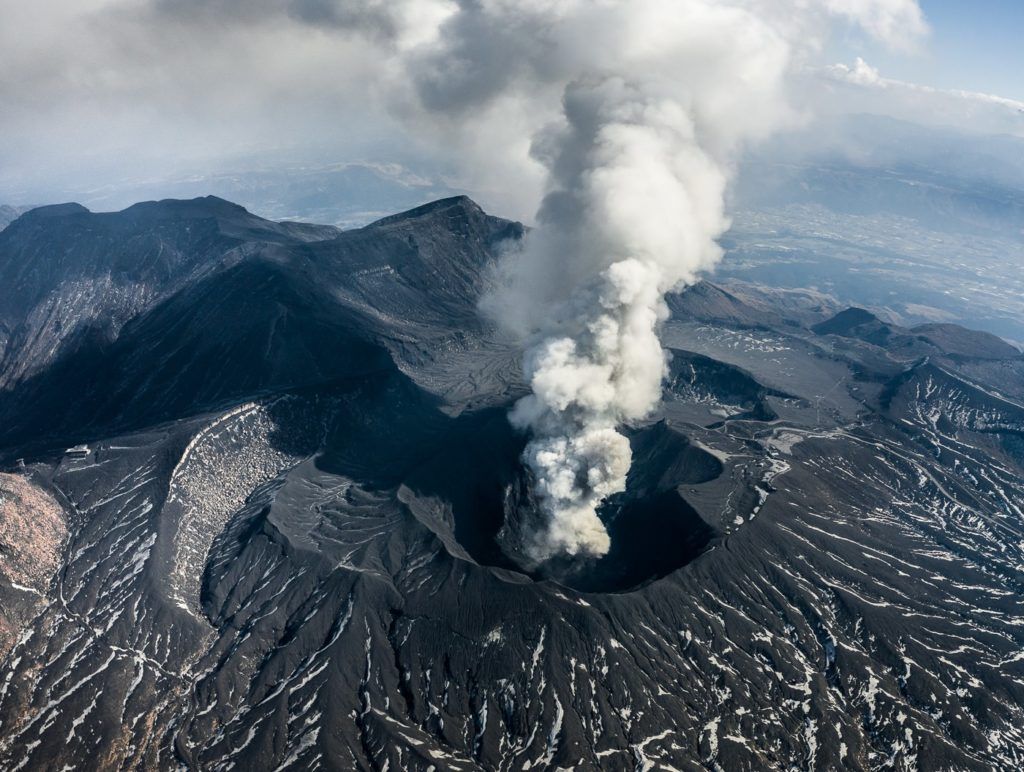
In the Aso region of the Kumamoto Prefecture in the center of Kyushu Island is the Mount Aso region, which is one of the largest calderas in the entire world. The Mount Aso Volcano hike and surrounding trails are some of the best hiking adventures you can have in Japan. Mount Aso is a volcanic depression, which is essentially a huge crater that has a number of peaks within this region that can be trekked. There are numerous craters within the crater such as the very active Nakadake Crater.
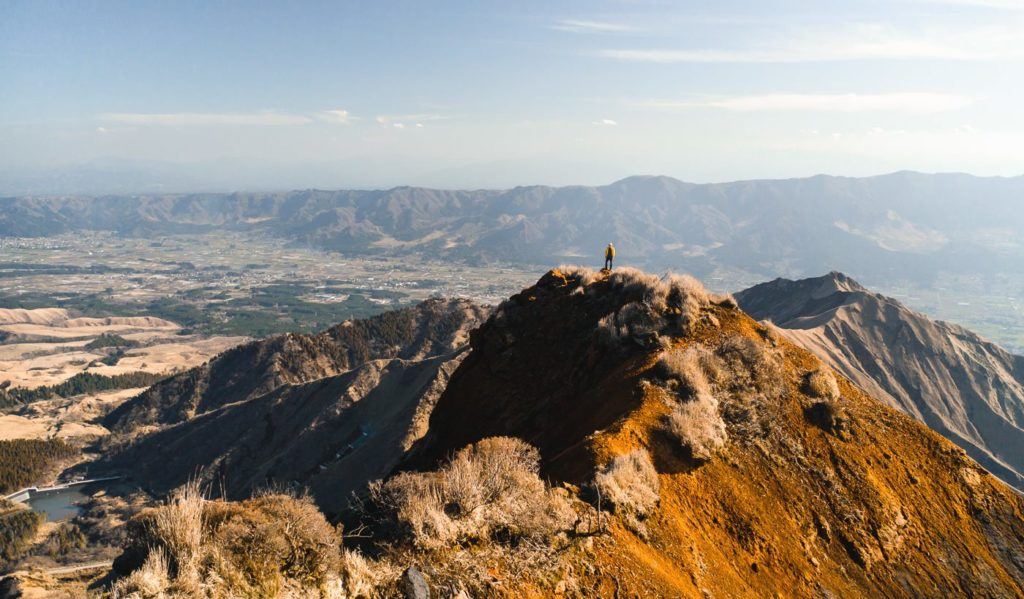
The Caldera spans 17 kilometers from east to west and 25 kilometers from south to north with a total area of 350 square kilometers. When we talk about this caldera it is a huge area but at the center of the caldera is where all of the action is when it comes to volcanic activity, hiking, museums, and tourism. In the middle of the caldera is the central crater group which consists of the five Aso peaks which are Mt. Taka (Takadake), Mt. Naka (Nakadake), Mt. Eboshi (Eboshidake), Mt. Kijima (Kijimadake), and Mt. Neko (Nekodake). Just for reference ‘dake’ and ‘san’ generally refer to peaks or mountains in Japanese so as you can see if you take away ‘Mt.’ and add ‘dake’ you can quite simply figure out the translation. Below you can see the span of the Caldera from atop Mount Eboshi.
These outer mountains or five peaks were formed when pyroclastic flows came in from outside the Caldera. They are considered part of the Aso Volcano. I’m trying to give you this background information because it was a little confusing for me as one would think when all the hype is about Mount Aso Volcano that it would actually be the part erupting but it is the entire region and inside that big region (which is Mount Aso Volcano) are these five peaks and the active Nakadake Crater. I hope that helps you to make sense of the many peaks, volcanoes, and calderas in the region.
TOP 3 PLACES TO STAY IN KYUSHU
- Ultimate Luxury: Amane Resort Seikai best location and view
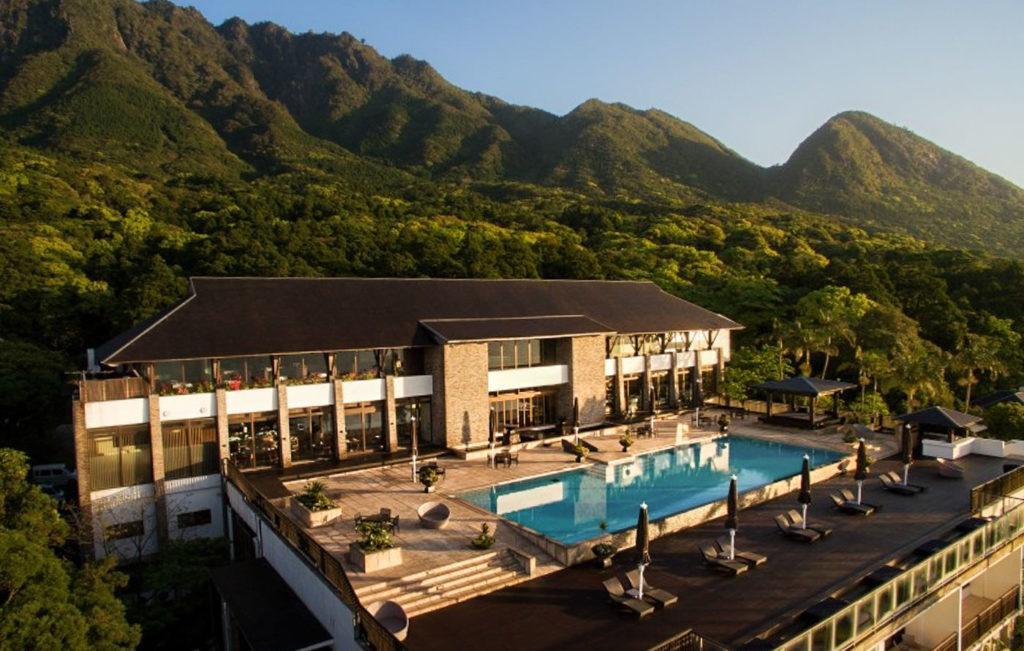
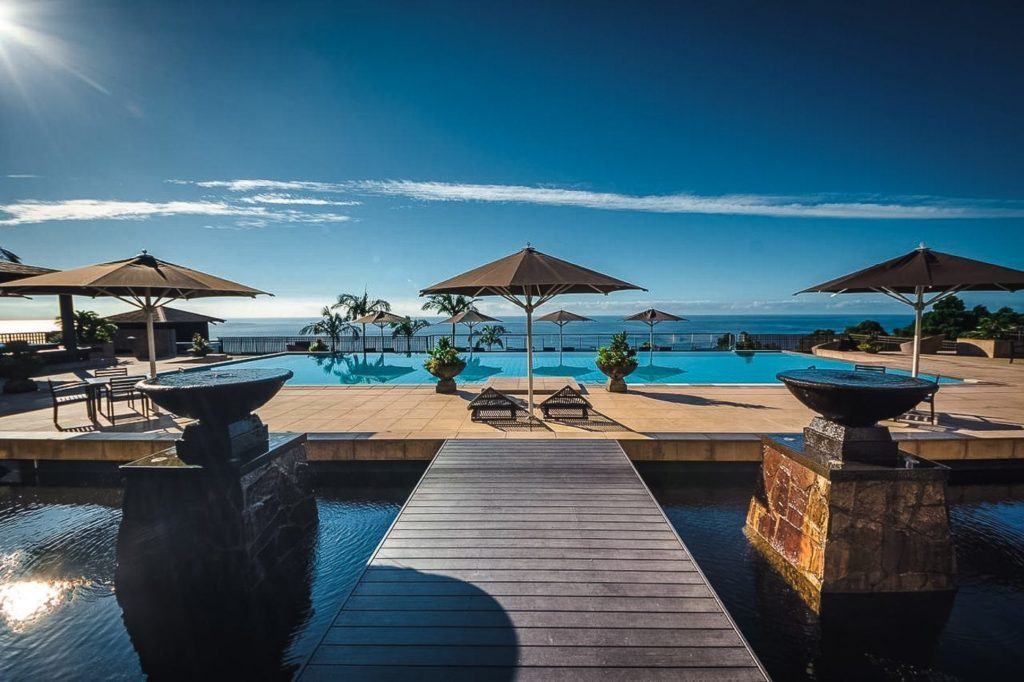
- My Favorite: Sankara Hotel & Spa – Natural Forest, Pool & Beautiful surroundings.
- Budget Hostel in Kyushu: WeBase Hakata Hostel is easily the top hostel in Kyushu
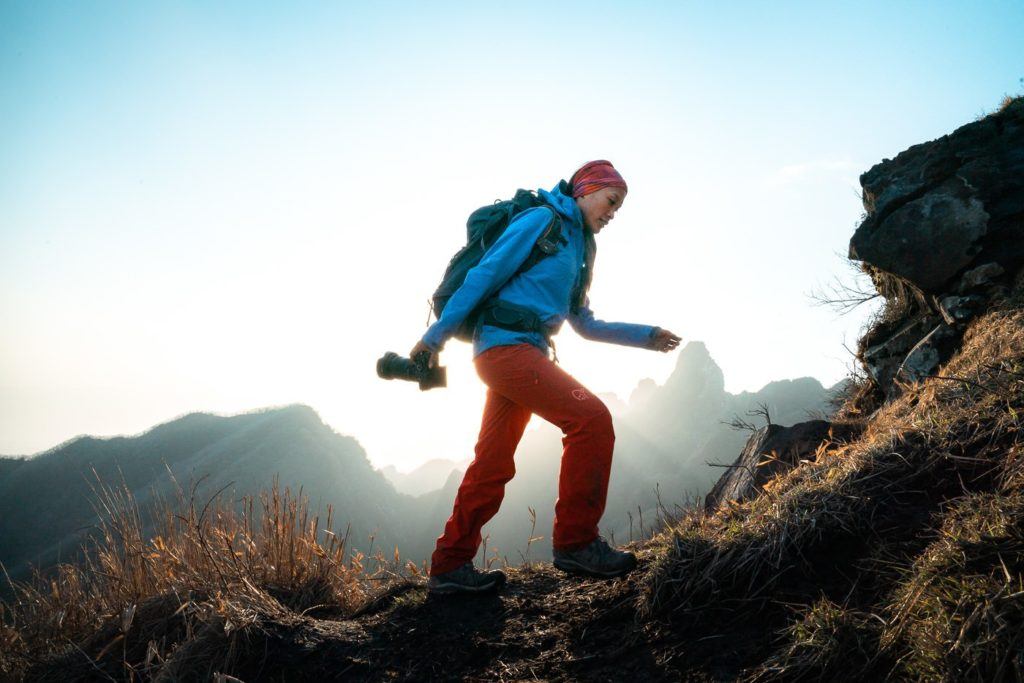
HIKING AROUND MT. ASO
Now, let’s talk hiking. Once you drive into the main arena and park in the museum or ropeway parking lot, there are a number of trails you might be interested in. It’s important to take note of the current restrictions in place on certain trails and you can do that on the official website. Trails can often be limited due to the risk of explosions or dangerous weather although there are some that are almost always open. To find out the current restrictions in place you can head to the official website.
In this blog post about hiking around Mt. Aso, I’m going to detail the three hikes I did and then give you some additional options on top of those.
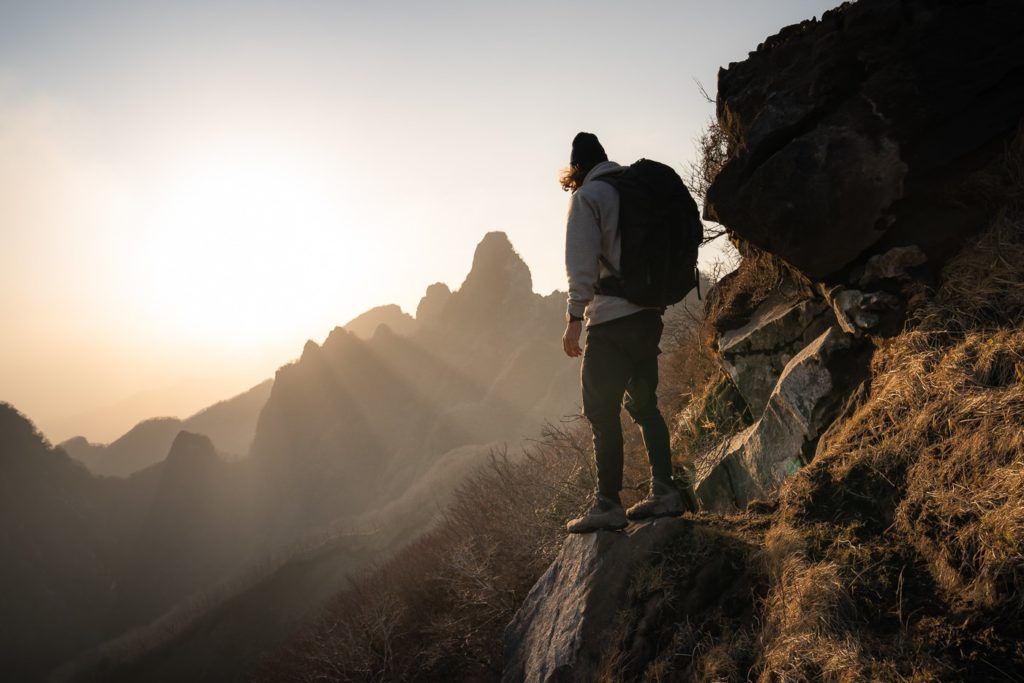
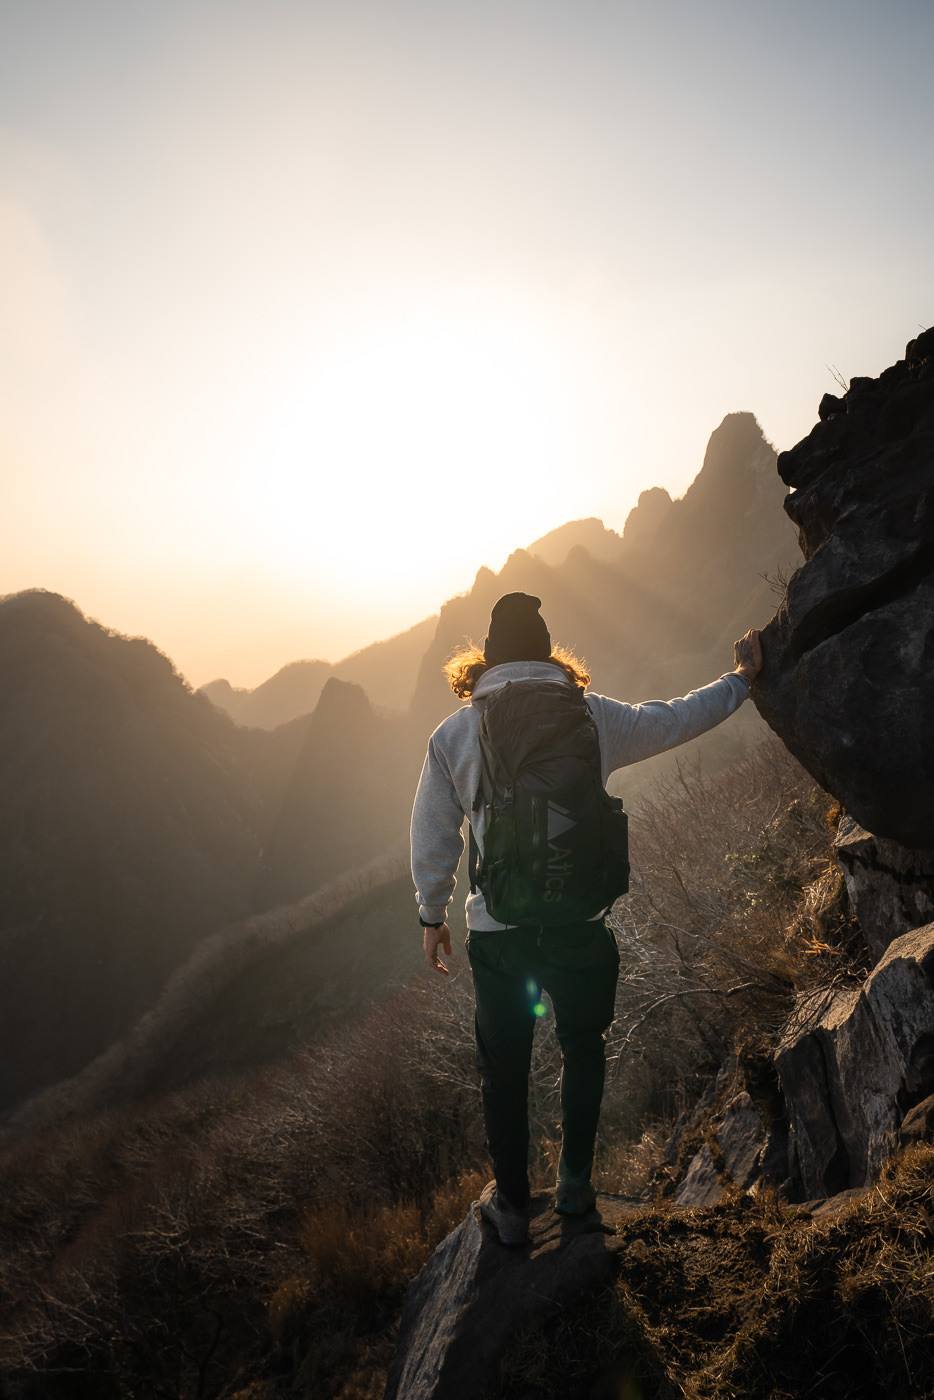
HIKING MOUNT EBOSHI (EBOSHIDAKE)
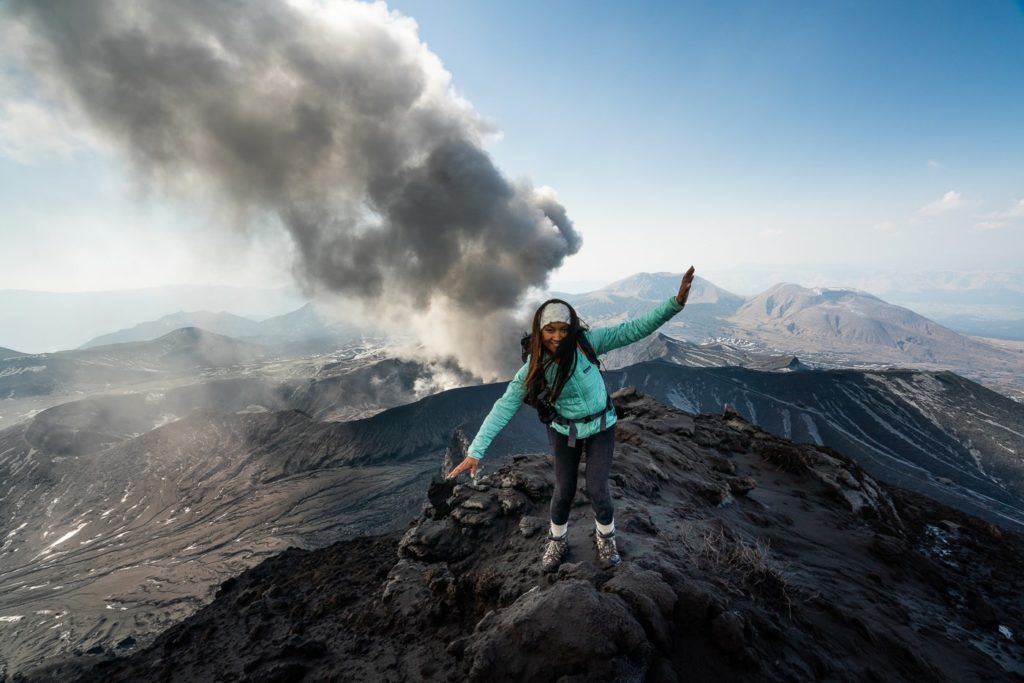
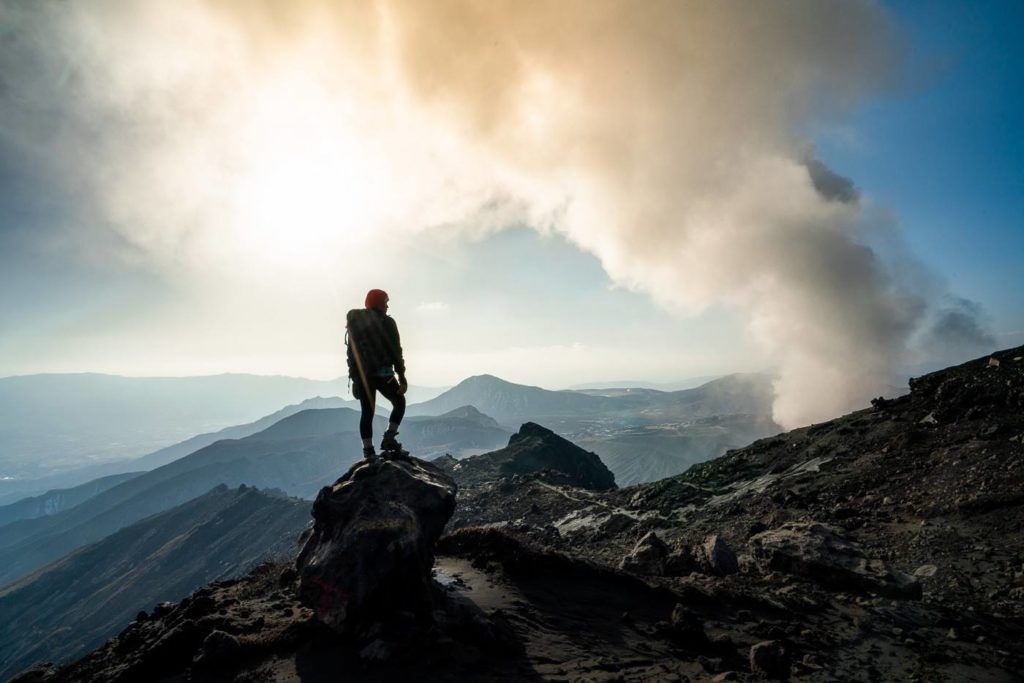
The easiest hike and most popular option for hiking are to summit Mount Eboshi. It’s the easiest peak and probably the safest peak to climb taking just over an hour to get up and down from the summit. It’s usually open and rarely restricted as it is much further away than the peaks like Nakadake and Takadake so it is a pretty safe bet. The view from the top is quite remarkable as it looks out over the Nakadake Crater, which is where the active volcano of Mount Aso is found. I visited Mount Eboshi as part of the ‘Around Aso Tour‘, which was the perfect way to explore this region on a full-day trip from Fukuoka.
You can read the full blog post I wrote about hiking Mount Eboshi here: MOUNT EBOSHI HIKE (EBOSHIDAKE)
- Hike Distance: The total hike distance for me was a 4-kilometers return trip.
- Hike Duration: The trek up was just under thirty minutes. We then hung out at the top for an hour before the 25-minute walk down. So you could get up and down within the hour if you only stopped for a quick look and photo at the top rather than a full photoshoot and drone flying session.
- Hike Difficulty: This hike is quite easy although slippery in some parts. The incline will trouble those who aren’t used to hiking but it’s a short hike and most people who are capable of walking 5-6 kilometers on flat will be able to handle the adventure.
- Hike Incline: The total hike incline was 230m.
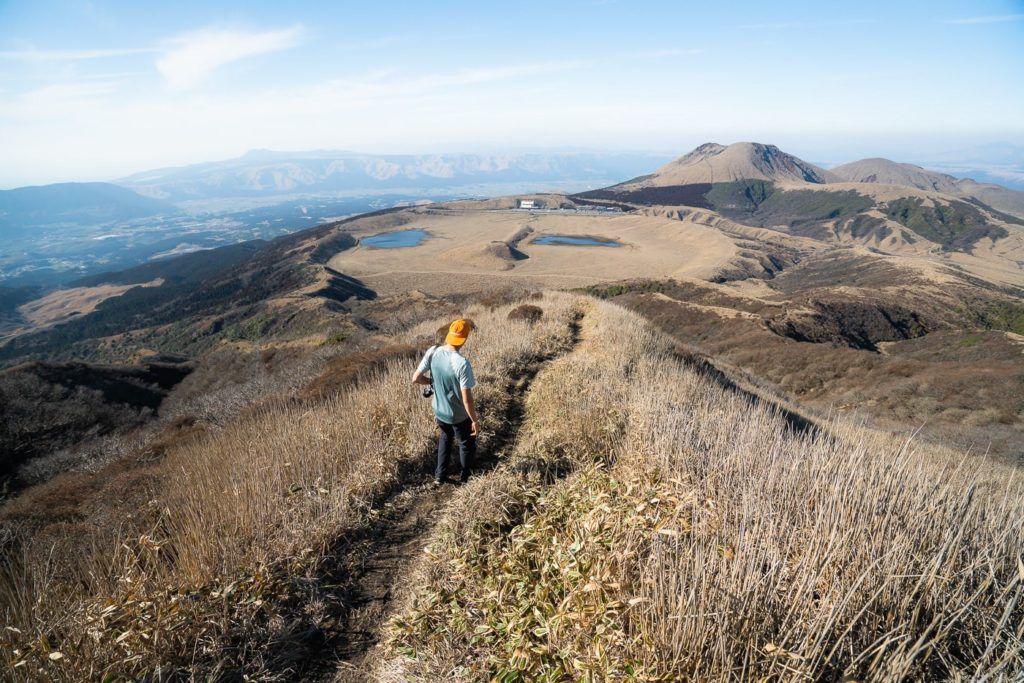
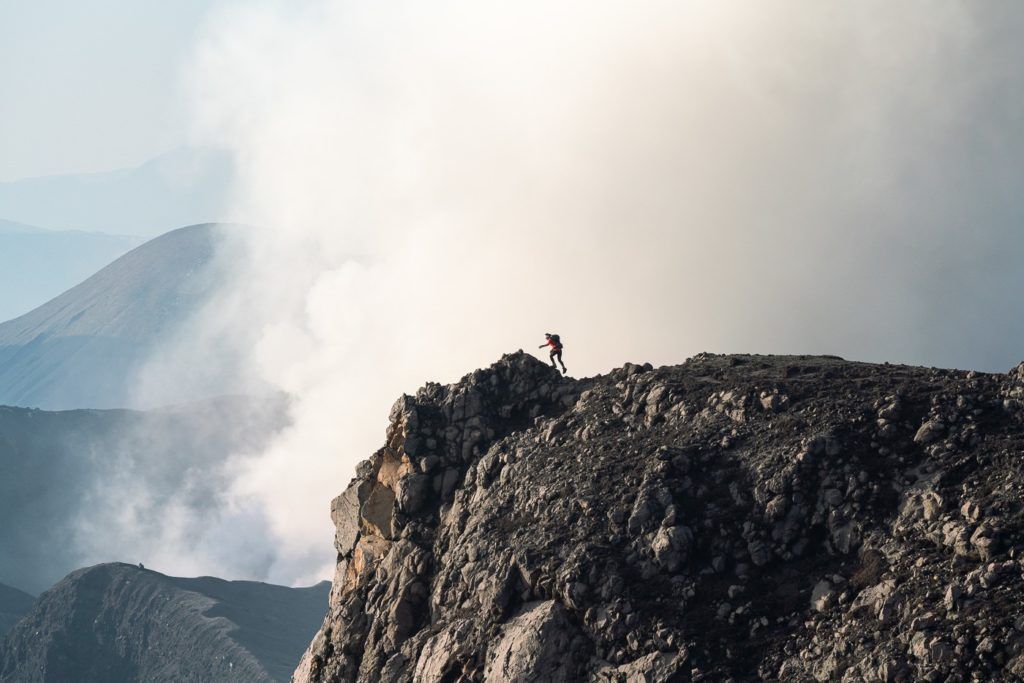
Most visitors to the Mount Aso region will park their car or have their tour bus parked in the museum parking lot. From here the Mount Eboshi trail is a loop. If you look up towards the Mount Eboshi peak you will see a ridge to the right and to the left that both climb up to the summit. I took the ridge to the right and then came back down on the opposite side (closer to Nakadake Crater, which is the active volcano). You simply walk from the parking lot and head up whichever ridge you prefer to begin on. There are plenty of signs that say ‘Eboshidake’ so you will quickly find your way.
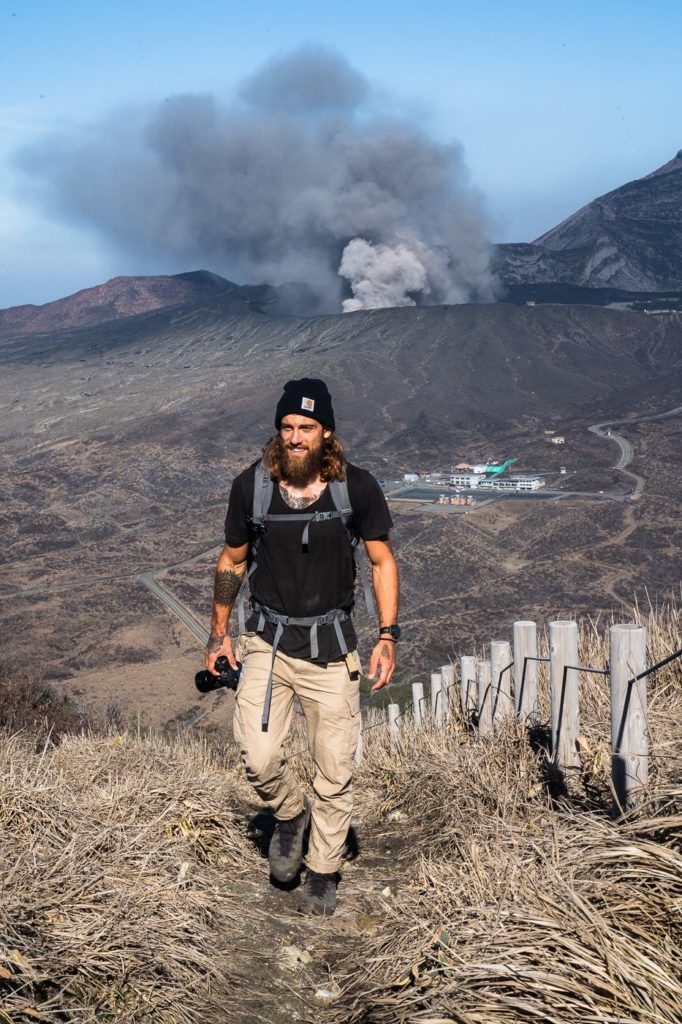
From the parking lot at the Mount Aso Museum, you can take the loop beginning either on the left or the right and come down the opposite ridge on the way back. I headed up towards the right side to begin the short 2-kilometer journey to the summit. You can see the museum in the background of the photo below as we made our way around the little lake to the trail.
The trail is well defined, marked with signs and has a lot of stairs installed to make the journey easier. It is quite steep but nothing ridiculous with just over 200m of incline over the course of the 2-kilometer track to the top. I found it quite slippery during the winter and was grateful to have chosen hiking boots for the trek.
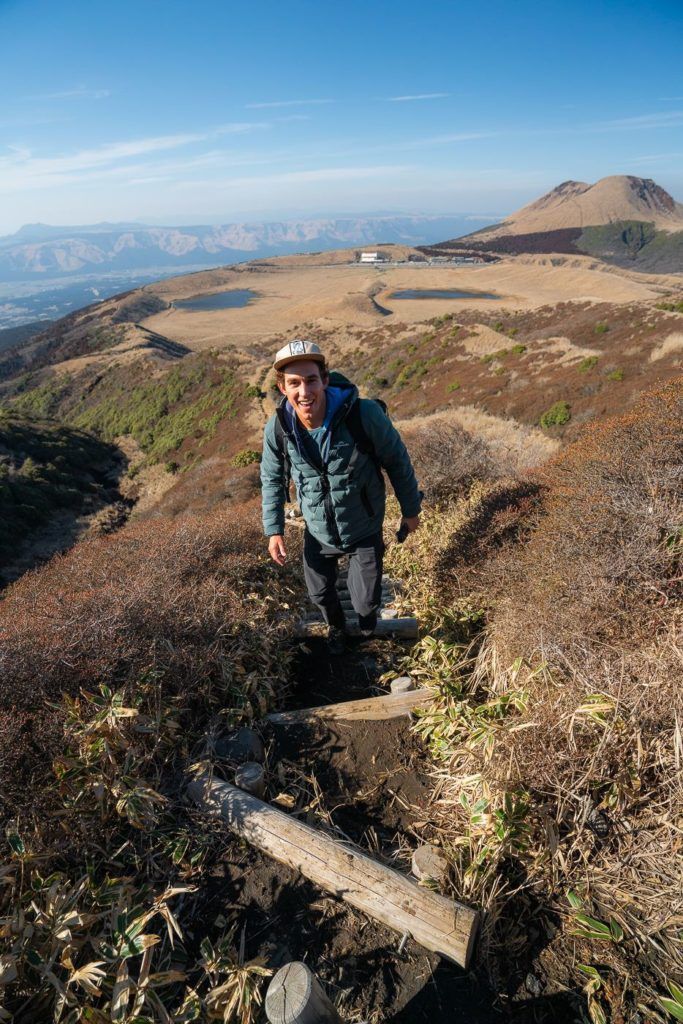
You really start to get an appreciation for Mount Aso as a whole in relation to the entire Caldera. It’s quite unique that it sits up in the caldera and then there are volcanoes within that space. There’s so much to take in no matter what direction you look out to.
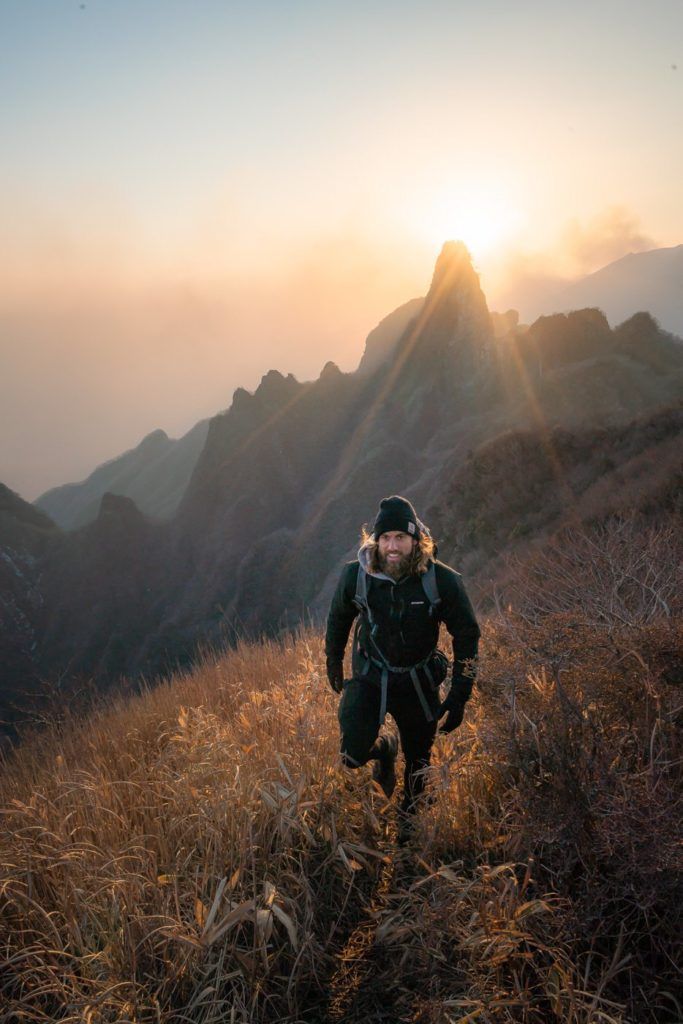
HIKING MOUNT NEKO (NEKODAKE
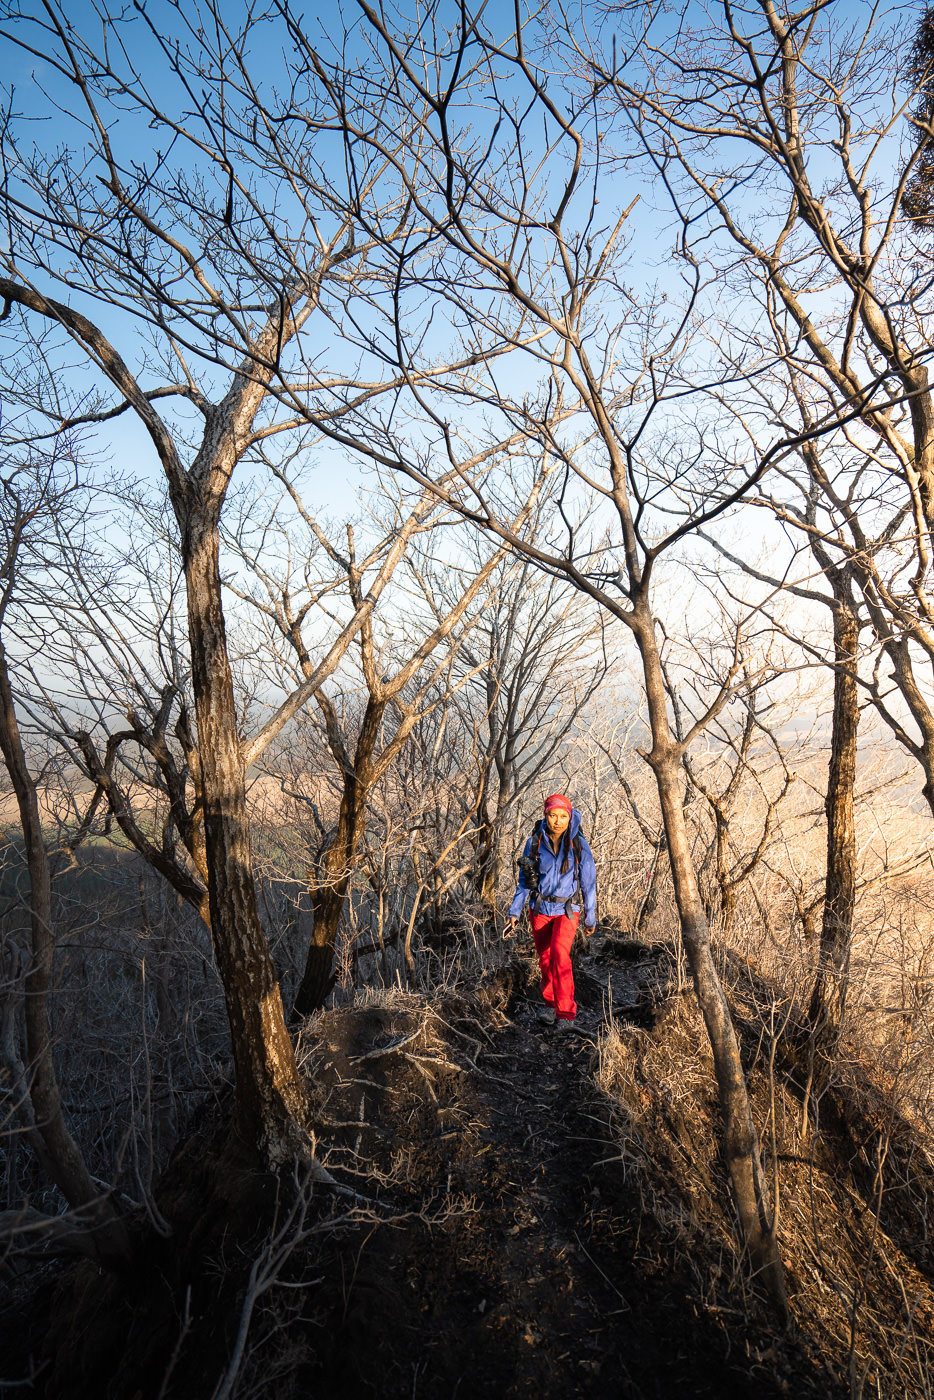
The second hike I did that was one of the five peaks within the Mount Aso Volcano was Mount Neko or Nekodake. Mount Neko is the second tallest peak in the Mount Aso region at 1,443m high for the Tengu Peak and the opposite Toho Peak is 1,408m high. It’s called Nekodake because from Aso it looks like two cat ears when you see both of the peaks. It was an awesome but steep hike and the jagged peaks were just incredible at the summit during sunset.
You can read the full blog post I wrote about hiking Mount Neko here: MOUNT NEKO HIKE (NEKODAKE)
- Hike Distance: The total hike distance for me was 5.77km return when hiking up to the plateau/summit and back down the same way.
- Hike Duration: The hike took about 2 hours of total moving time but it could take longer depending on your shape due to the steep incline and slippery path in the winter.
- Hike Difficulty: This hike is known as being pretty difficult due to the incline but it gets quite dangerous when you try and traverse the peaks. There have been reports of accidents occurring when traversing. There were no huge drop-offs or moments of dangerous exposure near to the trail when just going up the ridge and back down. You can expect to do some basic bouldering, climb a few ladders, and meet some serious incline.
- Hike Incline: The total hike incline was 730m, which was equally as taxing on the descent.

The trailhead is in Kamikishimi and it actually starts just behind a little cattle farm. Don’t worry this isn’t just my trespassing, as usual, this is the actual trail and there are signposts and trail markers the whole way once you get behind the farm.
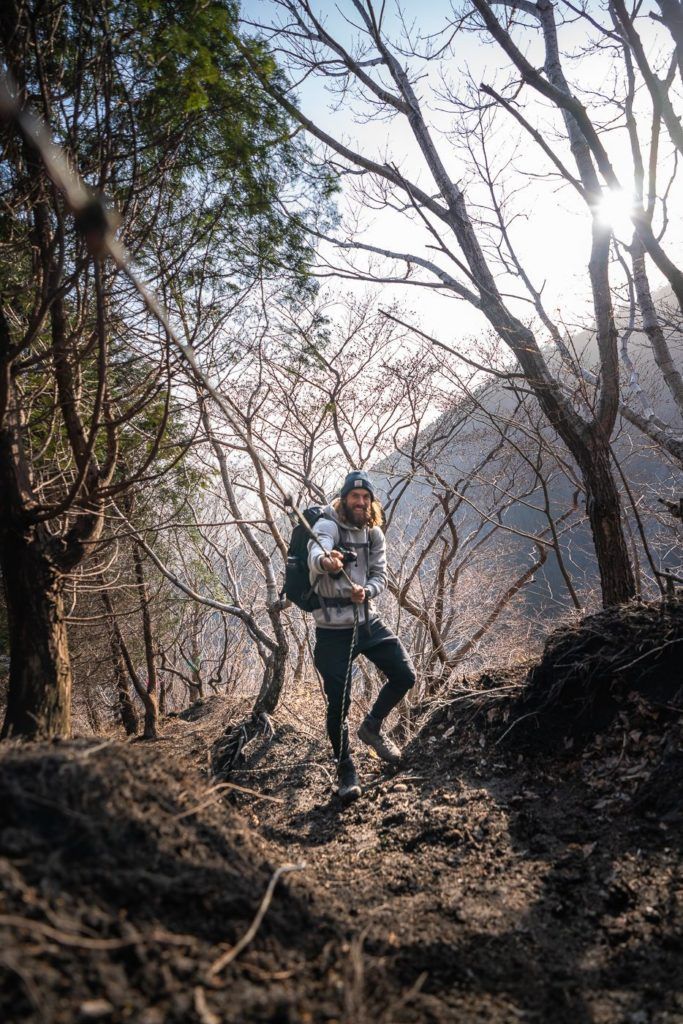
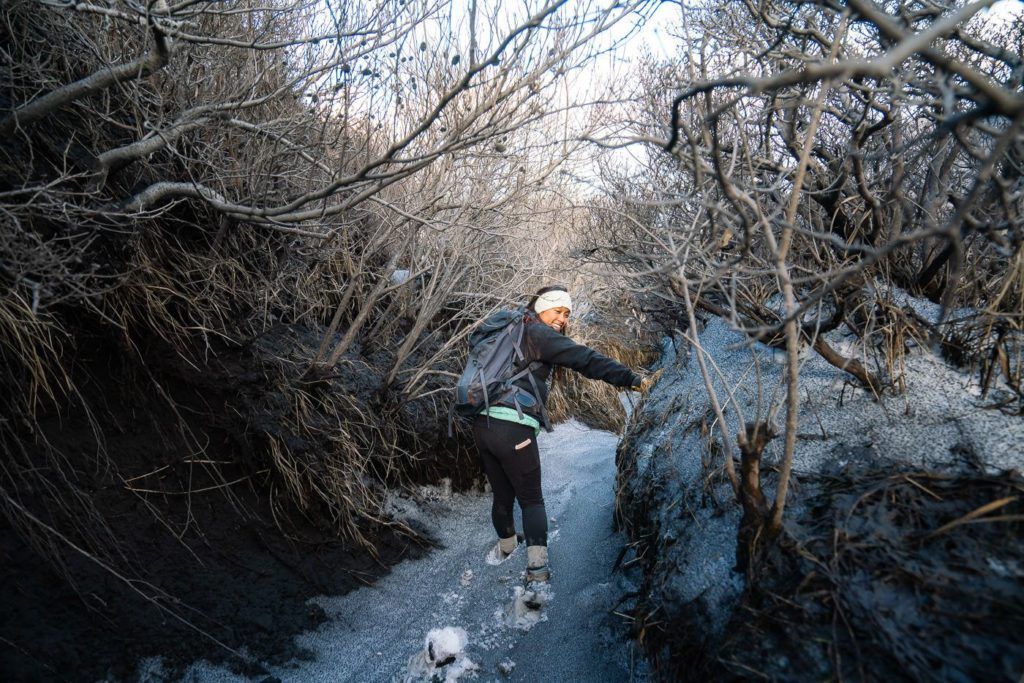
The trail is quite well defined but in the middle of winter, there is snow and the trail is damn slippery. Lots of sections have a rope but you will be hard-pressed not to hit the deck on this trail at least once. If not going up then definitely on the way down unless you are a purebred mountain goat.

As well as the numerous ropes to help you up the summit of Nekodake, you will also encounter several ladders, helping you ascend through the forest. None of the ropes, ladders, or bouldering is technical or very difficult but be prepared for a bit of action along the trail.
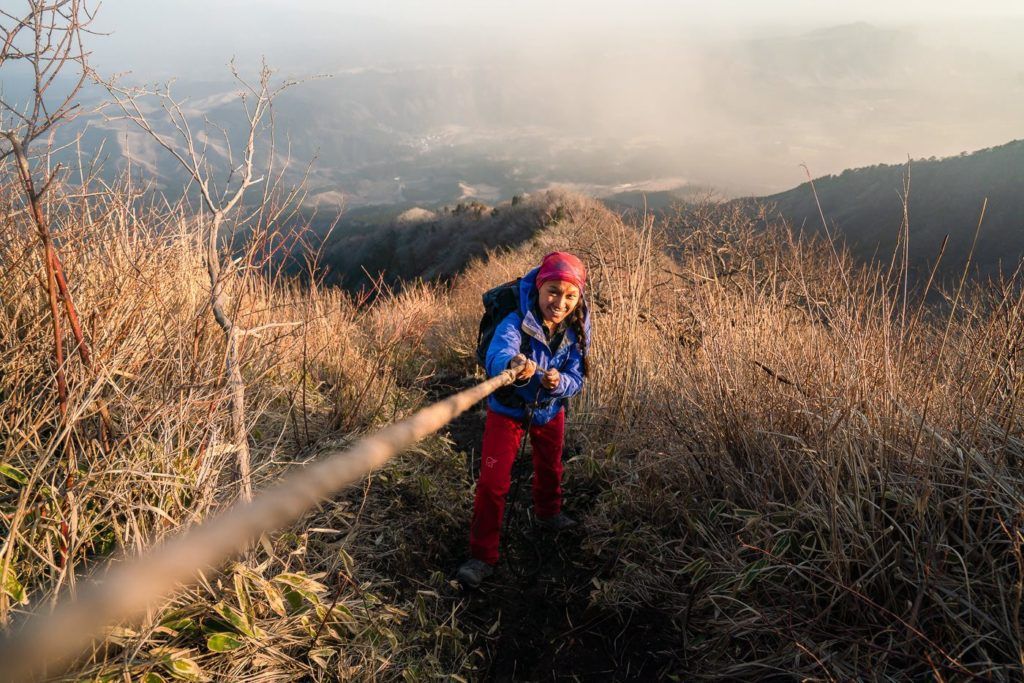
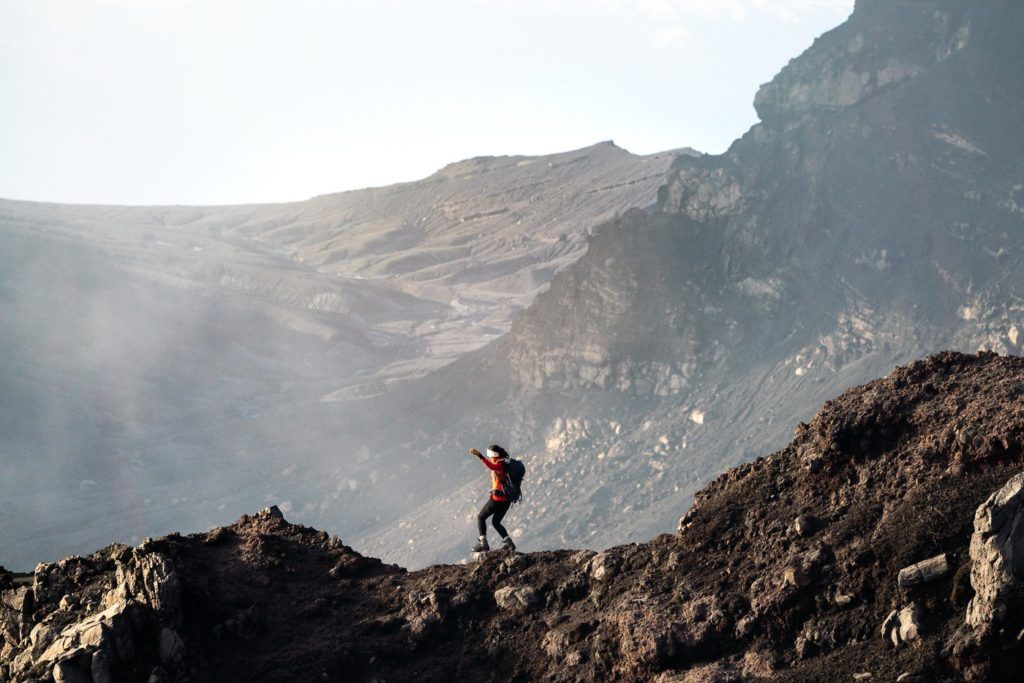
After a couple of kilometers, we reached the first plateau. It looked out across to the Tengu Peak, which is the most prominent peak and you really can’t miss it. In the late afternoon, the sun sets behind this peak so it’s a really magical spot to take in the whole ridge.

After just over an hour of trekking up to the Nekodake summit, we reached the summit plateau. It turns out the summit is actually pretty dangerous. I didn’t explore the ridgeline but it was extremely windy and the trail seemed to get narrower and narrower with the drop-offs getting more dangerous.
HIKING TO MOUNT NAKADAKE AND TAKADAKE PEAKS
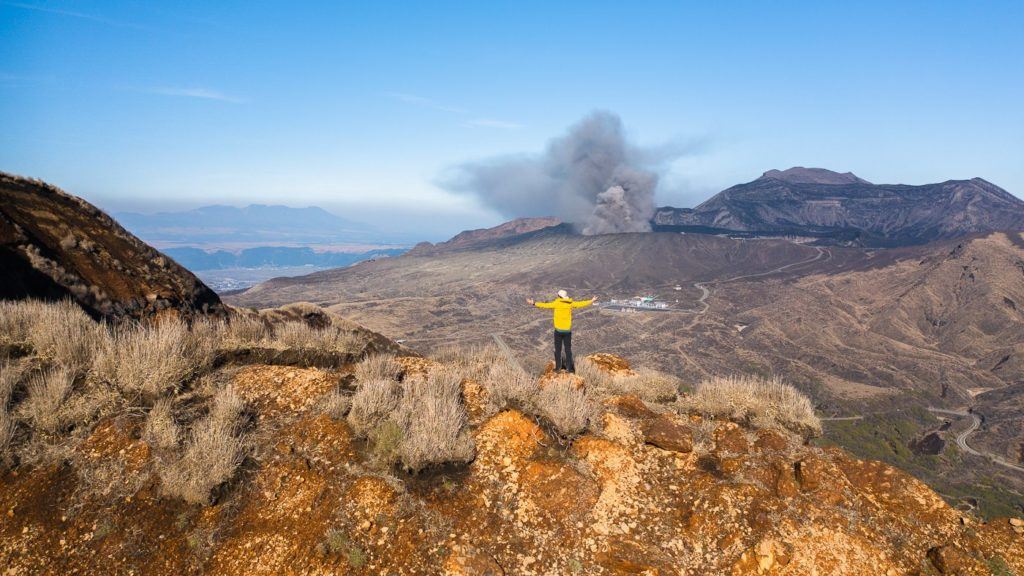
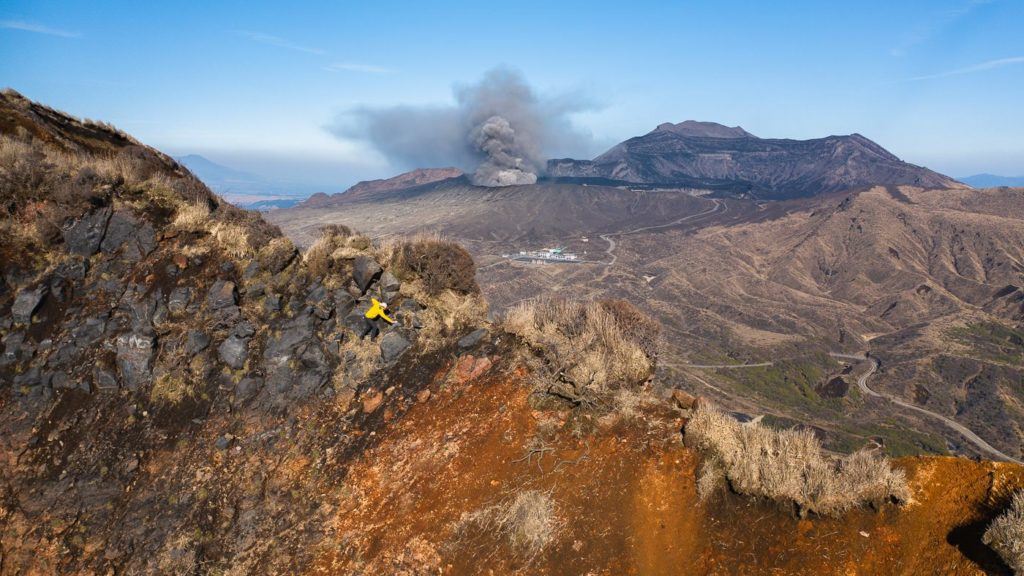
This hike is the tough one because it is often closed. Don’t be confused it doesn’t involve hiking to the crater rim of the erupting Nakadake but it traverses around and to the ridge behind the crater and looks back down towards the crater from the opposite side of the parking lot. You then continue up further away from the volcano towards Takadake, which is the highest of the five peaks in Mount Aso Volcano.
This trail is quite eroded and many would find it quite dangerous. It also has a number of sections that fall within the 1km zone, which means it can often be off-limits if Nakadake is blowing a lot of gas.
- Hike Distance: The total hike distance for me was 12km return when hiking up to the Takadake and Takadake Toho and then returning to the parking lot to complete the loop.
- Hike Duration: The hike took about 4.5 hours to complete as the terrain was quite muddy and slippery.
- Hike Difficulty: This hike is known as being pretty difficult due to the incline but it gets quite dangerous due to the rocky, slippery terrain. I’d say amateurs and beginners should just hike Mount Eboshi and those well versed in the mountains would be okay heading up to Takadake.
- Hike Incline: The total hike incline was 750m, which was equally as taxing on the descent due to the low-level bouldering required.
The hike can begin in the parking lot of Nakadake or in between Nakadake and the Aso Museum (that’s where I started. Don’t park at the first parking lot of the museum because it costs 1000 yen and is much further away. This lack of a parking fee may be temporary but that’s how it was when I visited. The trail can begin on the left or right of the parking lot and is a loop trail. I started on the left and made it to Nakadake Crater after following the rocky trail.
The evidence of previous explosions was there right before our eyes with the old ropeway battered and closed as well as a lot of small huts completely wrecked and covered in ash.
Once we reached Nakadake we had epic views of the Nakadake Crater, which is where all the action happens. The crater rim of Nakadake Crater has been closed for a while due to volcanic activity but the Nakadake and Takadake hike is on and off regarding restrictions for the last few years you just to check the current status.
After Nakadake Peak, the trail then heads up along the ridge to Takadake Pea (1433m) and then on further to do a short loop out to Takadake Toho and back. Out at Takadake Toho you will find a small shelter and a very ashy overgrown trail! The views out into the surrounding caldera from Takadake are quite beautiful.
It was genuinely freezing on Nakadake and Takadake peaks so make sure to pack gloves, jackets, and beanies even if it doesn’t seem cold down in the parking lot. You will get cold.

After summiting Takadake, it is just a mission to get down. With crumbly rock and wet, muddy conditions it is a mission attempted slowly and steadily. I didn’t find it too dangerous but can see many finding it a bit overwhelming. Again, this is for seasoned hikers not those on a leisurely day trip. The views heading back down during sunset were sublime and I had to do my best to concentrate on my footing and not the golden light wisping throughout the crater.
MOUNT KISHIMA (KISHIMADAKE)
The final hike that is possible is to the fifth peak which is to Mount Kishima (Kishimadake). It’s similar to Eboshi but on the other side of the museum. You can hike up and down this small mountain in under an hour, just like Eboshi. It offers great views of the Kusasenri region once you reach the top and will likely be open year-round even when the Nakadake Crater is highly active. I didn’t get around to this one as it seemed the least ‘epic’ and I only had time from three hikes in the Mount Aso region so it was the one peak of the five in Mount Aso I didn’t get to experience.
The trail is just 2km in the total distance (Half that of Eboshi) and just 200m of incline taking about an hour for most hikers.
Make sure to check the conditions, weather, and restrictions in place at the time you attempt any of the hikes around Mount Aso. Happy hiking!
WHERE TO STAY IN KYUSHU
- Best Luxury Place to Stay in Fukuoka: Hotel WBF Grande Hakata (Value): This is by far the most popular hotel and one of the most luxurious in Fukuoka.
- Best Value Place to Stay in Kumamoto: Hotel The Gate Kumamoto (Value): Hotel The Gate is a well-situated accommodation in the heart of Kumamoto, just across the train station and within walking distance to shops and restaurants.
- Best Luxury Place to Stay in Kumamoto: Kumamoto Hotel Castle (Luxury): Set near the infamous Kumamoto Castle, this luxury hotel features a wide range of carpeted rooms from standard rooms to suites fitted with plush amenities.
For a full list of the top-rated places to stay in Kyushu, you can check out my comprehensive guide: WHERE TO STAY IN KYUSHU: BEST REGIONS & HOTELS
ARE YOU FOLLOWING MY KYUSHU BLOG SERIES?
I spent over three weeks exploring Kyushu and visited some incredible waterfalls, hiked some amazing trails, and visited a number of epic volcanoes. I created a number of guides to help travelers find the best spots in Kyushu. You can explore the articles by clicking on the links below.
- The Ultimate Kyushu Bucketlist: 30 AWESOME THINGS TO DO IN KYUSHU
- The best places to stay in Kyushu in each region: WHERE TO STAY IN KYUSHU: BEST REGIONS & HOTELS
- How to plan your Kyushu vacation: THE ULTIMATE KYUSHU ITINERARY: 5-DAY, 7-DAY & 10-DAY
- Interested in chasing waterfalls?: 12 AWESOME WATERFALLS IN KYUSHU
- Keen for some epic hiking?: 11 AWESOME HIKES IN KYUSHU
- Everything you need to know about Oita: 11 AWESOME THINGS TO DO IN OITA
- Your Ultimate Guide to Kumamoto: 13 AWESOME THINGS TO DO IN KUMAMOTO
- My favorite waterfall in Kyushu: TAKACHIHO GORGE – MOST BEAUTIFUL WATERFALL IN JAPAN

Sunday 21st of April 2024
I love your blogs! Would you recommend the Mt Aso area or Mt Karakuni?
Mark Hobart
Monday 11th of April 2022
I read your blog, and I am still confused as how to best hike Aso. I'll be taking the Shinkansen from Yokohama to Hakata, then a rental car to the Aso area. Or, I could just make the grueling drive in my own car. For an intermediate hiker which peak do you suggest i hike to capture a sighting of the caldera without being killed by sulfur? Also, do you suggest hiking shoes on any trail? Good blog! Thanks!