
Spantik Peak, also known as Golden Peak, is a challenging, climbing expedition to reach a summit at 7,027m with panoramic views of the surrounding mountains in the Karakoram Range. The expedition can range from 15-35 days depending on weather windows and is known as a non-technical peak, although it wasn’t quite just a trekking peak either. The long approach, deep snow, and rough weather made this a challenging adventure and a great introduction to Mountaineering.
CLIMBING SPANTIK PEAK IN PAKISTAN
In this blog post, I will cover everything you need to know about the logistics of a Spantik Peak Climbing Expedition and also detail my experience through photos and shared stories. This will give you an idea of what to expect and a great insight into the scenery you will find on each day of the trek and climb. Before sharing my experience with this expedition in the second section of this blog post, I will detail all of the information you need to know in this complete guide about climbing Spantik Peak.
If you want to climb Spantik Peak organized by the same team I went with you can contact Epic Expeditions and just let them know I sent you and they will sort you out. They normally run one or two expeditions a year to Spantik and have western and local guides who have summited Spantik before. You can view their prices and full expedition details by clicking to view their Spantik Expedition Sign-Up Page.
BEST TRAVEL COMPANY FOR PAKISTAN
Interested in traveling to Pakistan or doing the K2 Base Camp Trek?
I recommend joining an Epic Expeditions trip for all things Pakistan adventure travel. Use code ‘JACKSON5’ when booking for a 5% discount.
SPANTIK PEAK BASECAMP TREK DETAILS
- Distance: 42 km one-way
- Days required: We took three days up and two days down, which is standard timing.
- Total Incline: 2,500m of incline througout the three day journey to basecamp.
- Difficulty: The three-day trek to Spantik basecamp is quite manageable for most hikers. While there is around 600-1000m of elevation each day, the undulating terrainp gives moments of respite and recovery with easy walking. The toughest and only dangerous parts of this route are the times spent on the glacier during the third day. Here your guide needs to choose a route to help you avoid the many crevasses and steep drop-offs. Even with a guide, we roped up several times as a precaution due to the slippery slopes on either side of the crevasses.
- Permits: Your tour operator will take care of these. It isn’t possible to hike independently and you must book with a guide and a registered tour operator.
- Guide: A guide is required on this trek and the guide manages all of the logistics, distances, directions, and camping sites. The directions weren’t always very clear regarding the path. The glacier imparticular was like a maze and a local guide is 100% necessary.
- Accommodation: Each night you will camp at an incredibly scenic campsite.
CLIMBING DETAILS FOR SPANTIK PEAK
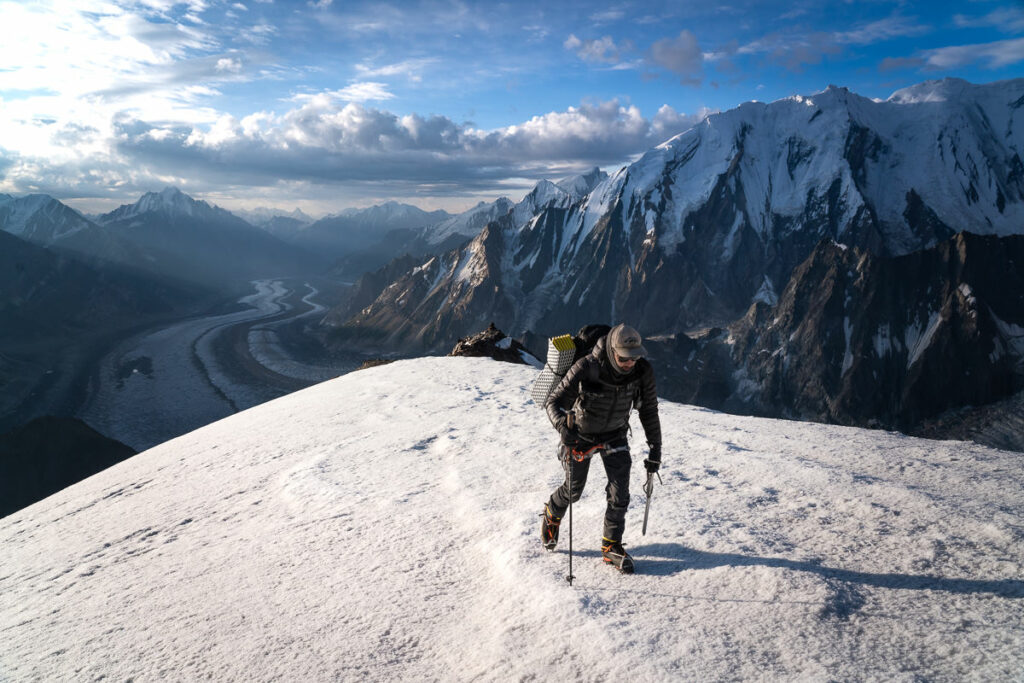
Camp 1:(5100m), 5 hrs: The route from base camp to Camp 1 begins on grass from basecamp, before ascending a solid rocky ridge. Camp 1 is located just before the snowline and is your last chance to wear trekking boots.
Camp 2: (5650m), 4-5 hrs: The climb from Camp 1 to 2 is mostly easy walking on moderately angled snow but requires the occasional crevasse to be crossed.
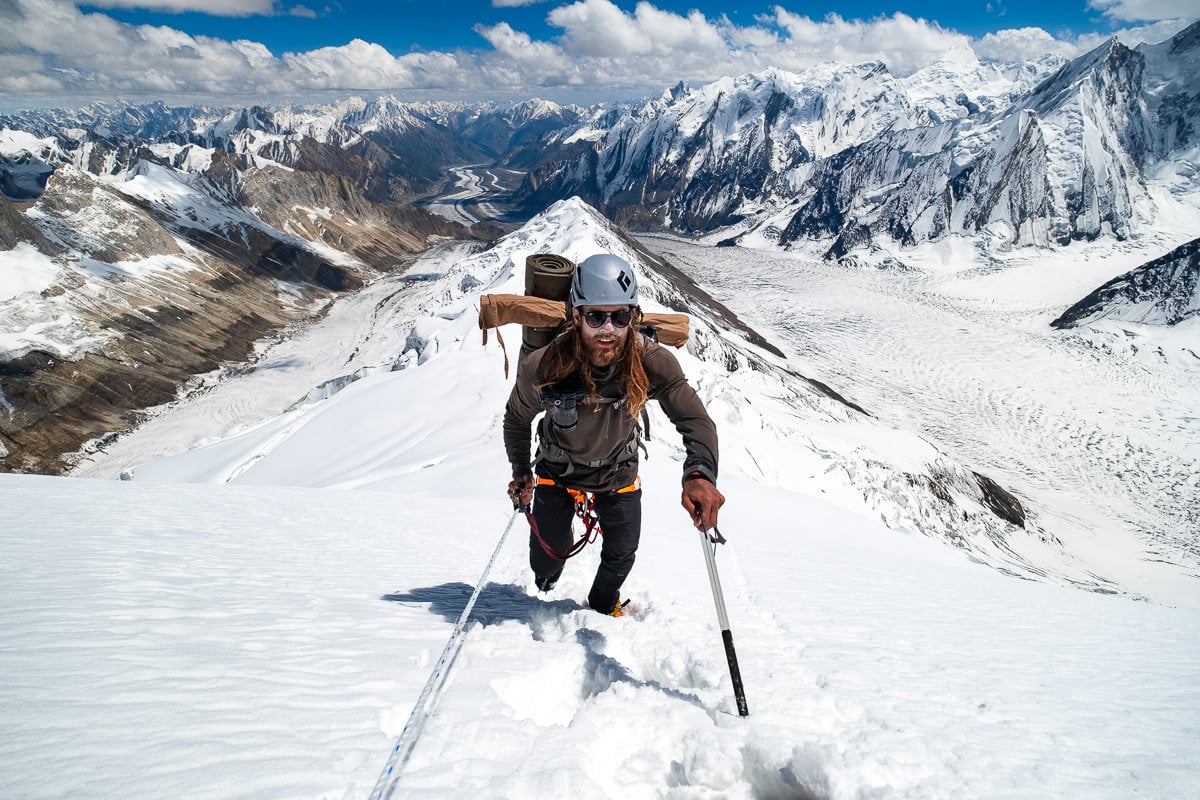
Camp 3: (6295m), 5-6 hrs: Situated on a wide plateau, Camp 3 has incredible views over the Hindu Kush and Karakoram. The climb from Camp 2 to Camp 3 includes the steepest slopes at 30-45 degrees on which fixed line will be placed for security for our ascent and descent. A jumar and belay device will be used to ascend and descend this route.
Summit: The climb from Camp 3 to the summit of Spantik usually takes around 7 to 10 hours and will be climbed alpine style, with the expedition group divided into rope teams.
INSURANCE FOR SPANTIK PEAK
Pakistan is a precarious place for climbing because the availability of helicopter rescue is almost non-existent. Compared to places like Nepal, helicopter rescue requires prior organization and deposits of $5000+ by your trekking or climbing company. There is a solution though.
Need extra protection?
Regular travel insurance is great but won’t cover you for high altitude hikes or for helicopter evacuation. Each year, I purchase a Global Rescue Subscription.
For less than $500 per year or $100 per expedition, you can purchase a Global Rescue subscription and be covered no matter how extreme the hike or how high the climb is.
MY SPANTIK PEAK HIGHLIGHT VIDEO
SPANTIK PEAK CLIMBING PACKING LIST
I pack pretty light and managed to wash most of my clothes each afternoon/night for the first half of the trip. In the latter stages of the trip, it was pretty cold so we weren’t sweating as much and we wore our warm gear basically nonstop. During the day it was incredibly hot and then very cold at night so you need a good spread of warm weather gear and cold weather gear. Our porter allowance was 12kg and the rest we needed to carry during the day on our way to the basecamp, such as personal items, cameras, and rainjackets.
Clothes
- 1 pair of pants that maybe convert to shorts
- 1 pair of shorts
- 1 Warm or thicker pair of hiking pants
- 1 Long sleeve quick-dry shirt
- 1 Long-sleeve thermal shirt
- 2 Short-sleeve t-shirts
- 1 Thermal long underwear
- 4 pairs of quick-dry underwear
- 1 Lightweight down jacket
- 1 Heavy-duty summit down jacket
- 1 Beanie
- 1 Cap
Gear
- Sunglasses
- 1 Neck Buff
- Gloves
- Hiking boots
- Microspikes
- Headtorch
- Helmet
- Crampons
- 6000-8000m climbing boots
- Descender
- Carabiners
- Warm mitts or high-altitude gloves
- Glacier glasses
- Harness
- Gaiters
- 1 pair of warm summit socks
- 3 pairs of regular socks
- Sunscreen
- Trekking poles
- Water filter
- Powerbank
- Camera
My camera gear included a DJI Mavic Pro 2 drone, 100-400mm, Mirrorless body, 16-35mm lens, 24-105mm lens, GoPro Max, Sony RX100, and a tripod. I used a 40L camera bag and my porter had my 12kg duffel.

SPANTIK WIFI/ELECTRICITY AVAILABILITY
Wifi: There is no WiFi on this trek although some operators may provide a satellite connection. Most will not offer WiFi. It’s important to bring a satellite phone or Garmin InReach to be able to coordinate with the weather. Without a weather report, you will have no idea when it is safe for your summit push.
Electricity: Our team had a generator, which was carried up to the base camp. Each night, one jug of gasoline would be used for the generator so we could charge cameras, phones, headlamps, power banks, and even drone batteries for a few hours each night. This seems to be standard practice among tour operators but you will need to check if it is available. I also took a small solar panel, which worked well to charge my phone and power bank each day.
GETTING TO ARANDU VILLAGE
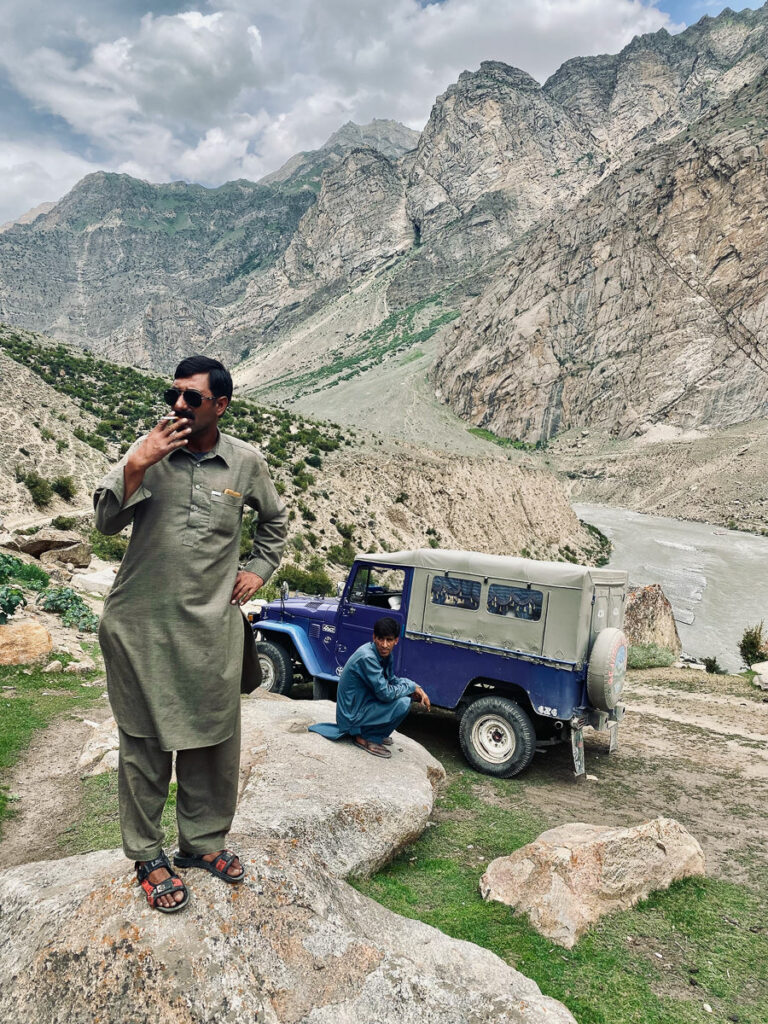
Our journey to Spantik, also known as the ‘Golden Peak’, began in Skardu at the Masharbum Hotel. After a couple of days of preparation in the dusty streets of the small mountain town, we had gathered the essentials and packed our bags ready for our big adventure. A vintage Jeep awaited us in the parking lot and we loaded our bags and barrels.
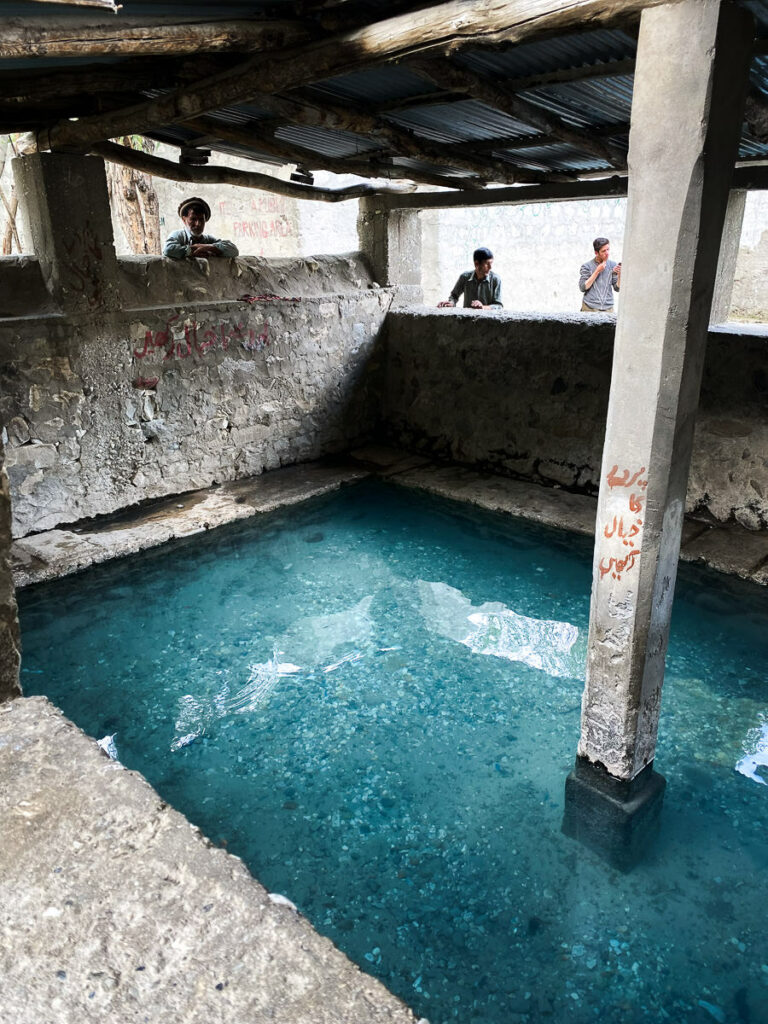
The drive to Arandu Village takes about five hours and passes through many small villages along the way. The roads aren’t quite as precarious as the journey to Askole, which is the starting point for the K2 Basecamp Trek. A surprise along the journey was a lunch stop at Chu Tron. Here we not only had a great local meal but also soaked our legs in the natural hot springs.
By mid-afternoon, we had reached the camping site just before Arandu Village and set up for a relaxing afternoon ready for our trek to begin in the morning. Our expedition had a potential of 20 days including the trek in and out of base camp, which gave us some time to wait for a good weather window while at base camp.
TREKKING TO SPANTIK BASECAMP
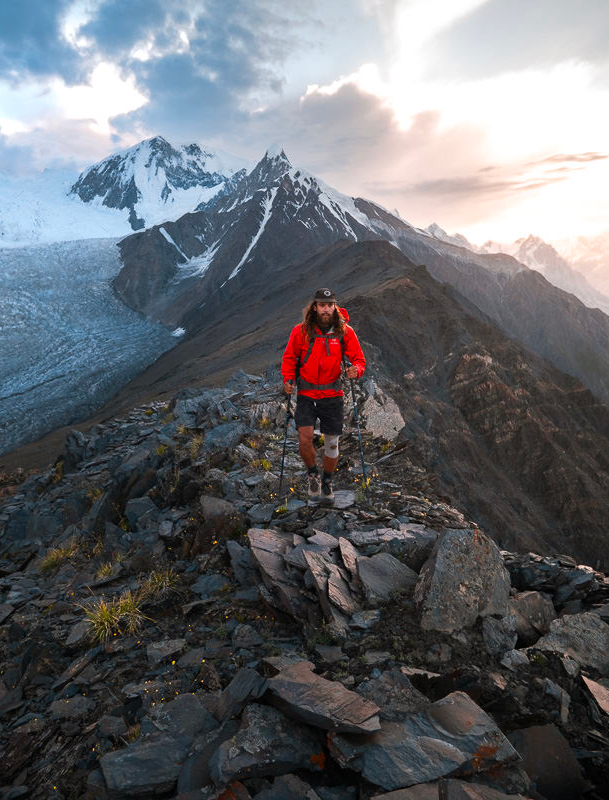
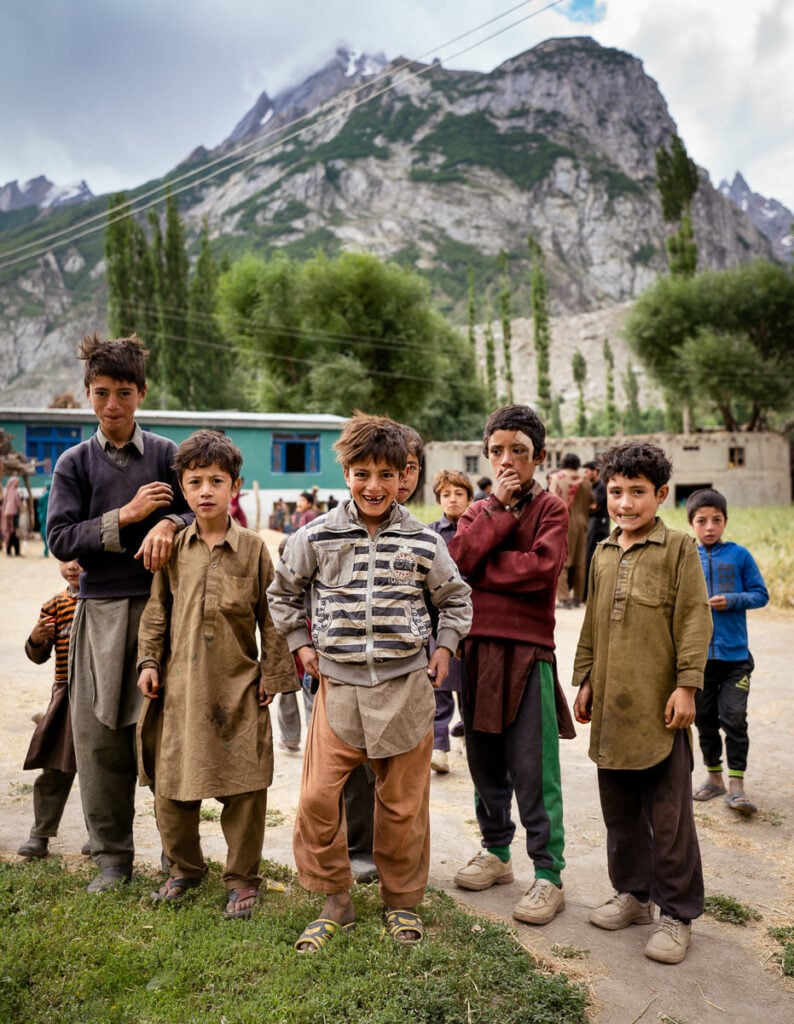
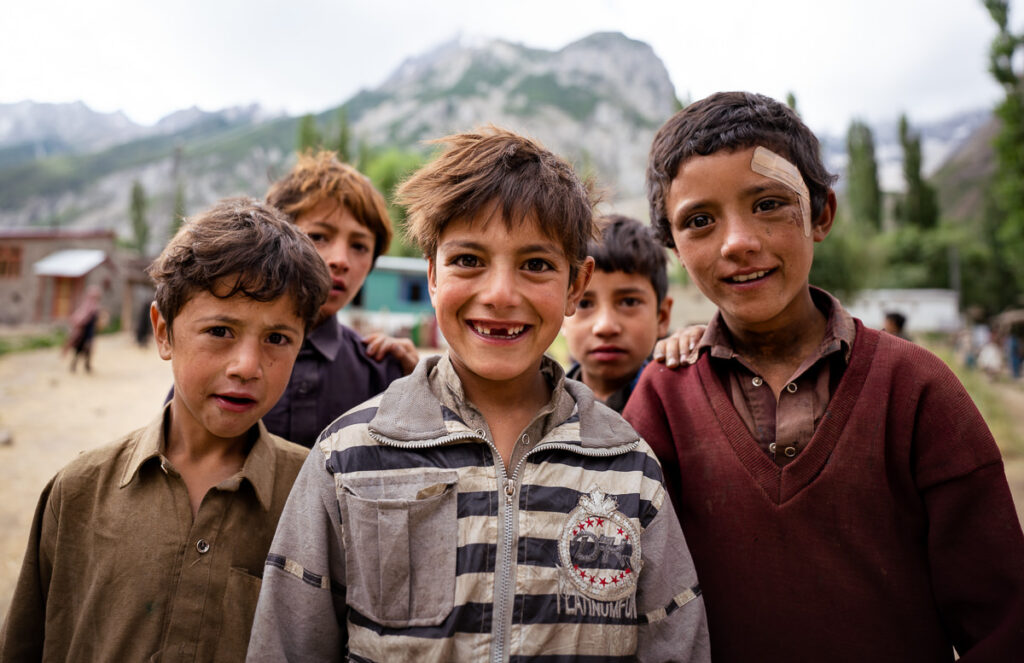
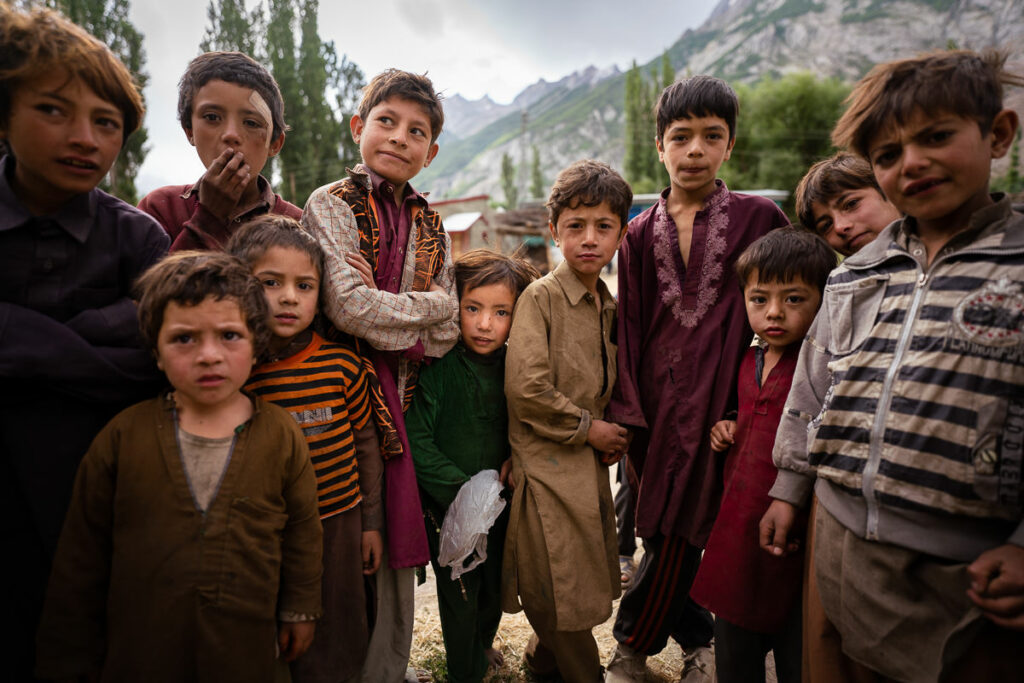
Day One: The time had come to begin our adventure after a lot of logistical planning and preparation. We drove the short distance from the campsite to the Arandu village center in the Jeep. This is where the trek really begins. We met a few locals and grabbed some last-minute essentials in Arandu before crossing the bridge and heading off into the mountains, waving goodbye to the local kids.
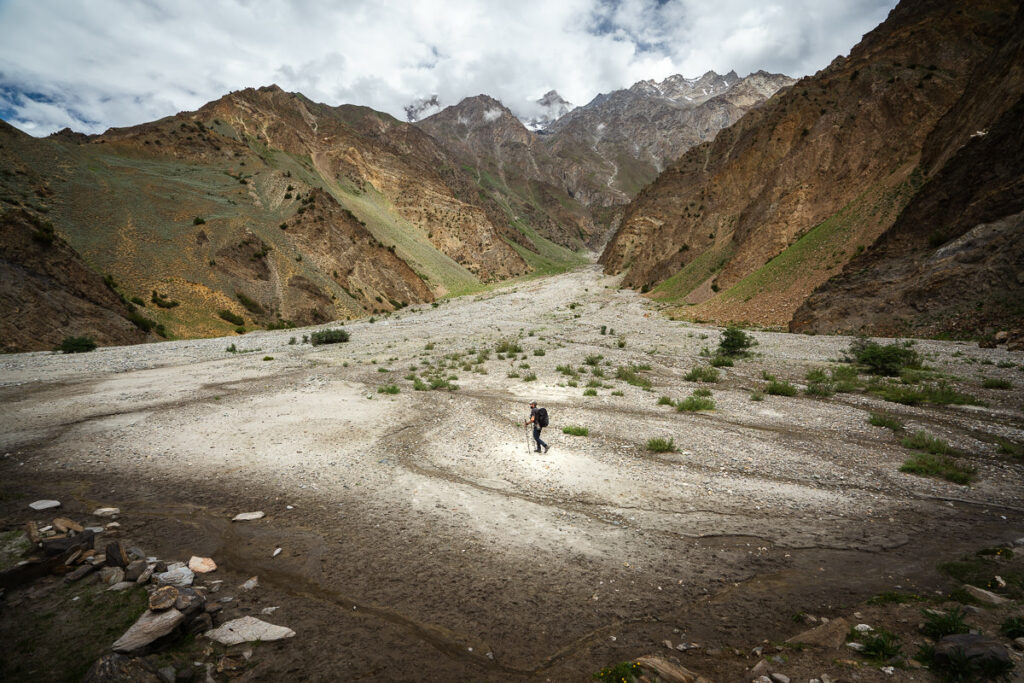
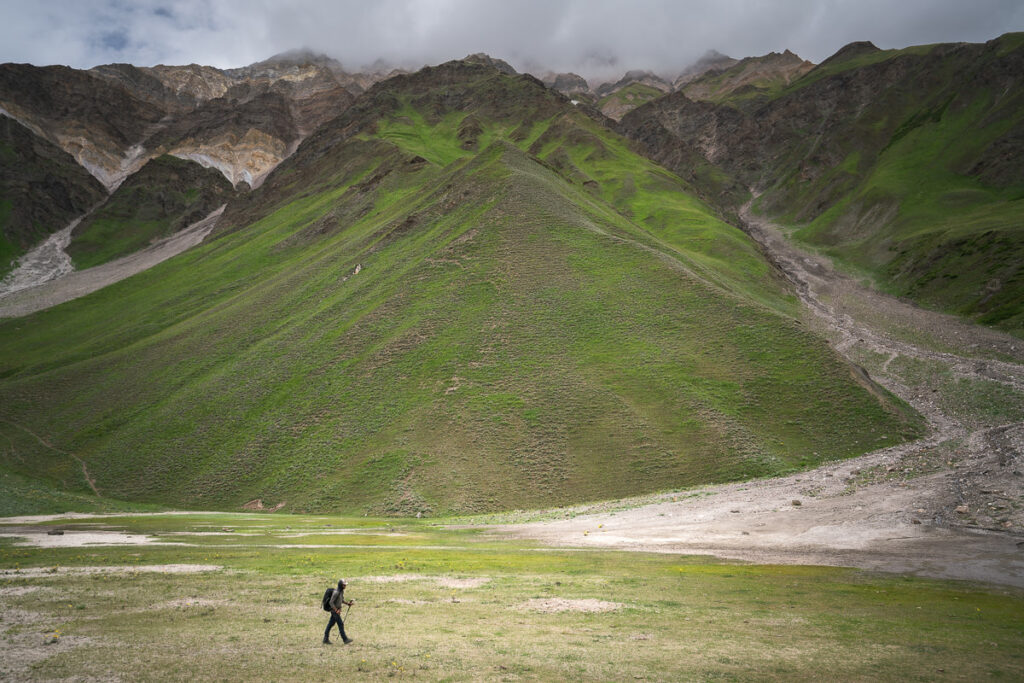
The first day of trekking leads you along the upper ridge of the glacier, avoiding the arduous, rocky undulations of the glacier itself. It was pleasant hiking with a dirt path for most of the journey. A small rain shower threatened our great start but passed quickly as we settled into a great weather window, which would last for our entire journey to base camp.
The most surprising aspect of the trek in the early moments was how lush and green the terrain was. I didn’t expect to walk through fields of wildflowers, which was a stark comparison to many other rocky, dry, and dusty treks in Pakistan.
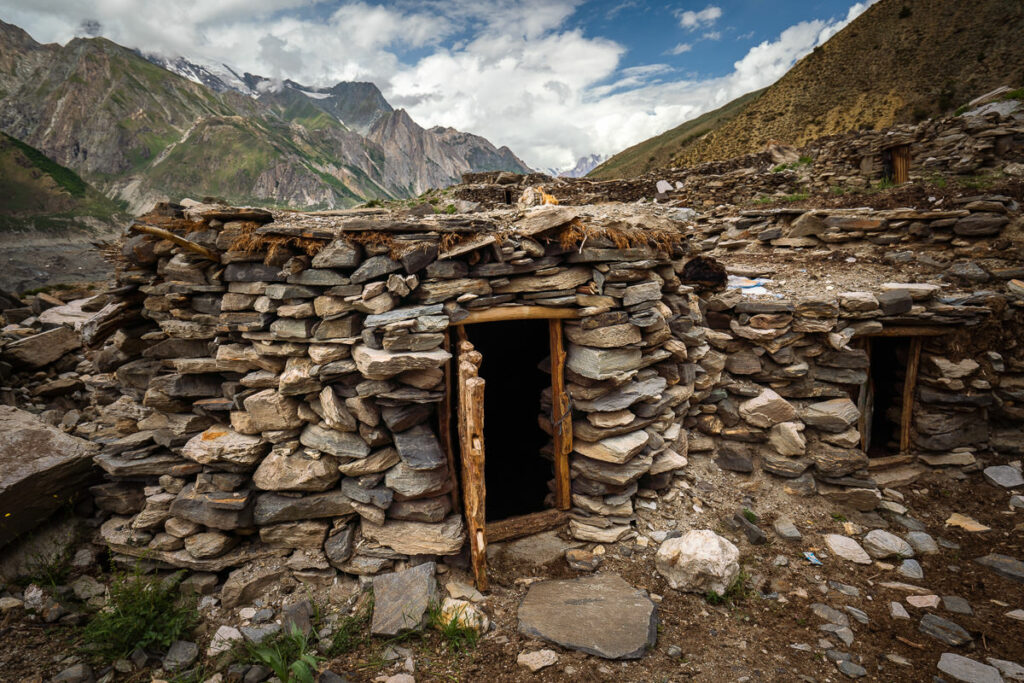

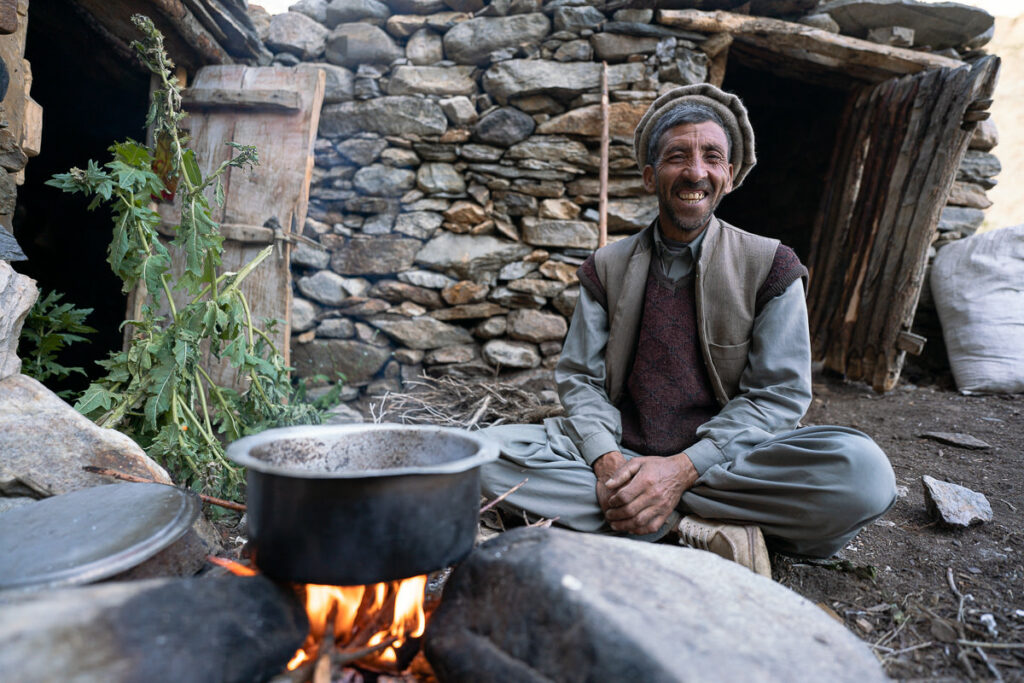
From the first moments of the trek, we were treated to spectacular views of the surrounding snow-covered peaks. It’s a very scenic journey and the trek towards basecamp is a spectacle in itself. Small farming villages comprising of a few rock huts are scattered throughout the route. Our campsite for night one was amidst one of these villages called Chogo Balansa (3350m) with the porters using the huts to sleep in, foregoing tents or tarps.
Our first day of trekking to basecamp was 14km with 937m of incline taking us just over four hours to complete.
Day Two: An early start with clear skies was the motivation we needed to get moving towards Bolocho Camp. The total distance for the day would again be 14km with 742m of incline taking us just over five hours.
Today we traversed the ridge above the glacier again, only detouring down onto the ice to avoid a few landslide-impacted sections of the route. The hiking was quite straightforward again with a nice path for the majority of the route and only a few rocky, steep sections to navigate.
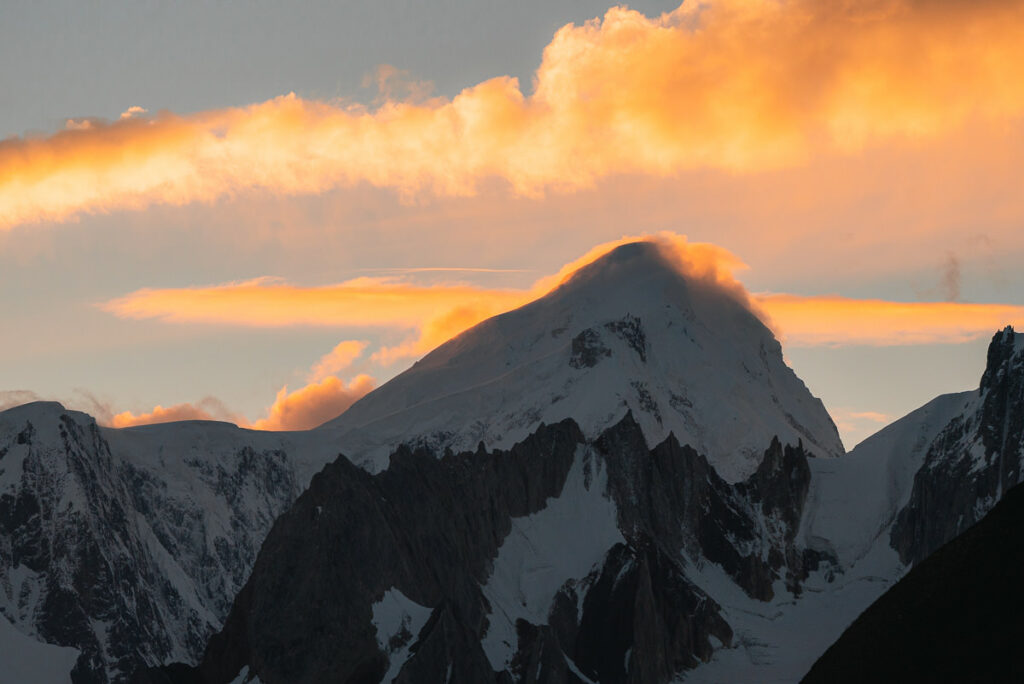
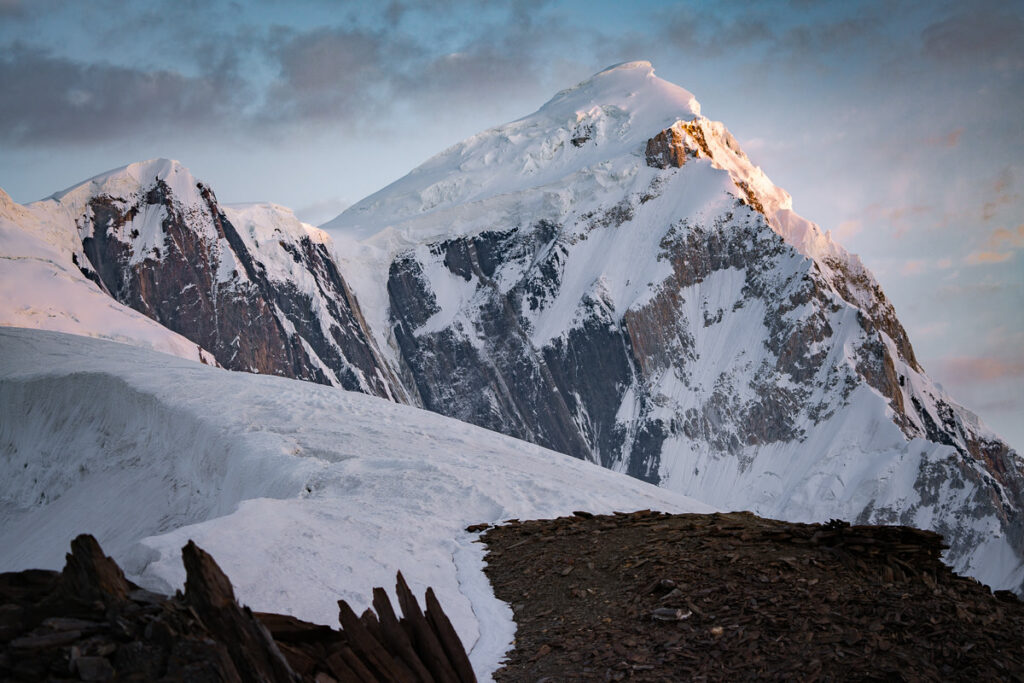
Our campsite for the night gave us spectacular views and we caught our first glimpse of Spantik Peak as the clouds parted late in the afternoon. It was a sunset special with all of the peaks, including Spantik, receiving some beautiful glow as the day came to a close.
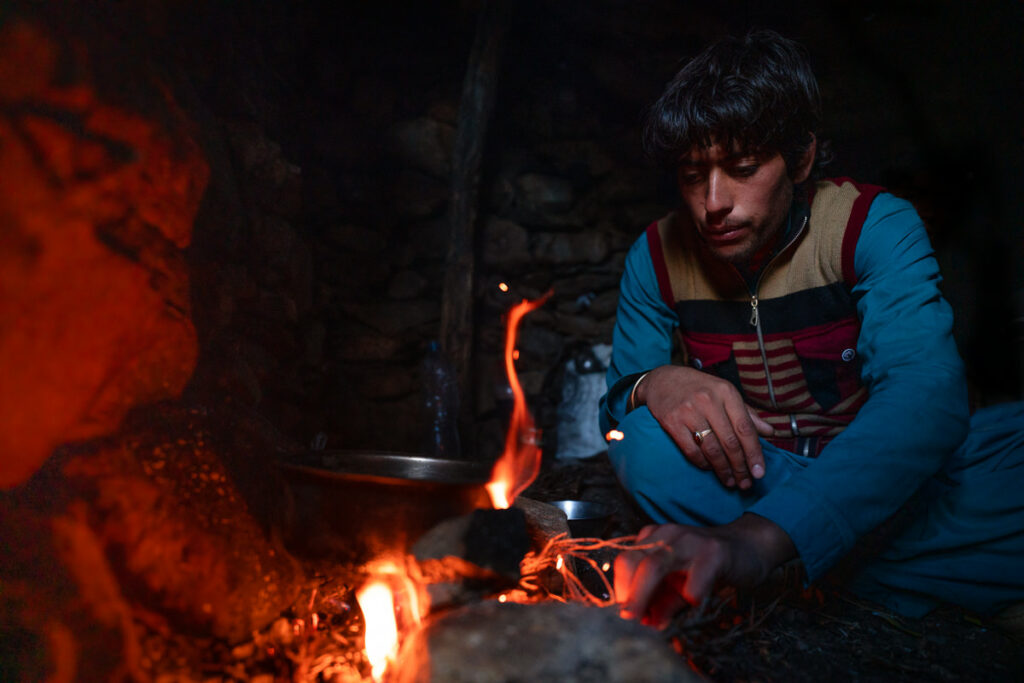
Our guides purchased an entire leg (20kg) of locally hunted Ibex, which apparently gives magical climbing powers and would surely be our staple food for the next few weeks.
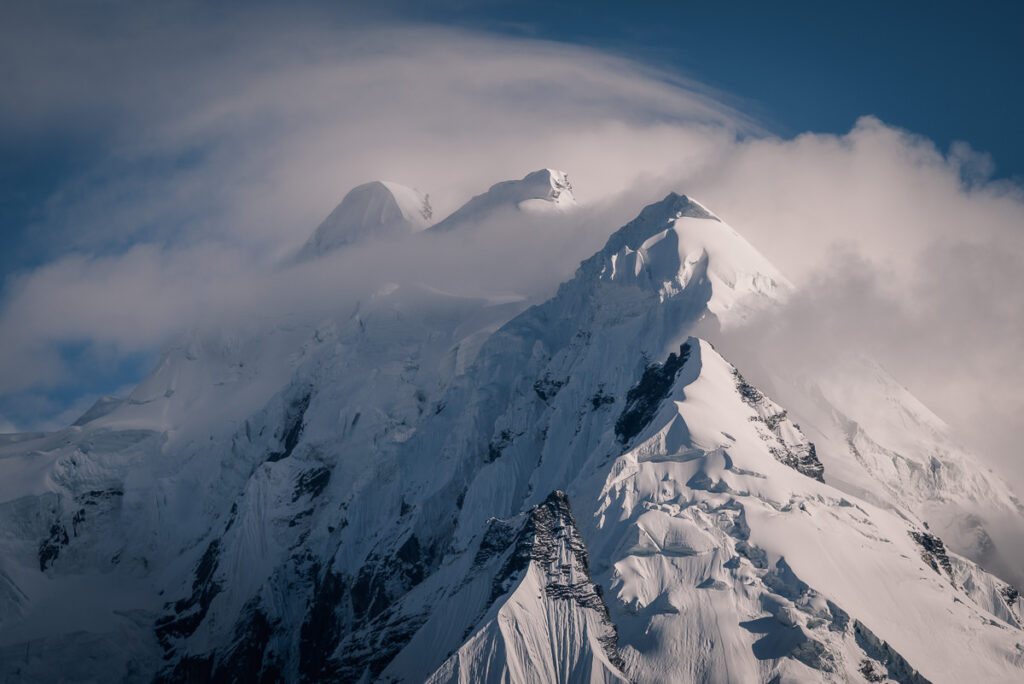

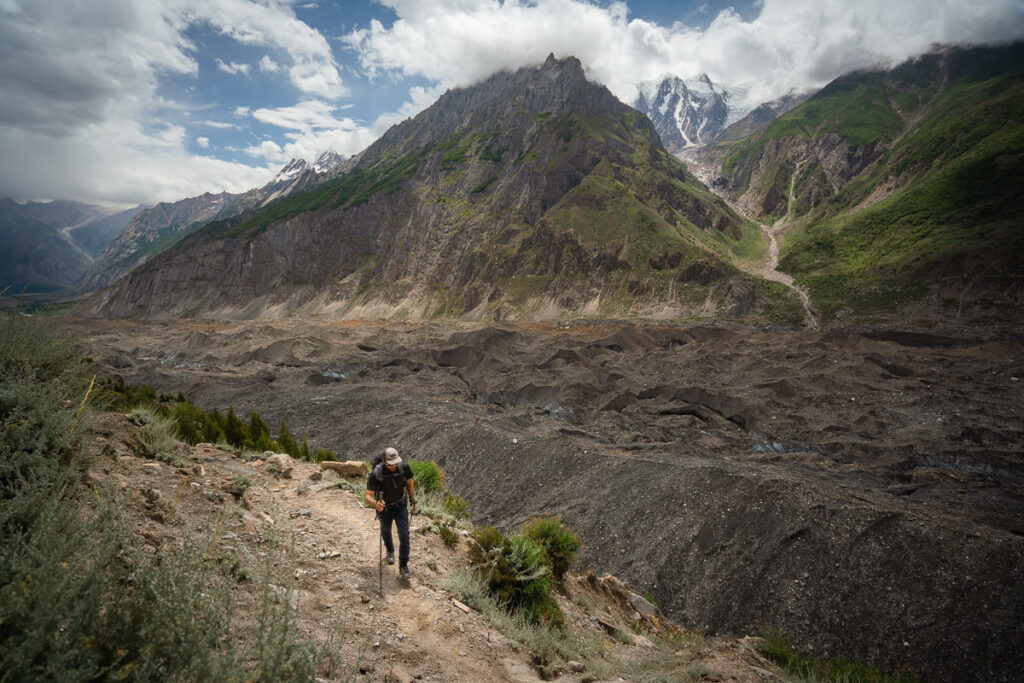
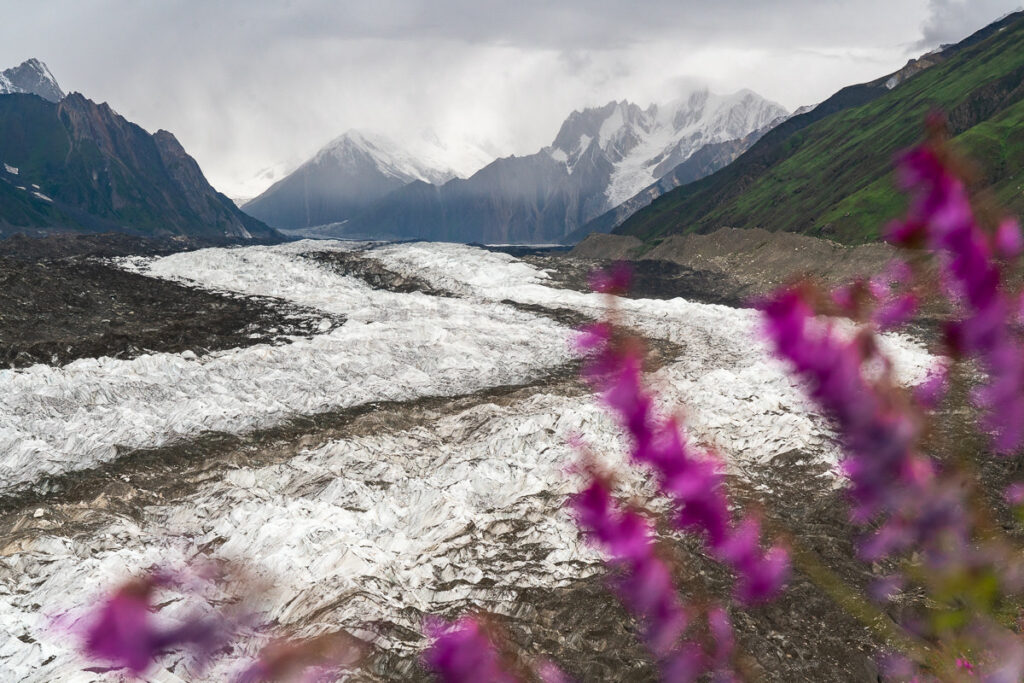
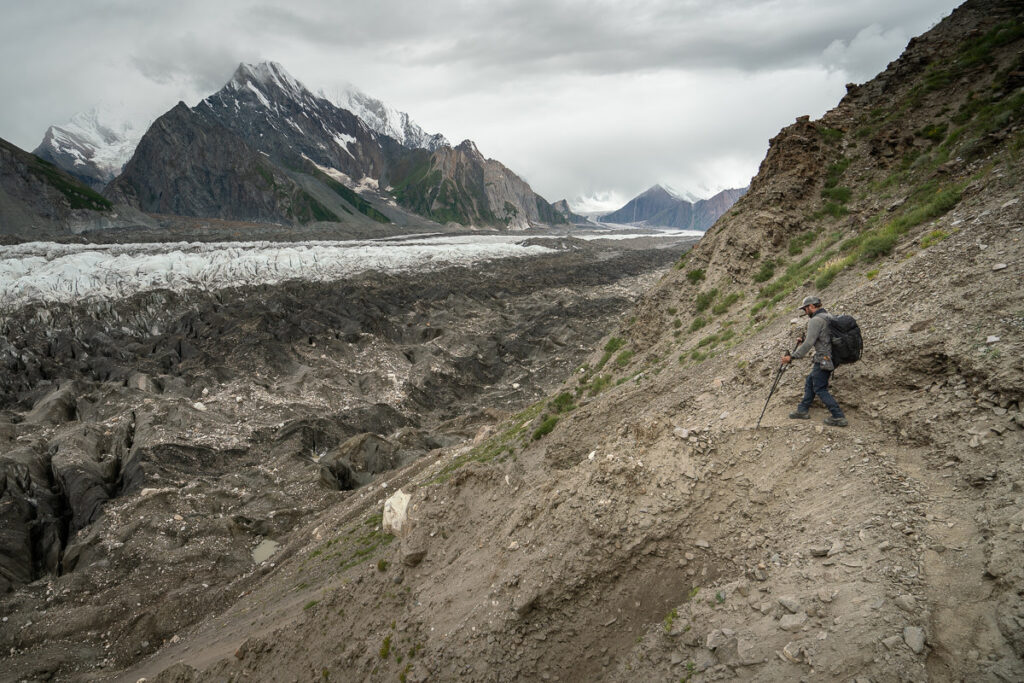
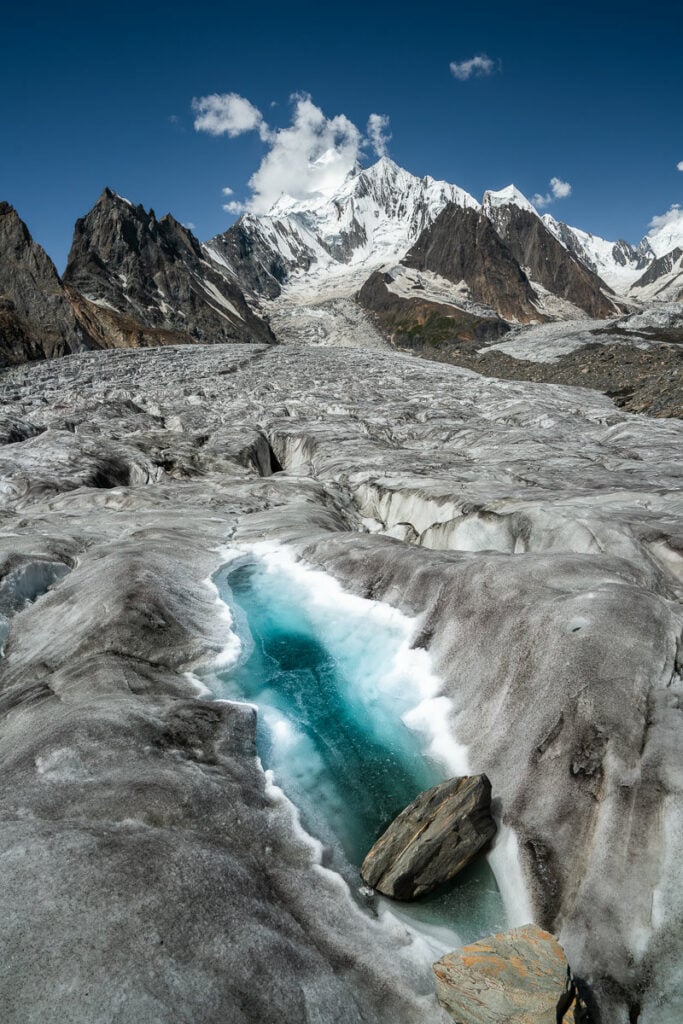
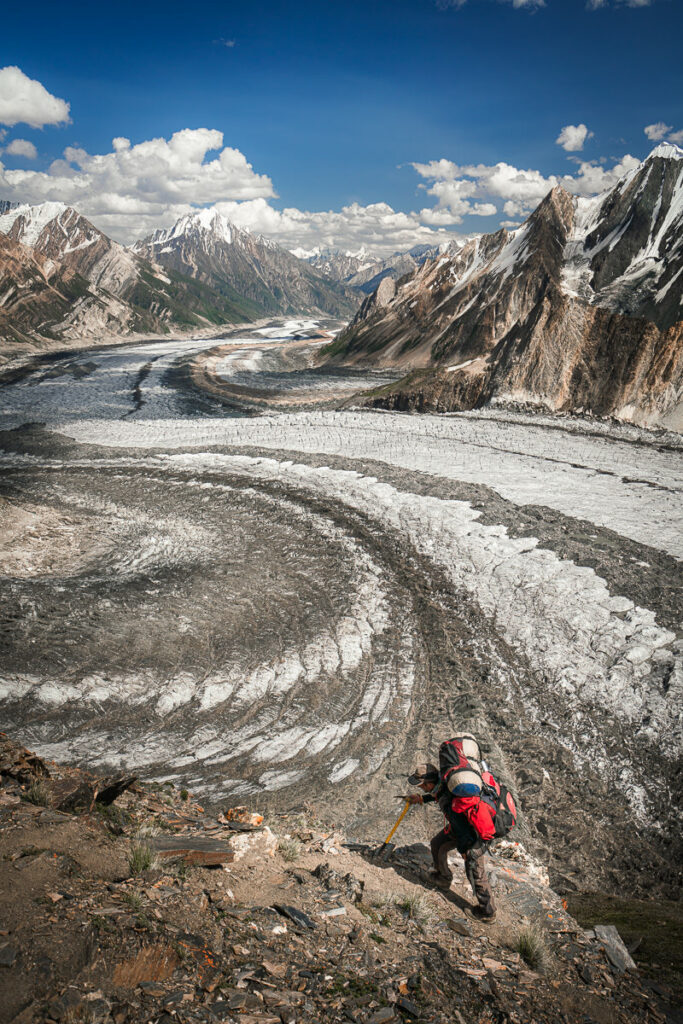
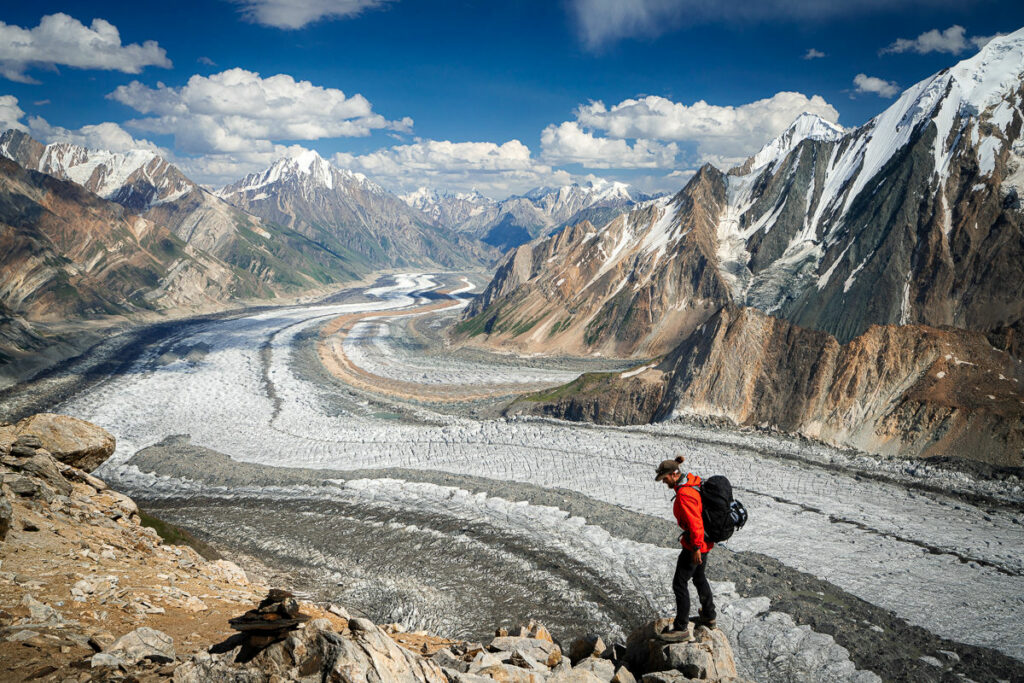
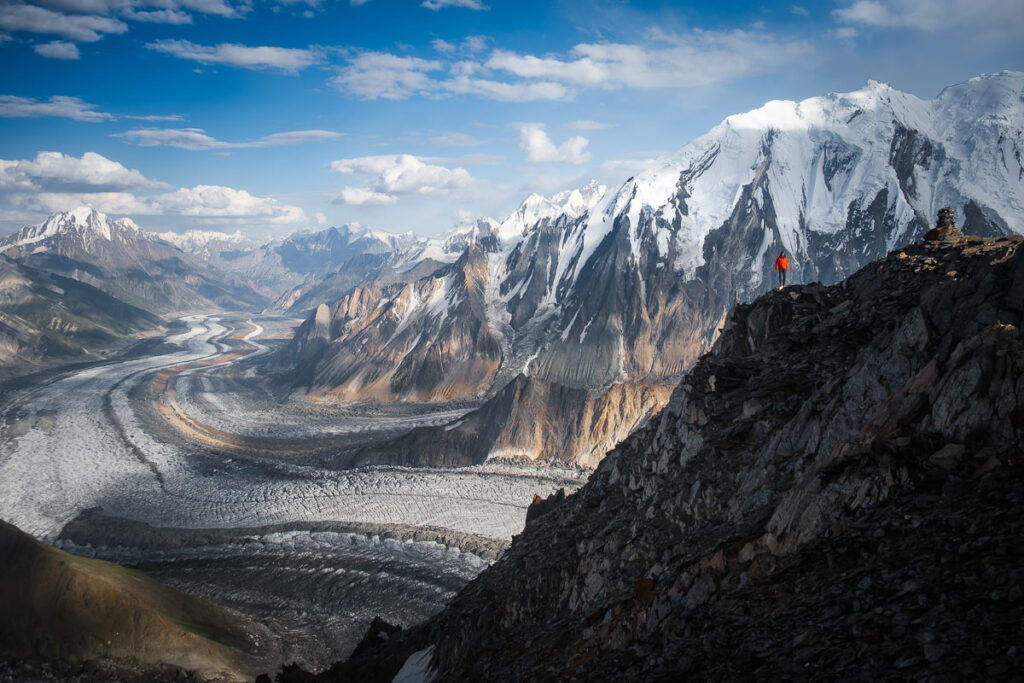
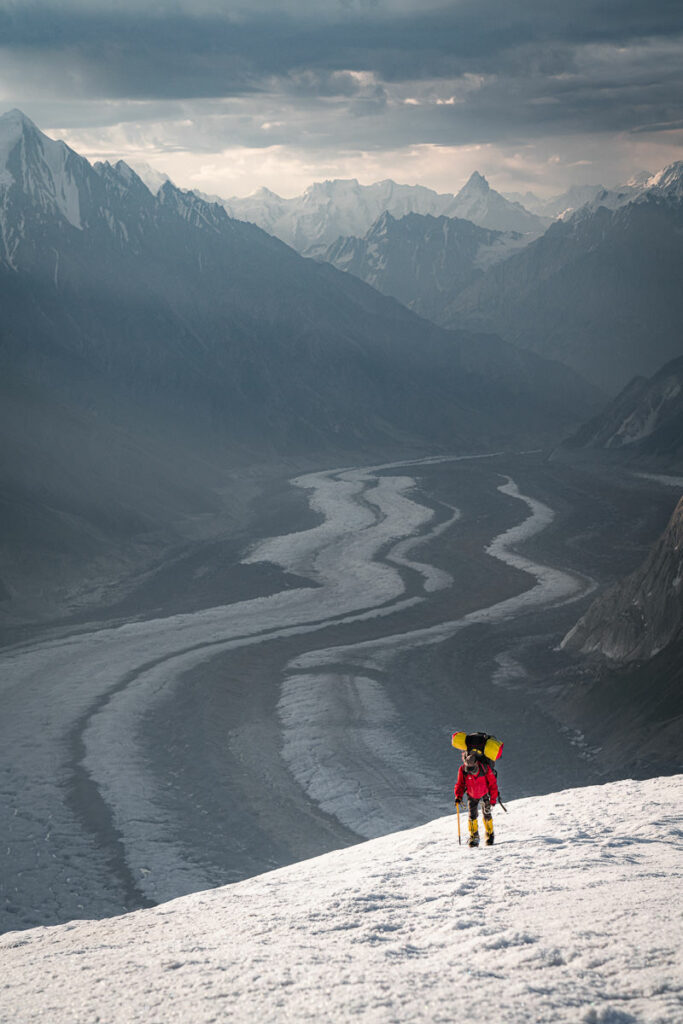
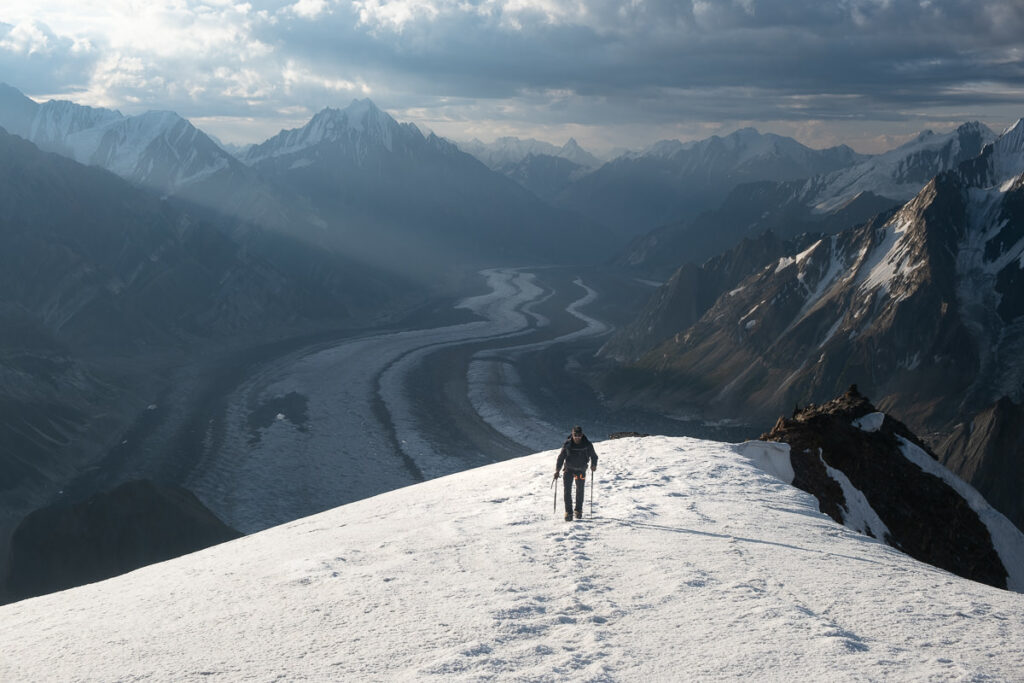
Day Three: Our final day of trekking to basecamp was a little more interesting than the mellow nature of the two days prior. We immediately dropped down onto the glacier and began traversing the ‘white highway’ directly towards Spantik. With clear weather, we were treated to views of the peak we would soon be attempting to climb.
The glacier became more and more intricate, turning into an ice maze that only the local guides had the intuition to navigate. In several sections, we nervously walked alongside huge drops into crevasses on either side. Our guides roped us up once but other than that we followed the ‘porters route’ all the way across the glacier and lived to tell the tale. I think in Europe, there would be a lot more ropes and safety implemented for this glacier crossing but not out here in the Wild Wild West of Northern Pakistan.

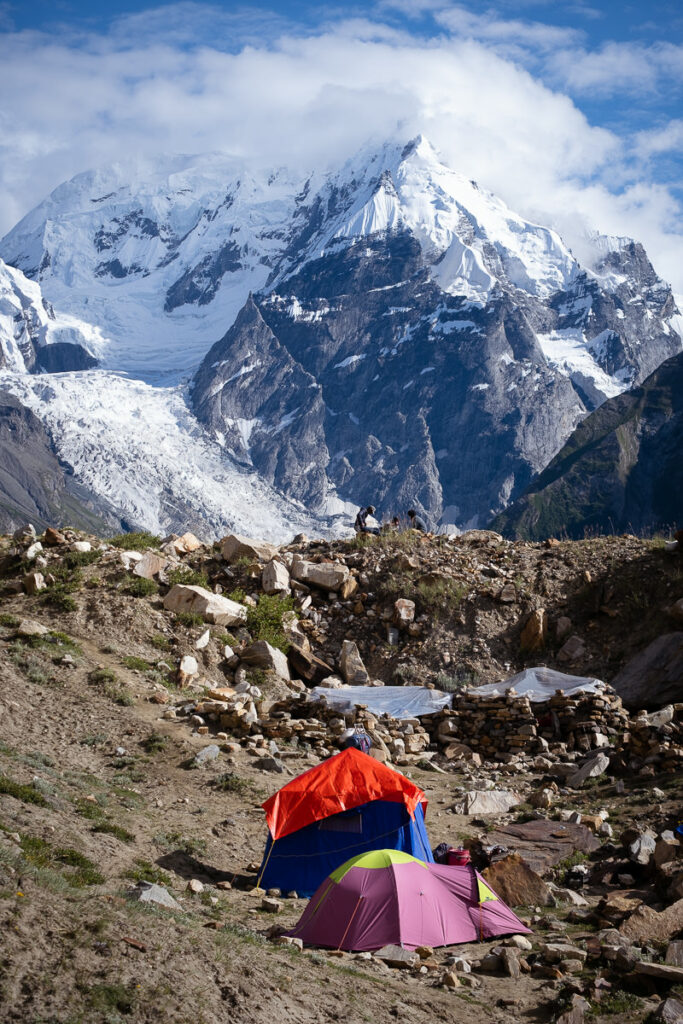
After passing across the last of the ice on the glacier, we had one final task for the day before reaching our new home, Spantik Basecamp. A steep climb led us up the foot of Spantik Mountain for a couple of hundred meters to the basecamp. The hill was covered in lush free grass and purple, red and yellow wildflowers. It is quite a sight and definitely an unexpected color palette at 4300m of elevation. It’s seemingly a little slice of Switzerland in the often harsh and unforgiving landscapes of Pakistan.
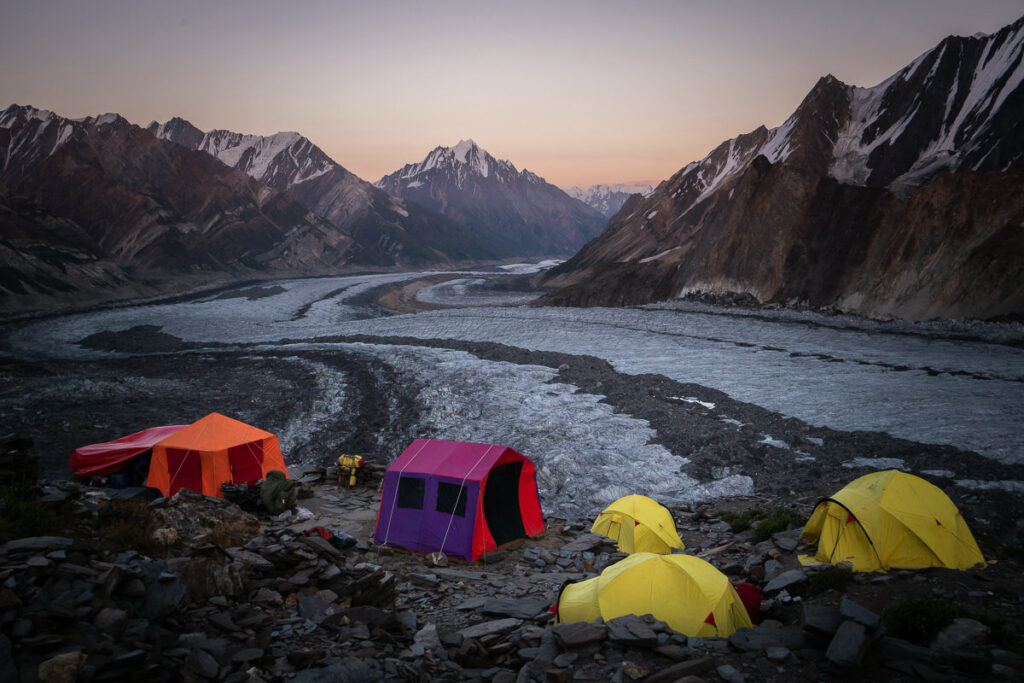
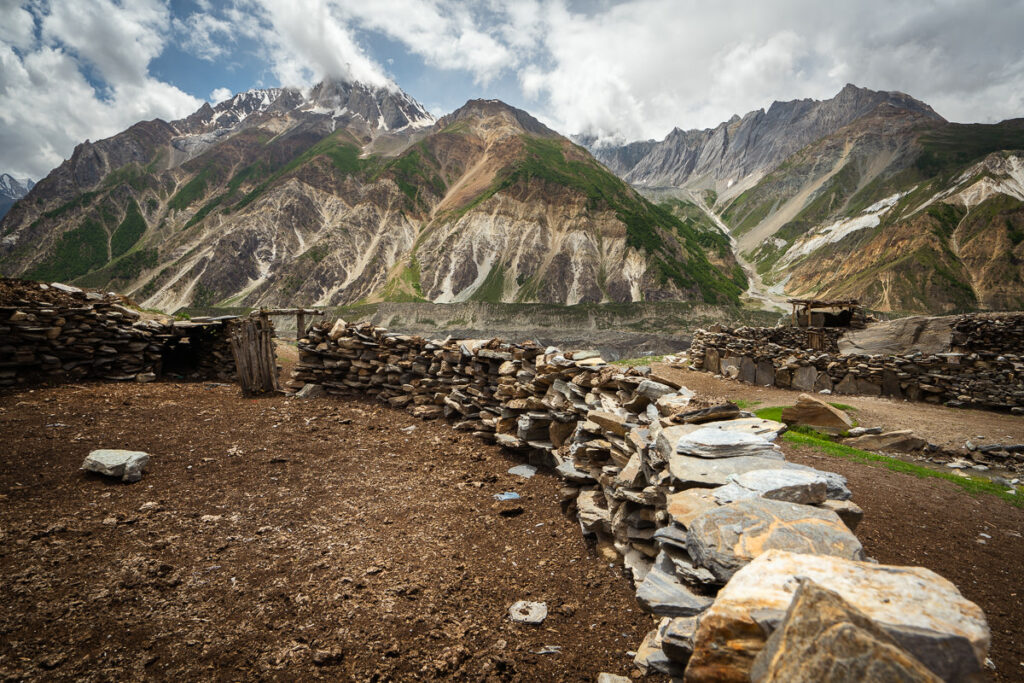
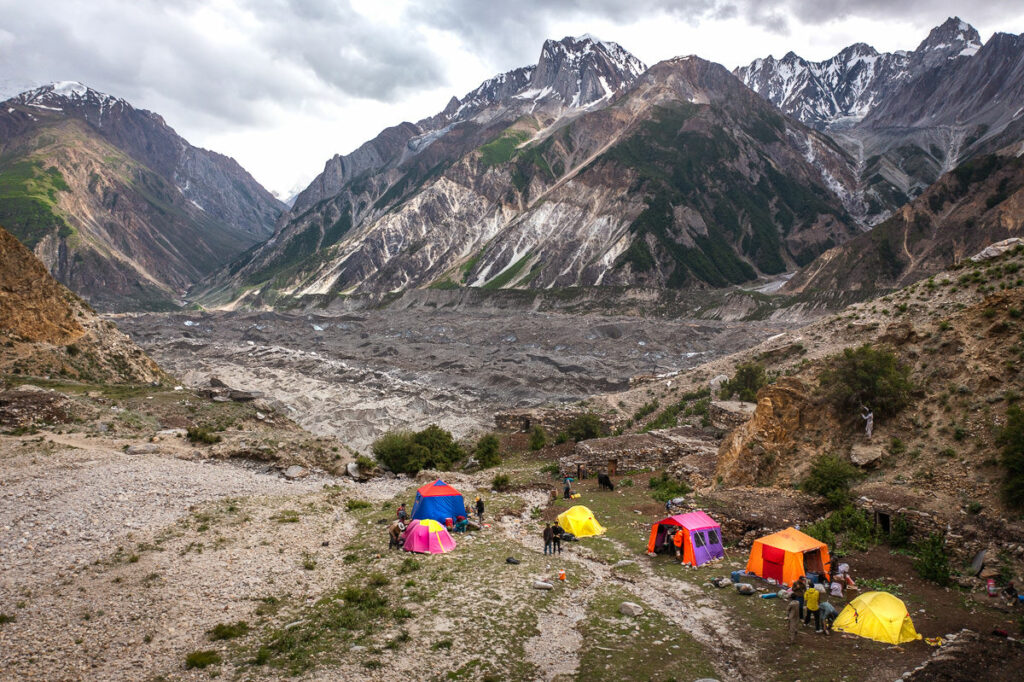
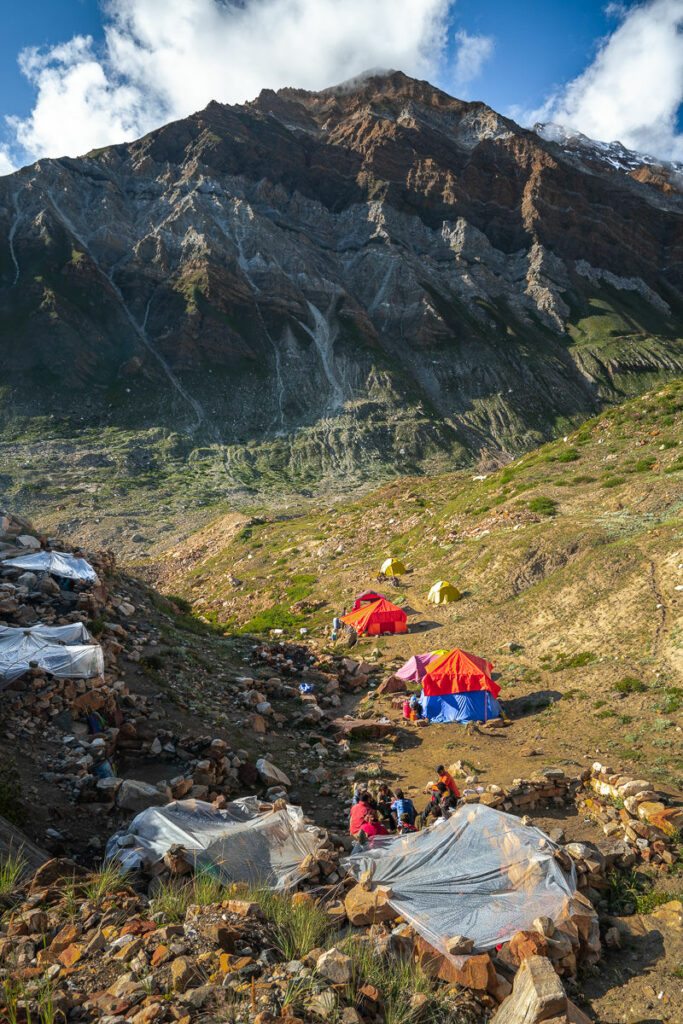
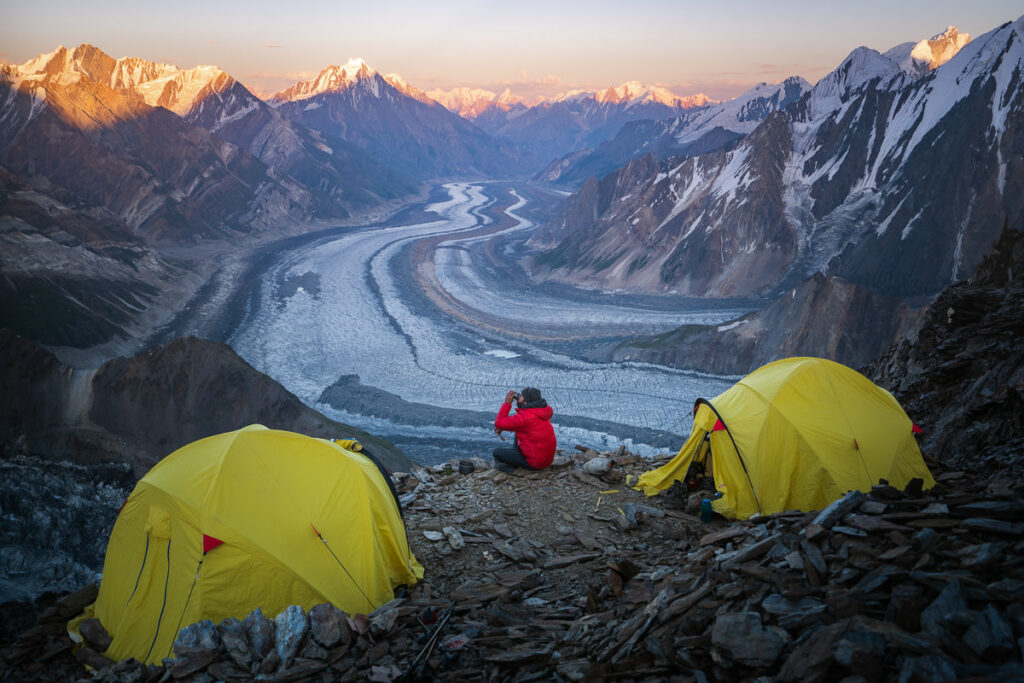
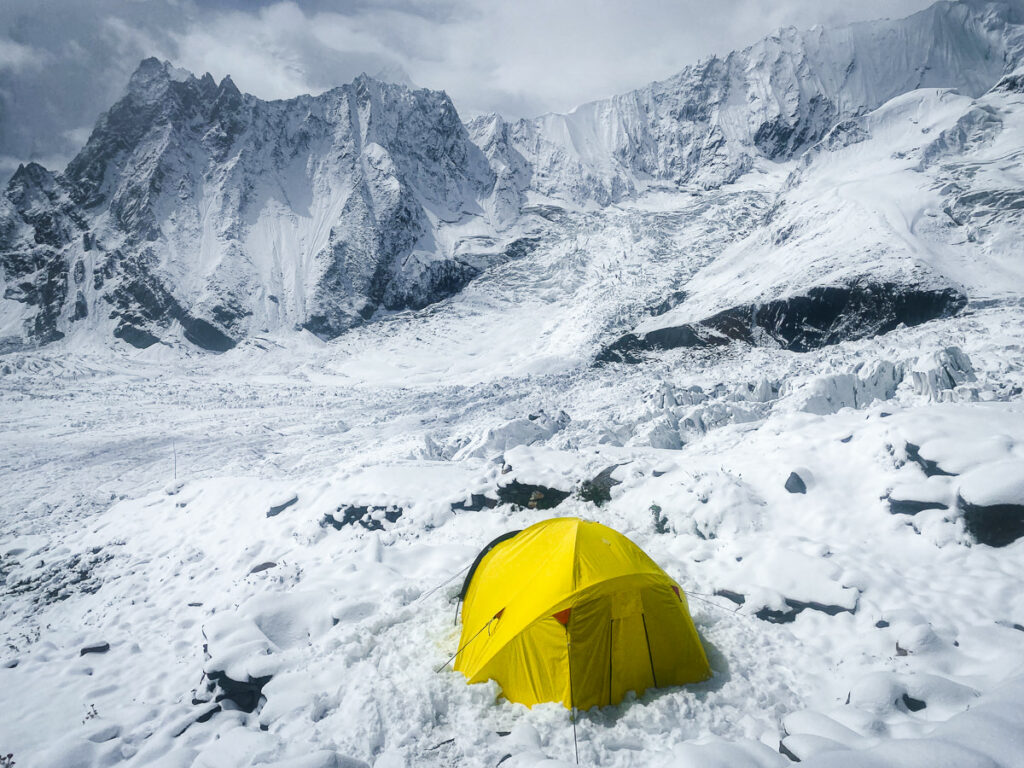
After 42km and more than 2000m of incline over three days, we made it to Spantik Basecamp in the early afternoon. Tents were set up, kitchens were constructed and our toilet tent was erected. We had settled in for what would likely be at least two weeks depending on our weather windows. Spantik Basecamp is one of the most scenic basecamps I’ve ever set foot upon. Perched on the edge of the cliff with 270-degree views of the surrounding peaks and directly down into the glacier, it is a phenomenal spot for both sunrise and sunset. With the wildflowers providing a pop of color to the hills behind us, it’s not hard to envision being ‘stuck up here for a couple of weeks.
ACCLIMATIZATION ROTATION TO CAMP 2 ON SPANTIK PEAK
Our focus now turns to acclimatization. We will first make a rotation, which will include camps one and two before coming back down to basecamp and riding out a few bad days of weather. With acclimatization under our belt, we will then wait for a weather window and make the push up all three camps, and head on to the summit on our next venture up the mountain.
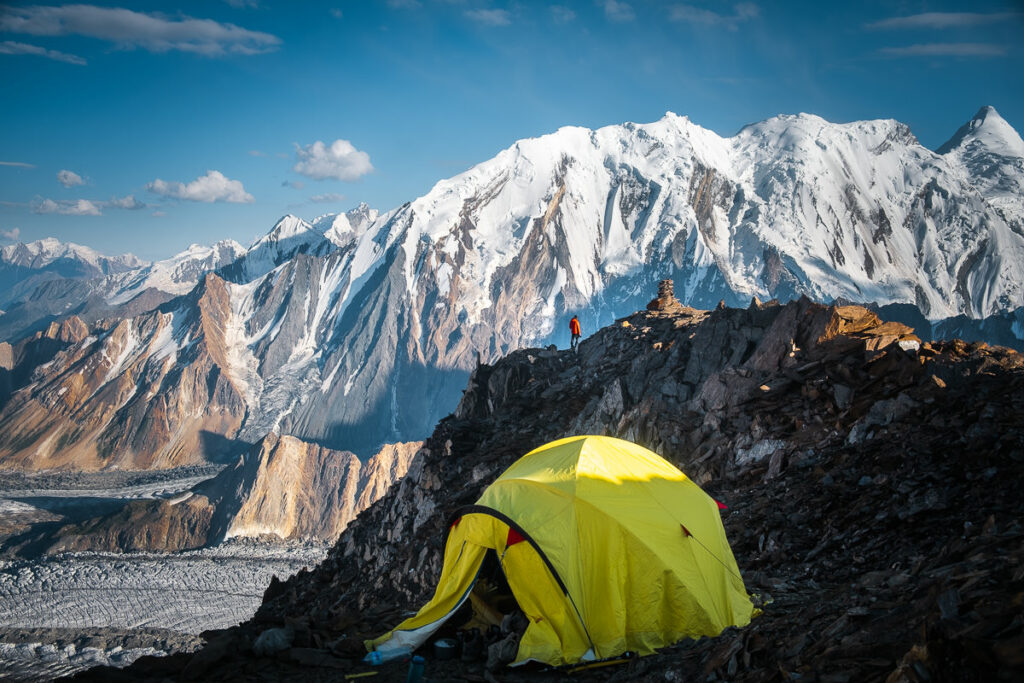
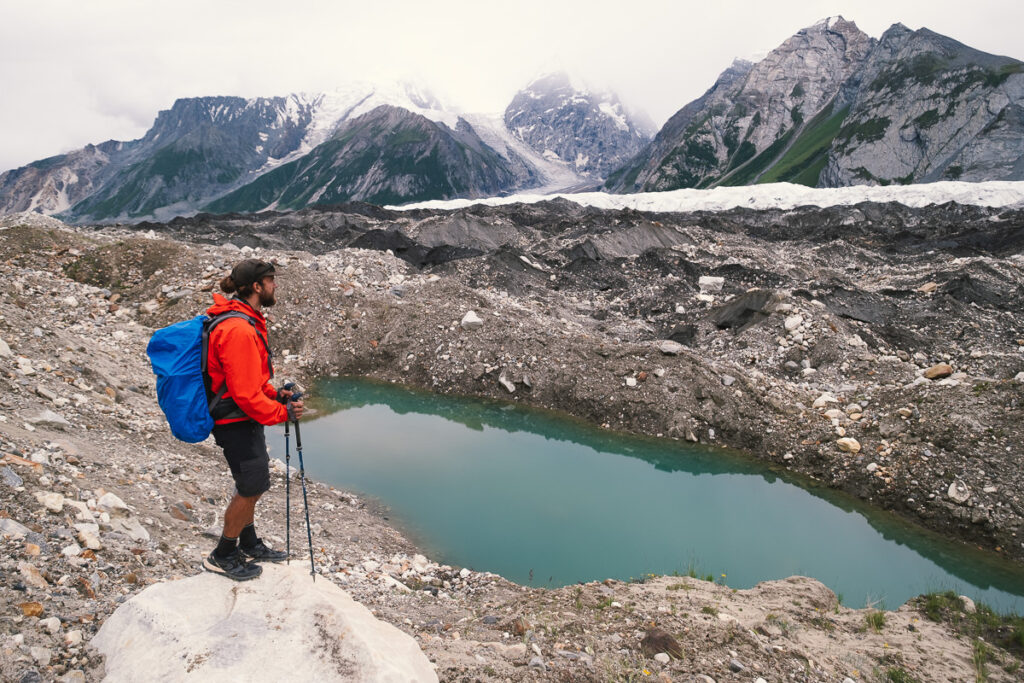
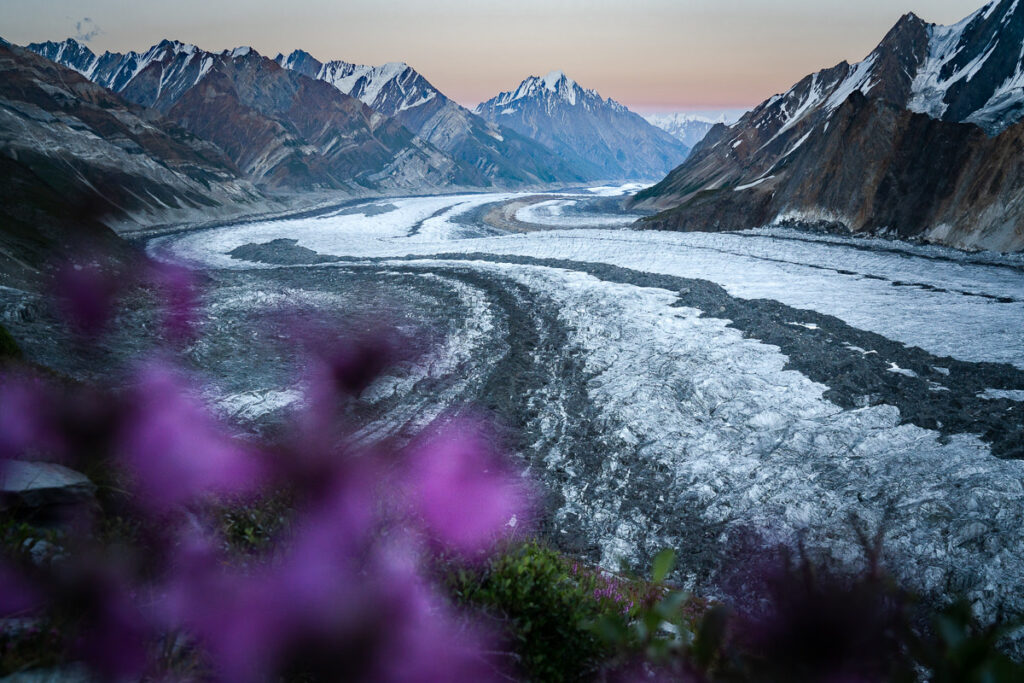
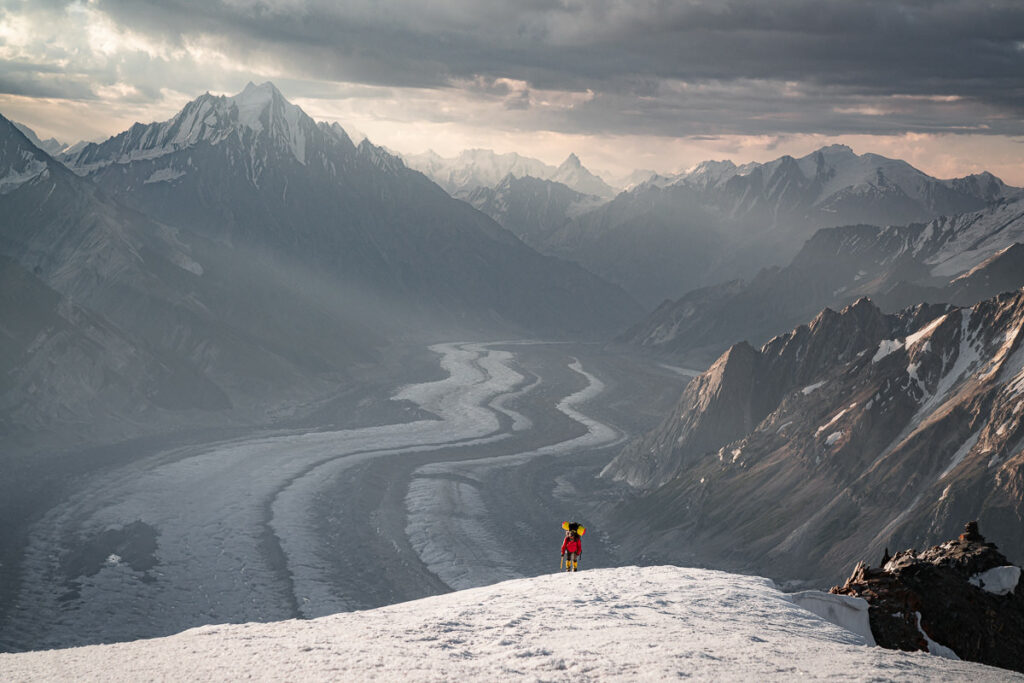
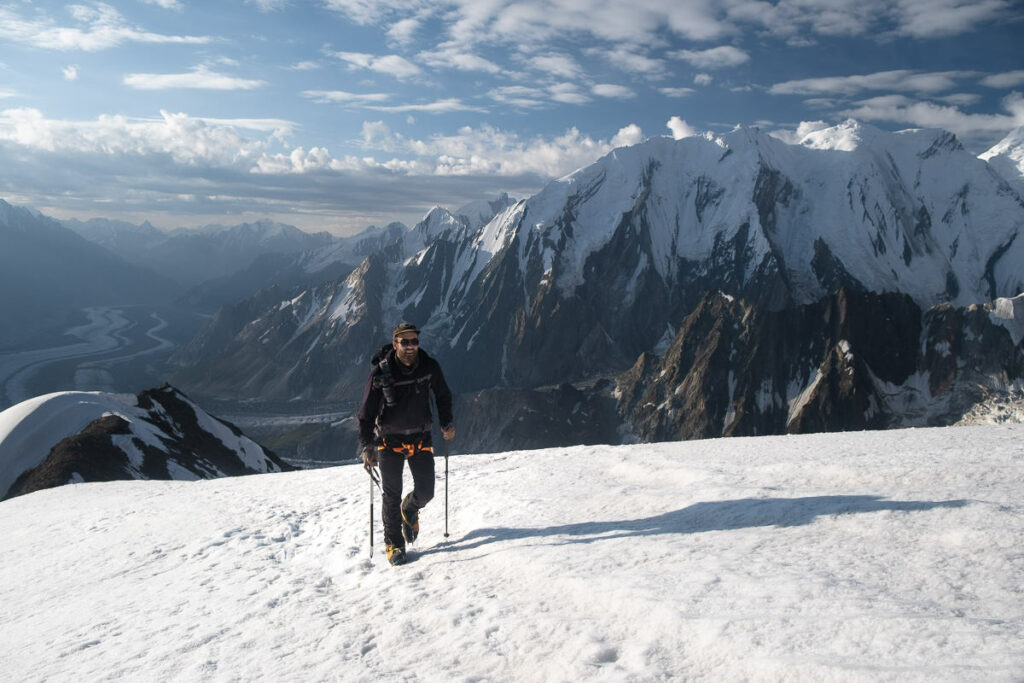
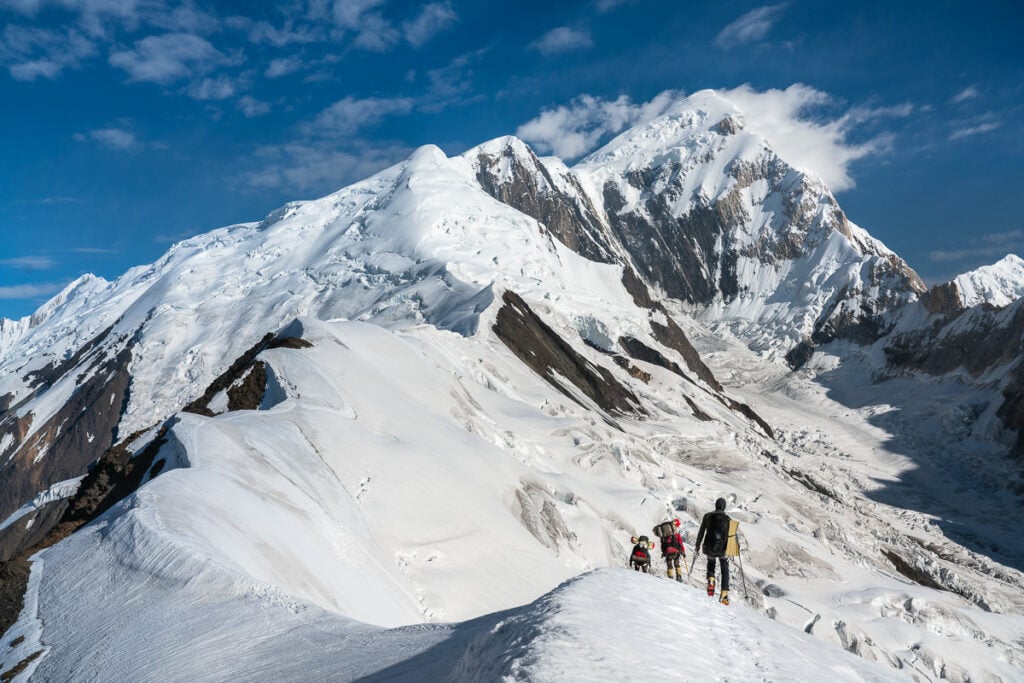
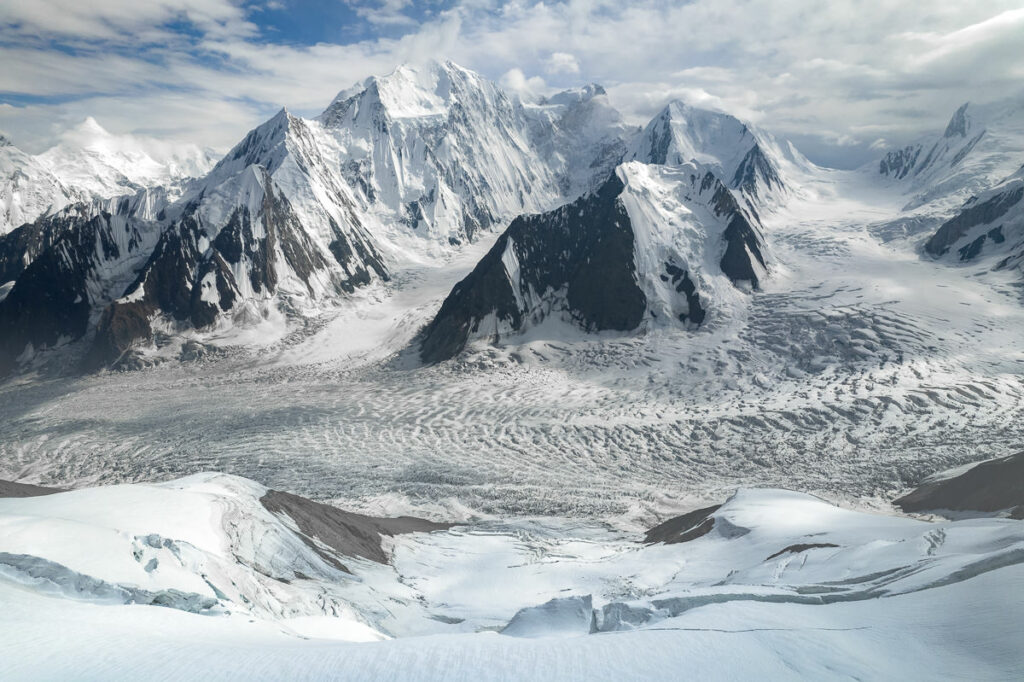
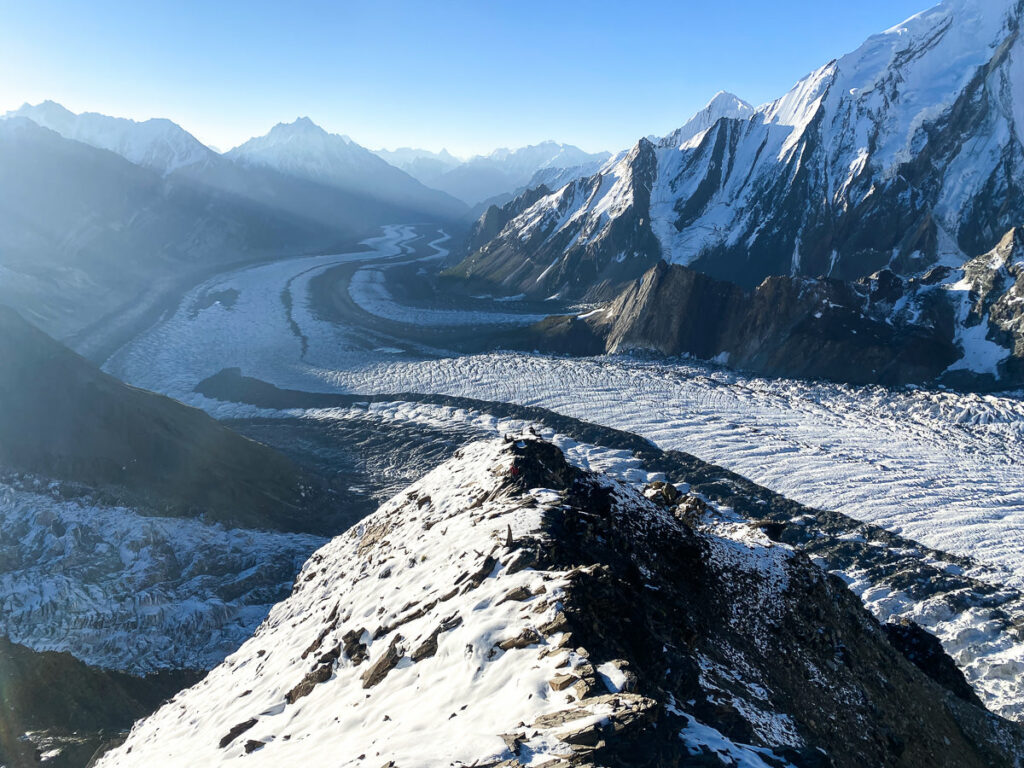
The journey from basecamp to Camp 1 is inherently steep. The distance is just a mere 2-kilometers but in that small journey, you will ascend more than 800m. With rocky terrain, often laced with gravel, this route can be a little slippery but overall is a comfortable ascent. At the halfway point there is a magnificent perch overlooking the Chogholungma Glacier, which we have traversed to reach basecamp from Arandu. The views of the glacier and surrounding peaks only increase as you continue the ascent up to Camp 1. You can expect this journey to take about two hours from base camp to Camp 1.
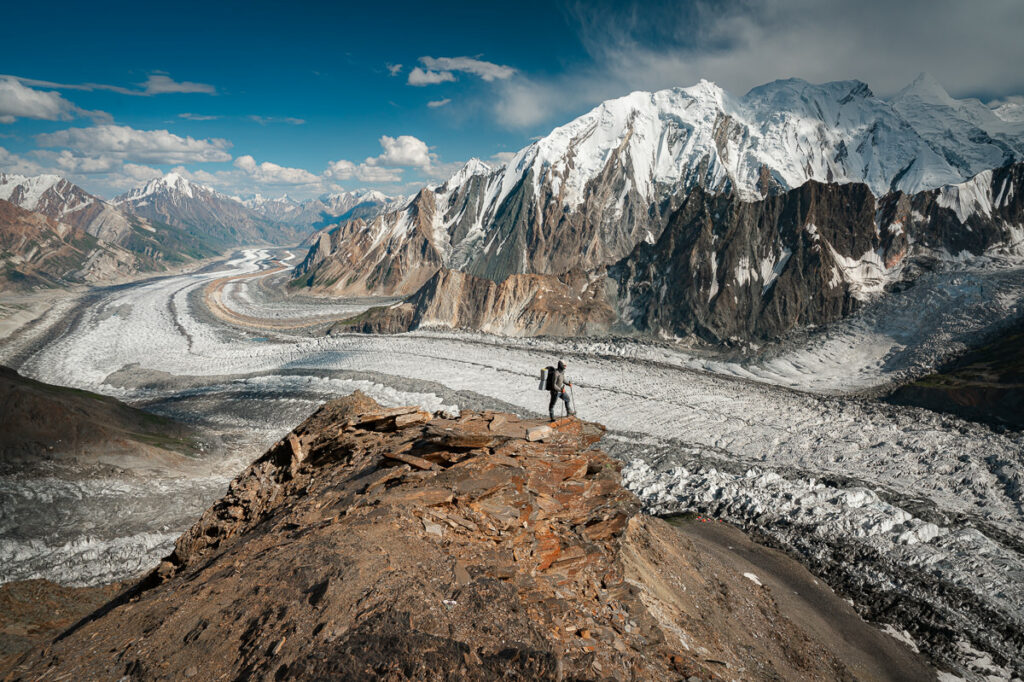
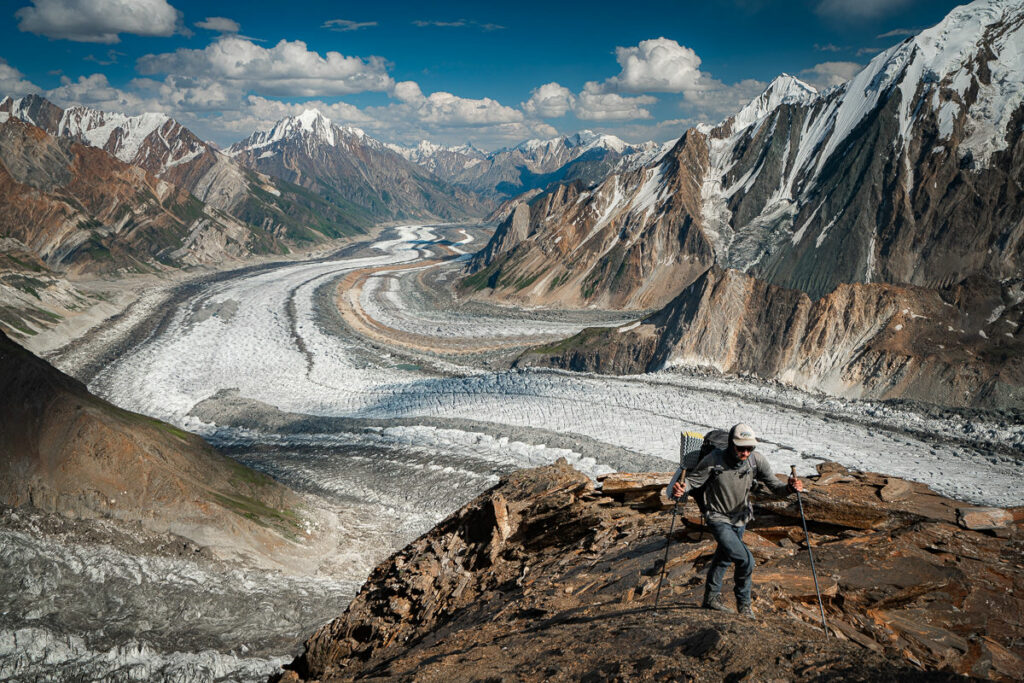
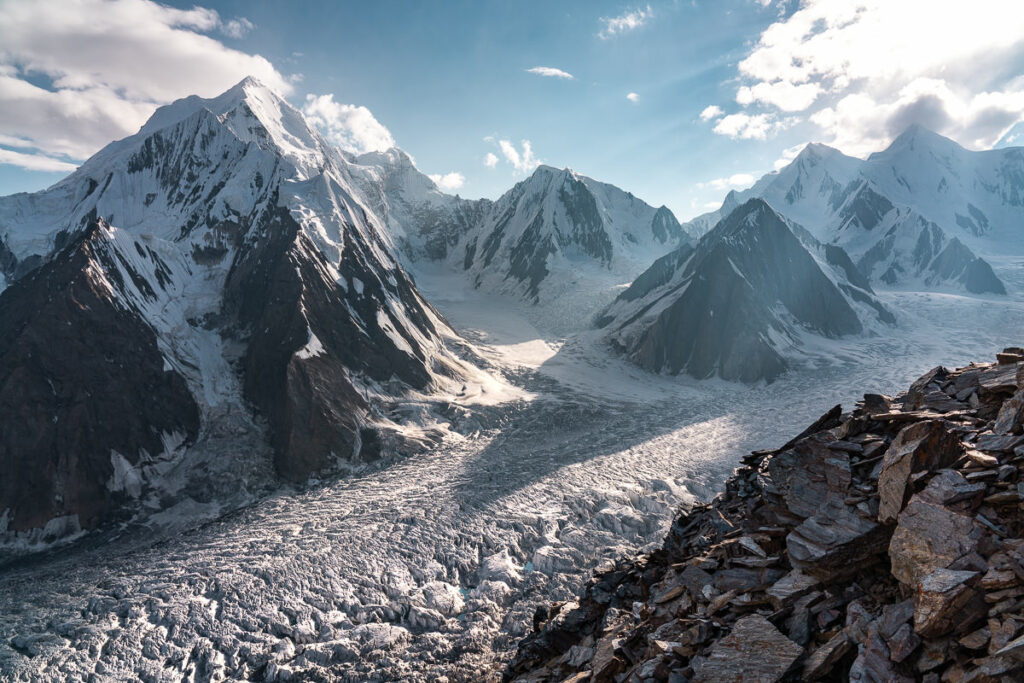
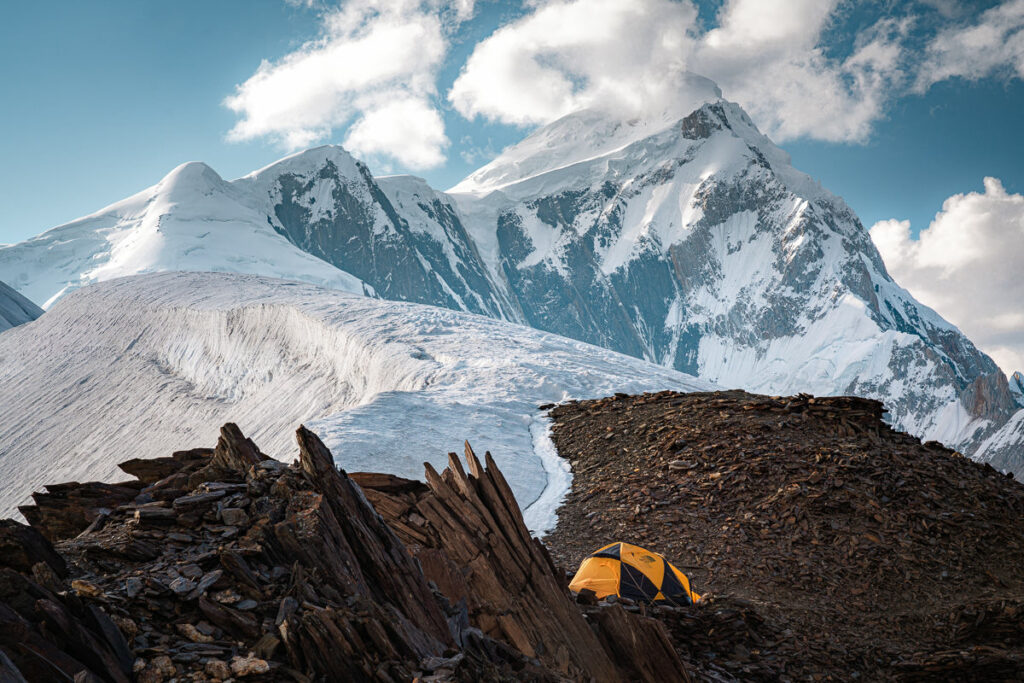
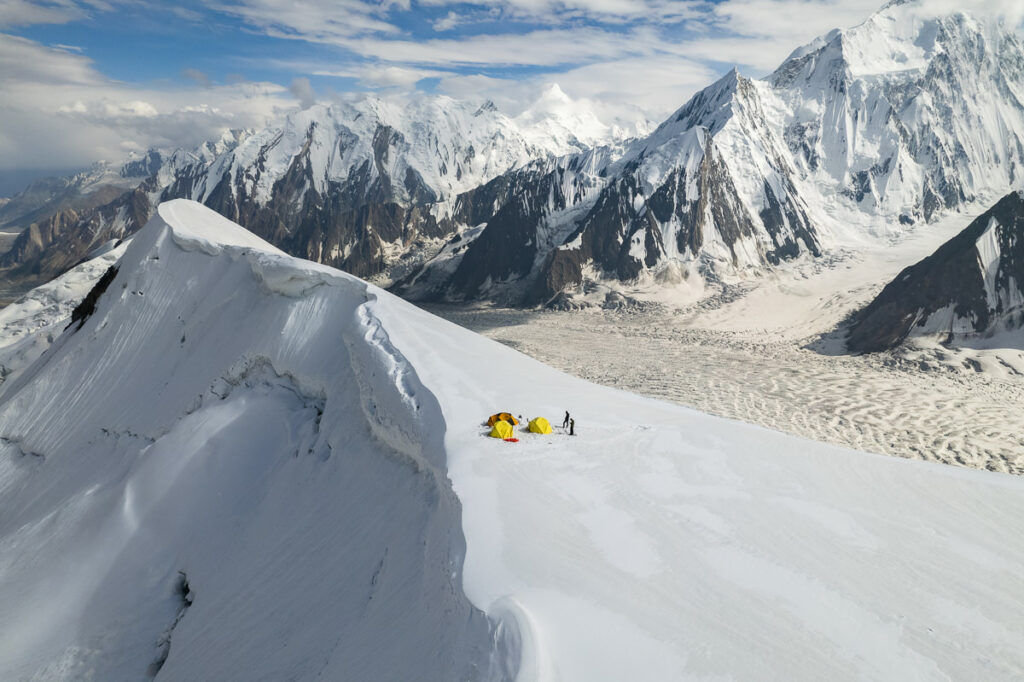
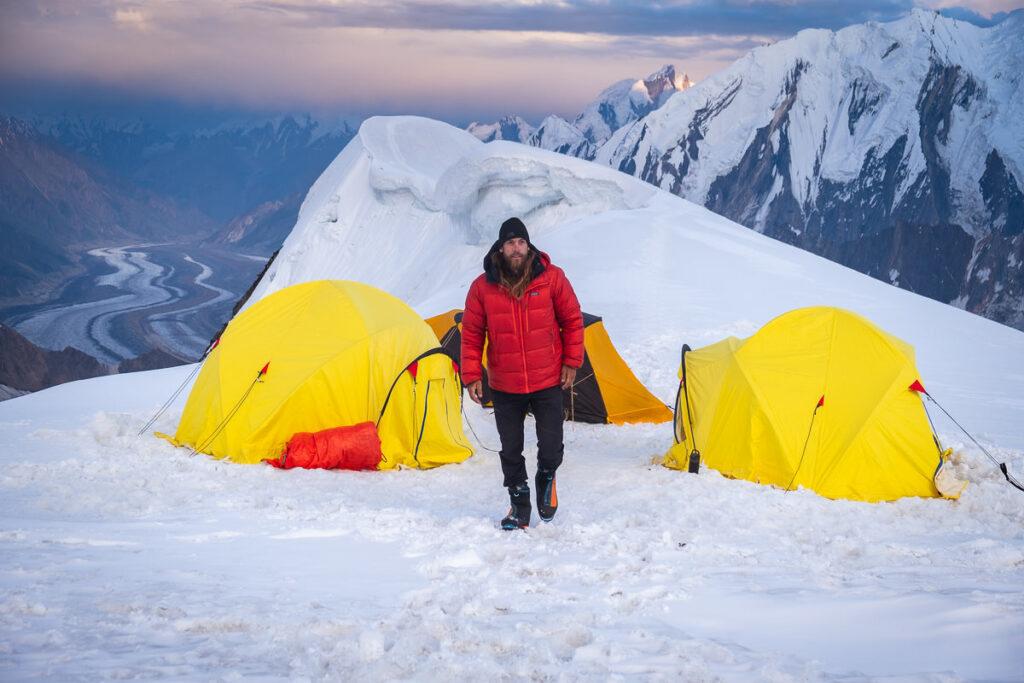
At the campsite, you will find a few small ledges with room for a handful of tents. The view right out of the tent is purely amazing with the Chogholungma Glacier in full view. The snowline begins right at the campsite, which means in the morning you can put your boots and crampons on and head off into the snow. We left this tent set up and stored gear in here while venturing further up the mountain.
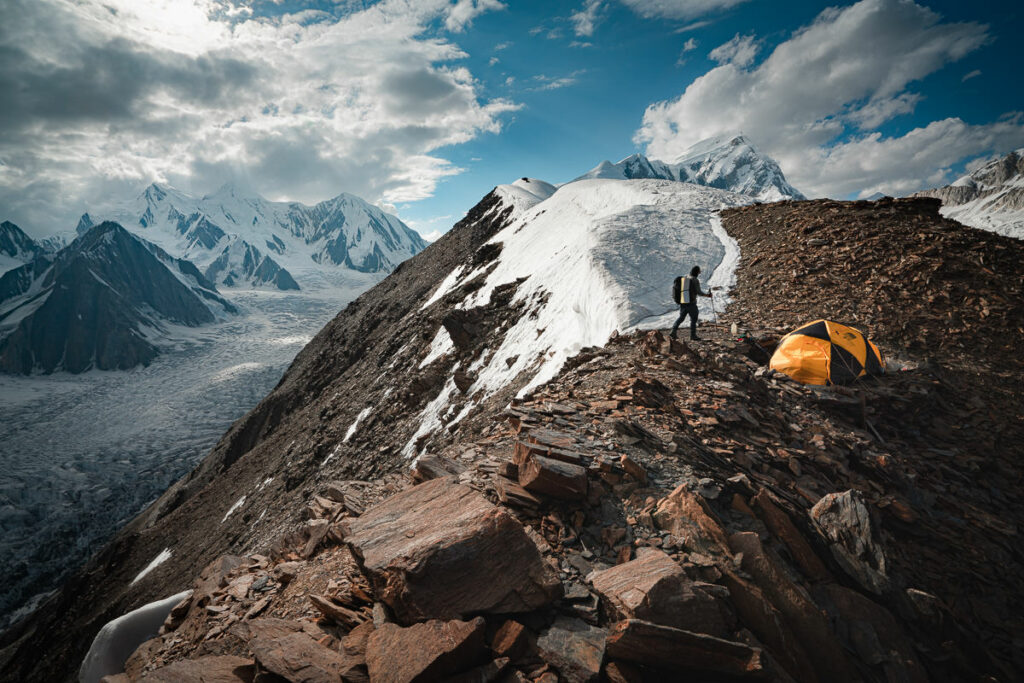
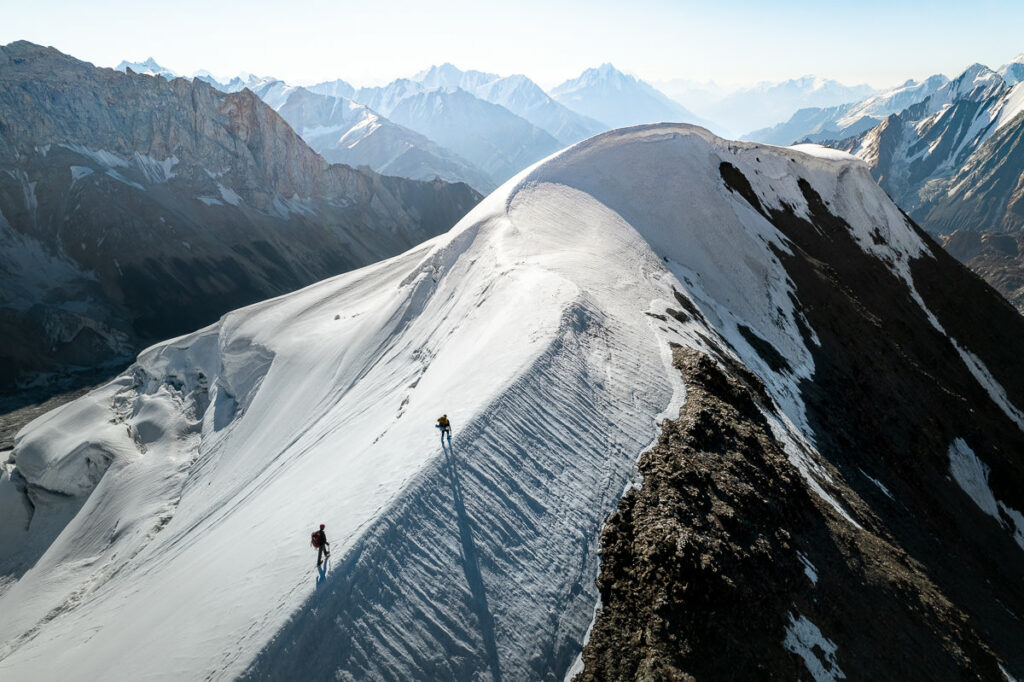
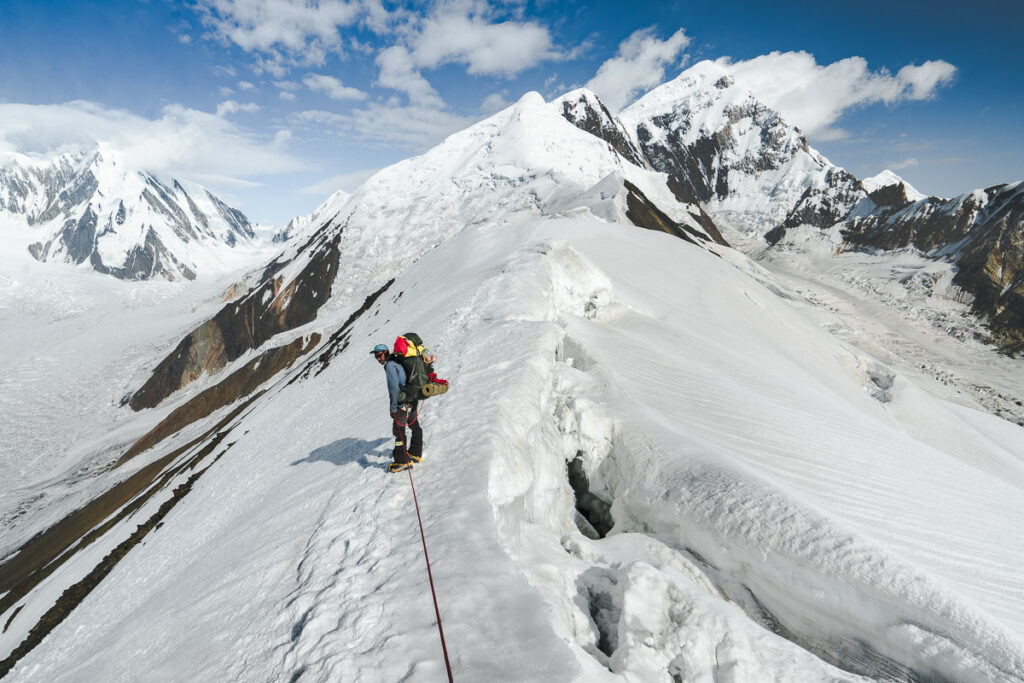
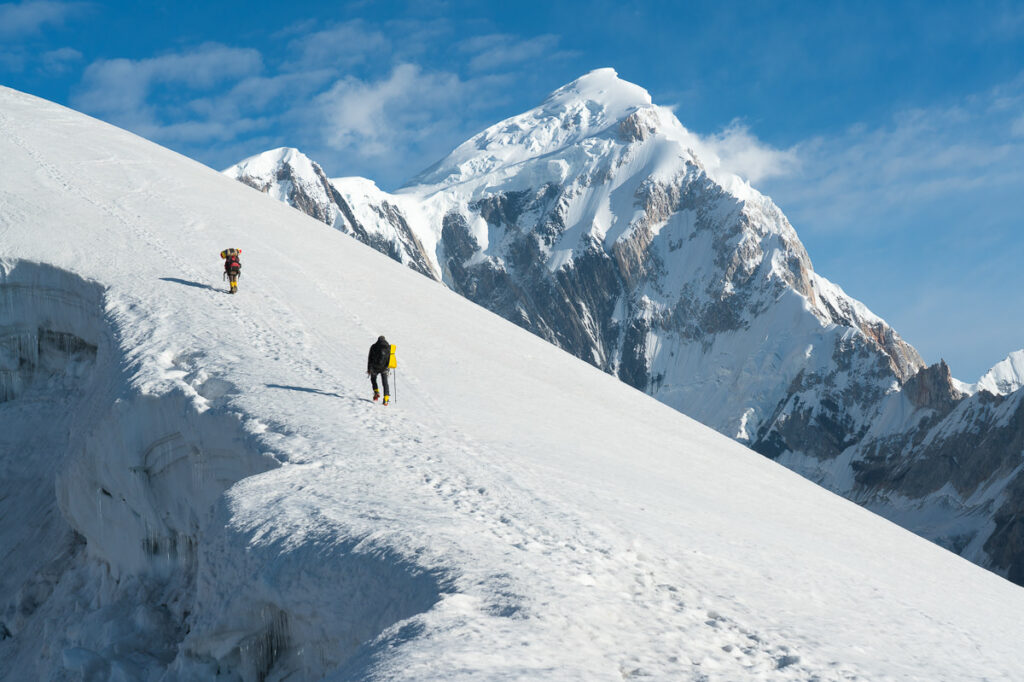
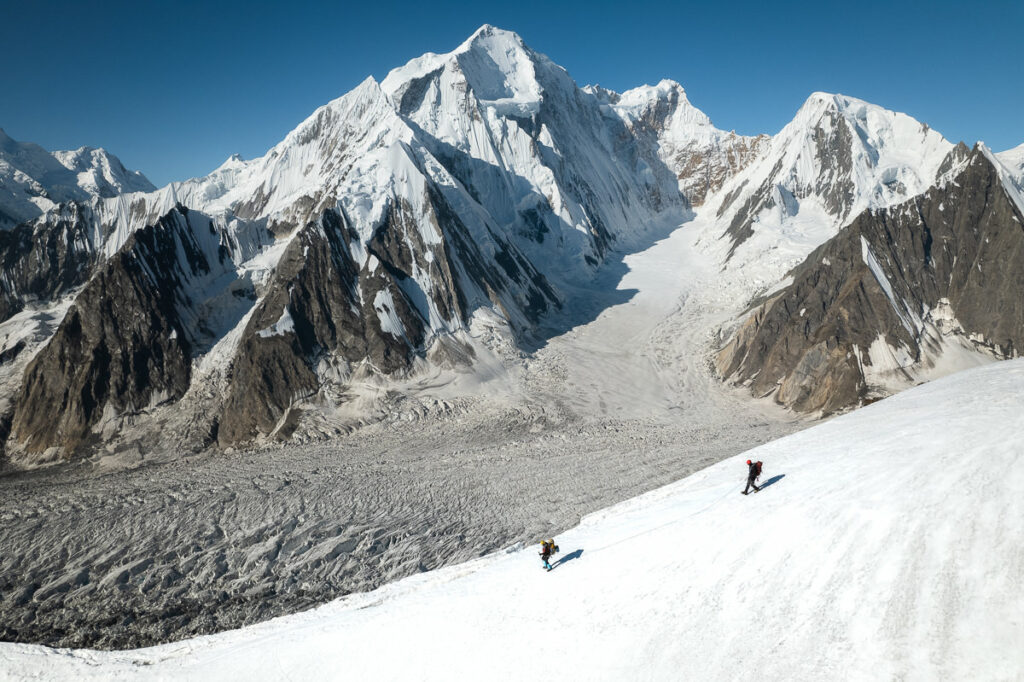
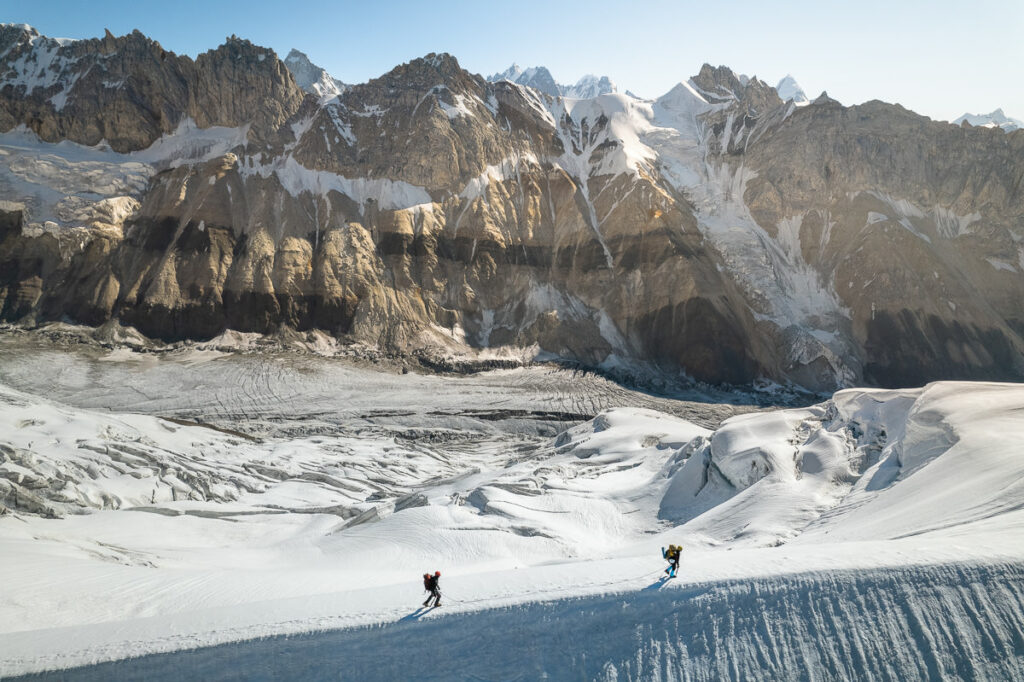
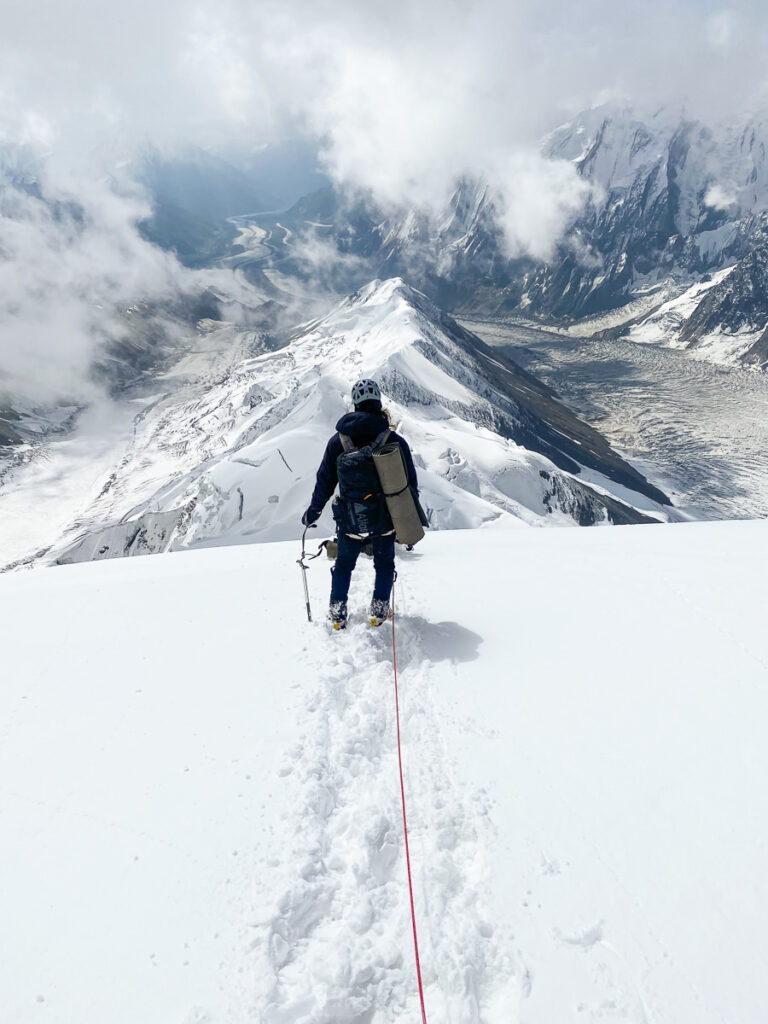
Once you leave the comforts of Camp 1 behind, you venture into the land of snow and crevasses. The route follows the narrow ridgeline, with four kilometers of undulation leading you towards the second camp of Spantik. It’s important to rope up here as a team or at least a duo.
There were multiple crevasses that at times swallowed our ankles and we even found ourselves knee-deep in snow during some moments. The conditions will vary depending on the weather and snowfall. On our acclimatization hike from Camp 1 to Camp 2, the journey took us four hours. The next time we did this traverse in heavier snow would take us eight hours as we had to break the entire trail in thick snow.
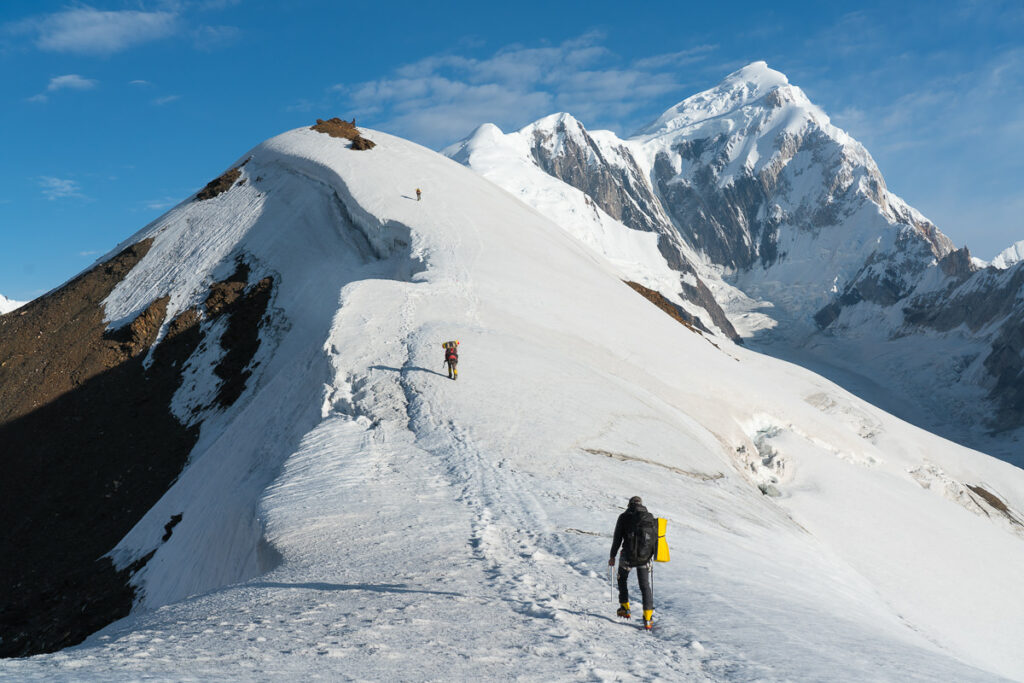
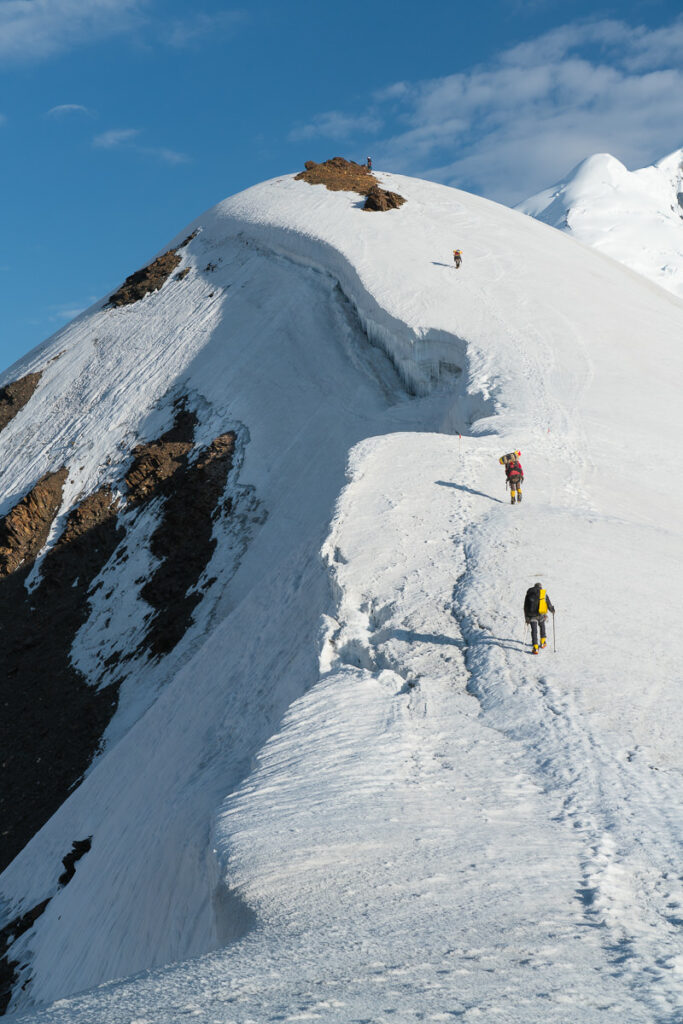
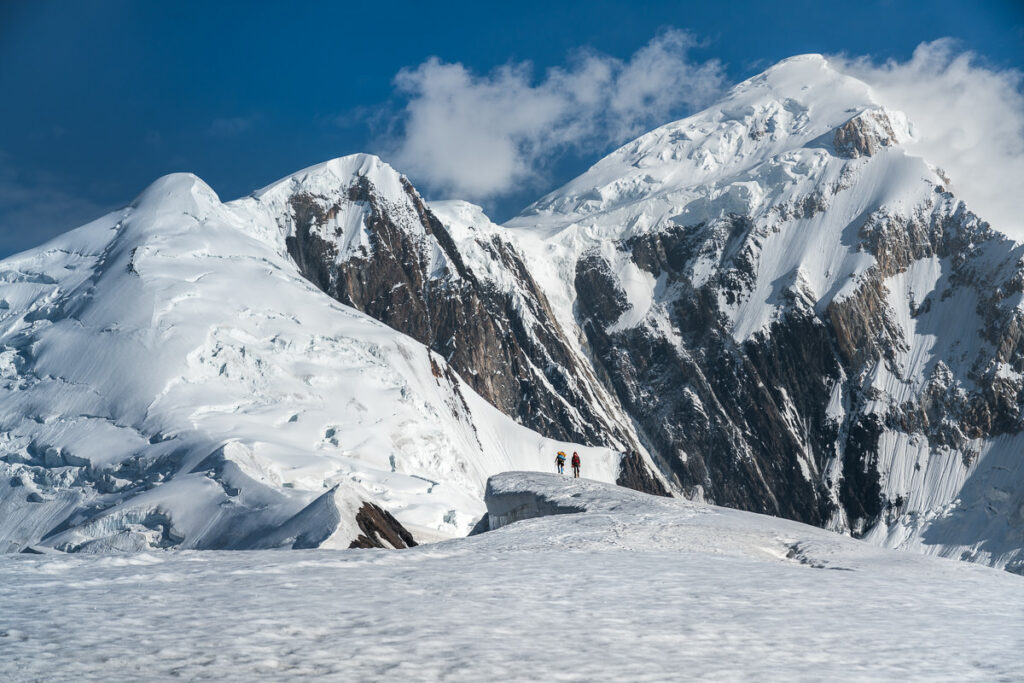
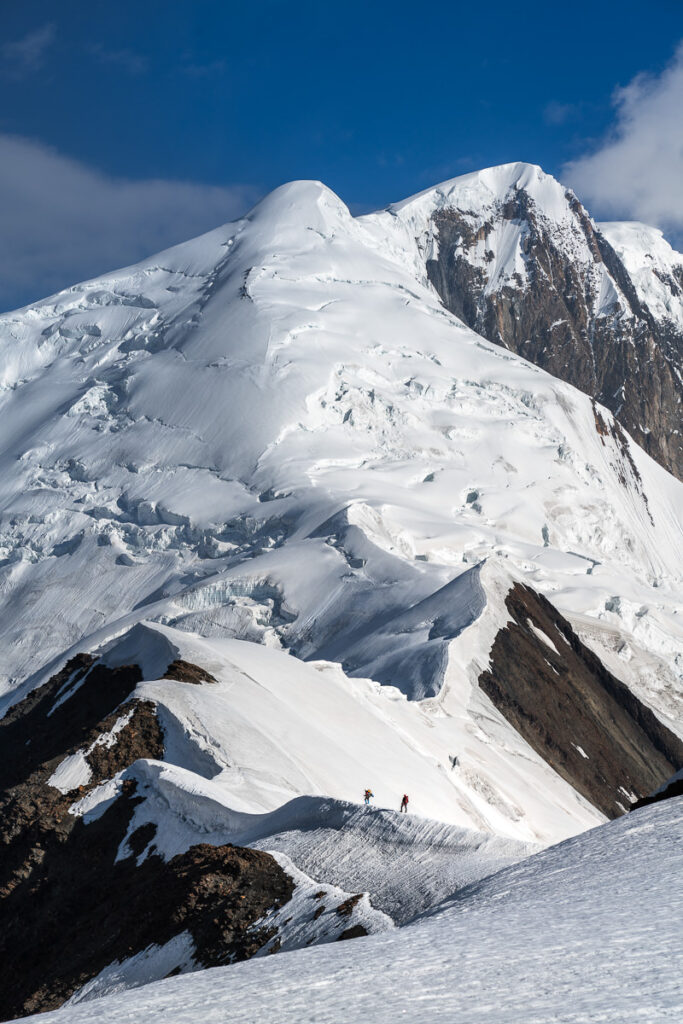

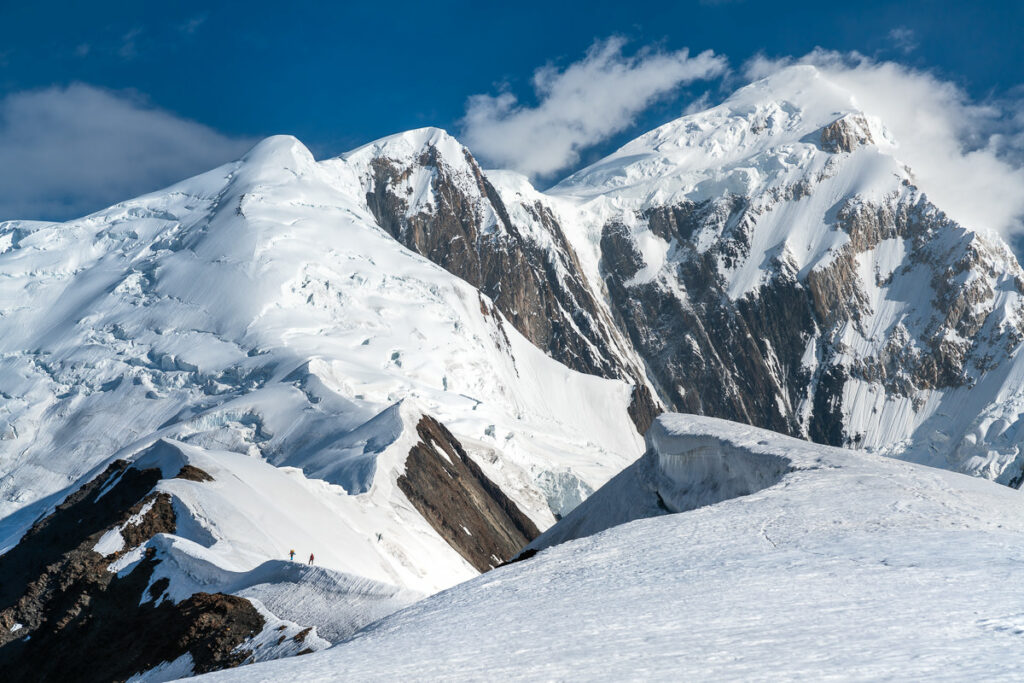
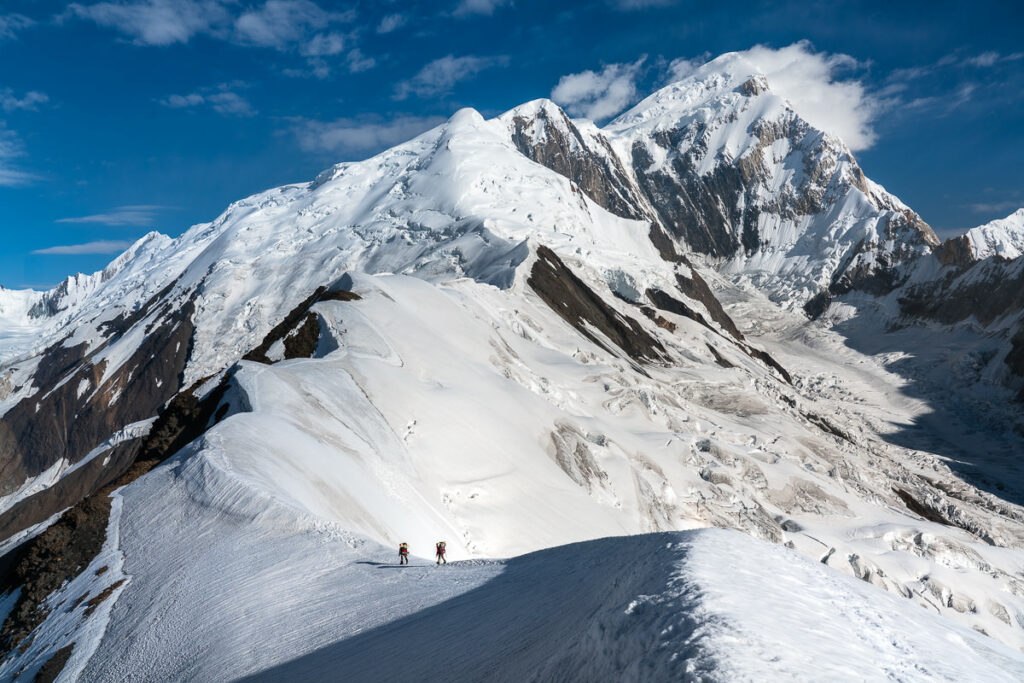
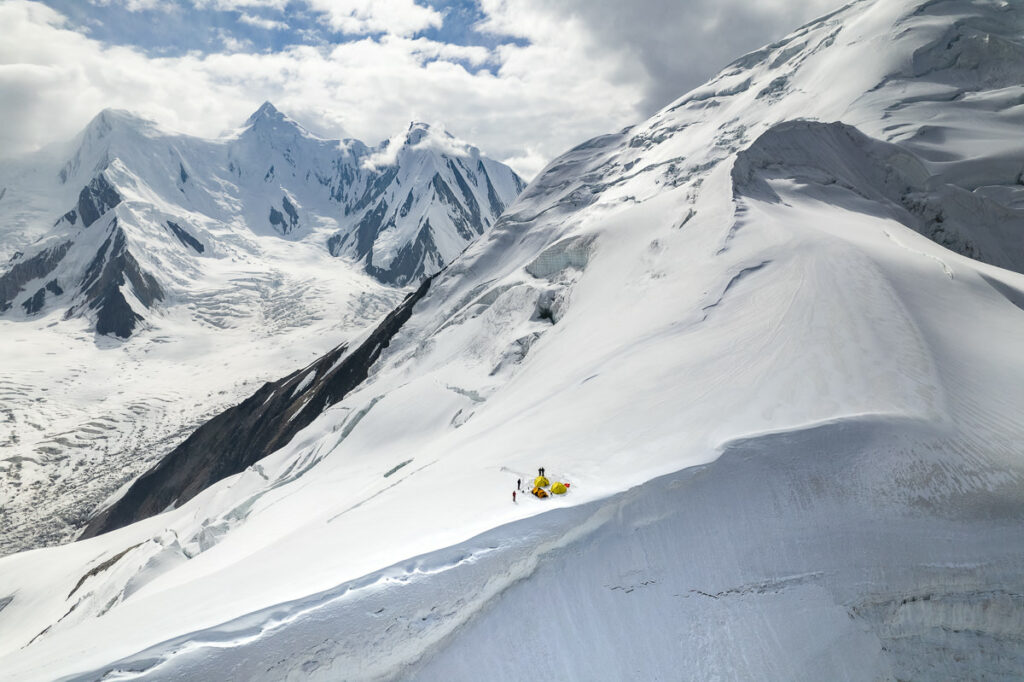
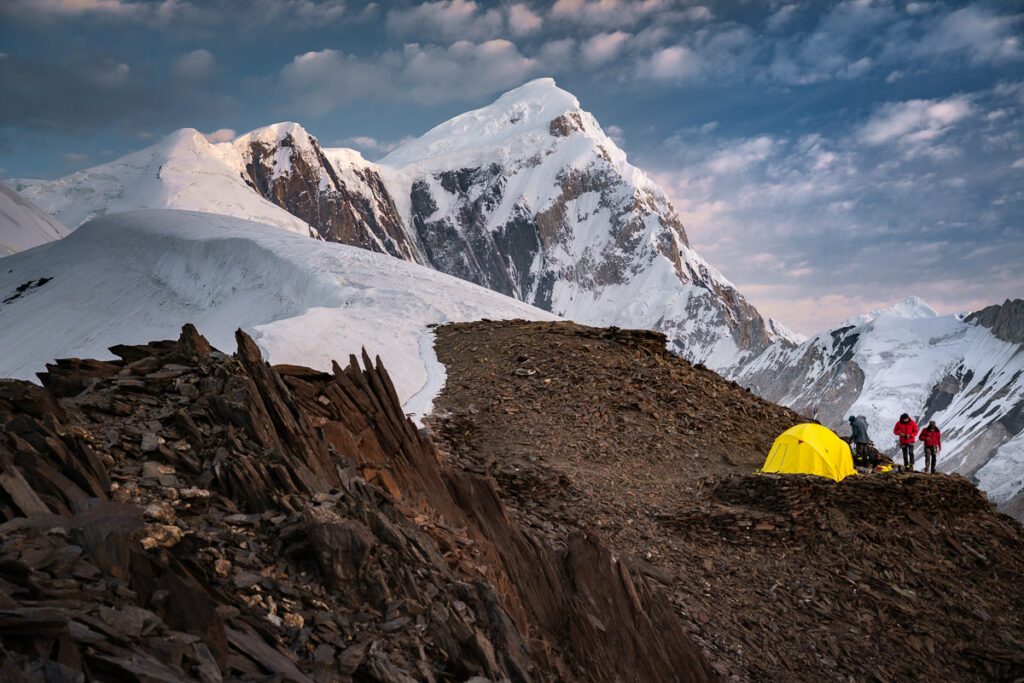
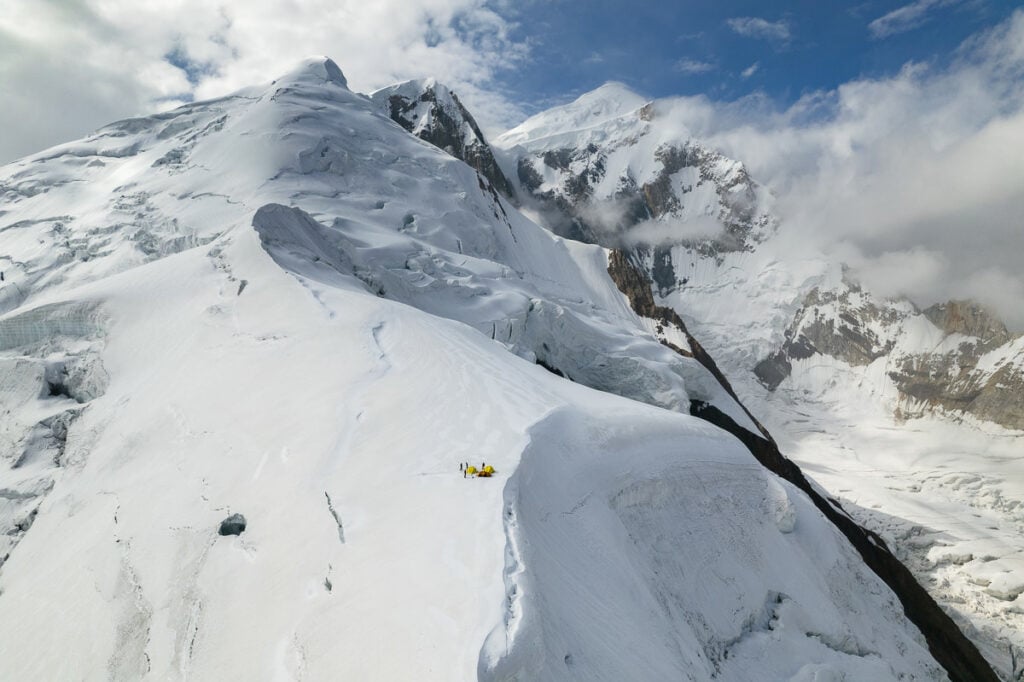
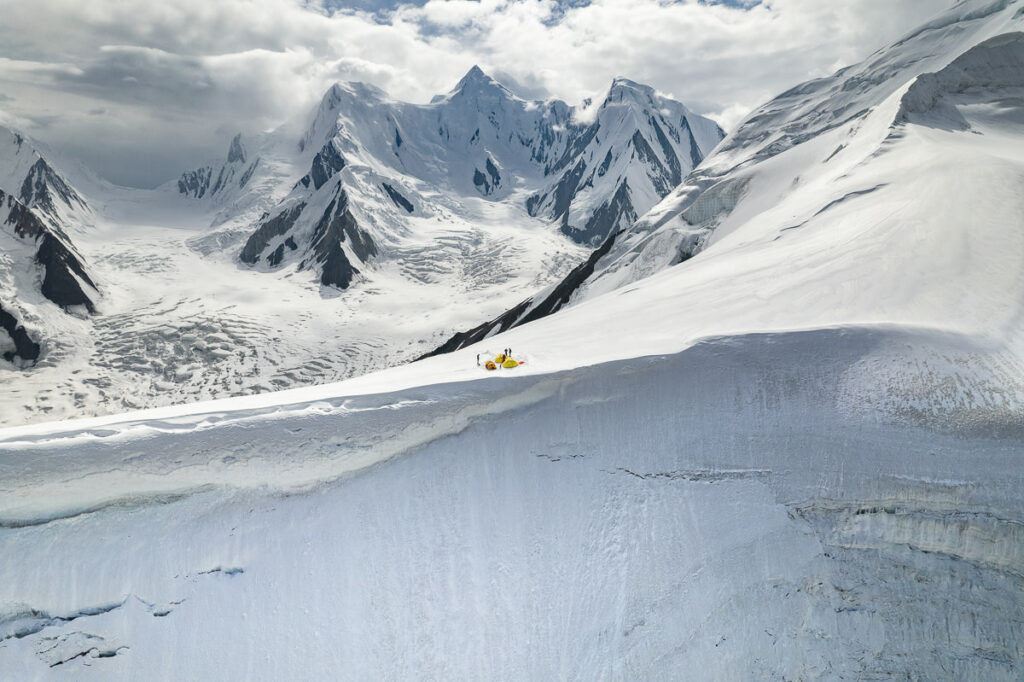
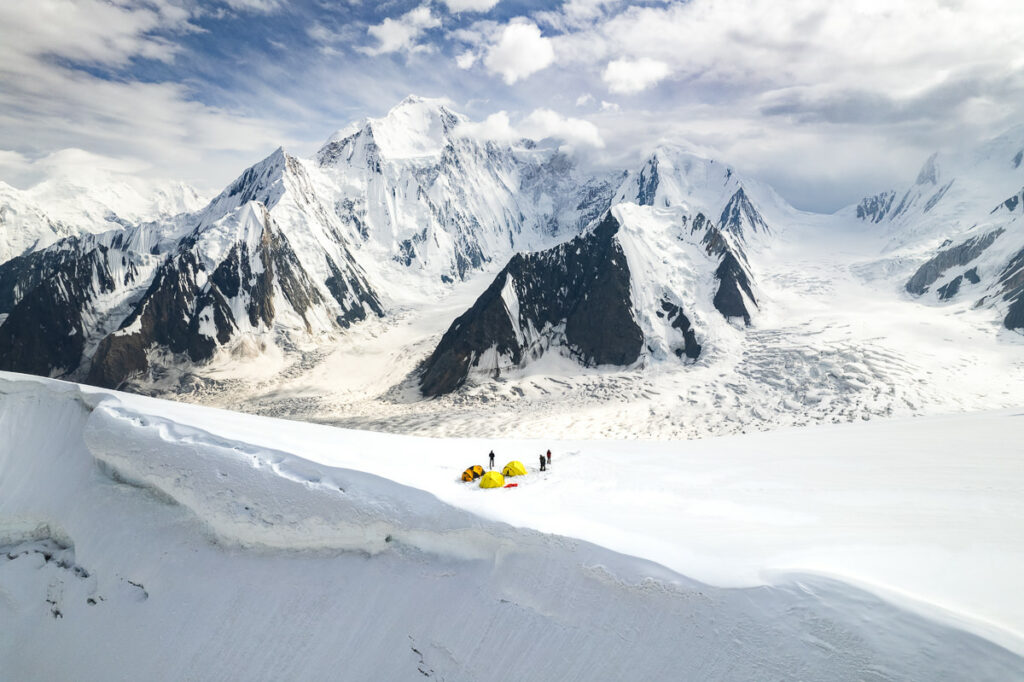
Camp 2 is on a wide plateau with steep drop-offs down to the glacier on either side of the site. It’s very exposed so there isn’t really anywhere to hide at this campsite from a stinging sun or a fierce storm. We had a couple of incredible sunsets here and the shots from the drone shots captured by Off The Atlas at this campsite are just phenomenal.
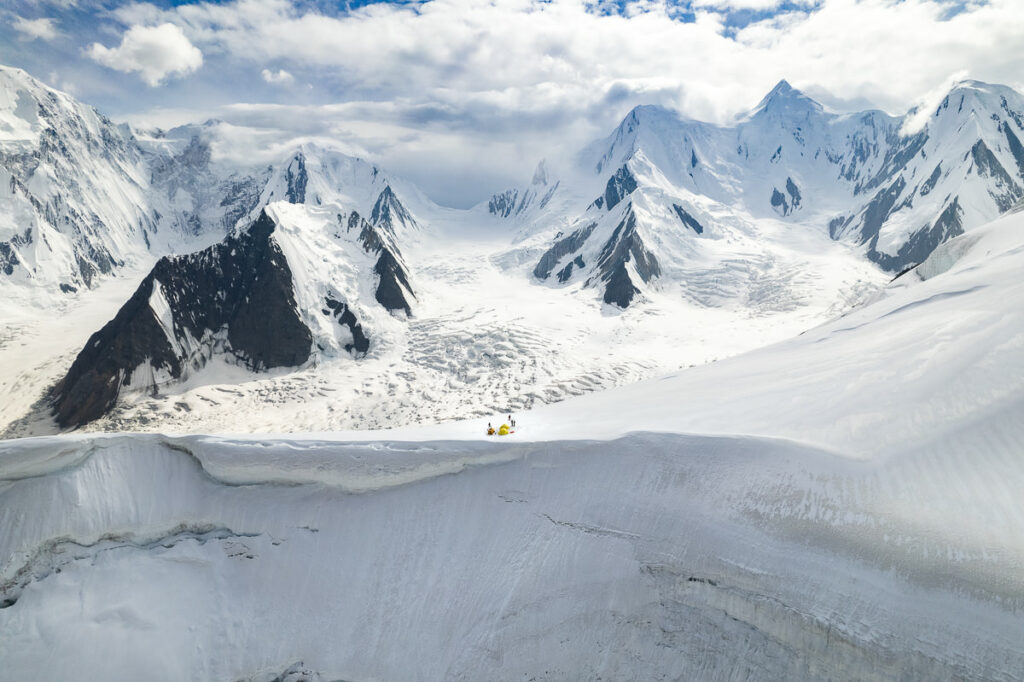
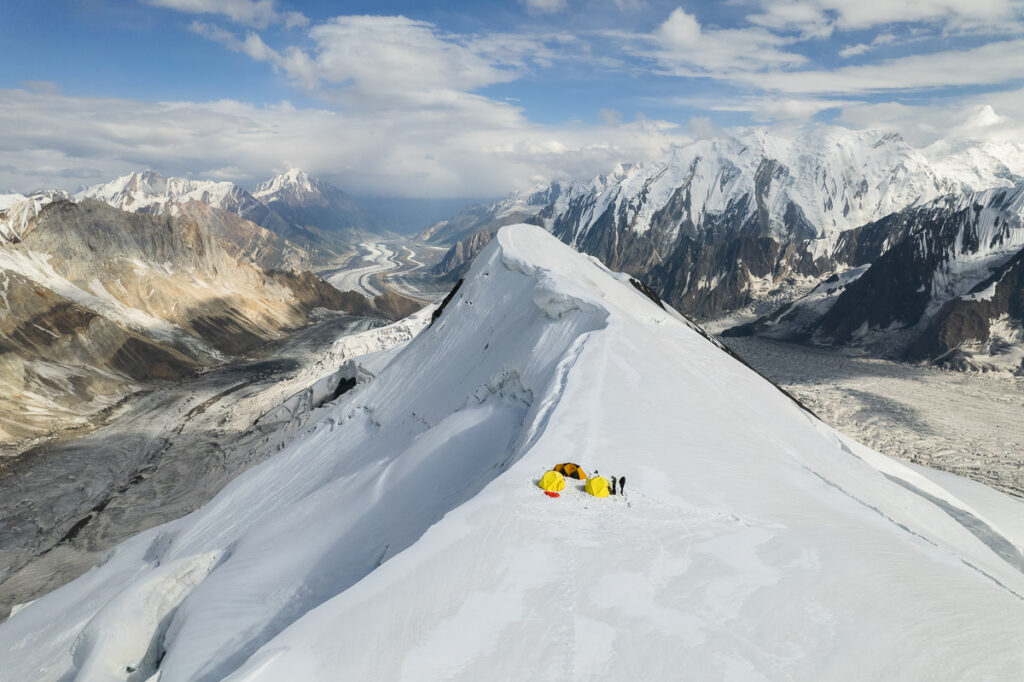
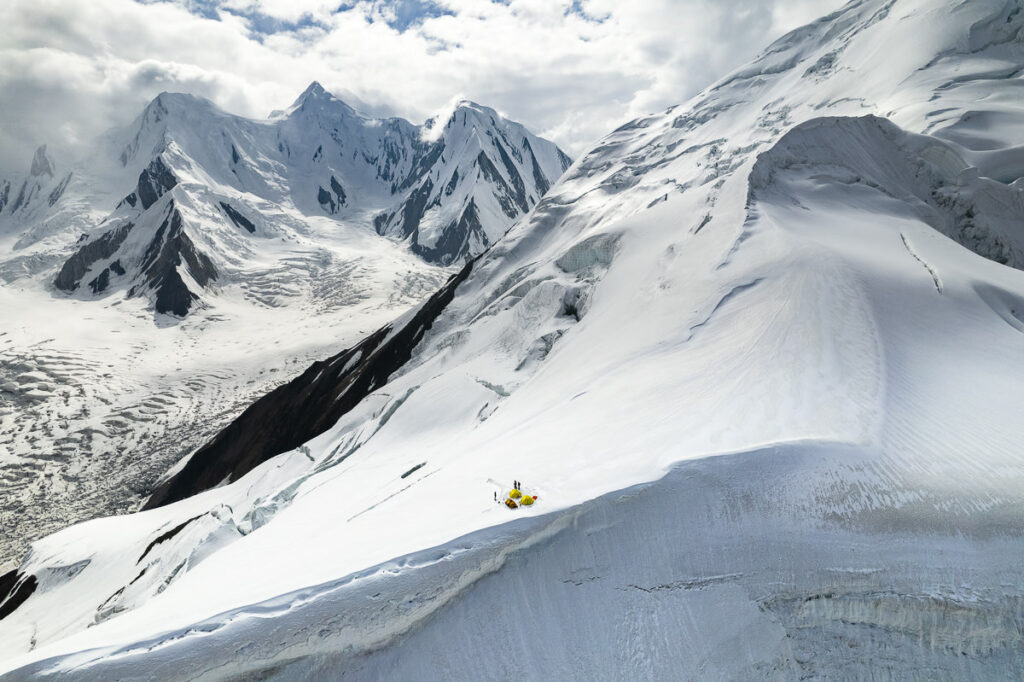
After a night at Camp 1 and then spending the following night at Camp 2, we headed back to basecamp in one day. The journey down from Camp 2 took us two hours and then from Camp 1 to base camp took just 1.5 hours. Therefore, descending from Camp 2 to basecamp took us 3.5 hours in these good conditions during our acclimatization.
CLIMBING SPANTIK PEAK
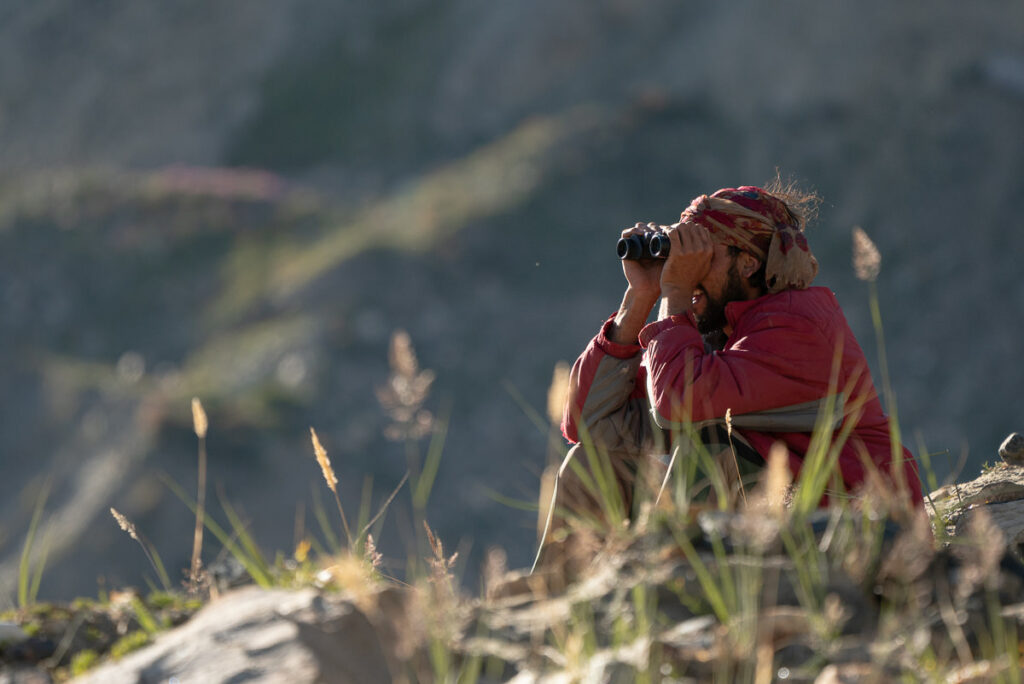
After arriving back down at Spantik Base Camp, we had to start analyzing the weather for a potential summit push window. Unfortunately, the weather wasn’t looking great and our only window for the next ten days was a 3.5-day period directly after a forecasted snowfall. This would mean heavy snow conditions up top on the ridge and peak in the days before we made our summit push. Not ideal, but it was our only window and we were willing to head up and give it a chance. It’s important to note that you really do need a satellite phone or Garmin InReach to be able to access the weather, which will help you make decisions about your weather window.
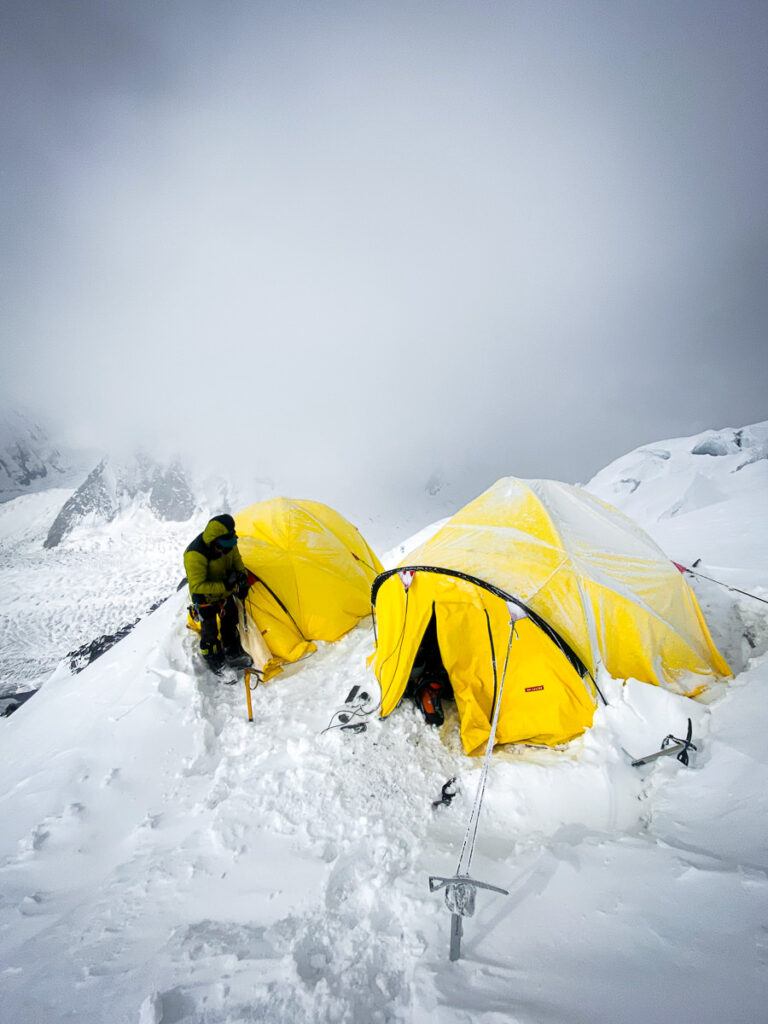
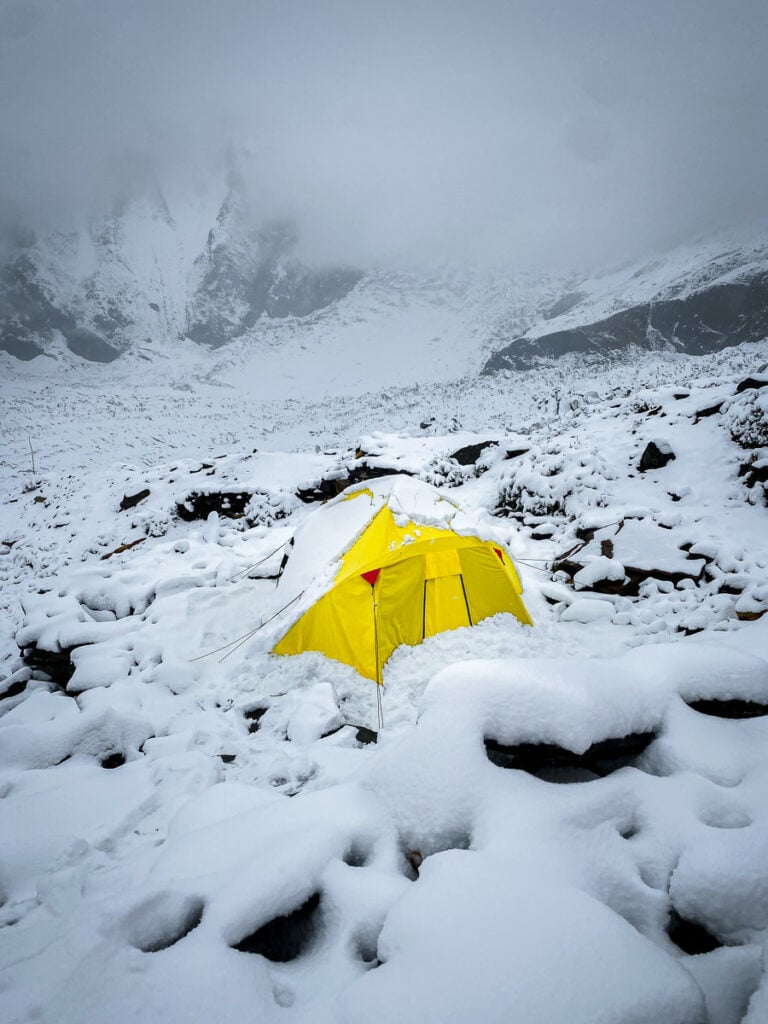
We hung out at basecamp in the snow for a few days. I watched my tent become completely engulfed by the snowstorm to the point I couldn’t even make it out of the yellow fabric underneath. We kept warm in our mess tent, ate well, and prepared both mentally and physically for the task ahead.
The weather had given us three clear days and then one semi-clear day. This was our 3.5-day weather window. Our plan was to climb to Camp 2 on day one, then to Camp 3 on day two. On the night of day two, we would begin our summit push to Spantik Peak and then descend back to Camp 3 on day three. We would then descend all the way to basecamp on day four to complete the journey. This plan would be quite manageable in normal conditions but due to the thick snowfall in the days prior, it would be a massive mission if we could pull it off.
Our journey began with the short climb back up to Camp 1. This time much of the trail was covered in the snow whereas, during our acclimatization journey, the snowline began after Camp 1. We stopped for an hour or so to assess the conditions while at Camp 1 but our guides decided it was ‘safe enough’ to continue on to Camp 2.
A journey that had taken us just 3-4 hours previously, this time cost us almost 8 hours as we reached Camp 2 late in the day. Thick snow was slowing us down dramatically and increasing the chance of falling into the menacing crevasses. Nevertheless, we made it to Camp 2, which was our objective for the day and I was relieved at that. It meant our summit push dreams were still alive.
The following morning as we were packing up, a disaster occurred. Chris, my climbing partner, was packing up his bag when his sleeping bag slipped out. In the blink of an eye, it was yards away and picking up speed as it began to roll down the steep hill. A $500 sleeping bag was gone as we headed up to sleep for two nights at 6,200 meters. Would we survive sharing just one bag between the two of us? We were about to find out!
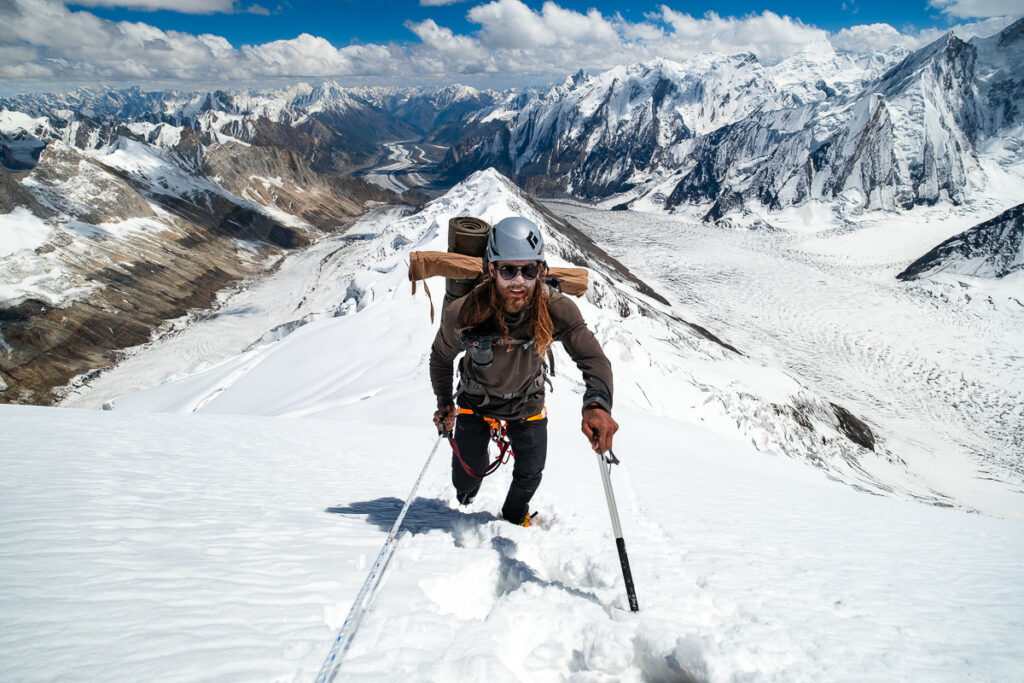
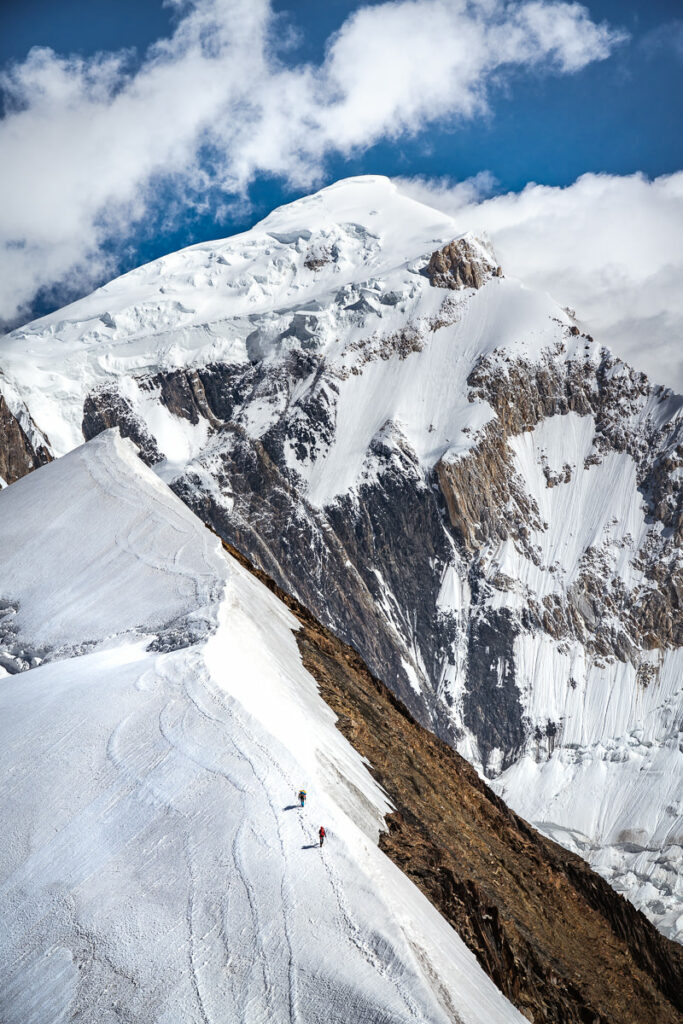
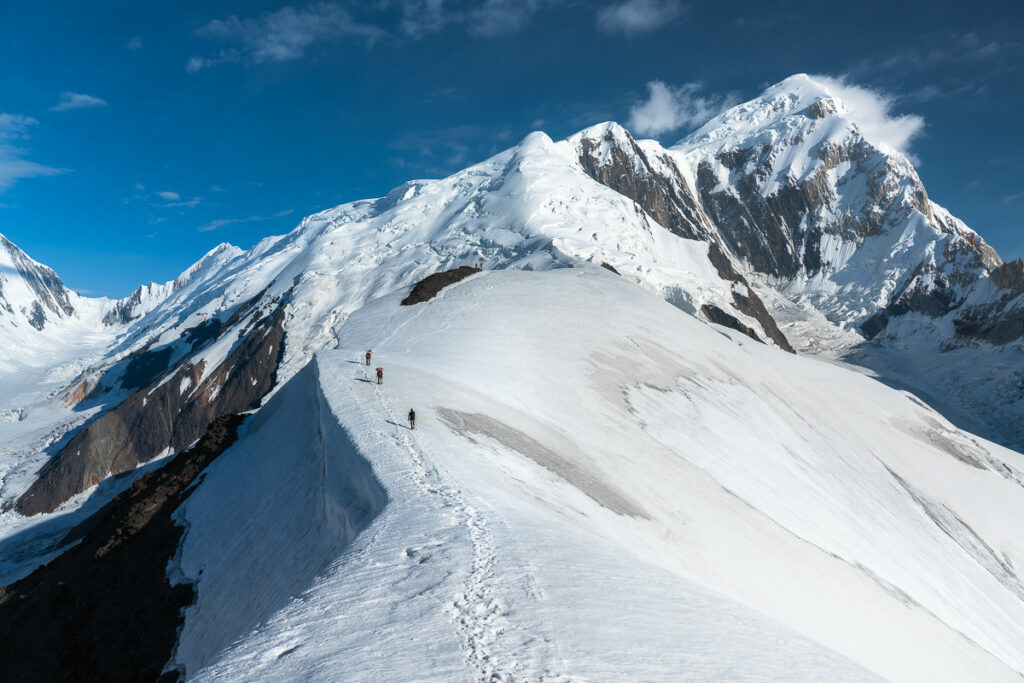
The climb up from Camp 2 to Camp 3 is largely the most technical part of the entire expedition. It doesn’t involve anything too extreme but you will jumar up a 45-degree slope for several hours (depending on your speed) to reach the third camp. The views back down the Chogholungma Glacier while ascending are just incredible and this section of the climb was definitely my favorite.
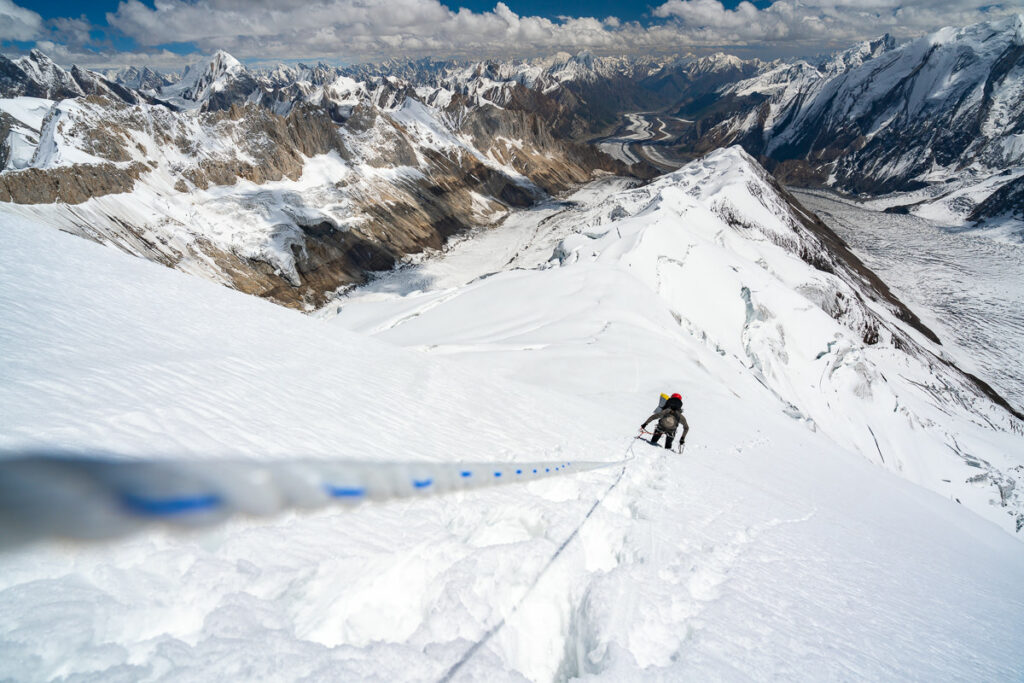
Despite the relatively short distance from Camp 2 to Camp 3 of less than four kilometers, the trip took us the entire day. The approach to the jumar section was incredibly thick with snow and the ‘Shark Fin’ ridge had to be traversed with care for crevasses. We ended up reaching Camp 3 at 6 pm after leaving early that morning. We then had just two hours of sleep after setting up the tents before it would be time to rise again to begin the final summit push to Spantik Peak.
After two hours of uncomfortable napping, we rustled ourselves out of the tent at 9 pm and geared up with boots, crampons, and all of our warmest gear. It was time for the summit push.
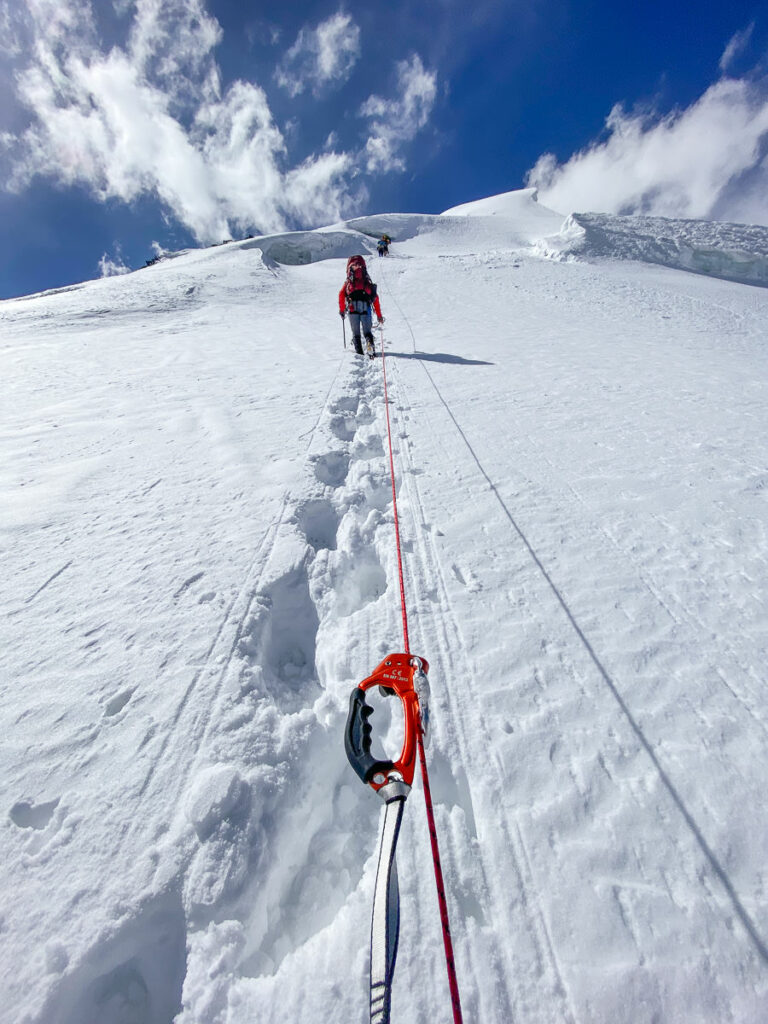
Our journey to the summit was dark, cold, and arduous. Through the night we trudged through the thick snow reaching the plateau by sunrise to sit beneath the final climb to Spantik Peak. With bad weather and blizzards rolling in, two members from the other expedition decided to head back. Our guides sipped a tea with us and said they were happy to move on to complete the mission.
The final climb up Spantik Peak is a continuous steep slope gaining the final 500m of elevation to reach 7,027m above sea level. The thick snow became incredibly difficult to manage throughout this portion of the climb. It seemed as if we moved two steps forward and one step backward with no traction for crampons or ice axes.
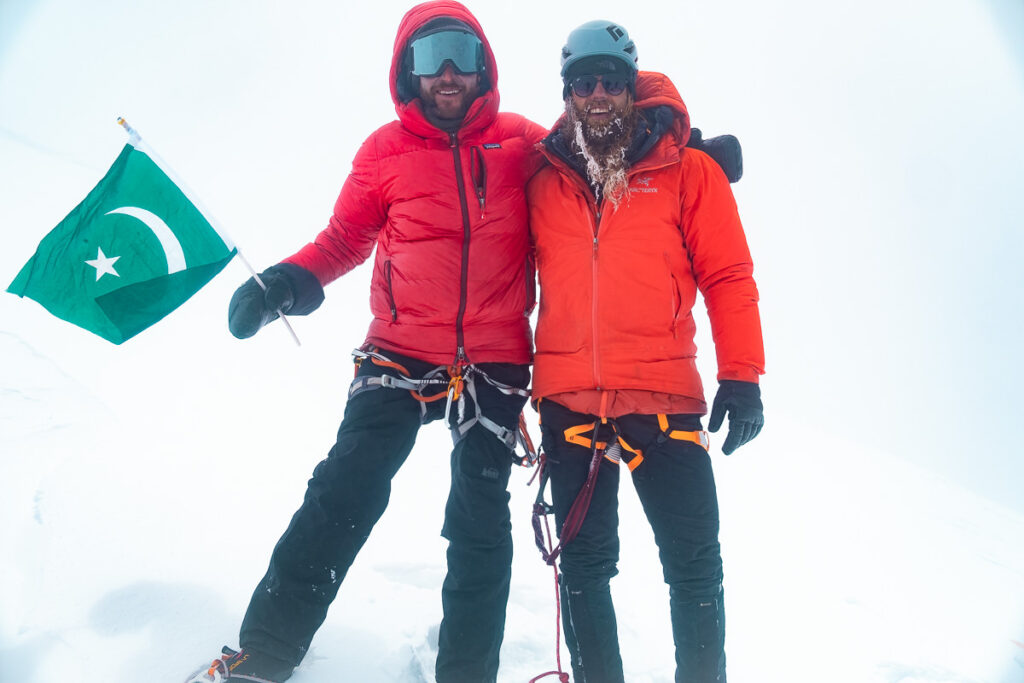
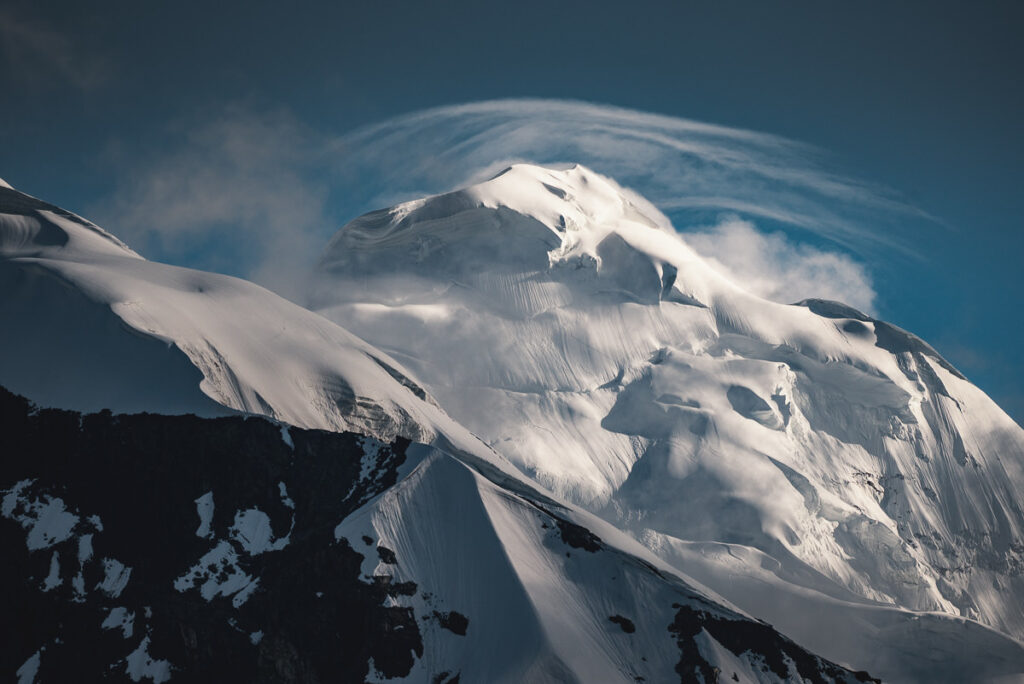
Unfortunately, at the summit, we had a complete whiteout with only a glimpse of Nagar Valley for a few moments. On a clear day, you can expect to find incredible views including looks toward K2, Nanga Parbat as well as other peaks. On this day it was snowing sideways. We took a photo, a breather, and then began the long descent back to Camp 3. We made it back to camp just before sunset completing a 22-hour push on just two hours of sleep. We made it.
The following morning, we woke tired and fatigued but had to descend all the way down to basecamp. It snowed heavily again during the night so we had to break the trail once again. It ended up taking us the entire day to descend and we reached basecamp at sunset after an arduous journey back down the ridge. We celebrated with a coca-cola (no alcohol allowed in Pakistan) and went straight to bed.
A rest day would have been nice but our team of porters had arrived and so we had to wake up at sunrise and march 28km in the piercing sun to Chogo Balansa, which is the first camp on the trek into Spantik Base Camp. We survived the day and then made the final 14km trek back out to Arandu the next day. Keeping the surprising level of efficiency rolling, we then jumped straight into a Jeep and headed back to Skardu that night. The following morning we flew to Islamabad. If you know anything about traveling in Pakistan, you would be astounded at that turnaround. Normally one form of transport fails you but on this occasion, we were in Islamabad just four days after being on the summit of Spantik Peak.

Climbing Spantik Peak was a journey of a lifetime and challenged us immensely. In better weather conditions the mission may be less intense but this incredibly scenic ridge is not to be underestimated. It’s long, difficult to get a wide weather window and will push you to your limits. I hope this guide and story has given you an insight into climbing Spantik Peak and I wish you a safe journey and an incredible climb.
Nathali
Saturday 8th of June 2024
Hi, thanks for sharing all this information. In which month did you go? What’s the best time of year to go? What was the average temperature when you were at the summit?
Thanks for your answers :)
Shahrukh
Sunday 11th of August 2024
@Sarwar Taqi Shigri, how much a guide charges for expedition.?
Sarwar Taqi Shigri
Friday 12th of July 2024
@Nathali, June 15 to August 15 is the season to climb this mountain if you need more information you can contact me I belong to Arundu village
Kaz
Thursday 10th of August 2023
Thank you so much for posting this to help us peeps out here / I am climbing July 24 and this insight is so helpful.
Hali Lee
Friday 14th of April 2023
Thanks for your sharing! We’re planning to summit Spantik this summer. Do you think it’s needed to hire a guide for route above BC? We’d appreciate your suggestion.
Fahad Mustafa Qureshi
Monday 30th of January 2023
Its vert helpful for me & my team as we are planning to summit this year 2023.
Janeek
Tuesday 6th of December 2022
Great report, lots of helpful information, thank you :-)