This article includes the best photography equipment for beginners who are looking to start shooting some awesome photos on a camera setup for under $1000.
I began taking photos on Oahu, Hawaii during the summer of 2015. I was inspired by a lot of talented people around me and of course, it is hard not to be amazed by the beautiful nature of an island paradise. Now I travel the world, taking photos and writing stories as a blogger and Instagrammer. I get asked quite often by friends, family and my audience about what camera they should get if they wanted to get started in photography.
In this guide, I’ve created a photography equipment list for beginners which includes the best products on the market today and a link to each item on Amazon. Which almost always has the cheapest options and is where I get most of my gear.I’ve sorted them by category to make it easy to navigate to tripods, bags, camera bodies and lenses.
TIP: check the ‘used’ section while browsing a product on Amazon as they often list refurbished or demo models, which are often brand new in a damaged box for example. I’ve bought all of my three lenses with this technique, saving me over 30% on each lens.
I will also list all of my camera gear at the bottom of the article if you are wondering about the gear I use.
Photography Equipment List for Beginners
- Mirrorless Camera
- Lens
- Tripod/Gorillapod
- SD Card
- Batteries
- Camera Backpack
- Polarizer/Filters
- Photography lighting equipment for beginners
- Portrait photography equipment for beginners
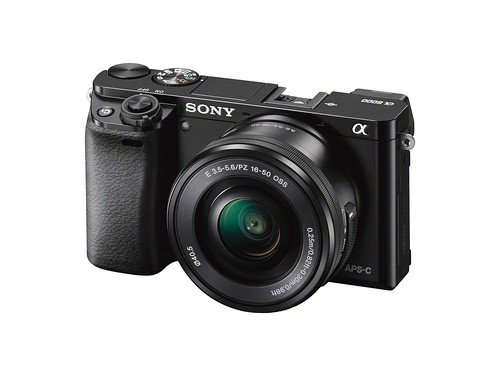
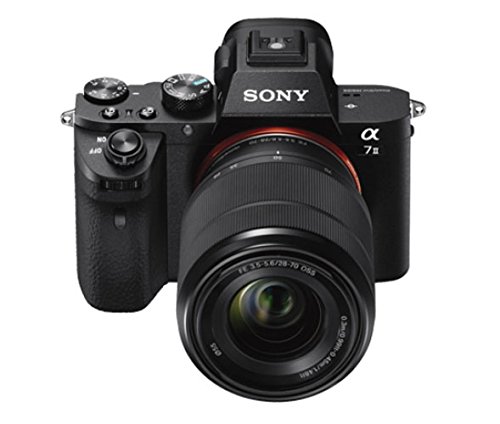
I am a huge fan of mirrorless cameras. They are small, lightweight have lot’s of built in features, often come with finder view and monitor view and are on par with their bulkier more expensive DSLR competitors. I have used a Sony Alpha a6000 Mirrorless Digital Camera with 16-50mm Power Zoom Lens while I was beginning photography in Hawaii but have now upgraded to the Sony Alpha A7II Mirrorless Digital Camera with FE 28-70mm Lens
.
These are the most popular entry-level and best value mirrorless cameras on Amazon right now. All of the cameras on this list are priced at UNDER $1000 INCLUDING A LENS!
Best Cameras for Beginner Photographers
| Camera | Megapixels | Weight | Frames Per Second | Check Amazon |
|---|---|---|---|---|
| Sony a6000 | 24.3 Megapixels | 344g | 11fps | Check Price |
| Sony a6300 | 24 Megapixels | 404g | 11fps | Check Price |
| Panasonic Lumix G85 | 16 Megapixels | 434g | 10fps | Check Price |
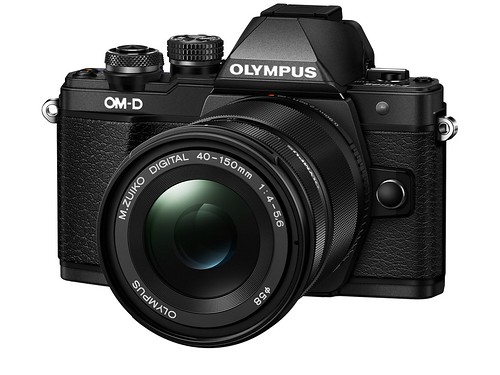
| Olympus OM-D E-M10 Mark II | 16 Megapixels | 390g | 10fps | Check Price |
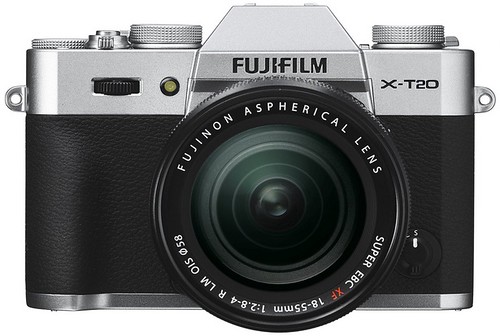
| Fujifilm X-T20 | 24Megapixels | 383g | 11 fps | Check Price |
Sony a6000
Key Features:
- 24.3 megapixel APS-C CMOS sensor
- Bionz X image processor
- Hybrid AF system with 25 contrast-detect and 179 phase-detect points
- Built-in flash + Multi-Interface Shoe
- 11 fps continuous shooting with Subject-tracking
- 3-inch tilting LCD with 921,600 dots
- OLED electronic viewfinder with 1.44M dots
- Diffraction correction, area-specific noise reduction, and detail reproduction technology
- Full HD video recording at 1080/60p and 24p; clean HDMI output
- Wi-Fi with NFC capability and downloadable apps
Perfect for: sports photography and action photography. The Sony a6000 has one of the fastest autofocus systems ever! 11 frames per second continuous shooting with subject tracking means it is literally impossible to miss the perfect moment in sports, action or travel photography. I remember when I began using this camera thinking it really was a mirrorless camera for dummies. It would pop up with suggestions on the LCD telling me how to shoot the stars at night or how to shoot action photography. The beauty is it is used by serious photographers because it has all the features they need. HD video recording in 1080p makes it perfect for YouTube videos and travel videos. Free time-lapse application means you can shoot a time-lapse without annoying cords. The built-in apps are really great because they limit the need for extra equipment for beginner photographers.
Click here to check the price of the Sony A600o with kit lens
Sony a6300
Key Features:
- 24MP Exmor CMOS sensor
- 425 phase detection points to give ‘4D Focus’ Hybrid AF
- 4K (UHD) video – 25/24p from full width, 30p from smaller crop
- 2.36M-dot OLED finder with 120 fps mode
- Dust and moisture resistant magnesium-alloy body
- Built-in Wi-Fi with NFC connection option
- Built-in microphone socket
Apart from a few changes to the buttons and dials most of the upgrades to the Sony a6300 compared to the Sony a6000 are internal. The Sony a6300 still comes in under $1000 with a kit lens even with all of the upgrades. This lens and body combo is one of the best photography kits for beginners on the market for under $1000.
The A6000 had 198 phase detection points and 25 contrast detection points while the new A6300 has 425 phase detection points and 169 contrast detection points making a huge difference to the ability to track subjects.
The A6300 has a High-Density track AF system with more than 7 times as many AF focus points that the A6000 has. It also captures 4k video which is a huge plus for the photographers/videographers who need an all-in-one camera.
Click here to check the price of the Sony a6300 with kit lens
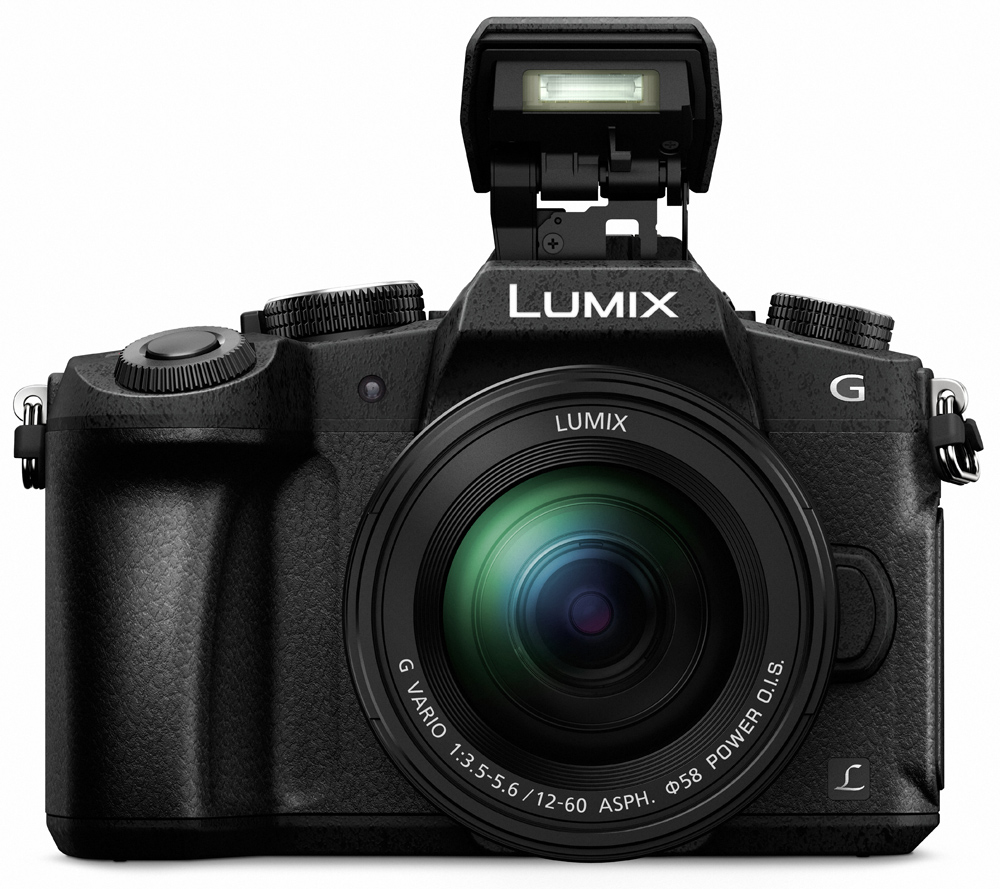
Panasonic Lumix G85 FK
Key Features:
- 16MP Four Thirds MOS sensor w/o optical low pass filter
- 5-axis image stabilization with Dual I.S. 2
- Splash/dust-proof body
- Depth from Defocus AF
- 2.36M-dot OLED EVF
- 3-inch 1.04M-dot fully-articulating touchscreen LCD
- 4K video / photo
- Focus stacking and post focus
Apart from looking super cool, the Panasonic Lumix G85 camera is awesome for videographers and photographers. It has 4k video capture, 2nd-generation 5-axis stabilization similar to the expensive Sony A7ii and also boasts a 16MP four thirds sensors.
It’s great for adventures because it is weather sealed with a magnesium alloy front plate. This doesn’t mean it can swim but it can handle some dust, rain or snow while you are out exploring the world.
Click here to check the price of the Panasonic Lumix G85 with kit lens
Olympus OM-D E-M10 Mark II
Key Features:
- 16MP Four Thirds Live MOS sensor
- TruePic VII processor
- 5-axis image stabilization
- 2.36M-dot OLED EVF
- Tilting 3″ touchscreen LCD
- 1080/60p video
- 4K time-lapse mode
- Wi-Fi
- Optional grip
The Olympus OM-D E-M10 Mark II is a four thirds mirrorless camera with a 16mp CMOS sensor and 5-axis stabilization. Like most mirrorless cameras it has built-in Wi-Fi and a nice viewfinder. The feature that stands out to me the most is the 4K time-lapse feature that you won’t find on many of its competitors. The camera also has a vintage look to it, which isn’t important to the photo quality but it is one of the coolest looking camera bodies on the market.
Click here to check the price of the Olympus OM-D E-M10 Mark II
Fujifilm X-T20
Key Features:
- 24MP X-Trans CMOS III sensor
- Up to 325 selectable AF points (169 of which offer phase detection)
- 2.36M-dot OLED electronic viewfinder
- 3″ 1.04M-dot tilting touchscreen LCD
- 4K UHD video at up to 30 fps, with clean output over HDMI
- 8 fps continuous shooting with AF, 5 fps with live view
- 2.5mm jack for external microphone or wired remote control
- Dials for exposure compensation, shutter speed, and drive mode
The Fujifilm X-T20 shoots in 4K and boasts a 24MP sensor, attractive to both video and photo enthusiasts and is the perfect beginner’s photography kit. It is competitive across the board and has no standout features but consistently competes with the top-range mirrorless cameras on the market. It keeps a vintage DSLR design which I really love. Probably one of the most consistent all-around performers on this list.
Click here to check the price of the Fujifilm X-T20 with kit lens
Best Camera Lenses for Beginner Photographers
The best lens for you will depend on which camera you choose. Each brand comes with its own range of lenses. The cameras listed above all come with a kit lens, which is great for capturing all types of travel, streets and portrait photography as you begin learning the skills. However, once you are comfortable with the controls you might want to purchase a specialty lens such as a wide angle lens for landscape or a prime lens for a narrow depth of field so you can blur the background. A prime lens instantly improves your photographs and gives them a much more professional look. Below I have listed the links to the prime lens range of each brand to use with the cameras listed above.
Click to view the Sony Prime Lens Range
Click to view the Olympus Prime Lens Range
Click to view the Fujifilm Prime Lens Range
Click to view the Panasonic Prime Lens Range
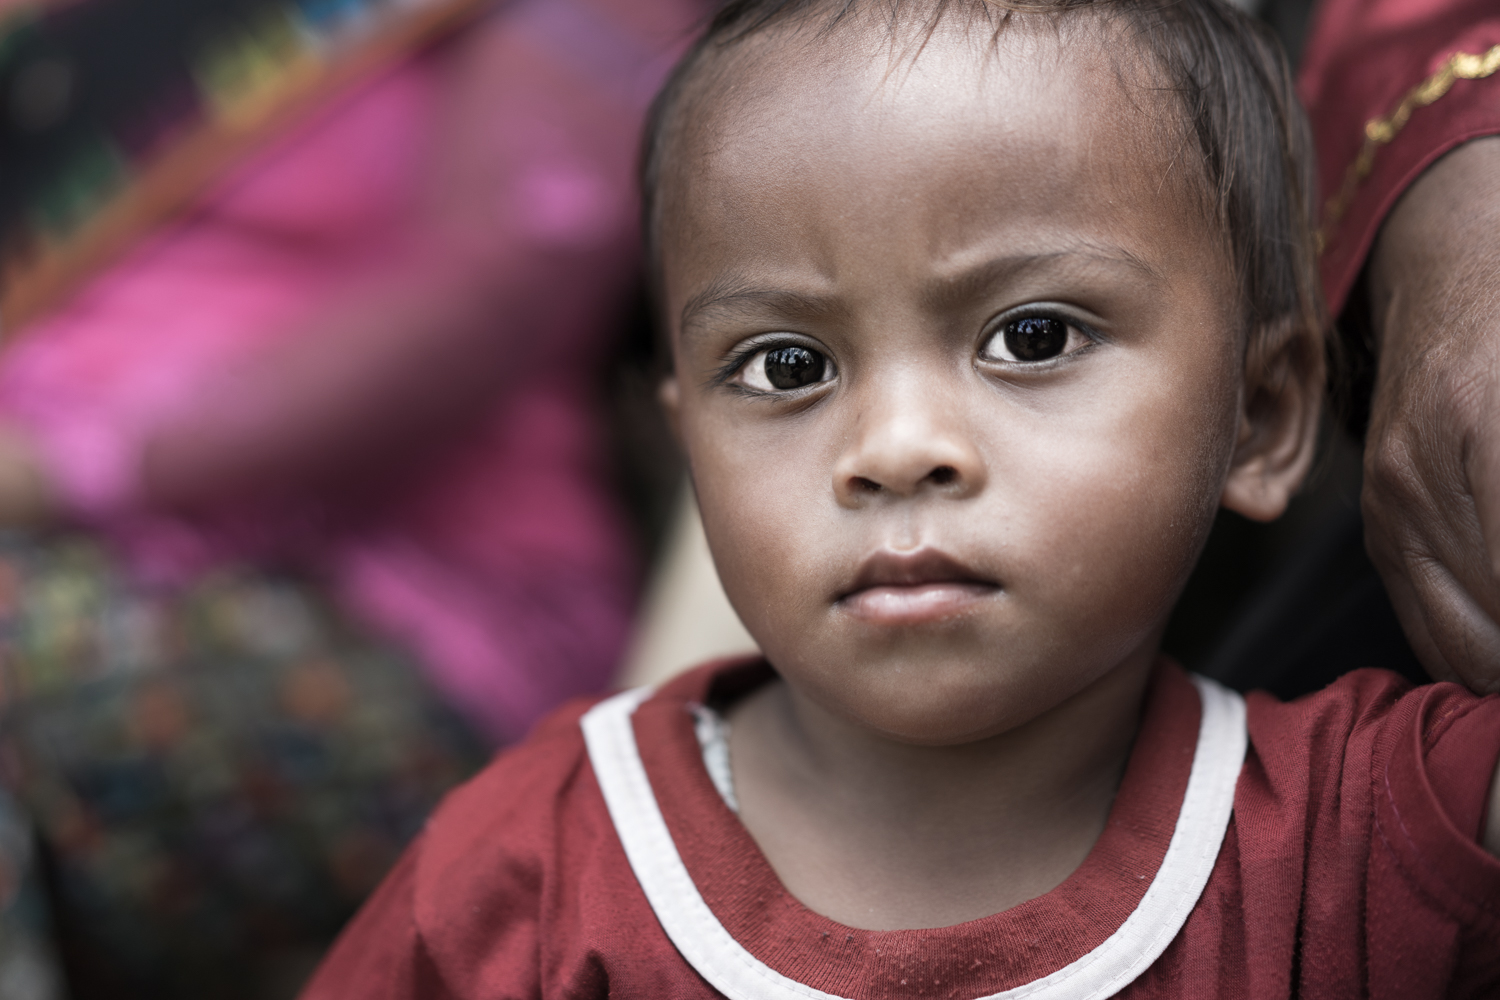
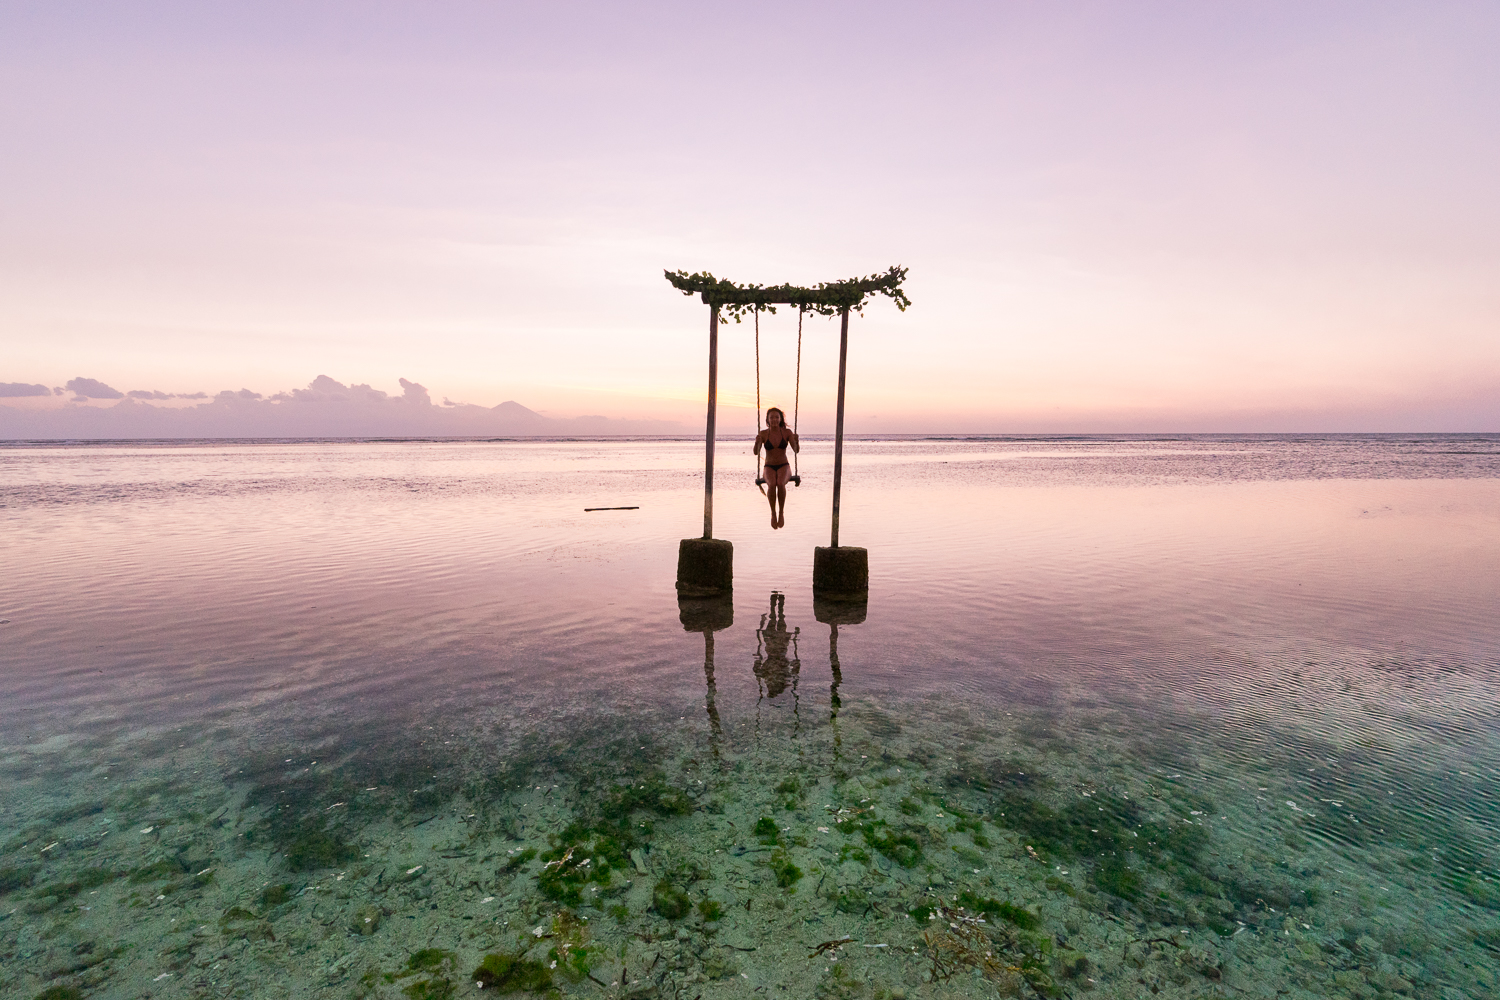
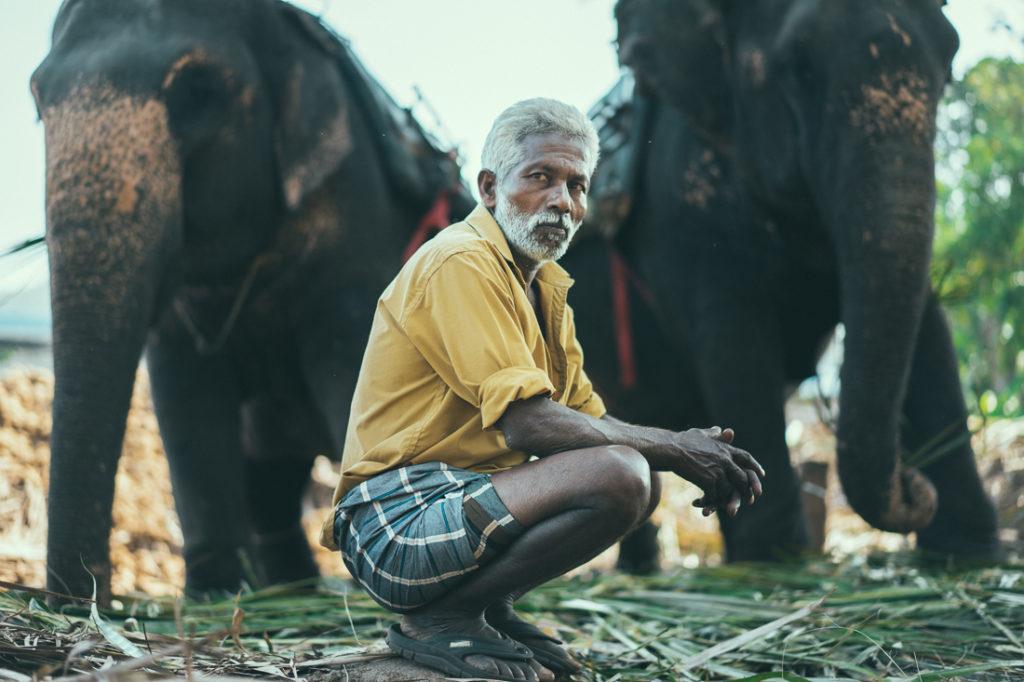
This is an example of a photo I took in Indonesia that shows the narrow depth of field you can achieve with a prime lens. This particular lens allows me to shoot with an aperture of f1.8 and it is a look you just can’t achieve on most kit lens setups.
Best Tripods for Beginner Photographers
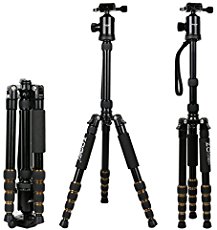
Zomei Z669C Portable Carbon Tripod, Monopod Kit & Ball Head
Key Features:
- Compact: The tripod is ultra compact and its legs can be inverted and folded back 180 degrees giving it a compact size of 15″, easy to put into your backpack
- Lightweight: The Z669C weighs only 3.4lbs, making it perfect for all events, such as sports activities, camping, family gatherings and much more
- Monopod: This portable tripod can be converted into a 60″ monopod by screwing together the center column and removable tripod leg
Carbon Fiber: The carbon fiber legs delivers maximum rigidity and combined with the lightest components makes this tripod extremely sturdy
Warranty: Backed by Zomei’s 1-year warranty
Click Here to view the latest prices for the Zomei Z669C Portable Carbon tripod
JOBY GorillaPod SLR Zoom.
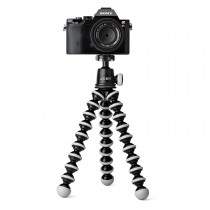
Flexible Tripod with Ballhead Bundle for DSLR and Mirrorless Cameras Up To 3kg. (6.6lbs)
Key Features:
- Stand Strong: Get crisper shots with this durable, lightweight tripod. The rubberized foot grips and wrappable legs will secure professional cameras up to 6.6lbs. as they hold their stance to any viable surface
- Different angles: Look at life from a different point of view with the GorillaPod SLR-Zoom Tripod and Ballhead Bundle. Easy maneuverability and precise positioning with 360 panning, to expand the range of shots you can capture
- Ground down: Get ultra-stable and find your grounding with over two dozen leg joints and German TPE joins, so you’ll never have a shaky shot. The GorillaPod SLR-Zoom can fiercely secure equipment up to 6.6 lbs., making the impossible shot, possible
- Easy set-up: Take this lightweight SLR and mirrorless camera tripod anywhere. The quick release plate simply stays connected to your camera, so you can interchange with ease. Hold on tight with the 1/4”-20 standard tripod mount and 3/8” adapter
Click Here to view the latest prices on the Joby Gorillapod
Memory Cards
What size memory card do you need?
There are several things to consider when selecting a memory card. Speed and storage are the two main factors. If your memory card doesn’t have the speed to keep up with 11 frames per second of shooting you are wasting the features on your camera. The SanDisk Extreme PRO is the ideal card which not only allows you to shoot at high frames per second but comes in 64gb which allows you to store over 1500 raw images and is also capable of shooting 4K video.
Camera Batteries
How many batteries do you need?
Battery life is one area where traditional DSLR cameras outperform mirrorless cameras. However, it doesn’t really change too much. If I shoot all day on my Sony a7ii or a6000 I will usually go through two batteries while those with DSLR cameras might use one. However, they also weigh twice as much. As I travel I carry four batteries with me and I’ve never run out of all batteries. I have a dual-charger which operates from a USB cord. This is important for traveling as it means I can charge batteries from a power bank or a MacBook while I’m on a boat, bus or plane. Below I have linked to a dual charger and dual battery pack (includes two batteries) for each of the camera brands listed above. TIP: Brand name batteries cost triple than generic brands and last just as long as the Amazon options listed below:
The Best Camera Backpack for Photographers
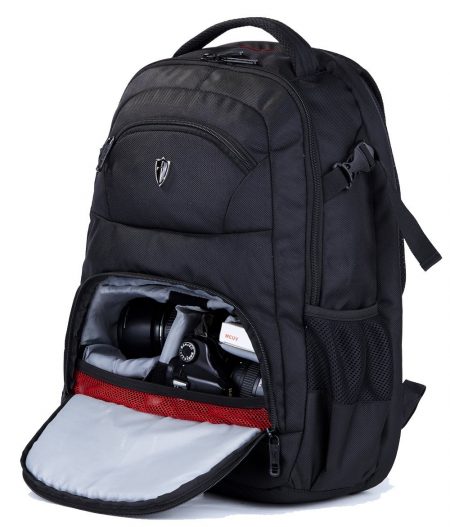
There is only one product I could possibly recommend here. It is the camera bag I have been traveling the world with for two years straight!
- It fits my camera, two lenses and two filters in the front pocket, which is padded and easily accessible. I think I can get it out and snap a shot within a couple of seconds. I never miss a thing.
- It also fits my 13-inch MacBook, MacBook charger cord, two hard drives in the case and passport holder in the back pocket.
- I’m not done! There are still two more pockets to go. A small front pocket fits my wallet, keys, and phone.
- The top pocket fits my Gorillapod, accessories bag full of batteries, lens wipes and other cords and chargers with room to spare.
- I carry 1.5 liters on both sides of the bag in the drink holders so I am a 3-liter camel, which was necessary for India believe me.
- Bonus Feature: When it starts raining and everyone panics around me about the electronics in their bag, I calmly undo the zip on the bottom of the bag and pull the rain cover over my bag and protect the thousands of dollars of equipment inside.
When I get asked what is your best piece of equipment I just show my bag straight away. I’ve searched for hours because it’s something I carry with me, it sleeps with me in dorm beds and sleeper trains in India. It travels with me across oceans on rickety boats and climbs to the top of mountains. There is nothing else like it if you need a rainproof, padded camera bag, which can also hold a MacBook and have room for all of your electronics and cords. If you find one please tell me about it. This is not a brand name bag it is by Victoria Tourist who I have never heard of before. I use it daily with a heavy load of gear inside and it survives without any issues.
You can click here to check out the bag which is only available on Amazon.
Polarizers
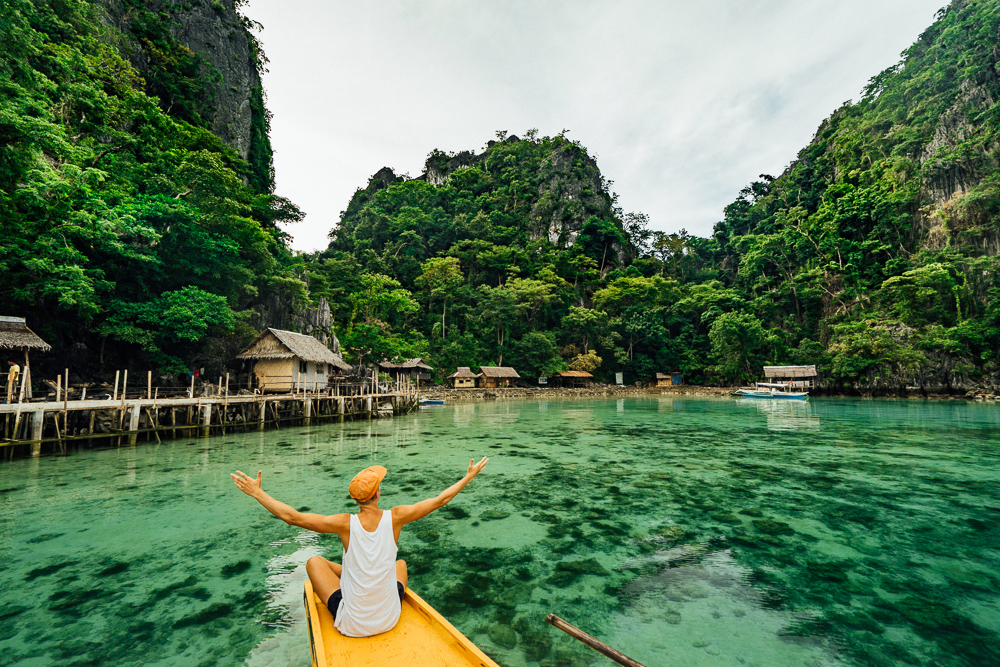
The harsh light from the sun often blows out the water with awful reflections. I bought a Hoya 72mm HRT Circular PL Polarizer and with a small twist before taking a photo I was now able to reduce or eliminate the reflections on the ocean. All of a sudden I could see the reef below the water and bring out the turquoise color of the Pacific Ocean. Even on hikes the polarizer really brings out the greens of the trees and is so handy when shooting a waterfall. My polarizer is on my camera 90% of the time and is one of my favorite accessories. You will need to search the width of your lens and then purchase a polarizer with that same width. For my Sony A7ii, it was 72mm. I highly suggest adding this to your kit because for less than $50 you can get a decent quality polarizer that will make your beach and jungle photos 10 times more vibrant!
Click here to view the best deals on Polarizers for mirrorless cameras on Amazon
Neutral Density Filters
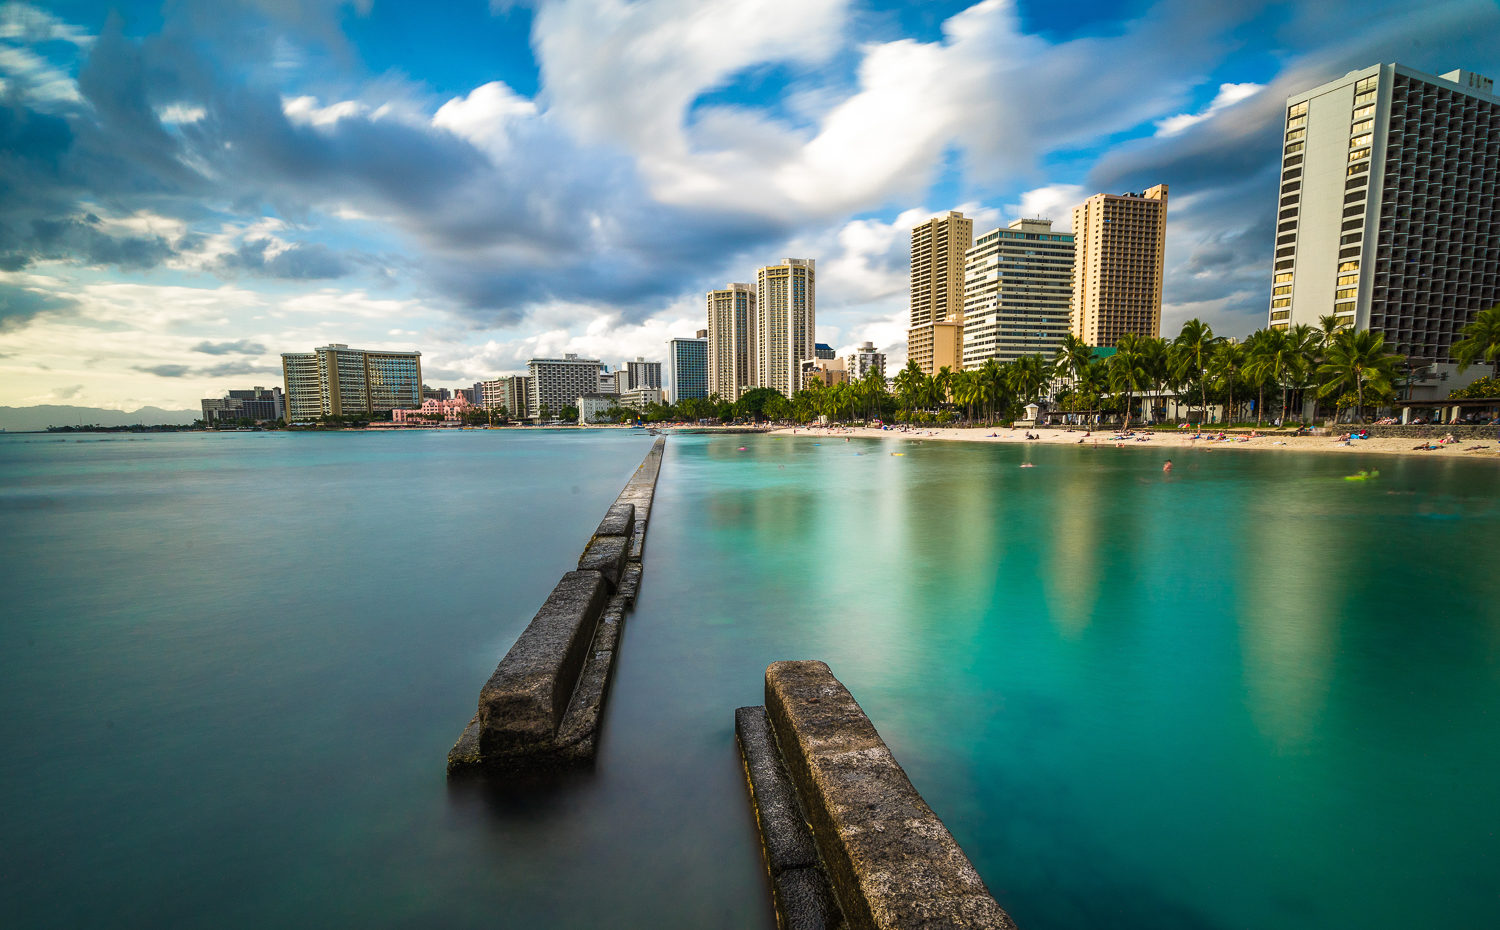
An ND filter (Neutral Density Filter) is a filter that darkens the view through the camera so that you can use a slower shutter speed while the camera is on a tripod. You might have seen photos of waterfalls or the waves in the ocean where the water seems soft and blurred. These have likely been achieved with the use of an ND filter. You can also use an ND filter to show the movement in the clouds and smoke. It takes a little getting used to but once you get the hang of setting up the shot you can achieve photos that the eye just cannot see and you will create professional style photos. ND filters often come in packs with varying thickness, which allow different levels of light to pass through to the camera. I would suggest looking getting a 10 stop filter in whatever pack you choose.
Click here to view the best deals on ND filters for mirrorless cameras on Amazon
Photography lighting equipment for beginners
StudioFX 2400-Watt
The StudioFX 2400-Watt would be my number one recommendation for lighting photography equipment for beginners. It ticks all the boxes except it is the heaviest of the three options listed in this article. The set up includes three main softbox units, three light stands, and three light heads. The best part is that the softboxes fit five light bulbs, which each have their own separate switch for ultimate control over your lighting. The setup is designed to work with all brands and is compatible with Nikon, Sony, Canon, Olympus, Panasonic and more. If the 29p pound weight won’t hold you back this 10-bulb set-up with overhead booms is beginner friendly but also a professional setup.
Click here to check the price of the StudioFX 2400-Watt lighting equipment setup
LimoStudio 700-Watt
The LimoStudio lighting kit is half the price of the StudioFX lighting kit and only weighs 10.4 pounds. It would be a great, portable setup to get started with studio and portrait lighting. It includes two tripod stands, which are 86 inches tall but also adjustable. The entire kit can be set up in four simple steps allowing the 85-watt white light bulbs to create a naturally lit scene in a couple of minutes.
Click here to check the price of the LimoStudio 700-Watt lighting equipment setup
Fovitec StudioPRO
The Fovitec StudioPRO is a great Photography lighting equipment setup for beginners. It is a little more expensive than the other two options here but only slightly. For a little extra cash, you are getting a solid set up with very powerful lighting. The lighting kit includes two stands, two five-socket heads, three softboxes, one one-socket head, one boom stands with bag and 11 45-watt light bulbs, which all fit into one nice transportation bag. All of this gear comes in at a weight of 26.1 pounds, which makes it very transportable. This setup is primed for creating some really amazing portrait shots and is quick to set up.
Click here to check the price of the Fovitec StudioPRO lighting equipment setup
Portrait photography equipment for beginners
Remote Flash Trigger
A remote flash trigger is an essential piece of portrait photography equipment for beginners. You have your camera on the tripod, flash set-up but now you need to walk around to move equipment or stand in different positions to engage your subject. Sitting behind the lens limits how you can engage with the subject. A remote flash trigger also ensures the steadiest possible shot. Viltrox offers a 2.4GHZ dual pack of wireless shutter release remotes for the most competitive price on the market.
Click here to check the price of the Viltrox 2.4Ghz wireless shutter release remote dual pack
Speed Light
A speed light will help you avoid awkward shadows when you don’t have the time or space to set up your studio lighting equipment. It is also a great piece of equipment to have at night events where you are constantly moving. There are so many situations where you need more light and having a speed light in your photography kit will give you the ability to shoot sharp, grainless photos in all scenes.
Click here to view the best deals on speed lights on Amazon
Light Meter
A light meter is an essential piece of portrait photography equipment for beginners. It enables you to make sure you have the correct reading. The light meter objectively measures light and breaks it down to according to your camera set up to ensure the perfect lighting from your flash.
Click here to view the best deals on light meters on Amazon.com
My Gear
I have included the equipment I personally use due to the regular questions I receive on Instagram and the blog. I would suggest this guy for someone looking to get into travel photography with middle to higher end equipment:
Sony a7II Mirrorless Camera
I wanted a light camera, one that I would be able to carry on hikes and to secluded beaches. It had to be able to take a knock or two and be relatively weather proof. It also had to be affordable, which is different for every person. My budget for the camera and lens was $2000 at the time. It was compatible with Canon lenses if I bought an adapter but I decided to sell off all of my Canon gear and purchase some Zeiss lenses designed for the Sony a7 series. My favorite part about the Sony A7II is being able to use the Sony PlayMemories Apps. There are lots of free apps you can install on the camera such as the Time Lapse app and Sky HDR app.
Sony Landscape Photography Lens
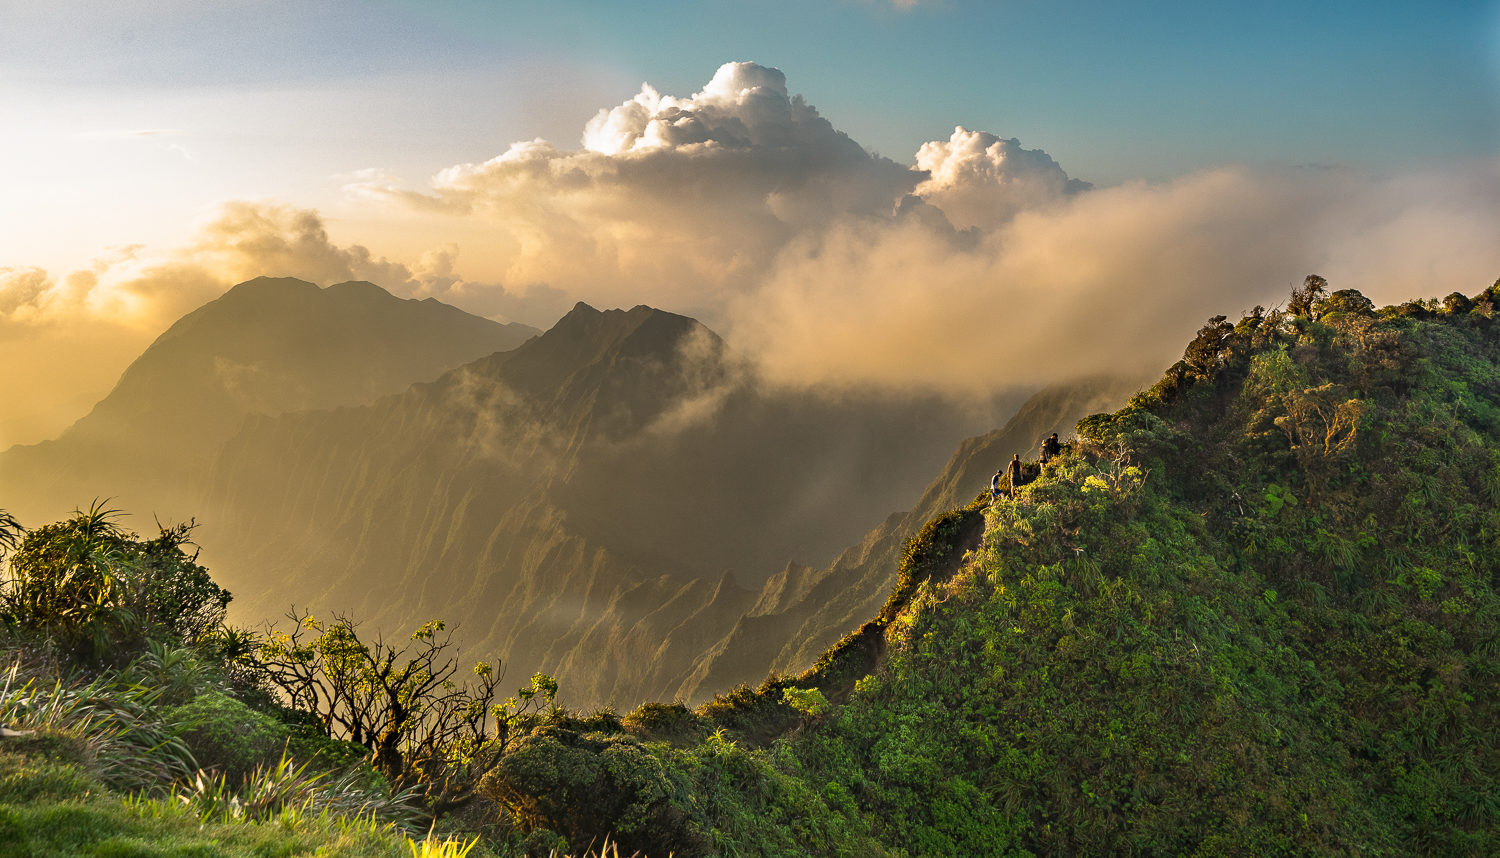
The Sony 16-35mm Vario-Tessar F4 Lens was the lens I decided to purchase and it gave me a lot of flexibility. The focal length of 35mm is equivalent to what you see with a naked eye. A focal length of 16mm is much wider and enabled me to capture an entire scene, a vast range of mountains or an entire beach in one shot. The Sony 16-35mm was my primary lens and It enabled me to shoot some portraits but also the flexibility to fit an entire landscape into my frame.
Portrait Lens
I started to field several requests for taking portraits and decided maybe it was time to look at a prime lens. A prime lens has a fixed focal length and a much wider aperture, which enables low light shooting and a much smaller depth of field. I purchased the Sony 55mm F1.8 Sonnar T FE ZA Prime Lens. I ended up doing a few paid jobs and paying off this lens quickly. My favorite time with this lens was in Indonesia where I tried my hand at travel portrait photography for the first time, which turned out to be really fun especially with the small depth of field the Sony 55m F1.8 delivered.
Why a Polarizer filter is so important!
All of my landscape photos involved the sun and often the ocean. The harsh light from the sun often blows out the water with awful reflections. I bought a Hoya 72mm HRT Circular PL Polarizer and with a small twist before taking a photo I was now able to reduce or eliminate the reflections on the ocean. All of a sudden I could see the reef below the water and bring out the turquoise color of the Pacific Ocean. Even on hikes the polarizer really brings out the greens of the trees and is so handy when shooting a waterfall. My polarizer is on my camera 90% of the time and is one of my favorite accessories.
Carbon Fiber Tripod
Of course to be able to use an ND Filter to smooth water and show movement with long exposure photography you need a tripod. Choosing which tripod to buy was a tough decision for me as I wanted something sturdy enough to endure windy conditions, however, it was something I would have to carry up mountains. I decided to get the sturdiest carbon fiber tripod that would fit in my bag. I am so happy with my ZOMEi Z669C Portable Carbon Tripod and it comes everywhere with me. In the past, I would have left a tripod at home unless there was a specific shot I wanted but because it is lightweight and compact, my tripod is constantly packed in my small backpack. This is definitely one of the most important pieces of photography equipment for beginners.

Taking it to the next level with an ND filter
I began looking the work of many talented landscape photographers and decided I wanted to try my hand at long exposures. I did hours of research and finally decided to get a Hoya Pro 72mm 1000x Neutral Density Filter, which is a 10 stop ND filter. This allowed me to smooth oceans, waterfalls and show motion in the water. It also helped to show motion in the sky especially with cloud movement and during sunset/sunrise.
Keeping charged with batteries
If you are traveling like me, you don’t get to charge your batteries every day. I carry four batteries with me and charge them all whenever I get the opportunity. The Wasabi Power Pack comes with 2 batteries and a charger, which is handy for the hotel room and is much cheaper than buying the Sony version. Sony mirrorless cameras tend to go through batteries a bit quicker than traditional DSLR’s so I suggest buying a few extras so you don’t run out on top of a mountain as the sun is setting.
Camera Backpack
I struggled to carry my gear in different sized backpacks and was constantly frustrated trying to pull out my camera to quickly get a shot. When I was hiking I would put it back in the bag to continue the hike with both hands-free for safety. I finally decided to get a VictoriaTourist DSLR Camera Backpack that was designed for carrying electronics. This durable bag fits my laptop, chargers, 2 lenses, memory cards, a jacket, 4 liters of water and still has space for any extras. The great thing about this bag is that comes with a waterproof cover that is in a zip pocket underneath the bag. I have used this a lot of times and is something that is actually really important to think about.
Memory Card
I bought two SanDisk Extreme PRO, which has worked perfectly for me and can hold over 1500 raw images and are also capable of shooting 4K video.
If you have any suggestions for other useful photography equipment for beginners comment below. I’m always looking out for handy accessories.


sanjay
Thursday 9th of November 2023
thank you for sharing this inforamtion through the blog. https://raghugaddam.com/best-content-marketing-course-in-hyderabad
sanjay
Thursday 9th of November 2023
Thank you for this well-detailed content. I’m sure this will be certainly helpful in the near future.
Wedding banquets
Saturday 8th of October 2022
Wedding Banquets is the one of the India’s largest and most trusted Wedding Company millions of couples around the world are able to search, compare and book from a directory of over 500,000 Venues and vendors.
Michelle Catapang
Monday 9th of November 2020
Thank you for this well-detailed content. I'm sure this will be certainly helpful in the near future.
Darwis Photography Indonesia | Usaha Photografy
Thursday 5th of March 2020
[…] Download Image More @ www.journeyera.com […]