
The Mount Taharayama hike leads you on a steep ascent up to an epic, rocky ridgeline before you descend down into the forest to discover a 10th-century stone buddha carved into the cliff wall. It’s an adventure with a tomb-raider vibe and is definitely sure to have you off-the-beaten path and out there amongst the adventure in the Oita Prefecture of Kyushu Island, Japan.
HOW TO GET TO MOUNT TAHARAYAMA
Kumano Magaibutsu: If you are only interested in the stone Buddha statue (Kumano Magaibutsu) and don’t want to hike at all that is a possibility. You can simply drive up to the parking lot and then hike up the stairs through the shrine to the stone carvings. The trail is a stairway the whole way and is common among tourists.
Mount Taharayama: If you are keen on an epic adventure that finishes at the Buddha statue (Kumano Magaibutsu), then you can start in the lower parking lot and hike up the ridge and finish at the statue before returning the same way you came, or walking back along the road to your car. I’ve attached my map below so you can see how I did it. It wasn’t very straightforward with no English signs but we managed to find our way. A little tip is that ‘Kumano Magaibutsu’ is on Google Maps so when we were a bit lost on the trail (there are many routes) we just tried to head in that direction and it worked out well enough. I’ve added the exact pin to the parking lot below.
MOUNT TAHARAYAMA TO KUMANO MAGAIBUTSU TRAIL MAP
I started our trek in the parking lot and then went up to the ridge and down to the Buddha statue. I then exited the same way the tourists come in and out and walked 2.5km back on the side of the road. I did that because it was dark when I finished at the statue and I didn’t fancy going back along the ridge in the dark. If you did it in the day then I would suggest returning the same way you came because walking back along the road takes about the same time and is much less scenic obviously.
Below you can find my map, which I recorded on my Garmin. If you want to download it as a map for your Garmin or smart device I’ve attached the GPX route and you can download it by clicking here.
The hike following my route was 5.7km but it can be shorter if you take other routes as detailed below. The total incline for me was 400m and took just over 2 hours.
TOP 3 PLACES TO STAY IN KYUSHU

- Ultimate Luxury: Amane Resort Seikai best location and view
- My Favorite: Sankara Hotel & Spa – Natural Forest, Pool & Beautiful surroundings.
- Budget Hostel in Kyushu: WeBase Hakata Hostel is easily the top hostel in Kyushu
MY EXPERIENCE ON THE MOUNT TAHARAYAMA HIKE TO KUMANO MAGAIBUTSU
This trail was a bit of a tough one to find much information on so I probably would have parked in the Kumano Magaibutso parking lot and done my route in reverse so I didn’t have to walk back along the road but alas it was a good adventure and everything turned out fine.


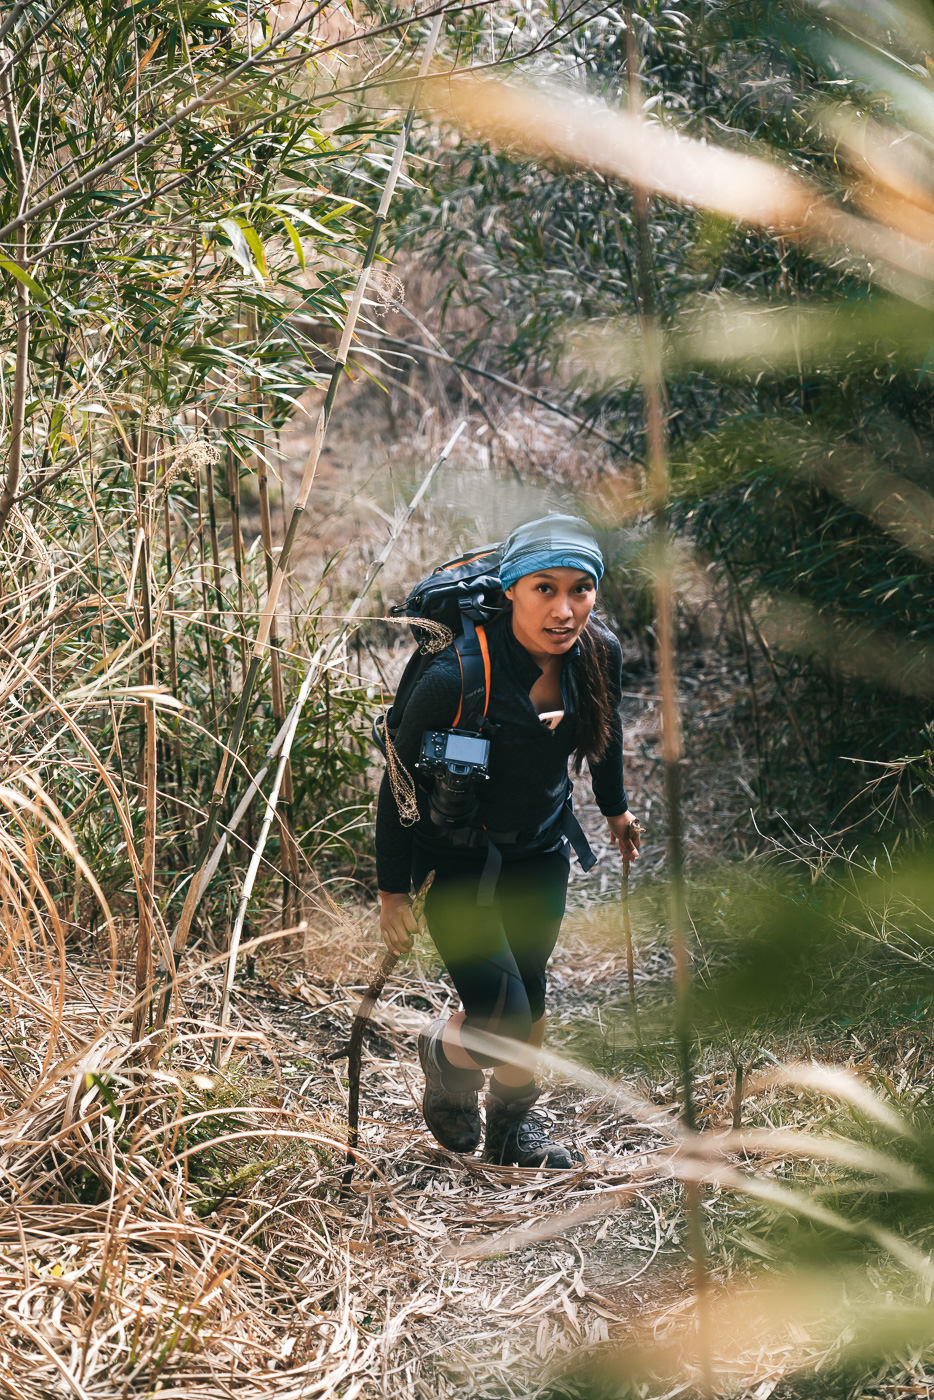
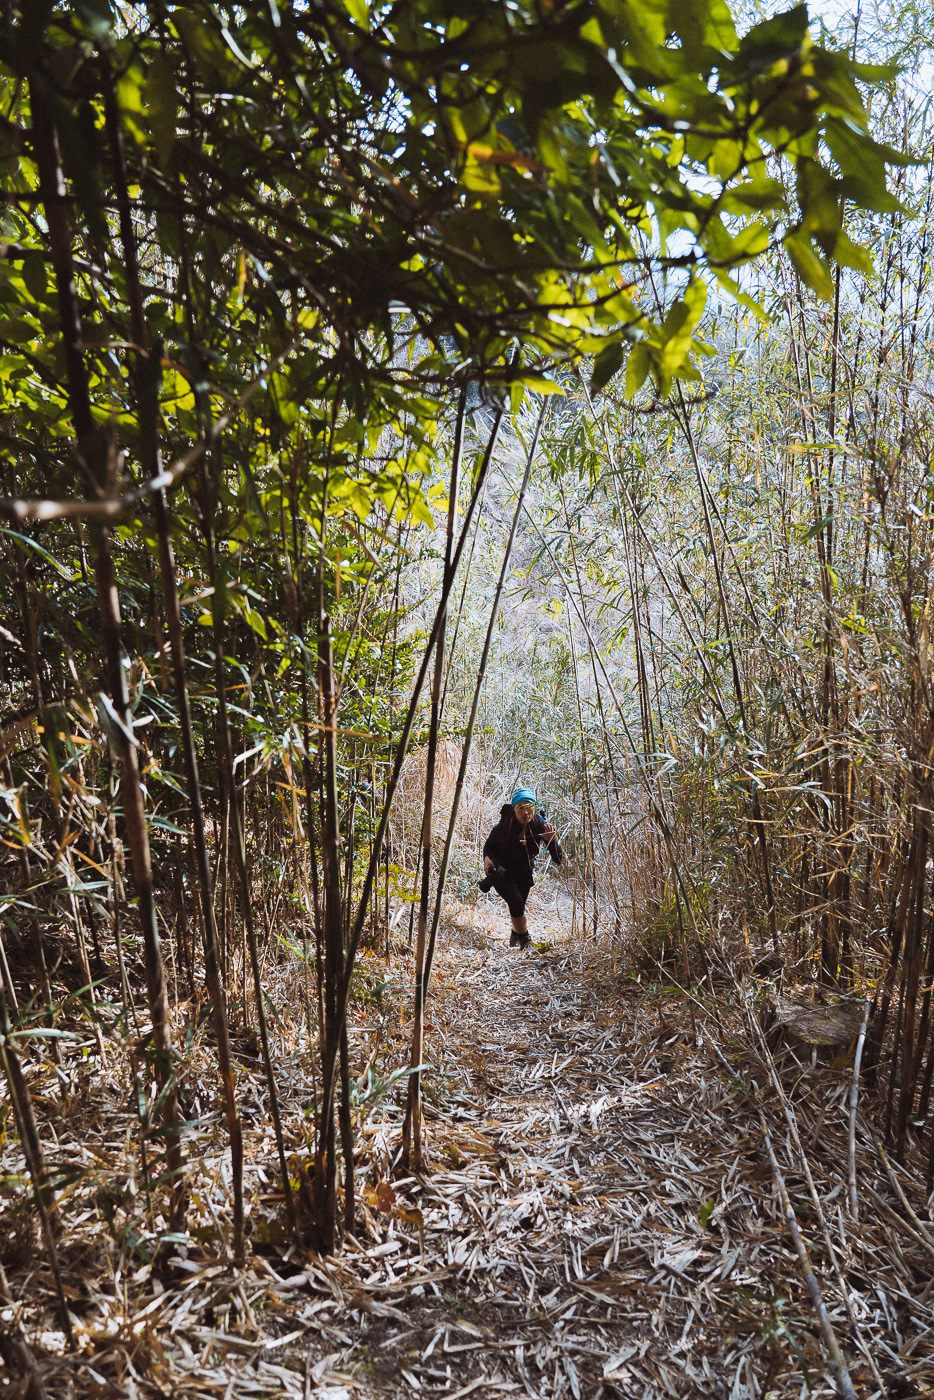
We parked the car at the place on the map you can see above and began the trek straight into the thick trees. The trail was 20m inside the road but ran parallel for about half a kilometer through the thick brush. We could hear birds but also something bigger inside the tall grass. In the end, we found out that there were a number of wild boars in this area but they tended to run away before we got too close so we had no issues with them.


In the early stages, I wasn’t sure exactly which route to take as there were often forks in the trail with signs in Japanese that neither I nor Google Translate was able to decipher. I ended up cutting half of the ridge off with the route I took but it ended up okay. Basically, if you follow my route it will be a bit of a scramble at times but as you can see we made it up on the ridge and to the buddha statue so I will call it a success. If you can read Japanese, I imagine it is very straightforward and well-signed.


The trail began to get interesting when we took a steep turn up to the left through the tall grass, which led us to a small wooden cabin. We passed by the cabin and went to the left of it and up over the hill. We followed the pink tabs tied to the tree but these also led in other directions. Finally, they led us up on top of the ridge and then we were in the right place so it all became a bit simpler from then.
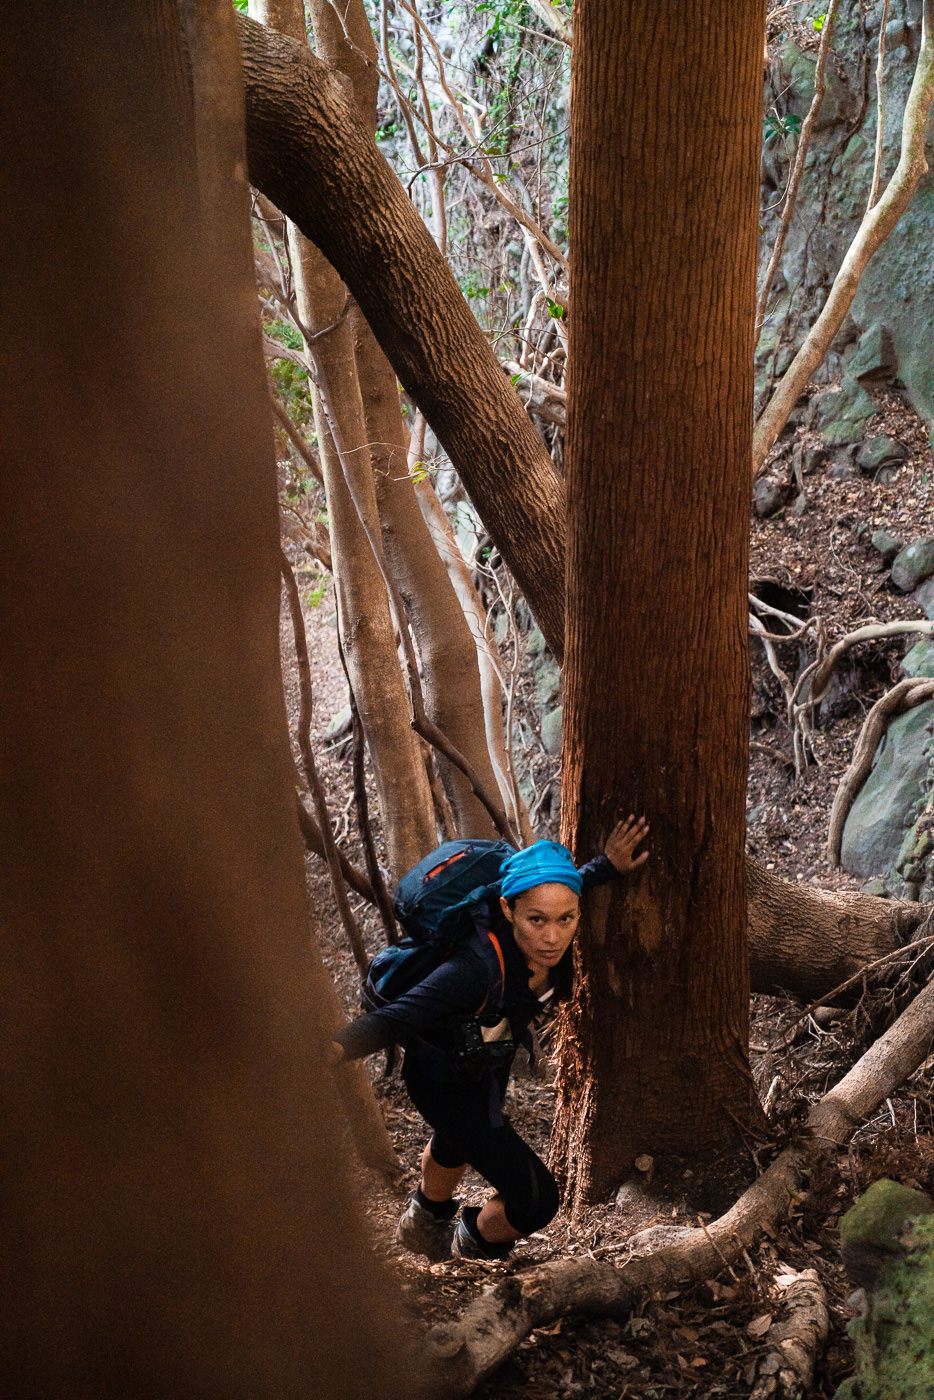
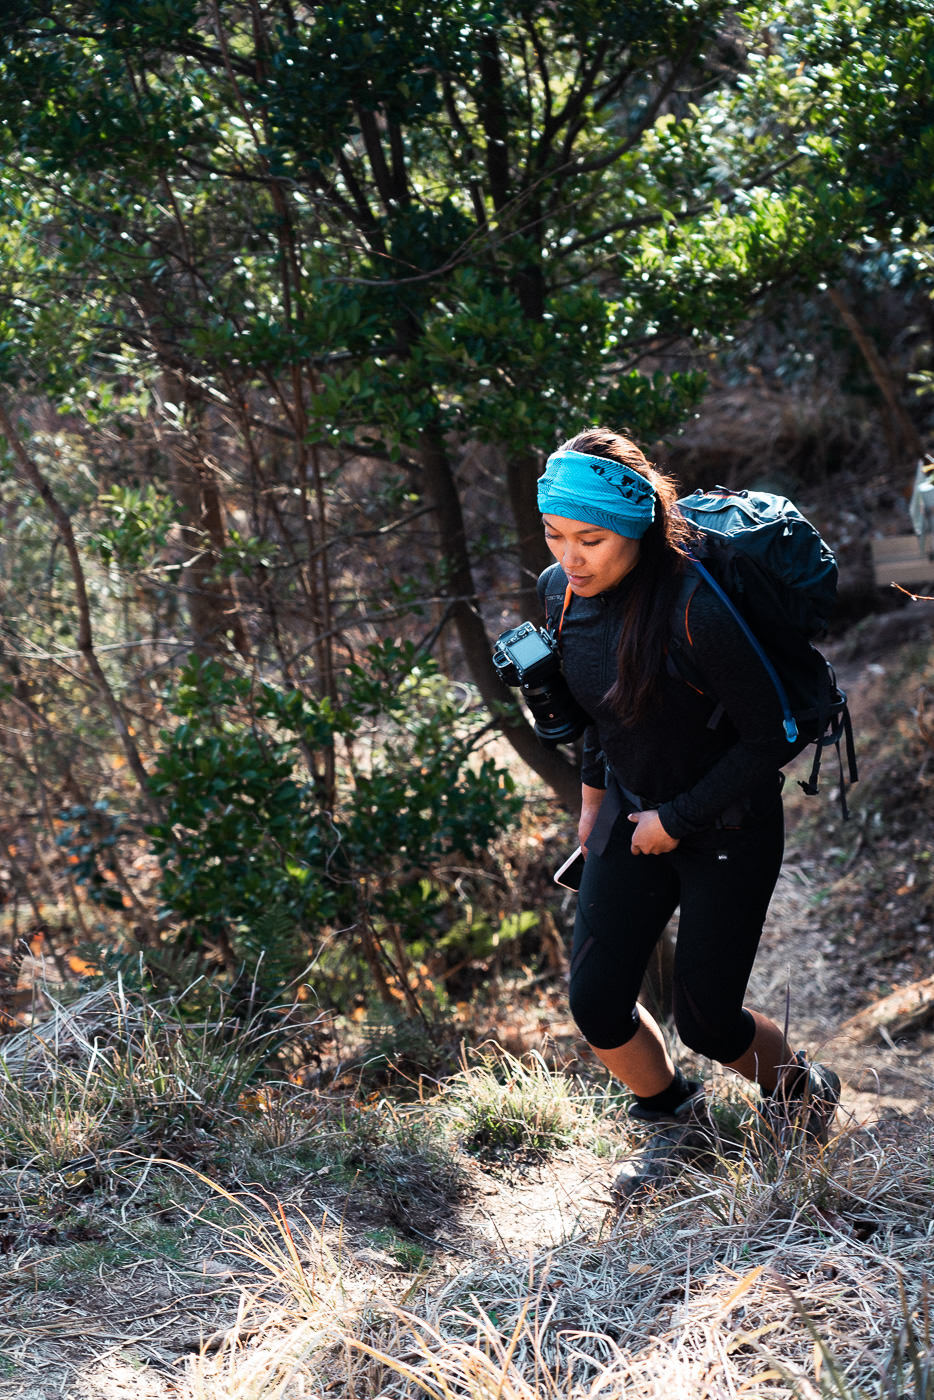

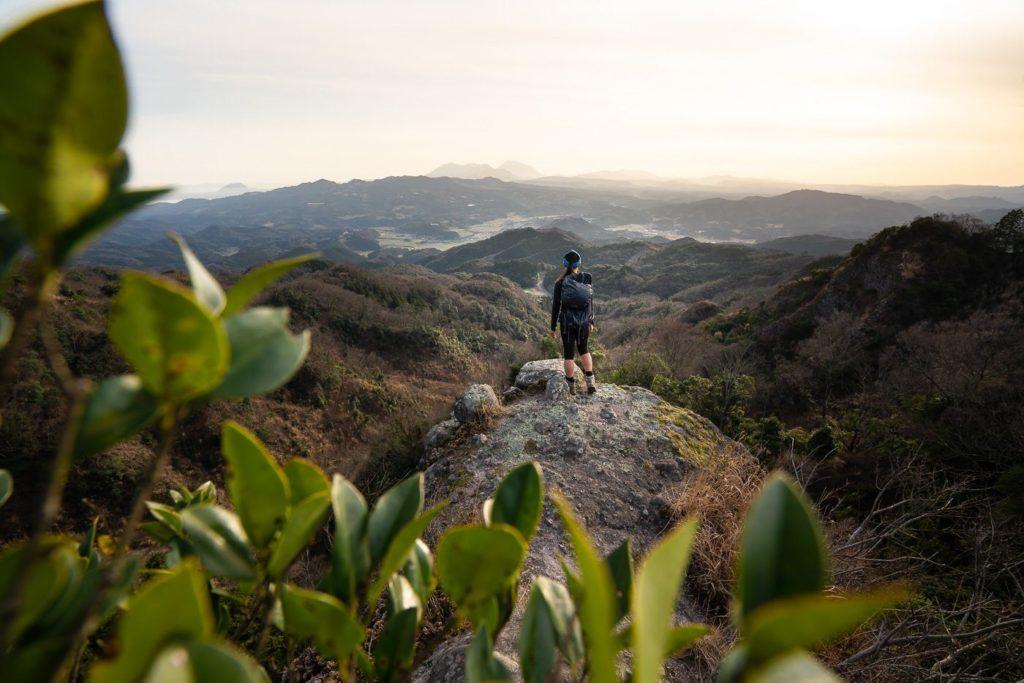
The ridge was the fun part of the hike as we scrambled and bouldered our way along the narrow, rocky path in the direction of the stone Buddha, which is known as Kumano Magaibutso. We had some pretty nice views of all the layers but we never made it to a high altitude. This isn’t a very mountainous view or the toughest hike but moderates across the board. You do get a pretty nice view up to Mount Yufu and you can see the two peaks quite clearly, which was nice.


After following the rocky ridgeline for a while, I began to wonder how and where we would find the Buddha statue. It was at this tree pictured below that we deviated off the ridge and went down into the forest.
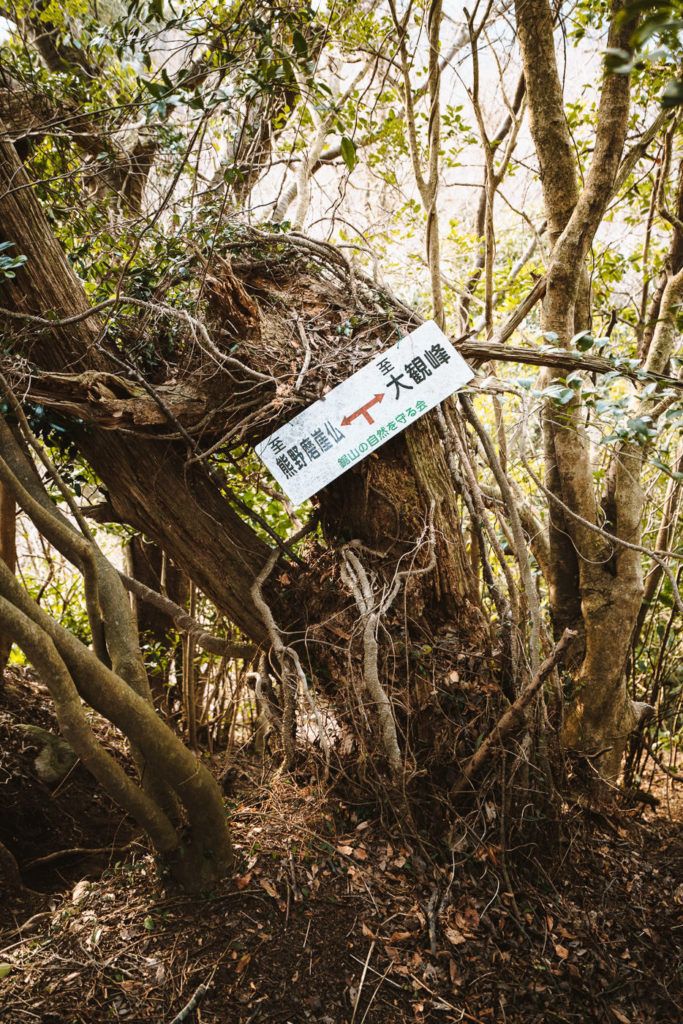
The sign was one of the few that Google Translate managed to decipher and it said something like the ‘Eternal Buddha’ with the arrow going down. That was about as much direction as we had all afternoon so we set off down the hill. A couple of wrong turns, muddy scrambles and corrections later and we find our way to the side-entrance for the Kumano Magaibutsu (Buddha Statue).

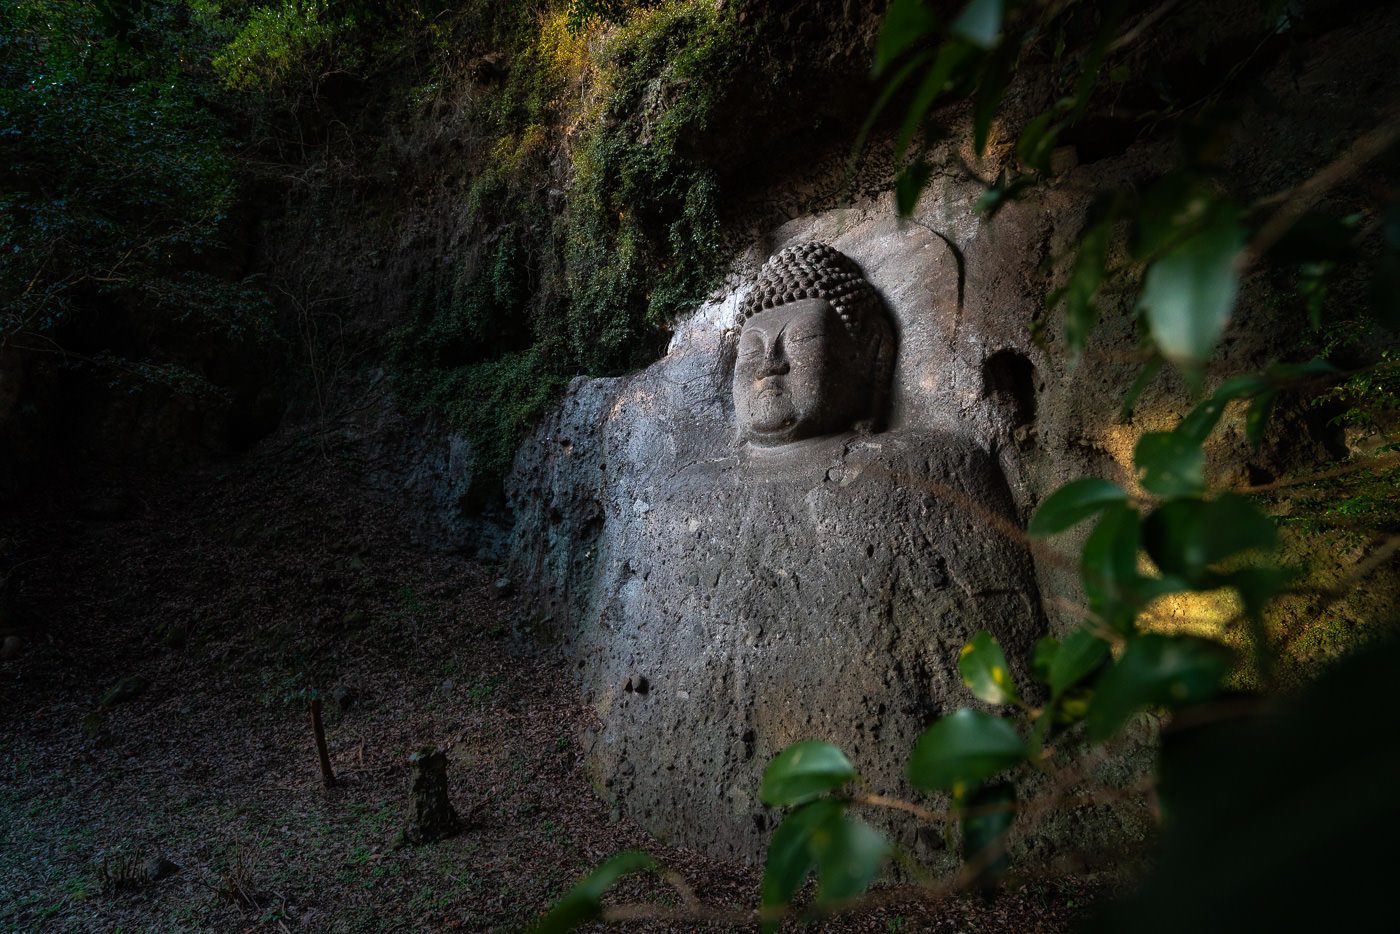
The sun was just giving its final goodbye as a golden tinge floated through into the area of the carvings. We read the signs at the site and did a little research and it turns out that the sculptures are from the late Heian or early Kamakura period in Bungotakada, Ōita Prefecture, Japan. The image of Fudō Myōō measures 8.07 m and the image of Dainichi Nyorai 6.82 m.
One funny anecdote from the sign was that the carving on the left was done much later than that on the right by an apprentice. It does seem that the carving on the right is of a higher quality and strange that an apprentice would be given a huge area to give it his best shot on a bigger rock next to the original site. You’ll see what I mean when you compare the two in person.

We hung out here until the sun pretty much set and then walked down the stairs and through the shrine to the Kumano Magaibutsu parking lot. We then had a 2.5km journey back along the road but it was all part of the adventure and it’s a fun little off-beat adventure if you are staying in Beppu.
WHERE TO STAY IN KYUSHU
- Best Luxury Place to Stay in Fukuoka: Hotel WBF Grande Hakata (Value): This is by far the most popular hotel and one of the most luxurious in Fukuoka.
- Best Value Place to Stay in Kumamoto: Hotel The Gate Kumamoto (Value): Hotel The Gate is a well-situated accommodation in the heart of Kumamoto, just across the train station and within walking distance to shops and restaurants.
- Best Luxury Place to Stay in Kumamoto: Kumamoto Hotel Castle (Luxury): Set near the infamous Kumamoto Castle, this luxury hotel features a wide range of carpeted rooms from standard rooms to suites fitted with plush amenities.
For a full list of the top-rated places to stay in Kyushu, you can check out my comprehensive guide: WHERE TO STAY IN KYUSHU: BEST REGIONS & HOTELS
ARE YOU FOLLOWING MY KYUSHU BLOG SERIES?
I spent over three weeks exploring Kyushu and visited some incredible waterfalls, hiked some amazing trails, and visited a number of epic volcanoes. I created a number of guides to help travelers find the best spots in Kyushu. You can explore the articles by clicking on the links below.
- The Ultimate Kyushu Bucketlist: 30 AWESOME THINGS TO DO IN KYUSHU
- The best places to stay in Kyushu in each region: WHERE TO STAY IN KYUSHU: BEST REGIONS & HOTELS
- How to plan your Kyushu vacation: THE ULTIMATE KYUSHU ITINERARY: 5-DAY, 7-DAY & 10-DAY
- Interested in chasing waterfalls?: 12 AWESOME WATERFALLS IN KYUSHU
- Keen for some epic hiking?: 11 AWESOME HIKES IN KYUSHU
- Everything you need to know about Oita: 11 AWESOME THINGS TO DO IN OITA
- Your Ultimate Guide to Kumamoto: 13 AWESOME THINGS TO DO IN KUMAMOTO
- My favorite waterfall in Kyushu: TAKACHIHO GORGE – MOST BEAUTIFUL WATERFALL IN JAPAN

Sunday 15th of September 2024
The big sign in Japanese basically states "Beware! Fatal falls have occured in this area".