

Starting a travel blog is an awesome way to document your adventures around the world. It gives you a focus and a creative outlet to share all of the amazing places, experiences, and people you meet along your travels. I started my travel blog as a hobby like most people but within a year it had become my obsession and my full-time income.
A QUICK RECAP ABOUT STARTING MY BLOG
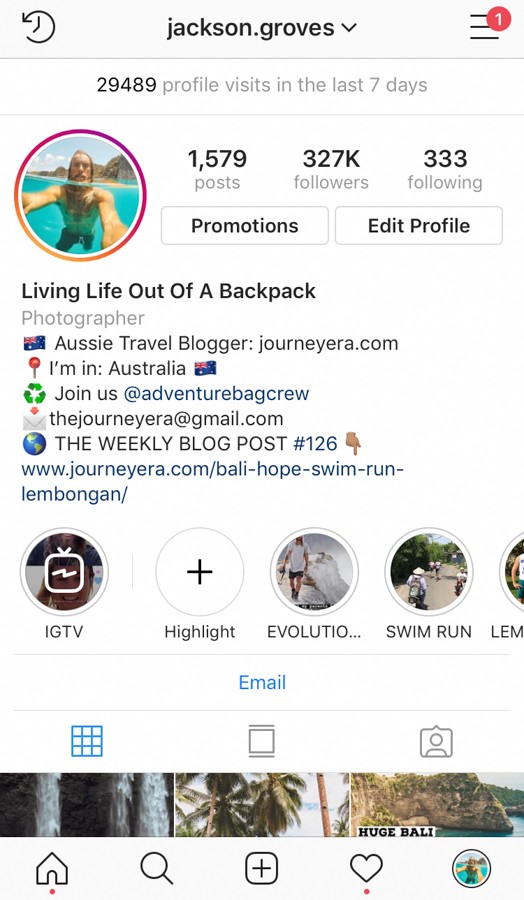
My travel blog is now ranked in the top 50 travel blogs in the world (ordered by traffic). With more than 450,000 page views per month, my personal travel blog was one of the few blogs on the list that was written solely by me, run by just one person, and written by someone under 30. I quickly realized that blogging was challenging but incredibly fun and compared to Youtube and Instagram, it was much easier to make a passive income. Through affiliates and advertising, my blog now earns me a passive income of almost $200,000 USD per year.
When I started my travel blog I had no experience in blogging, WordPress, web design, marketing, affiliate marketing, and many more areas. I did have some experience in photography and was in the last semester of my journalism degree at Hawaii Pacific University. I would work on my travel blog at the back of the class! I didn’t ever expect I could earn a lot of money from the blog and to be honest, it isn’t why I started it. This blog is now three years old and continues to grow.
BEFORE YOU START
In this blog post, I want to show you all of the key things I did when I started. How did I have 12,000 page views in my first month? How did I reach 100,000 page views in just over 14 months? This guide will teach you the very basics of how to set up your blog with a domain and hosting. It will show you how to kick things off but it will also guide you on how to skip all the irrelevant advice you will likely hear from someone who did things in their own way and had a quick rise because they did it differently.
I have been blogging for almost a year now and while I am not a six-figure entrepreneur, it has opened up a lot of opportunities for me and I make enough to survive while on the road. My aim was always to be able to fund continual travel. After 10 months my blog is viewed more than 75,000 times a month and is on track to be viewed 100,000 times per month by the end of my first year of blogging. More importantly, I get emails each day from people thanking me for helping them plan a trip to the Philippines, Oahu or other locations around the world. I get to explore the world, improve my photography and challenge myself in so many different areas.
* THE ESSENTIAL FIRST STEP TO STARTING A TRAVEL BLOG *
To get started with creating your very own travel blog, you’re going to need an affordable domain name and hosting. We’ll be using the hosting provider I personally recommend so you can follow the steps throughout this blog post to make it easy.
Get your free domain name and 65% off a hosting plan with Bluehost.
1. CHOOSING A NAME
- Choose an evergreen name: If you want your blog to last a number of years pick a name that will still be relevant even if you change your lifestyle or blogging topics. For example, if you call it ‘teenswhotravel.com’ it will be quite awkward when you are 20. When I was deciding on my blog name with my partner at the time we discussed some names that incorporated couples into the title. We split up a few months later and it would have been a bit of an issue for the blog if it was called ‘thetravelingcouple.com’.
- Go for something unique: Nothing against them but I think there are enough blogs with the word nomad, travel, backpacker, and wanderlust. This is your first chance to let your personality and creativity shine through. Journey Era represents is a bit obscure but I still like it three years later. After graduating I felt that this next era or period of time would be a huge journey and I had no idea where it would take me. Three years later it is still the Journey Era and it still makes sense.
- Make it short and memorable: The shorter the better. Correct spelling and no hyphens, dots, or dashes are perfect. Imagine having to tell people about my website ‘journey dash era’ (journey-era.com).
- Ranking: Having the word’ travel’ in your title isn’t going to help you rank for travel articles. I don’t rank better for articles about ‘journeys’ because of my name. Choose the name you want and remember people don’t click on your articles because of the URL they click because of the article title.
- You only get to pick it once so go big and go bold
- Don’t stress: The final piece of advice I have for choosing the name is to not let it consume you. Yes, you will be stuck with the name but don’t spend a month picking it. That is one month you could have spent with the blog up and running.
2. CHECK THE DOMAIN AVAILABILITY
Once you have come up with a name you need to check if it is available. It can be quite frustrating because what you may find is that all of the ‘good ones’ are taken. To check if your name is available you can use a site like Domainr.
Type your name into the search bar and it will tell you if someone already has the name. Sometimes you can purchase that domain from someone else but generally, it is best to find one that is available already.
3. CHOOSE THE BEST HOSTING
You might be wondering what exactly is hosting. It is the place on the internet you will rent each year for your website to live. It stores all of your blog’s data, photos, and files. Luckily hosting is very cheap. I recommend new travel blogs choose their hosting with Bluehost. There are lots of options to choose from but Bluehost is the most reliable overall, has the cheapest prices, and makes it very easy to set up for beginners.
They offer high-quality shared hosting for only $2.95 per month for a whole year by clicking through this link.
The best part about Bluehost is that they give you a free domain name when your purchase their hosting. So it really is a one-stop shop. You can check out all of the plans on this page at Bluehost.
STEP 1: Click on the green button that says “get started now.”
STEP 2: Pick a hosting plan.

STEP 3: Check to see if your blog name (domain name) is available.

STEP 4: Add extra features if you want to.
Most of these you probably don’t need. However, I can recommend the Domain Privacy Protection. Otherwise, it is possible for anyone to look up who owns your site, which gives them access to your mailing address, email, phone number and details.

4. REGISTER THE NAME ON ALL SOCIAL MEDIAS
Before even worrying about getting the hosting for the domain and registering your name make sure it is available on social media. Don’t panic if it is already taken because you can always find a different combination that will work.
Journey Era was taken on Instagram but my Instagram is @jackson.groves anyway so it is fine. Don’t be overwhelmed by all of the social media platforms. You don’t have to do them all. In fact, it’s better to do 2-3 well and skip the others. I do Instagram, Pinterest, and Facebook but don’t touch Twitter, Snapchat or Youtube much.
5. INSTALL WORDPRESS
You want to start a serious travel blog, which means you need a ‘self-hosted’ WordPress account. This means that the WordPress software lives in your hosting company’s servers, not in a free WordPress.com account. But what is the difference?
- Your website is Journeyera.com, not Journeyera.WordPress.com
- You own all of the data and have full control
- You can advertise on your site (your future income)
- You can use custom themes, and plugins and have full customization control)
- You can use Google Analytics to track your statistics
WordPress is without a doubt what you want to use not Blogspot, Blogger, Wix or even Squarespace. Wordpress is the most widely used platform and probably always will be. WordPress is used by all of the professional blogs and even big companies like BBC and NY Times.
Installing WordPress with your new BlueHost Account is very easy. It just takes one click of a button and then the rest happens automatically.
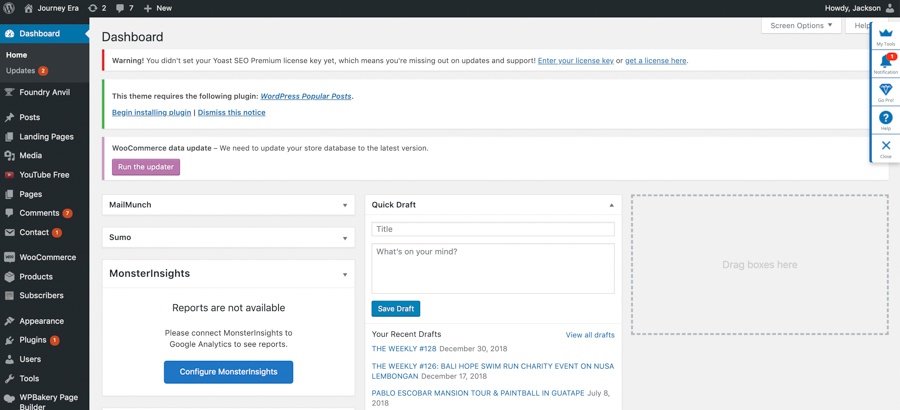
Once it is installed, you can log into the ‘backend’, which is your WordPress dashboard with your username and password. You now have a travel blog and are ready to start fitting it out and then adding content.
6. GET A LAYOUT FOR YOUR BLOG
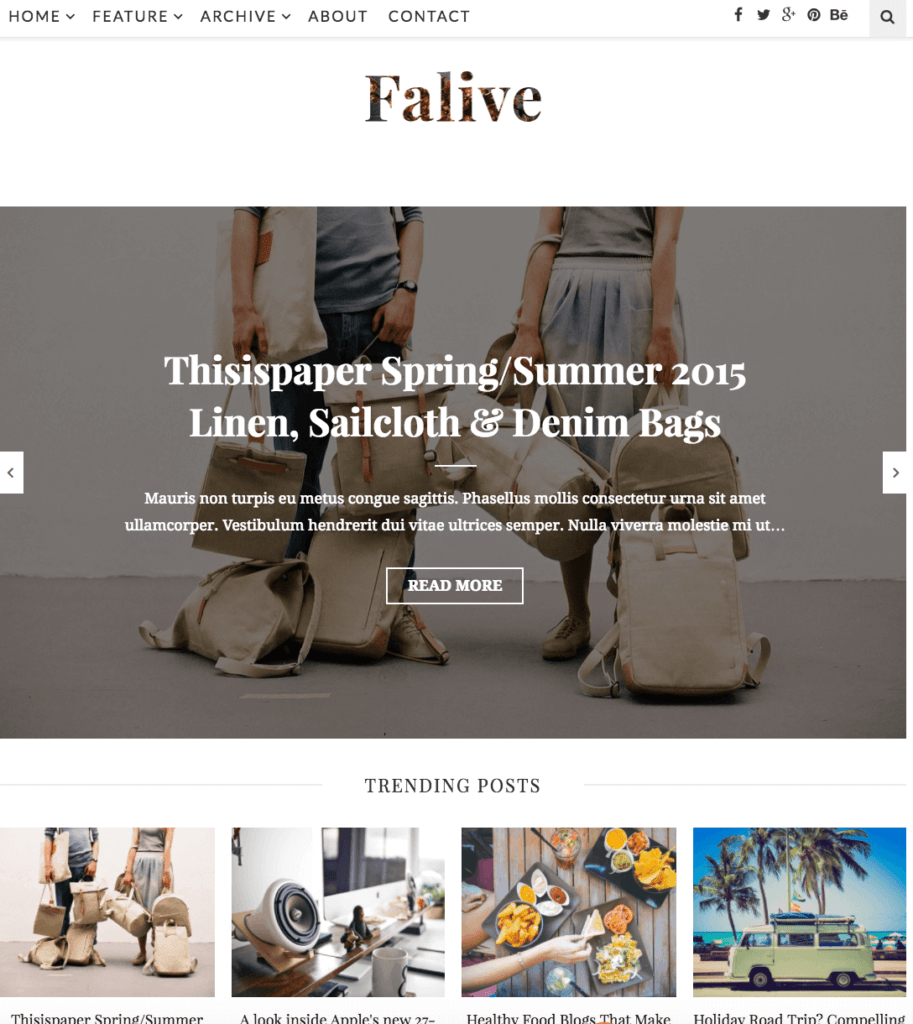
Your new WordPress blog comes with some basic themes but if you are taking this travel blog seriously, you will probably want to purchase a theme. I searched on Themeforest and found the Falive theme, which suited my minimalist, white-space style. There are lots of different travel blog WordPress themes, and it’s just about finding one that suits your style.
A professional blog theme will cost between $20 – $80 and will improve the functionality and look of your site a lot.
You can then make any custom changes you need by doing the coding for it. If, like me, you have no idea how to do that you can find professionals on Fiverr, to help you for $5-$20 for small issues. I have used Fiverr a lot when setting up my site or for bug fixes. I don’t know much about coding and to be honest you don’t need to these days with WordPress.
Below is what my theme originally looked like when I chose it for Journeyera.com
7. CREATE A LOGO
I had my logo made on Fiverr for $5. I gave someone three images and they combined them all in an original watercolor painting and then converted it to a digital png. file and jpg. file. Not bad for five dollars.
I didn’t want a cheesy cartoon as I see so often on blogs. I also didn’t want my blog to be all about me so I kept myself out of the title and the logo. I wanted it to be written and photographed by me but it was all about the travel. This logo kept things pretty neutral and as you can see three years later it is still doing the job for me. It is another part of the website that isn’t as important as you make it out to be at the time.
8. DOWNLOAD THE ESSENTIAL PLUGINS
Plugins, Plugins, Plugins. These little guys are great. A plugin is essentially minor customization to your blog. Some of them make your blog look prettier, some are social media sharing tools and others will help you with SEO. There are thousands to choose from to help you do all kinds of tasks. These are the essentials that most people add to their blogs.
Akismet
The comment section is awesome on your blogs and helps you interact with your readers. It is also a perfect place for spammers to promote strange things in your comments. Akismet blocks and secures your site against spam comments.
Easy Share Social Buttons
This is the best way to encourage readers to share your post on their social platforms. It automatically adds the Facebook, Twitter, and Pinterest icons at the bottom or side of your blog posts, which encourages people to share them. You can customize which icons it shows.
Yoast SEO
This plugin will help you with SEO. It will appear on the sidebar and underneath your posts on the ‘backend’ (while you are writing) and help you create SEO-friendly articles so you are more likely to rank and be found on Google. It’s super handy and even when you become an SEO expert you will still use Yoast SEO.
Search for Yoast SEO and click on install once you’ve found it. This plugin will give all the SEO features a blogger can wish for. Including an SEO strength check when you are writing a new article.
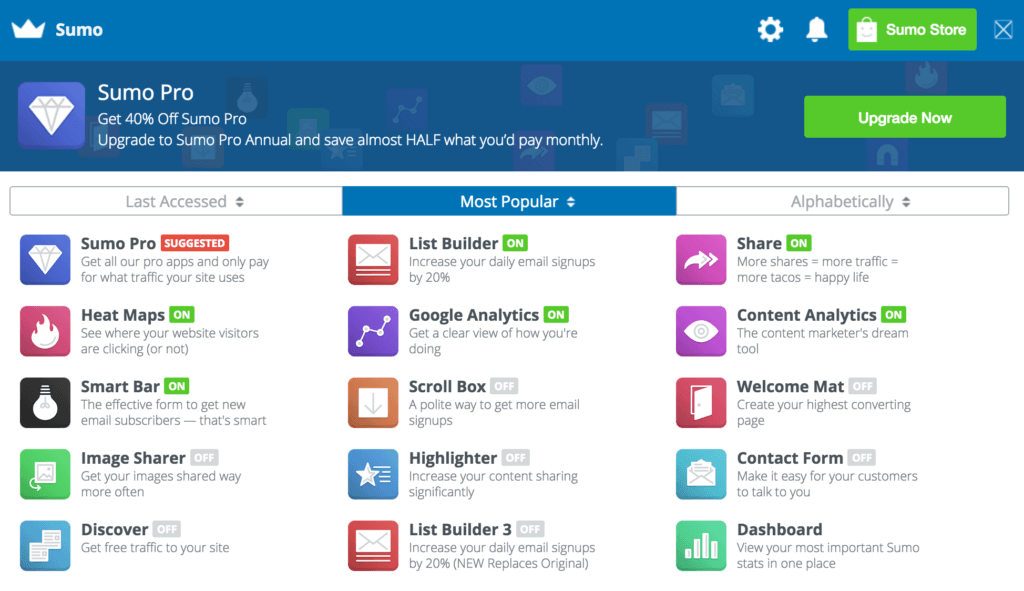
SumoMe
SumoMe is how I view my analytics. It appears on my page so I don’t have to open Google Analytics every day to find these things out. It also helps you create drop-downs, builds email lists and view heat maps of where people are looking on your page. It is pretty much a one-stop shop for upping the amount of time people are on your page and how much they are sharing on social media from your site.
9. CREATE YOUR PAGES
Get creative. Everyone has the same pages if you look at travel blogs. Destinations, about, media kit, lifestyle, food, health. I decided I needed the about page and I liked the destinations page but I also added a gallery and a weekly page. On THE WEEKLY page, you can see my weekly reviews from my time on the road!
To create a page, simply click “New” and then select page. You can then build it out however, you like. Like I said earlier, I don’t know how to code, so I keep everything very simple. There is no need for fancy components in my opinion and often it can slow your site down. I just put the information and photos and it has worked for me.
10. GET SOCIAL
This is an entire blog post in itself, actually, it is an entire blog post for each platform at the least. I’ll give a brief overview of how I use each platform.
Let me just say that each platform is its own beast. If you learn how to tame one it doesn’t mean you know a thing about the other. I know some people who generate 50,000 page views a month from Pinterest but their Instagram is hopeless or they have an awesome Instagram but don’t know how to convert readers to their blog posts. Here is my breakdown of how to use each social media platform.
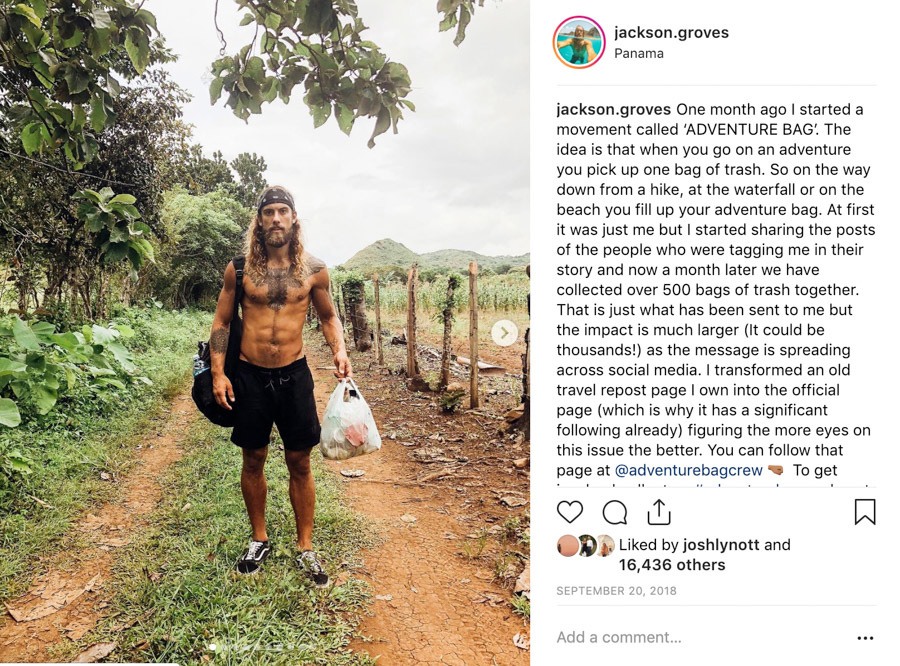
Instagram: Share your best photos here but also share yourself and your personality. This is my favorite platform and a very personable one. I chat with people each day show real-time happenings on my story and get to interact with lots of other like-minded people. I’ve met so many people lately through Instagram. Being able to show your personality on Instagram makes people much more interested in what else you do. Enter the blog. I often direct people to my blog posts by telling them about the posts in my Bio or Instagram story. Because they are interested in me from my posts and previous stories they are likely to click through and read the blog post.
Pinterest: This is a platform that has the potential to drive great traffic to your site. Create beautiful pins directing traffic back to your articles and watch a few of them go viral. Join popular group boards that have thousands of followers and post to them to increase your exposure. Several of my pins have been repinned over 10,000 times and they still drive traffic to those blog articles daily.
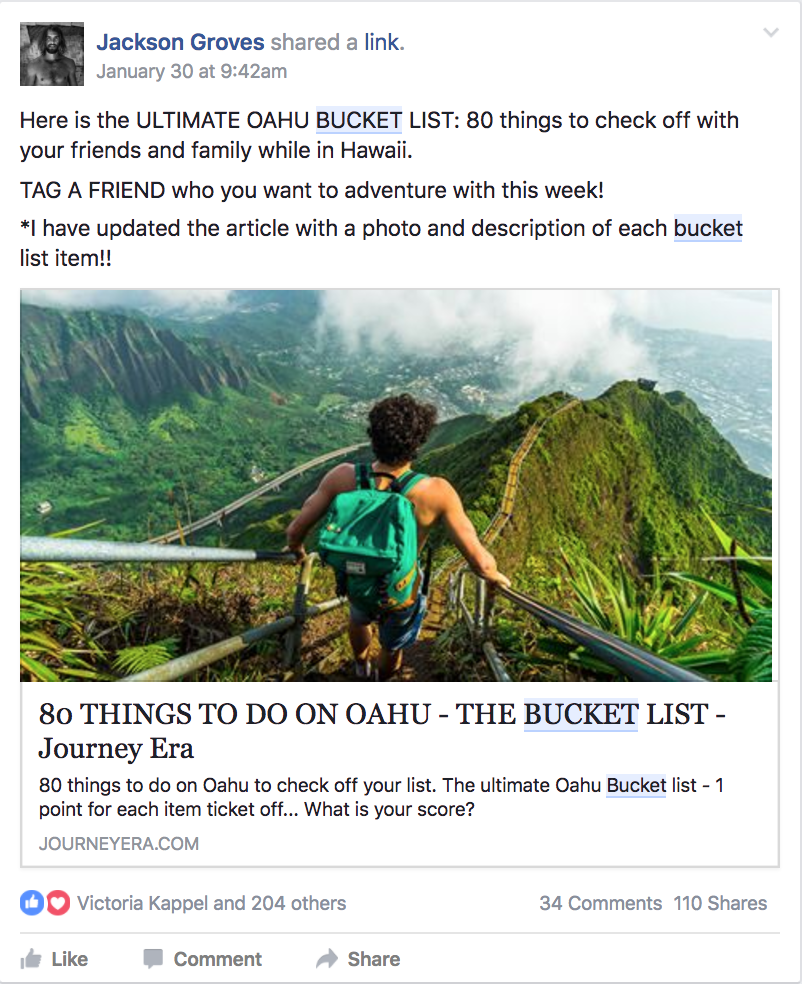
Facebook: Create a page and share your blog posts, pictures, and anything else you think people will enjoy. Facebook is a platform centered around liking and sharing. Can you create content that is highly shareable and makes people want to tag their friends? Several of my articles have had over 100 shares after I posted them on my own page and in specific groups. For example, if you post an article about backpacking in the Philippines to a Philippines Backpacking Facebook group it is going to get much more attention than on your own feed. In 2017 I had a video of my diving in the Philippines go viral with millions of views and my page grew from 5k to 20k overnight! It is hit and miss but sharing articles and videos that people are likely to share with their friends or tag a friend in the comments is they key.
11. CREATING YOUR CONTENT FOR YOUR BLOG LAUNCH
4-5 articles: You will want to launch with at least 4-5 articles so that your blog layout looks full. I launched with five articles at once and promoted each one on social media throughout the week.
About me: Write an ‘About Me’. Tell the readers about you and what type of content you will be producing. Tell them what type of travel you are doing. You are essentially suggesting why they should read your blog instead of the other hundreds out there but also you are just showing them who you are and who is the person behind the blogs and guides they are reading.
I launched a blog about why I started a travel blog. This let all my friends and family know what was going on and right there you create a few loyal readers. Every reader you can get in the beginning is valuable. Across Facebook and Instagram, this article was read a few thousand times in the first month.
12. DECIDING ON YOUR NICHE (TRUST ME YOU NEED ONE)
The question now is what content will you create? In my opinion, it is all about a niche. The biggest mistake people make is trying to be an ‘everything’ blog. I get it you are interested in yoga and backpacking and being vegan. They are all your passions. Guess what? Google wants you to be an expert on just one. It is possible to incorporate them all into your blog with no problems. However, the best way to rank for things is to be seen as an expert by google on that topic. How do you do that? Write a lot about one topic and have other relevant pages within that niche linking to your content.
For example, I became an authority blog for Oahu (according to Google). How do I know this? Everything I write about Oahu ranks very highly, very quickly because I have written extensively about this location. Therefore what I am suggesting to you is to pick a topic and try and be an expert on it in the eyes of Google. I have chosen many locations around the world to travel to and to blog about. The articles I have the most success with are in the spots I have written about the most.
This can help you earn money as well. If you write one article about GoPro being a great camera for travelers compared to another site that has written 200 articles about GoPro, – all other factors aside – Google will favor the page with 200 articles.
13. REPLACE A WAY TO STAND OUT
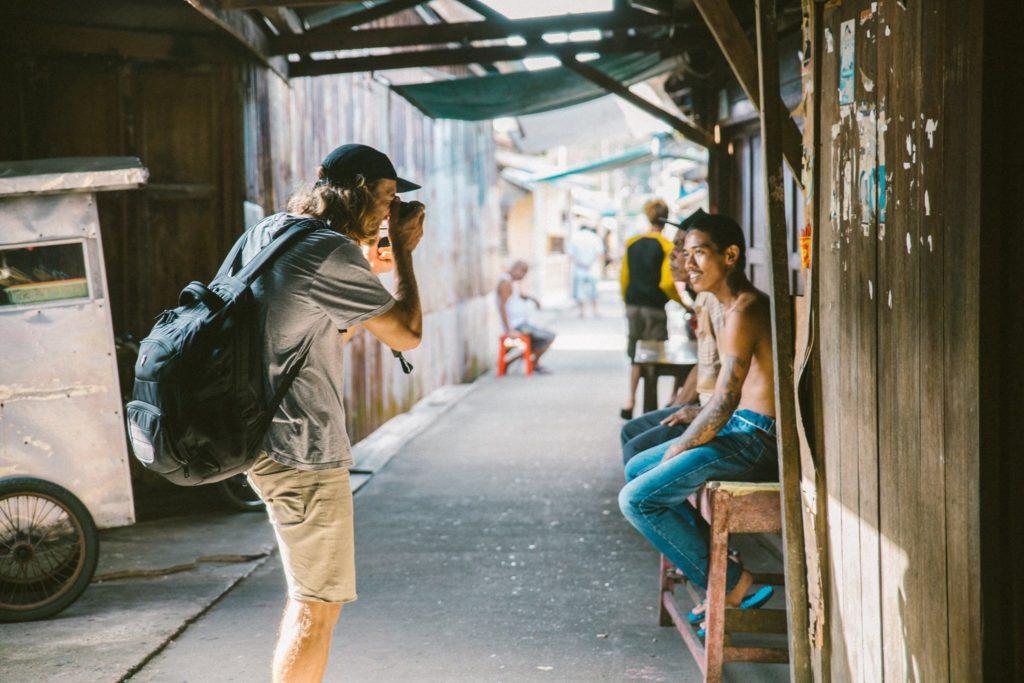
I try and stand out by the quality of my photographs, having adventurous guides, and the depth of my guides on a specific town or region. I don’t classify myself as a great photographer by any means but I do spend a lot of time making sure that my photos are great content in themselves.
I also found one big hole in the blogging industry. So many bloggers were selling out and only doing paid gigs and staying in hotels that gave them free stays in exchange for promotion. Each to their own, but this way of travel is not relevant to the regular traveler who doesn’t get the free stay or the free tour. I decided I would travel as normally as possible. That’s why I have never paid more than $12 for accommodation even though I could get free stays in 5-star accommodation. It’s why I don’t join group tours so that I can share with you guys how it will be to DIY backpack around the Philippines.
However, for the most part, I backpack on the cheap and try and travel as raw as possible. I ride on the top of buses, walk an hour from the airport with my luggage to save $4, and eat $1 noodles from street carts. These are things I do because I enjoy them and I spend my money wisely so it lasts. I hope my readers respect this and can relate to my experiences and I like to think I am portraying authentic experiences to my audience.
That is my way of standing out. You will, of course, find your own way. I suggest analyzing all of the top blogs and doing it differently, doing it your way.
14. STRATEGIES FOR GROWING TRAFFIC FROM DAY 1
The social media web: Now it’s time to be different. Why did I have over 12000 page views in my first month without any google searches? My site hadn’t even been indexed by Google yet! It’s because I built a social media web first. The web was made of Twitter, Facebook, Instagram, Pinterest, and Snapchat. I spent 6 months prior to launching the blog growing what I like to call the web. Consider yourself the spider attaching your web to different points. Each point is a social media platform. Once the blog launched I already had a few thousand followers on each platform who I could then direct to the blog. Don’t wait until you publish your first article to post on Twitter or to share something on your Facebook page. You have the opportunity now to start growing these platforms. Put time and research into current trends and strategies for growing each platform.
The cluster theory: This is another theory I came up with and implemented. I figured if Google ranked the experts on page one, I would be the expert. I wrote detailed guides for all of the adventures I was doing on Oahu. Most people had only written big overall guides on their vacation but I was blogging in depth about each waterfall, each hike, and each beach. Yes, it was a lot of work to cover so many blogs. However, by the time I wrote my big guide about Oahu, I was an authority about Oahu in the eyes of Google.
Rank for the small stuff first: Everybody wants to rank for the keyword ‘Things to do on Oahu’ or ‘Hikes on Oahu’ etc. because they have thousands of searches per month. However, they are so competitive. What wasn’t competitive was the ranking for each location. I was one of the only serious bloggers writing about each individual hike or waterfall. These were easier to rank for and I was the most in-depth. Soon I started getting a small amount of traffic for each individual location and they began to add up. Too often I see people trying to rank for things that are just out of their reach as new bloggers competing against established blogs. I saw no search volume as too low and it paid off as the numbers began to accumulate.
Internal linking: Now that I had 50 articles about Oahu, I began linking them all together. When you mention a hike is near ‘x waterfall’ or it reminded you of ‘x hike’, you link to it. You build a link web within your own website and Google loves this as it shows you are creating a lot of articles on similar topics and becoming an expert in this niche. Then when I wrote the big guide, they all linked to the big guide, and the big guide all linked to them. It gave huge power to my big guide. This is the simple strategy I have used all over the world. It is very time-consuming but it works. My Oahu guide has now been viewed almost 2 million times in three years!
I hope you have an awesome experience blogging and get off to a great start. Email me any questions you have to thejourneyera@gmail.com or hit me up on Instagram @jackson.groves
Disclosure: Some of the links in this post are “affiliate links.” This means if you click on the link and purchase the item, I will receive an affiliate commission. Regardless, I only recommend products or services I use personally and believe will add value to my readers.
UAE Visa Travel
Friday 13th of February 2026
This is such an encouraging and practical guide for anyone wanting to become a travel blogger — so many great tips! For those writing about international destinations like Dubai, including clear Dubai visa information can really help readers with their planning. Thanks for sharing your experience! visit: https://uaevisatravel.com
Saturday 26th of July 2025
Helpful content! I recently helped a few clients shift from shared hosting to dedicated servers and the performance difference is massive. https://mukhost.com/new-york-vps/
Xeni.com
Tuesday 19th of December 2023
Thank you for the amazing guide on starting a travel blog! Your step-by-step advice, personal stories, and helpful tips are great. You love travel and want to help others start blogging, and it shows in your guide. It's super helpful for anyone starting in travel blogging. You did an awesome job sharing all this useful info! Our company - Xeni, provides a platform where Travel influencers travel Agents, and Travel bloggers can build their travel brands with custom domain and language options. Also, it allows agents to easily create and sell their customized travel packages for their clients. I hope these insights are helpful to your readers. Visit - https://www.xeni.com/ for more information"
tannazhosseinpou
Monday 2nd of January 2023
Great post on how to start a successful travel blog. The field of travel blogging is competitive, and it's growing more so every day. After all everyone wants to visit wonderful places around the world. In addition, here are few strategies we can start a travel blog and stand out from the competition. It includes, research your niche, publish your first blog post, promote and grow your audience, customize your travel blog, and more! Get in touch with 2Passports 1Dream to know more on how to become a successful travel blogger
Jane
Wednesday 21st of December 2022
I am very glad that you've made this for everyone. If you someone want to travel here in Texas, we'll guide you about things to do in san antonio . Let's see each other here!